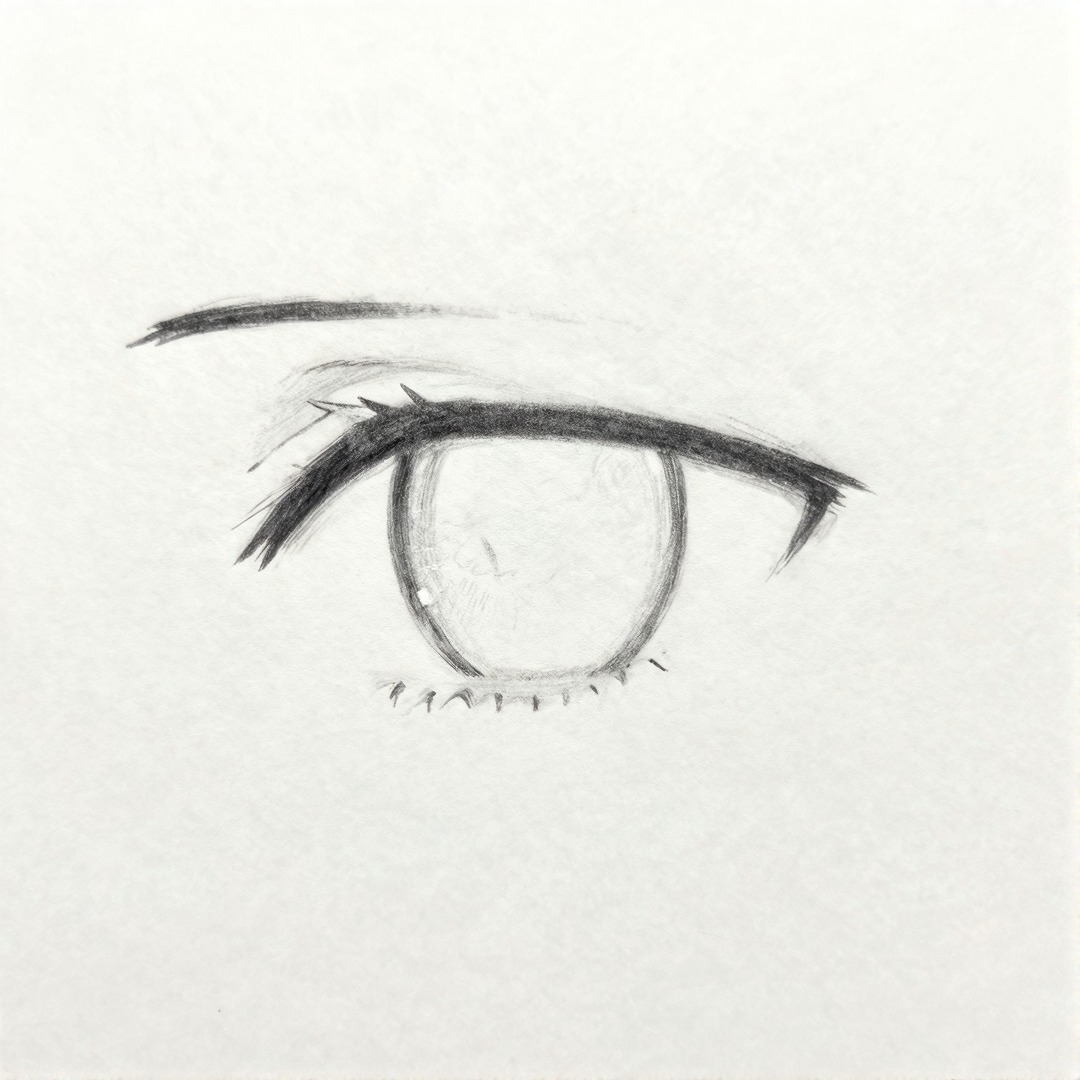
Want to learn how to draw anime eyes without getting stuck on tiny details? Build the eye in six simple passes: upper lash line, lower lid, iris, pupil, highlight, then shading. If those pieces sit in the right place, the drawing already reads as anime before you add color or heavy lashes.
I usually tell beginners to keep the first sketch light and a little boring. A clean almond or rounded shape, one large iris, and two simple highlights will teach you more than piling on lashes too early. Once the structure works, you can push the style toward cute, sharp, sleepy, angry, or dramatic.
This guide walks through anime eye drawing from the basic anatomy to line art, shading, expression, and common beginner mistakes, so you can practice with pencil, fineliner, markers, or a digital brush.
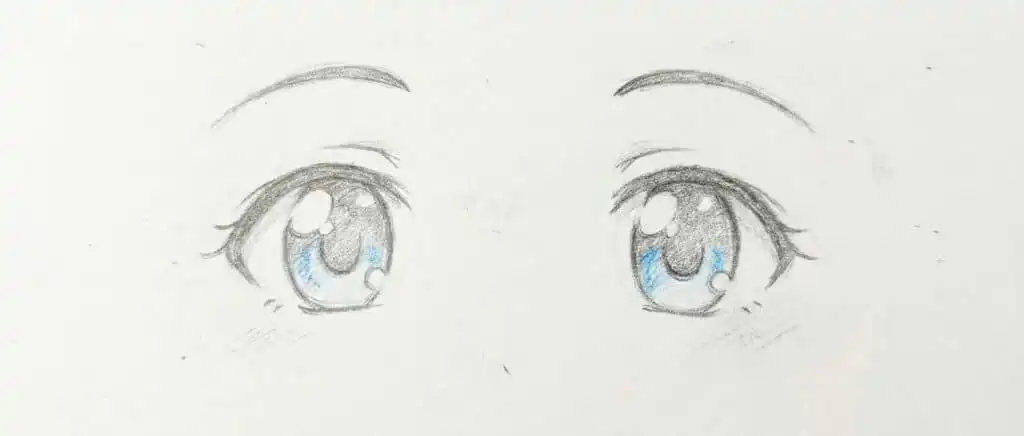
For a full-page practice session after the eye studies, try these anime sketch ideas and build the expression into a complete character moment.
How to draw anime eyes step by step
Start with a light curve for the upper eyelid, then a thinner line underneath for the lower lash line. Place the iris under the top lid — larger than you think it needs to be — draw the pupil in the center, and block in one or two highlight shapes before you touch the shading.
Darken the top of the iris where the upper lid casts shadow, keep the lower half lighter. Then lashes and eyebrows, which do more for expression than most beginners expect. An eyebrow angle alone can shift a face from neutral to angry to exhausted.
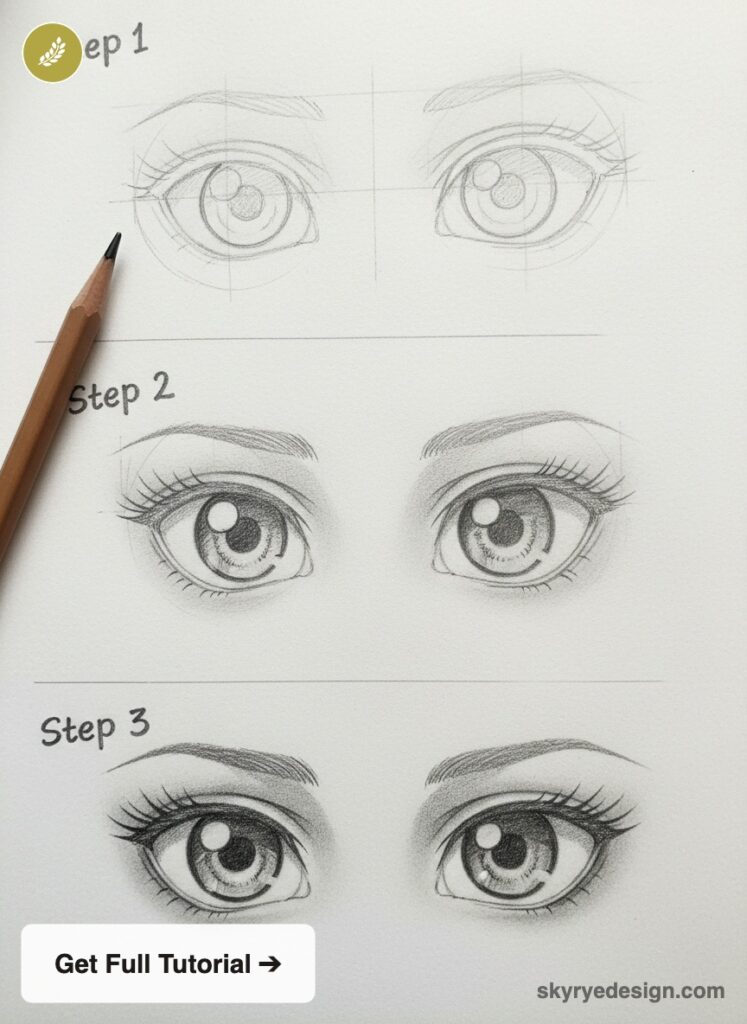
Structure before decoration. Eye shape, iris size, highlight placement, eyebrow angle — those four have to work before extra detail means anything. Sparkle on a broken foundation just makes the problem harder to find.
| Step | What to draw | Beginner tip | Common mistake |
|---|---|---|---|
| 1 | Upper lash line | Use one confident curved line. | Making the outline too dark too soon. |
| 2 | Lower lid | Keep it lighter and shorter than the top. | Closing the eye shape too tightly. |
| 3 | Iris and pupil | Let the iris tuck under the top lid. | Drawing a tiny floating iris. |
| 4 | Highlights | Place highlights before shading. | Adding too many shiny spots. |
| 5 | Shading | Dark top, softer lower iris. | Using one flat gray value everywhere. |
| 6 | Lashes and brows | Use the eyebrow angle to set emotion. | Decorating before the expression is clear. |
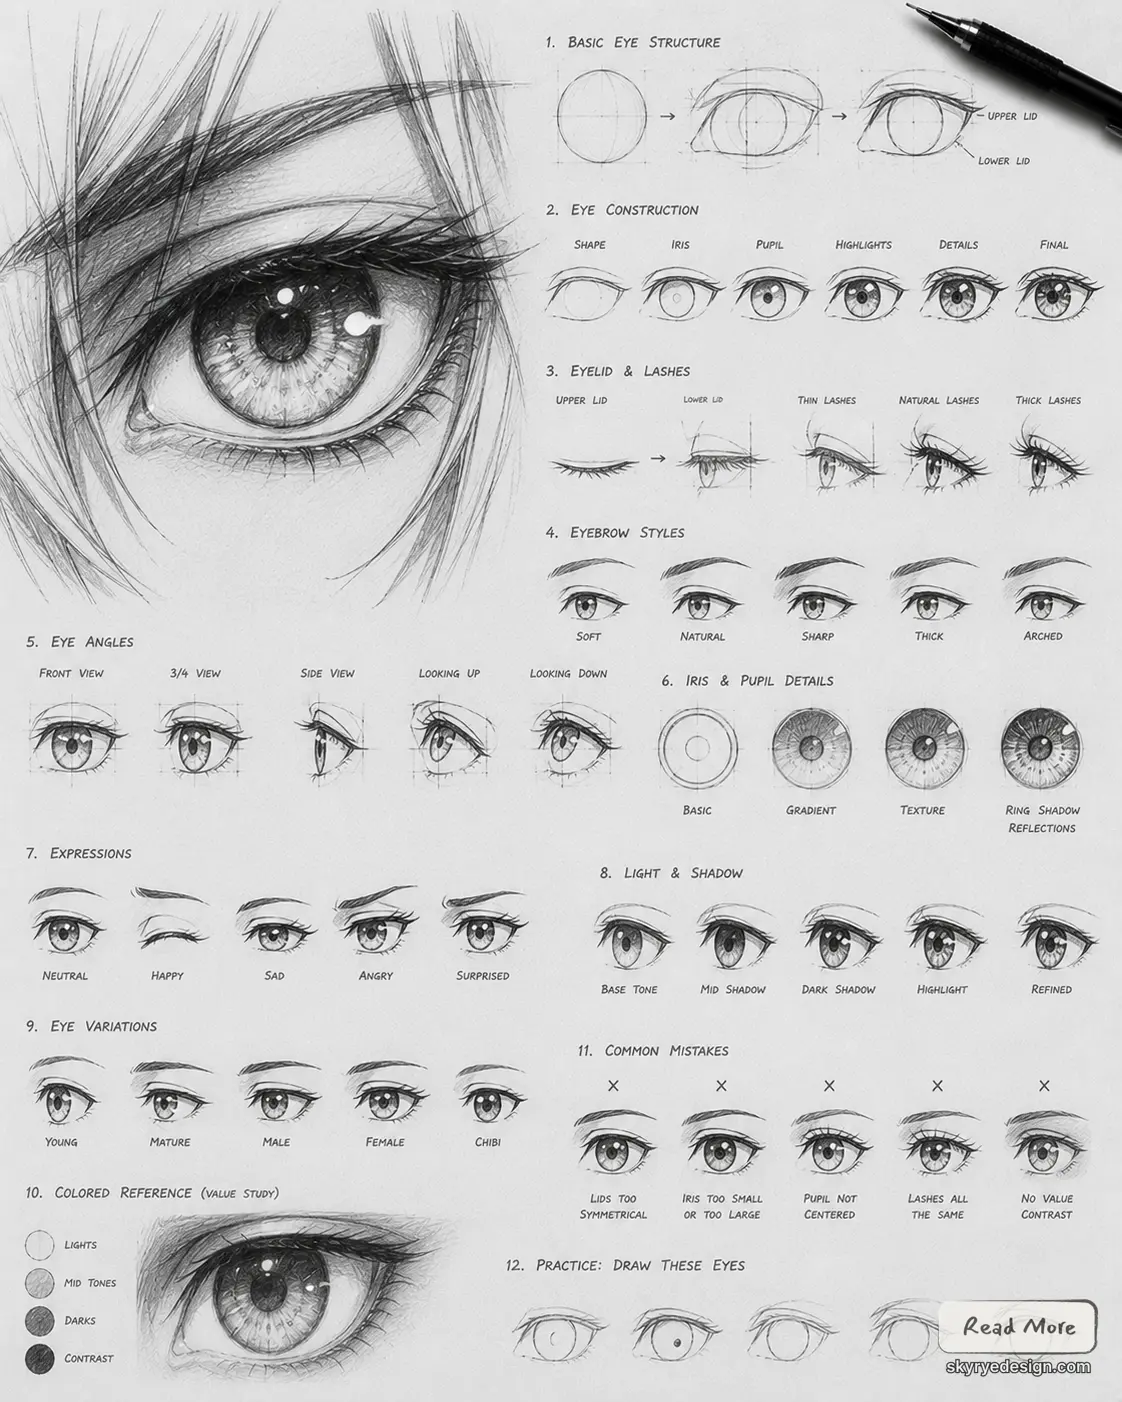
Anime eye reference sheet: 8 shapes to copy
Use this anime eye reference sheet as a quick style menu before you start a full character drawing. Pick one shape, copy it three times, then change only the eyebrow angle and highlight size. That keeps the practice focused instead of turning every sketch into a new character design problem.
| Eye shape | Best for | What to watch |
|---|---|---|
| Round | Cute, young, surprised characters | Keep the iris large and the highlights simple. |
| Almond | Calm, balanced, everyday anime faces | Do not make both corners equally sharp. |
| Sharp | Serious, confident, rival, or villain designs | Let the upper lid carry most of the angle. |
| Sleepy | Tired, bored, quiet, or mysterious characters | Lower the top lid and shrink the highlight. |
| Angry | Action poses and intense expressions | Tilt the brows inward before adding lashes. |
| Cute girl | Soft portraits, romantic faces, bright characters | Use fuller lashes, a big iris, and one clean shine shape. |
| Boy or simple | Cleaner character designs and quick sketches | Use fewer lashes and a stronger brow shape. |
| Side view | Profile poses and turned heads | Compress the iris into an oval and keep the lid narrow. |
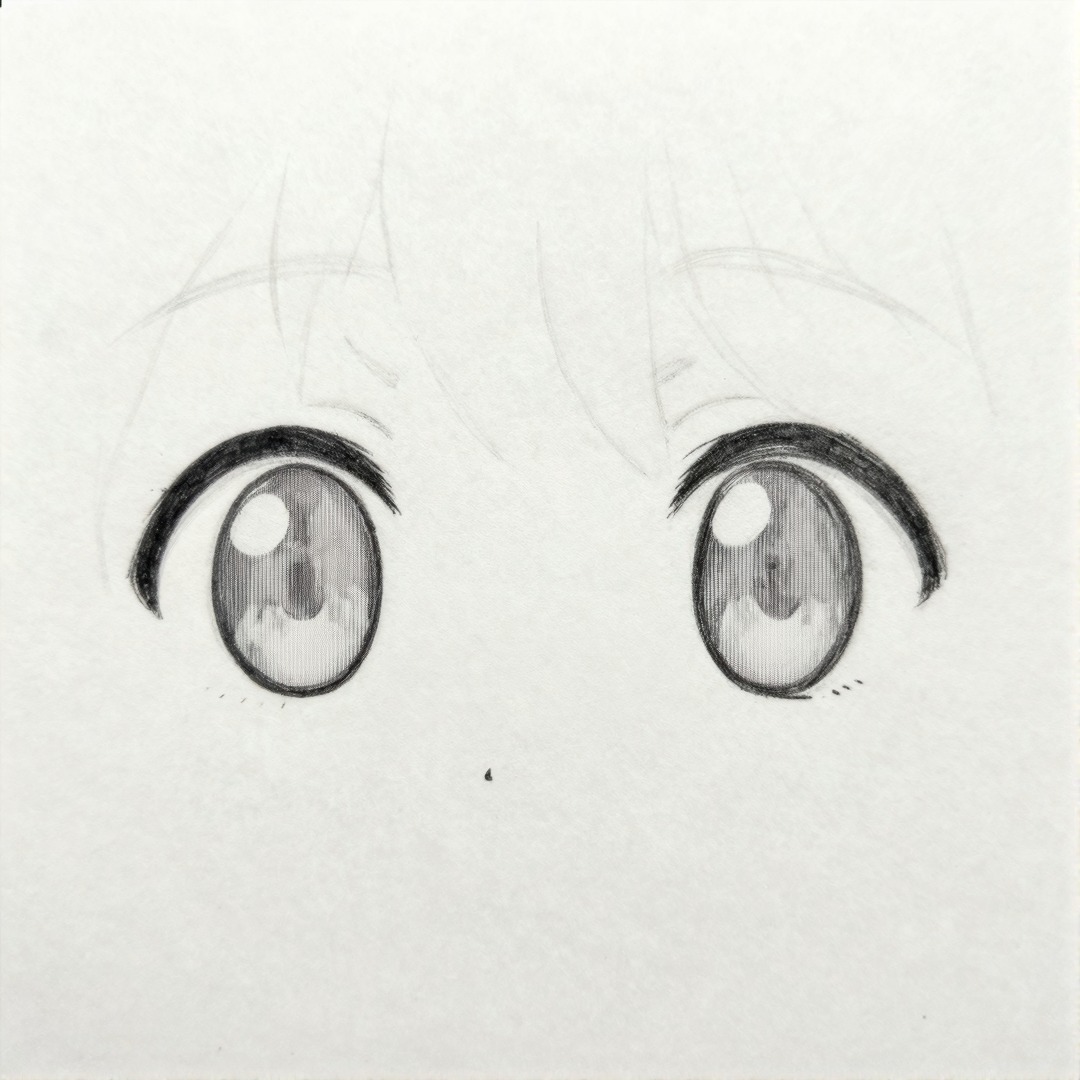
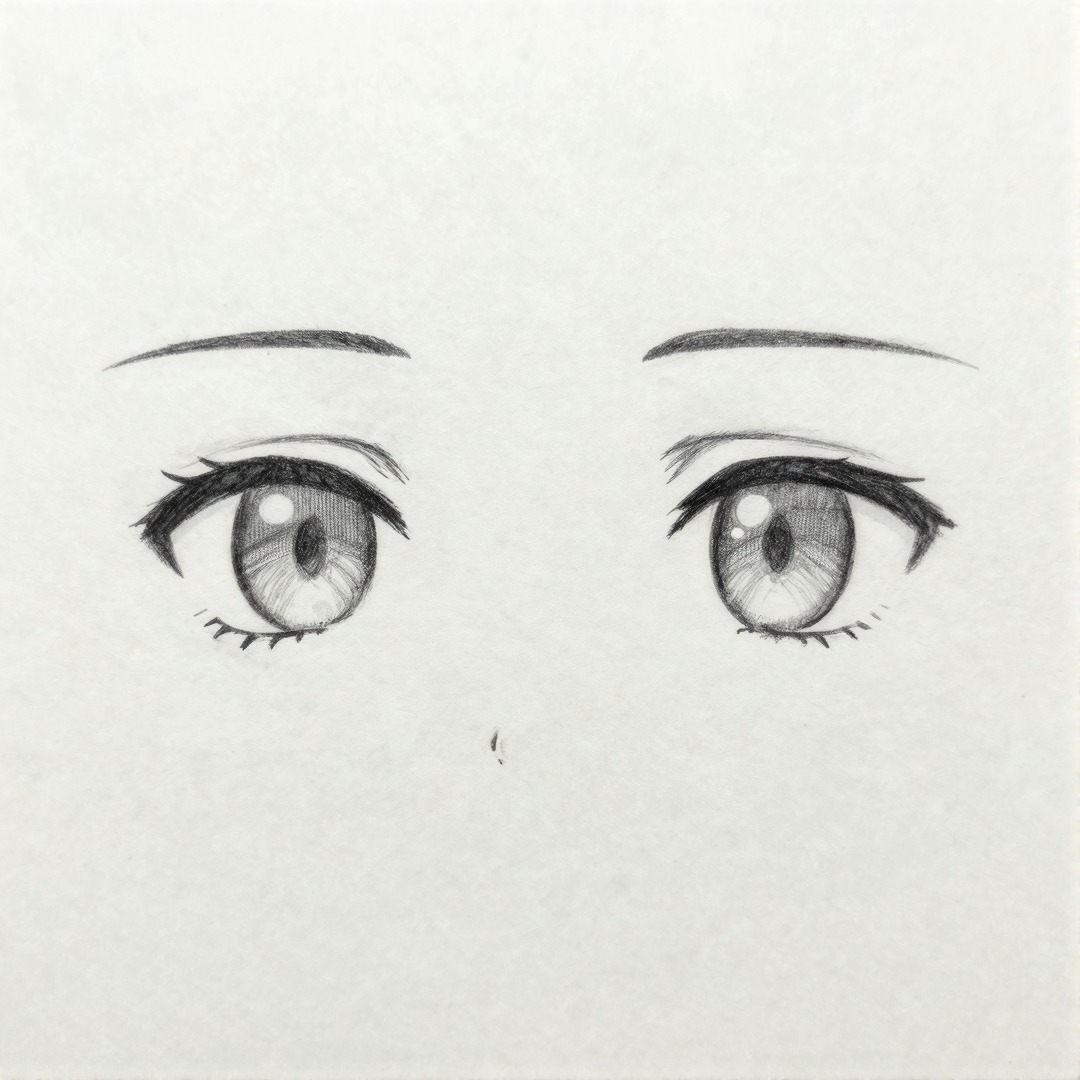
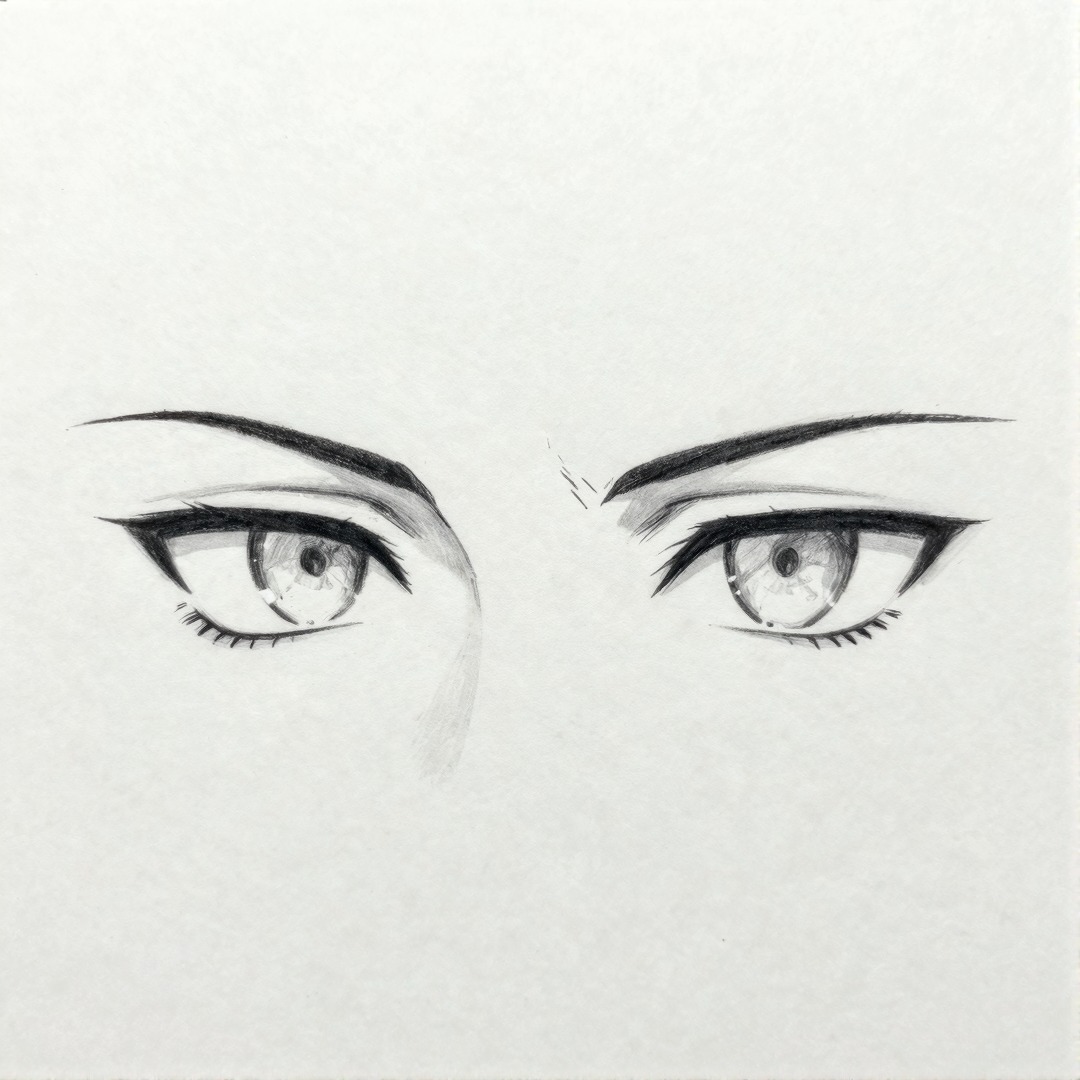
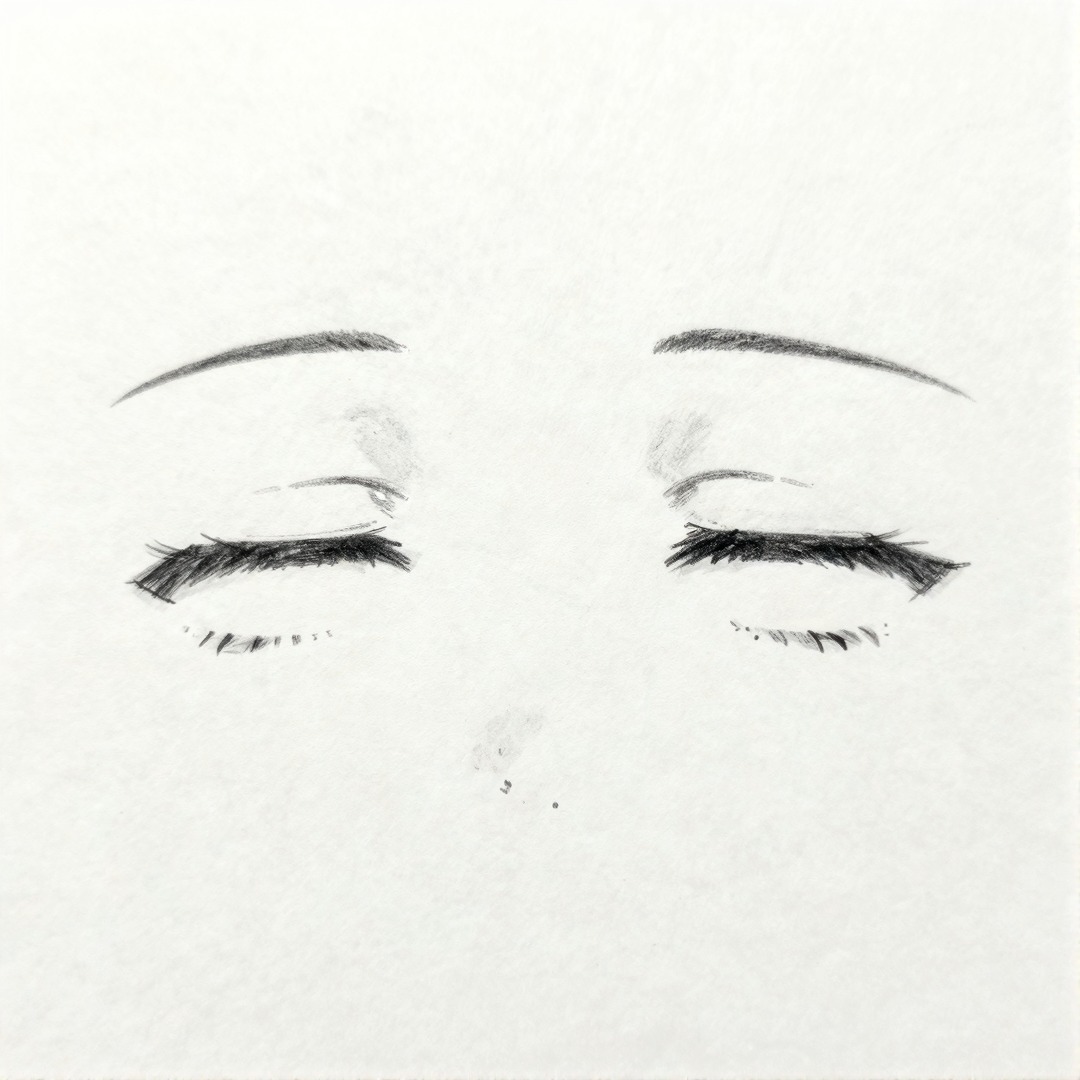
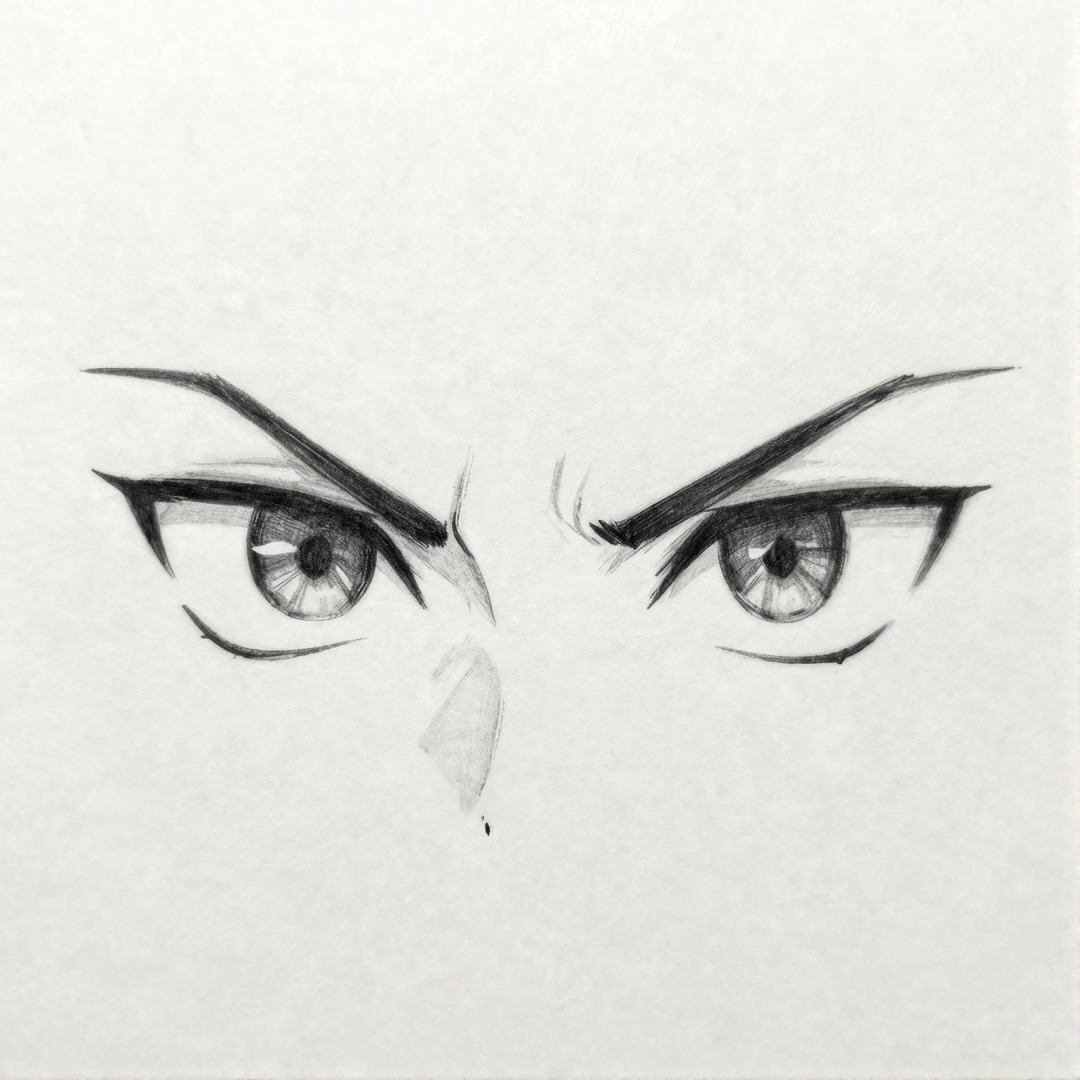
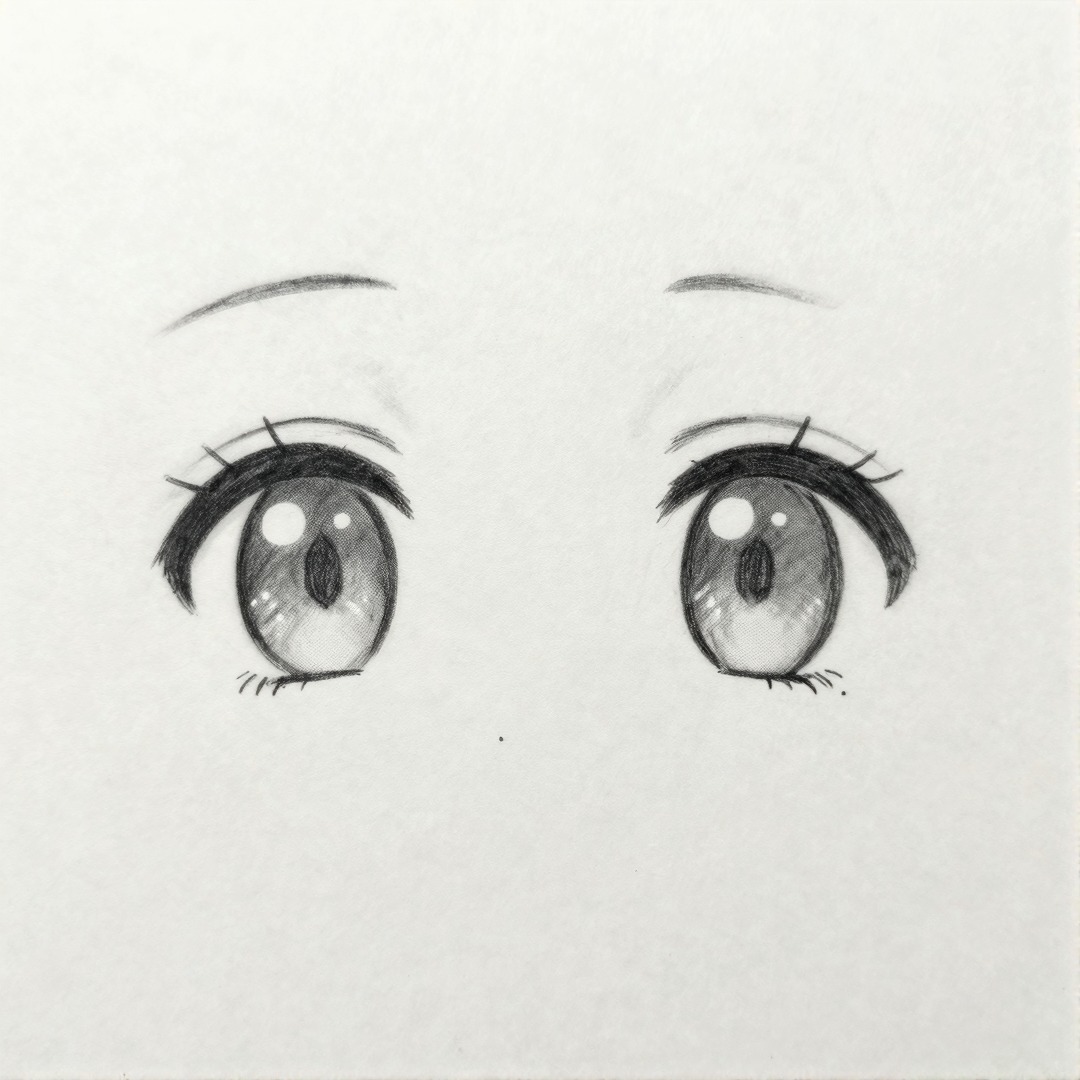
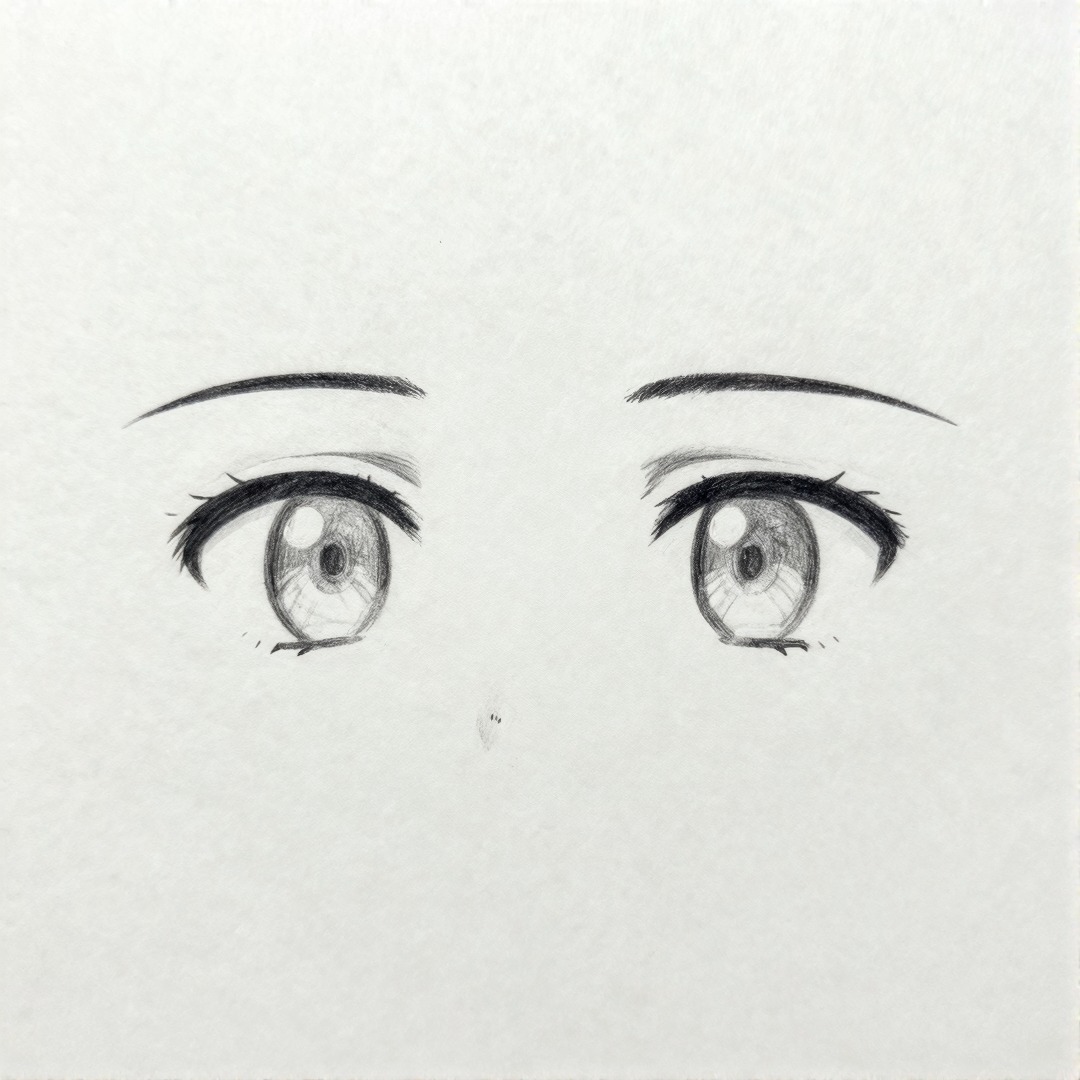
Copy these one at a time rather than treating them as a collage. Start with the round or almond eyes if you are new, then move into sleepy, sharp, angry, cute girl, simple boy, and side-view shapes once the spacing feels steady.
Anime eye drawing basics
Anime eyes are distinct because of their size, shape, and how they express emotions. Mastering the way eyes are built, understanding their common shapes, and using the right tools all help create convincing and stylish anime eyes.
Understanding Anime Eye Anatomy
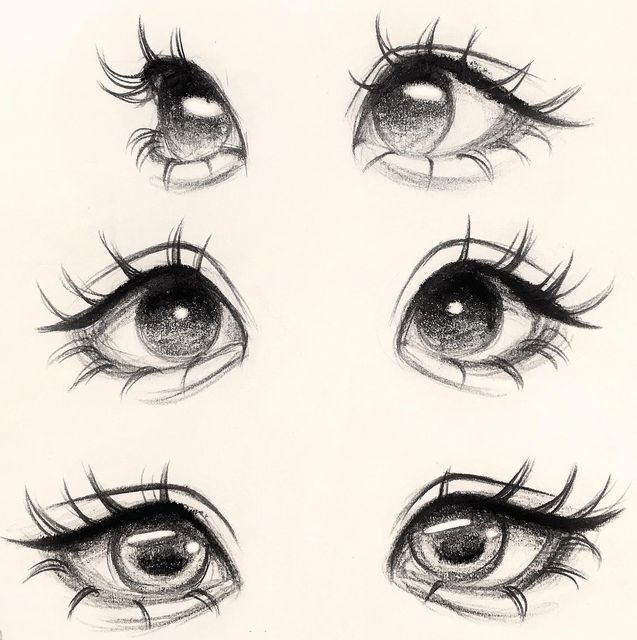
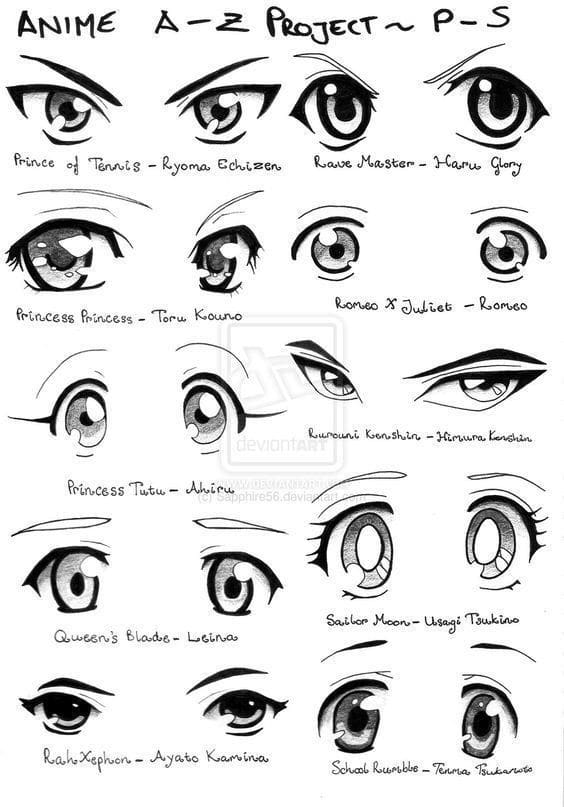
Anime eyes are larger than real eyes, with specific parts that give them life. They have an upper eyelid that is usually thick and curved. The lower eyelid is often thinner and less defined.
Inside the eye, the iris is big and round, almost taking up most of the visible space. The pupil is smaller and in the center, which helps show where the character is looking. Highlights or white spots are added to give the eye a shiny, wet look.
The shape of the eye can change to show different emotions, like excitement, sadness, or anger. Eyelashes may be anime drawing sketch or more detailed depending on the style.
Common Shapes and Proportions
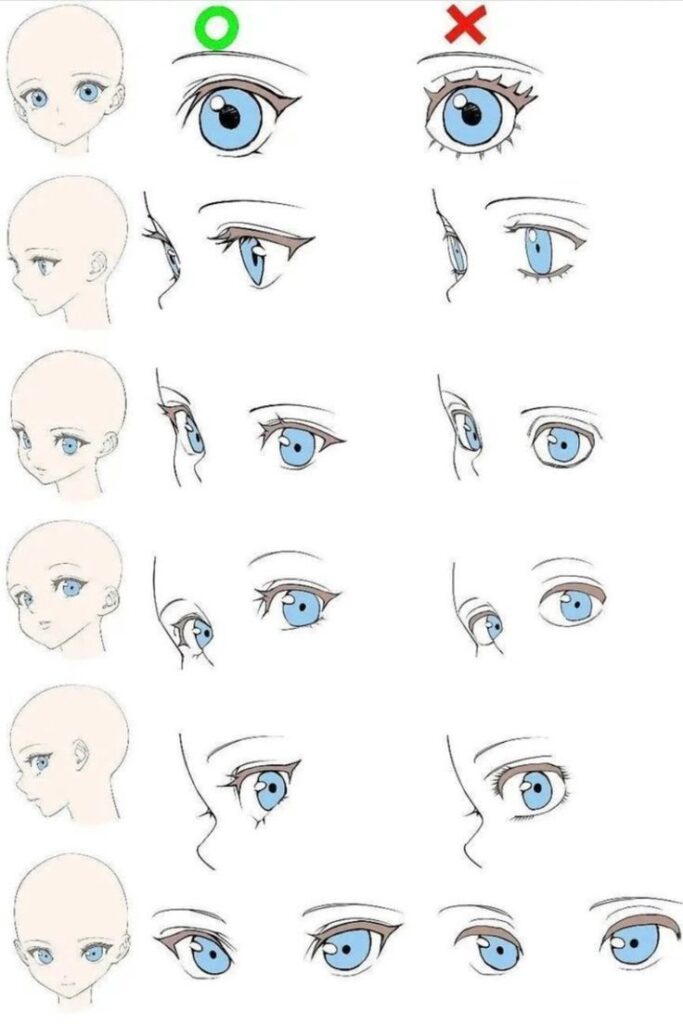
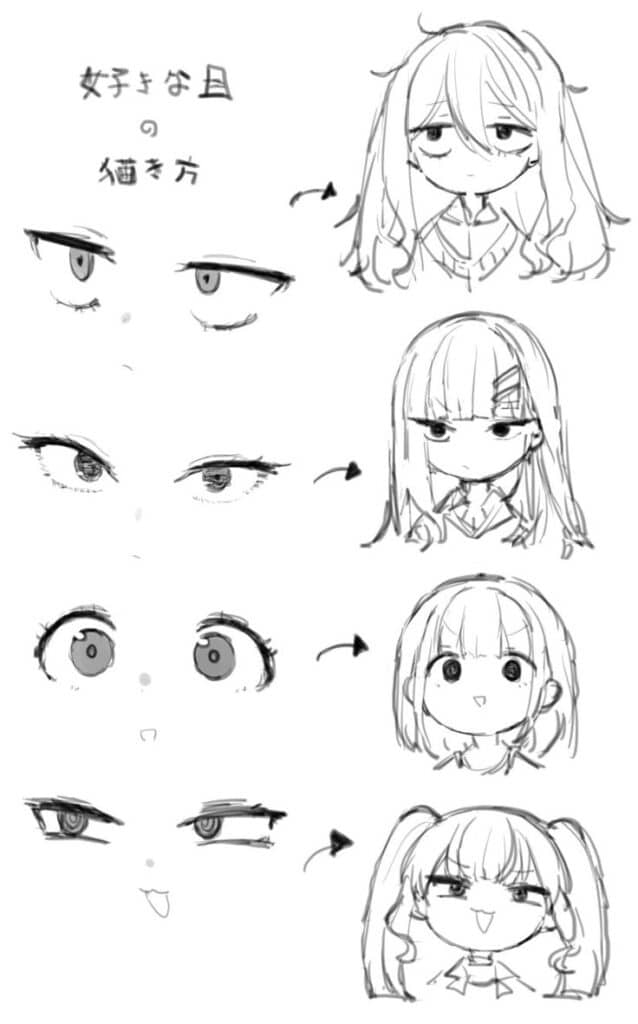
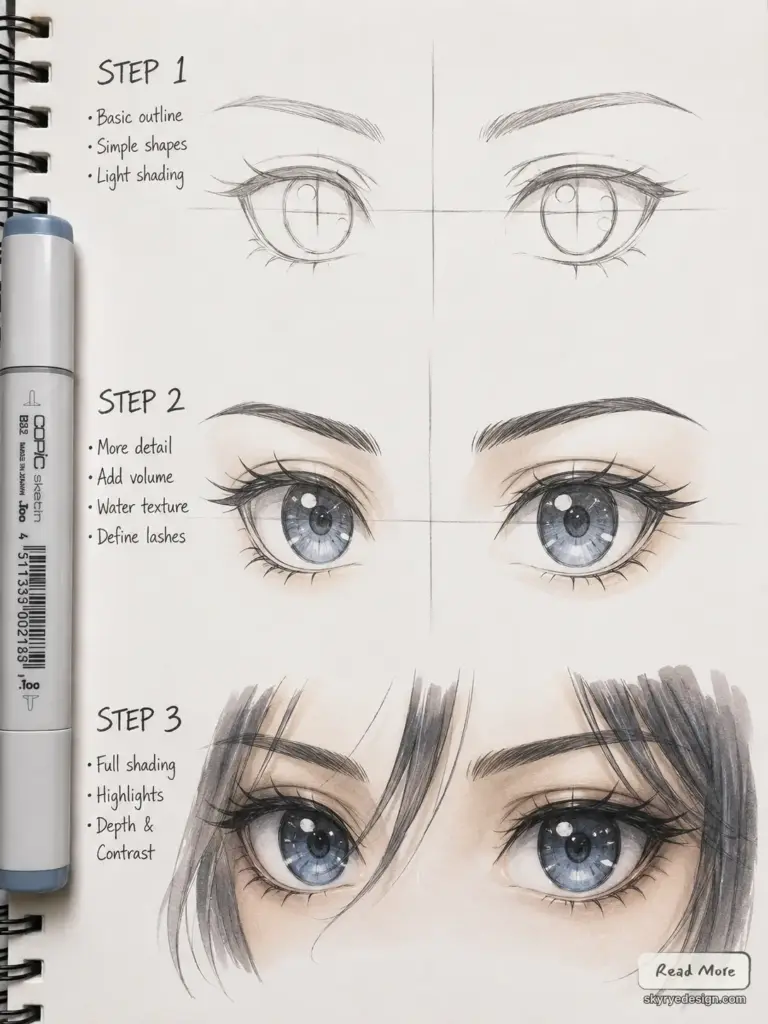
Anime eyes come in many shapes, but beginners can start with two useful families. Round eyes make a character feel younger, softer, or more open. Almond-shaped eyes feel calmer, older, or more serious, especially when the upper lash line has a sharper corner.
A simple spacing rule helps: leave about one eye-width between the two eyes. The height can change a lot depending on style, but the pair should still feel balanced on the face. If one eye drifts higher, lower, or farther out than the other, the character will look off even if each eye is nicely drawn.
Character type changes the proportions too. Cute or romantic characters often have larger irises, brighter highlights, and fuller lashes. Serious characters usually work better with narrower eyes, smaller highlights, and cleaner line work.
Use this quick checklist when the drawing starts to feel messy:
- A clear upper lash curve that carries the expression.
- A large iris that often touches or hides under the top lid.
- One or two clean highlights placed before shading.
- Lashes and eyebrow angles that support the character, not random decoration.
For a related creative prompt, see How to Draw Anime Guy Hair.
Essential Drawing Tools
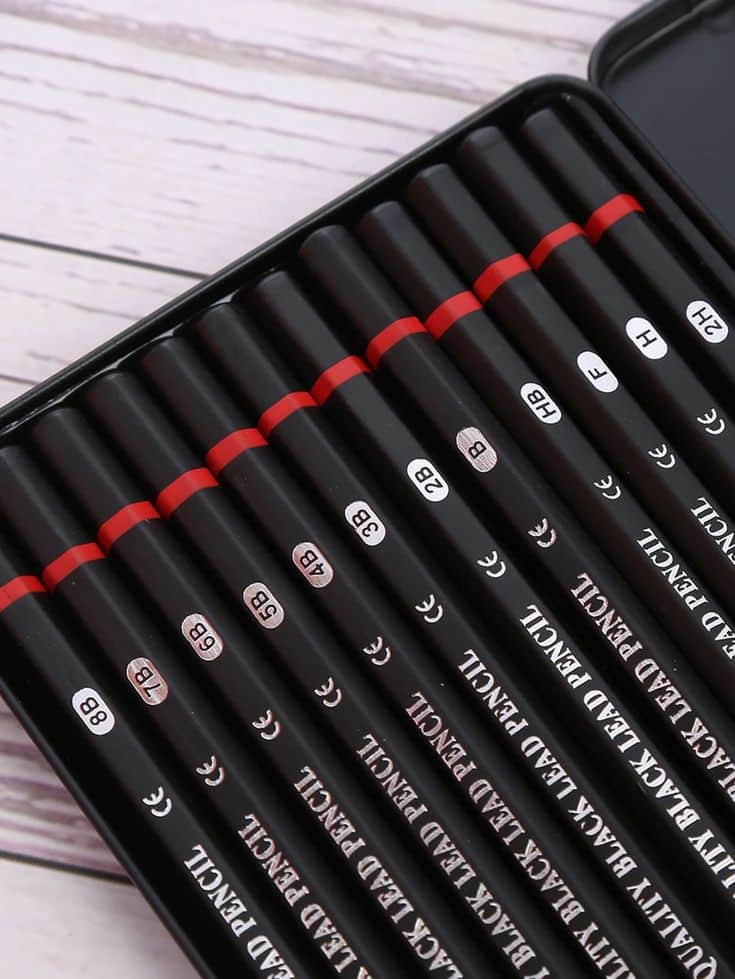
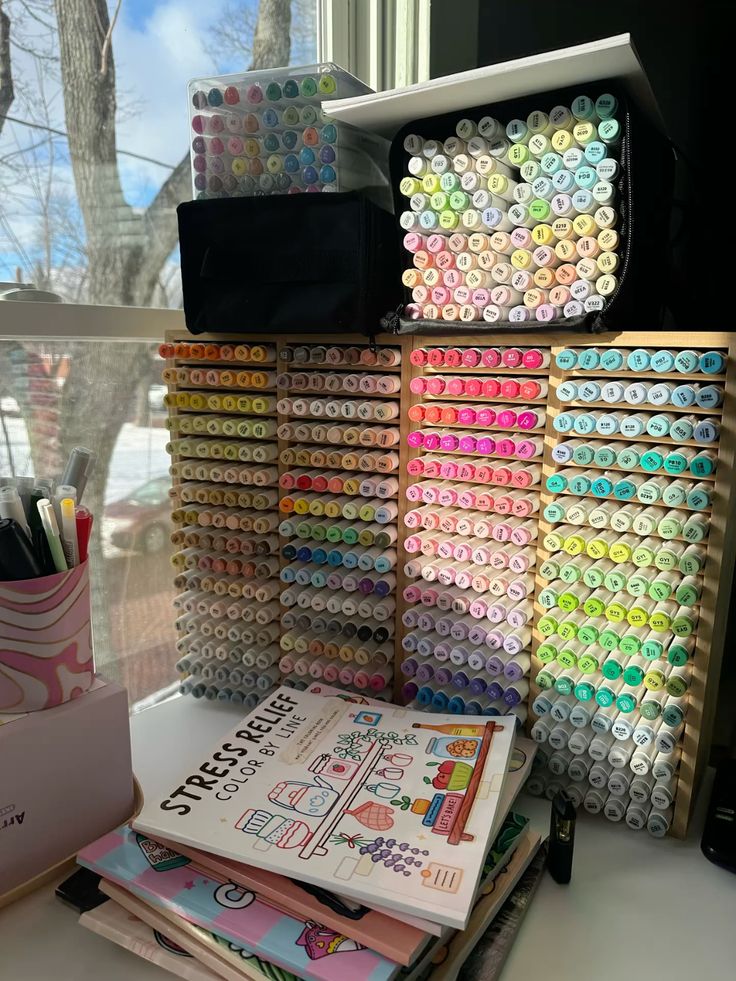
You do not need fancy tools to practice anime eyes. A pencil, eraser, and clean paper are enough for the structure. Better tools only matter once you want cleaner ink lines, smoother shading, or stronger color.
For beginners, a 2B pencil is a good starting point because it gives a visible line without digging into the paper. Pair it with a kneaded eraser or soft white eraser so you can lift guidelines without tearing the page.
For inking, use a fine-tip pen or a digital brush with pressure sensitivity. Keep the outer lash line heavier than the inner iris details, so the eye has structure without looking overworked.
For color, markers, colored pencils, or digital layers all work. The important part is separating the iris base color, upper shadow, pupil, and highlights, instead of coloring the whole eye with one flat tone.
A simple starter kit looks like this:
Once the eyes and face proportions are placed, the next big read is the silhouette; this how to draw anime hair guide keeps the hairline and clumps working with the expression.
- For sketching: a 2B pencil and a good eraser
- For inking: fine liners or felt-tip pens
- For colouring: markers, coloured pencils or digital brushes
The tool matters less than pressure control. Keep the sketch pale, commit to the final lash line only when the shape works, and save the darkest marks for the pupil, top lid shadow, and deepest lashes.
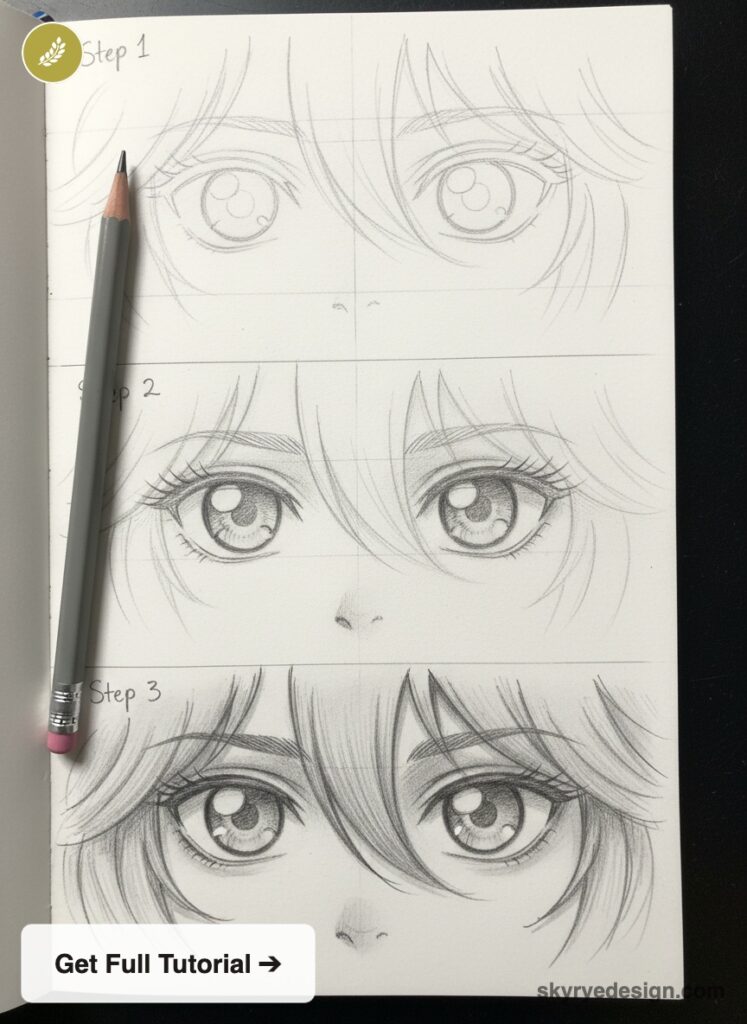
Pencil sketch workflow for anime eyes
For pencil anime eyes, keep the first pass pale enough that you can erase it with one light touch. I like a 2B pencil for the main sketch because it gives a visible line without carving a groove into the paper. Save the darkest pressure for the pupil, the top eyelid shadow, and the thickest lash edge.
| Pencil pass | What to do | Pressure |
|---|---|---|
| Layout | Place both eye shapes and the center line of each iris. | Very light |
| Structure | Draw the upper lid, lower lid, iris, pupil, and highlights. | Light |
| Value | Shade the top third of the iris and soften downward. | Medium |
| Finish | Darken the pupil, upper lash line, and tiny contact shadows. | Dark but controlled |
If the drawing starts to look muddy, stop adding graphite and clean the highlight edges with a kneaded eraser. A crisp highlight usually does more for anime eyes than another layer of shading.
How to draw anime eyes: step-by-step techniques
The easiest way to draw anime eyes is to build them in passes: rough shape, iris placement, highlight shapes, clean line art, then shading. Do not try to finish one tiny detail before the rest of the eye is placed. Work across the whole eye so the expression stays balanced.
Sketching the Eye Outline
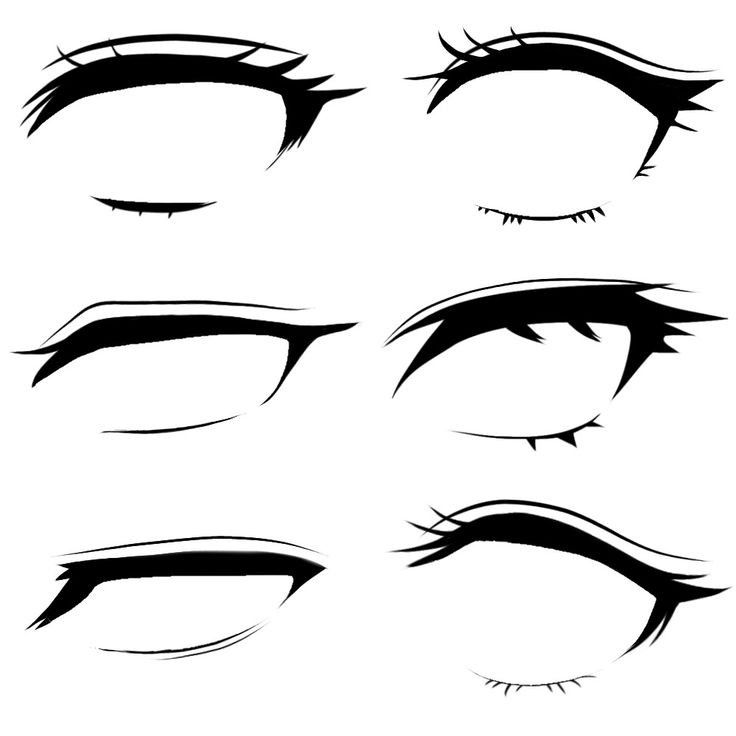
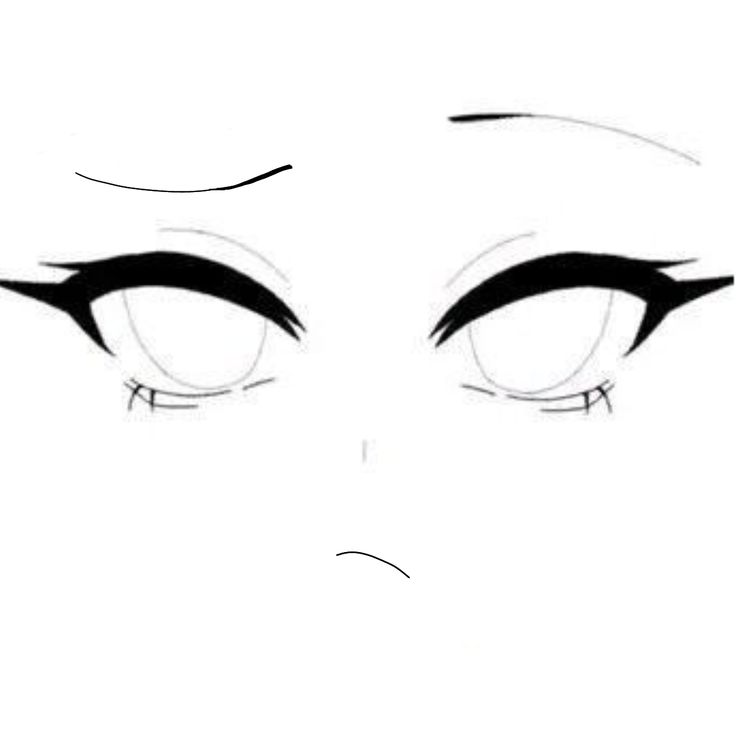
The first task is to draw the basic shape of the eye. Anime eyes vary from round to almond shapes, so deciding the style early is important. Usually, the upper eyelid is thicker and more curved than the bottom.
Start with a light pencil to create an oval or a slightly pointed oval. Mark the corners of the eye clearly. The size of the eye depends on the character’s style, with younger characters often having larger eyes.
Next, add a soft line inside to show the eyelid crease. This line should follow the general shape of the top eyelid. Avoid making the sketch too dark at this stage so changes can be made easily.
A Gojo eye drawing turns an anime-eye study into a character exercise: compare the lid angle, iris detail, highlights, and the shadow cast by the hair or blindfold.
Drawing the Iris and Pupil
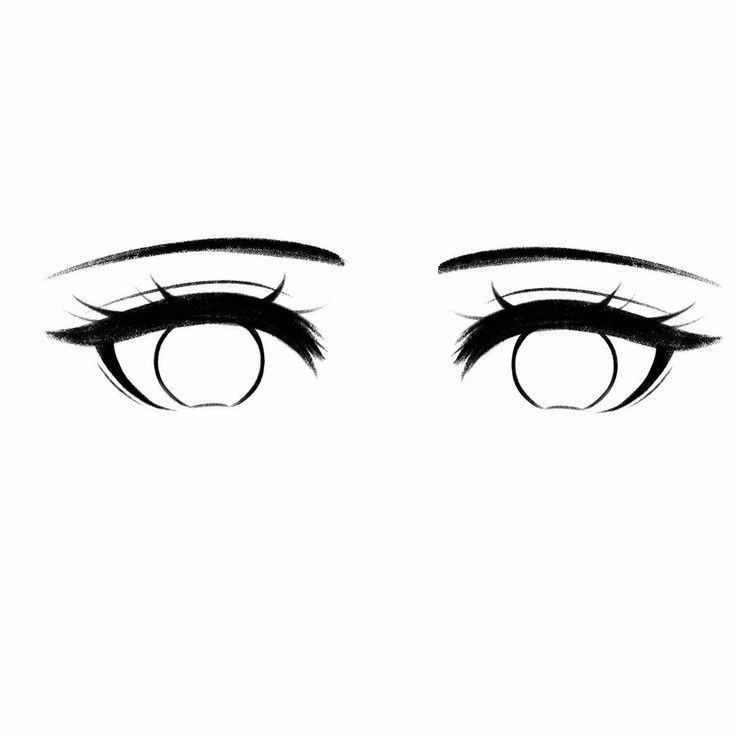
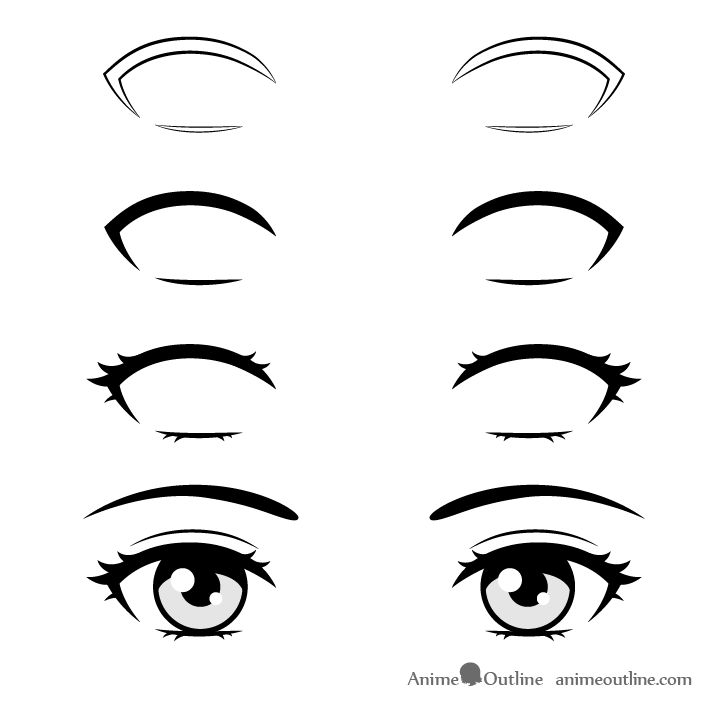
The iris in anime eyes is large and expressive. It often takes up most of the eye space and can be drawn as a big circle inside the outline. The pupil is usually smaller and centered within the iris.
Place the iris so it slightly touches the upper and lower lids. This gives a natural fit. For a simple look, draw a round pupil near the center or slightly to the side where the character looks.
Adding highlights is common to give life to the eyes. This is done by drawing small circles or ovals inside the iris. Leave those areas white to show light reflection, which adds sparkle.
If you want a looser pop-culture warm-up after eyes, try these fan-art sketch prompts built around simple wizarding-world shapes like glasses, a Snitch, and a letter.
Adding Eyelashes and Eyebrows
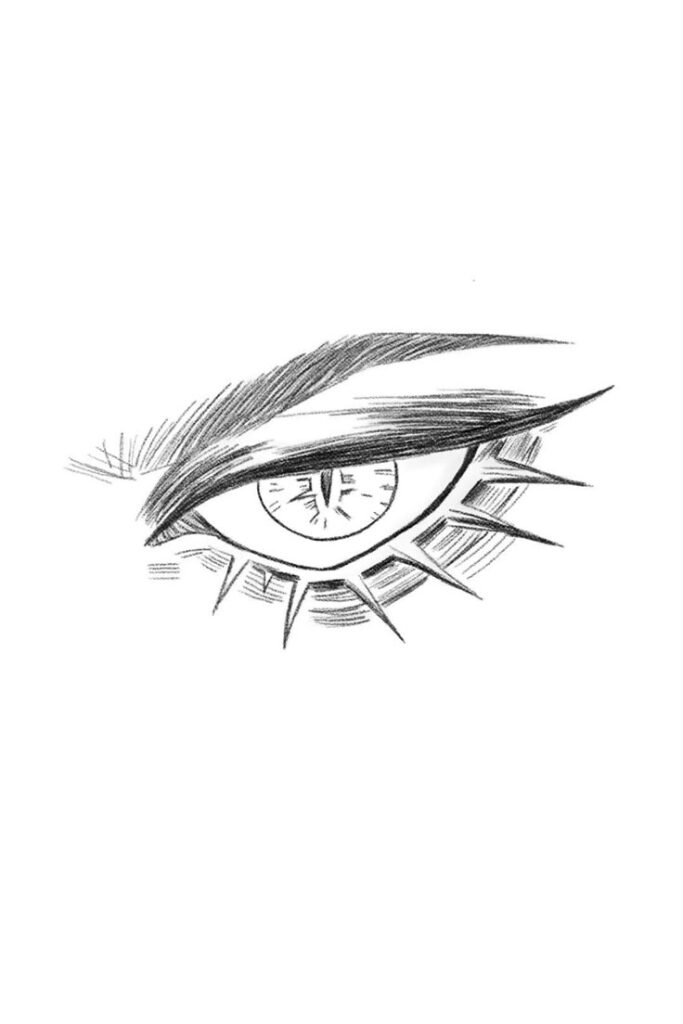
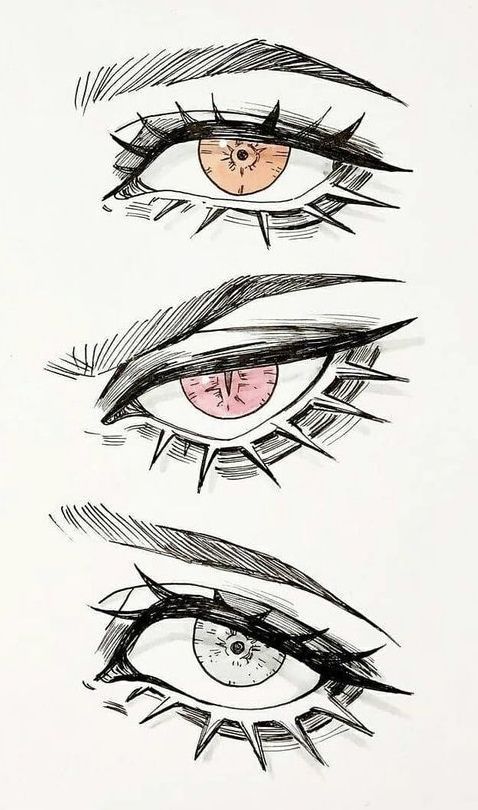
Eyelashes in anime styles range from simple strokes to fuller sets. Usually, the upper lash line is emphasized with thicker or longer strokes, while the lower lashes are thinner or fewer in number.
Use short, curved lines that taper off at the ends. Place the lashes regularly spaced but vary their length for a natural look. Avoid making eyelashes too harsh unless the character’s design calls for it.
Eyebrows sit above the eye and help show emotion. They can be thin, thick, straight, or curved depending on the character. Draw them lightly at first to adjust their angle and shape before thickening or refining.
After practicing the eyes, try placing them in a complete sketch; these girl face drawing ideas give you quick portrait and character prompts for that next step.
Inking and Line Art
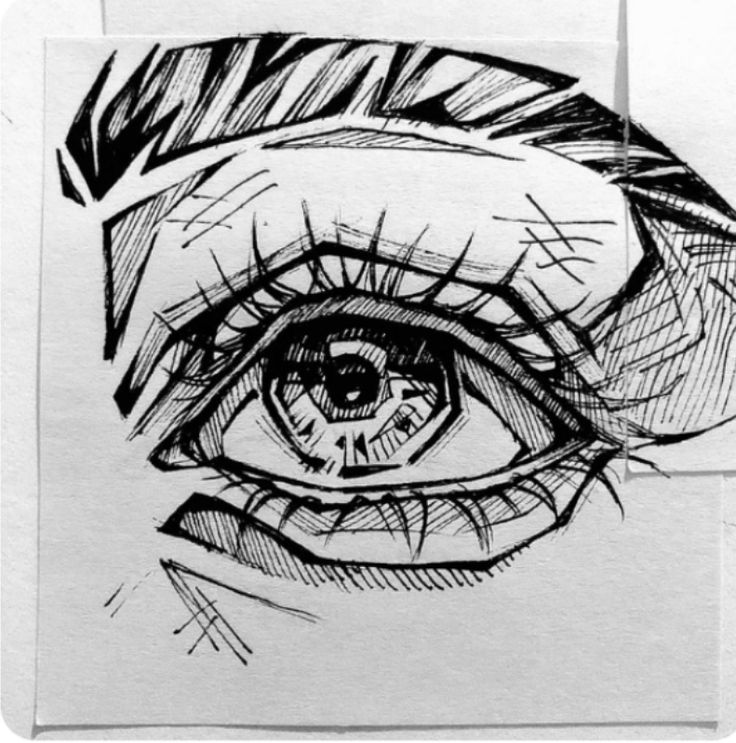
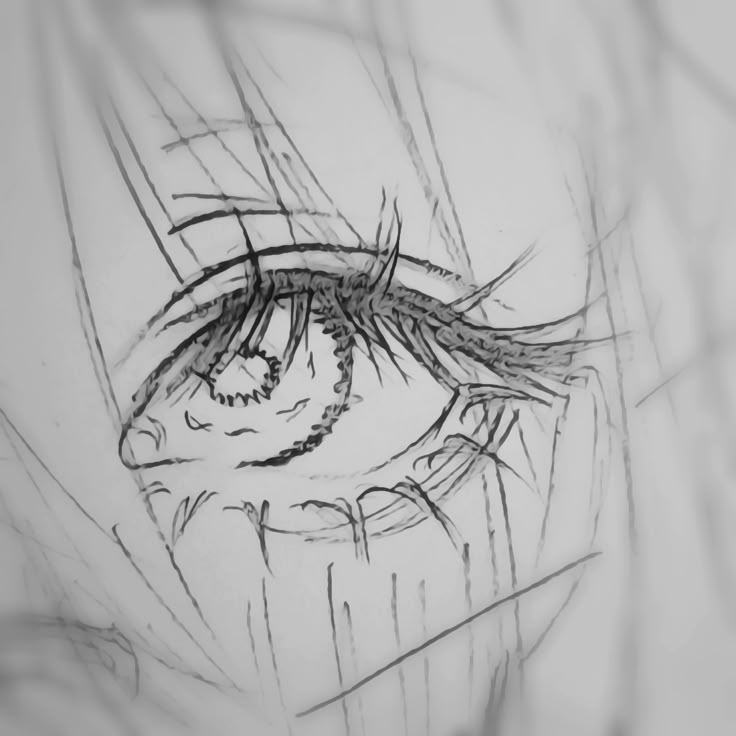
Inking turns the sketch into clean, bold lines that define the eye. Use a fine pen or digital brush with steady pressure to trace over your final pencil lines. Start with the eye’s outer shapes, then ink the iris and pupil.
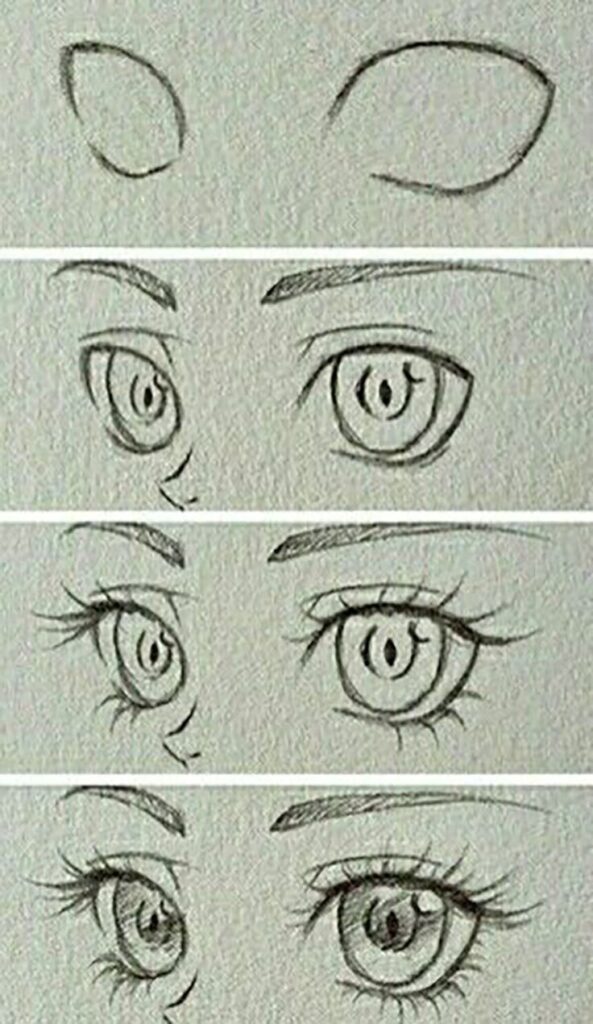
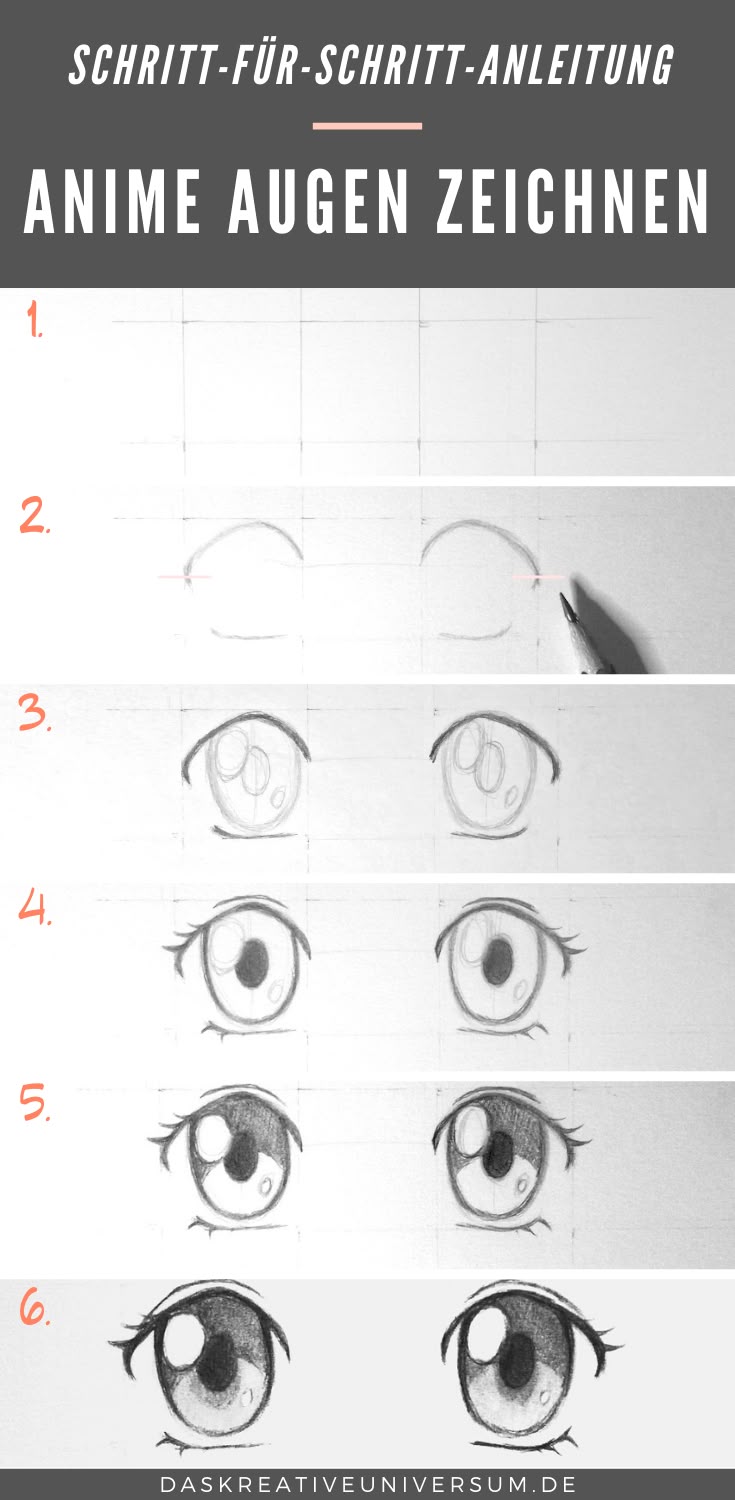
Make sure to vary line thickness. Thicker lines around the eyelid add weight, while thinner lines inside keep details delicate. Be careful not to overdo it, as too many thick lines can look heavy.
Erase the pencil marks after the ink dries or hide the sketch layer if working digitally. This leaves clear outlines ready for coloring or shading, which will enhance the eye’s depth and expressiveness.
Common anime eye drawing mistakes
| Mistake | Why it hurts the drawing | Quick fix |
|---|---|---|
| Tiny iris | The eye loses its anime look and feels stiff. | Make the iris larger and let it tuck under the upper lid. |
| Uneven pair | The face feels tilted even when the eyes look good alone. | Use a light horizontal guide and compare both corners. |
| Too many highlights | The eye becomes noisy instead of shiny. | Use one main highlight and one smaller accent. |
| Flat shading | The iris looks pasted on. | Darken the top third and soften toward the lower iris. |
| Random eyebrows | The emotion does not read clearly. | Set the eyebrow angle before adding lash details. |
Most beginner anime eye drawings fall apart for boring little reasons. Not because the style is wrong. Usually the eyelid curve is off, the iris sits too high, the highlight does not match the direction of the eye, or the brow is saying a different emotion than the eye.
So before adding more lashes, sparkles, color, or dramatic shading, fix the structure. If the pair looks wrong, cover the details with your thumb and check only three things: are the inner corners aligned, are the irises the same size, and are the brows telling the same emotion?
One drill helps a lot: draw the same eye six times. Neutral, happy, angry, sad, surprised, tired. Do not redesign the whole eye each time. Keep the shape mostly the same and change only the parts that control expression: eyelids, iris visibility, highlights, and brows.
That is where the logic starts to show. A happy eye lifts and compresses. An angry eye cuts downward with the brow. A tired eye droops. A surprised eye opens up and shows more iris. Once you see those small changes side by side, anime eyes stop feeling like random pretty shapes and start feeling like something you can actually control.
Once the eyes are placed, the next expression checkpoint is how to draw anime lips, because the mouth can change the whole mood with one small curve.
How to make anime eyes look expressive
Making anime eyes expressive is mostly about contrast: open versus half-closed lids, large versus tiny highlights, soft versus sharp brows. Choose the emotion first, then let the eyelid angle and brow do the heavy lifting before you add color.
Shading and Highlights
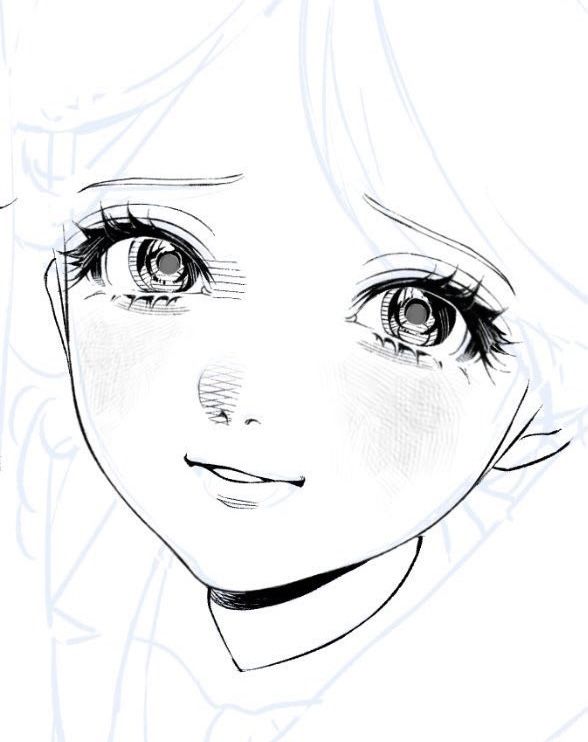
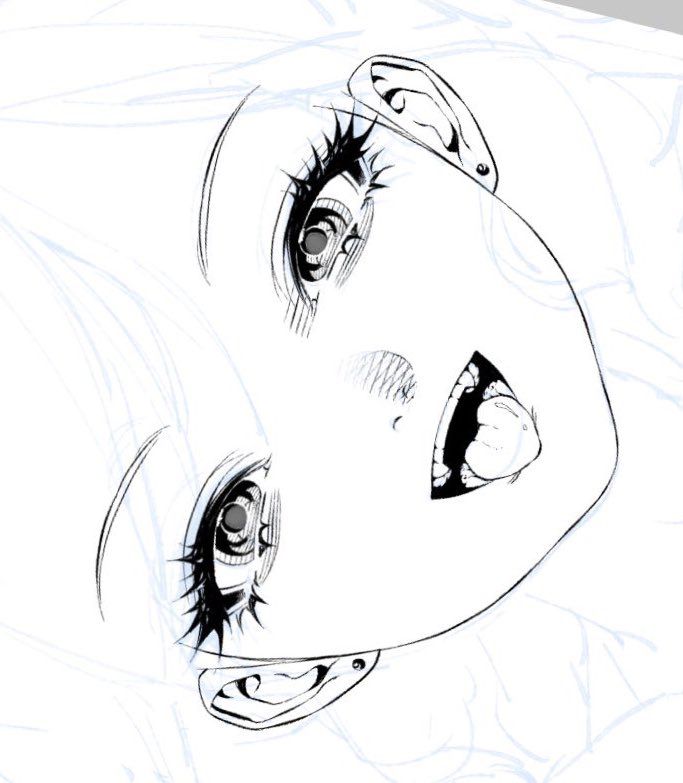
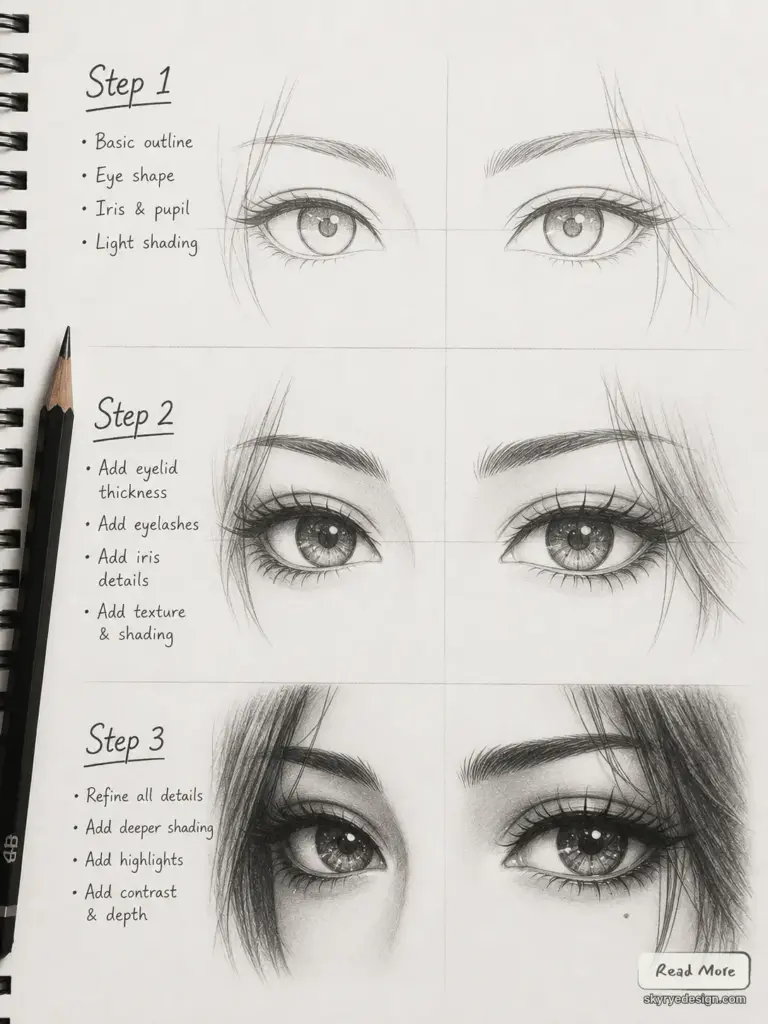
Shading adds depth to anime eyes by showing where the light hits and where shadows fall. Usually, the top part of the eye is darker because the eyelid casts a shadow. The bottom is lighter to show reflection.
Highlights are small bright spots that make eyes look shiny and lively. They often appear as white dots or sparkles. Adding more than one highlight can create the effect of wet, glassy eyes.
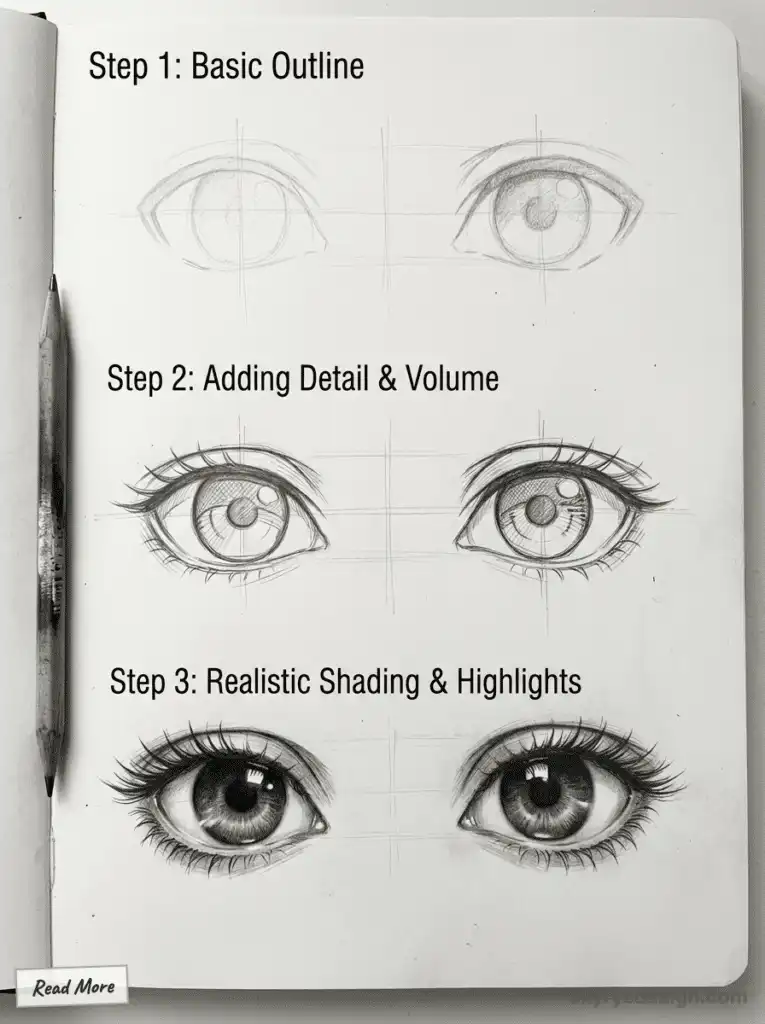
Artists can use soft gradients and layers of color to create smooth shading. This technique helps the iris stand out. Using a mix of dark and light tones inside the eye makes it feel round and real.
Expressing Emotions
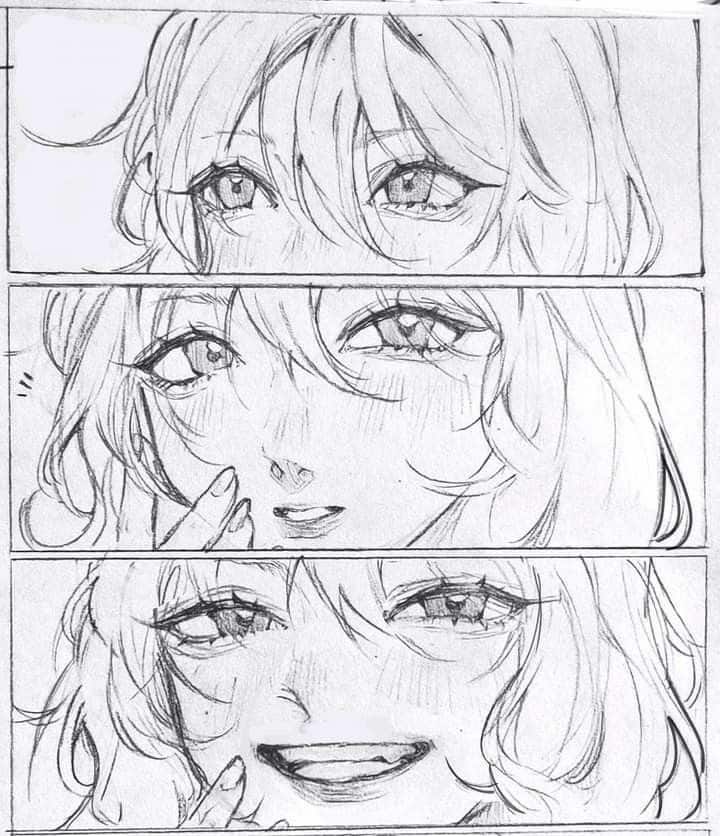
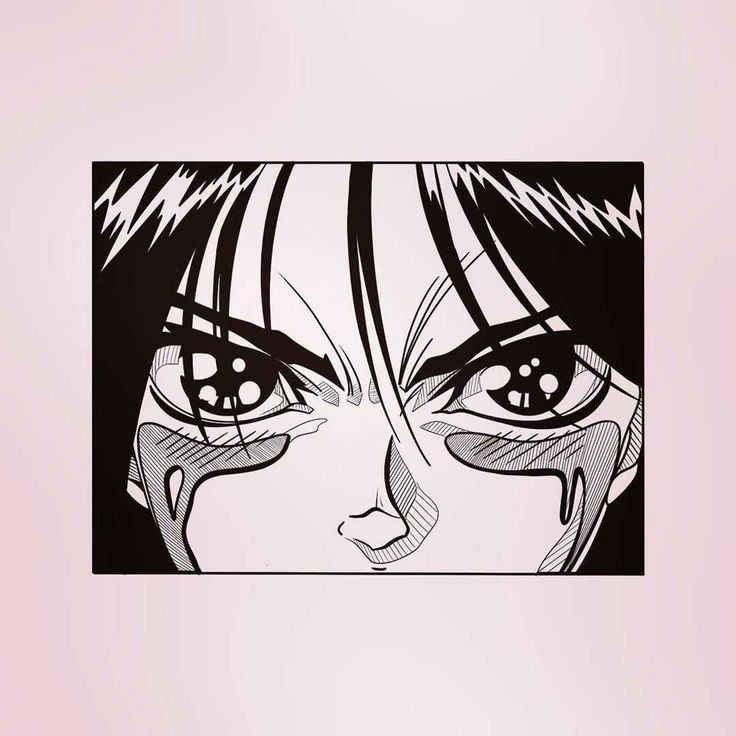
Anime eyes are very good at showing feelings. The shape, size, and position of the eyes change between emotions like happiness, anger, or sadness.
For example, wide-open eyes with large highlights show excitement or surprise. Half-closed eyes with smaller or no highlights can express tiredness or boredom. Eyebrows also play a big role in emotion when drawn near the eyes.
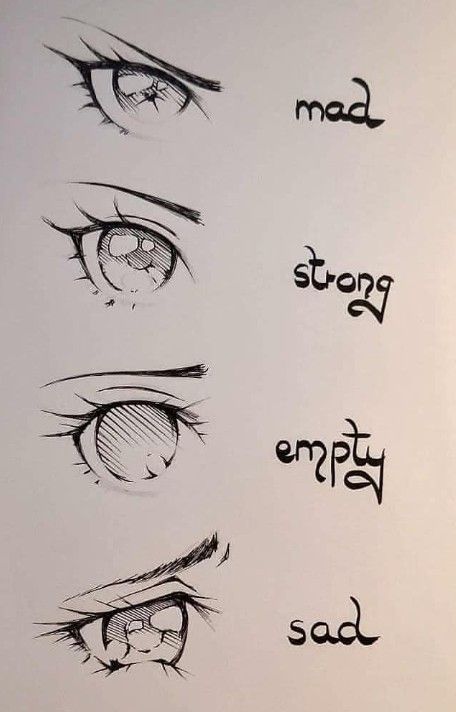
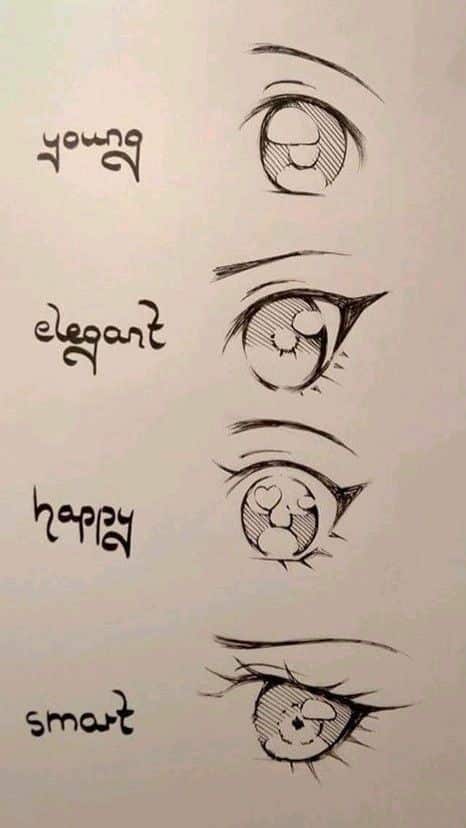
Small details such as wrinkles or tears add realism and show pain or joy. The way the pupil is drawn can change the mood—small pupils can show fear or shock, while big pupils can show love or innocence.
Different Styles and Variations
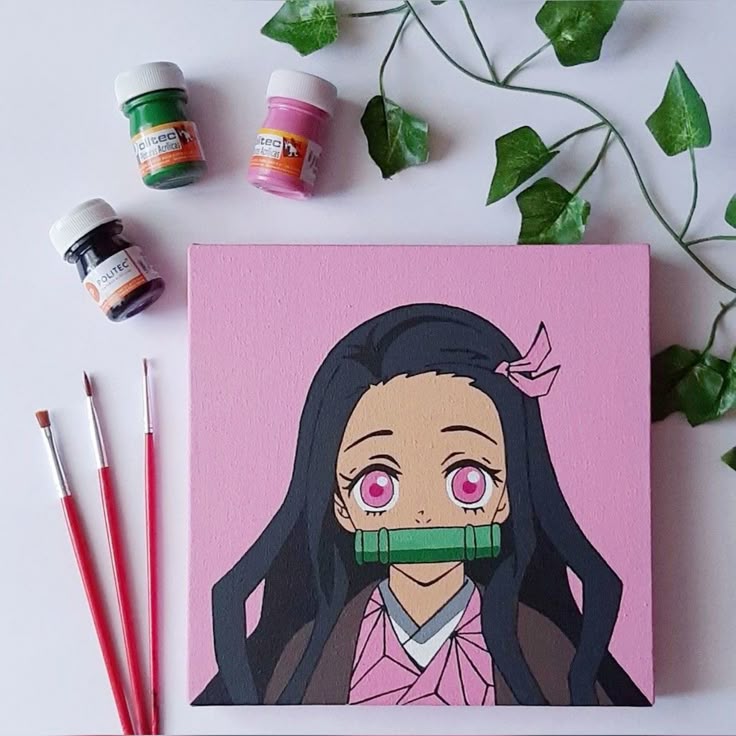
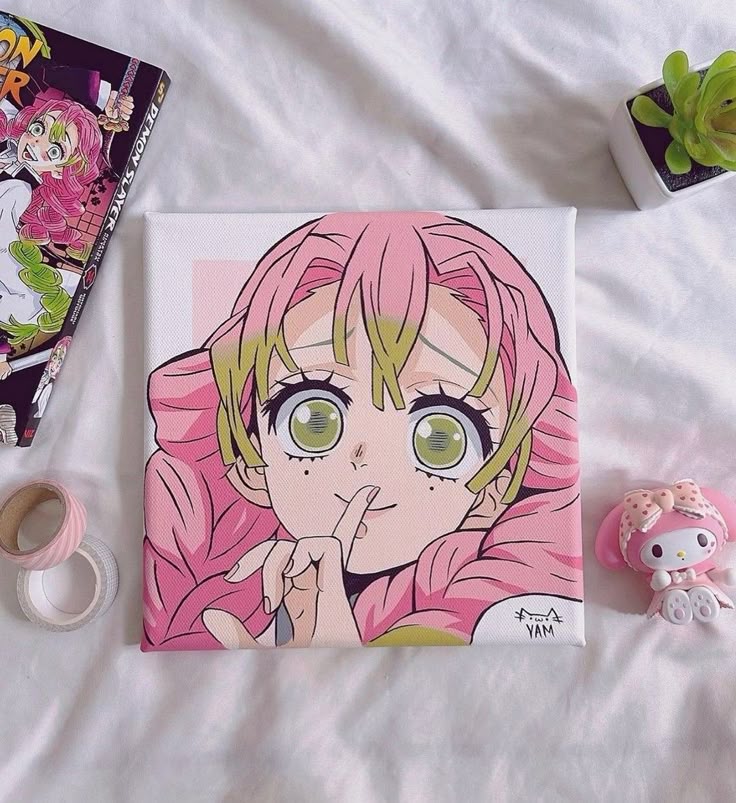
Anime eyes come in many shapes and sizes depending on the character’s age, personality, and the artist’s style. Some eyes are big and round, perfect for cute or innocent characters.
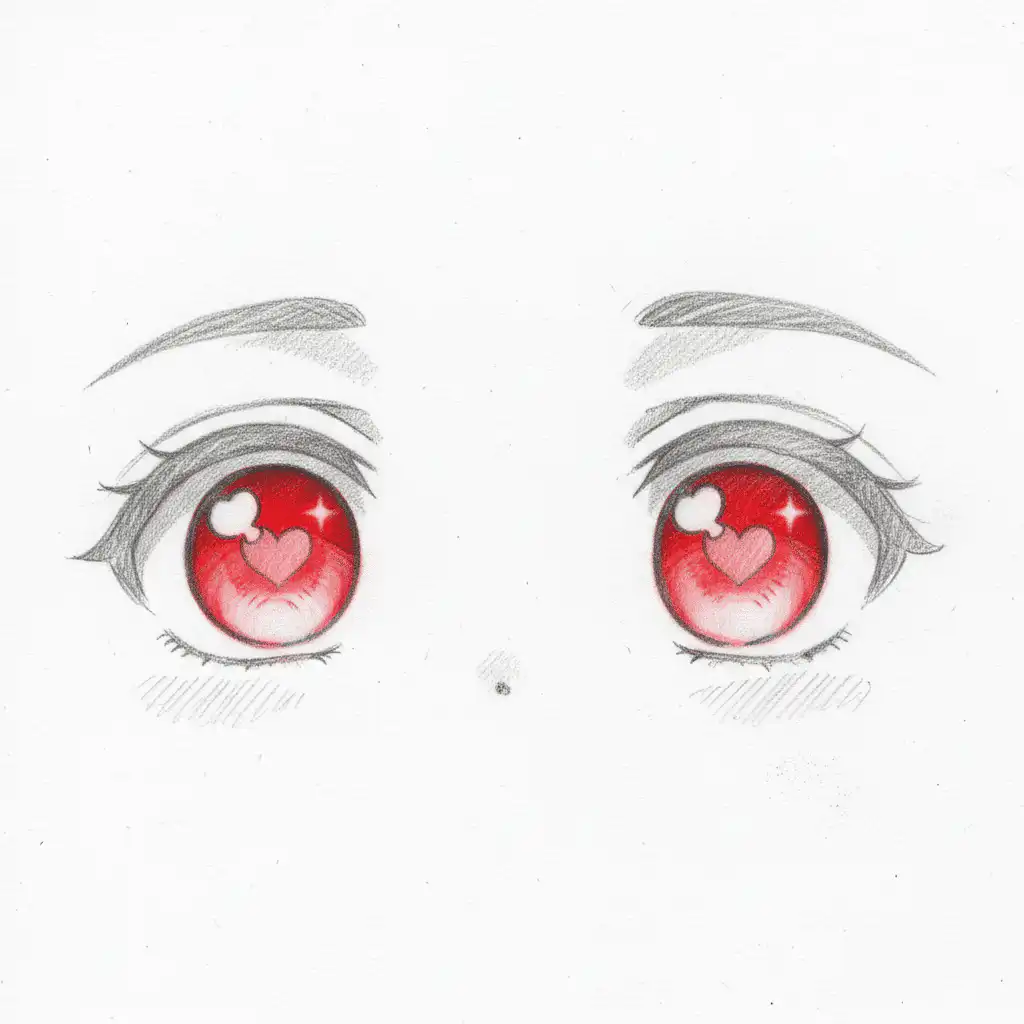
Narrow, sharp eyes read as serious or villainous almost automatically because the upper lid cuts across the iris and the brow presses down. Cute girl eyes usually do the opposite: they open the shape, enlarge the iris, and use a cleaner shine.
Cute girl eyes vs sharp serious eyes
| Style choice | Cute girl eyes | Sharp serious eyes |
|---|---|---|
| Outer shape | Rounder and more open | Narrower with a sharper outer corner |
| Iris | Large, bright, often touching the upper lid | Smaller or partly hidden by the eyelid |
| Highlights | One large shine plus a small accent | Smaller, fewer, or placed lower for tension |
| Lashes | Fuller upper lashes and a softer lower lid | Cleaner line weight, fewer lash strokes |
| Eyebrows | Lifted or gently curved | Lower, straighter, or angled inward |
Some artists push further and add multiple colors inside the iris, or unusual patterns, to make a character’s eyes feel specific rather than just polished. Keep that extra detail for the final pass. If the silhouette does not read yet, more color will only hide the problem.
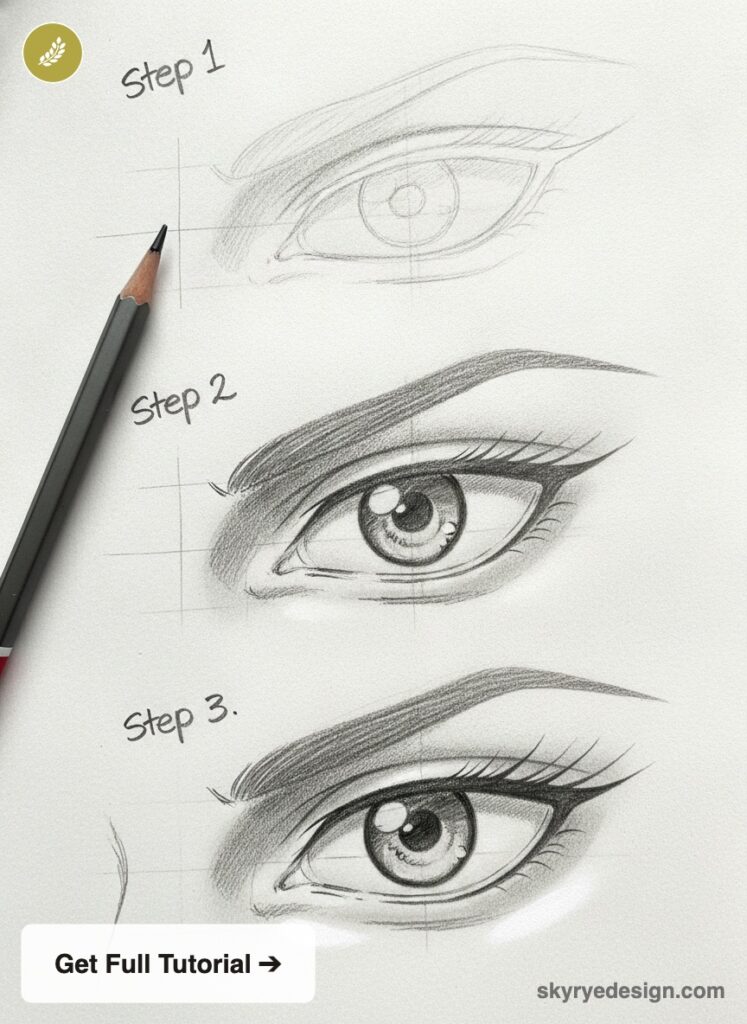
Style range matters too. A few lines and flat color can be just as effective as fully shaded eyes with glow effects — it depends on what the rest of the design is doing. Mixing approaches across characters in the same project is how you use eyes to tell the story without dialogue.
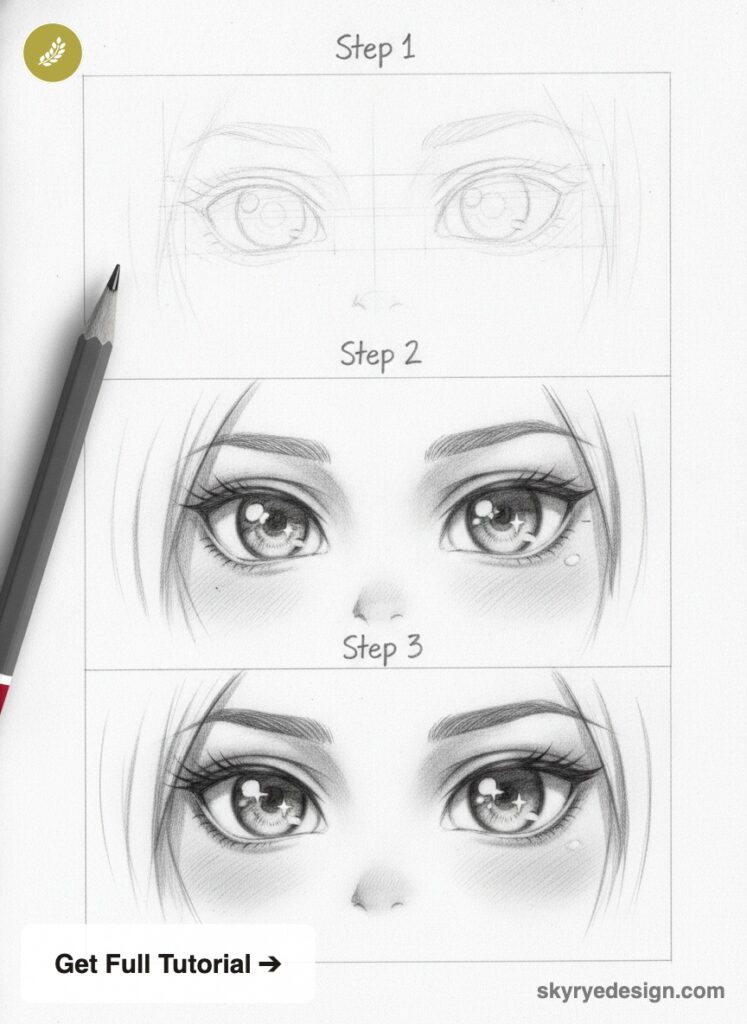
Useful references for anime eye drawing
For extra practice, compare this tutorial with a few focused art references. AnimeOutline’s expression guide is useful for seeing how brows, lids, and pupils change emotion. Clip Studio’s anime eye tutorial is stronger for digital color and grayscale layers. Easy Drawing Guides shows a very simple beginner sequence. If you want background on the broader style, the anime overview on Wikipedia gives context without replacing drawing practice.
When the hairstyle needs to show direction instead of just decoration, use this anime ponytail drawing practice to study the tie point, tail weight, and silhouette before adding strand texture.
If your eye drawings feel inconsistent, compare anime and manga eye style differences before you add highlights, because manga panels and anime frames handle expression in different ways.
Anime eyes are also a useful starter prompt for digital art ideas for beginners because you can practice line art, gradients, highlights, and layer effects in one small study.
Eyes carry the expression, but the body carries the pose. After you finish the eye shapes, add a quick round of human figure drawing practice so the character’s head, shoulders, hands, and posture all support the same emotion.
Anime eyes drawing FAQ
Q: How do you draw anime eyes step by step?
A: Start with a light upper lash curve, then add a thinner lower lid. Draw a large iris under the top lid, place the pupil in the center, and reserve one or two white highlights. Shade the top of the iris darker, keep the lower area softer, then add lashes and eyebrows to control the expression.
Q: What should beginners draw first in anime eyes?
A: Beginners should draw the upper lash line first because it sets the eye shape and emotion. After that, place the lower lid, iris, pupil, and highlights. Keep everything light until the spacing and expression feel right.
Q: Why are anime eyes usually so large?
A: Anime eyes are often large because they make emotion easier to read. A bigger iris gives room for highlights, gradients, and shape changes that show surprise, sadness, confidence, or softness without needing many facial details.
Q: What tools are best for drawing anime eyes?
A: A 2B pencil, kneaded eraser, smooth sketch paper, and a fine liner are enough for traditional practice. Digital artists can use a pencil brush for sketching, a pressure-sensitive ink brush for lashes, and separate layers for color, shadows, and highlights.
Q: How do you shade anime eyes?
A: Shade anime eyes by making the upper part of the iris darker, since the eyelid casts a shadow there. Keep the lower iris lighter, blend gradually if you are coloring, and protect the highlight shapes so they stay crisp.
Q: What is the most common mistake when drawing anime eyes?
A: The most common mistake is decorating too early. Beginners often add lashes, sparkles, and heavy shading before the eye shape and iris placement are correct. Fix the structure first, then add style.
Q: How can I make anime eyes look more expressive?
A: Change the eyelid angle, iris visibility, highlight size, and eyebrow position. Wide eyes with large highlights feel surprised or excited, while half-closed eyes with smaller highlights feel tired, calm, or suspicious.
Q: How do you draw cute anime girl eyes?
A: Draw cute anime girl eyes with a rounder outer shape, a large iris, fuller upper lashes, and one clear highlight. Keep the lower lid light so the eye stays soft. If the drawing looks too harsh, reduce the lash count and lift the brow slightly.
Q: How do you draw anime eyes with pencil?
A: Use a light 2B pencil sketch first, then build the eye in passes. Place the lids and iris, reserve the highlights, shade the top of the iris, and darken the pupil last. A kneaded eraser helps clean the shine shapes without damaging the paper.
Q: Why do my anime eyes look uneven?
A: Anime eyes usually look uneven because the inner corners, iris size, or eyebrow angles do not match. Draw a light guide through both eyes before adding details. Check the pair while the sketch is still pale, because heavy lashes make alignment mistakes harder to fix.
Related anime drawing practice
For the next facial feature, practice anime nose placement so the eyes, brows, nose, and mouth sit on the same face angle.
Once the eye shape feels right, continue with facial expression drawing practice so the brows, mouth, cheeks, and head angle support the same emotion. For a full character next, use the anime hair drawing guide, anime girl drawing ideas, and anime pose references.
If you want more focused fundamentals, practice drawing eyebrows, shading techniques, and eye drawing tutorials before moving into full portraits. The broader easy anime drawings page is better when you want simple character ideas instead of only eye practice.
By drawing expressive, high-contrast eyes, you establish a strong focal point that grounds your entire set of detailed character drawing ideas.
Once the eye shape is working, test it in dedicated anime drawing software so you can separate lashes, highlights, shadows, and color on clean layers.
Once the eyes feel right, step back and study how to draw anime body structure so the expression, head angle, and full pose feel like one character.
For a realistic base before stylizing, practice how to draw eyes in 7 steps, then simplify the same structure for anime highlights and lash shapes.
- 11.0Kshares
- Facebook0
- Pinterest11.0K
- Twitter0
- Reddit0