How to draw anime lips starts with one simple decision: what expression is the character making? The mouth is small on most anime faces, but it carries a lot of emotion. A tiny curve can look shy, confident, annoyed, sleepy, or bright, depending on the corners and the space around the chin.
This guide keeps the process beginner-friendly: simple mouth shapes first, light placement lines, soft lip volume, then shading only where it helps. I have also added short notes under each image so you can use the references as drawing practice instead of scrolling past them.
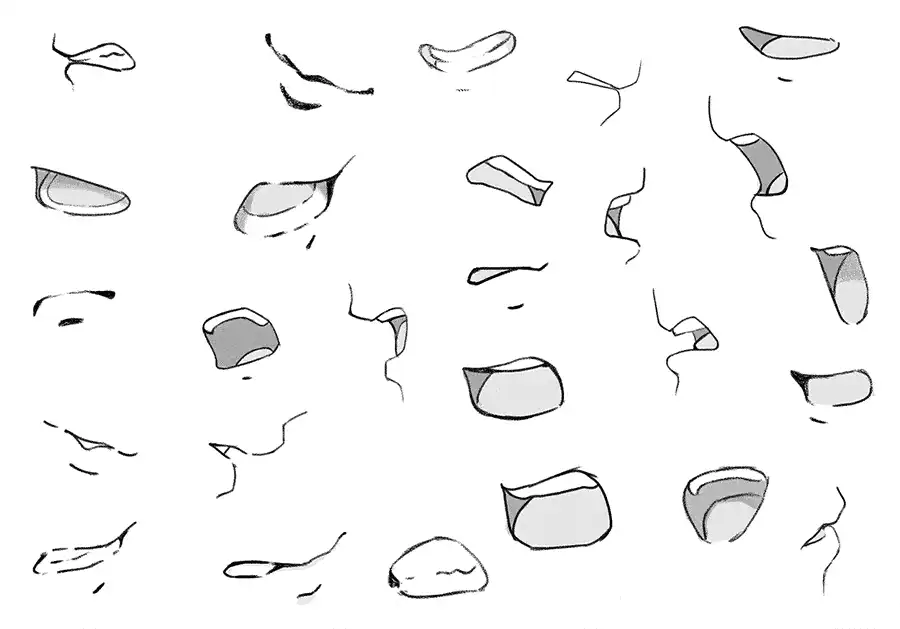
This expression sheet is the best starting point. Notice how most anime lips are built from one clean mouth line, a small lower-lip hint, and enough empty space to keep the face light.
How to draw anime lips step by step
To draw anime lips, sketch the head angle first, mark the nose and chin, then place a light mouth line between them. Shape the corners for the emotion, add a small lower-lip shadow or highlight, and erase any lines that make the mouth look too heavy. The cleaner the mouth reads before shading, the better the finished drawing will look.
- Draw the lower face lightly, including the nose, chin, and center line.
- Place the mouth line about one third of the way between the nose and chin for a normal face.
- Curve the mouth line for the expression: soft for relaxed, lifted for happy, tight for annoyed.
- Add only the lip detail you need, usually a small lower-lip mark or highlight.
- Shade the mouth opening and corners before adding shine or color.
- Step back and check whether the mouth matches the eyes, head angle, and character mood.
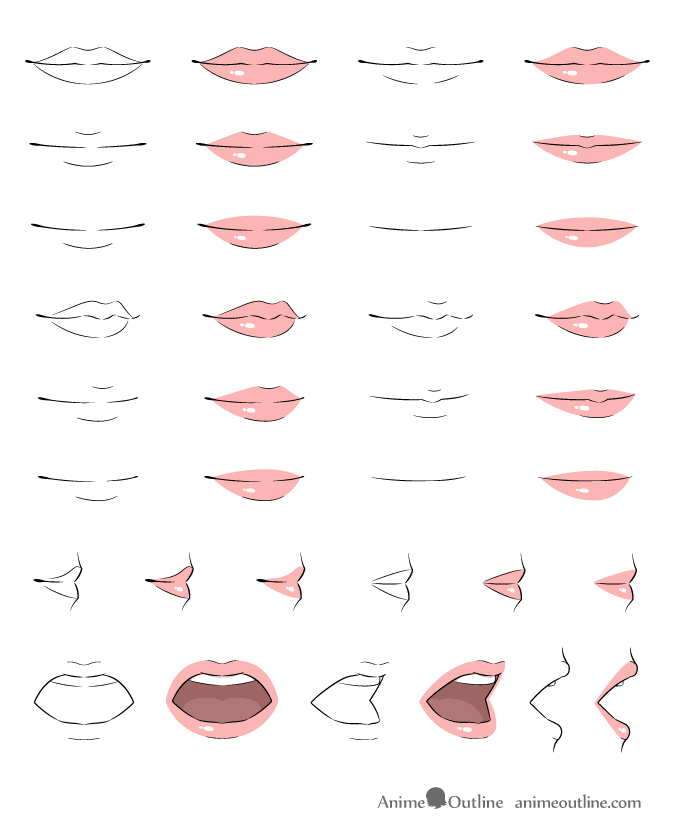
Use this guide like a shape menu. Closed mouths need a confident curve; open mouths need a simple dark interior before teeth or tongue details are added.
Why anime lips use fewer lines than realistic lips
Anime lips are simplified because the face usually puts more attention on the eyes, hair silhouette, and overall expression. If you outline the full upper and lower lip too strongly, the mouth can look older, heavier, or disconnected from the style. When the face proportions are still rough, compare the mouth with an anime head drawing guide so the lips land in the right place before you polish them.
A useful rule: draw the mouth opening darker than the lips around it. The opening tells the viewer the expression. The lip shape adds softness, style, or gloss. Reverse that order and the drawing often starts to feel like makeup floating on the face.
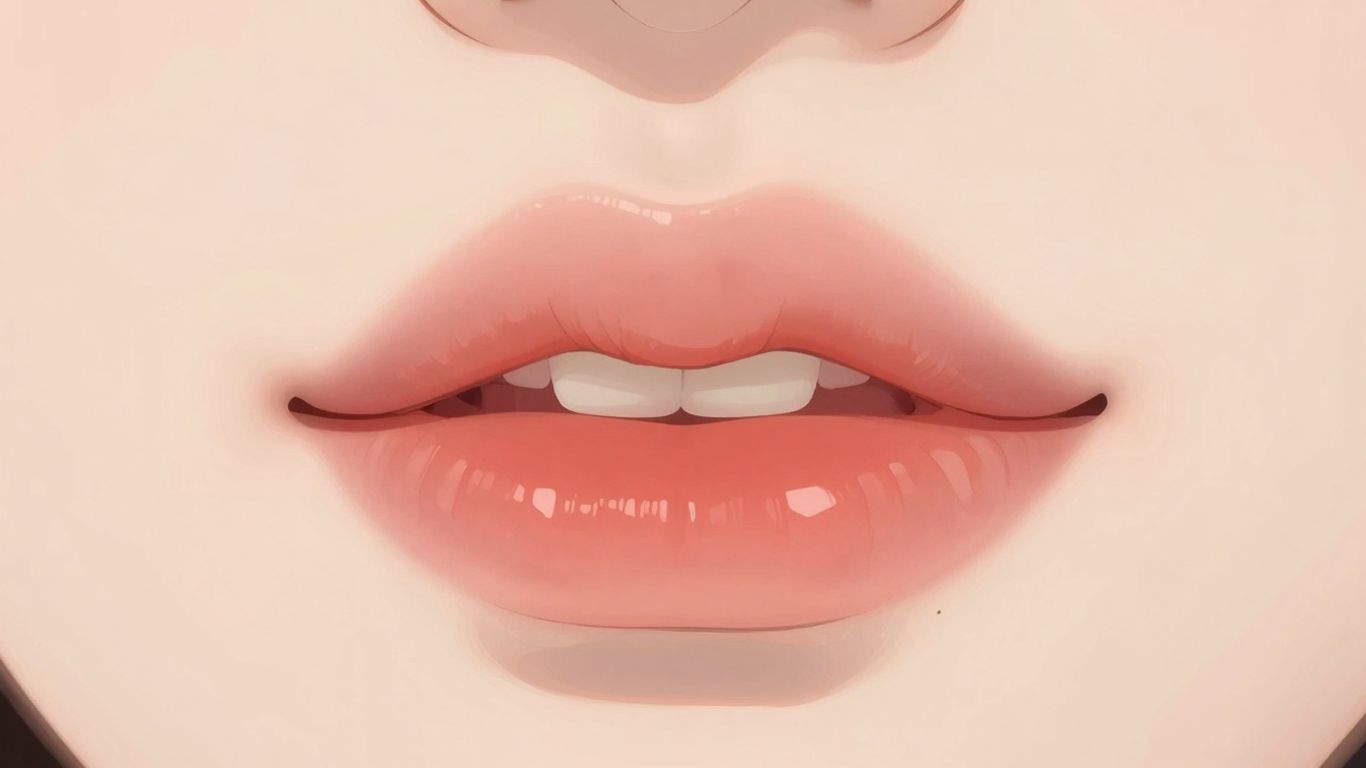
This close-up shows the cute version of the idea. Keep the upper lip understated, then let the lower lip carry the soft highlight so the mouth does not become too realistic.
Anime mouth drawing shapes for beginners
Most anime mouth drawing practice can be reduced to a few reusable shapes. You do not need twenty complicated mouths at the start. Learn a closed smile, a neutral line, a small open mouth, a surprised oval, a pout, and a speaking shape. Once those work, you can adjust the corners and thickness for different characters.
| Mouth shape | Best use | Drawing note |
|---|---|---|
| Small closed smile | Cute, friendly, relaxed characters | Use one clean curve and barely show the lower lip. |
| Flat neutral line | Calm, tired, or serious faces | Keep the corners subtle so it does not look angry by accident. |
| Open oval | Surprise or soft speaking | Darken the inside first, then decide if teeth are needed. |
| Wide grin | Excited or teasing expressions | Lift the corners and keep the teeth simple. |
| Pout | Annoyed, shy, or cute moods | Push the lower lip slightly forward without over-outlining it. |
| Side-profile step | Speaking, kissing, or looking away | Build two small lip steps between the nose and chin. |
If the emotion still feels vague, study drawing face expressions before adding more shading. Expression problems are usually shape problems, not rendering problems.
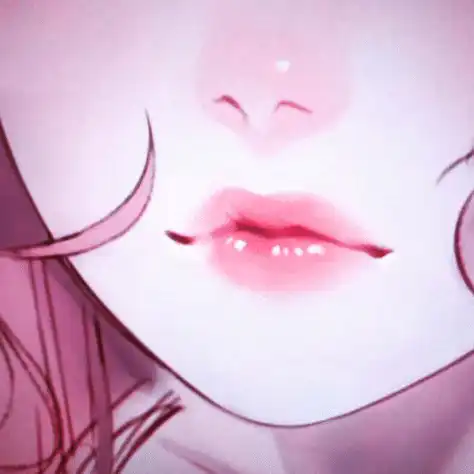
The soft shading here works because the edge is controlled. If you shade every outline equally, the lips start looking heavy; keep the darkest line at the mouth opening.
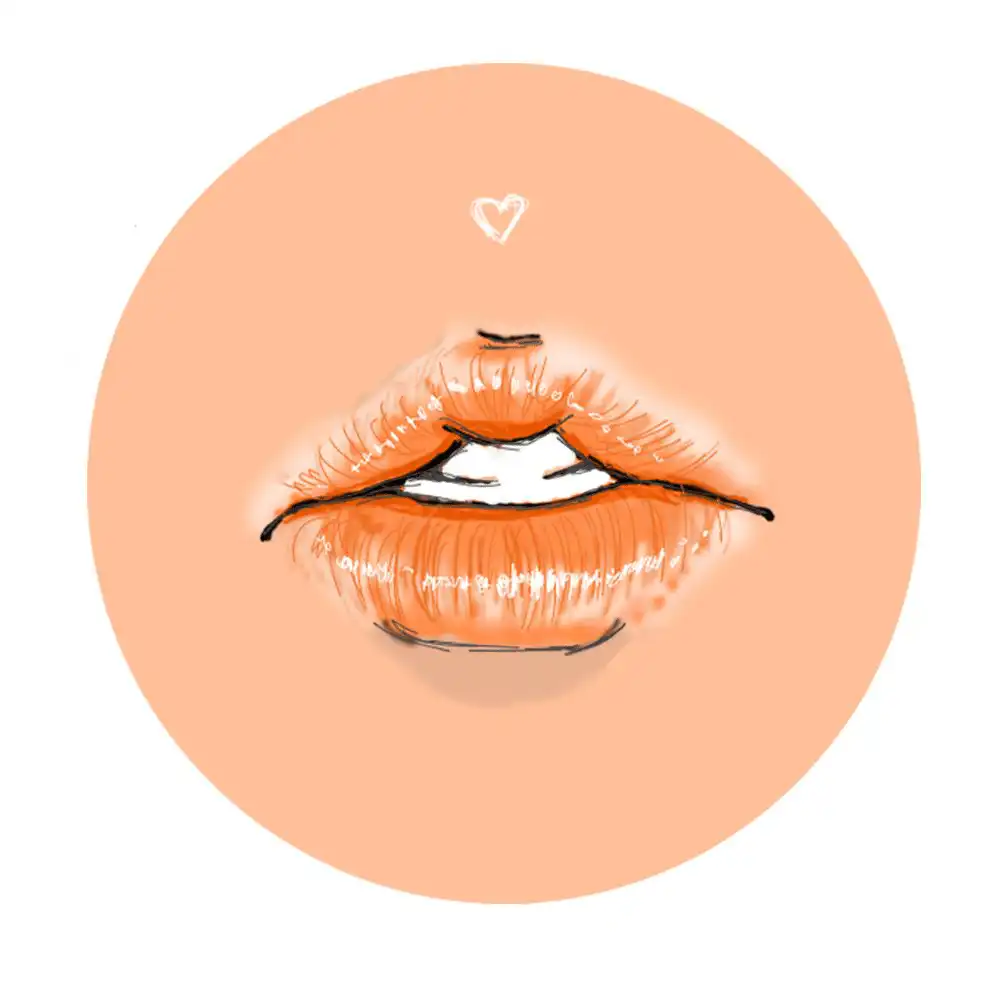
This stylized mouth is not about anatomy; it is about graphic personality. The heart accent and rounded color block make the lips read as playful rather than realistic.
Cute anime lips and soft girl mouth styles
Cute anime lips usually stay rounded, light, and slightly glossy. The upper lip can be almost invisible. The lower lip can have a small shine mark or soft shadow, but it should not become a full realistic tube. The face should still feel drawn in anime style, not copied from a makeup reference.
For a full character, match the mouth with the eye shape and cheek space. A wide cheerful mouth works well with larger eyes, while a tiny shy mouth often needs softer eyelids and a quieter pose. That is why I like pairing this page with anime eyes drawing and cute anime girl drawing when building a complete expression.
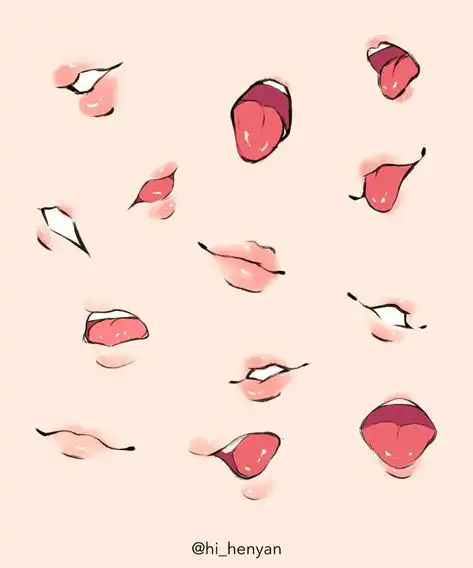
Study the spacing between the mouth shapes. A surprised mouth needs vertical space, while a shy smile stays narrow and close to the nose-chin line.
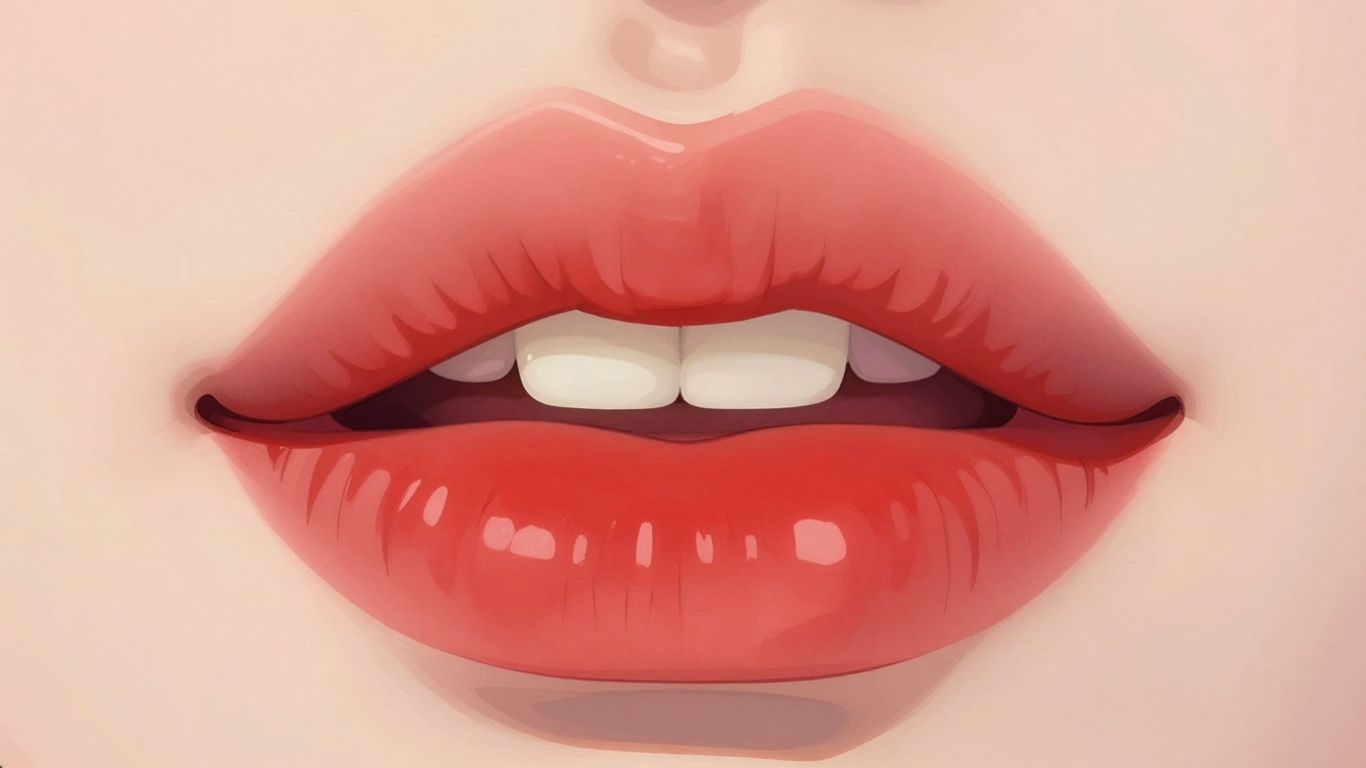
This close-up is useful for line confidence. Try copying the mouth opening first, then add the lip volume only after the expression already reads correctly.
Juicy anime lips without over-rendering
Juicy anime lips are mostly a value problem. Keep the center of the lower lip lighter, shade the corners, and add one or two clean highlights. Do not blend every edge. A little contrast looks glossy; too much soft shading makes the mouth feel muddy.
If you want a more realistic version, use realistic lips drawing as a structure study and then simplify it back down. Real lips have planes, wrinkles, and complex edges. Anime lips borrow the volume but leave out most of that surface noise.
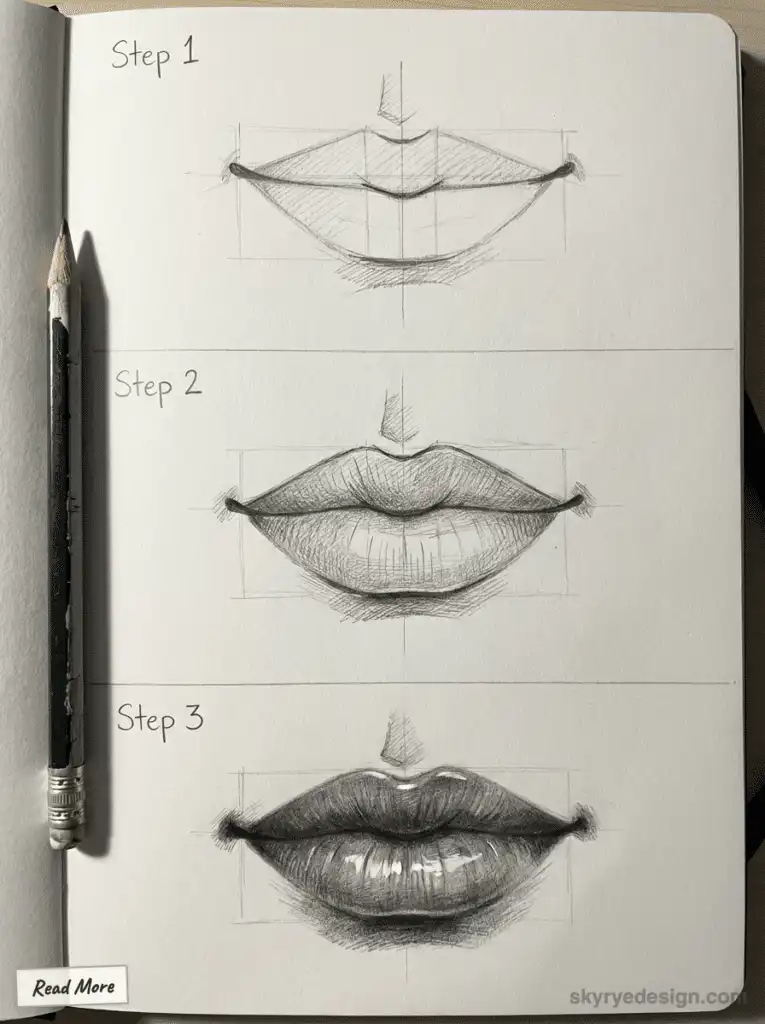
The realistic lip sketch helps with structure. Borrow the center line, corner placement, and soft lower-lip shadow, but simplify the detail when you return to anime style.
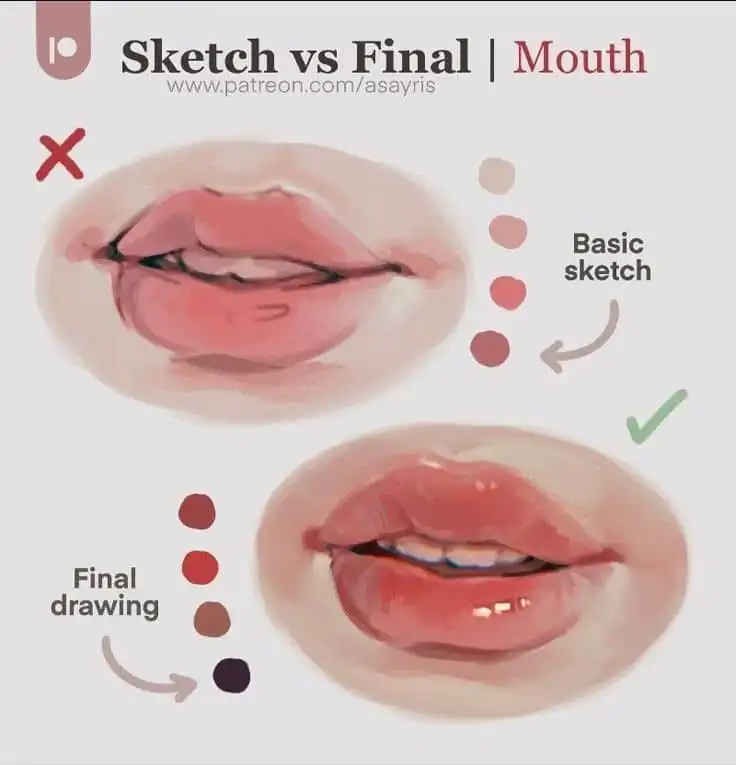
This process image shows why the sketch stage matters. The final color feels better when the mouth shape already has a clear tilt, corner tension, and highlight placement.
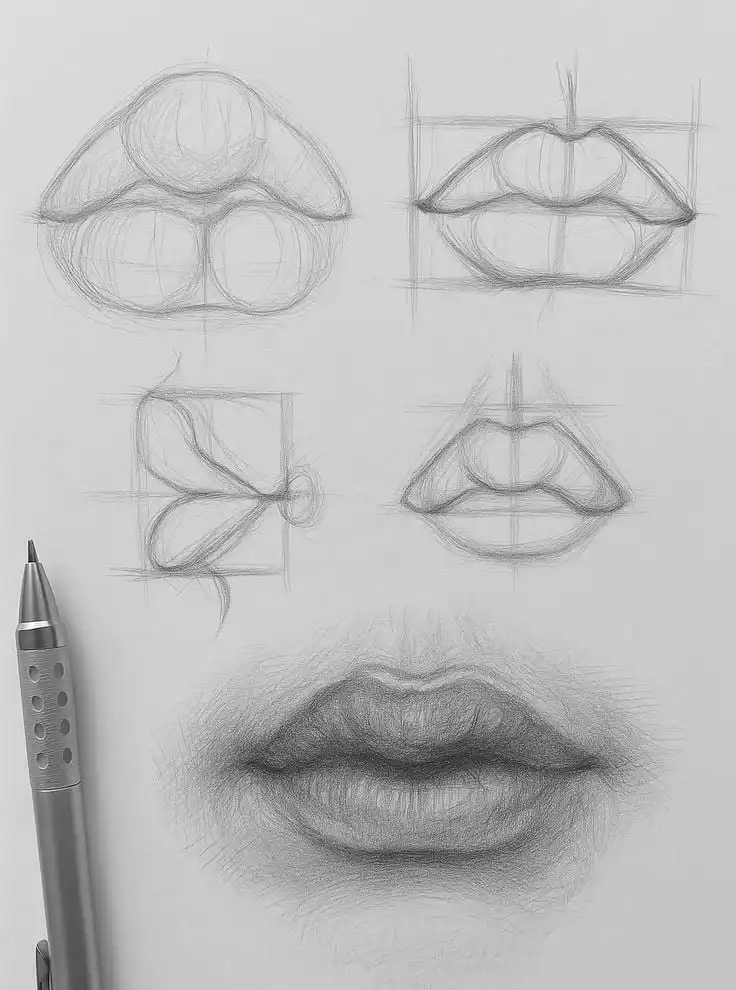
Use this as a shading drill. Even in anime lips, the lower lip often needs a soft middle highlight and a small cast shadow just below the mouth.
How to place anime lips on the face
Placement matters more than detail. On a front-facing head, the mouth usually sits below the nose with enough chin space to breathe. On a tilted head, the mouth line should tilt with the face. If the mouth stays perfectly horizontal while the head turns, it will look pasted on.
The nose is the closest landmark, so check it before finishing the lips. A small anime nose drawing reference can help you judge whether the mouth sits too high, too low, or too far forward.
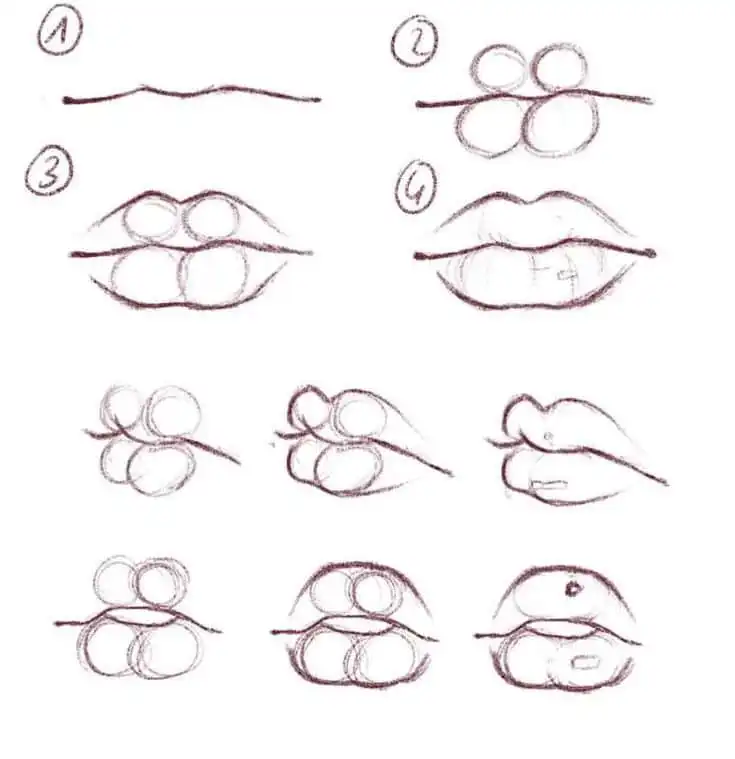
This step sequence is good for beginners because it separates construction from detail. Draw the mouth line, place the corners, then decide how much lip volume the character needs.
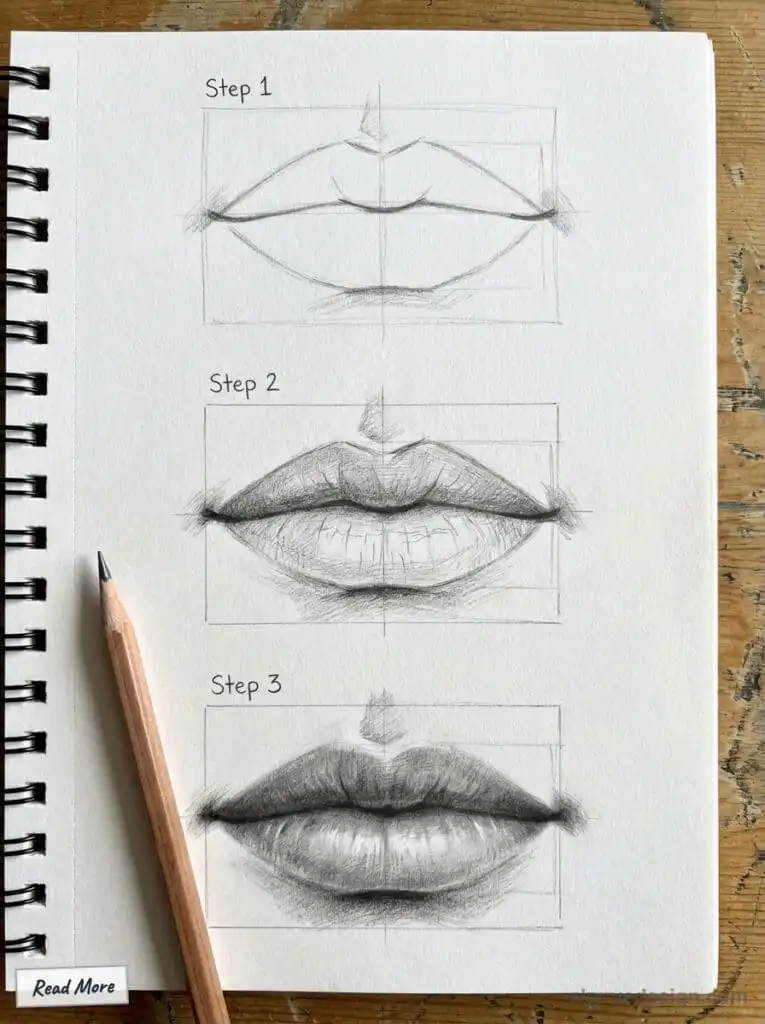
The pencil progression makes value easy to see. Keep the first two stages light, then darken the center crease and corners only after the shape feels balanced.
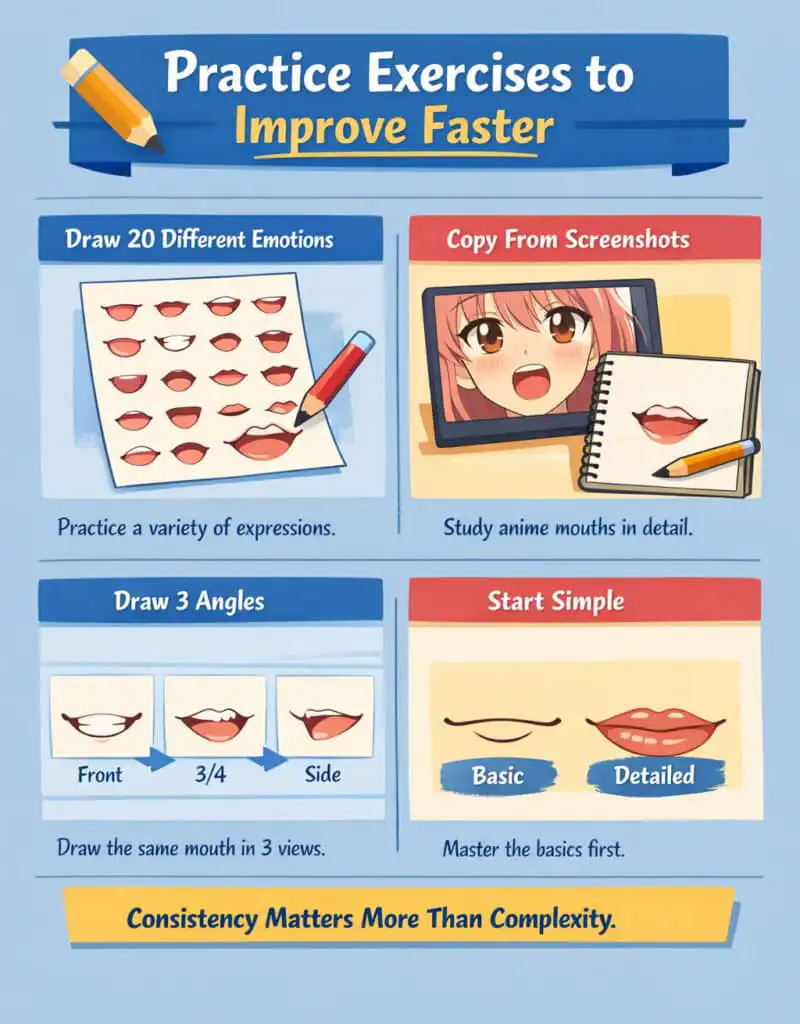
This practice sheet is the page in miniature: emotions, screenshots, angles, and basics. Use it when your anime mouth drawing starts to repeat the same smile every time.
Drawing anime lips from the side and three-quarter angle
From the side, anime lips become two tiny steps instead of a flat line. The upper lip usually projects a touch more than the lower lip, then the chin turns back underneath. Keep the mouth corner tucked behind the front shape so the profile does not become a sticker-like outline.
Three-quarter views are trickier because one corner of the mouth is closer to the viewer. Make the far side shorter, curve the opening around the face, and let the lip volume follow the cheek. For the same lower-face logic in a different pose, compare with anime hair drawing only after the face angle is working; hair should support the head, not hide a weak mouth placement.
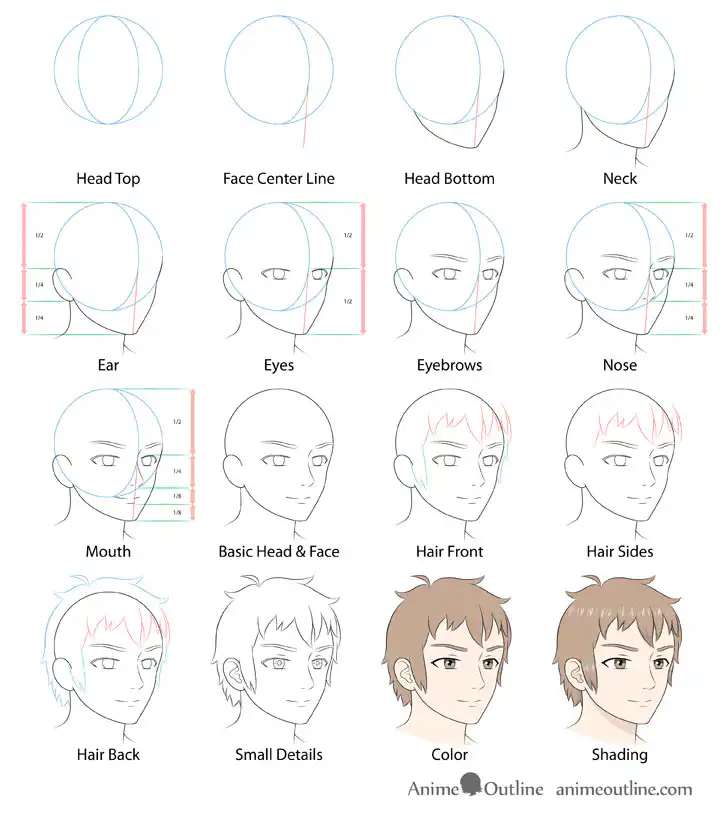
The lips only work if they belong to the head. Check the distance from the nose to the chin before adding shine, teeth, or a dramatic expression.
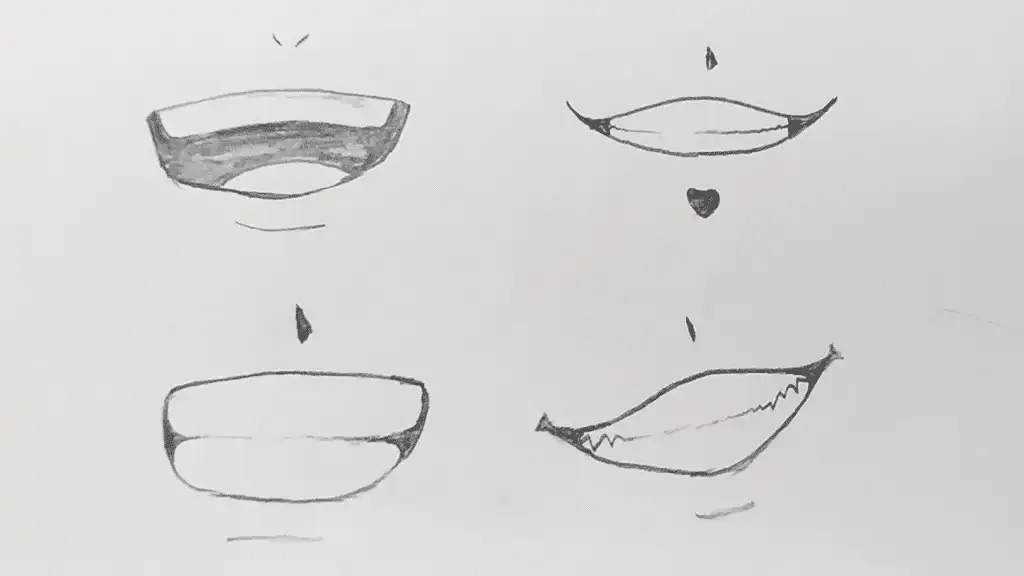
These small line drawings prove that expression comes before detail. The grin, smile, and quiet mouth all use different corner angles, even when the lip lines stay minimal.
Shading anime lips with pencil or digital color
For pencil, keep the pressure light at first. I usually shade the mouth opening, soften the lower-lip shadow, then add a clean highlight by leaving the paper untouched. For digital color, use one base color, one shadow color, and one highlight. More colors can work, but beginners often lose the mouth shape when they blend too much.
The Adobe lips drawing guide is useful when you want to understand realistic planes, while Clip Studio mouth drawing tutorial helps with a more illustration-focused workflow. Use both as structure references, then reduce the lines for anime style.
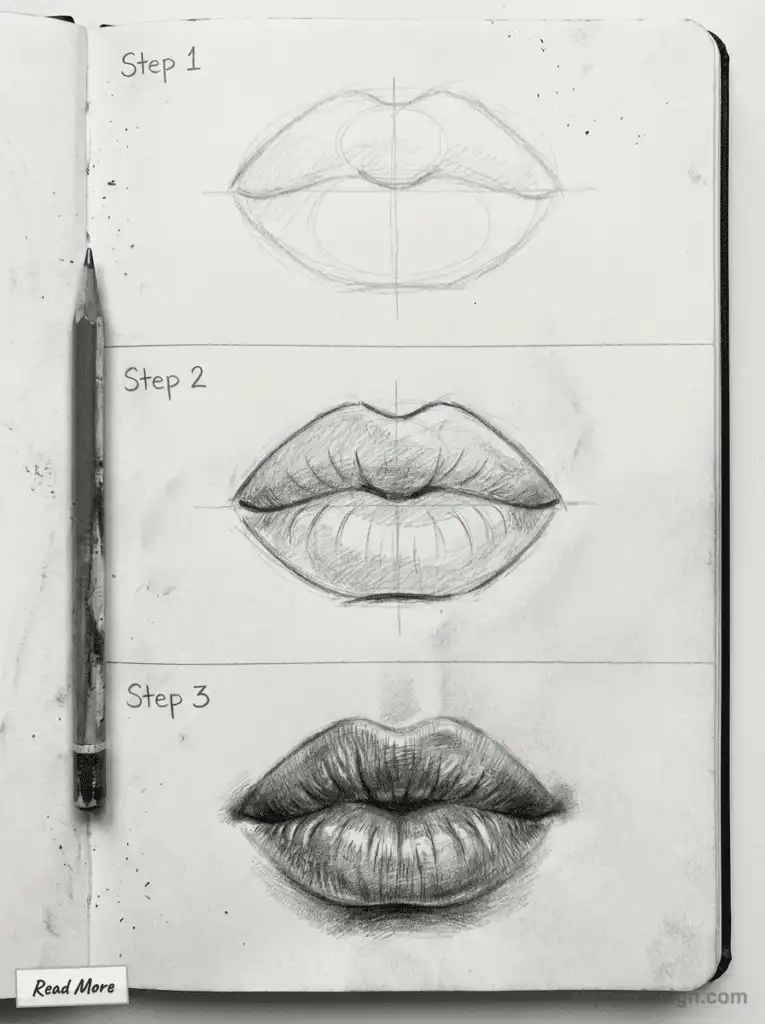
This version is heavier and more realistic. Use it when you want semi-realistic anime lips, but stop before the texture starts fighting the character style.
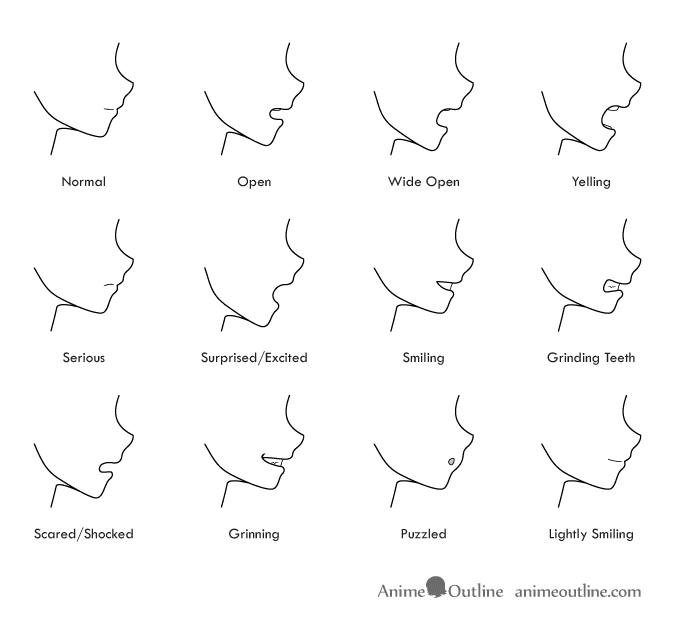
This chart is excellent for quick expression swaps. Cover the labels and ask yourself which emotion each mouth shows; if the answer is clear, the shape is doing its job.
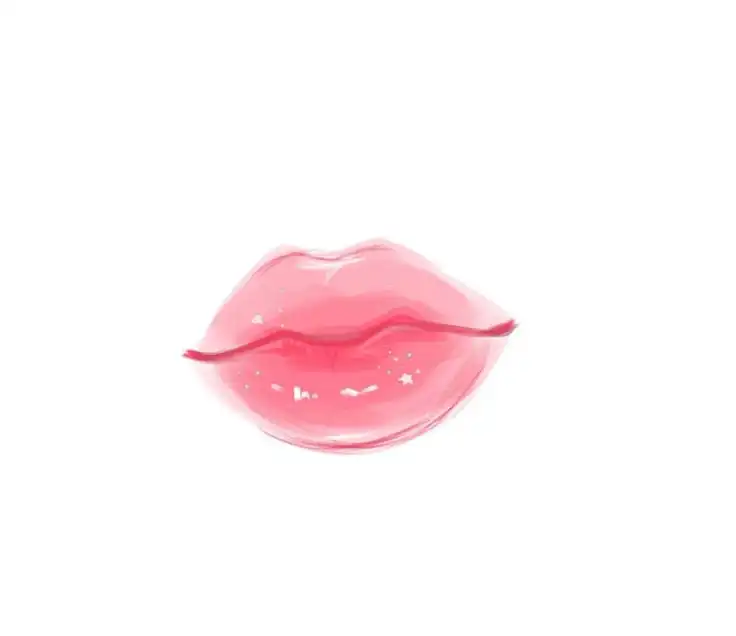
The glossy example is intentionally decorative. Copy the highlight logic, not every sparkle, unless the character style calls for a beauty or idol look.
Common mistakes that make anime lips look wrong
- Too much outline. Full lip borders can make a young anime face look heavy or overly realistic.
- Straight mouth corners. Corners decide expression, so give them a clear angle.
- Shading before structure. If the mouth line is wrong, no amount of gloss will rescue it.
- Ignoring the head angle. The mouth should tilt and curve with the face.
- Copying realistic lips too literally. Borrow the planes, then simplify the texture.
Reference notes and deeper practice
For anime-specific comparison, look at AnimeOutline anime lips tutorial and GVAAT anime mouths and expressions guide. The strongest SERP pages answer visually, which is why this article now keeps the reference images, adds notes under each one, and makes the steps easier to quote or reuse in practice.
Next, move through the cluster in a practical order: anime head drawing, anime eyes drawing, anime nose drawing, anime hair drawing, cute anime girl drawing, drawing face expressions, realistic lips drawing. Use these links after the mouth practice section, not before, so the main how-to stays focused.
Anime lips drawing FAQ
Q: How do you draw anime lips for beginners?
A: Start with the expression, not the lip outline. Draw a light center mouth line, place the corners, then add a tiny lower-lip shadow or highlight only if the style needs it. Most beginner anime lips look better with fewer lines and cleaner spacing between the nose, mouth, and chin.
Q: What is the easiest anime mouth shape to draw?
A: A small closed smile is the easiest anime mouth shape. Use one shallow curve, lift the corners slightly, and add a short shadow under the lower lip if you want softness. Avoid outlining both lips completely, because that can make the mouth look older or too realistic.
Q: How do you make anime lips look cute?
A: Cute anime lips usually have a soft curve, gentle corners, and very little texture. Keep the upper lip light, make the lower lip slightly rounder, and leave a small highlight instead of filling the whole mouth with shading. The expression should feel simple before you add gloss.
Q: Should anime lips be realistic?
A: Anime lips can be realistic, but they do not have to be. For most characters, realism works best as a quiet guide for placement and light, not as full anatomy. Use realistic lips to understand volume, then remove extra wrinkles, heavy outlines, and deep texture.
Q: How do you shade anime lips without overdoing it?
A: Shade the mouth opening, the two corners, and the soft area under the lower lip. Keep the middle of the lower lip lighter. If the mouth starts pulling attention away from the eyes, erase one value step and simplify the edge.
Q: How do you draw anime lips from the side?
A: In side profile, think of the lips as two small steps between the nose and chin. The upper lip usually projects a little, the lower lip sits softer, and the mouth corner tucks behind the front shape. Keep it subtle unless the character is kissing, shouting, or speaking.
Q: What mistakes make anime mouths look stiff?
A: The common mistakes are straight mouth lines, identical corners, too much lip outline, and shading before the expression is clear. Tilt the mouth slightly with the head angle, vary the corners, and test a few tiny thumbnails before drawing the final face.
Final drawing check
Before you call the drawing finished, cover everything except the mouth for five seconds. Does the expression still read? Then cover the mouth and look at the eyes. If both parts tell the same story, your anime lips are doing their job. If not, change the mouth line first, not the highlights.
- 6.0Kshares
- Facebook0
- Pinterest6.0K
- Twitter0
- Reddit0