You can capture the calm lines and unique roof shapes of Japanese architecture by learning a few clear rules about proportion, perspective, and roof construction.
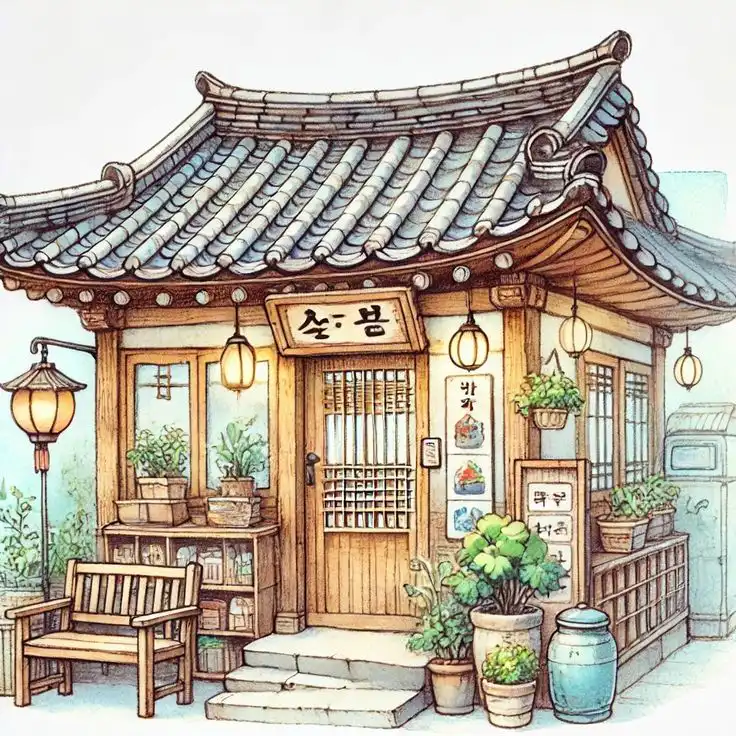
Studying one regional tradition is more useful when it can be compared with neighbouring building cultures. This guide to Korean architecture follows the line from hanok and palaces to contemporary Seoul.
Start with simple geometric forms. Focus on roof profiles and timber grids, then build details step by step to create authentic-looking buildings.
This guide shows how to use basic drawing tools and simple techniques to sketch traditional houses, temples, and village scenes.
- Japanese architecture drawing: quick start
- Understanding Key Principles of Japanese Architecture
- Essential Drawing Foundations
- Drawing Traditional Japanese Houses
- Depicting Japanese Roofs and Details
- Illustrating Iconic Japanese Structures
- Adding Natural Elements and Finishing Touches
- Coloring and Texturing Techniques
- Common mistakes in a Japanese temple drawing
- Related drawing practice
- Reference notes for Japanese building details
- Japanese architecture drawing FAQ
- How do you draw Japanese architecture step by step?
- What is the easiest Japanese building to draw?
- How do you draw a Japanese temple roof?
- What makes Japanese architecture recognizable in a drawing?
- How do you draw Japanese architecture in perspective?
- What materials work best for a Japanese architecture sketch?
- Is a pagoda the same as a Japanese temple drawing?
You’ll explore perspective, roof styles, wooden frames, and how to place buildings in natural settings so your work feels balanced and true to the style.
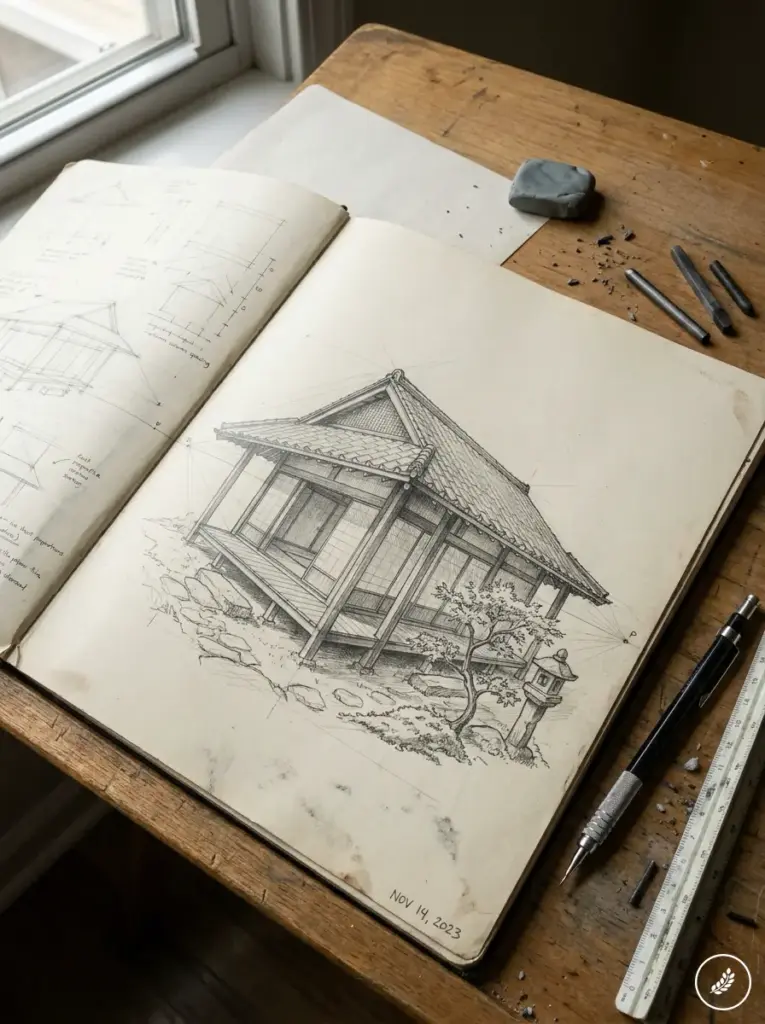
Follow short, practical exercises that cover foundations, specific roof and detail studies, and easy coloring and texturing tips to finish your pieces.
Japanese architecture drawing: quick start
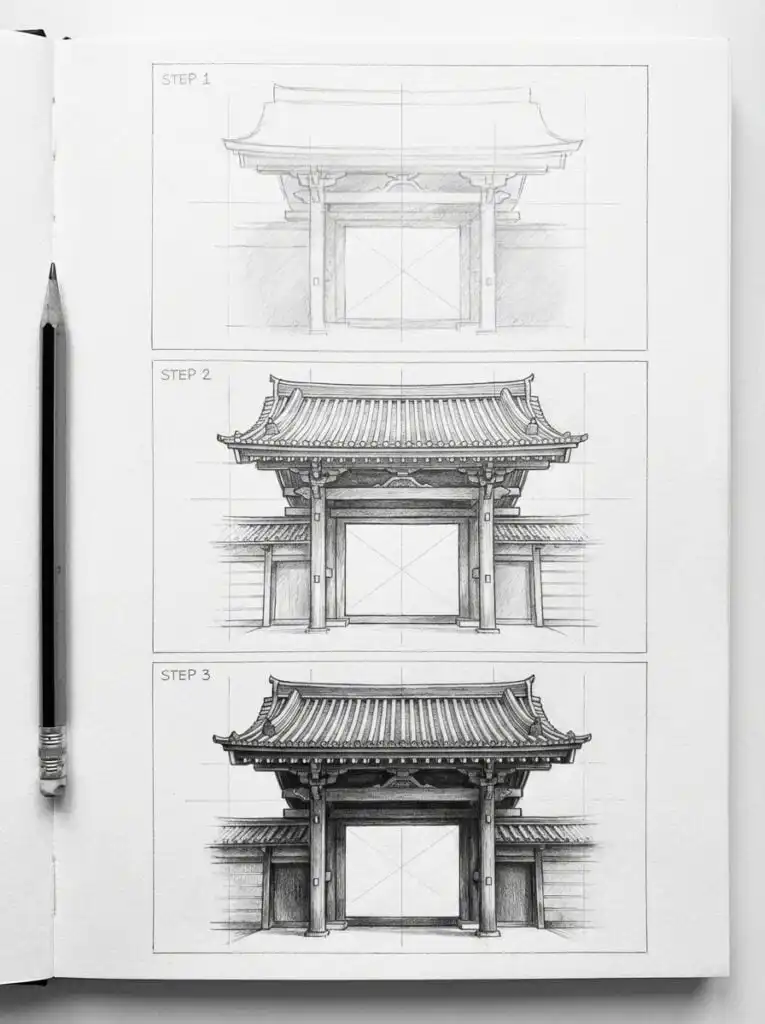
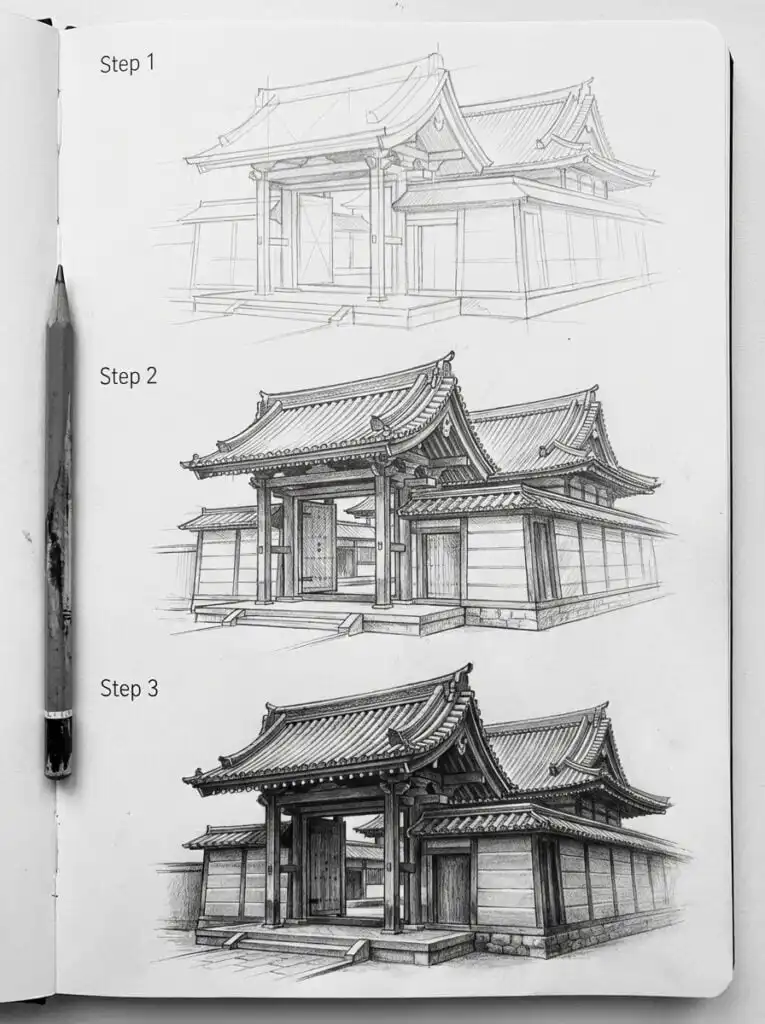
For a Japanese architecture drawing that reads clearly, build the sketch in three passes: mass, roof, then detail. Draw the main temple or house as simple boxes first. Add the sweeping roof silhouette before windows, tiles, or plants. Then use repeated posts, shoji grids, torii beams, and garden stones to make the subject feel Japanese rather than just generally architectural.
| Search intent | Best drawing move | Why it helps |
| Japanese temple drawing | Start with a low hall, broad eaves, and a stone base | Matches the strongest tutorial demand and gives beginners a clear subject |
| Japanese architecture drawing | Show roof rhythm, timber grids, and negative space | Connects style cues to the broader architecture keyword |
| Japanese pagoda drawing | Stack tiers from largest to smallest | Makes scale and symmetry easier to control |
| Japanese house drawing | Use shoji panels, veranda lines, and a calm garden edge | Keeps the sketch approachable for beginners |
Understanding Key Principles of Japanese Architecture
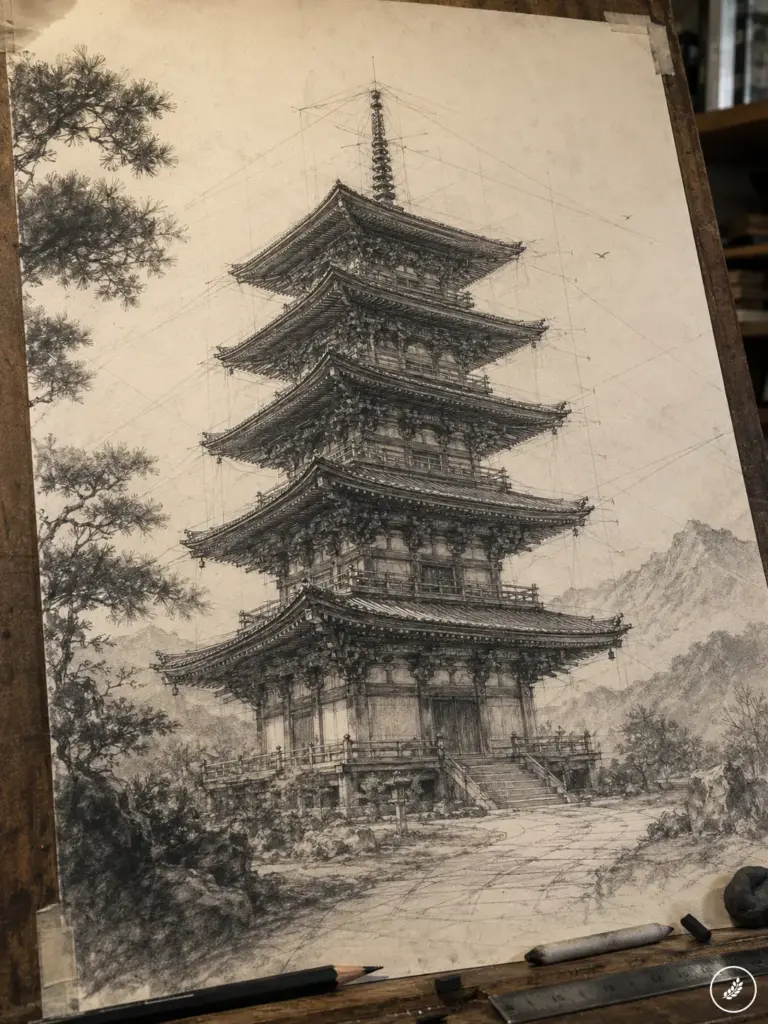
You’ll pick up the main visual rules, common materials, and how old and new styles differ.
These ideas will help you draw accurate rooflines, joinery, and room layouts.
Common Features and Aesthetic Ideals
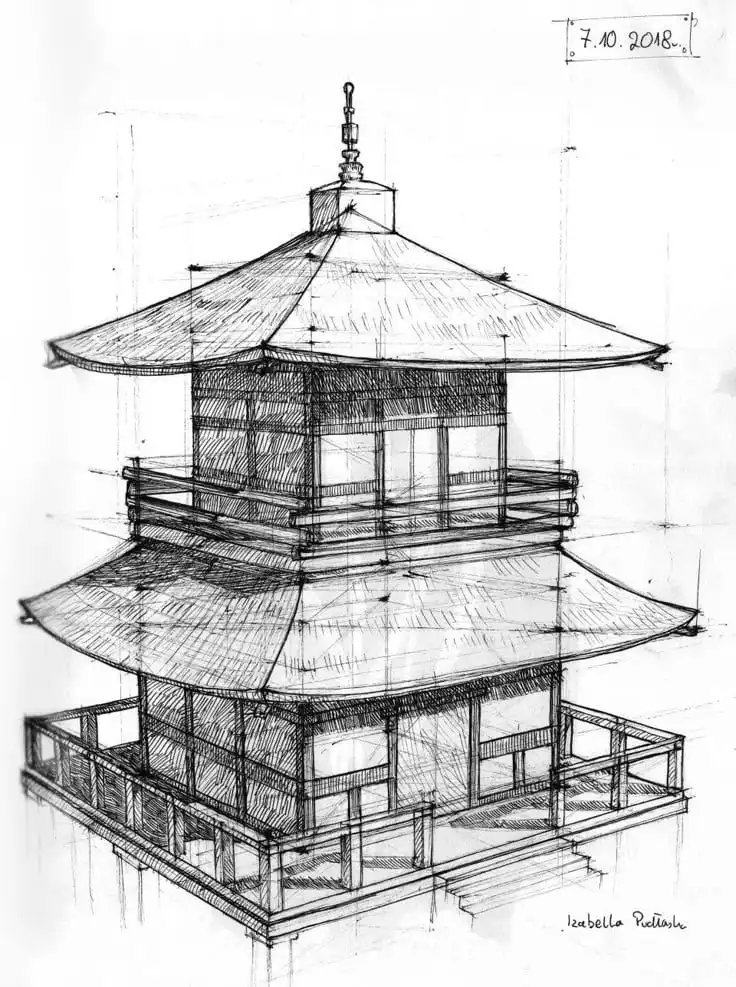
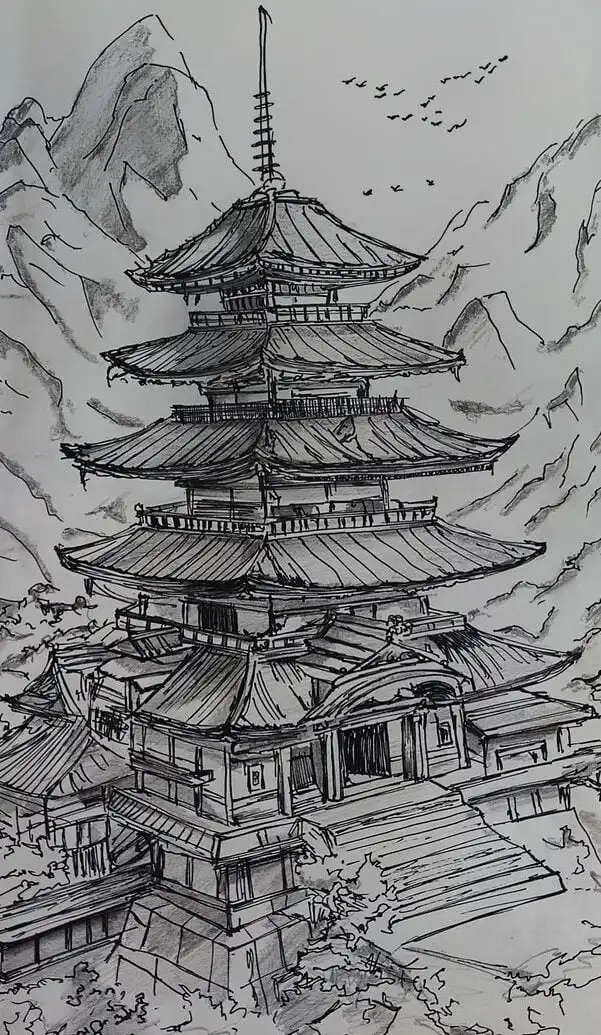
Japanese architecture favors simple, clean lines and careful balance.
You’ll see wide eaves, low roof slopes, and strong horizontal lines that make buildings feel grounded.
Sliding screens (shōji and fusuma) and large openings create flexible spaces and soft, diffused light inside.
Minimal ornament keeps attention on form and material.
Proportions often follow the human scale—you can step easily between levels and sit comfortably on tatami floors.
Nature plays a role: verandas (engawa), gardens, and visible wood grain connect the building with its site.
When you draw, emphasize negative space and subtle rhythm in repeated elements like columns and roof tiles.
Materials and Structural Elements
Wood dominates traditional Japanese buildings because it handles humidity and earthquakes well.
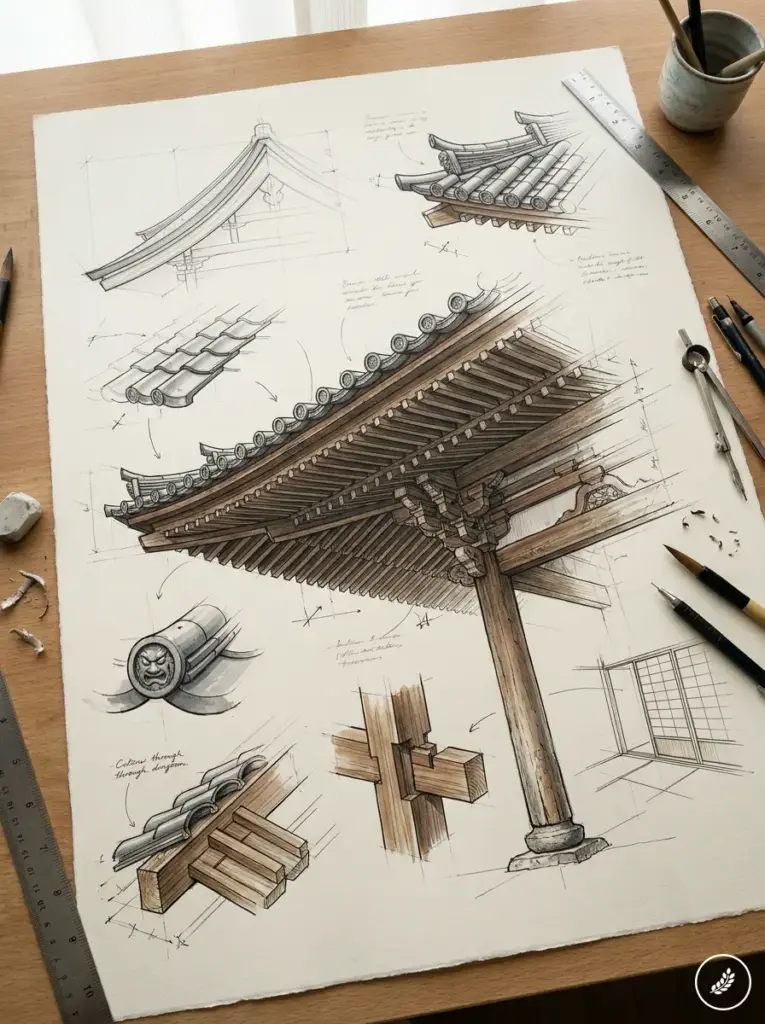
Look for exposed timber frames, post-and-beam construction, and joinery that locks pieces together without nails.
That interlocking detail gives character; show tapered posts, bracket clusters, or layered beams in your sketches.
Roofs are key: use broad, curved eaves and tiled or thatched surfaces.
Floors include tatami mats with rectangular proportions—use those to set room sizes.
Entryways like the genkan are sunken and mark a clear change from outside to inside.
Add textures: paper shōji, rough-cut timber, and ceramic kawara tiles for realism.
Traditional vs. Modern Styles
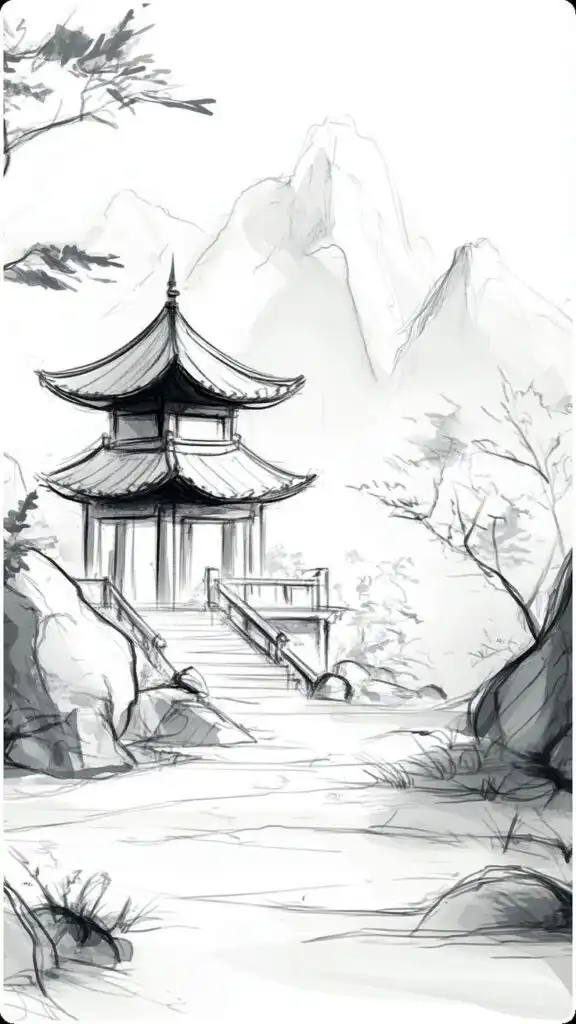
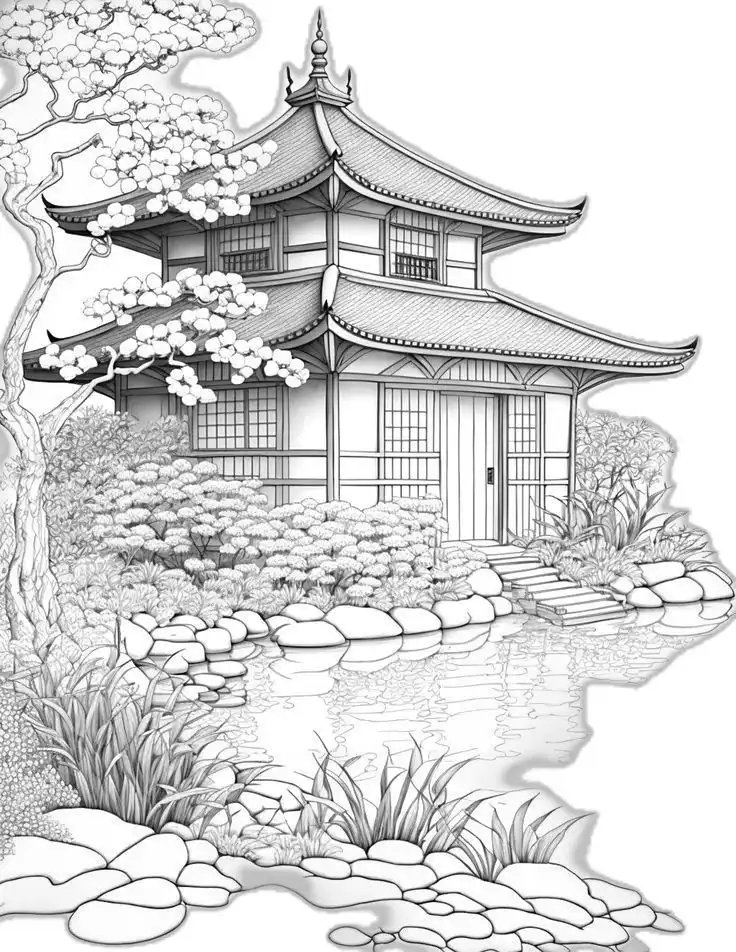
Traditional buildings emphasize modular rooms, natural materials, and movable partitions.
When drawing these, use sliding panels, raised wooden floors, and visible beams.
Proportions are often based on tatami sizes, so plan room grids around those rectangles.
Modern Japanese architecture mixes minimalism with new materials like concrete and glass.
You’ll notice larger single planes, exposed concrete surfaces, and more open floor plans.
Yet many modern works keep strong rooflines, careful light control, and a dialogue with nature.
To show this contrast, pair slender timber elements and paper screens in one sketch.
Then draw another with flat concrete walls and floor-to-ceiling glass.
Essential Drawing Foundations
You’ll learn how to place your building in space, set sight lines, and keep rooflines and details in correct relation.
Focus on clear eye level, one or more vanishing points, and measured proportions before adding ornament.
Using Vanishing Point and Eye Level
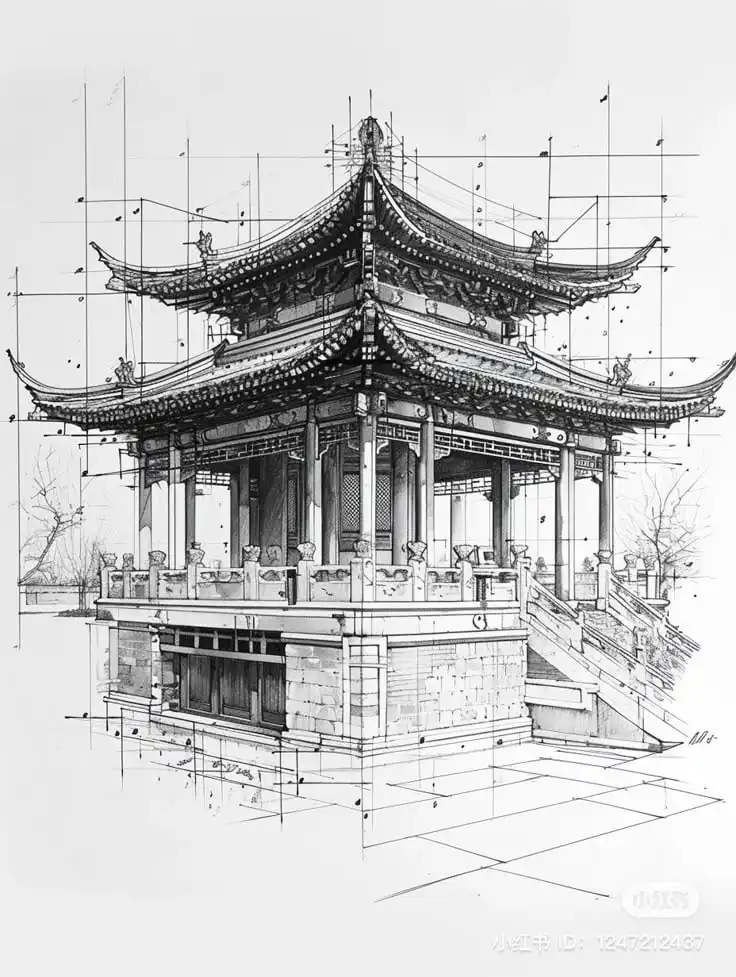
Start by drawing a horizontal line for the eye level.
This line shows where your eyes sit relative to the building and fixes where vanishing points live.
Mark one or two vanishing points on that line, depending on whether you use one- or two-point perspective.
Use a ruler to draw light construction lines from the edges of roofs, eaves, and floor lines back to the vanishing point.
These guide the angle of the roof curves and the taper of walls.
Keep vanishing points off the main building so lines don’t clutter the facade.
Adjust the eye level higher to show more roof and less ground.
Lower eye level makes the building look taller and shows more of the base.
Remember the visual rule: parallel lines recede toward the same vanishing point.
Basic Perspective Techniques
Choose one-point perspective for front-facing facades, and two-point perspective for corner views.
For a temple roof, use a two-point to capture the sweeping eaves angled toward both vanishing points.
Sketch the primary mass first: simple boxes for walls and stacked boxes or wedges for roof tiers.
Use vertical lines for true verticals; let only horizontal receding lines go to vanishing points.
Add a simple grid on the ground plane to keep columns, steps, and windows evenly spaced.
Check proportions by measuring with your pencil: hold it at arm’s length, align it to a known height, and transfer.
Erase construction lines lightly after you confirm major planes.
Sketching Outlines and Proportions
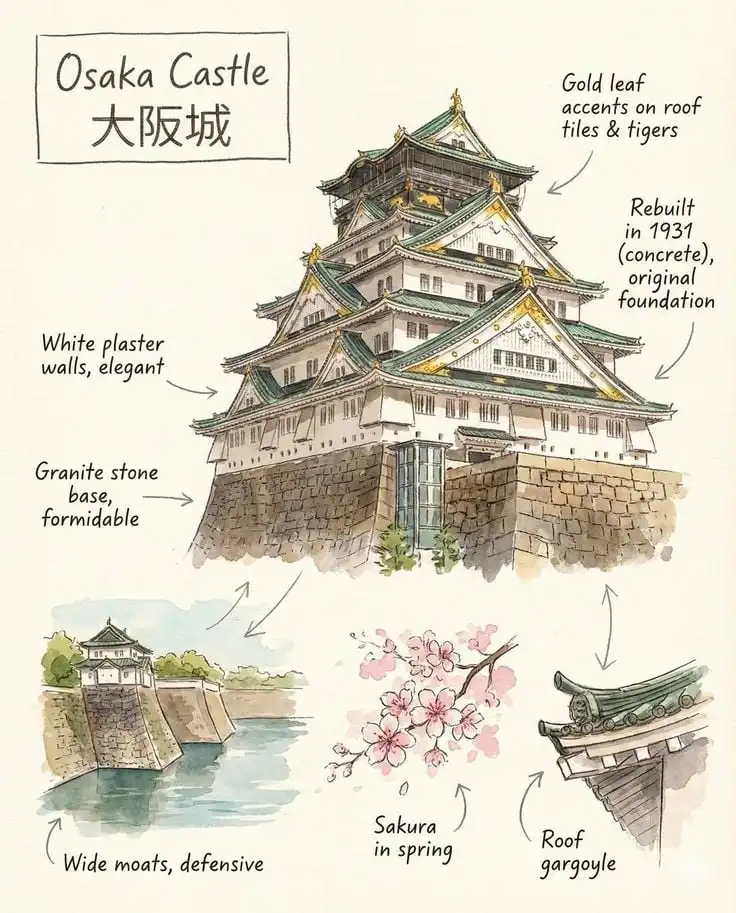
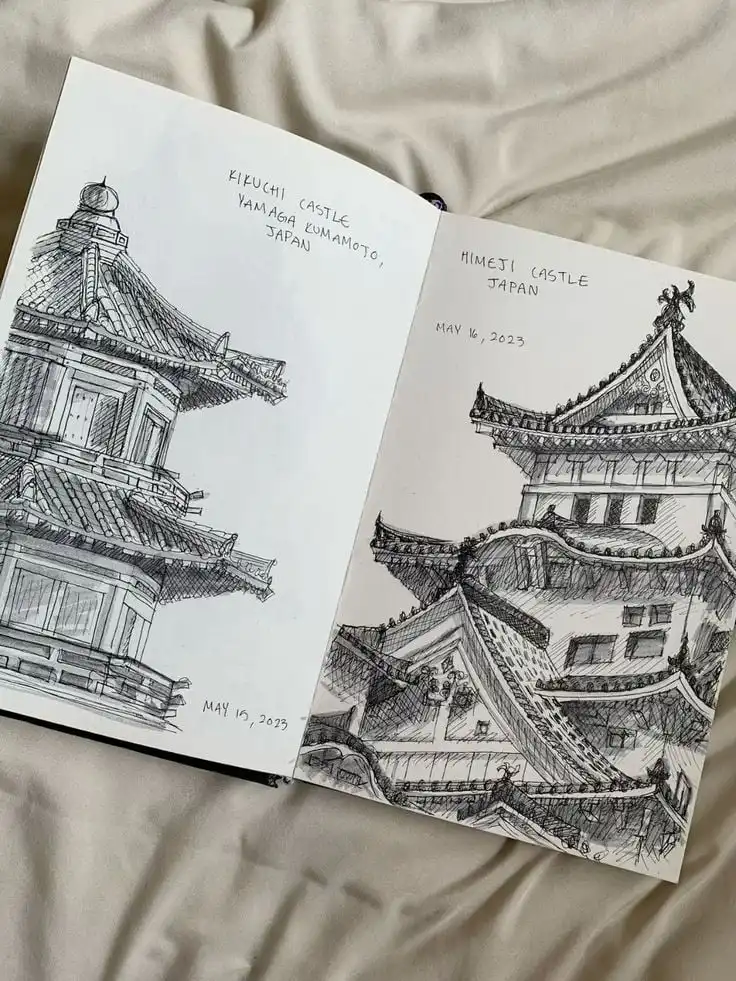
Block in the main shapes before details.
Draw the roof silhouette first, because Japanese roofs often define the building’s character.
Then place major verticals: corner posts, entrance, and eave ends.
Use simple ratios: the width of the entrance often fits within a third of the facade; roof overhangs usually extend a measured fraction of wall height.
Mark window and door heights with short vertical ticks so spacing stays consistent.
Refine outlines with confident strokes.
Keep decorative elements—brackets, lanterns, ridge tiles—smaller than structural parts so they read correctly from a distance.
Use light construction lines under final inked lines to retain proper proportion.
Drawing Traditional Japanese Houses
Focus on the porch, visible timber frame, paper sliding doors, and the layout of tatami mats.
Pay attention to perspective, wood grain, and simple repeating patterns to make the house read as traditional.
Porch and Exterior Framework
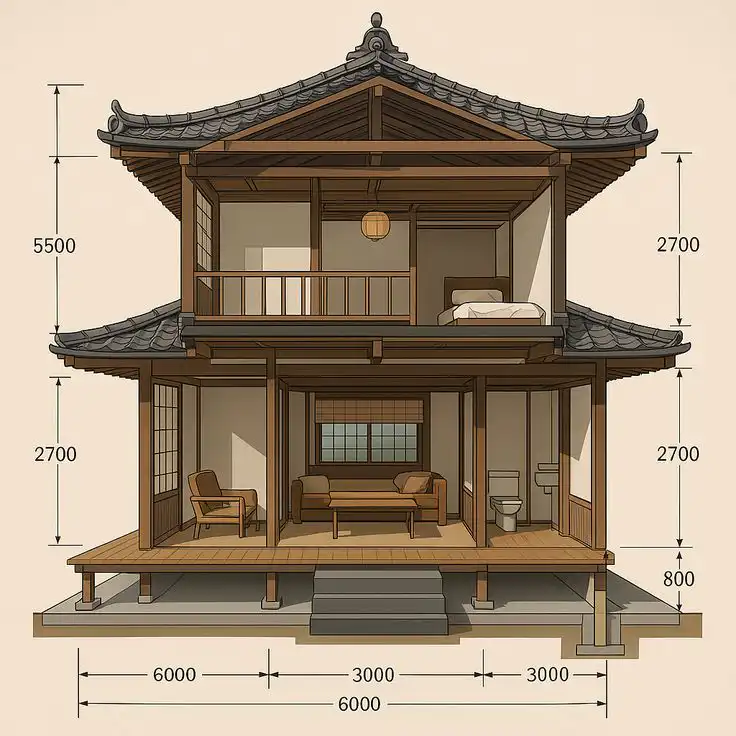
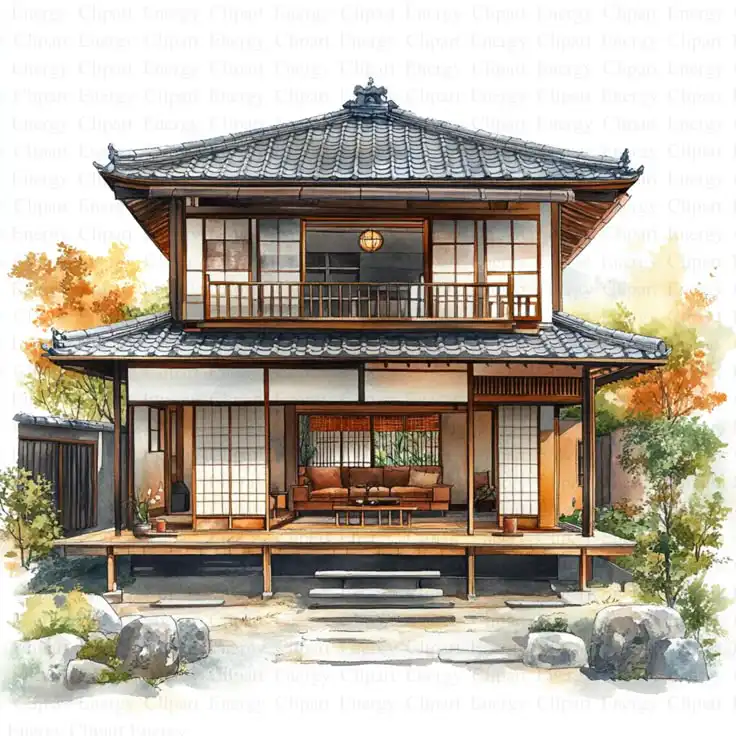
Set a low eye level to show the porch edge and roof eaves.
Use one- or two-point perspective so the porch boards and roof lines converge cleanly.
Draw the veranda (engawa) as a narrow horizontal plane that wraps the house.
Add thin vertical posts where they meet the ground.
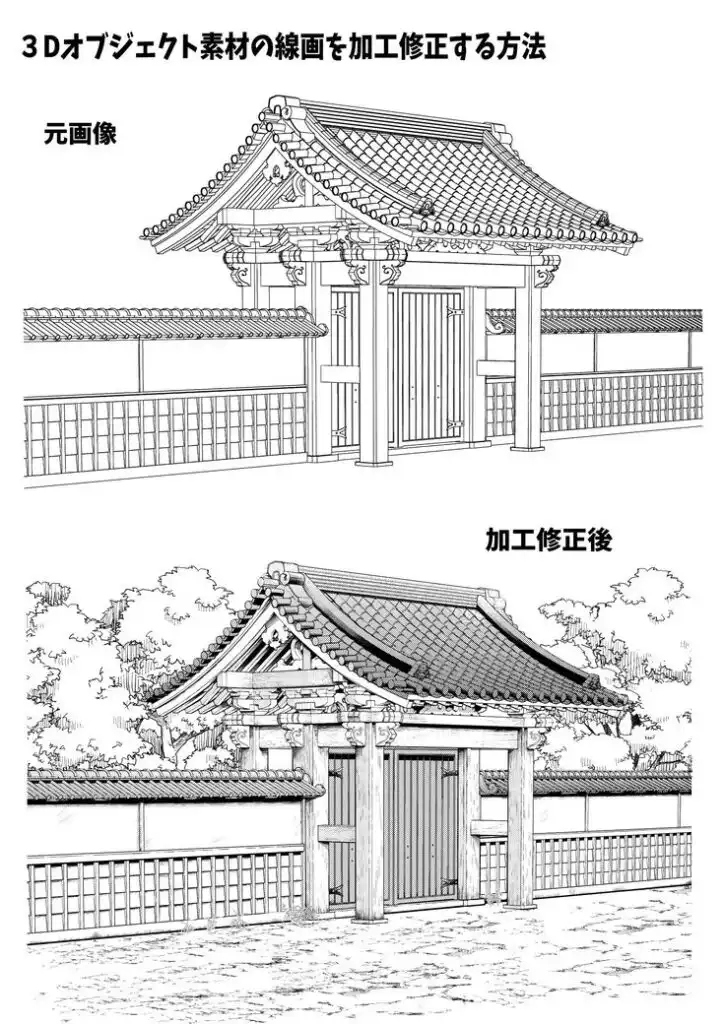
Show roof overhangs with layered eaves and curved kawara tiles.
Indicate tiles with simple repeating semicircles along the eave edge.
For wooden beams and lintels, block in wide rectangles first, then add thinner lines for joints and seams.
Add texture with short, parallel strokes for wood grain on posts and floorboards.
Keep shadows under the eaves and between porch boards darker to suggest depth.
Small details—like a step stone, a hanging sudare, or a drain spout—help sell the setting without crowding the drawing.
Shoji Screens and Pillars
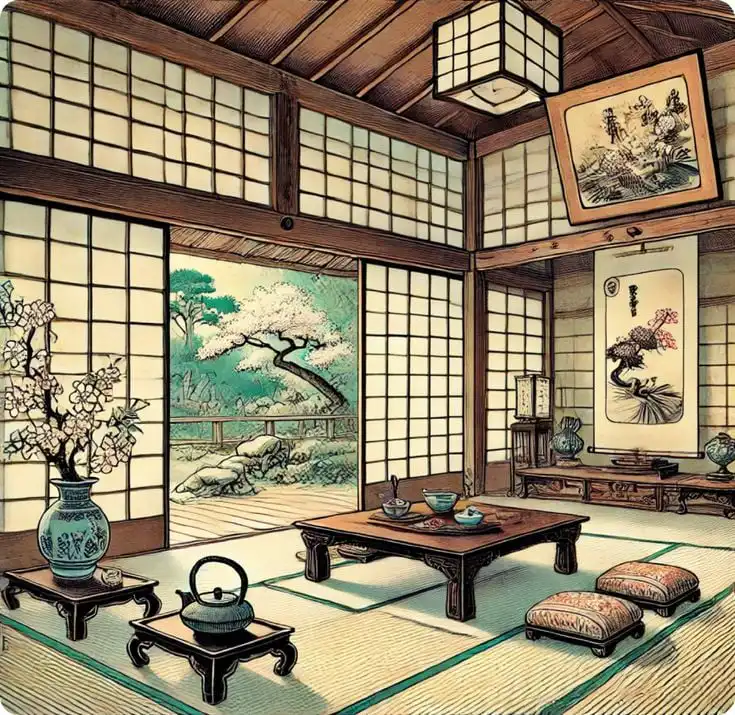
Treat shoji as a flat plane divided into regular rectangles.
Draw the wooden lattice first, then the paper panels inside each grid.
Keep the grid spacing consistent; slightly narrow the grids near the vanishing point to maintain perspective.
Show the wooden pillars as vertical posts with simple base and cap hints.
Use slightly rounded edges and vertical grain to make them read as aged wood.
Add subtle shadow where the pillar meets the shoji to imply depth and separation.
For worn or aged shoji, add faint dirt tones or small tears with soft, uneven marks.
Use a pale gray or warm off-white for the paper instead of pure white.
When light passes through, place soft rectangular highlights on the floor inside to show translucence.
Tatami Mats Arrangement
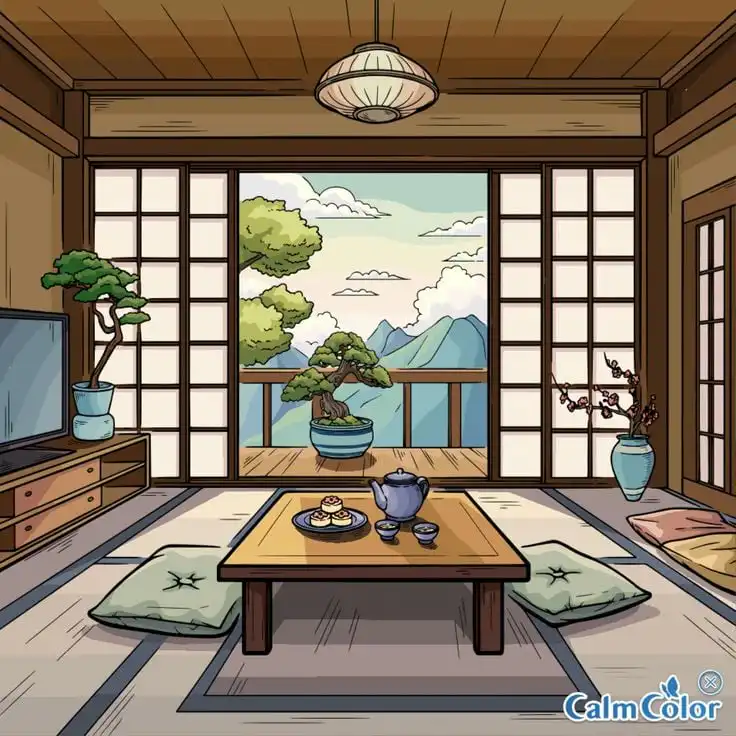
Tatami follow set rectangular patterns; avoid random grids.
Lay out mats in staggered rows where seams rarely form a four-way cross.
Draw each mat as a long rectangle with a narrow border (heri) along the edges.
Use subtle perspective: mats nearer the viewer appear wider and longer.
Add thin woven texture lines running along the mat’s length and darker shading along the seams to define edges.
Keep the color a muted straw tone, and vary the value slightly between adjacent mats.
Mark entryways or sliding door tracks by leaving small gaps at the mat edges.
If you show interior furniture, keep it low and sparse—tables or zabuton cushions sit directly on the tatami and should not obscure the mat pattern.
Depicting Japanese Roofs and Details
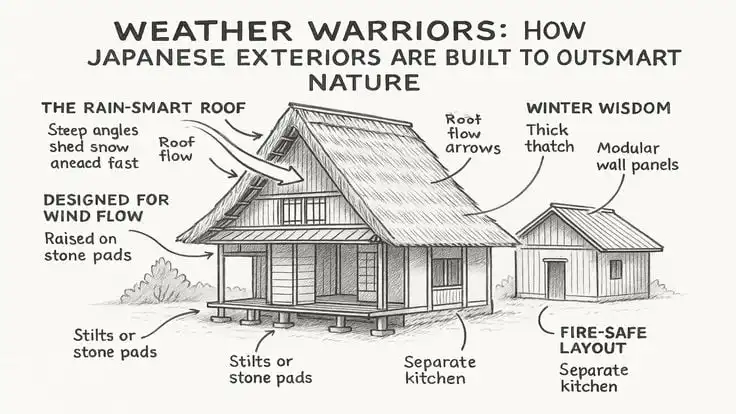
Focus on the roof shape, tile patterns, and how the edges curve.
Add small decorative pieces at ridge ends and eave corners to make the roof read as Japanese architecture.
Kawara Roof Tiles
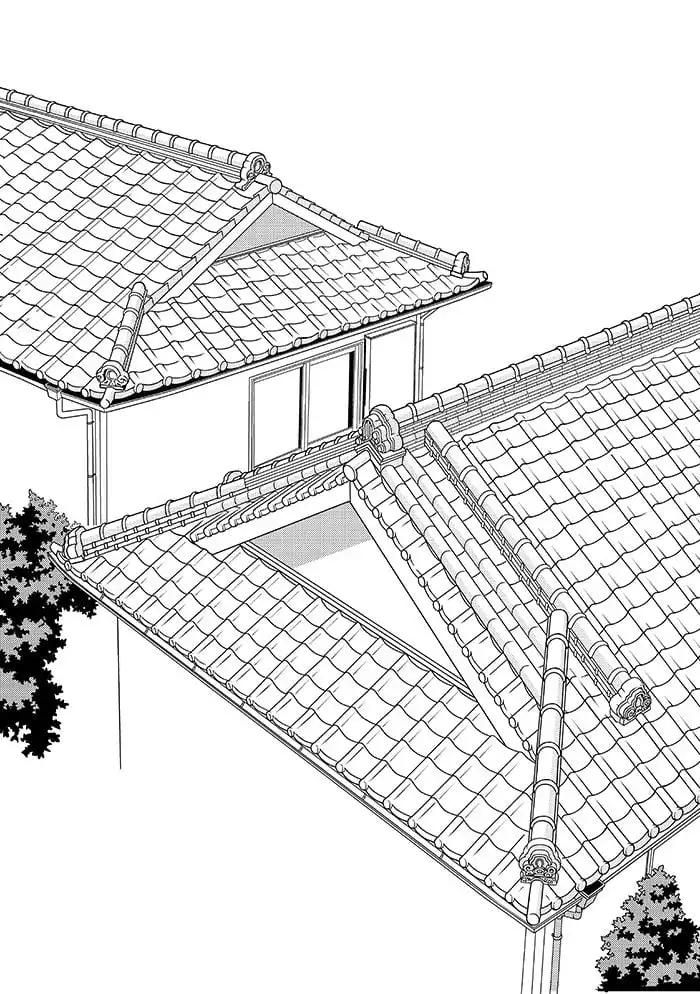
Kawara are curved clay tiles laid in rows.
Start by drawing a base roof slope, then add horizontal lines to mark tile courses.
For each course, sketch repeating semicircles or rounded rectangles to show the exposed edge of the tiles.
Vary the tile edges slightly to avoid a mechanical look.
Darken the joints and add thin shadows under each tile row to give depth.
For temple roofs, show thicker end tiles (onigawara) at the ridge by drawing a larger, rounded tile with a simple crest or spiral.
When you shade, use short, consistent strokes along the tile curves.
This keeps the pattern readable from a distance without overworking the drawing.
Eaves and Decorative Elements
Eaves often flare upward with layered rafters underneath.
To draw them, extend the roof line slightly past the wall, then draw parallel rafters visible from below as evenly spaced slats.
Add bracket complexes (tokyō) as stacked blocks or curved supports where the eave meets the wall.
Keep their shapes geometric: rectangles, small curves, and stepped layers.
For ridge ends and corners, include small finials, round end-tiles, or carved motifs.
Draw these as simple silhouettes first, then add minimal detail like a crest line or slight shadow.
Use contrast: darker tones under the eaves and lighter highlights on the curved outer edge.
That contrast makes the upward sweep and layered construction clear in your sketch.
Illustrating Iconic Japanese Structures
Focus on clear rooflines, balanced proportions, and distinctive joinery.
Capture the materials—wood grain, ceramic tiles, and stone bases—using line weight and simple shading.
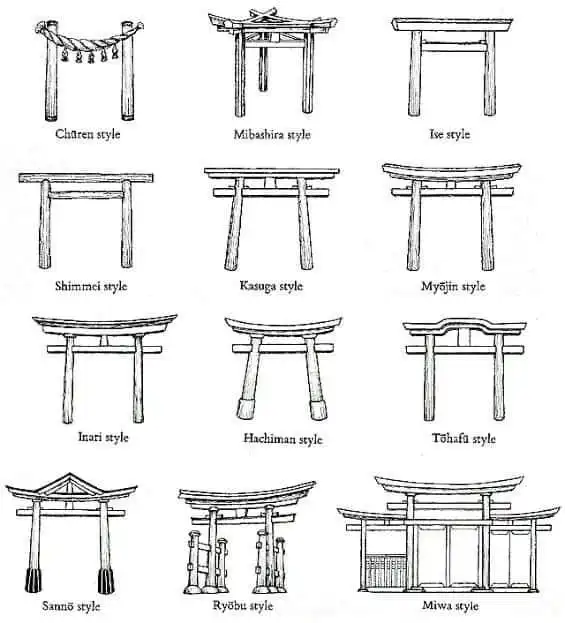
Shinto Gates (Torii)
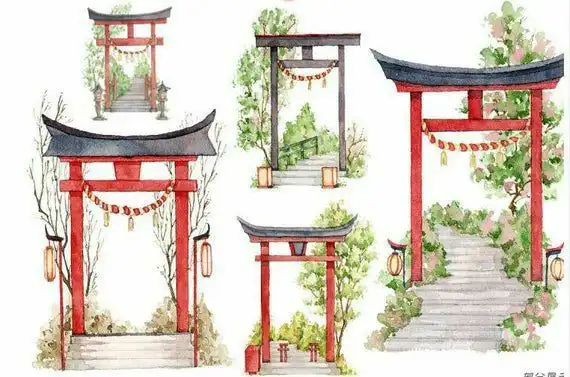
A torii has two upright posts and two horizontal beams; draw those first to set the correct proportions.
The top lintel (kasagi) often curves slightly upward at the ends.
Below it, the secondary beam (nuki) sits between the posts; make it thinner and straighter.
Show the join where posts meet beams with a small gap or simple bracket lines.
Torii can be painted (bright red) or natural wood; use bolder lines and flat color for painted examples, and softer cross-hatching for wood grain.
Add a stone base or step to ground the gate.
For perspective, keep vertical posts parallel and shorten the far post slightly when angled away.
Tips:
- Use a ruler for straight beams, then soften edges by hand.
- Indicate weathering with light streaks and chipped paint.
- Place small lanterns or a shrine plaque to add context.
Pagodas and Temples
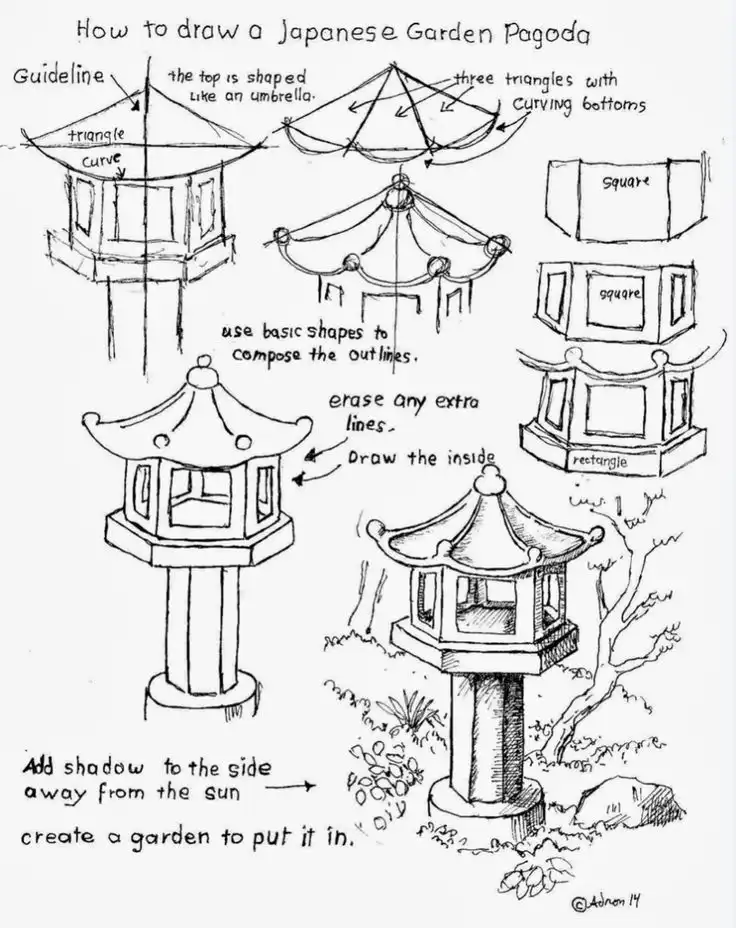
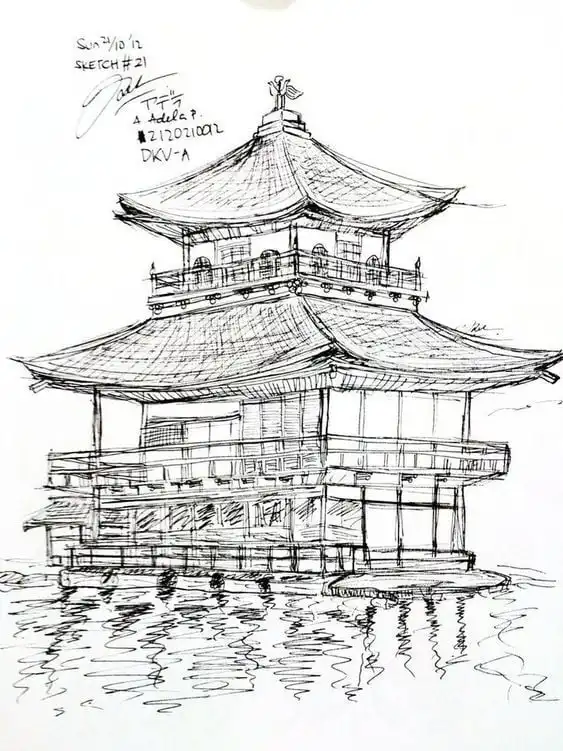
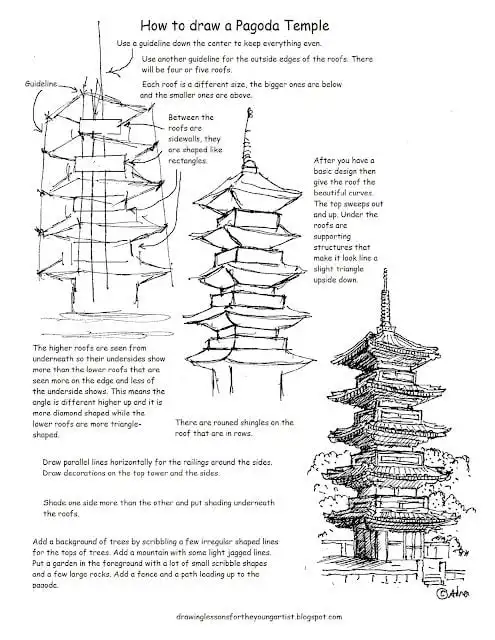
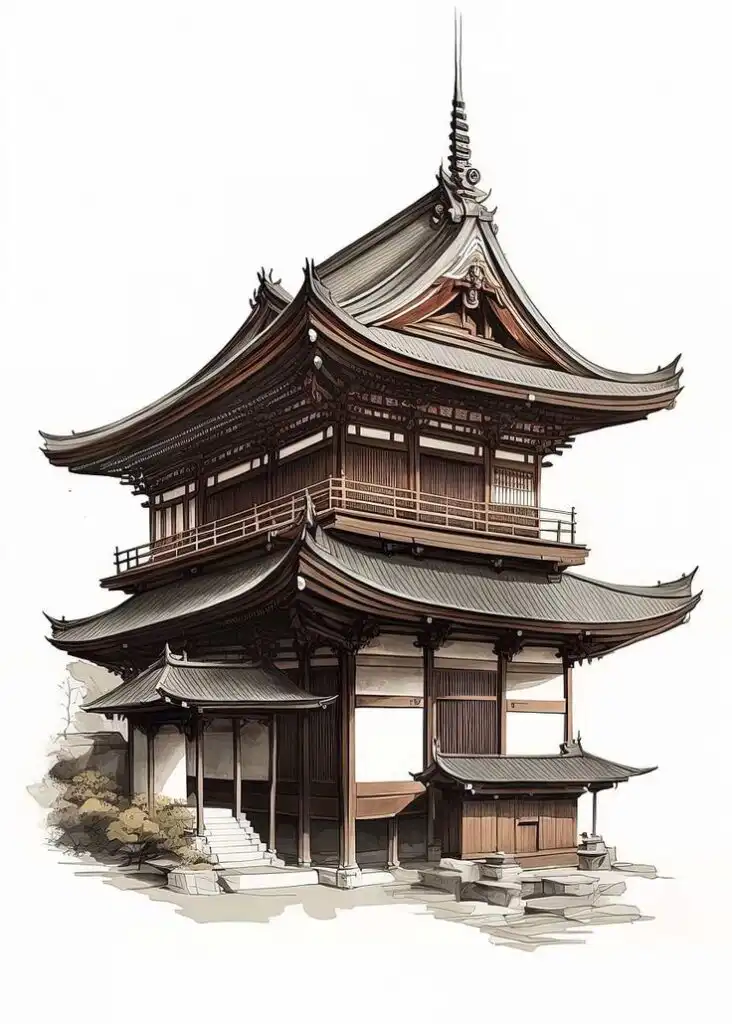
Start pagodas with stacked rectangular tiers that shrink as they rise. Each tier gets a broad, overhanging roof with upturned eaves. Draw the roof’s curve before sketching the floor line to keep proportions believable.
Show roof tiles with repeating horizontal strokes and a slight curve at the edges. Temples usually show off visible bracket systems (tokyō). Sketch the main pillars first. Add bracket clusters as layered Y- or L-shaped forms between the pillars and the roof.
Emphasize chunky wooden beams and the raised wooden platform (engawa) with plank lines. For depth, darken the undersides and add cast shadows beneath the eaves.
- Vary line weight—thin for tiles, thick for beams.
- Mark joinery with small notches.
- Add stone steps, lanterns, or trees around the building for scale and atmosphere.
Adding Natural Elements and Finishing Touches
Add plants, ground textures, and careful lighting to make the building feel rooted and lived-in. Pay attention to plant placement, paths, and the way shadows fall so the architecture reads naturally.
Landscapes and Gardens
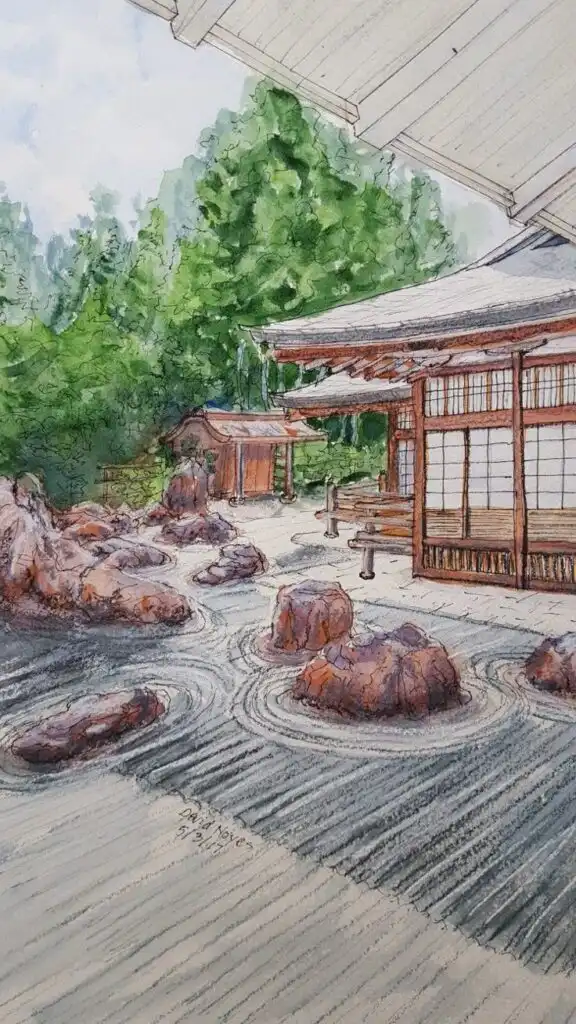
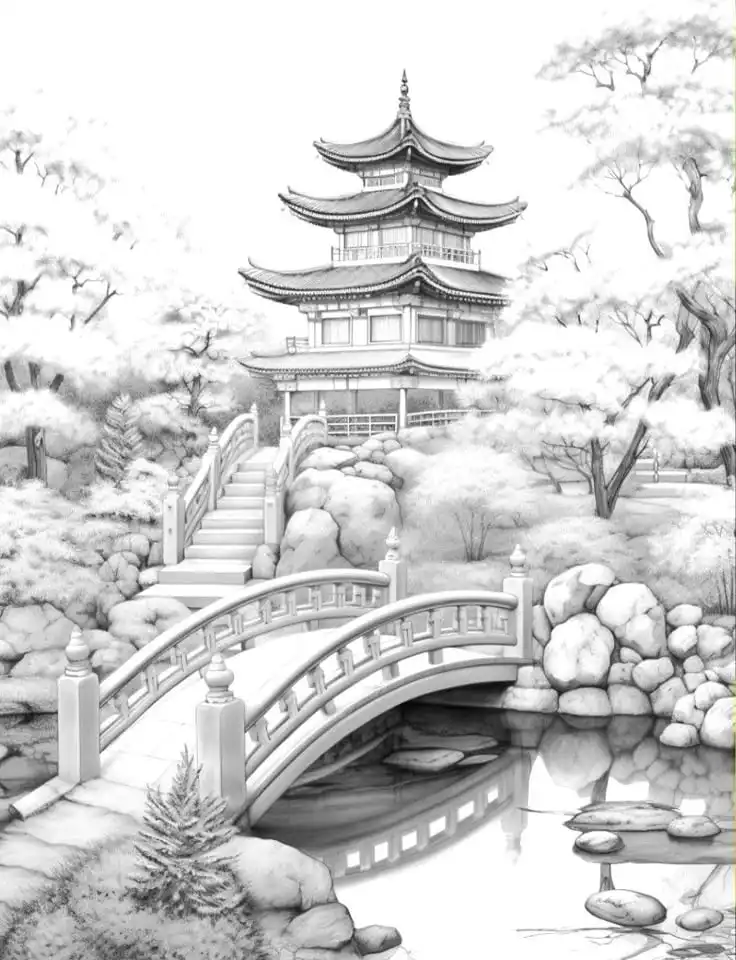
Place big elements first—a curved path, a pond, or a row of rice paddies to set the scene. Use really simple shapes for distant trees, then get more detailed with plants closer to the building.
For bamboo, draw a few vertical lines with short diagonal nodes and cluster the narrow leaves. Show layered planting: low moss or grass at the base, mid-height shrubs, and taller trees behind the roofline.
This layering helps create depth and keeps the roof silhouette clear. Add texture with short, repeated strokes for grass and soft, rounded shapes for shrubs.
Include cultural details like stone lanterns, stepping stones, or a simple torii gate. Stick these beside paths or the water’s edge to guide the eye. Keep scale believable—a lantern by a door should be about waist-high next to a person.
Lighting and Shadows
Pick one light source, usually the sun, and stay consistent. Draw cast shadows of roofs, eaves, and trees at the same angle for believability.
Use darker, sharper shadows close to objects and softer, lighter ones farther away. Shade roof curves and eaves to show form: a thin strip of dark under the eave, a mid-tone on the slope, and a light edge where sunlight hits.
For wood, use parallel short strokes following the grain to hint at planks without fussing over every detail. Add reflected light gently—a shadowed wall might have a faint, lighter edge from the sky or ground.
When you ink or color, leave a few small white spots for highlights. It keeps the scene fresh and gives it some dimension.
Coloring and Texturing Techniques
Think about how light hits each surface and how to show material with mark-making and color choices. Use simple, repeatable steps for wood, tile, and plaster so the building feels convincing up close and from a distance.
Wood Grain and Material Texture

Pick a base color close to real cedar or aged pine—warm brown or muted ochre usually works. Lay down a flat base, then add vertical streaks for grain. Change up stroke length and pressure: short, broken lines for rough beams, longer smooth ones for polished pillars.
Add two shadow tones—one just a bit darker for depth, and a thin, deep line along edges and joints. Use a lighter, narrower highlight on the face that catches the light. For worn wood, scratch in tiny chips and thin horizontal marks near high-traffic spots like doorways.
For shoji frames, keep the grain subtle and use soft, thin strokes. Try a low-opacity brush or diluted wash to hint at dust and age on flat panels. If you’re working digitally, slap the grain on a clipping mask so it follows the wood shape neatly.
Surface Shading for Roofs and Walls
First, pick your light direction. Block in three values: light, mid, and shadow.
For tiled roofs, make each tile show the light difference. The tops get bright, while the recesses go deep blue-gray.
Add a thin, darker line where tiles overlap. That line helps suggest depth and keeps the pattern believable.
For plaster or earthen walls, grab a soft, slightly textured brush. Lay down a base mid-tone, then dab on blotchy, darker patches for unevenness.
Smudge lightly so you don’t end up with harsh edges. Corners and spots under the eaves should stay darker to show cast shadow.
Use small, contrasting accents—maybe a bright rim light on sun-facing edges. Slip in faint, cool reflections in the shadowed spots.
These tiny touches help wood, tile, and wall read correctly both from a distance and up close.
Common mistakes in a Japanese temple drawing
| Mistake | Fix |
| Roof drawn too small | Extend the eaves beyond the wall box before adding tiles |
| Every detail has the same weight | Keep distant roof tiles lighter and save dark lines for corners and shadow |
| Posts do not align | Mark a receding baseline and place each post on the same perspective grid |
| The scene feels generic | Add one specific cue: torii beams, shoji grids, tatami rhythm, pagoda tiers, or kawara tile rows |
Related drawing practice
After this Japanese architecture drawing exercise, strengthen the same skills with architecture sketches, perspective drawing, art drawing ideas, and Japanese style illustration. These connected guides cover building rhythm, vanishing points, sketchbook prompts, and Japanese visual motifs.
Building sketch studies become more useful when they include real residential forms, so keep a set of A-frame cabin design references nearby for roof pitch, gable proportion, and landscape placement.
Reference notes for Japanese building details
For outside reference, compare your sketch against real examples of Japanese architecture and then simplify what you see into roof, frame, opening, and landscape layers. A reference should correct proportions, not turn the drawing into a copy.
Japanese architecture sketches reward patience with small marks. This hand drawn illustration reference is a useful side study for dense ink texture, repeated forms, and marker shading.
Japanese architecture drawing FAQ
How do you draw Japanese architecture step by step?
Start with a simple box for the main building, set the horizon line, then add a broad roof with deep eaves. Block posts, beams, doors, and steps before drawing details. Finish with roof tile rhythm, wood grain, garden stones, and shadows.
What is the easiest Japanese building to draw?
A small front-facing temple gate or simple Japanese house is the easiest starting point. Both use clear rectangles, a strong horizontal roof, repeated posts, and a few recognizable details without forcing hard three-point perspective.
How do you draw a Japanese temple roof?
Draw the roof as a wide wedge first, then extend the eaves past the walls. Curve the outer edges slightly upward, add stacked tile rows, and darken the underside of the eaves so the roof has weight.
What makes Japanese architecture recognizable in a drawing?
The most recognizable cues are deep eaves, exposed timber posts, sliding shoji screens, modular proportions, stone bases, torii gates, pagoda tiers, and a careful relationship with gardens, paths, and water.
How do you draw Japanese architecture in perspective?
Keep verticals straight, send roof edges and floor lines to the same vanishing points, and measure repeated posts along a receding guide line. Draw the large box first, then add the roof and decorative details.
What materials work best for a Japanese architecture sketch?
Use an HB pencil for construction, a 2B pencil or fineliner for final lines, a kneaded eraser for lifting guides, and smooth sketch paper. Add light watercolor or colored pencil only after the structure reads clearly.
Is a pagoda the same as a Japanese temple drawing?
A pagoda can be part of a temple complex, but it is not the same as every temple drawing. Pagodas are tiered towers, while temple drawings may show halls, gates, verandas, gardens, and roof details.
- 1.4Kshares
- Facebook0
- Pinterest1.4K
- Twitter0
- Reddit0