The first time I tried to draw a Dodge Charger, I got the wheelbase wrong before I even touched the grille. I was treating it like a sketch instead of an engineering shape, and the whole car ended up looking like it was drawn on rubber. That mistake taught me something most drawing tutorials skip: a Dodge Charger drawing lives or dies on proportion, not linework.
- Which Dodge Charger generation should you draw first
- Getting the proportions right (an automotive designer's approach)
- Step-by-step: how to draw a Dodge Charger
- Drawing the Charger from different angles
- Drawing the Hellcat and SRT supercharger scoop
- Materials: traditional pencil vs digital
- Coloring your Charger with real factory colors
- Common mistakes beginners make
- Conclusion
- FAQ
- Q: What is the easiest way to draw a Dodge Charger for beginners?
- Q: How do you draw a Dodge Charger Hellcat step by step?
- Q: What pencil grade is best for muscle car drawings?
- Q: How do you get the proportions of a Dodge Charger right?
- Q: What are the official Dodge Charger paint colors?
- Q: Can you draw a Dodge Charger digitally on an iPad?
- Q: What's the difference between drawing a Charger and a Challenger?
This car rewards that kind of attention. The Charger’s silhouette (long hood, short deck, aggressive stance) has stayed recognizable across six decades of redesigns, which makes it one of the best subjects for practicing muscle-car proportions. You’ll get the same visual payoff whether you’re working from a 1969 Coronet-based Charger or a 2023 Hellcat Redeye.
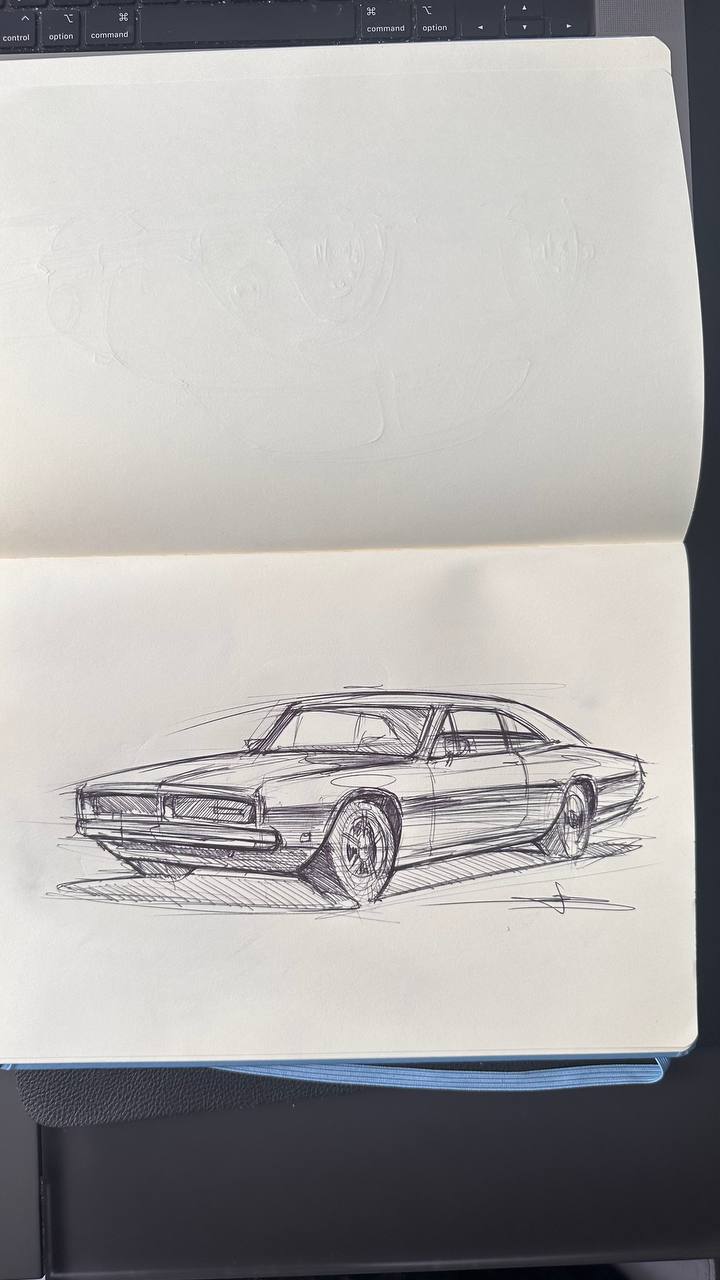
Here’s what this guide covers: how to pick a generation to start with, how to nail proportions before you draw a single panel line, five steps to build the car from blank page to finished shading, how to handle different angles, and how to render the Hellcat’s supercharger scoop without it looking like a lump on the hood.
If the Dodge Charger feels too boxy, move next to Porsche drawing easy and practice making the car read from silhouette before detail.
Which Dodge Charger generation should you draw first
Pick a generation before you pick up a pencil. The Charger has gone through four distinct design eras, and each one asks for a different drawing approach (flat panels versus sculpted surfaces changes everything about how you build shadow).
Classic muscle (1966–1974)
The 1966 Charger was Dodge’s first fastback muscle car, built on the Coronet platform. But the version everyone actually draws is the 1968–1970 restyle: hidden headlights, a recessed “electric shaver” grille, and that split rear taillight bar. It’s the Dukes of Hazzard car, the Bullitt-chase-scene car, the Fast & Furious car. If you’ve never drawn a muscle car before, start here.
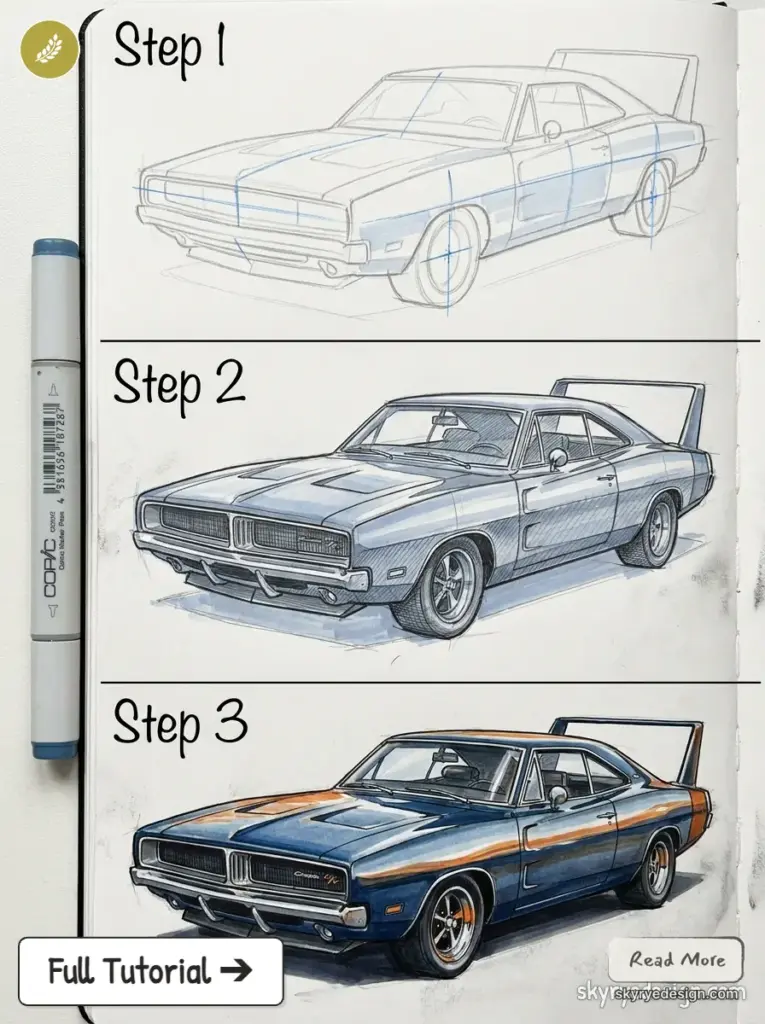
The panels are flatter and the curves are simpler than anything Dodge has built since, which makes the proportions easier to nail before you’re fighting complex surfacing too.
Modern LX/LD (2006–2023) and the Daytona EV
The 2006 Charger brought the nameplate back as a four-door sedan on the LX platform, which some purists still argue about (I get it, but the SRT8 version earned its badge). By 2011 the LD facelift sharpened the creases, and the lineup grew into a wall of trims: SXT, R/T, Scat Pack, Hellcat, Hellcat Redeye.
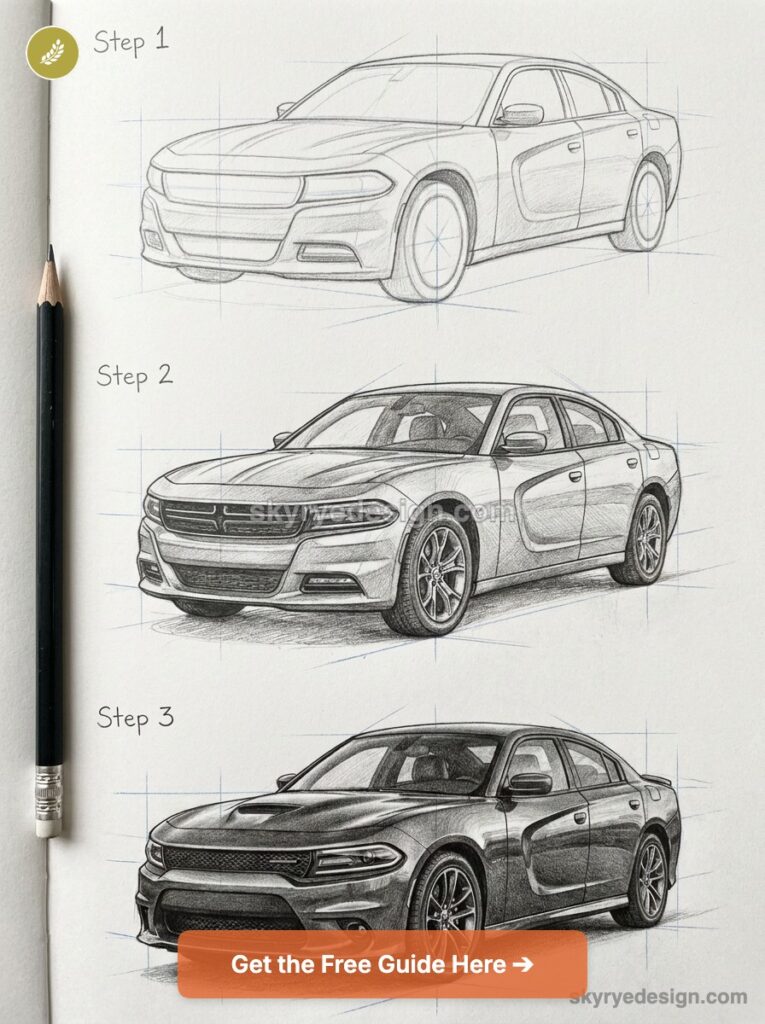
Dodge closed out the era in 2023 with “Last Call” specials like the Charger King Daytona and Charger Black Ghost, then replaced the whole platform with the 2024 Charger Daytona EV, a two-door electric coupe with a fake-exhaust sound system called Fratzonic. Drawing the modern car means dealing with deeper haunches over the wheels and much sharper character lines. It’s a harder subject, but it’s worth attempting once the classic shape feels natural under your hand.
The designer behind the Charger’s silhouette
Most accounts credit Chrysler stylist Carl Cameron with the shape that started it all. Cameron penned the 1964 Charger II show car, a two-door fastback concept that previewed the “coke-bottle” body Dodge would put into production. Working inside Elwood Engel’s Chrysler styling studio, that concept sketch turned into the 1968 production Charger almost unchanged in spirit, hidden headlights and all. I find that detail useful when I’m teaching proportion: the production car exists because a show car got the stance right first. Sketch the stance before the details, same as Cameron did.
Once you’ve picked your generation, the next problem is proportion, and that’s where most Dodge Charger drawings actually go wrong before a single detail gets added.
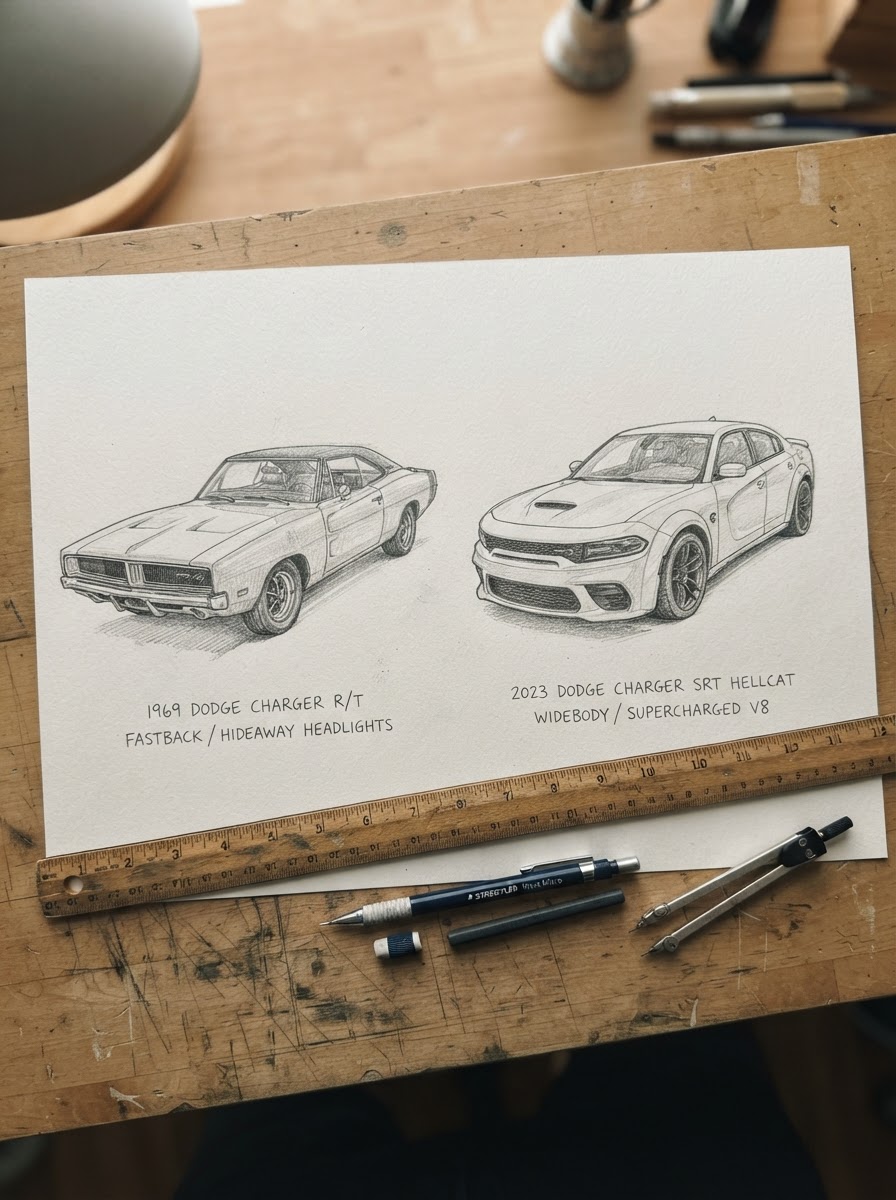
Getting the proportions right (an automotive designer’s approach)
Nine times out of ten, a beginner’s Charger drawing reads as a family sedan instead of a muscle car, and it’s not because of bad shading. The wheelbase is drawn too short, the ride height is drawn too tall, and no amount of detail work fixes that later.
Wheelbase and stance
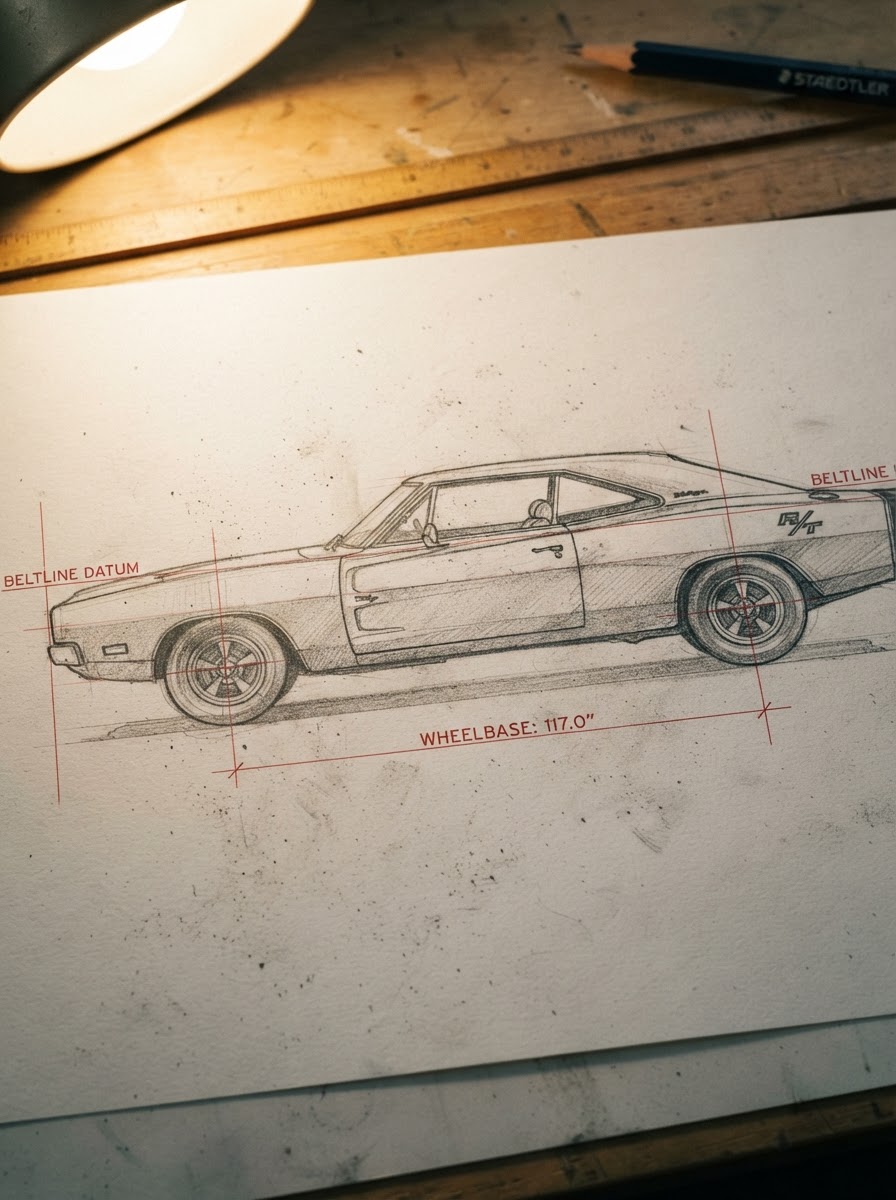
The 1968–70 Charger rides on a 117-inch wheelbase; the modern LX-platform car (2006–2023) stretched that to 120.2 inches, and on a Hellcat with its 20-inch wheels, the ratio between wheelbase and wheel size drops to roughly six-to-one instead of the classic car’s near eight-to-one. That’s why the modern Charger looks lower and more planted even though it’s technically longer. My trick: measure your wheelbase in wheel-widths before you draw a single body panel. Count how many wheels fit between the front and rear axle, lock that ratio in, then build outward.
Beltline and greenhouse height
The beltline is where the glass meets the body, and on a Charger it does a lot of the visual work. Modern cars run a low, aggressive beltline with a compressed greenhouse (the cabin glass) that reads as “chopped” even though nothing was actually cut down at the factory. Classic 1968–70 cars sit taller and more upright through the glass. I ran into this exact issue sketching an EV concept early in my career: drop the beltline half an inch on paper and the whole car suddenly looks like it’s about to move.
Panel lines and character lines
The crease running from the front fender through the door and into the rear haunch isn’t decoration. It’s doing the same job a muscle insertion does in figure drawing (a spot where the surface changes direction, so shadow catches there first). Draw it as one continuous stroke, not a series of short segments copied off a reference photo — segmented lines are the fastest way to make a Charger look stiff.
Once your wheelbase, beltline, and character lines are locked in, you’re ready to actually put pencil to paper. Here’s the five-step build I use to go from blank page to a finished Charger.
Step-by-step: how to draw a Dodge Charger
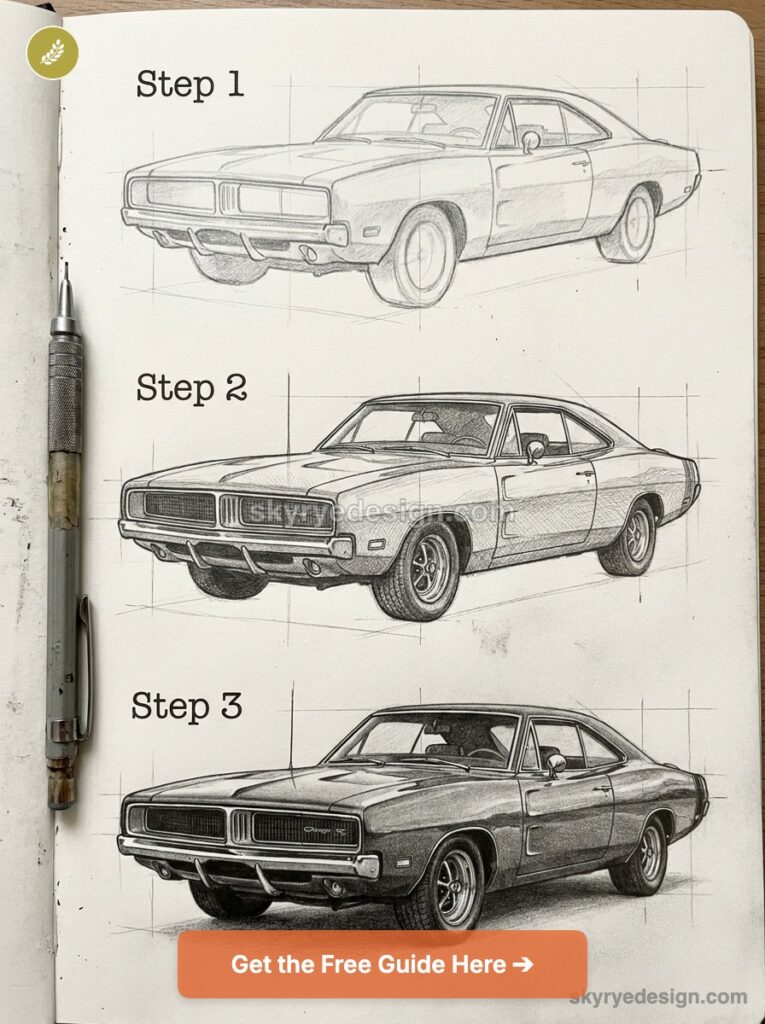
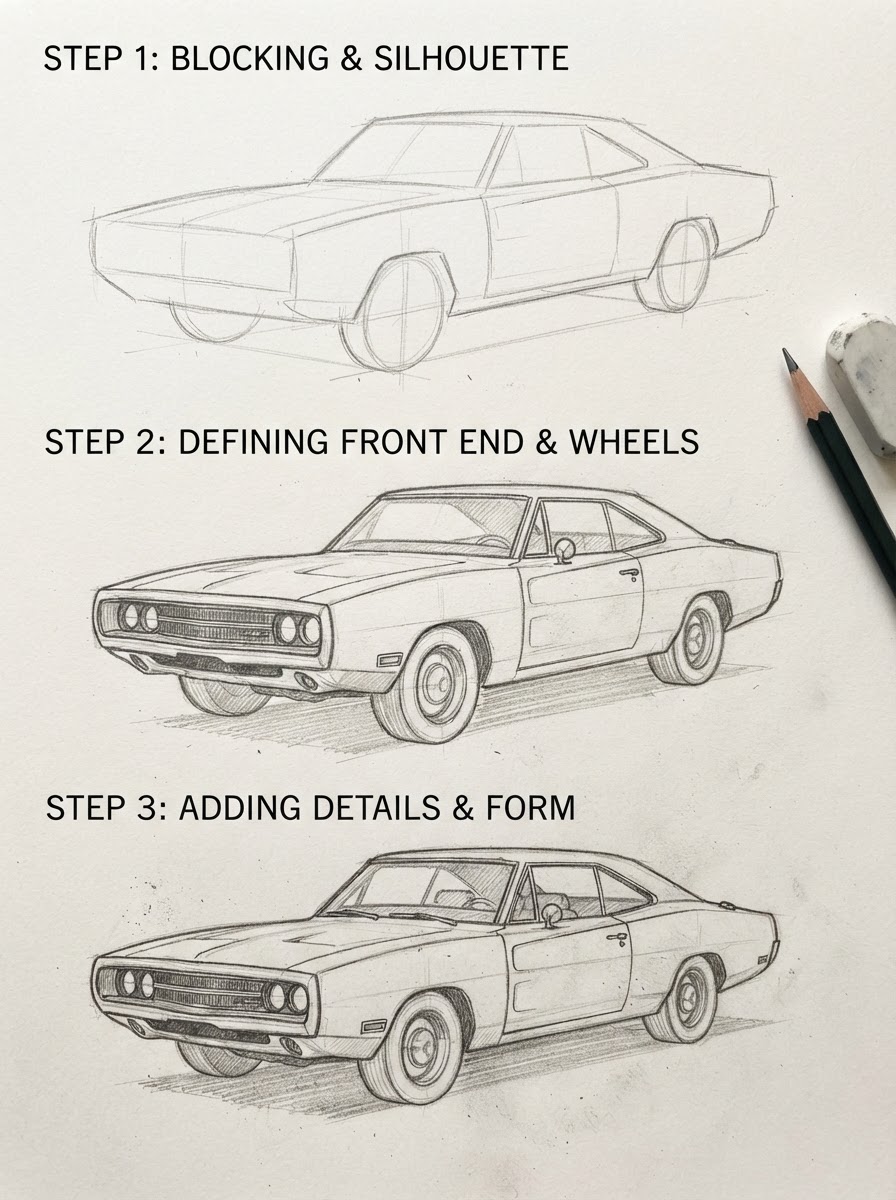
Everything from the last two sections comes together here. Grab a pencil (I block everything in 2B, doesn’t matter much at this stage) and a sheet of A4 or 11×17 if you want room for a full side profile. Five passes, and each one builds on the last.
Step 1: Blocking the silhouette and wheel ellipses
Start with a horizontal baseline and mark your two axle points using the wheelbase ratio from the last section. Draw the wheels as tilted ellipses, not circles (this is the single most common beginner mistake, and it’s why so many amateur car drawings look like the wheels are floating half an inch off the ground). I still draw wheel ellipses first on every car sketch, a habit left over from academic drawing training: get your load-bearing points right before anything else touches the page. Sketch the rough body mass as a simple box between the wheels.
Step 2: Defining the front end — grille, headlights, bumper
This is where the generation you picked earlier actually matters. A 1969 Charger gets a split grille with hidden headlight covers and a simple chrome bumper bar. A modern Hellcat gets a wide matte-black grille surround, a deep chin splitter, and functional brake ducts low in the fascia. Rough in the hood scoop outline now too, even if you’re saving the full Hellcat scoop detail for later. Keep your lines light here; you’ll darken only the ones that survive.
Step 3: Roof, windows, and doors
Trace the roofline down into the rear deck: a steep fastback taper for the classic car, a shorter, flatter arc for the modern sedan. Drop your door cut lines along the character line you established earlier, and place the handle roughly a third of the way back from the front edge of the door. Small thing, but it’s where a lot of drawings lose credibility: the door line has to follow the body’s surface logic, not just cut a straight line across the silhouette.
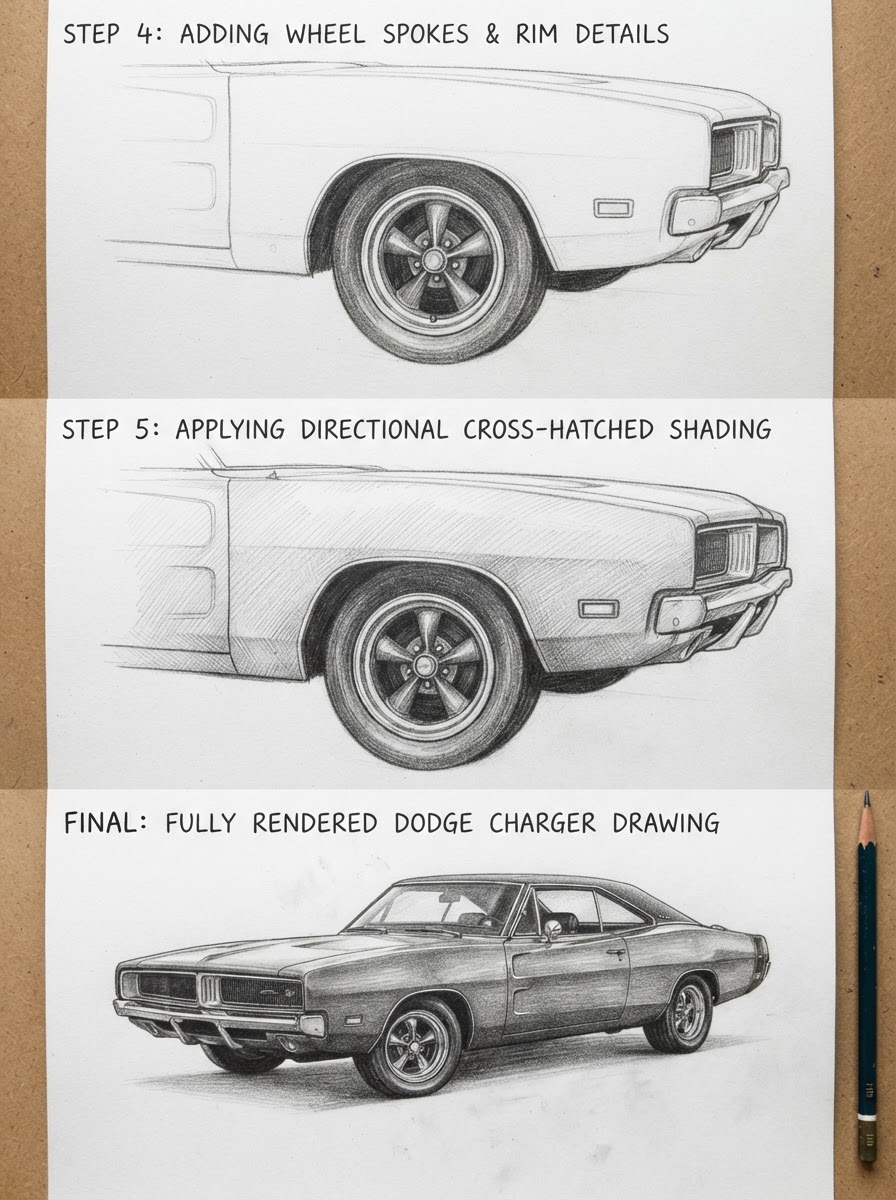
Step 4: Wheels and rim details
Different trims wear genuinely different wheels, and it’s worth getting specific. Scat Pack cars run 20-inch “Devil’s Rim” style multi-spoke wheels; the Hellcat Redeye’s forged wheels have a tighter spoke count and a deeper concave face. Draw the spokes radiating from a slightly off-center hub (perspective foreshortens the near side) and leave a crescent of reflected light along the rim’s outer edge before you commit to tire shadow underneath.
Step 5: Shading and finishing touches
Pick one light source and stick to it through the whole drawing, that’s non-negotiable. Cross-hatch the body shadow in the direction the surface curves, not in a flat grid. For glass, one clean sweeping highlight reads as reflection; five scattered white marks just reads as noise. Chrome trim wants sharp value jumps (near-black next to near-white) rather than a gradual blend, because that’s what makes metal look like metal instead of plastic.
Once you’ve got a full Charger on paper from one angle, it’s worth pushing yourself to draw it from others, especially the front three-quarter view, since that’s the angle most people actually search reference photos for.
Drawing the Charger from different angles
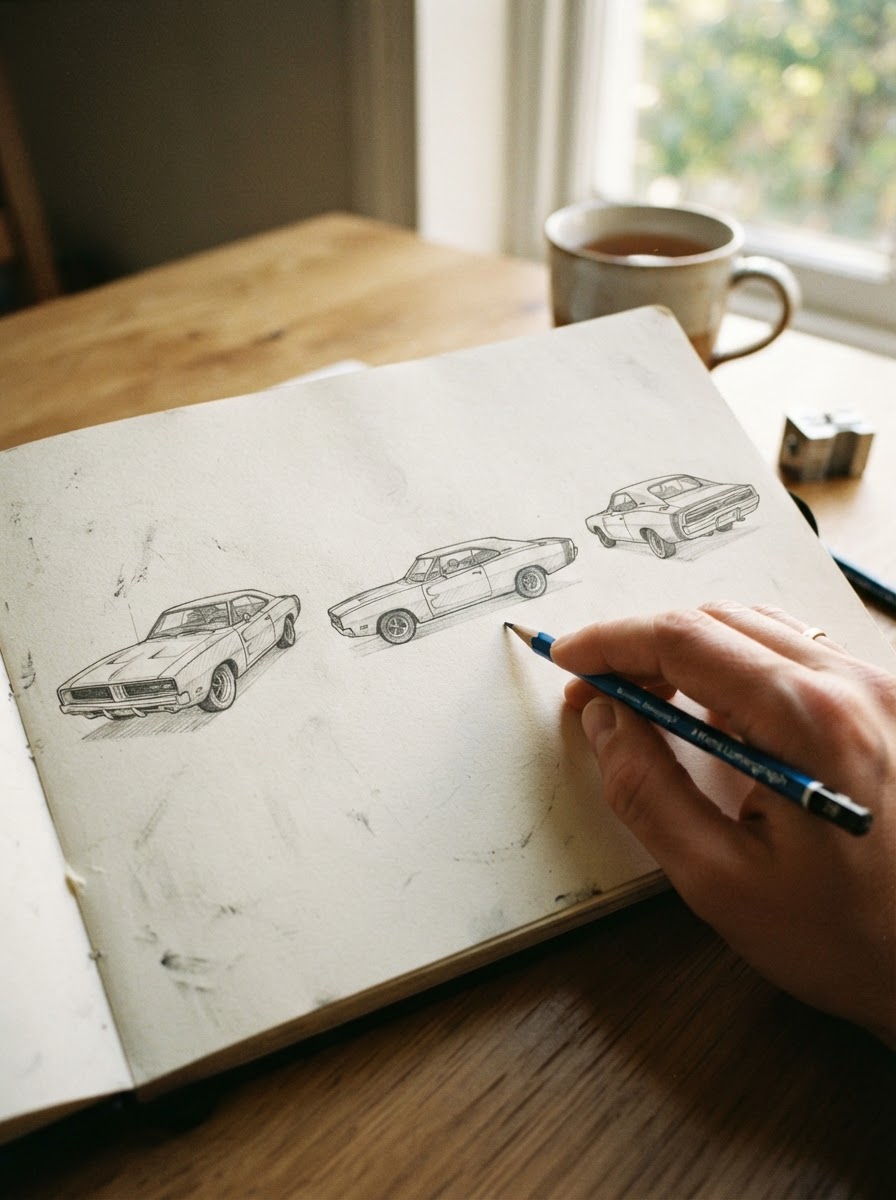
A side profile is the easiest angle to fake and the hardest to make look alive. If you want a drawing that actually reads as a photo reference rather than a diagram, you need to practice all three core angles, not just the one from the steps above.
Front three-quarter view
This is the angle most people search for, and for good reason: it shows off the grille, the hood scoop, and the fender shoulder all at once. The trick is foreshortening the far side of the car so it recedes convincingly instead of just shrinking in a straight line. I sketch a rough perspective box first (two vanishing points, low horizon) and only then place the wheels inside it. Skip that step and the near fender always ends up too wide.
Side profile
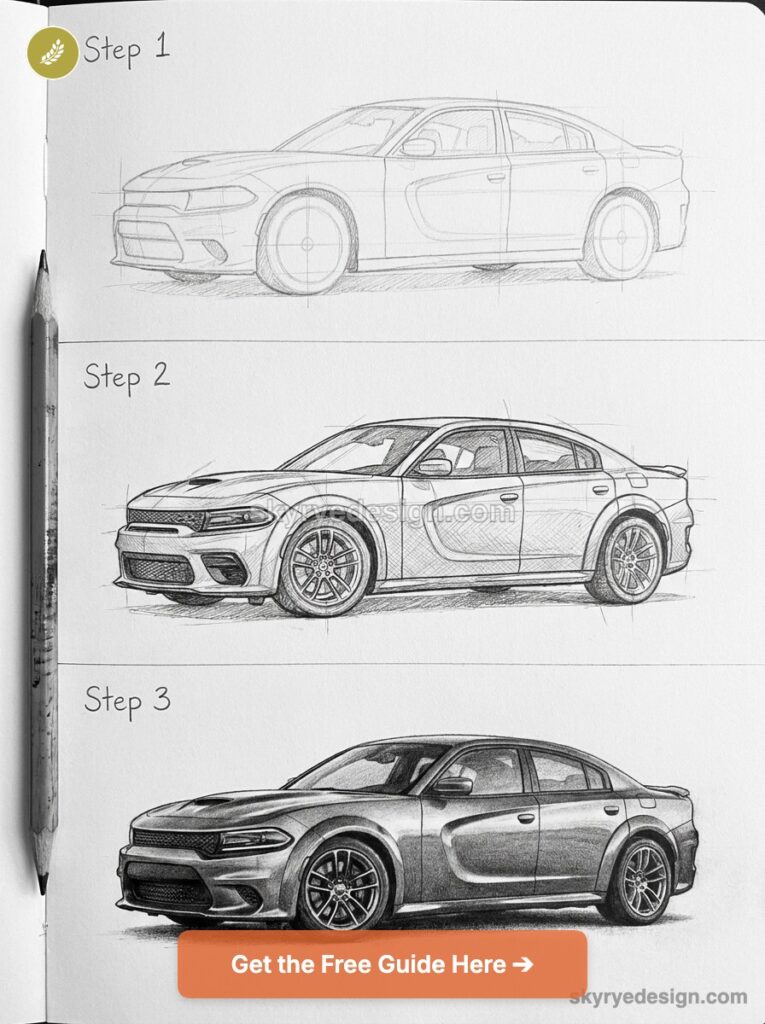
Here’s where your wheelbase math actually gets tested, because there’s nowhere to hide a wrong ratio. Both wheels sit on the same baseline, both ellipses tilt identically, and the character line runs uninterrupted from headlight to taillight.
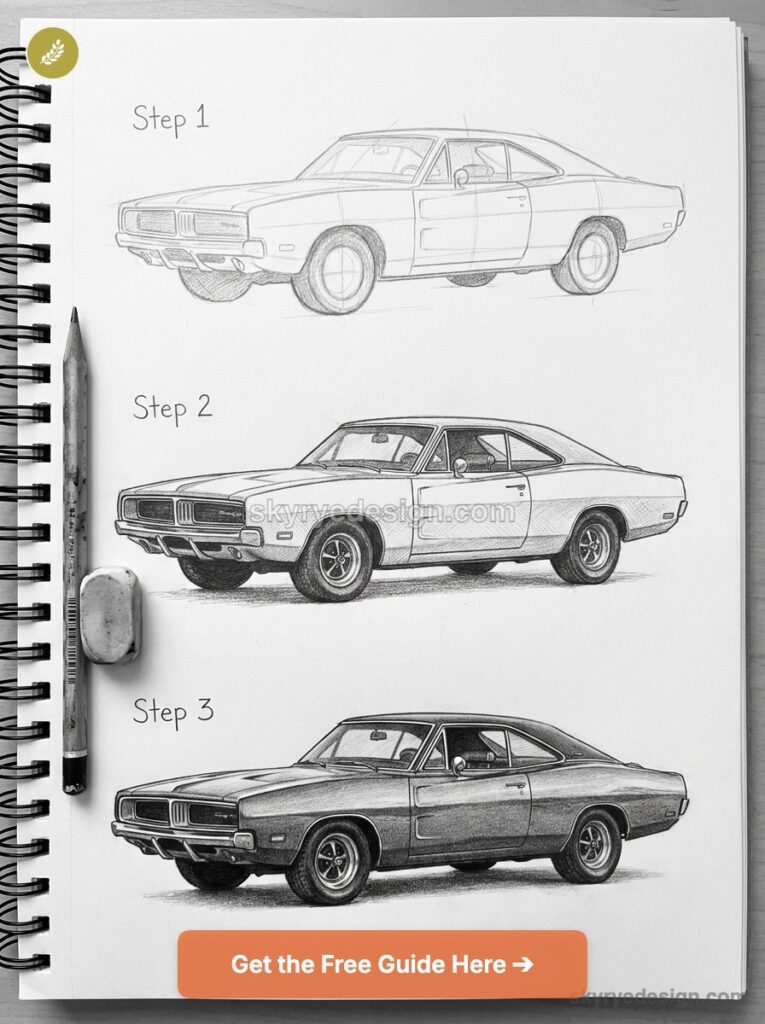
This is also the best angle for practicing the roofline taper, since you can see the whole fastback curve (or the modern sedan’s shorter arc) in one continuous stroke.
Rear view
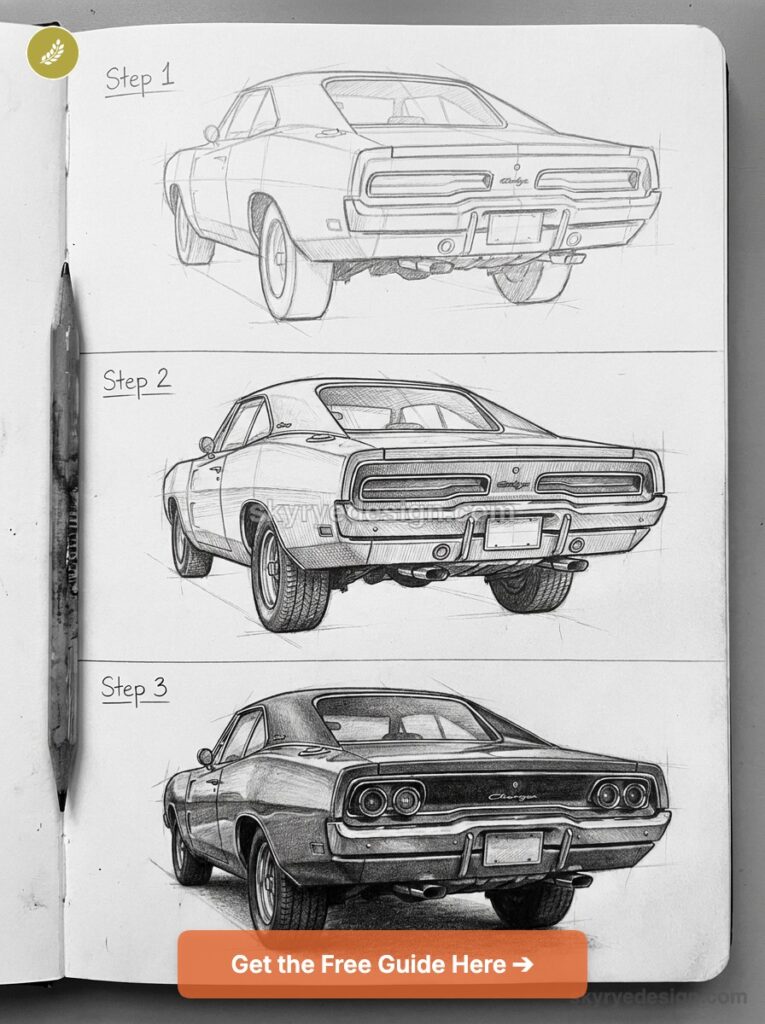
The most overlooked angle, and honestly one of the more distinctive ones on a Charger. The full-width taillight bar (a Charger signature since 1968) reads almost like a single graphic element rather than individual lamps. Add the spoiler lip on Scat Pack and Hellcat trims, and angle the dual exhaust tips slightly inward toward the center for a subtle, confident stance.
Practicing all three angles on the same generation, before you move to a different Charger year, is what actually builds the muscle memory. Once the car looks convincing from every side, the next problem is rendering one specific, tricky detail: the Hellcat’s supercharger hood scoop.
Drawing the Hellcat and SRT supercharger scoop
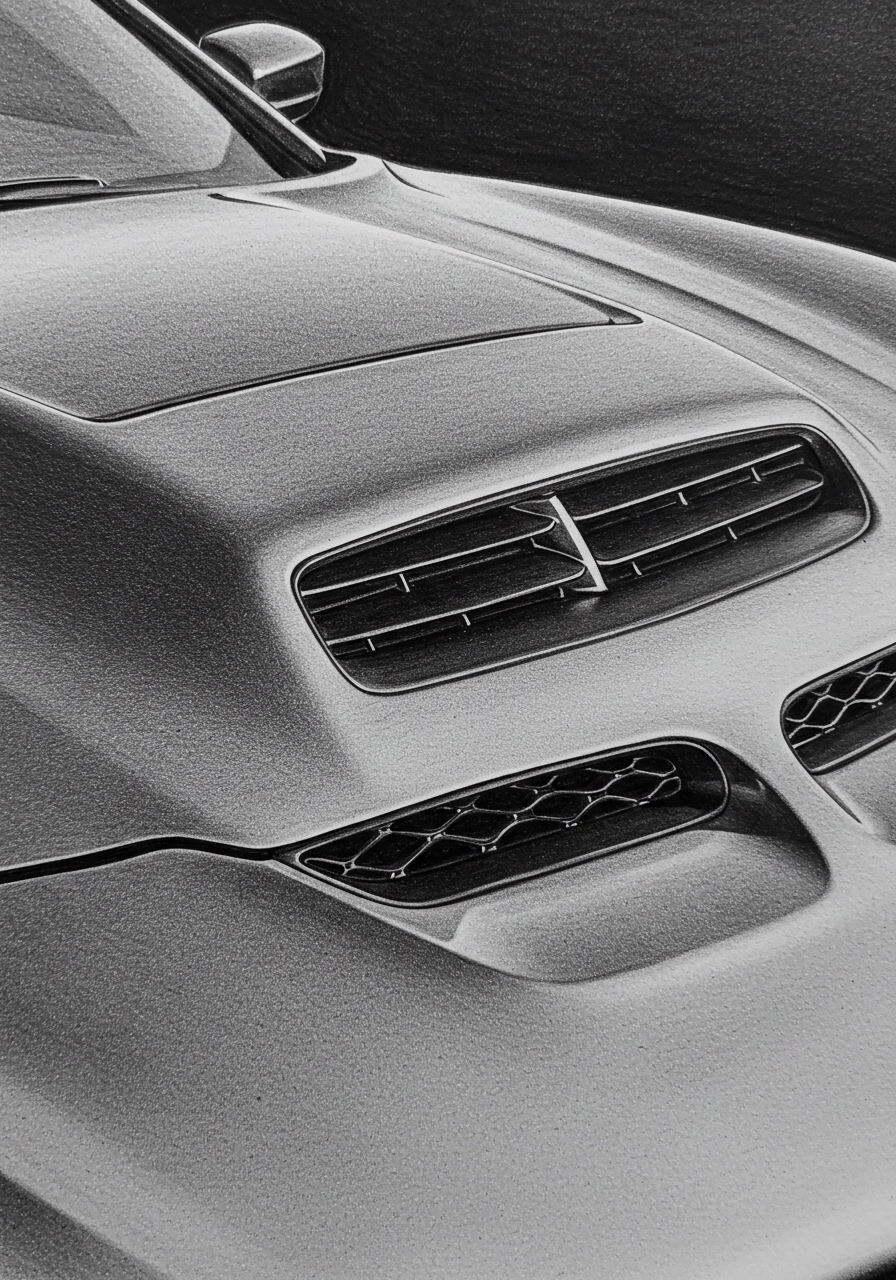
The Hellcat’s hood scoop isn’t a styling add-on, it’s functional, and drawing it like a bump on the hood is the fastest way to make an otherwise good Charger drawing fall apart.
Scoop anatomy
The Hellcat’s 6.2-liter supercharged HEMI (707 horsepower in the base Hellcat, 797 in the Redeye) needs serious airflow, so the scoop is built as twin intakes flanking a raised center spine, not a single symmetrical bump. The Demon variant took it further with an actual functional “Air Catcher” element built into the headlight housing, feeding cold air straight to the intake. Block the scoop as three separate volumes: the center spine, and the two intake shoulders dropping away from it at a sharper angle than most people draw.
Rendering metal, vents, and reflections
The vents themselves are mostly matte black mesh or slotted openings, which gives you a useful contrast trick: keep the surrounding painted hood glossy with a tight highlight, then drop the vent openings to flat, matte darkness with almost no gradient. That contrast alone sells the material difference. For the raised spine, run a single sharp highlight line along its ridge and let the shadow fall off quickly on either side. I made the mistake early on of shading the whole scoop as one gradient, and it read as soft plastic instead of stamped metal. Sharper value jumps, fewer of them, fixed it immediately.
Get the scoop right and the rest of the drawing earns some credibility by association. Next up: the actual tools that make all of this easier to render, whether you’re working traditionally or on a screen.
Materials: traditional pencil vs digital
You don’t need an expensive kit to draw a convincing Charger, but a couple of specific tools save real time.
Pencils, paper, blending tools
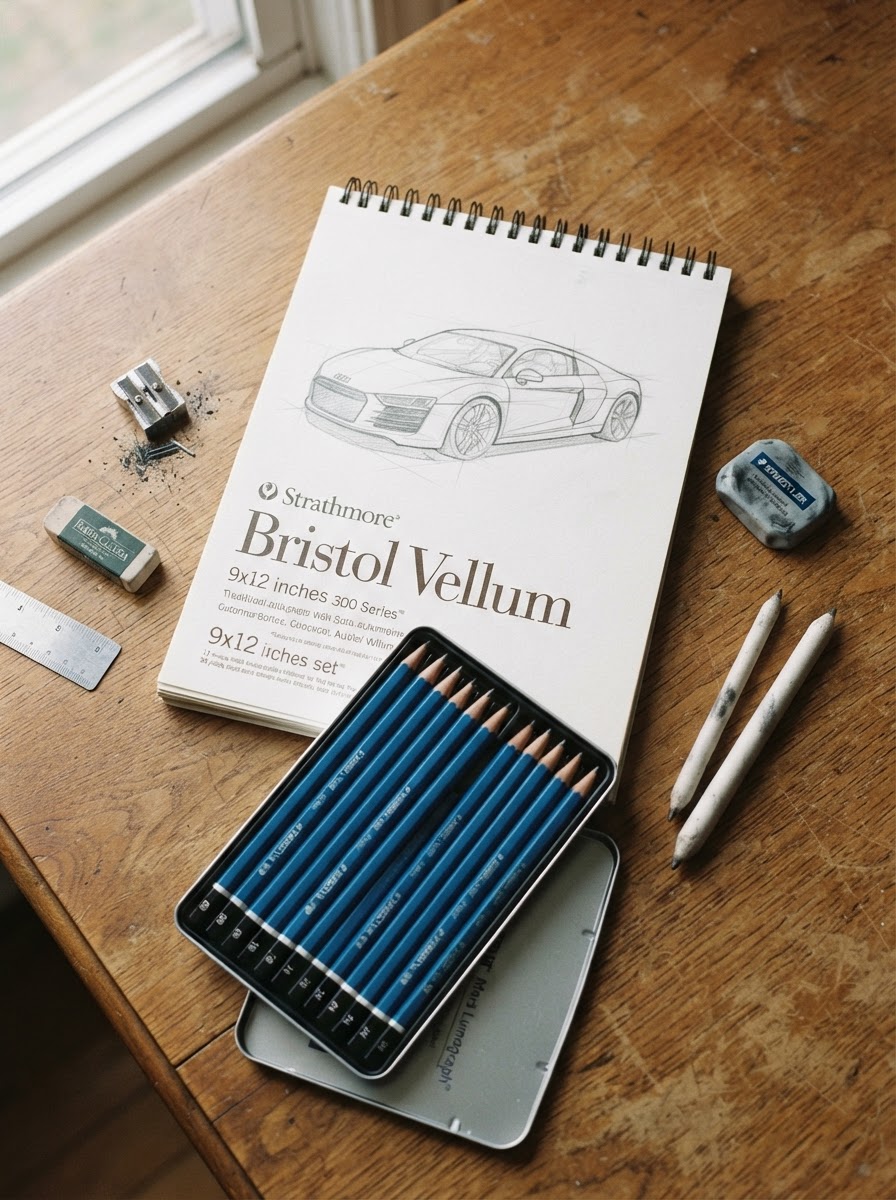
I keep it simple: a Staedtler Mars Lumograph set (HB through 6B covers everything from light construction lines to deep shadow), a Strathmore 400 series bristol pad for the smooth surface it gives cross-hatching, and a blending stump for the softer gradients on glass and painted panels. A kneaded eraser matters more than people think, since you can pull a highlight back out of graphite instead of just erasing to bare paper. Total cost for all of it is under $40, and it’ll last through dozens of drawings.
Drawing digitally on iPad and Procreate
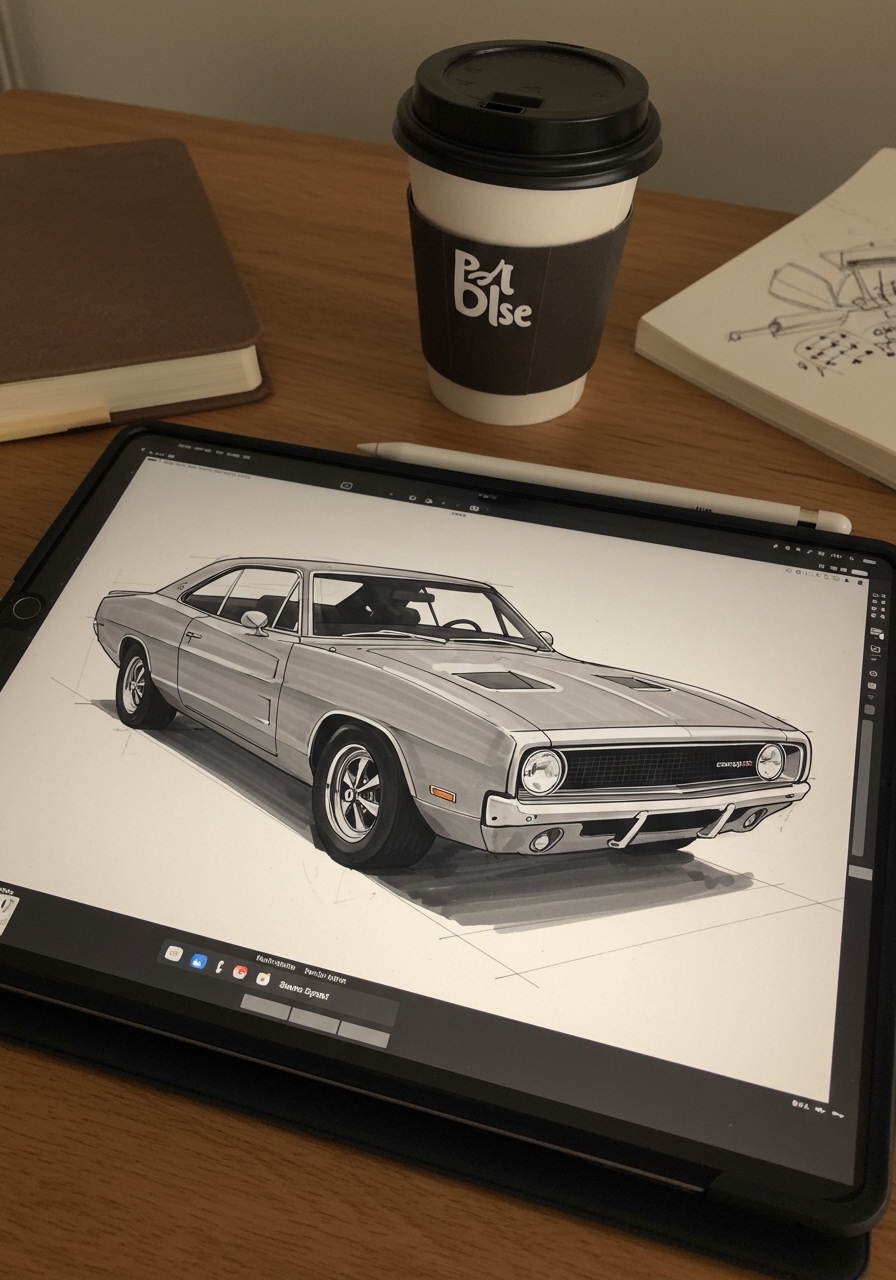
If you’ve got an iPad and Apple Pencil already, it’s worth trying the digital route at least once. Procreate’s default “6B Pencil” brush behaves close enough to real graphite that the techniques from the step-by-step section transfer directly, and layers make the Hellcat scoop’s sharp value jumps much easier to isolate and adjust without redrawing the whole hood. The undo button alone makes it a forgiving place to practice wheel ellipses until they stop looking oval-shaped instead of tire-shaped.
Either way works. Pick whichever one gets you actually drawing instead of shopping for gear, and save the upgrades for once you’ve got a few Chargers under your belt.
Materials sorted, the last creative decision is color, and the Charger’s factory palette gives you more to work with than red and black.
Coloring your Charger with real factory colors
Red and black will always work, but Dodge’s actual paint chart gives you a lot more personality to play with, and using a real factory color instantly makes a drawing feel more specific.
Iconic Dodge colors
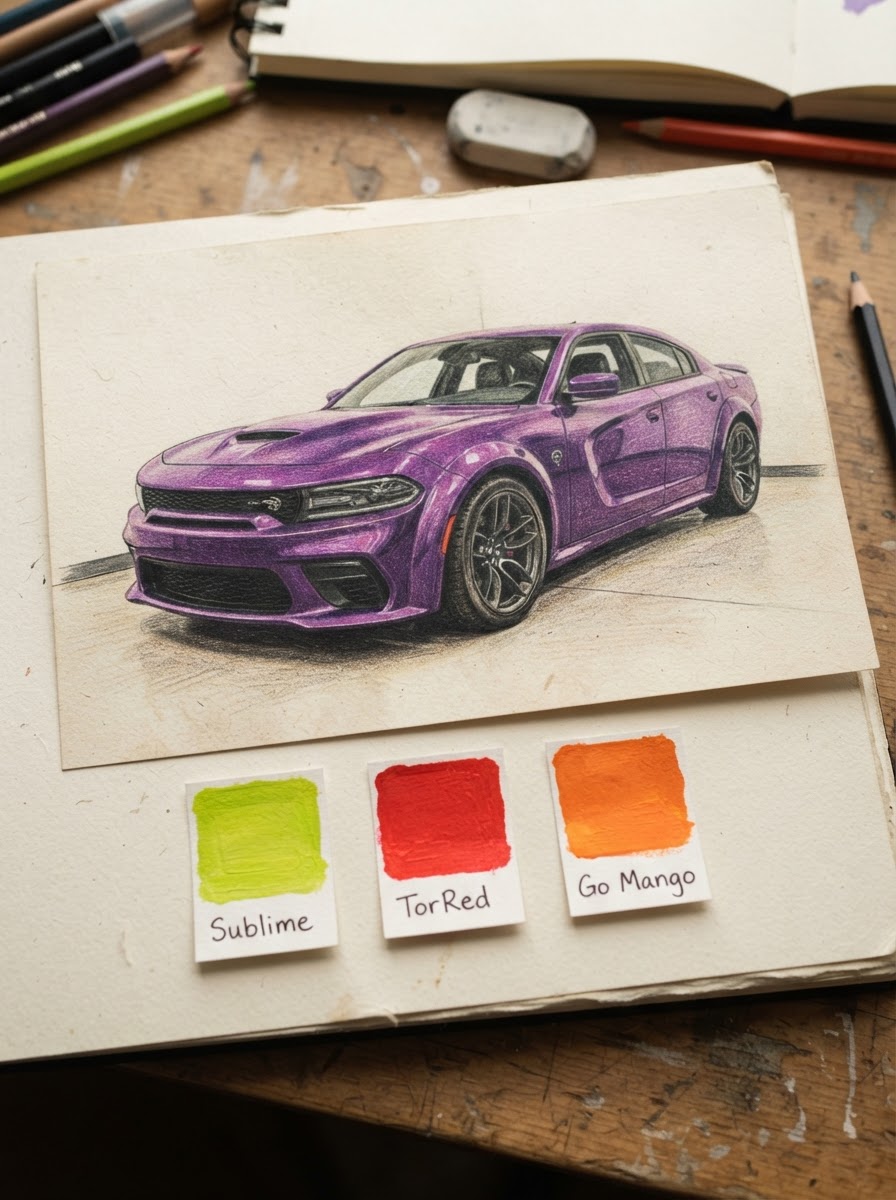
Modern Chargers come in genuinely loud “High Impact” colors: Sublime (a yellow-green that looks almost radioactive under direct light), F8 Green, TorRed (a red with an orange undertone, brighter than the standard red), Go Mango, and Hellraisin, a purple so dark it reads nearly black indoors and shifts violet in sunlight. If you’re drawing a classic 1970 Charger instead, look up Plum Crazy or Hemi Orange, the original High Impact colors from that era. Picking one of these over generic “red” or “orange” does more for the finished piece than another hour of shading.
Rendering glass and chrome believably
Glass on a Charger should almost never be solid black or flat gray. Leave a lighter band near the top of the windshield to suggest sky reflection, then drop to near-black at the bottom edge where the interior shows through. Chrome trim (the door handles, the classic-era bumper) works the same way it did on the Hellcat scoop: alternate bright white highlights directly against near-black shadow with almost no gray in between, since that sharp contrast is what your eye reads as polished metal rather than plastic.
Color choices done right make the drawing look intentional. What often undoes all of that work, though, are a handful of small structural mistakes that show up over and over in beginner Charger drawings.
Common mistakes beginners make
Most Charger drawings don’t fail because of bad shading. They fail because of a handful of structural errors that repeat across almost every beginner attempt I’ve seen (and made myself, more than once).
Round wheels instead of tilted ellipses is the most common one, already covered above, but it’s worth repeating because it’s the single biggest tell that a drawing was rushed. Second is asymmetry: one headlight sits noticeably higher than the other, or the two wheel ellipses tilt at different angles. Fix it by lightly sketching a centerline down the hood and checking both sides against it before you commit to ink or dark graphite.
Third, and this one’s sneaky, is an oversized greenhouse. Beginners tend to draw the cabin and windows too tall relative to the body, which instantly reads as a cartoon car rather than a real one, because animated cars exaggerate cabin size for character appeal. Real Chargers, especially modern ones, have a surprisingly low, compressed greenhouse. If your drawing looks a little too cute, that’s usually why.
Last: drawing every panel line at the same weight. A single uniform line thickness flattens the whole car. Character lines and shadow-casting creases should be your darkest, heaviest strokes; construction guides and minor surface details should stay light. That hierarchy alone does more for realism than another pass of shading.
Catch these four and your next Charger drawing will look dramatically more confident, even before you touch color.
The same discipline that keeps a car sketch believable also helps with a 3D pencil drawing illusion on paper, especially around shadow and contact points.
Conclusion
Proportion beats detail, every time. Get the wheelbase, the beltline, and the character lines right, and even a loosely shaded Charger will read as unmistakably a Charger. Skip that groundwork and no amount of chrome highlights or Hellraisin paint will save the drawing.
If you only take one habit from this guide, make it the wheel-ellipse-first approach from the step-by-step section. It’s a small thing, borrowed from academic figure drawing, but it fixes more beginner mistakes than any shading technique will.
Try one full drawing from here, start to finish, on whichever generation caught your eye. Then try the same car from a different angle. That’s where the proportions actually click into muscle memory instead of just theory.
For a softer classic shape, pair this muscle-car study with a VW Beetle sketch tutorial. The Beetle forces you to control arcs and friendly oval headlights instead of the Charger’s long hood and squared-off stance.
For a second American muscle-car study, use this Ford Mustang drawing guide. The long hood carries over, but the Mustang’s two-door fastback roof and shorter rear deck create a different balance from the Charger’s longer body.
FAQ
Q: What is the easiest way to draw a Dodge Charger for beginners?
A: Start with the classic 1968–70 generation from the side profile. Its panels are flatter than modern LX-body Chargers, so you’re not fighting complex surfacing while you’re still learning proportion. Block the wheel ellipses first, lock in a wheelbase-to-wheel ratio of roughly eight-to-one for the classic car, then build the body around those two fixed points instead of freehanding the outline first.
Q: How do you draw a Dodge Charger Hellcat step by step?
A: Follow the same five-step build as any Charger (silhouette, front end, roof and doors, wheels, shading), but treat the hood scoop as its own three-part structure: a raised center spine with two intake shoulders dropping away at a sharper angle. Render the matte vent openings almost flat black against a glossy hood for contrast. That contrast is what makes the Hellcat’s 707-horsepower scoop look functional instead of decorative.
Q: What pencil grade is best for muscle car drawings?
A: A range from HB to 6B covers most of it. HB and 2B work for construction lines and mid-tones; 4B and 6B handle deep shadow under the car and inside wheel wells. A Staedtler Mars Lumograph set gives you that whole range in one box for under $20, which is enough for dozens of drawings before you’d need to replace anything.
Q: How do you get the proportions of a Dodge Charger right?
A: Measure your wheelbase in wheel-widths before drawing the body: roughly eight wheel-diameters for a classic 1968–70 Charger, closer to six for a modern Hellcat on 20-inch wheels. Then check your beltline height and keep the greenhouse (cabin glass) compressed rather than tall, since an oversized greenhouse is what makes a drawing read as cartoonish instead of realistic.
Q: What are the official Dodge Charger paint colors?
A: Modern High Impact colors include Sublime, F8 Green, TorRed, Go Mango, and Hellraisin, a purple so dark it looks almost black indoors. Classic 1970-era Chargers came in their own High Impact lineup, including Plum Crazy and Hemi Orange. Using one of these by name instead of generic “red” or “purple” makes a colored drawing feel far more specific and intentional.
Q: Can you draw a Dodge Charger digitally on an iPad?
A: Yes, and it transfers well. An iPad with Apple Pencil and Procreate’s default “6B Pencil” brush behaves close enough to real graphite that every technique in this guide, from wheel ellipses to cross-hatched shadow, works the same way. The main advantage is layers: you can isolate the Hellcat scoop’s sharp highlight-to-shadow jumps and adjust them without redrawing the whole hood.
Q: What’s the difference between drawing a Charger and a Challenger?
A: The Challenger is a two-door coupe with a longer, flatter hood and a more upright, retro greenhouse borrowed directly from the 1970 original. The Charger (in its modern form) is a four-door with a lower beltline and more aggressively sculpted rear haunches. Wheelbase math and shading technique carry over between the two, but the Challenger’s proportions read closer to the classic-era Charger than the modern four-door does.
If drawing complex metal bodies feels stiff or tiring, it is a great time to shake up your muscle memory. Try a few quick, freeform drawing exercises in your sketchbook to loosen up your hand and restore your creative flow before starting your next car sketch.
- 549shares
- Facebook0
- Pinterest546
- Twitter3
- Reddit0