A strong F1 car drawing starts with proportion, not tiny sponsor logos. Block in the low body, large exposed wheels, narrow nose, cockpit, front wing, rear wing, and side-pods first. Once that skeleton feels right, the Formula 1 details start to look intentional instead of decorative.
Use this guide when you want to draw a Formula 1 car from a side view, three-quarter view, or top view. The same order works for Ferrari, Red Bull, McLaren, Mercedes, Aston Martin, and classic Formula 1 sketches: structure first, aerodynamic pieces second, livery last.
- F1 car drawing: quick construction guide
- Key Takeaways
- Understanding Formula 1 car design for drawing
- Tools for F1 car drawing
- Common F1 car drawing mistakes
- How to draw an F1 car step by step
- Realistic Formula 1 drawing techniques
- How to Draw an F1 Car Step by Step
- Improve your Formula 1 car art
- Formula 1 Car Drawing FAQ
- Is it hard to draw a Formula 1 car?
- How do you draw an easy F1 car for beginners?
- How do you draw a specific team's car, like a Red Bull, Ferrari, or McLaren?
- What's the easiest way to draw an F1 car from a top view?
- What tools do you need to draw a Formula 1 car?
- How many wheels does an F1 car have, and how should you draw them?
- More car drawing practice
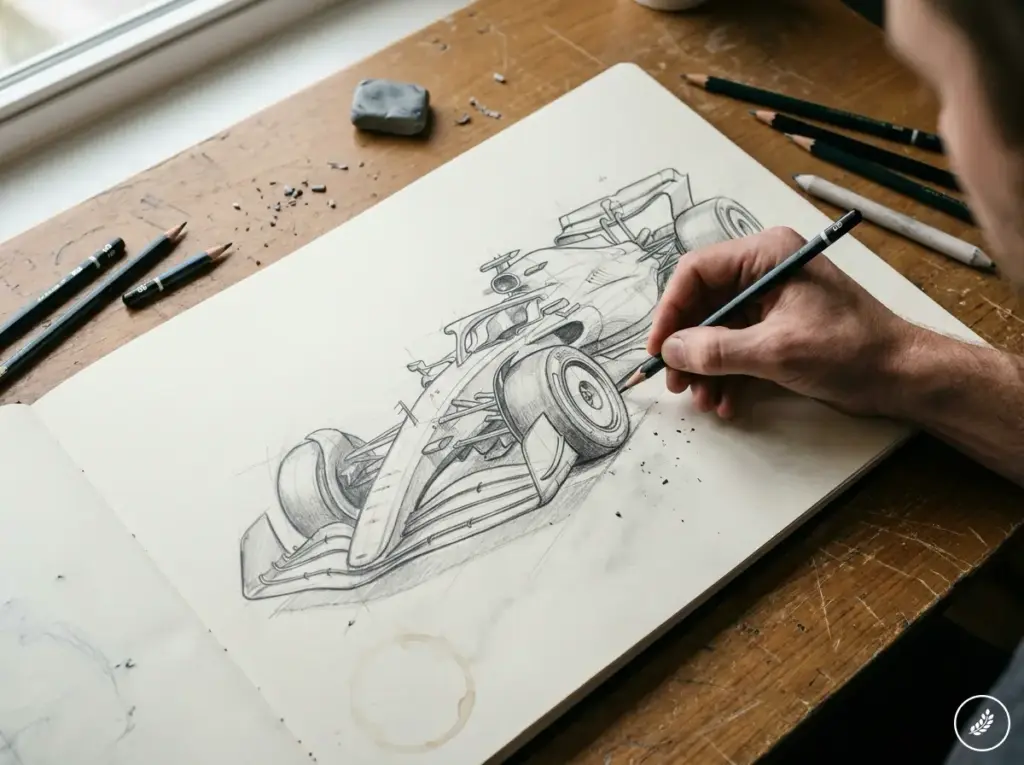
I like to keep the first pass almost embarrassingly simple: a baseline, four wheel ellipses, a long chassis, and two wing blocks. That rough map gives you enough confidence to add the halo, suspension arms, air box, vents, shadows, and team colors without losing the stance.
F1 car drawing: quick construction guide
For a clean F1 car drawing, build the sketch in this order: ground line, wheel ellipses, low body, narrow nose, cockpit, front wing, rear wing, side-pods, suspension arms, then livery and shading. Keep the car long and low. The drawing should read as fast before it reads as detailed.
| Stage | What to draw | What to check |
|---|---|---|
| 1 | Ground line and wheelbase | The wheels sit on the same baseline and the car feels long. |
| 2 | Body, nose, and cockpit | The cockpit is small, and the nose is narrow compared with the tires. |
| 3 | Front and rear wings | The front wing is wide and low; the rear wing is higher and cleaner. |
| 4 | Sidepods and airbox | The body tapers toward the rear instead of staying boxy. |
| 5 | Suspension and vents | Thin mechanical lines support the big exposed wheels. |
| 6 | Shading and livery | Darken under the chassis and keep team colors in bold blocks. |
Key Takeaways
- Lock the big shapes first: wheelbase, body height, exposed tires, nose, and wing placement.
- Keep a real F1 reference open so the nose, side-pods, cockpit, and wings do not drift into generic race-car shapes.
- Add color only after the sketch works; team liveries look best when they sit on clean, believable bodywork.

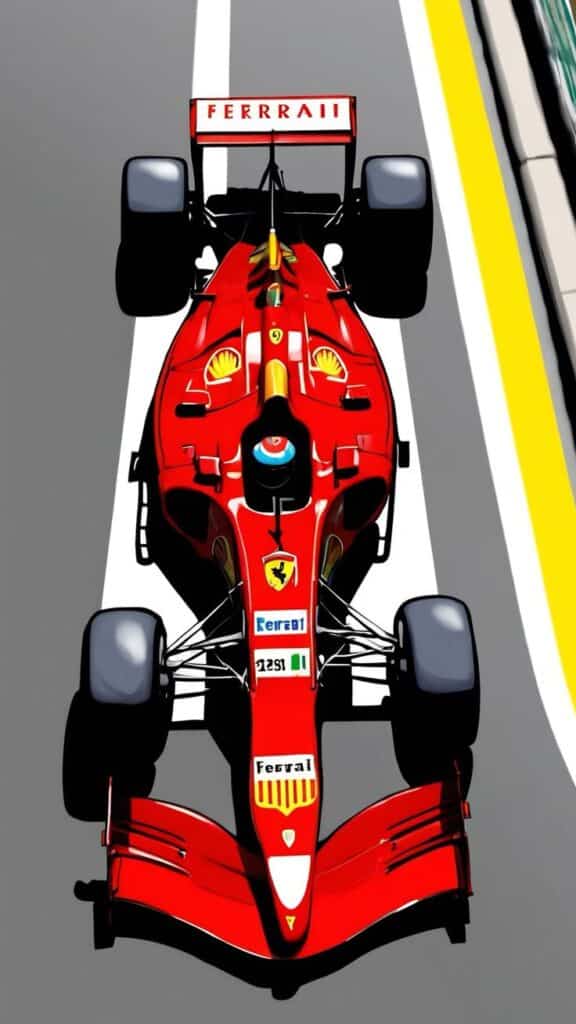
Understanding Formula 1 car design for drawing
Formula 1 cars are shaped by speed first. Every surface has a job: guide air, cool the power unit, add down force, or reduce drag. For artists, that means the aerodynamic principles are not background trivia; they explain why the car looks so low, sharp, and stretched.
Key Features of Formula One Cars
An F1 car is a single-seat racing machine, so the cockpit stays tiny compared with the tires and body. That contrast is useful on paper: small driver area, big wheels, long floor, and wings that look almost oversized.
A modern Formula 1 car sits under strict minimum-weight rules, so the body looks lean rather than bulky. This lightweight construction relies heavily on carbon fiber composites for strength without unnecessary mass.
Power comes from hybrid powertrains consisting of a 1.6-liter V6 turbocharged engine paired with energy recovery systems. For drawing, the exact power figure matters less than the visual consequence: tight packaging, huge cooling demands, and bodywork shaped around airflow.
The wide, low profile is the first thing your viewer reads. Keep the cockpit protected but small, then let the wheels and wings carry most of the visual weight.
Aerodynamics and Wings
Aerodynamics is the single most important thing to understand before you draw an F1 car. The front and rear wings generate approximately 60% of the car’s total down force, literally pushing the vehicle into the track.
The front wing is not just a flat plank. Draw it as layered planes with endplates, because it splits air around the tires and sends flow toward the rest of the car.
Rear Wing Components:
- Main plane
- DRS (Drag Reduction System)
- Endplates
- Beam wing
Floor tunnels and the rear diffuser create ground effect, so the car looks planted even before you shade it. In a drawing, a dark shadow under the floor helps sell that low, sealed-to-the-track feeling.
Bargeboards and turning vanes manipulate airflow around the side-pods, cooling the power unit while minimizing turbulence. Every surface of an F1 car serves an aerodynamic purpose.
The Importance of Body Structure
The monocoque chassis is the hard central shell around the driver. You do not need to draw every layer of carbon fiber, but you should keep this middle section compact, strong-looking, and clean.
Crash structures sit at the front, rear, and sides, while the halo wraps around the driver area. Even in a simple sketch, the halo is worth adding because it instantly dates the car as modern F1.
Sidepods house radiators and cooling systems while being shaped to optimize airflow. Their shape is always a trade-off between cooling the engine and keeping drag low.
When drawing an F1 car, pay special attention to how the body tapers toward the rear. This “coke bottle” shape accelerates airflow toward the diffuser, enhancing down force.
Body panels feature precision-engineered slots, vents and winglets that manage turbulence. These seemingly decorative elements serve critical functions in controlling vortices and pressure zones around the car.
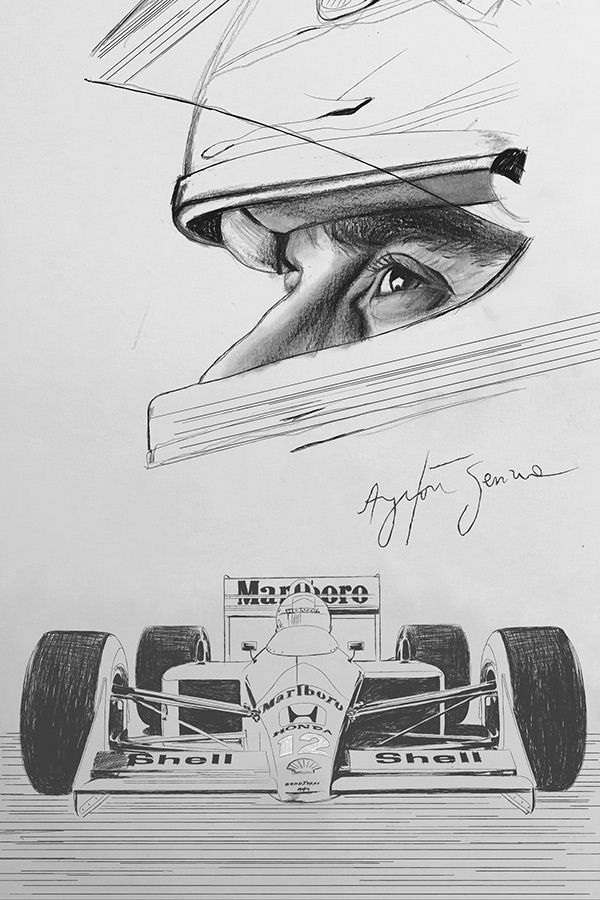
Tools for F1 car drawing
You do not need expensive tools for a Formula 1 car drawing, but precision helps. Quality supplies make a significant difference in capturing the sleek aerodynamics and technical details that define these engineering marvels.
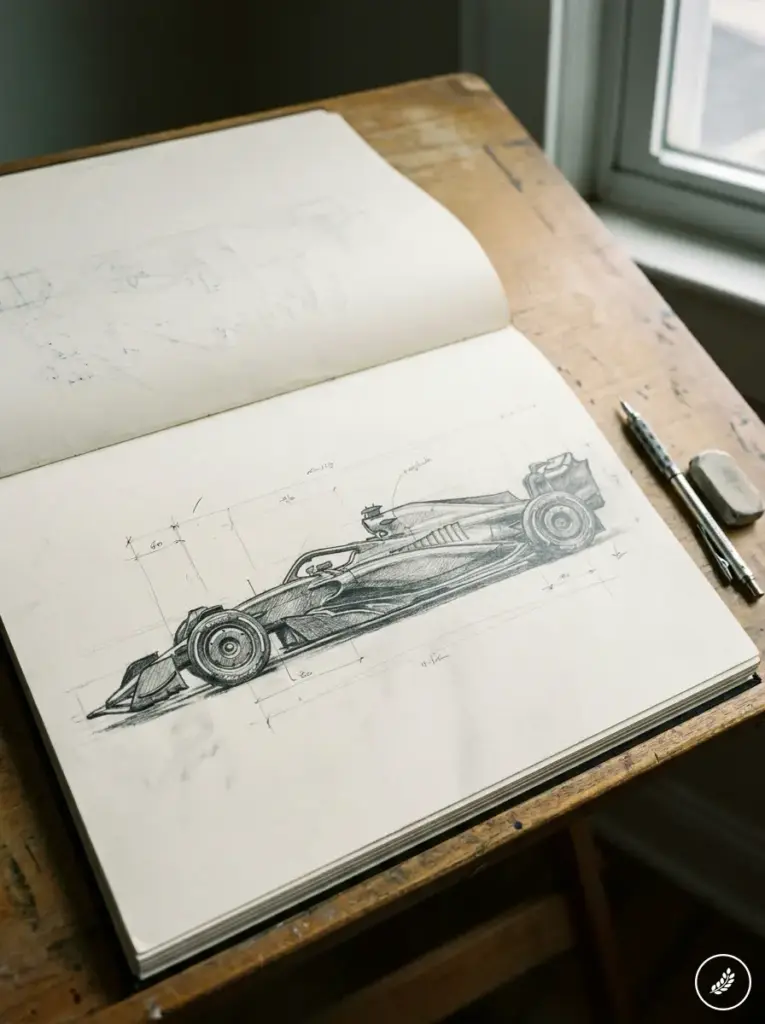
Choosing the Right Paper
Paper choice matters because F1 drawings involve lots of correction. Medium to heavyweight drawing paper handles sketching, erasing, and shading well. Bristol board is smoother if you want crisp suspension arms, wing edges, and tiny body details.
Sketch pads in A3 or A4 size give you adequate space to capture the long, streamlined proportions of F1 cars. For preliminary sketches, standard printer paper works well before transferring to higher quality stock.
Use a little tooth for graphite so the pencil has something to grip. If you plan to use markers, switch to bleed-proof paper so wing edges, tires, and livery shapes stay sharp.
Using Colored Pencils and Markers
Colored pencils offer excellent control for F1 car details. Professional-grade pencils like Prismacolor or Faber-Castell provide rich pigmentation for team liveries and sponsor logos. Layer colors gradually to achieve realistic metallic and carbon fiber textures.
For vibrant team colors, alcohol-based markers like Copics deliver smooth coverage on large surfaces. Water-based markers work well for beginners due to their affordability and forgiving nature.
Create depth by using darker shades in shadow areas beneath the car and wings. Light-colored pencils help add highlights to curved surfaces and reflective elements.
When drawing sponsor decals, fine-tipped markers ensure precision. Keep a white gel pen handy for adding highlights to tires, helmet visors, and reflective surfaces.
Recommended Drawing Equipment
Mechanical pencils (0.5mm and 0.7mm) provide consistent line weight for initial sketches and technical details. Include a range of graphite hardness from 2H (lighter) to 2B (darker) for varying line intensity.
A kneaded eraser lifts graphite gently, and a vinyl eraser cleans harder guide lines. A ruler and French curve help with wings, floor edges, and the long arcs of the body.
Circle templates are useful for wheels, brake details, and small mechanical parts. Tracing paper also helps if you want to study a reference without copying every line too early.
Digital tools like drawing tablets offer alternatives for those comfortable with technology. Programs like Procreate and Adobe Illustrator provide layers and precision tools ideal for technical F1 illustrations.
Common F1 car drawing mistakes
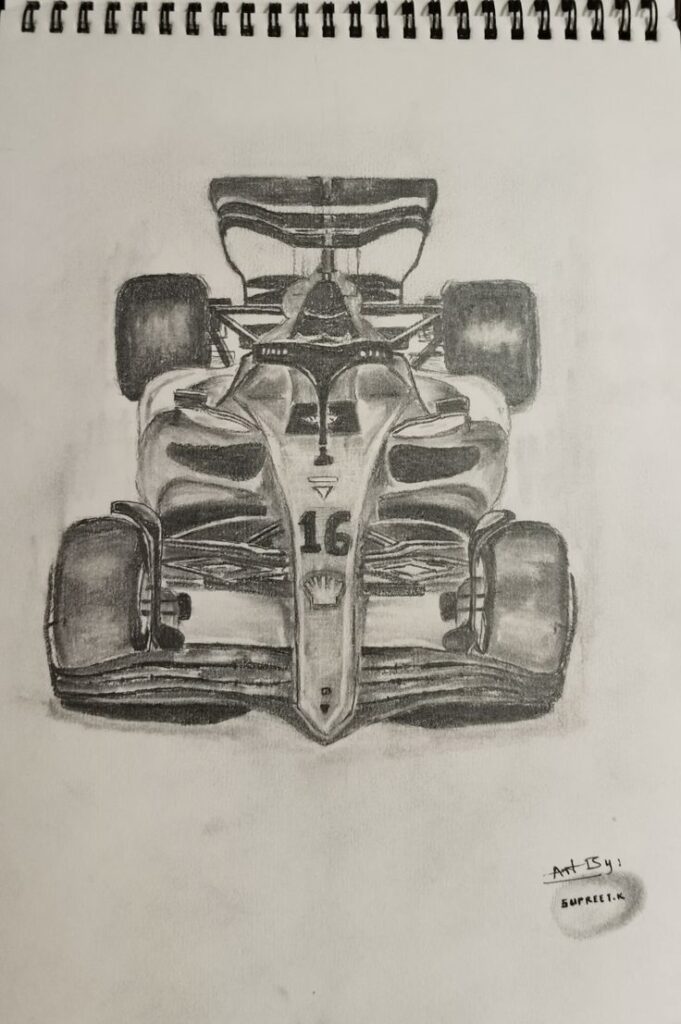
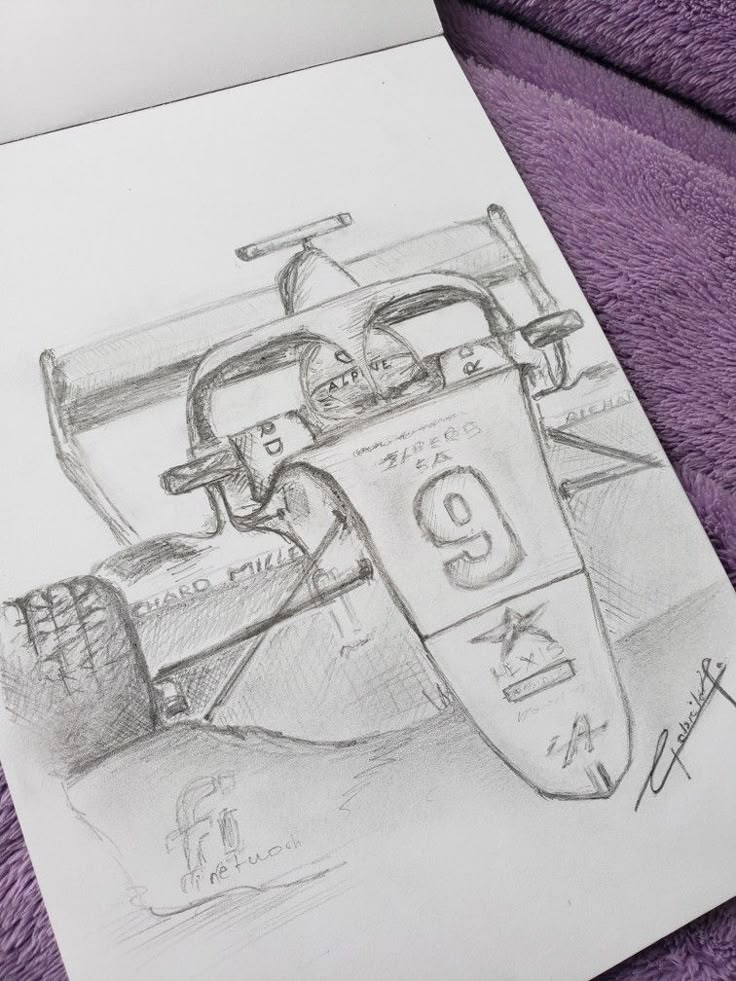
Most beginner Formula 1 drawings fail for the same reason: the details arrive before the proportions. If the tire size, wheelbase, nose, and wing placement are wrong, extra vents and sponsor logos will only make the problem louder.
- Small wheels: F1 tires are huge and exposed, so make them a major part of the silhouette.
- Flat wings: show at least a little thickness, endplate shape, or layered structure.
- Boxy side-pods: taper the body toward the rear so the car feels aerodynamic.
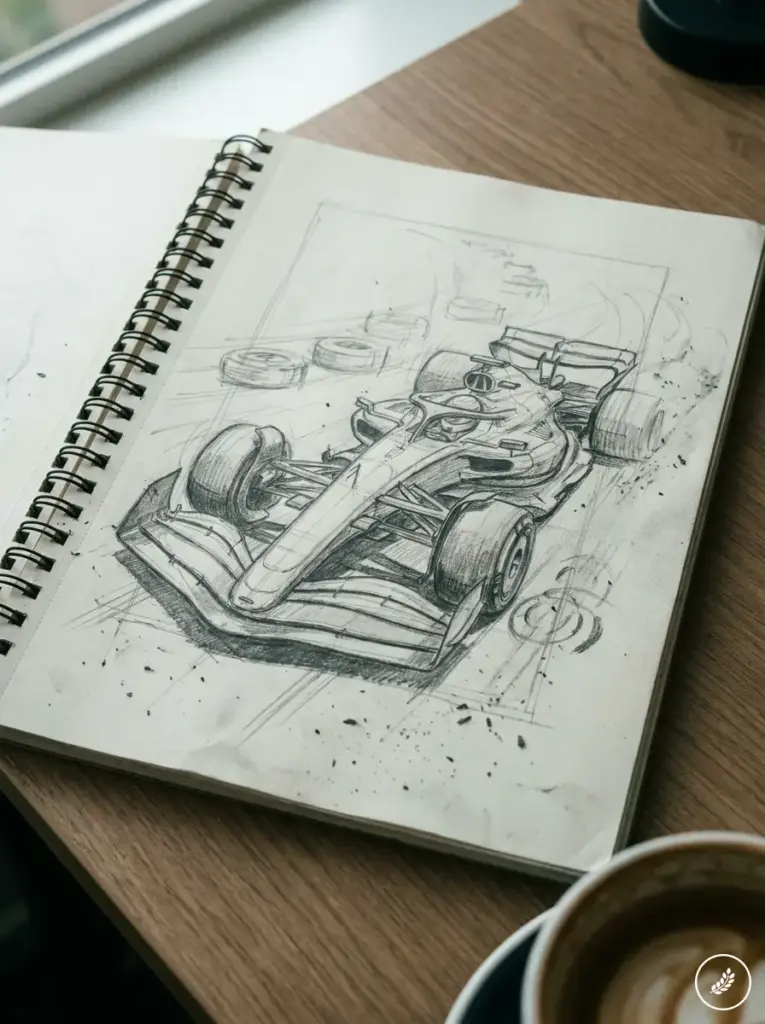
- Random livery lines: use reference photos for Ferrari, Red Bull, McLaren, Mercedes, or any team you want to draw.
How to draw an F1 car step by step
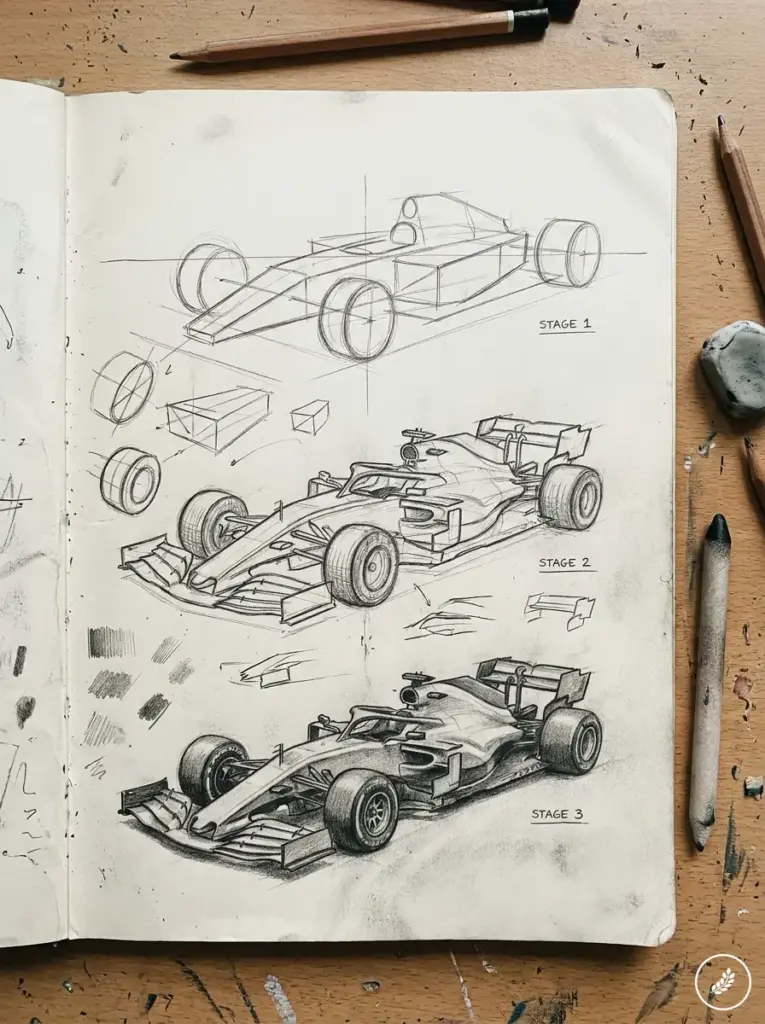
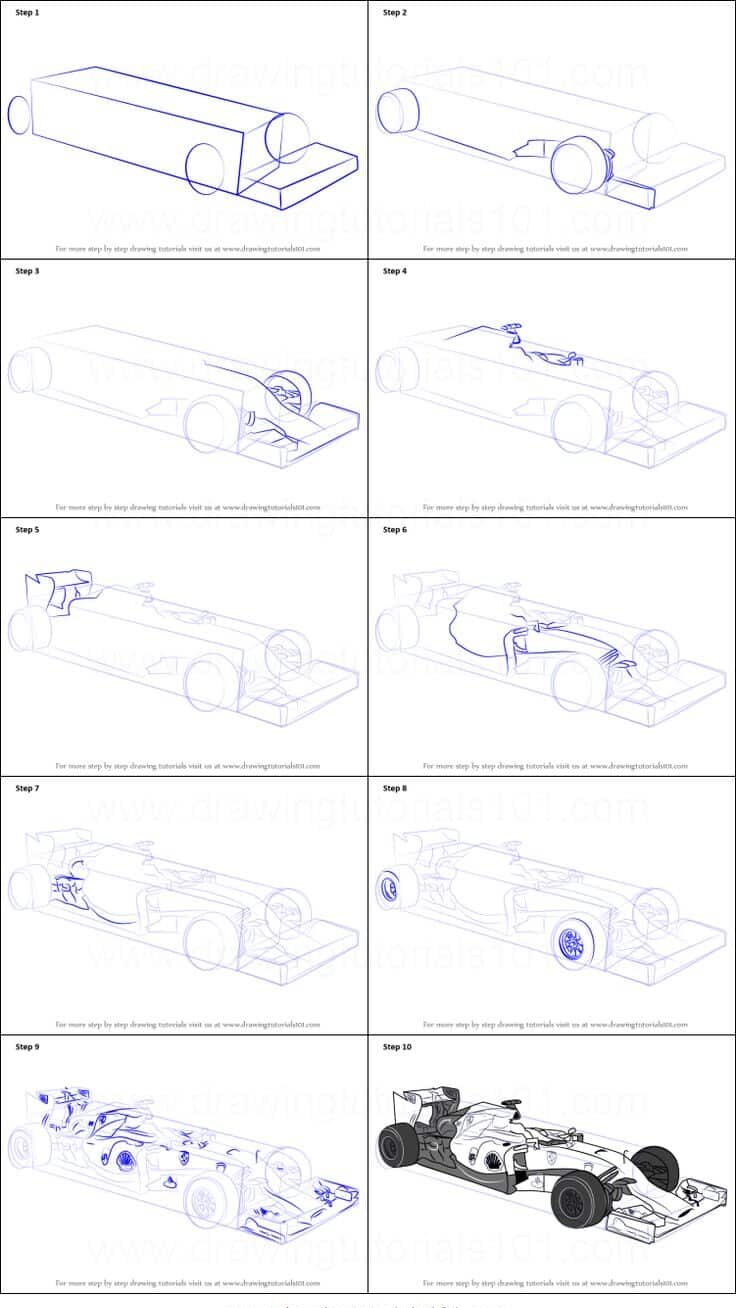
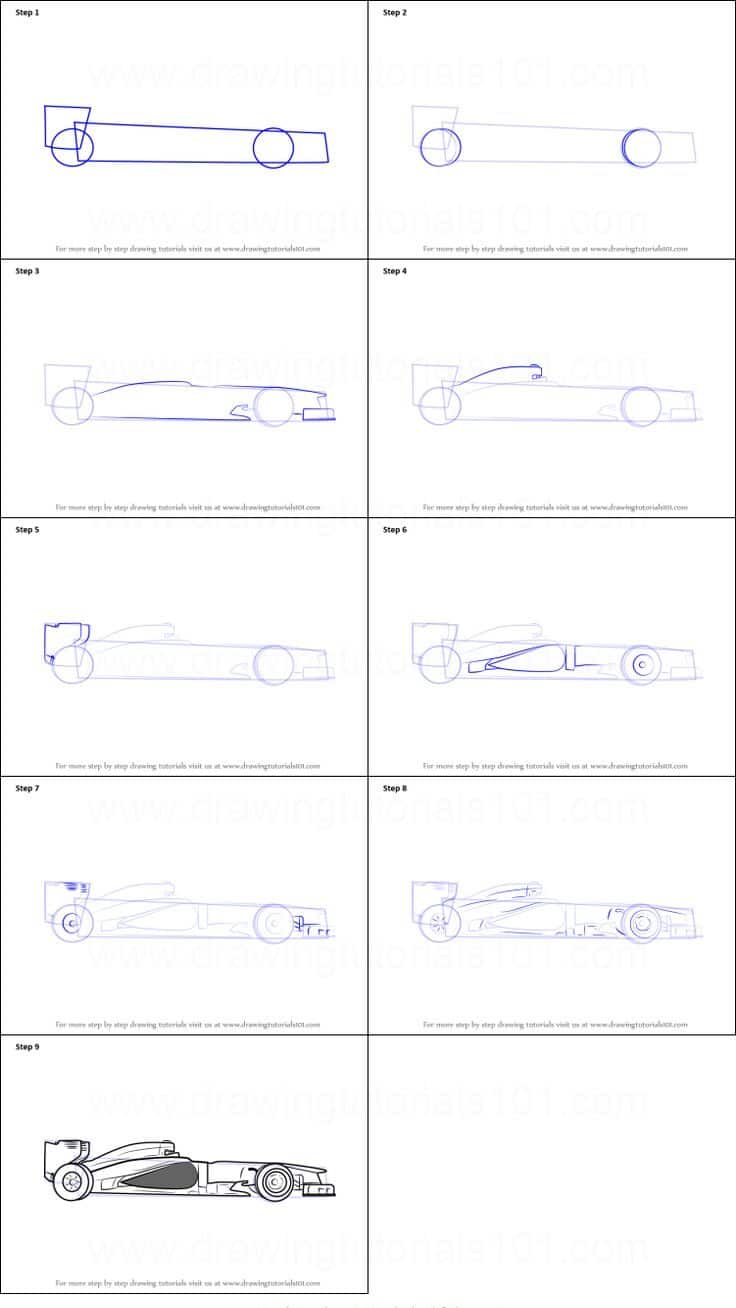
This section turns the F1 car into a sequence you can actually draw: body, wheels, wings, cockpit, details, then finish. Keep checking the automotive drawing fundamentals as you go.
Sketching the Basic Outline
Begin with light pencil strokes to establish the fundamental shape of the F1 car. Draw a horizontal line across your paper to serve as your ground reference.
Sketch a low, elongated oval shape for the main body, making sure it’s slightly wider at the front than the rear. This forms the base of your car’s chassis.
Add a smaller, narrow rectangle at the front for the nose cone. It should feel long and sharp, but not so thick that it looks like a road-car hood.
Sketch the side-pods beside the cockpit. Think of them as air-guiding shapes, not simple boxes; they swell near the middle and tighten toward the rear.
Drawing Wheels and Details
Add four wheel ellipses: two front, two rear. Make them large and exposed, because the tires are one of the clearest signals that this is an F1 car.
Draw the suspension arms connecting the wheels to the car body. These thin, angled lines show how the wheels attach to the chassis.
Sketch the front and rear wings next. The front wing sits wide and low; the rear wing is higher, simpler, and easier to read from a distance.
Add the air intake above and behind the driver’s head. In side view it often reads like a small triangular scoop, and it helps break up the long body line.
Refining the Body and Cockpit
Define the cockpit area with a small, oval-shaped opening. This is where the driver sits, with only their helmet visible.
Add details to the cockpit such as the halo safety device – the curved protective structure that surrounds the driver’s head. This became mandatory in F1 since 2018.
Refine the side-pods by adding cooling vents and aerodynamic elements. These complex shapes help direct airflow around the car.
Draw the floor line and rear diffuser. Keep this area dark and tucked under the car so the body feels close to the ground.
Adding Final Lines and Touches
Go over your sketch with darker, more confident lines once you’re satisfied with the basic structure. Erase unnecessary guide lines for a cleaner look.
Add car numbers, sponsor blocks, and team livery patterns only after the sketch is clean. Color can add personality, but it should not hide weak proportions.
Include technical details such as brake ducts, barge boards, and mirror housings. These small elements add authenticity to your F1 car drawing.
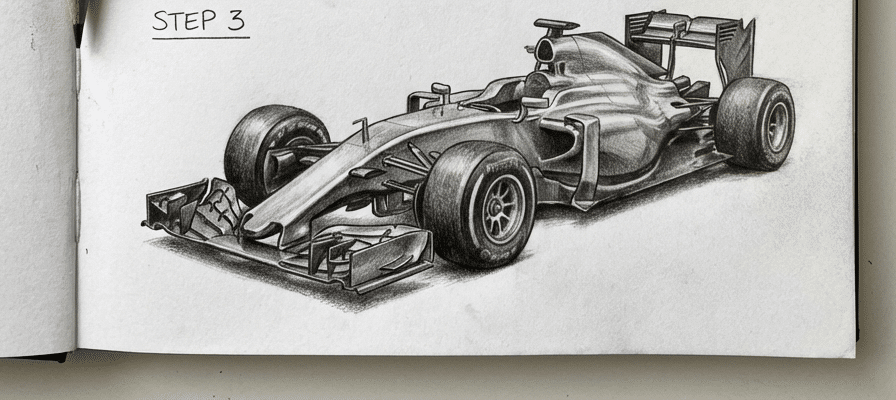
Finish with shading to create depth and dimension. Add shadows beneath the car and in recessed areas to make your drawing pop. Consider using colored pencils or markers to bring your F1 car to life with team colors.
Realistic Formula 1 drawing techniques
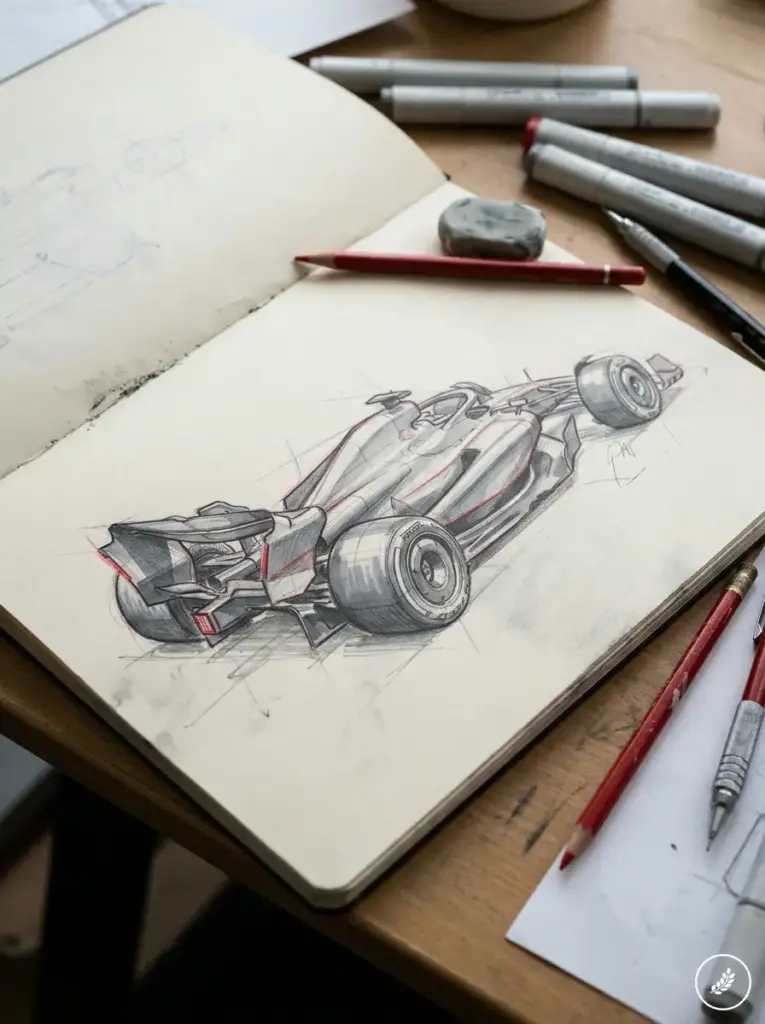
A realistic Formula 1 drawing comes from three habits: consistent perspective, confident shading, and enough technical detail to feel believable. You do not need every bolt; you need the shapes that make the car read as fast, low, and engineered.
Shading and Depth for 3D Effects
Shading gives the F1 car its volume. Pick one light source and stick with it, especially on the tires, wings, cockpit rim, and curved sidepod surfaces.
Use cross-hatching techniques for darker areas like wheel arches and underneath the chassis. This creates texture while adding depth to your drawing.
For glossy or carbon-fiber areas, use sharp highlights and tight, controlled shading. A few clean value changes usually look better than a busy texture pattern everywhere.
Gradual transitions between light and dark areas create the curved surfaces characteristic of aerodynamic elements. Pay special attention to the way light interacts with the front and rear wings.
Contrast is your ally – darker shadows near the ground create a grounding effect that makes the car appear to sit naturally on the track surface.
Working with Perspectives
Perspective changes the whole mood of the sketch. Side view is best for learning; three-quarter view feels more dramatic because you see the nose, sidepod, cockpit, and wheel depth at the same time.
Start with basic perspective guidelines to ensure proper proportions. A slight low angle perspective makes the car appear more aggressive and powerful on paper.
Pay careful attention to wheel ellipses – they should be consistent with your chosen perspective. Incorrect wheel shapes are a common giveaway of amateur drawings.
Use vanishing points to guide the structural lines of the car. This technique ensures that parallel lines converge properly according to perspective rules.
Draw the car’s centerline first as a reference for symmetry. Remember that F1 cars have asymmetrical elements that must be accurately represented from your chosen viewpoint.
Incorporating Technical Drawings
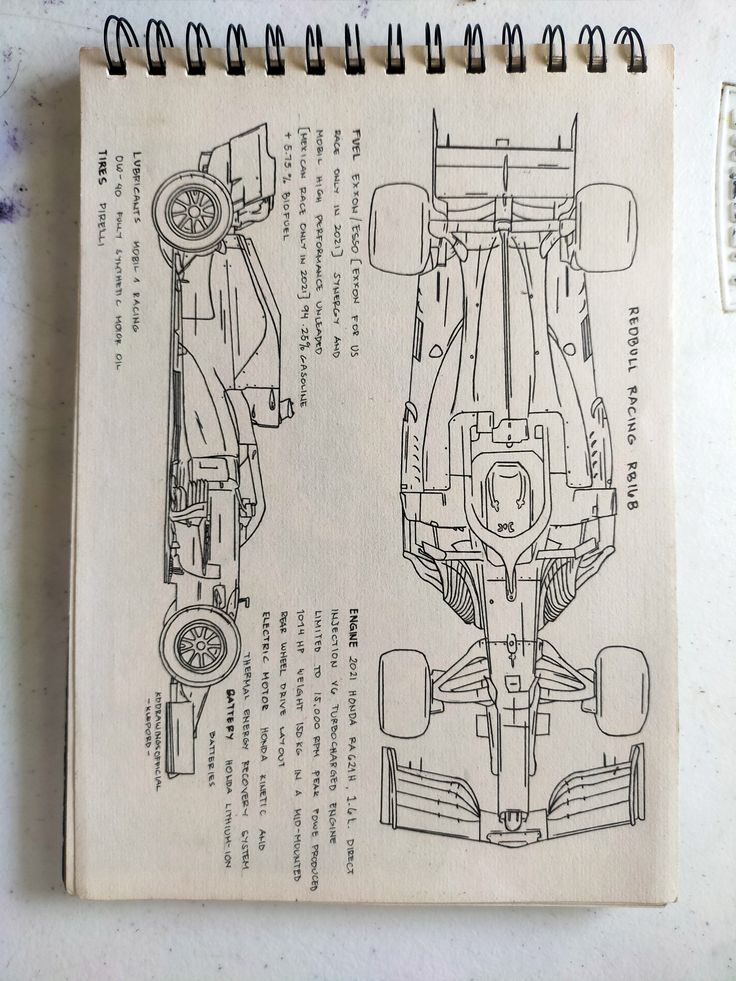
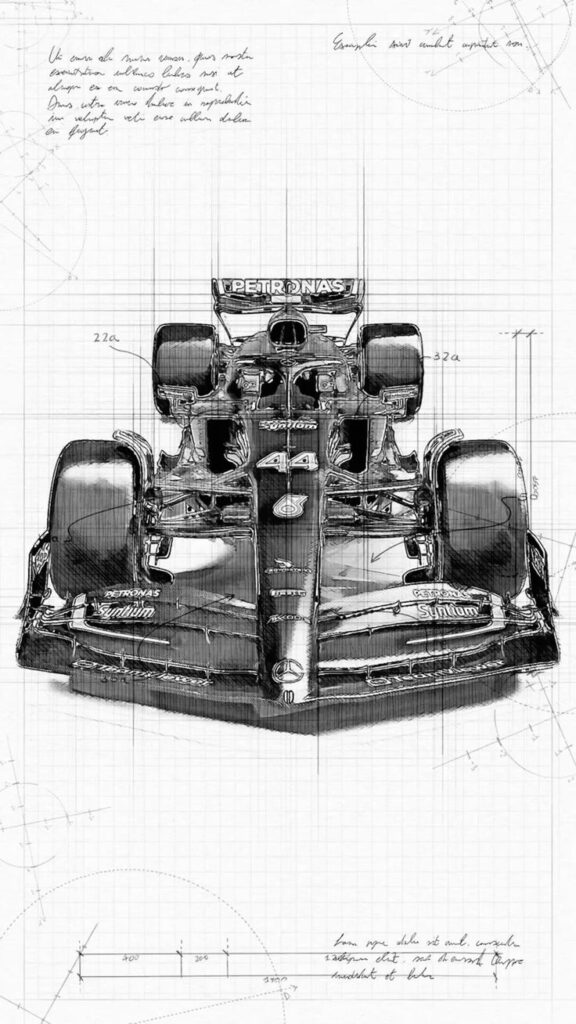
Blueprint-style references are especially helpful for F1 proportions. A top, side, and front view will show you how wide the wings are and how sharply the body tapers.
Study the engineering aspects of F1 cars to better represent their complex aerodynamic components. Each element serves a purpose, and understanding this helps create more authentic drawings.
Focus on getting key technical features correct: the monocoque structure, side-pods, bargeboard area, and complex front and rear wing assemblies. These define the car’s identity.
Use team-specific references when you draw a current grid car. Ferrari, Red Bull, McLaren, Mercedes, and Aston Martin all solve the same design problem with slightly different shapes.
Incorporate cutaway elements selectively to showcase internal components like the power unit or suspension geometry. This adds technical interest without overwhelming your drawing.
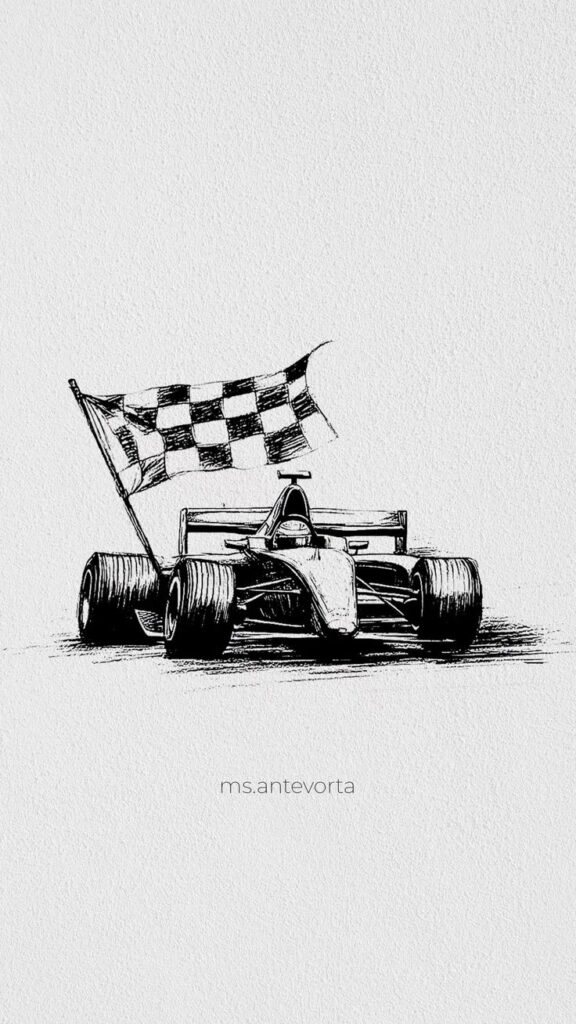
How to Draw an F1 Car Step by Step
Drawing a Formula 1 car can be a rewarding challenge that combines precision and creativity. Follow these steps to create a detailed and realistic F1 car illustration:

- Start with Basic Shapes: Begin by sketching simple shapes like ovals and rectangles to outline the main body, cockpit, and nose cone of the car. This helps establish the overall proportions and layout.
- Outline the Wheels: Draw four circles to represent the tires, making sure to position them correctly relative to the body. F1 tires are large and exposed, so pay attention to their size and placement.
- Add the Wings and Aerodynamic Elements: Sketch the front and rear wings, side-pods, and air intake. Use straight and curved lines to capture the complex shapes that contribute to the car’s aerodynamics.
- Refine the Body Shape: Smooth the first shapes, add the cockpit opening, halo, and cooling vents, then taper the rear so the body does not stay boxy.
- Draw Suspension and Technical Details: Add suspension arms, brake ducts, mirrors, and a few small mechanical parts where they support the main silhouette.
- Ink and Clean Up: Once satisfied with your pencil sketch, go over the lines with a darker pen or marker. Erase unnecessary guidelines to create a clean drawing.
- Add Shading and Color: Use shading techniques to give depth and dimension, highlighting the car’s curves and surfaces. Apply colors to replicate team liveries and sponsor logos for authenticity.
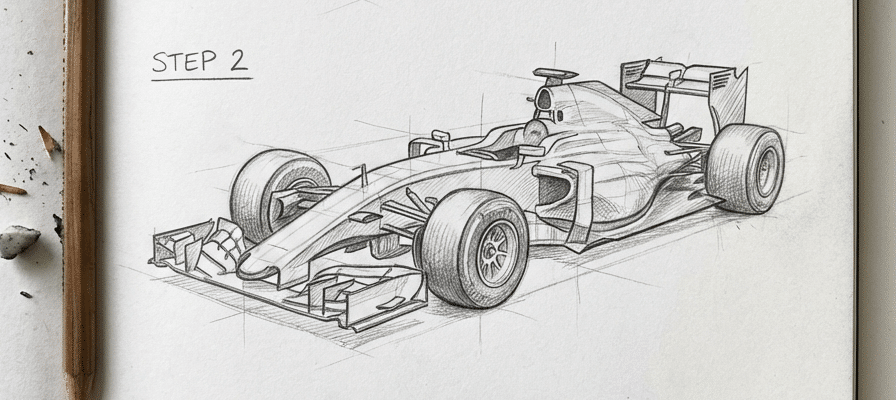
By following these steps, you’ll take a Formula 1 drawing from a rough sketch to a finished, detailed illustration. Compare your work against real reference photos as you go so you catch proportion mistakes early, before they get inked in.
Improve your Formula 1 car art
Improving a Formula 1 car drawing is mostly about checking proportions before you polish the surface. The right references and consistent improvement strategies will elevate your artwork from basic sketches to impressive technical illustrations.
Selecting Reference Images
Good references save time. Choose photos that clearly show the car model you want, then keep at least one side view and one three-quarter view nearby.
Official F1 team websites and motorsport publications offer excellent high-resolution images that reveal important technical details. Consider using images of stationary cars for your first attempts, as they’re easier to study than cars in motion.
Blueprint-style technical drawings can provide precise proportions and measurements. These are particularly valuable when attempting cutaway illustrations that show internal components.
Classic F1 cars are worth sketching too. Older cars have simpler wings, different tire proportions, and cleaner body lines, so they teach a different kind of restraint.
Tips for Continuous Improvement
Study F1 technical illustrators when you want to get serious about accuracy. Giorgio Piola is a useful reference because his drawings explain how the car works, not only what it looks like.
Practice individual car components separately before attempting complete vehicles. Wings, tires, and cockpit details all benefit from focused practice sessions.
Share the sketch with artists or F1 fans if you can. Fresh eyes will catch crooked wheel ellipses, thick wings, or a nose that drifted off-center before you spend hours rendering it.
Try different mediums as you progress. While beginners might start with pencil sketches, experimenting with digital tools can help capture the sleek, technical nature of modern F1 cars.
Document your progress by keeping all your drawings. Reviewing earlier work helps you recognize how far your skills have developed.
Once the F1 proportions are working, it can help to study marker illustration ideas where crisp edges, layered color, and small mechanical details have to stay readable.
Formula 1 Car Drawing FAQ
Is it hard to draw a Formula 1 car?
It’s harder than drawing a road car because the proportions are so extreme, but it’s manageable if you build it in stages. Block in the low, wide body and the oversized wheels first, then add the wings and cockpit details last. Most beginners struggle because they try to draw the wings and vents before the basic shape is right.
How do you draw an easy F1 car for beginners?
Simplify the shapes: an elongated oval for the body, a narrow rectangle for the nose, four circles for the wheels, and two flat wing shapes front and rear. Skip the sidepod vents, bargeboards, and cutaway details until you’re comfortable with the basic silhouette.
How do you draw a specific team’s car, like a Red Bull, Ferrari, or McLaren?
The construction steps stay similar across teams. What changes is the livery and a few team-specific shapes, so pull up a current reference before coloring a Ferrari, Red Bull, McLaren, Mercedes, or Aston Martin.
What’s the easiest way to draw an F1 car from a top view?
From the top, the front wing is nearly as wide as the car and the rear wing is narrower and set further back, with the body tapering in between. Start with a centerline for symmetry, then mirror each shape on both sides so the car doesn’t end up lopsided.
What tools do you need to draw a Formula 1 car?
A mechanical pencil (0.5mm works well), a kneaded eraser, a ruler for the straight structural lines, and a circle template for the wheels will cover the basics. Add colored pencils or alcohol markers once you’re ready to render team liveries.
How many wheels does an F1 car have, and how should you draw them?
Four, all exposed rather than covered by bodywork. Draw them as large ellipses whose shape matches your chosen perspective; wheel ellipses that don’t match the rest of the drawing’s angle are one of the fastest ways to make an F1 sketch look off.
More car drawing practice
Stay in the same drawing cluster after this F1 car drawing: start with how to draw cars step by step for the foundation, compare sports cars to sketch for performance silhouettes, then try the Porsche 911 GT3 RS drawing, Ferrari drawing guide, and Alfa Romeo drawing guide when you want brand-specific surfaces. If you want to understand why the wings and side-pods matter, the F1 car design software page gives the engineering side of the same shapes.
- 10.6Kshares
- Facebook0
- Pinterest10.6K
- Twitter6
- Reddit0