Dinosaur drawing ideas work best when you start with the silhouette, not the teeth. A T. rex needs a heavy head and counterbalancing tail, a Stegosaurus needs those back plates, and a Triceratops needs the horn-and-frill shape before any shading matters.
This guide collects easy dinosaur sketches for kids, beginners, and anyone who wants a relaxed sketchbook page. Most of the ideas begin with circles, ovals, and simple gesture lines, then build toward cute details, pencil texture, or color.
- How to draw dinosaurs with simple shapes
- How to use these dinosaur drawing ideas
- 1) T. rex sketch
- 2) Stegosaurus doodle
- 3) Velociraptor in motion
- 4) Triceratops grazing
- 5) Brachiosaurus silhouette
- 6) Pterodactyl soaring
- 7) Ankylosaurus armor study
- 8) Parasaurolophus headshot
- 9) Spinosaurus aquatic scene
- 10) Diplodocus tail swing
- Dinosaur Coloring Page Inspiration
- Materials Needed
- Basic Drawing Techniques
- Dinosaur drawing ideas FAQ
- Related drawing practice
I like dinosaur subjects because they let you practice design decisions without getting too precious. You can make the same creature cute, realistic, dramatic, or almost logo-like just by changing the proportions and line weight.
How to draw dinosaurs with simple shapes
To draw a dinosaur, start with the biggest body shape, add the head and tail, then place the legs under the weight of the body. After that, add one identifying feature, such as T. rex teeth, Stegosaurus plates, Triceratops horns, or a Spinosaurus sail. Keep the first lines light, because dinosaur proportions usually need a few small corrections before the outline feels alive.
| Dinosaur idea | Best for | First shape to draw |
| T. rex sketch | Bold beginner silhouette | Large body oval and blocky head |
| Stegosaurus doodle | Cute dinosaur drawing ideas | Long oval body with repeated plates |
| Triceratops grazing | Calm animal scene | Wide head frill and sturdy legs |
| Brachiosaurus silhouette | Easy shape practice | Tall neck rising from a large body |
| Spinosaurus aquatic scene | Color and background practice | Waterline, sail, and long snout |
How to use these dinosaur drawing ideas
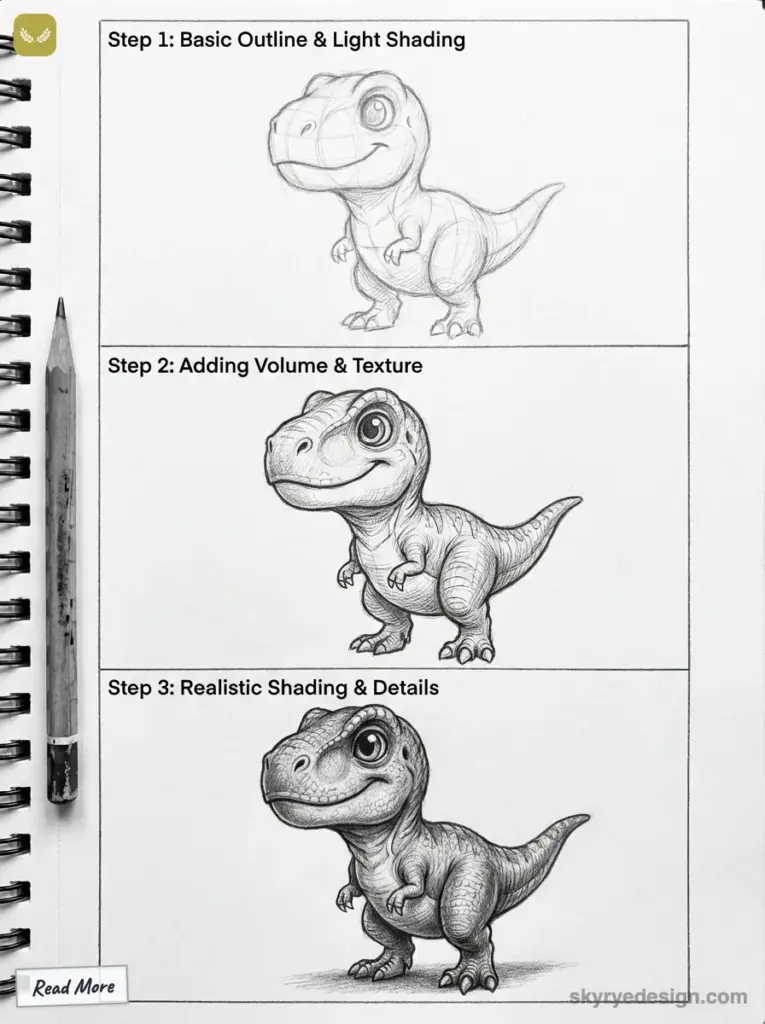
Think of dinosaur art as shape practice with a little prehistoric drama attached. Before adding claws, scales, or background plants, ask one question: would this dinosaur still read correctly as a flat black shape? If the answer is yes, the drawing is already on solid ground.
For an easy dinosaur drawing, block in the body first and keep the details light. Use a 2B pencil or a mechanical pencil, sketch the large forms, then add only the species details that matter: teeth for T. rex, plates for Stegosaurus, horns for Triceratops, sail for Spinosaurus.
You can follow these ideas in order or treat them like a menu. Pick one dinosaur, draw it three times, and change one thing each round: pose, expression, or color. That small repetition teaches more than one overworked sketch.
1) T. rex sketch
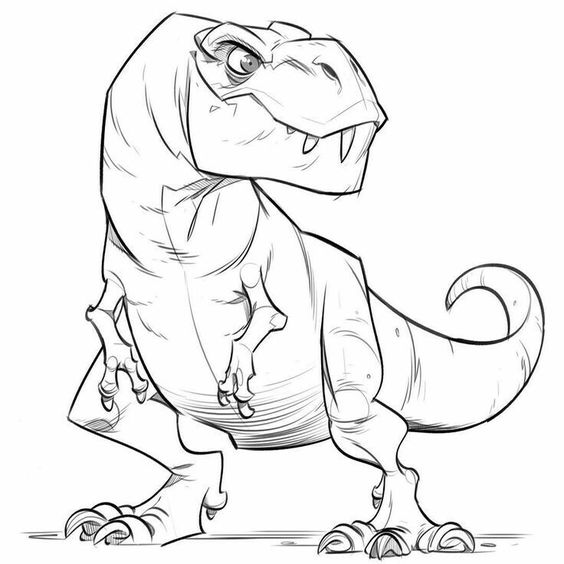
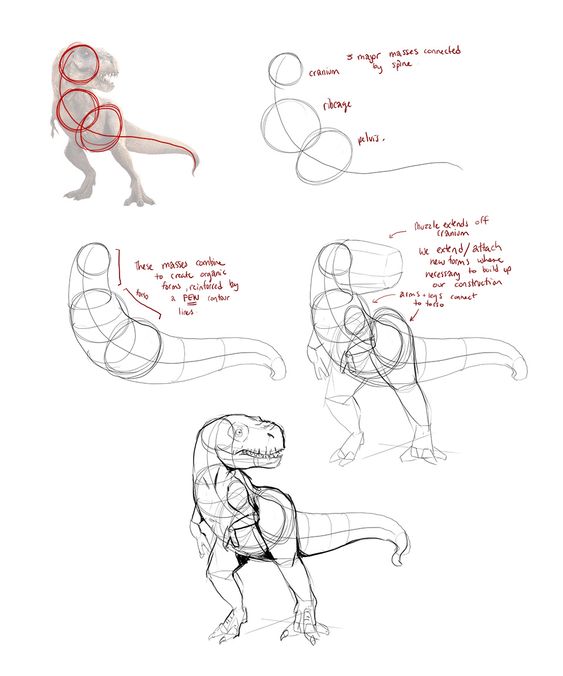
A T. rex sketch starts with a big tilted body oval, a blocky head, and a tail that pulls the whole pose back into balance. I keep the arms tiny but deliberate, because loose little marks there can make the drawing look accidental.
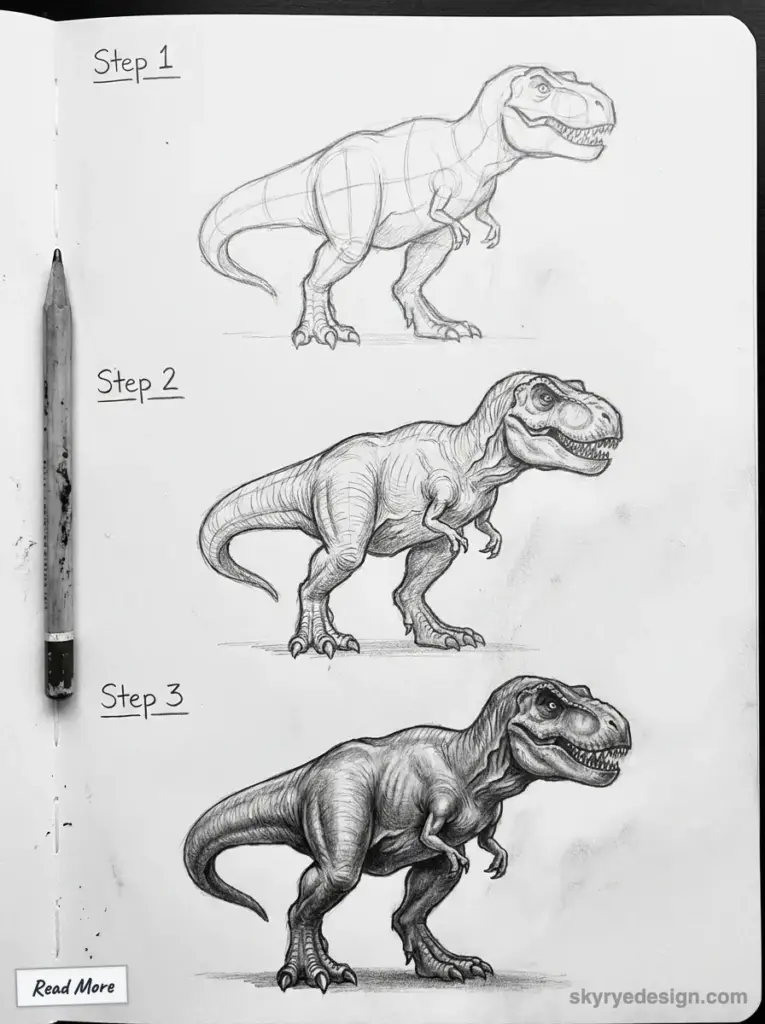
For the legs, think of thick thighs sitting under a heavy body. If you want more pose practice later, use a basic pose construction guide and simplify the joints before adding claws.
The tail should feel like a counterweight, not a rope stuck onto the back. Start it thick at the hip and taper slowly so the dinosaur looks balanced instead of falling forward.
On the head, place the jaw first, then the brow, nostrils, and teeth. Beginners often draw every tooth the same size; a few larger front teeth and smaller back teeth usually look more natural.
For texture, use wrinkles around the jaw, belly, and leg joints, then a few scale marks near the focal point. If you add feathers, keep them grouped around the neck or back instead of sprinkling them everywhere.
When the pencil sketch feels right, ink only the confident lines. A sketchy base is useful, but the final outline needs cleaner decisions: thicker line under the belly, thinner line on the lit edge, and small breaks where texture would get noisy.
This is a strong first idea because the silhouette is instantly readable. If the head, tail, and legs work, the drawing will still feel like T. rex even before you add details.
2) Stegosaurus doodle
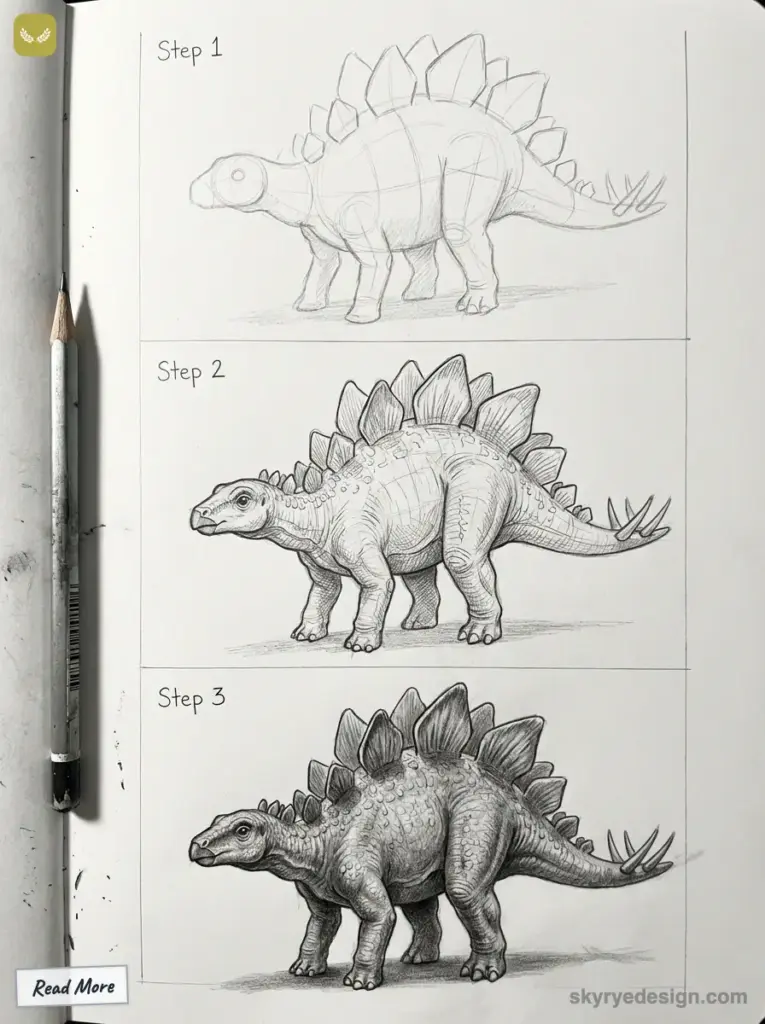
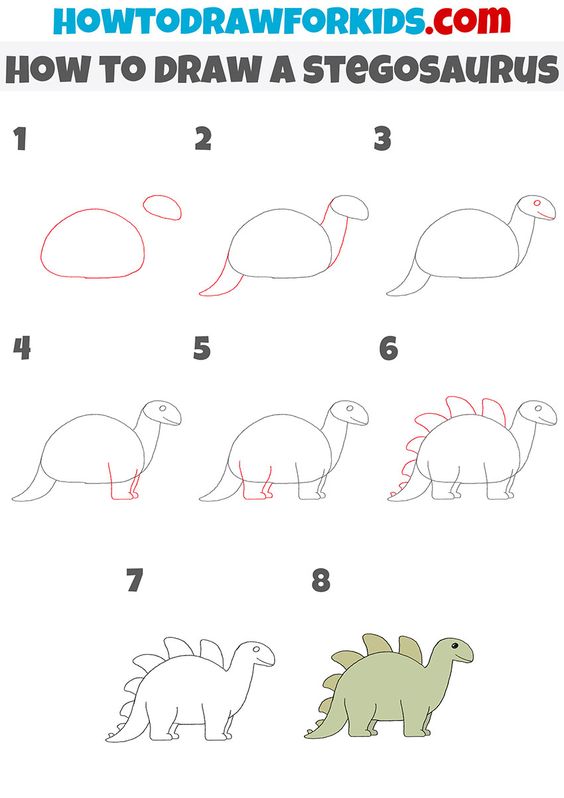
A Stegosaurus doodle is great for beginners because the back plates do so much of the character work. Start with a long oval body, four short legs, a small head, and a tail that angles slightly upward.
Place the plates after the body is stable. I usually draw the largest plates near the middle of the back, then make them smaller toward the neck and tail so the rhythm feels intentional.
Add the tail spikes last. Four spikes are enough for a clear read, and they look better when they follow the direction of the tail instead of pointing randomly outward.
For skin detail, put wrinkles at the knees, shoulder, and base of the tail. A few plants in the background can help the dinosaur feel grounded, but keep them lighter than the main outline.
Color can stay earthy, with olive green, warm gray, or burnt sienna. If you want a cute version, make the plates brighter than the body, almost like a tiny parade of color across the back.
This idea is mostly about rhythm: oval body, short legs, repeated plates, tail spikes. Draw it once as a simple doodle, then redraw it with a lower head and heavier shading.
3) Velociraptor in motion
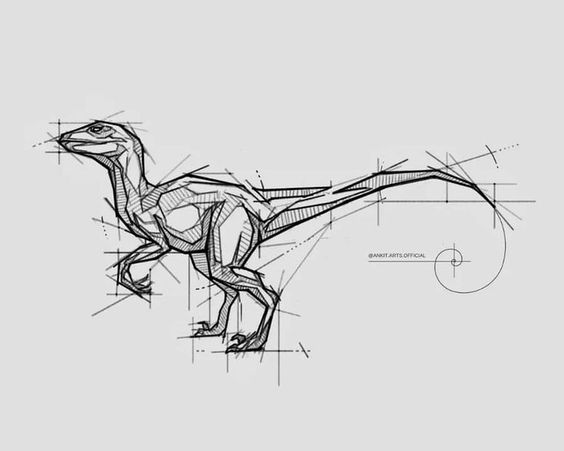
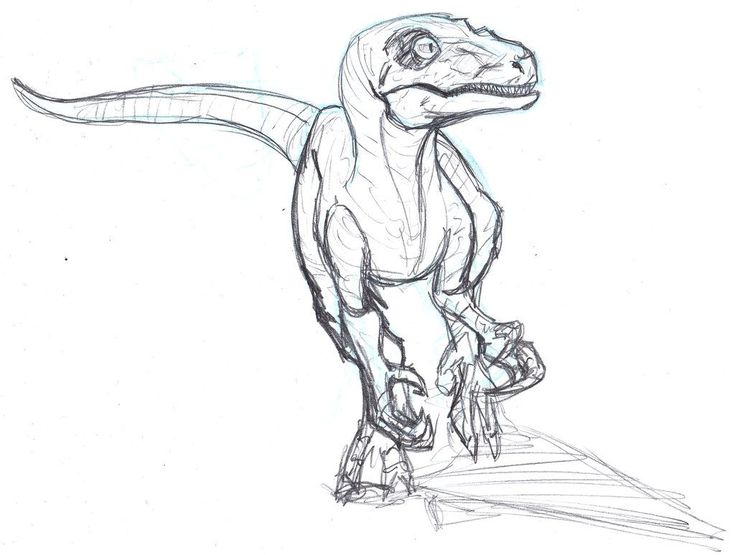
A Velociraptor in motion is a good way to practice gesture. Start with the line of action first, then hang the head, chest, hips, tail, and legs from that movement line.
I block the pose like a quick stick figure, then build basic body shapes around it. If the skeleton feels stiff, the finished dinosaur will feel stiff too, no matter how many scales you add.
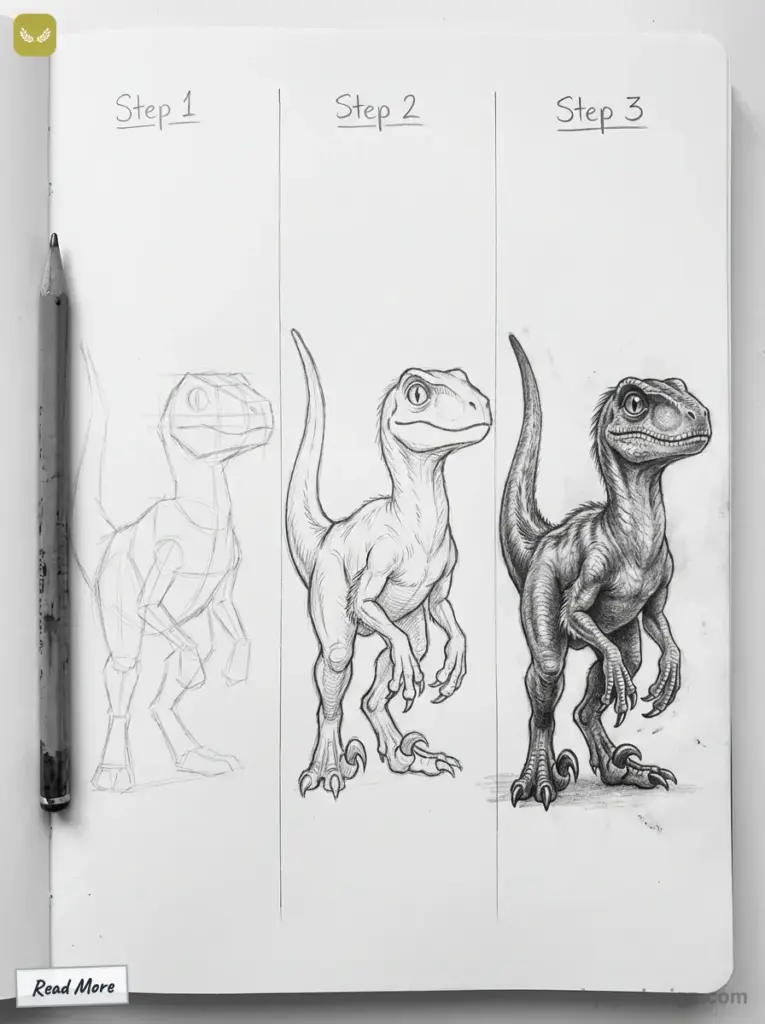
Lean the raptor forward, bend one leg under the body, and stretch the other leg back. The tail should point against the movement to keep the pose balanced.
For the head, use a wedge shape and tuck the eye under a sharper brow. An open jaw adds drama, but the brow angle is what gives the raptor that alert, hunting expression.
The foot claw is the detail to slow down for. Make the raised sickle claw larger and cleaner than the other toes, then shade under it so it does not disappear into the foot.
Motion lines can help, but do not use them to rescue a weak pose. Get the torso tilt and tail direction working first, then add a few light lines behind the legs or background grass.
4) Triceratops grazing
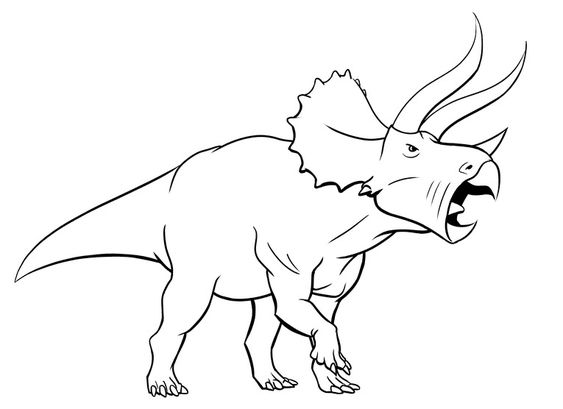
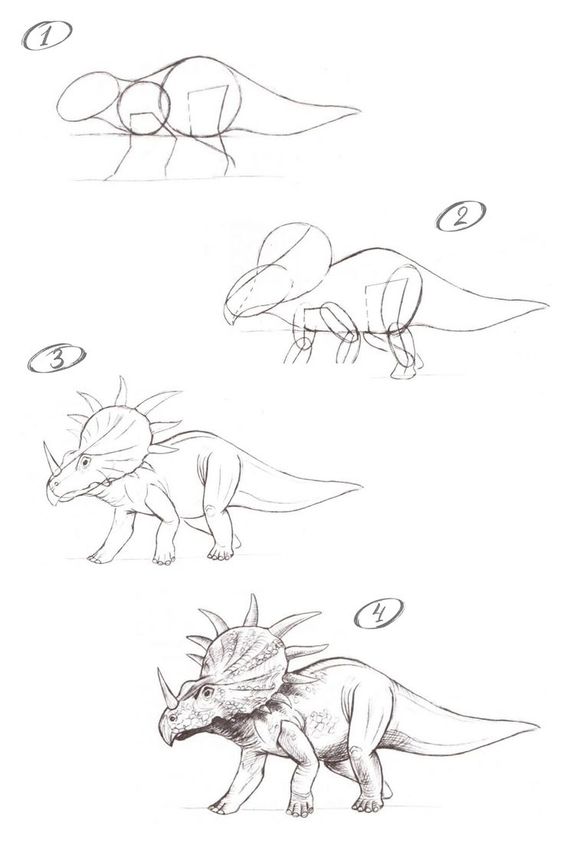
A grazing Triceratops gives you a calmer dinosaur drawing idea. Lower the head, widen the stance, and let the frill and horns become the main shape of the picture.
Start with the head angled toward the ground. The mouth can overlap a fern or branch, which immediately explains the pose without needing a busy background.
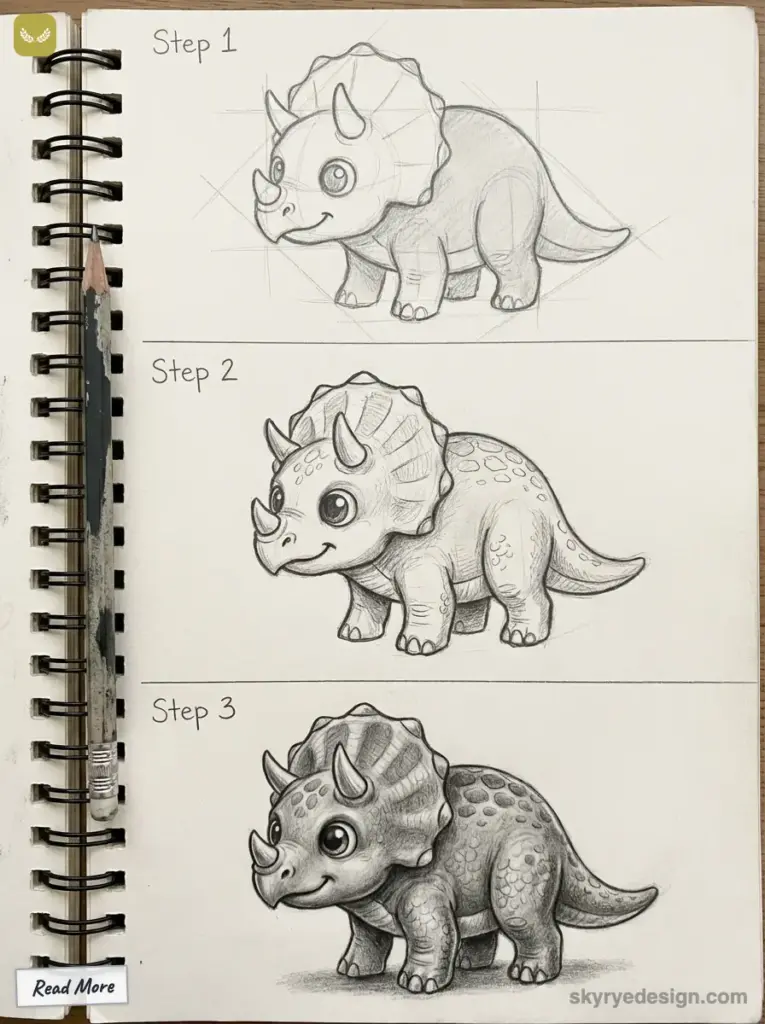
The frill should feel wide and heavy. Place the two brow horns symmetrically, then add the smaller nose horn. If the horns are too thin or too close together, the head loses its weight.
For the setting, use simple prehistoric plants: fern shapes, horsetail stalks, or big leafy silhouettes. Keep the plant detail lower in contrast than the dinosaur.
Small animals or stones near the feet can show scale, but use them sparingly. One tiny shape next to a massive leg is usually enough.
This is a nice scene when you want a dinosaur drawing that feels peaceful instead of aggressive. The challenge is making a heavy animal look relaxed without making the legs sloppy.
If you are practicing species differences, draw T. rex, Triceratops, and Stegosaurus on the same page. The contrast between jaws, horns, and plates makes the design lesson obvious.
5) Brachiosaurus silhouette
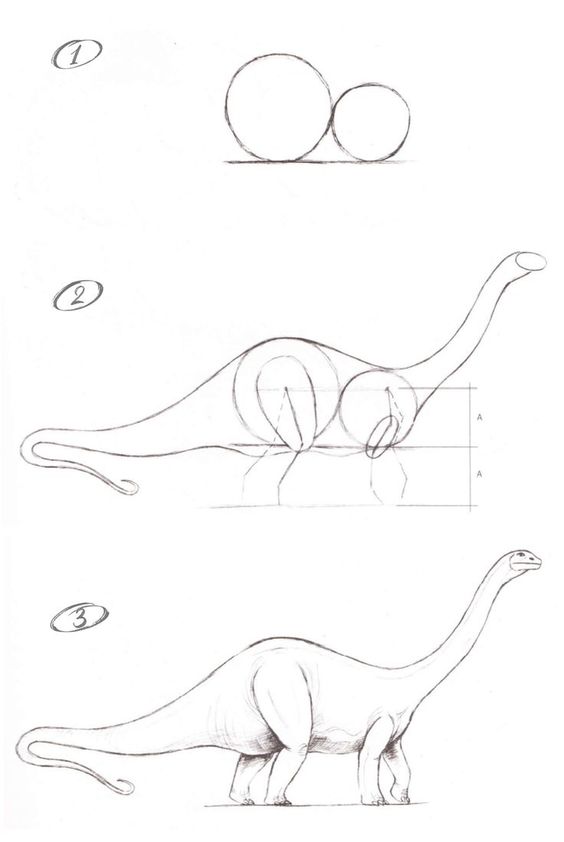
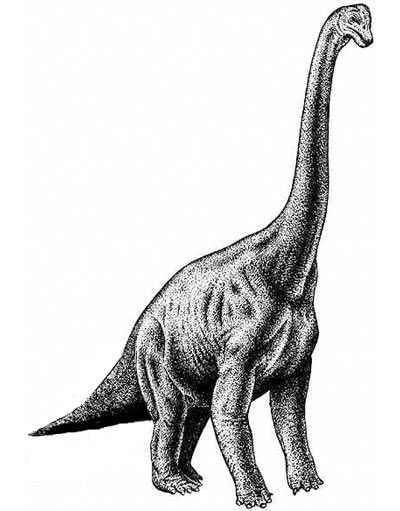
A Brachiosaurus silhouette is one of the easiest dinosaur drawing ideas because it depends on one strong outline. The long neck, small head, huge body, and trailing tail do almost all the work.
Sketch the body as a large oval, then lift the neck upward from the shoulders. Keep the front legs taller than the back legs so the pose feels like a Brachiosaurus, not a generic sauropod.
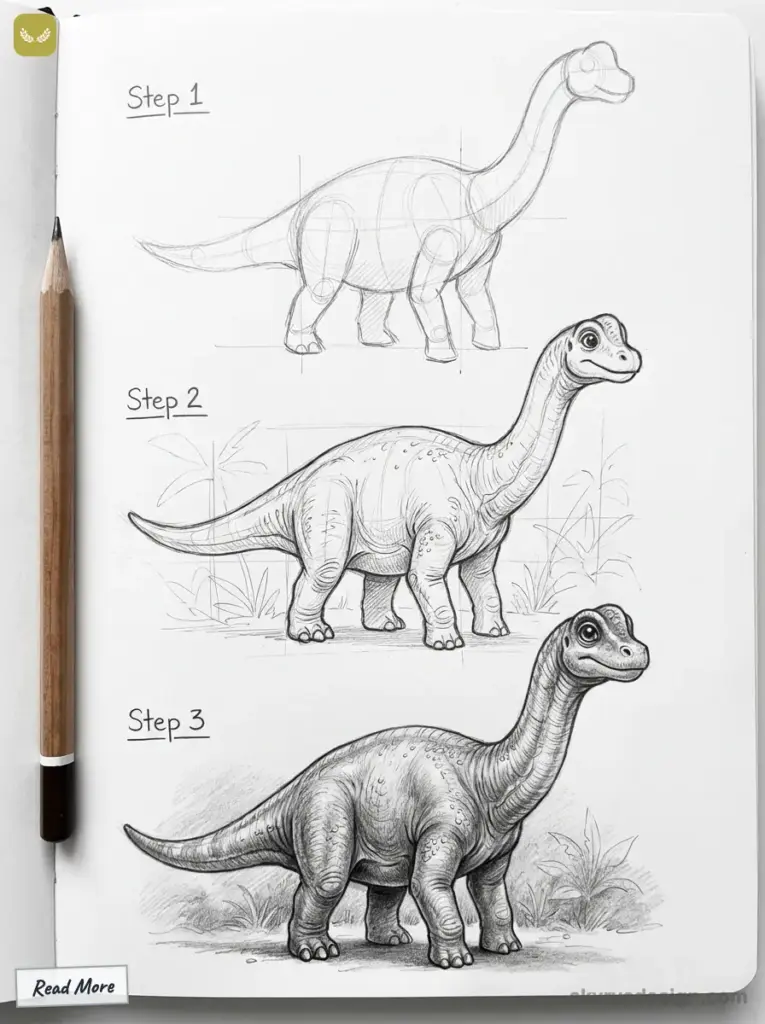
The head should stay small. If you make it too large, the calm long-neck feeling disappears and the drawing starts to look cartoonish in the wrong way.
For a sunset silhouette, fill the dinosaur shape with black or a very dark brown. Leave the background simple: one horizon line, one tree, or a soft colored-pencil sky.
Smaller paper can help here. A half sheet keeps the silhouette controlled and stops you from overworking a drawing that should stay bold and graphic.
This is a good warm-up before a more detailed sauropod. If the black shape reads well, you can later redraw it with skin folds, shoulder shadows, and a light background.
You can also try a full page of dinosaur silhouettes: T. rex, Triceratops, Plesiosaurus, Stegosaurus, and Brachiosaurus. It is a quick way to train your eye for recognizable shape language.
6) Pterodactyl soaring
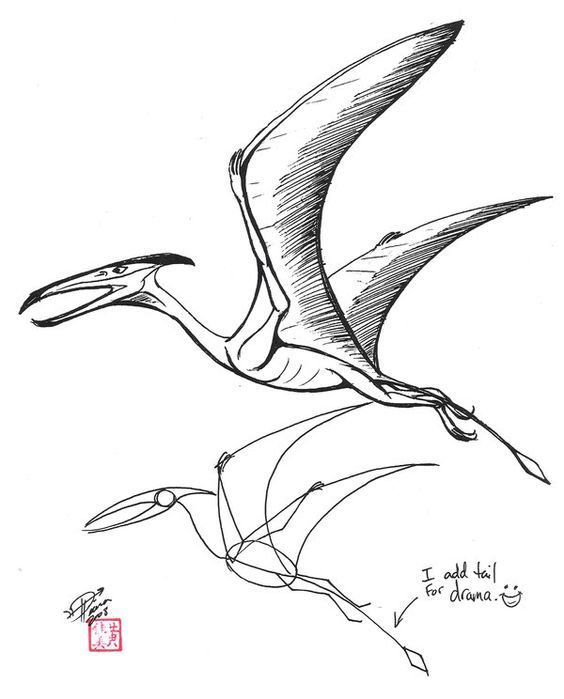
A flying pterodactyl, or more accurately a pterosaur, is about wingspan. I start with the long wing bones first, then place the smaller body underneath them.
The wing membrane should stretch from the long finger toward the body. Keep the body light and small so the wings feel like the main structure.
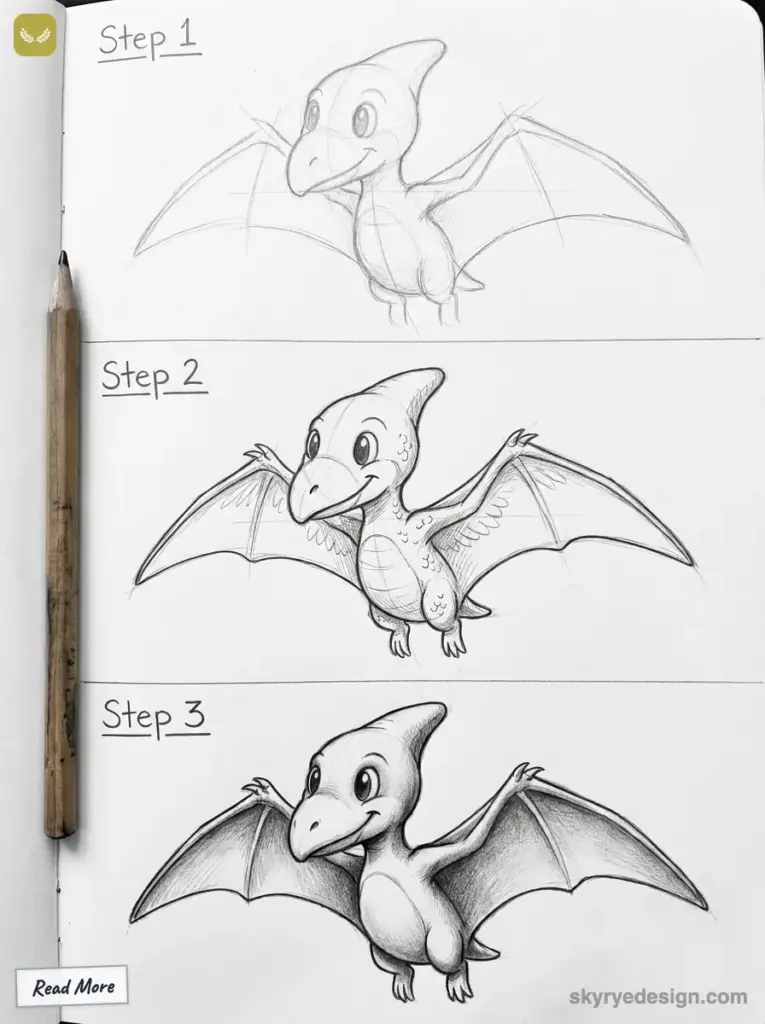
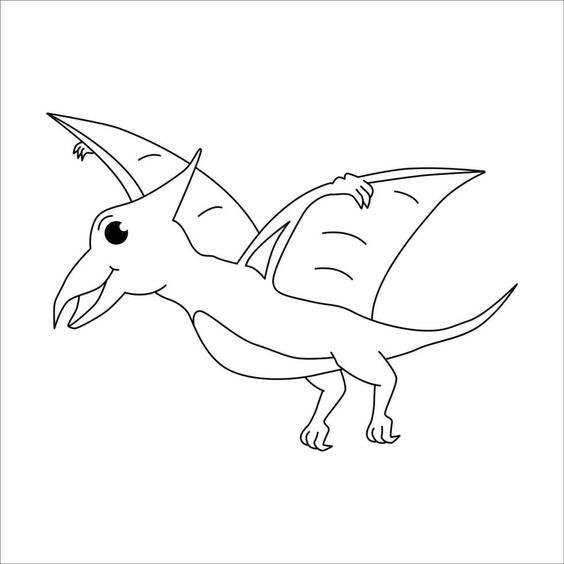
To show flight, tilt one wing higher than the other. A perfectly symmetrical pose can look flat unless you are deliberately making a coloring-page design.
Clouds, cliffs, or distant mountains give the drawing height. Draw them with softer lines so they do not fight the wing shape.
A few wrinkles in the wing membrane make the creature feel less like a paper airplane. Use long curved lines that follow the direction of the membrane, not random scratches.
For beginners, a cartoon pterosaur is enough. For advanced practice, study wing anatomy and make the pose more believable before adding color.
7) Ankylosaurus armor study
An Ankylosaurus armor study is all about texture and spacing. The body is low, wide, and heavy, almost like a tank with legs.
Block the body first, then add armor plates in groups. Vary the size of the plates so they feel organic, but keep their direction consistent across the back.
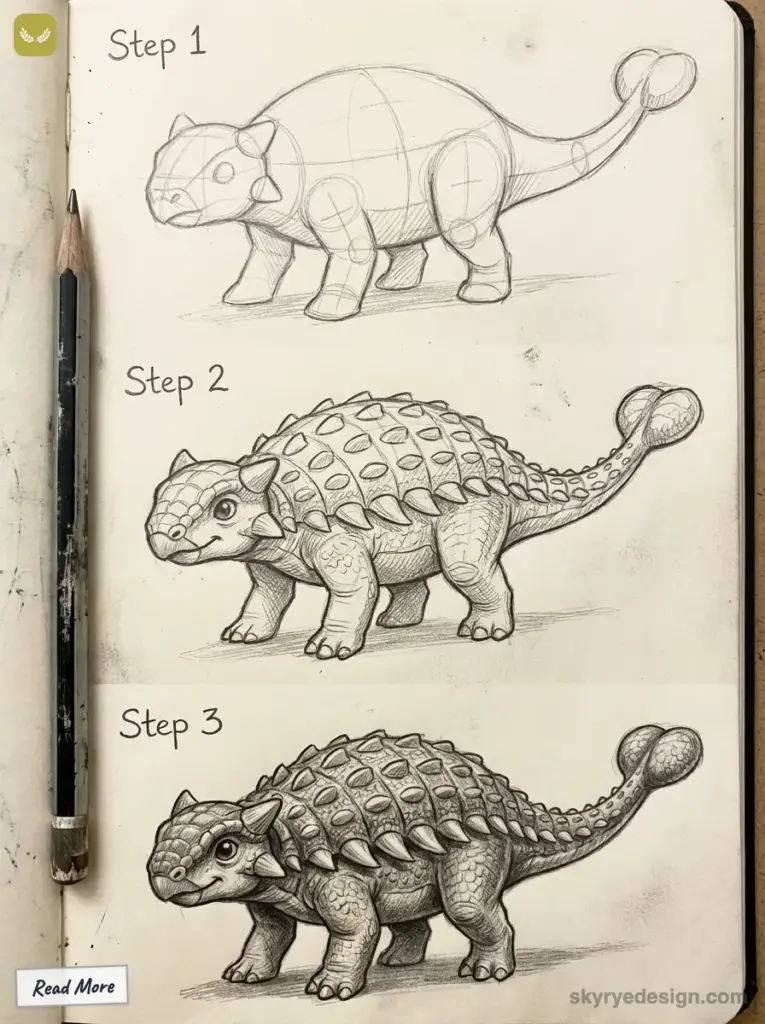
The tail club needs weight. Draw it as a thick form with bony knobs, then shade underneath it so it feels capable of swinging.
For color, try gray-green, dusty brown, or muted ochre. Pattern can work, but keep it subtle or the armor texture will become too noisy.
A close-up study of the head is worth doing. It teaches you how plates overlap around the brow, cheeks, and neck without drawing the entire body again.
If you want a more advanced dinosaur drawing, make the armor follow the body perspective. Plates closer to the viewer should look larger and clearer than plates turning away.
8) Parasaurolophus headshot
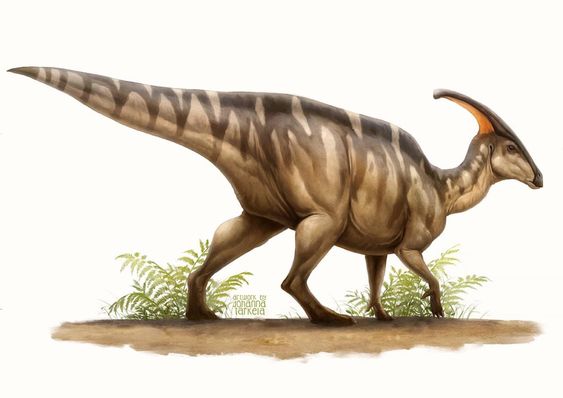
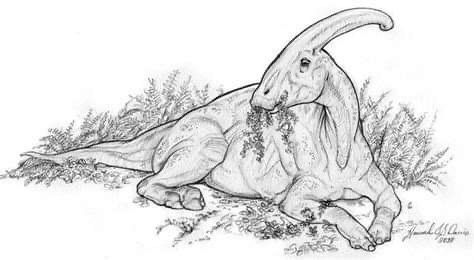
A Parasaurolophus headshot is a clean profile exercise. The long crest gives you one beautiful sweeping line from the skull toward the back.
Draw the beak shape first, then the eye and crest. The crest should feel attached to the skull, not pasted on like a handle.
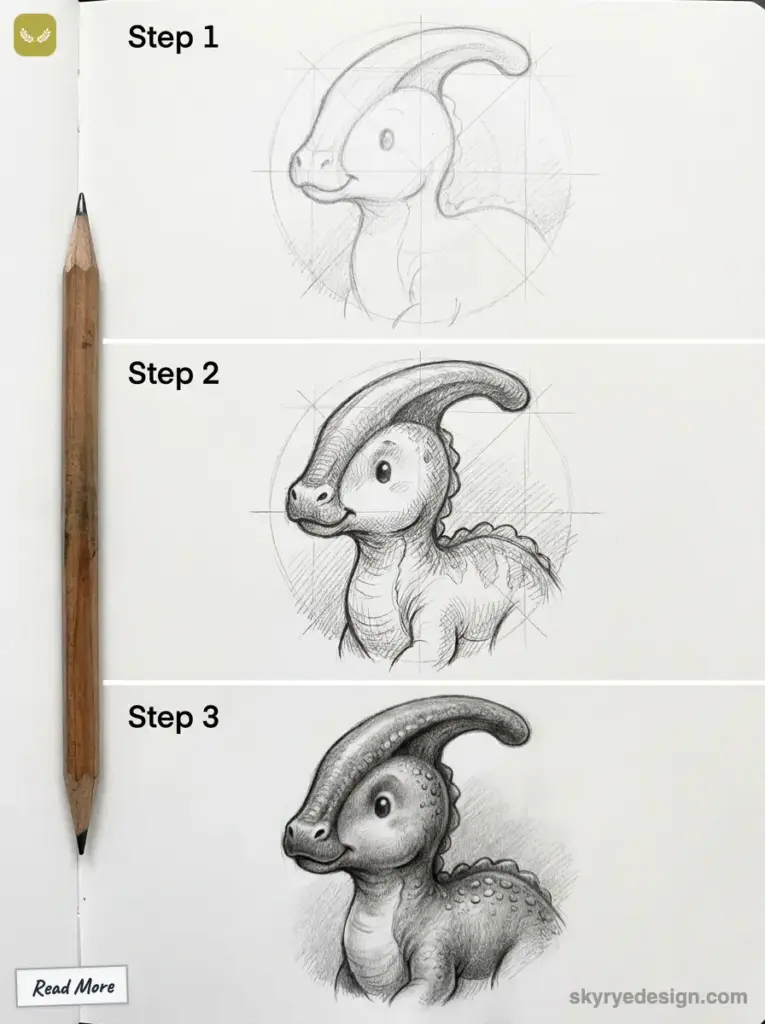
Use small texture marks around the cheek and neck, but leave some open space. Too many little lines can flatten the head instead of making it more realistic.
Color is a good place to experiment here. An earthy body with a slightly brighter crest can make the headshot feel finished without needing a detailed background.
This sketch also works for cards, stickers, or a small portfolio piece. Save the first attempt, then redraw it later with cleaner proportions to track your progress.
9) Spinosaurus aquatic scene
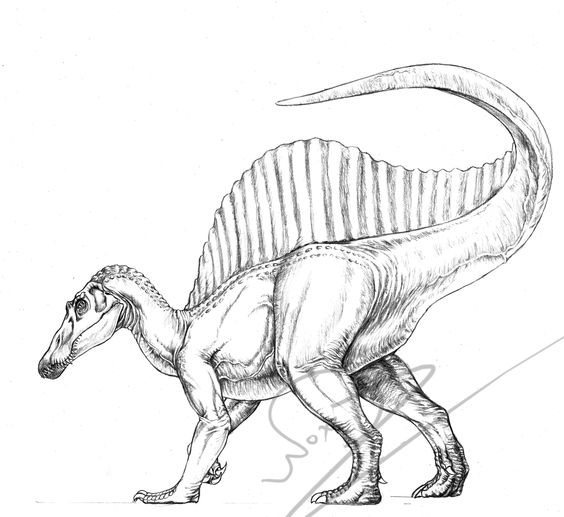
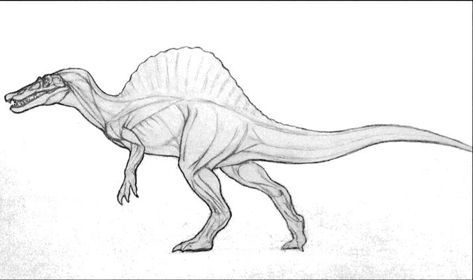
For a Spinosaurus aquatic scene, place the waterline before drawing the dinosaur. That line decides how much of the body will show above the surface.
Show the long snout and sail breaking the water. A fish nearby, or partly inside the jaws, can explain the hunting action without making the scene crowded.
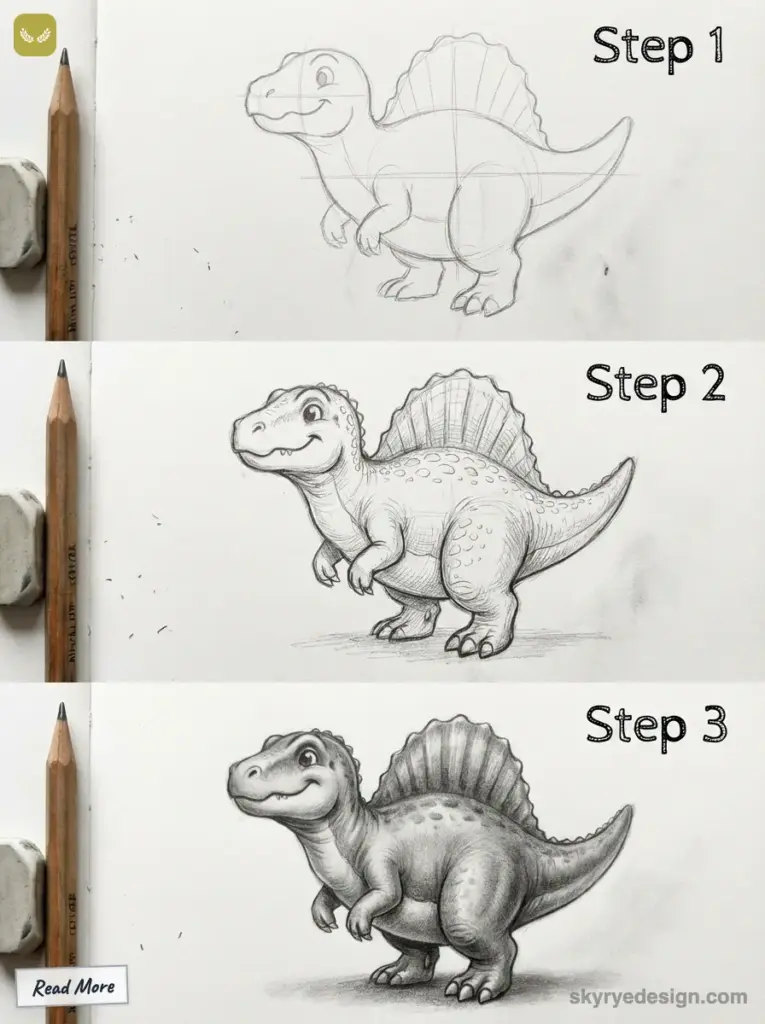
Crocodiles, turtles, or shoreline plants can help with scale. Keep them smaller and simpler than the Spinosaurus so the focal point stays clear.
Blue-green water with brown or gray body tones usually works well. Save the darkest marks for the sail, snout, and shadow under the jaw.
Ripples are the secret detail here. Draw them wider near the dinosaur and softer as they move away, like the body is disturbing the surface.
After cleaning the guidelines, check whether the waterline cuts through the form in a believable place. If it feels awkward, lower or raise the line before adding final texture.
10) Diplodocus tail swing
A Diplodocus tail swing is a motion study. Start with the long body and neck, then draw the tail as a sweeping curve that leads the viewer’s eye across the page.
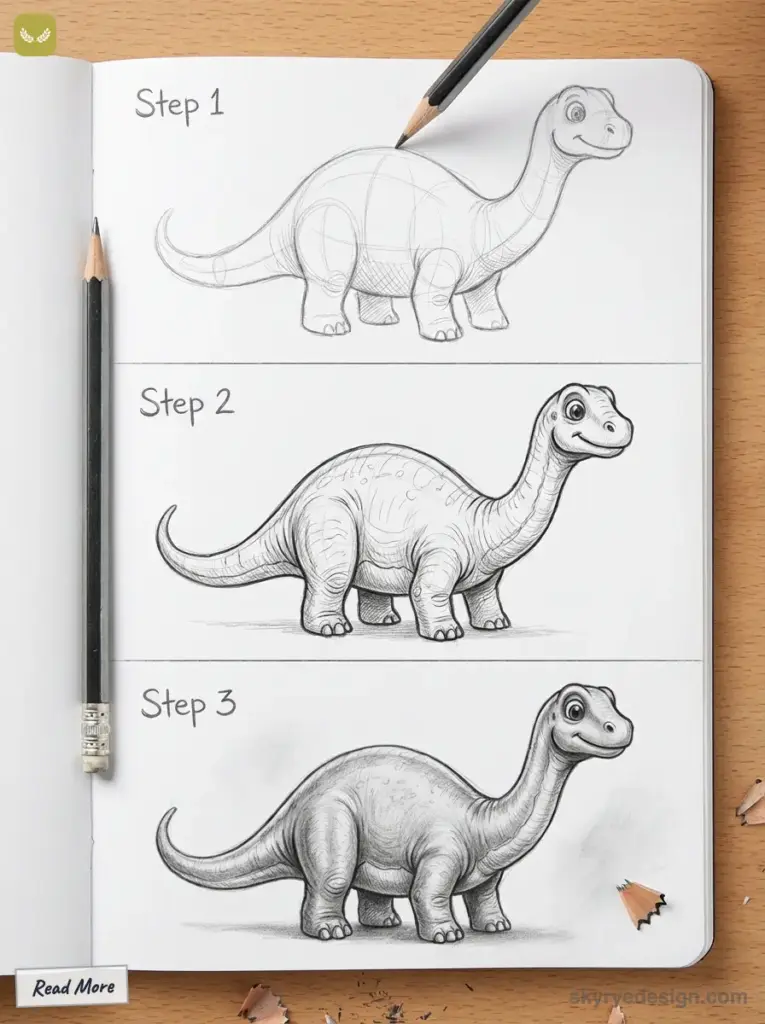
You can show the tail before, during, or after the swing. A slight blur at the tip works, but the curve of the whole tail is more important than special effects.
If you add geometric shapes in the background, keep them light and decorative. The tail gesture should stay the loudest movement in the drawing.
Muscle folds near the hip and base of the tail can make the action feel stronger. Draw those forms bigger near the body and lighter toward the tip.
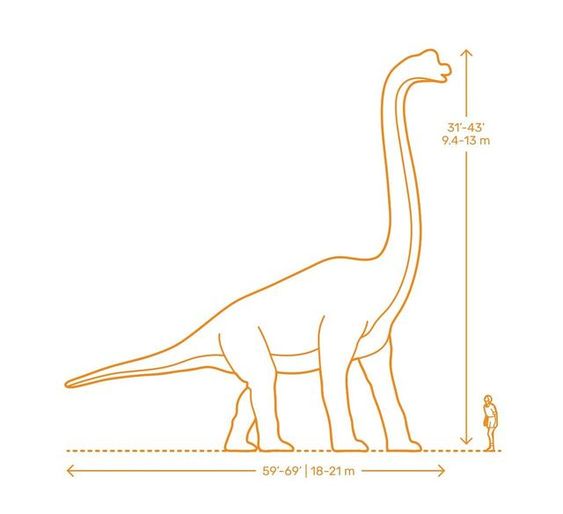
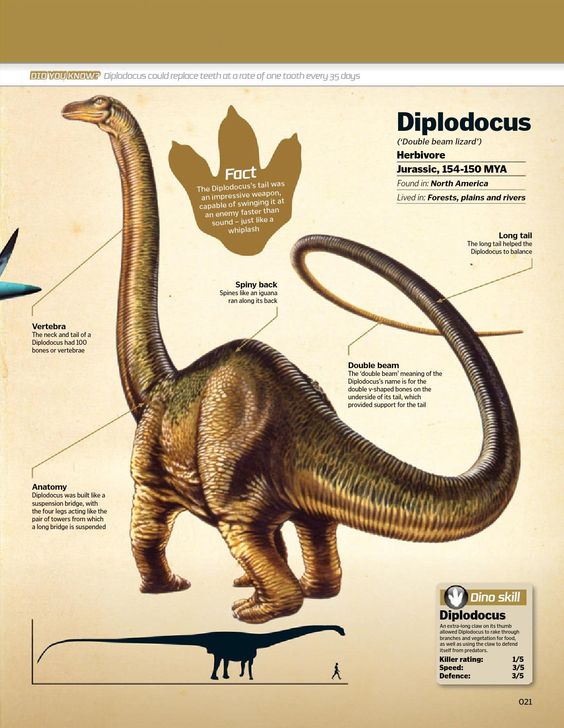
Dust, leaves, or a few curved motion marks can finish the scene. Use restraint; three well-placed marks often look better than a whole storm of lines.
This idea can turn into a classroom mobile or wall display if each dinosaur is cut out separately. Keep the outlines bold if the drawing will be seen from across the room.
Dinosaur Coloring Page Inspiration
Dinosaur coloring pages are a useful bridge between tracing, doodling, and full sketching. They let kids practice color, pattern, and patience before worrying about proportions.
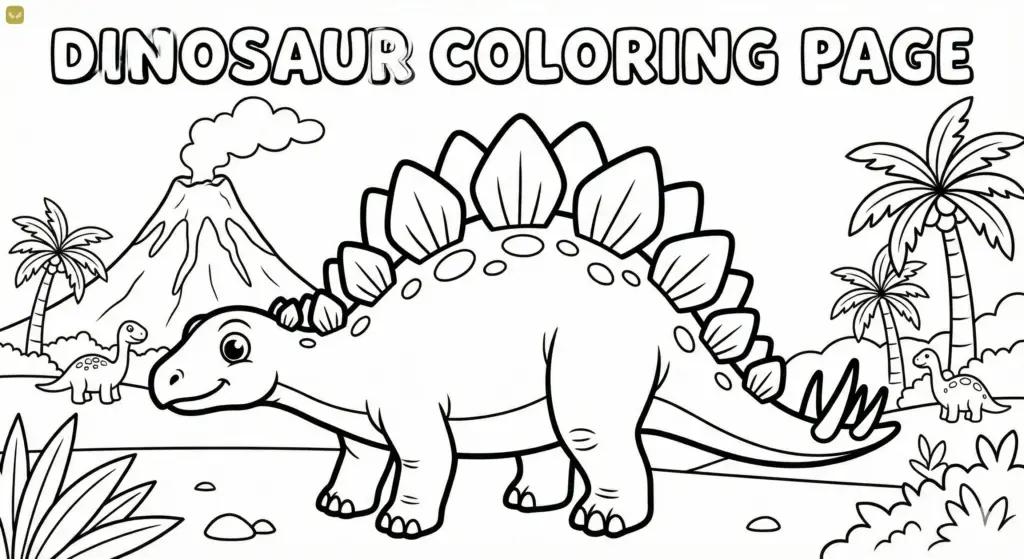
Use colored pencils, markers, or crayons to test simple palettes. A green T. rex with orange stripes, a gray Triceratops with warm horn shadows, or a rainbow-backed Stegosaurus can all work if the values stay readable.
Treat each coloring page as a design exercise. Add spots, scales, feathers, or a background volcano, then compare which details make the dinosaur clearer and which ones just add noise.
Materials Needed
You do not need many supplies for good dinosaur drawings. A small, reliable kit is better than a crowded desk full of tools you are not using.
A sketchbook is useful because it keeps all your attempts together. Loose sheets are fine too, especially for kids, but a book makes progress easier to see week by week.
The same paper, pencils, and colors can also turn into dinosaur masks, puppets, or classroom cutouts if you want a craft extension.
Paper and Pencils
For paper, I prefer a smooth sheet that can handle erasing. A 2B pencil gives soft lines, an HB pencil keeps construction clean, and a kneaded eraser lifts graphite without tearing the surface.
Mechanical pencils are useful for teeth, claws, eyes, and small texture marks. A 0.5mm lead is crisp; a 0.7mm lead feels better for looser sketching.
Coloring Supplies
For color, colored pencils are the most forgiving. Markers are bolder and faster, so test them on scrap paper first to avoid bleeding through the page.
Watercolor pencils can give a soft painted look, but they need thicker paper. Crayons are perfect for younger artists because they encourage big shapes and confident color blocks.
Erasers and Sharpeners
Keep an eraser and sharpener close. Dinosaur drawings use lots of construction lines, and clean corrections are part of the process, not a sign that the sketch is failing.
A thin eraser stick helps around teeth, horns, and eyes. Brush crumbs away with a soft brush or clean tissue so you do not smear graphite across the paper.
Basic Drawing Techniques
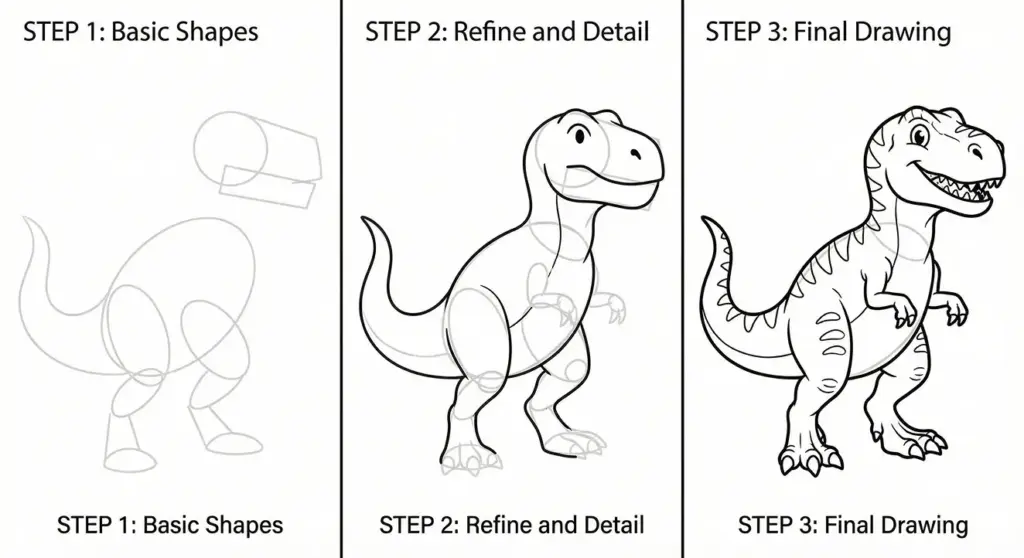
The basic technique is simple: build the big shapes, check the silhouette, then add species details. This order keeps the drawing readable even when the final texture stays loose.
Kids can turn the same process into puppets by drawing a dinosaur side view, cutting it out, and attaching it to a stick. Strong outlines matter more than tiny details for that version.
Sketching the Outline
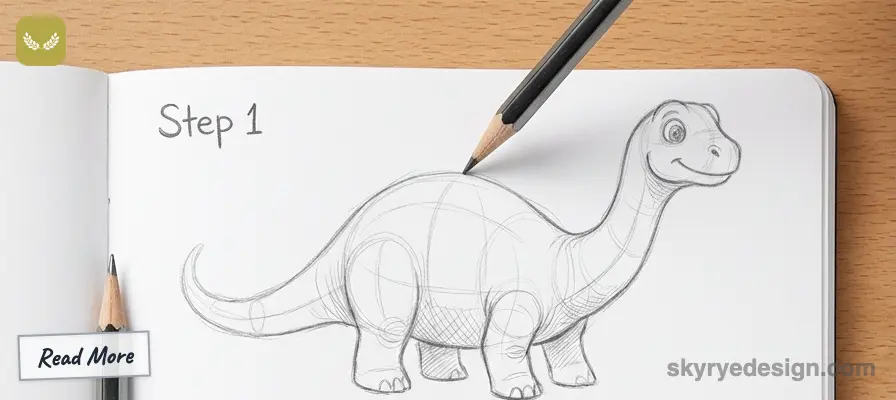
Start with light pencil strokes. Use a large oval for the body, a smaller head shape, and simple circles or blocks for the hips, shoulders, and feet.
Keep the construction loose. Some dinosaurs have long necks, some have tiny arms, and some carry most of their weight in the hips, so adjust the base shapes before adding detail.
Reference images help, especially for legs and skull shapes. Even a cartoon dinosaur feels stronger when the big anatomy choices make sense.
Adding Details
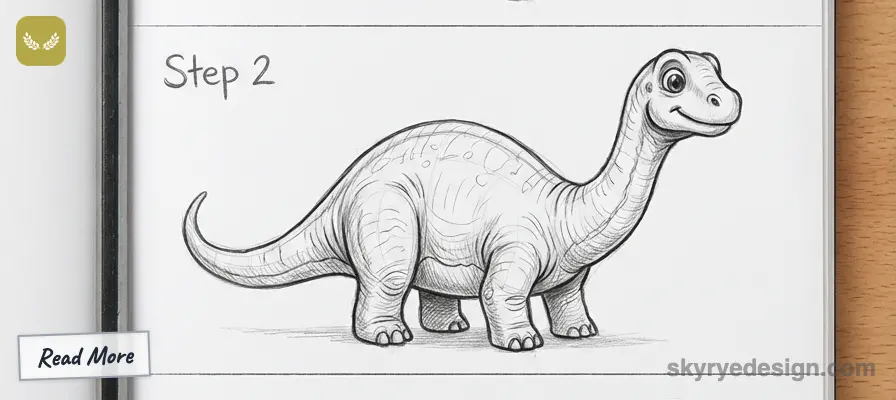
Once the outline works, add the eyes, nostrils, mouth, claws, plates, horns, or feathers. Choose the details that identify the dinosaur first.
T. rex needs a heavy head and tiny arms. Stegosaurus needs plates. Triceratops needs the frill and horns. If those features are clear, the drawing will read quickly.
Use firmer pencil strokes only after the structure is set. Pressing too hard too early makes the sketch harder to adjust and often leaves dirty eraser marks.
Shading and Texturing
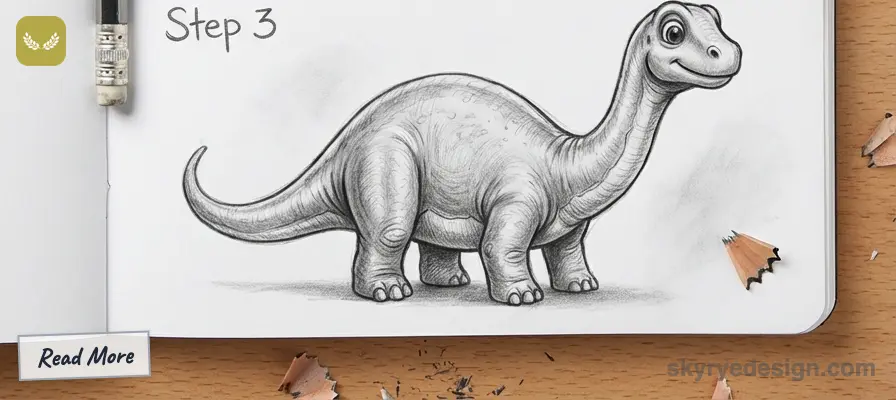
For shading, decide where the light comes from. Put darker values under the belly, under the tail, inside the mouth, and behind overlapping legs.
Scales can be small curved marks, feathers can be light tapered strokes, and rough skin can use broken irregular lines. Keep the texture following the form.
Vary pencil pressure instead of making every shadow the same gray. A few strong darks, a few soft midtones, and clean highlights will make the dinosaur feel more solid.
Dinosaur drawing ideas FAQ
Q: What are easy dinosaur drawing ideas for beginners?
A: Start with dinosaurs that have clear silhouettes: a T. rex side view, a Stegosaurus with big back plates, a Triceratops head, a long-neck Brachiosaurus, or a cute baby dinosaur. Keep the first sketch simple. Use one oval for the body, one smaller shape for the head, then add the neck, legs, tail, and one feature that makes the species recognizable.
Q: How do you make a dinosaur drawing look cute?
A: Make the head a little larger, soften the teeth, round the feet, and use friendlier eyes. A cute dinosaur drawing usually works best with fewer wrinkles and simpler claws. I would still keep one clear dinosaur clue, such as T. rex arms, Stegosaurus plates, or Triceratops horns, so the design does not turn into a generic lizard.
Q: What supplies do kids need for dinosaur drawing?
A: A regular pencil, eraser, smooth paper, and a small set of colored pencils are enough. A 2B pencil is nice for soft sketching, while markers can make the final outline bolder. For younger kids, crayons are easier to control than fine fineliners. Keep the tool list short so the drawing stays about shapes, not supplies.
Q: Should I draw realistic or cartoon dinosaurs first?
A: Draw cartoon dinosaurs first if you are new, because the shapes are easier to control and mistakes feel less serious. Once the silhouette is clear, try a more realistic version using reference images for the skull, hips, legs, and tail balance. Realistic dinosaurs need better proportions; cartoon dinosaurs need stronger expression.
Q: How do I shade a dinosaur drawing?
A: Pick one light direction before you shade. Put the darkest values under the belly, inside the mouth, behind overlapping legs, and under plates or horns. Use small curved marks for scales, longer strokes for feathers, and a soft side-of-pencil tone for large body shadows. Do not cover the whole dinosaur in texture at once; save detail for the focal area.
Q: What dinosaur should I draw first?
A: A side-view T. rex is the easiest first dinosaur because the body, head, tail, and legs read clearly even with simple shapes. Stegosaurus is also beginner-friendly because the plates do a lot of the visual work. If you want a gentler drawing, start with a baby sauropod or Brachiosaurus silhouette and add color later.
Related drawing practice
If you want to keep the practice going, move from dinosaurs into nearby beginner-friendly drawing subjects. These pages fit the same sketchbook workflow without forcing a totally different skill set.
- drawing ideas for kids
- coloring pages for kids
- cute drawing ideas
- base drawing guide
- sketchbook prompts
- fun drawing exercises
- drawing tips
- colored pencil ideas
- marker drawing doodles
- water drawing practice
- 6.1Kshares
- Facebook0
- Pinterest6.1K
- Twitter0
- Reddit0