Learning how to draw dragon eyes gets much easier when you treat the eye like a real form first and a fantasy detail second. Start with the socket shape, tuck the iris under the upper lid, then build the slit pupil, scales, shadows, and highlights in layers.
I like to block the value pattern before adding scale texture: dark pupil, shadow under the top lid, mid tone iris, and one clean catch-light. That simple order keeps the drawing readable even when the final eye becomes fiery, glowing, or heavily armoured.
- How to draw dragon eyes step by step
- Dragon eye anatomy: pupil, iris, lids, and scales
- Tools for drawing dragon eyes
- How to sketch the dragon eye shape
- Creating the Pupil and Iris
- How to add dragon eye scales and texture
- Dragon eye shading and color techniques
- Common dragon eye drawing mistakes
- Final touches that make dragon eyes look alive
- Dragon eyes drawing FAQ
- Related eye and creature drawing practice
Use a sharp pencil, a kneaded eraser, and one clear light source. Small, consistent choices do more for a dragon eye than piling on random cracks and color.
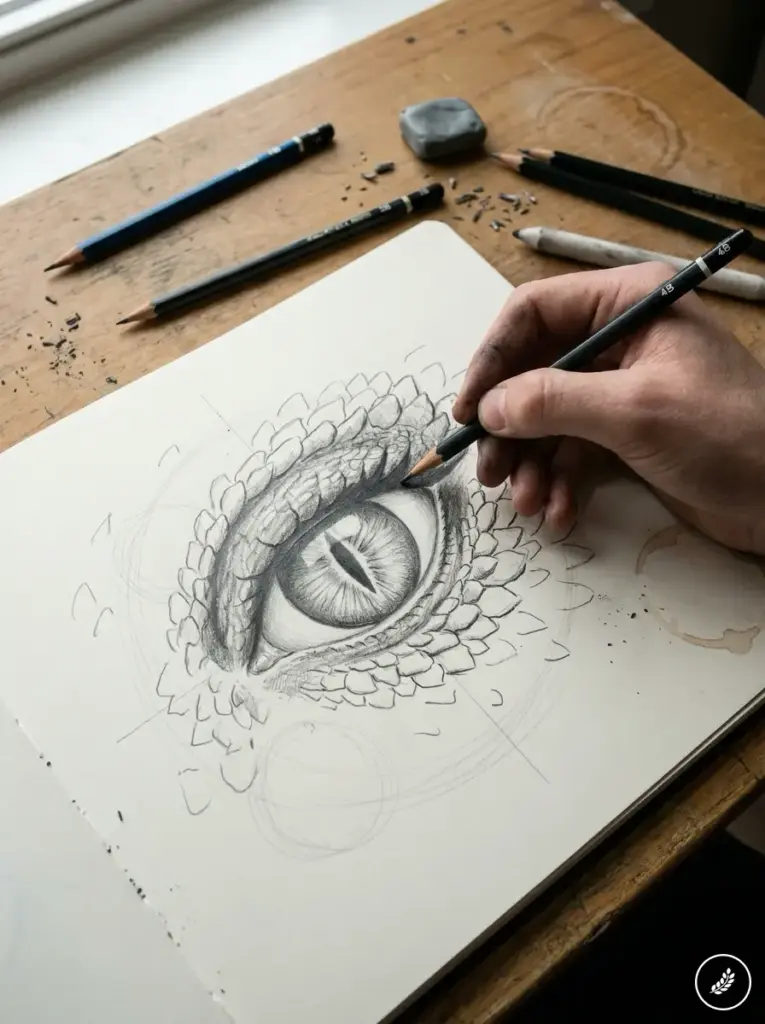
How to draw dragon eyes step by step
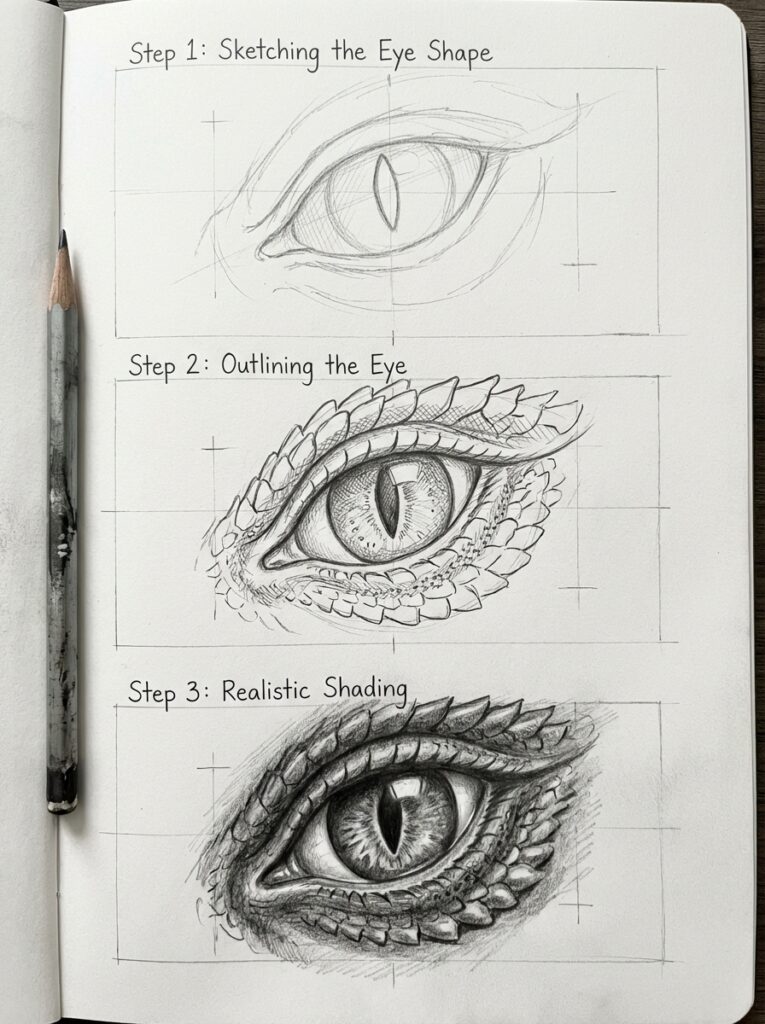
To draw dragon eyes, sketch an almond-shaped socket first, place a large iris inside it, add a vertical slit pupil, then build eyelids and scales around the eye. Keep the first lines light. The drawing starts to look convincing when the upper lid casts a shadow over the iris and the scales follow the curve of the eye instead of floating randomly.
| Step | What to draw | What to check |
|---|---|---|
| 1 | Almond eye shape | The top lid is heavier than the bottom lid. |
| 2 | Iris and slit pupil | The pupil sits cleanly inside the iris. |
| 3 | Eyelids and brow ridge | The lid overlaps the eyeball, so the eye feels set into the head. |
| 4 | Scales around the socket | Small scales sit near the lid; larger plates move outward. |
| 5 | Shadows and highlights | The darkest value is under the upper lid and inside the pupil. |
| 6 | Color and final texture | Keep one bright catchlight so the dragon eye looks wet and alive. |
Dragon eye anatomy: pupil, iris, lids, and scales
The key parts are simple: iris, pupil, eyelids, brow ridge, and the scales around the socket. Small choices, like pupil width or scale placement, change the whole expression. Focus on the iris, pupil, eyelids, and surrounding scales to make your dragon eyes believable and striking.
Basic Eye Structure
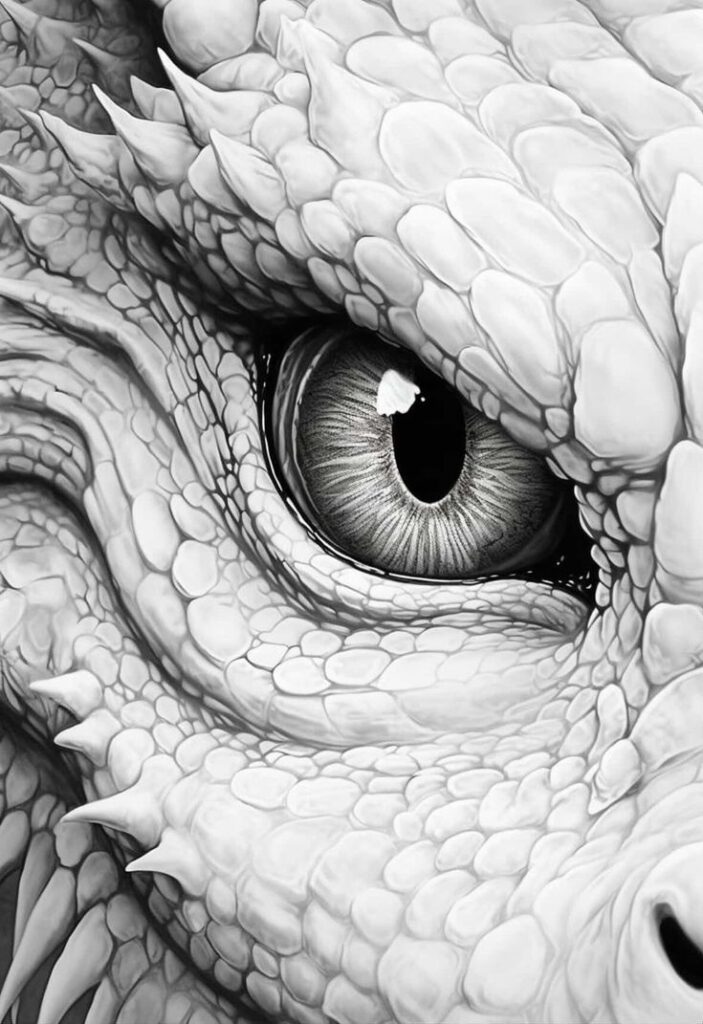
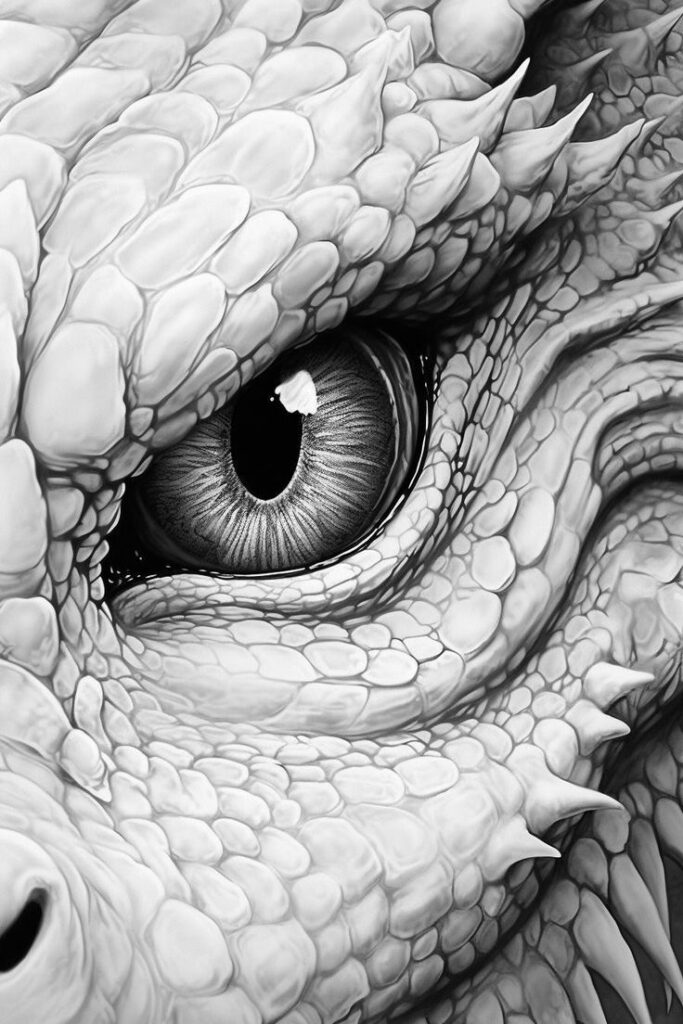
Start with the core shapes: a circular or oval sclera, a colored iris, and a pupil. The iris usually has radial lines or striations. Draw those as thin, slightly curved strokes that radiate from the pupil to the outer edge of the iris.
Pupil shape changes mood and species. Use a vertical slit for predatory, reptile-like dragons. Use a round pupil for more mammal-like or young dragons. You can also use a horizontal slit or star-shaped pupil for exotic looks.
Add eyelids and tear ducts to show expression. Heavy, scaly lids make the eye look armoured and older. Thin, smooth lids suggest youth. Place a small highlight on the iris to indicate a light source; this makes the eye read as glossy.
Dragon Eye Variations
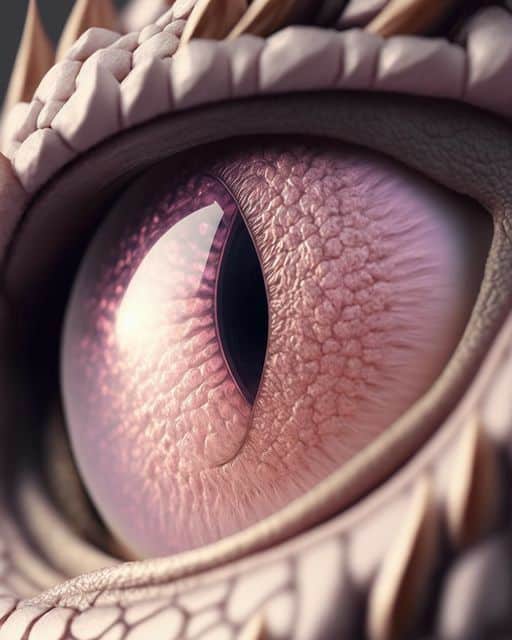
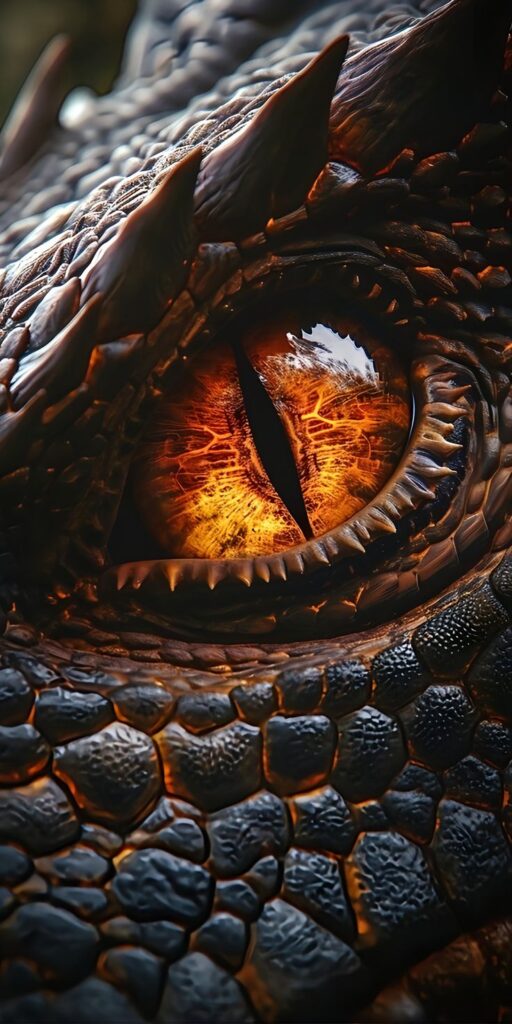
Decide whether the eye is human-sized or massive; size affects detail. A large eye lets you add veins, complex iris textures, and scratches. Small eyes need bolder shapes and clearer contrasts to read at a distance.
Texture around the eye changes species. Smooth skin with fine scales suggests a sleek, aquatic dragon. Thick, overlapping scales make the dragon feel rugged and battle-worn. Add tiny scars, chipped scales, or serum-like drips for character.
Color choices set the tone quickly. Deep golds and ambers read as ancient and wise. Bright greens and blues feel elemental or magical. Use complementary rim colors at the iris edge for a sharp, jewel-like effect.
Fantasy vs. Realistic Features
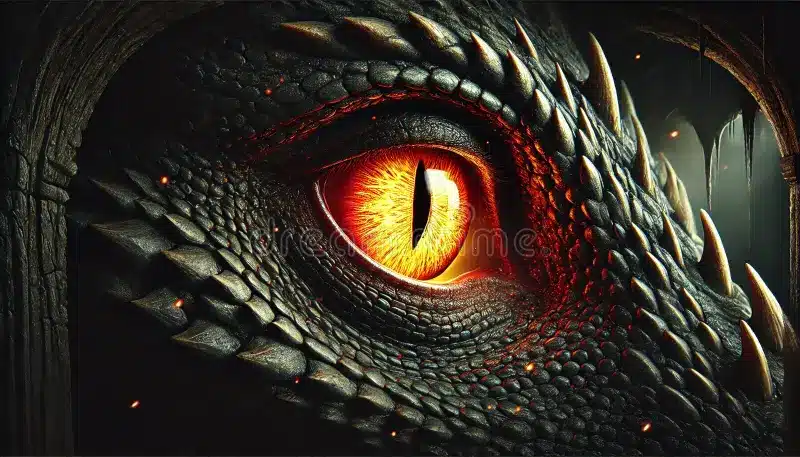
Realistic reptile references help ground your design. Look at the lizard and snake eyes for scale placement, pupil mechanics, and eyelid folds. Use those references to place scales along the eye socket and to shape the tear line.
Fantasy elements let you break rules. Add glowing pupils, inner-ring patterns, or floating specks inside the iris for magic. You can give the eye an inner glow without altering basic anatomy; place the glow behind the pupil and fade it toward the sclera.
Balance realism and fantasy to keep the eye readable. Too many surreal details can confuse form. Keep core anatomy accurate — pupil behavior, lid placement, and light reflection — then layer fantasy marks, like runes or bioluminescent veins, on top.
Tools for drawing dragon eyes
You only need a few simple tools and a couple of clear reference photos to build a believable dragon eye. Focus on pencils for sketching, an eraser for cleanup, and clear image references for shape, texture, and light.
Recommended Drawing Tools

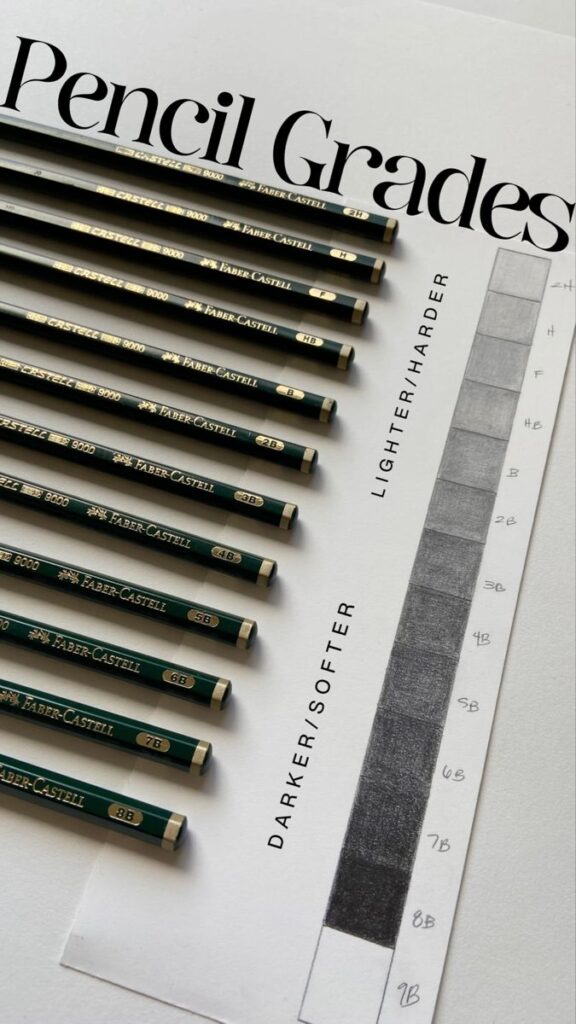
- Pencils: Use a range from HB (general sketching) to 4B or 6B (darker shading). Start light with HB, then deepen shadows with softer leads.
- Erasers: Have a kneaded eraser for gentle lifts and a vinyl eraser for clean edges. Kneaded erasers help pull highlights without smudging.
- Paper: Choose smooth heavyweight paper (80–100 lb / 120–200 gsm). Smooth surface shows fine detail; heavier stock resists erasing and layering.
- Blending tools: Use a paper stump or tortillon for smooth gradients. Cotton swabs work in a pinch but can deposit oils from your fingers.
- Optional color tools: Colored pencils, markers, or watercolor for iris hues. Test colors on scrap paper first to avoid surprises.
- Sharpener & ruler: Keep pencils sharp for line work. A small ruler helps place eyelid angles and symmetry.
Choosing Reference Images
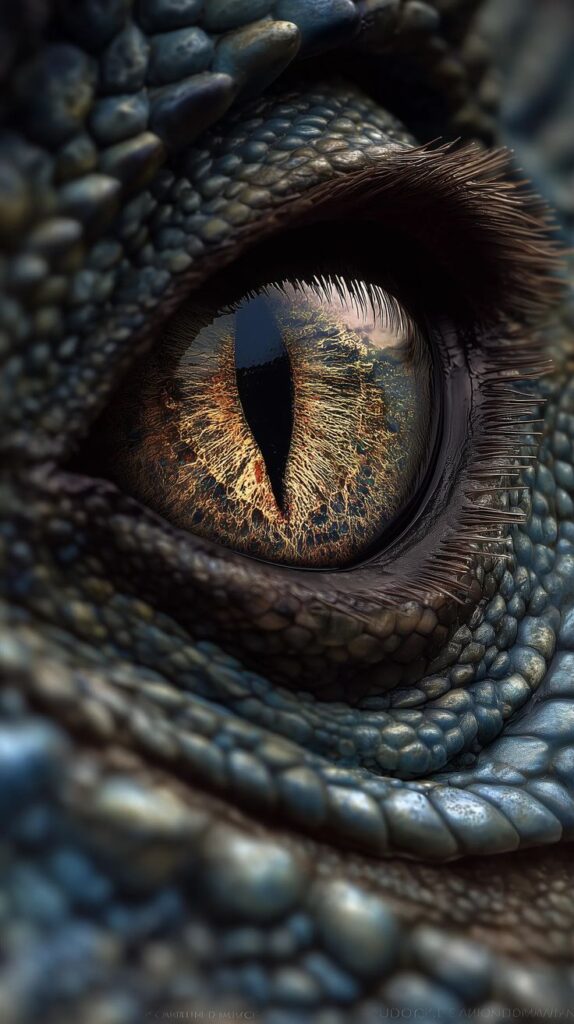
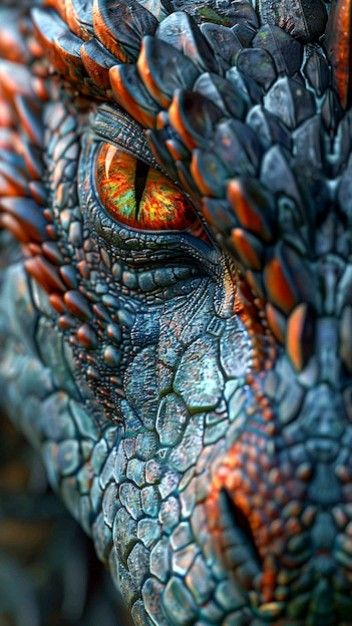
Pick photos that show reptile eyes, cat eyes, and artistic dragon examples to mix realism with fantasy. Look for close-ups with clear light direction so you can study highlights and the pupil shape.
Aim for at least three references: one for shape and scale, one for texture (scales and eyelid folds), and one for lighting and color. Save images at high resolution so you can zoom in on the iris detail. If you study animal eyes, note how the slit pupil changes with light and how the wet surface creates bright reflections. Keep your references visible while you work so you can compare proportions and tonal values as you draw.
How to sketch the dragon eye shape
Start with a clear, light sketch to lock in the eye’s size, angle, and placement. Focus on the overall silhouette and how the eye fits the head before adding detail.
Outlining the Eye
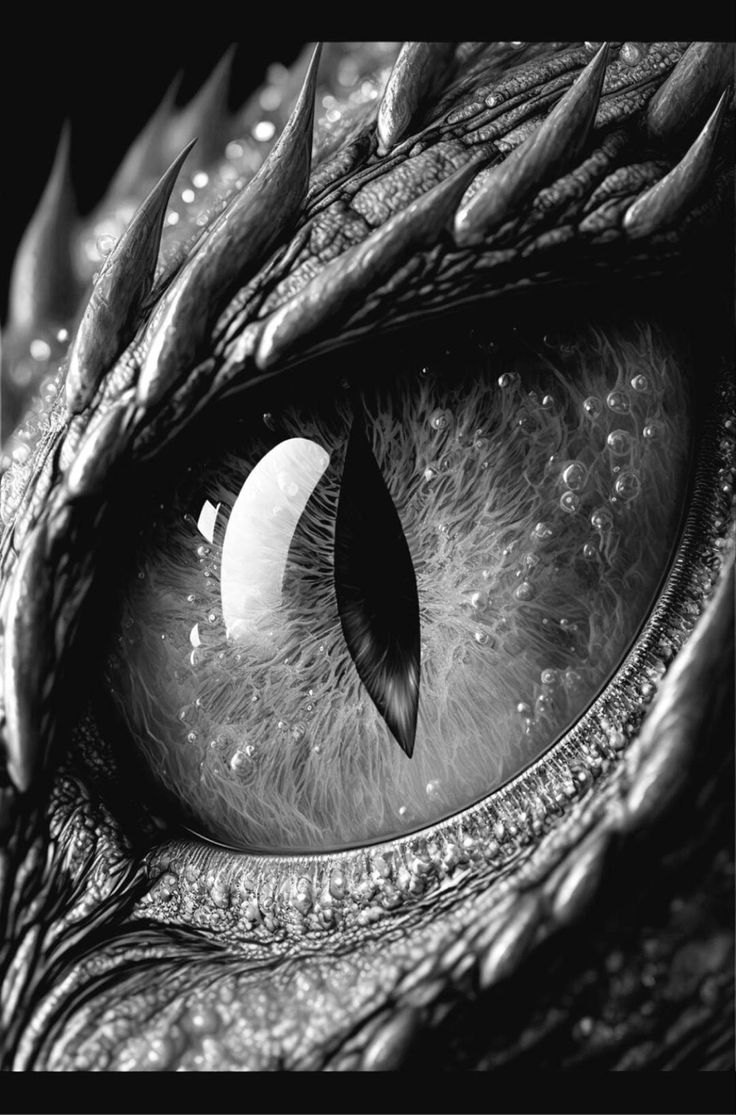
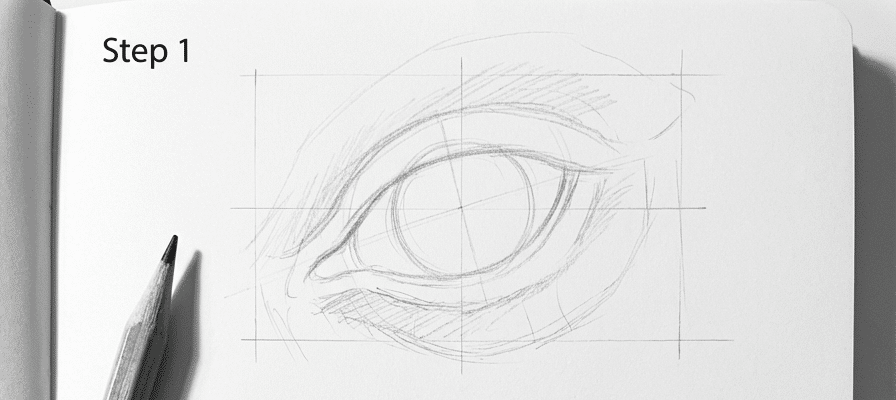
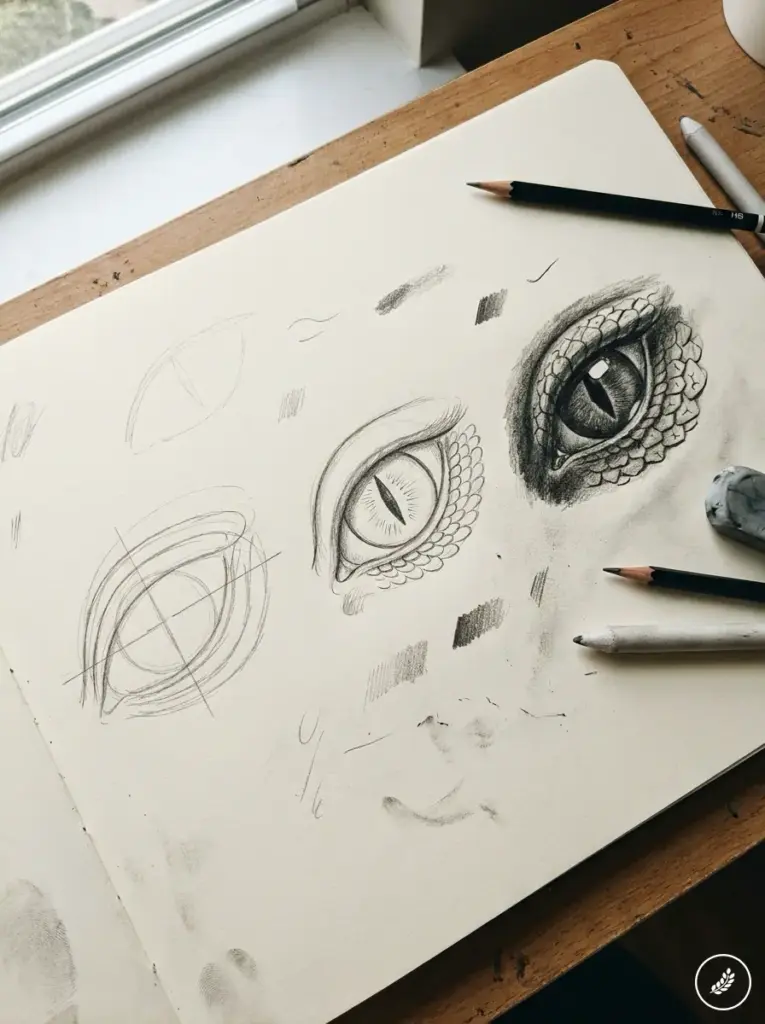
Draw a simple almond or leaf shape as your base. Keep the top edge slightly more curved and the bottom edge flatter to suggest a reptilian form. Use light strokes so you can adjust shape and symmetry easily.
Mark the centerline for the pupil and the inner corner where the tear duct would sit. Place the pupil off-center if the dragon looks to one side. Try a vertical slit for a classic reptile look, or a round pupil for a more mystical style.
Check proportions: the eye width should match the space between the brow ridges. If the dragon has heavy scales, make the outline a bit thicker to read through shading later.
Drawing the Eyelids
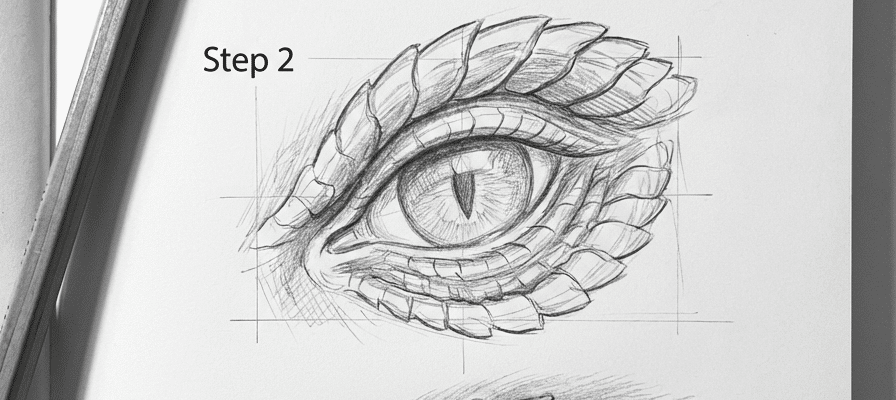
Sketch the upper eyelid as a hooded curve that overlaps the top of the outline a little. This creates depth and suggests a brow ridge above the eye. Draw the lower eyelid as a thinner curve that tucks under the eyeball.
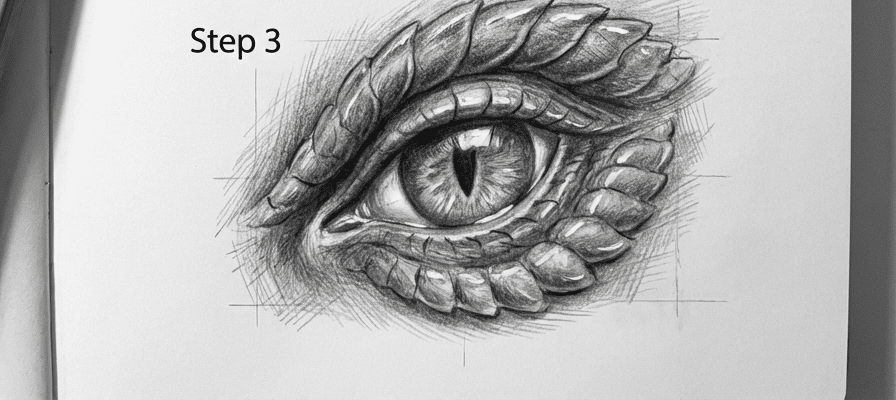
Add folds and creases where the eyelids meet the corners. Use short, angled strokes to show scale overlap or leathery skin. Keep these marks subtle at first; you can darken them later.
Decide how expressive you want the eye: a sharply hooked upper lid makes the dragon look fierce, while a rounded lid softens the gaze. Adjust lines and thickness to match that emotion before moving on to shading and detail.
Creating the Pupil and Iris
You will choose a pupil shape that sets the mood and then build iris layers to add depth. Pick clear contrasts, simple highlights, and radial texture to make the eye read well from a distance.
Designing Unique Pupils
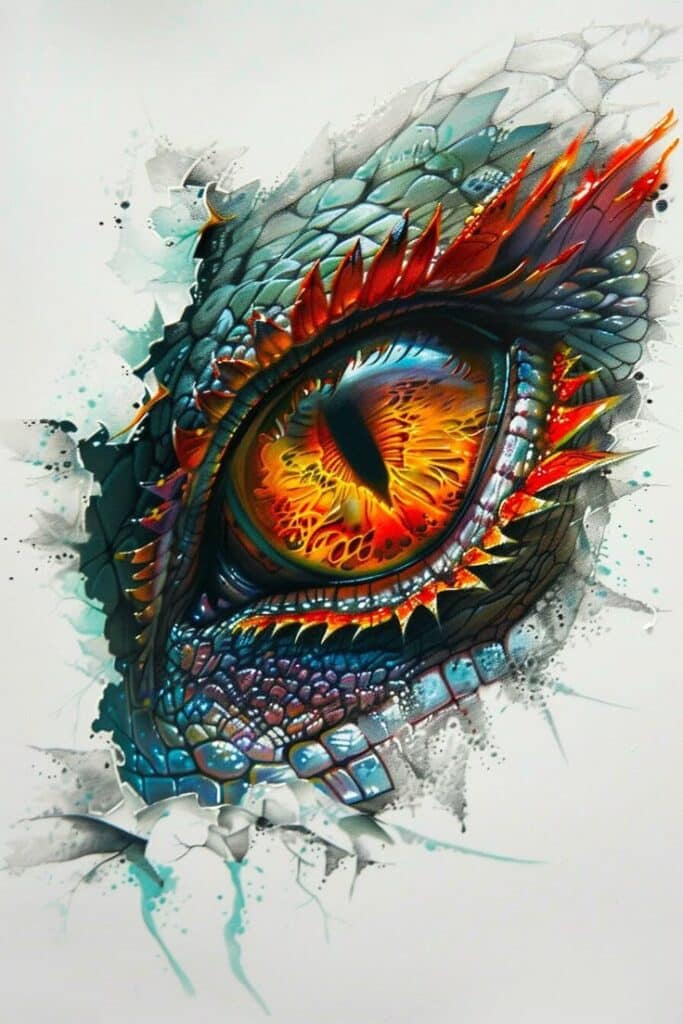
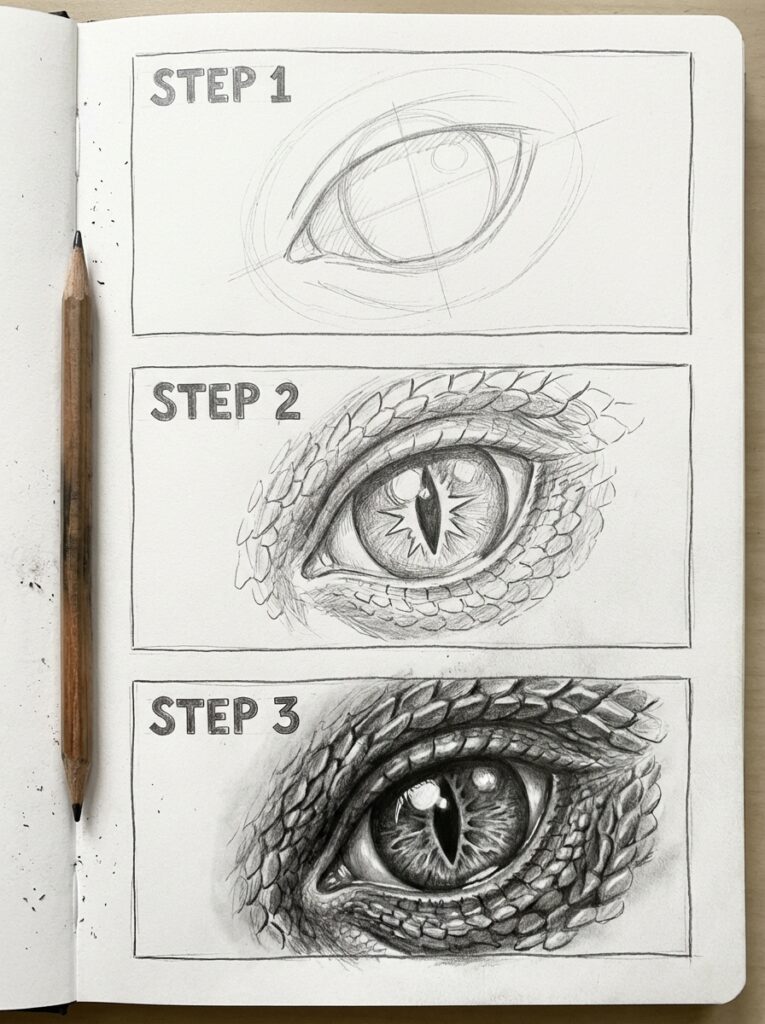
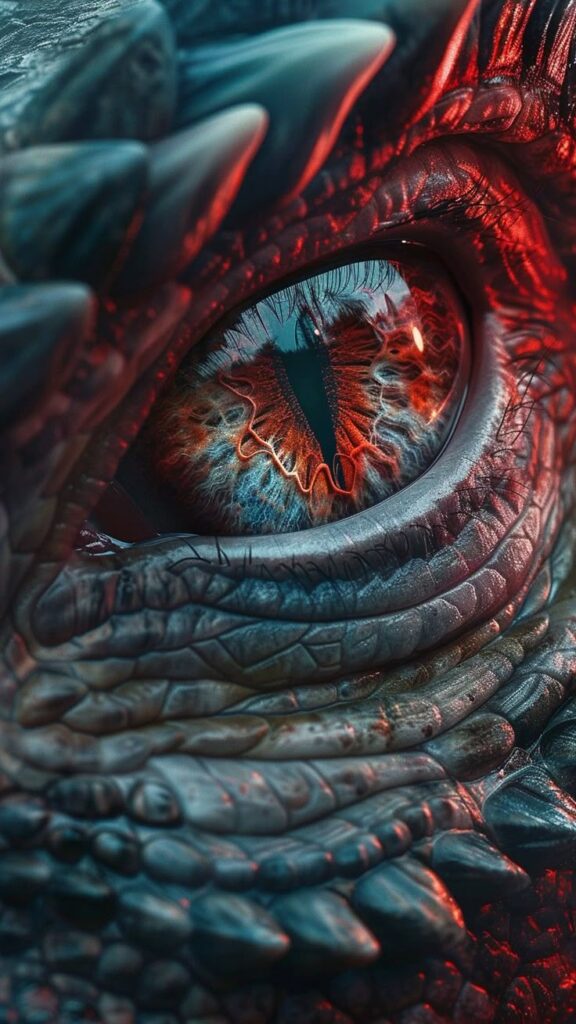
Decide what emotion or species you want the dragon to show. Use a vertical slit for a predatory, reptilian look. Make the slit narrow for a cold, focused stare, or slightly wider for a more relaxed expression.
Try nonstandard shapes for character: a rounded pupil reads softer, a keyhole or diamond shape looks mystical, and twin slits can feel alien. Keep the pupil centered or shift it slightly toward the inner corner to suggest attention.
Draw the pupil dark and crisp. Use a hard edge so it contrasts with the iris. If you want glow, add a thin rim of light color around the pupil or a soft outer blur to imply luminescence.
Adding Iris Details
Start with a circular iris that nearly fills the visible eye area. Use short radial strokes from the pupil outward to create texture. Vary stroke length and pressure to mimic fibrous rings.
Add darker shading under the top eyelid and lighter tones near the lower edge to follow the eye’s curve. Place one or two small bright highlights—leave them unshaded—to show wetness and catch light.
Layer color or tone: base color, mid-tone fibers, then darker veins or streaks. Blend gently toward the outer edge, but keep some sharp lines near the pupil for contrast. Add tiny flecks or rings to give the iris character without cluttering it.
How to add dragon eye scales and texture
Focus on scale shapes, size variation, and small skin marks to sell realism. Use light sketching first, then layer darker lines and shading where scales overlap or cast shadows.
Sketching Scales Around the Eye
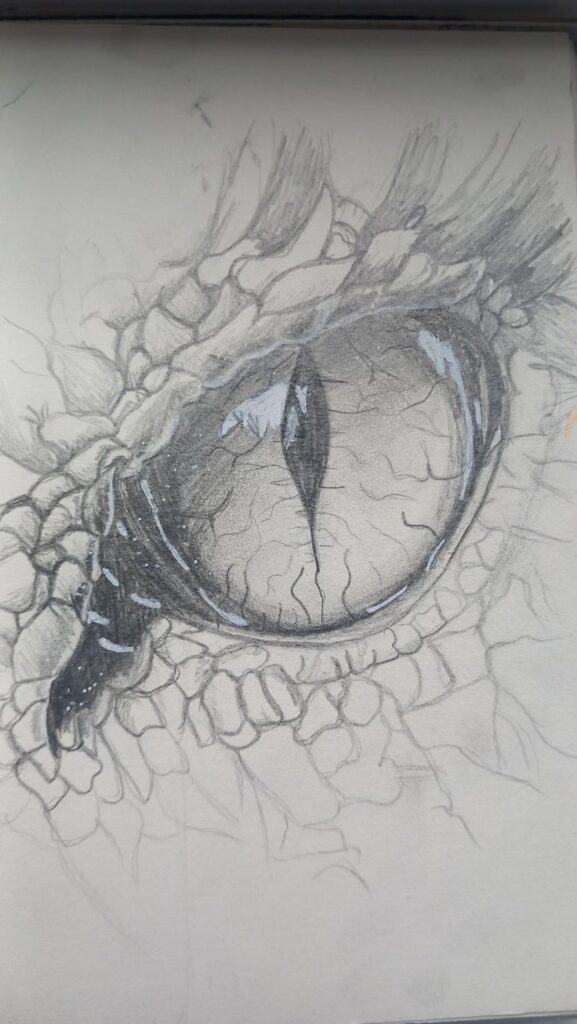
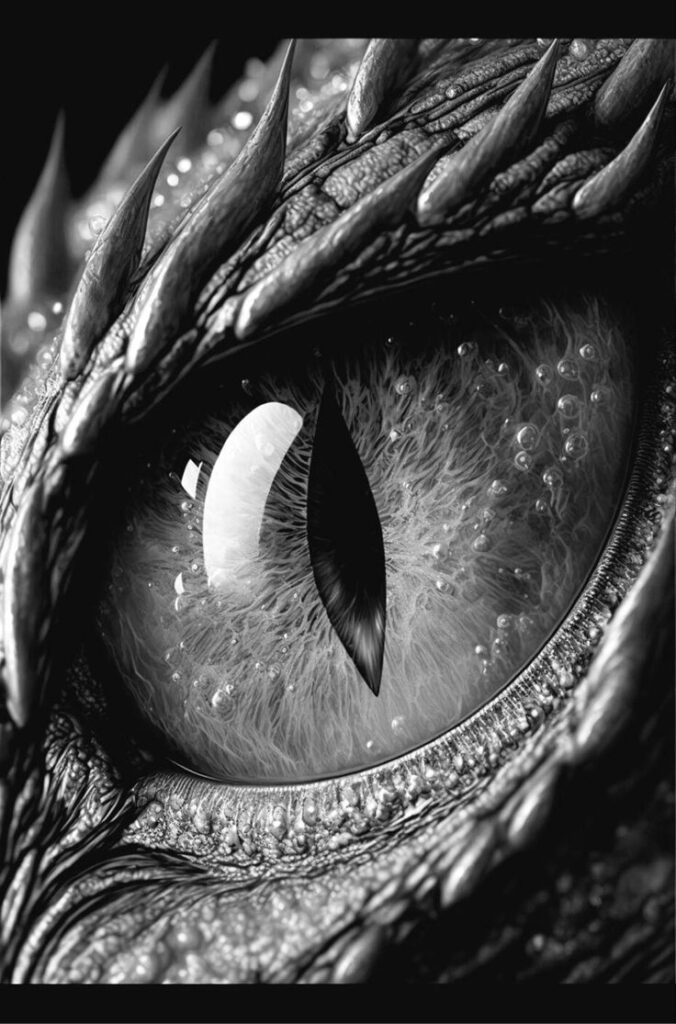
Start by drawing the eye socket shape and marking the eyelids. Work outward with rows of scales that follow the curve of the eye — this keeps the pattern natural and helps the eye sit in the face.
Vary scale size: use smaller, tighter scales near the eyelids and larger, looser plates farther away. That contrast adds depth and makes the area look armoured.
Use these steps:
- Light pencil strokes for placement.
- Define overlaps where one scale sits above another.
- Darken the edges that receive shadow.
Add tiny cracks or chips on a few scales to break uniformity. These small imperfections make the skin feel lived-in. Keep your pencil pressure light at first so you can adjust shapes without erasing heavily.
Emphasizing Skin Texture
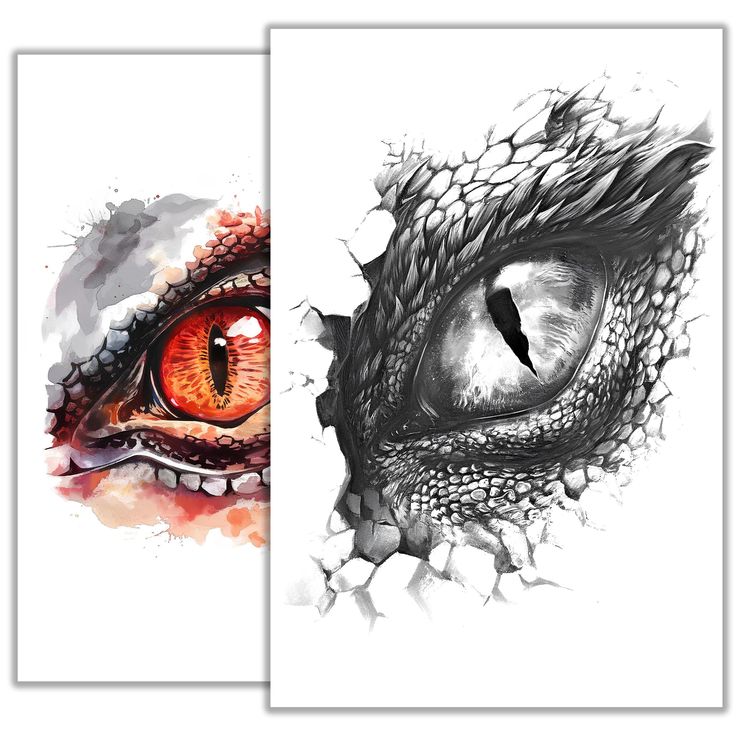
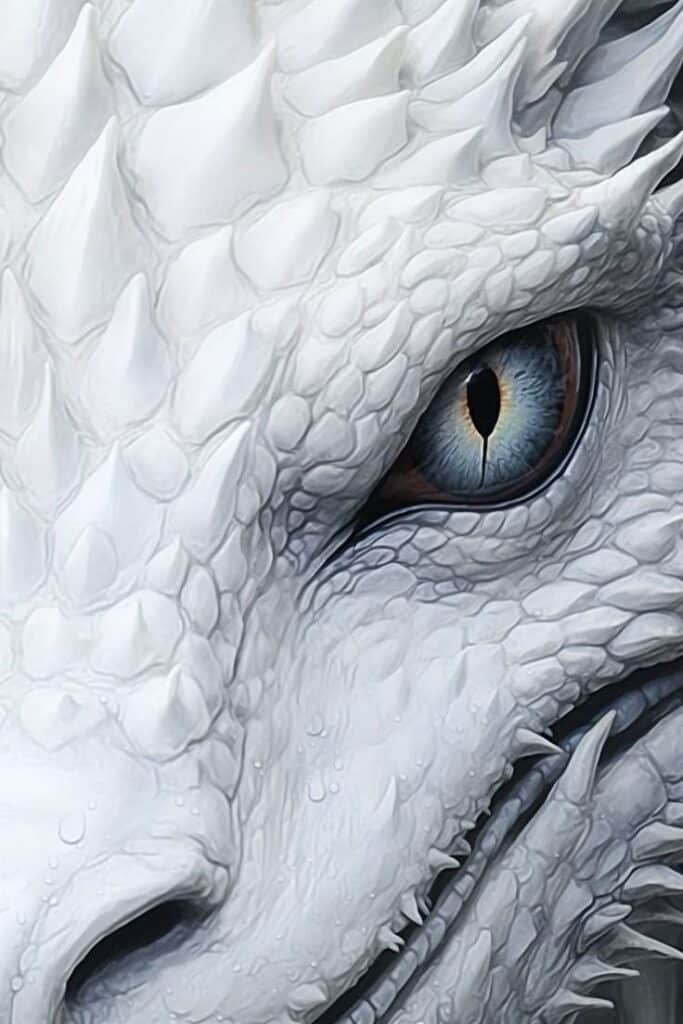
Add short, directional strokes to indicate rough skin and creases around the eyelids. Follow the natural folds: vertical creases at the inner corner and curved wrinkles above the lid.
Use shading to show form:
- Shade under the upper eyelid to suggest depth.
- Darken between overlapping scales for contrast.
- Apply a soft highlight on scales that catch light.
Consider using different tools: a harder pencil for fine cracks, a softer pencil or charcoal for broad shadow, and a kneaded eraser to lift highlights. Blend lightly with a tissue for smooth areas, but keep some grainy texture to imply scales.
Dragon eye shading and color techniques
This is where the drawing starts to feel dimensional: build depth, place strong highlights and shadows, and pick bold colors that make the eye look alive. Use soft blending, precise darks, and bright accents to guide the viewer’s focus.
Blending for Depth
Start by laying down base tones for the iris and surrounding scales. Use light pressure with pencils or a diluted wash with paints to create smooth gradients from the pupil outward. Blend in small circles or soft strokes; this avoids harsh bands that flatten the eye.
Layer values from dark to light. Put the darkest tones near the pupil and under the eyelid, then gently transition to midtones and highlights. Use a tortillon, soft brush, or fingertip to soften edges. Keep a clean blending tool to avoid muddying colors.
Work in thin layers and let each layer dry if you use wet media. Rebuild texture by adding small, curved strokes that follow the iris lines. These tiny strokes catch light and create the illusion of a rounded form.
Highlighting and Shadows
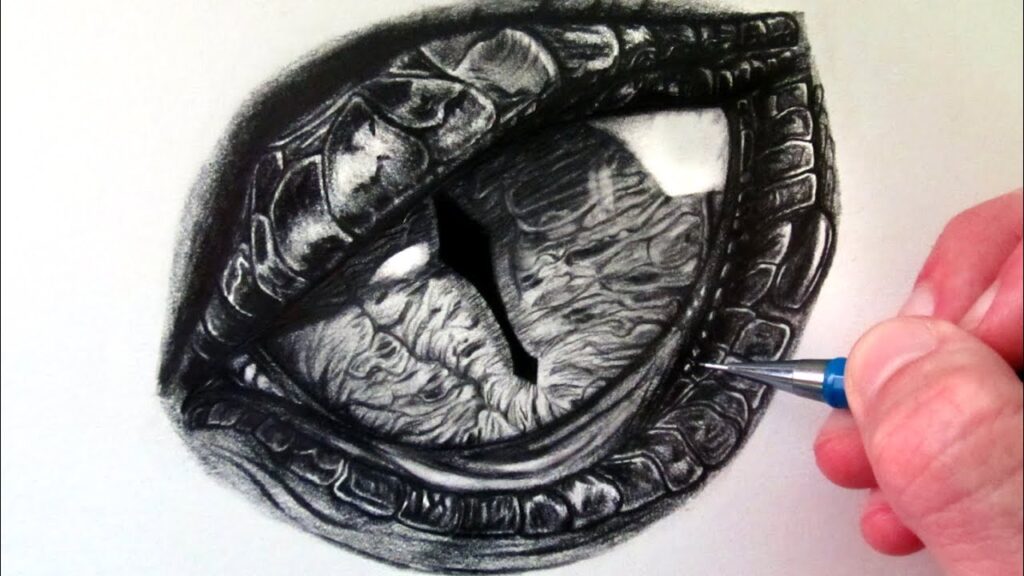
Place a crisp white highlight on the cornea to simulate reflected light. A single bright dot or a small crescent near the top of the pupil reads as wetness. Reserve highlights by leaving the paper white or add them last with opaque white gel or paint.
Drop shadows under the upper eyelid and along the inner corner to anchor the eye in the socket. Use cool, desaturated colors for shadows so they recede. Add tiny cast shadows from the lid on the cornea to increase realism.
Add subtle secondary highlights along textured parts of the iris for sparkle. Use a very small brush or sharpened pencil for these marks. Keep highlights consistent with one light source to avoid visual confusion.
Adding Vibrant Colors
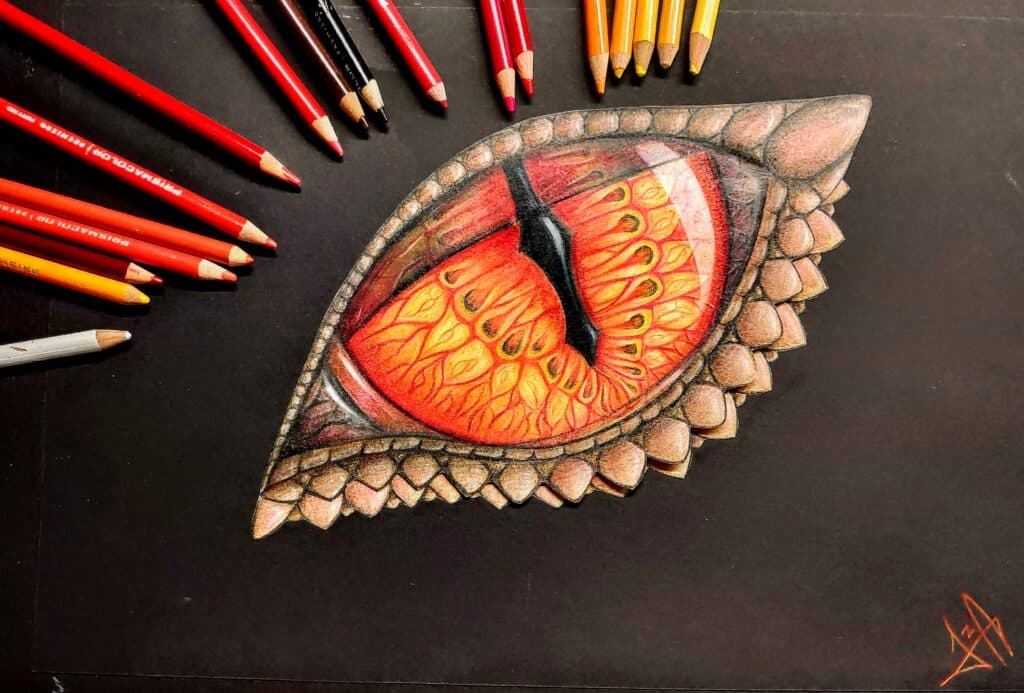
Choose a strong color palette for the iris center and complementary tones for outer rings. For example, pair a bright gold center with deep teal edges, or use emerald green with hints of rust. Contrast increases visual pop.
Apply transparent glazes of color to intensify saturation without losing value. Layer thin washes or light pencil color over your base shading. This keeps depth while giving a vivid hue.
Add tiny veins or specks with a fine tool to suggest organic detail. Vary warm and cool notes inside the iris so it reads as alive. Finally, step back and adjust saturation or contrast so the eye reads clearly from a distance.
Common dragon eye drawing mistakes
The fastest way to flatten a dragon eye is to decorate it before the form works. I usually check the silhouette, the lid overlap, and the shadow under the brow before I touch scales or color. If those three things are weak, texture will not save the drawing.
- Drawing the pupil too softly: keep the slit dark and crisp so it anchors the iris.
- Making every scale the same size: use tiny scales near the eyelid and bigger plates farther out.
- Putting highlights everywhere: choose one light source and keep the main catch-light consistent.
- Skipping the upper-lid shadow: that shadow is what makes the eyeball feel tucked into the head.
Final touches that make dragon eyes look alive
Tighten your lines, sharpen contrast, and add small light and texture details to make the eye stand out. Focus on edges, highlights, and tiny imperfections that sell realism.
Refining Details
Go back with a sharp pencil or fine liner to crisp the eyelid edges and the pupil. Darken the pupil to a deep black and clean any stray sketch marks around it. Use an eraser to lift tiny, tapered highlights on the iris and along the tear line.
Add small scales or skin texture near the eye with short, angled strokes. Vary stroke length and pressure to avoid repeating patterns. Introduce a few thin veins or creases to the inner corner for realism.
If you use color, layer midtones first, then add darker rim shadows and subtle color shifts in the iris. Blend gently to keep texture while removing harsh transitions.
Making Eyes Look Alive
Place at least one bright catch-light where a light source would hit the eye. A single white spot near the pupil gives immediate life. For a wet look, add a thin, glossy highlight along the lower eyelid.
Create depth with a subtle rim light on the outer edge of the iris and a faint shadow under the upper eyelid. This makes the eyeball feel spherical. Use tiny radial lines from the pupil outward to suggest texture inside the iris.
Introduce small imperfections: asymmetrical highlights, uneven pupil edges, or a faint reflection of nearby objects. These details make the eye feel real and responsive to its environment.
Dragon eyes drawing FAQ
How do you draw dragon eyes for beginners?
Start with a light almond shape, then place a large iris and a vertical slit pupil inside it. Add the upper eyelid before the scales, because the lid tells the viewer how the eye sits in the head. Once the form works, darken the pupil, shade under the upper lid, and leave one clean highlight.
What pupil shape works best for dragon eyes?
A vertical slit is the easiest choice for a classic reptile or fantasy dragon look. Make the slit narrow for a colder, more predatory stare. A round pupil feels softer and younger, while a diamond or keyhole shape gives the dragon a magical design without changing the basic eye structure.
How do you make a dragon eye look realistic?
Use real animal-eye logic: a wet highlight on the cornea, a dark shadow under the top lid, and scale rows that wrap around the socket. The eye should feel round before it feels detailed. If the iris, lid, and shadow are placed well, the fantasy texture becomes much easier to believe.
What pencils are best for drawing dragon eyes?
Use HB or 2H for the first construction lines, 2B for mid tone shading, and 4B or 6B for the pupil and deepest shadows. A kneaded eraser is useful for lifting catchlights from the iris and small highlights from the scale edges. Colored pencils can be added after the value structure is clear.
How do you shade scales around a dragon eye?
Shade the scales as overlapping plates, not as a flat pattern. Darken the lower edge of each scale where it tucks under the next one, then lift a small highlight on the upper edge. Keep the smallest scales close to the eyelid so the eye socket feels detailed but still readable.
Can you draw dragon eyes with colored pencils?
Yes. Build the drawing in graphite or very light colored pencil first, then layer color from light to dark. Try amber, green, red, or blue in the iris, but keep the pupil nearly black and preserve the white catch-light. Burnish only at the end, after the shadows and scale texture are working.
After the eye study, it helps to place the creature in a scene; fantasy drawing ideas for dragons can give you prompts for the head, wings, setting, and story before you start shading.
Related eye and creature drawing practice
If the dragon eye still feels stiff, build the fundamentals around it: start with the eye drawing guide, compare the core eye shapes, then use the realistic eye shading guide for cleaner values. For more variations, save a few eye drawing ideas, follow the eye drawing tutorials, or use these sketchbook prompts when you want another fantasy subject.
- 1.7Kshares
- Facebook0
- Pinterest1.7K
- Twitter0
- Reddit0