Porsche drawing works best when you treat each model as a different shape problem, not just another sports car. The 356 is soft and compact, the 911 lives in one long roof arc, the 914 turns into a flat wedge, and the Cayenne asks you to keep Porsche face language on a taller body.
This guide walks through 9 successful Porsche models with sketch cues for each one. Use it for proportion checks, image reference notes, beginner mistakes, and cleaner Porsche car drawing practice in pencil, ink, marker, or digital tools.
How to start a Porsche drawing from any model
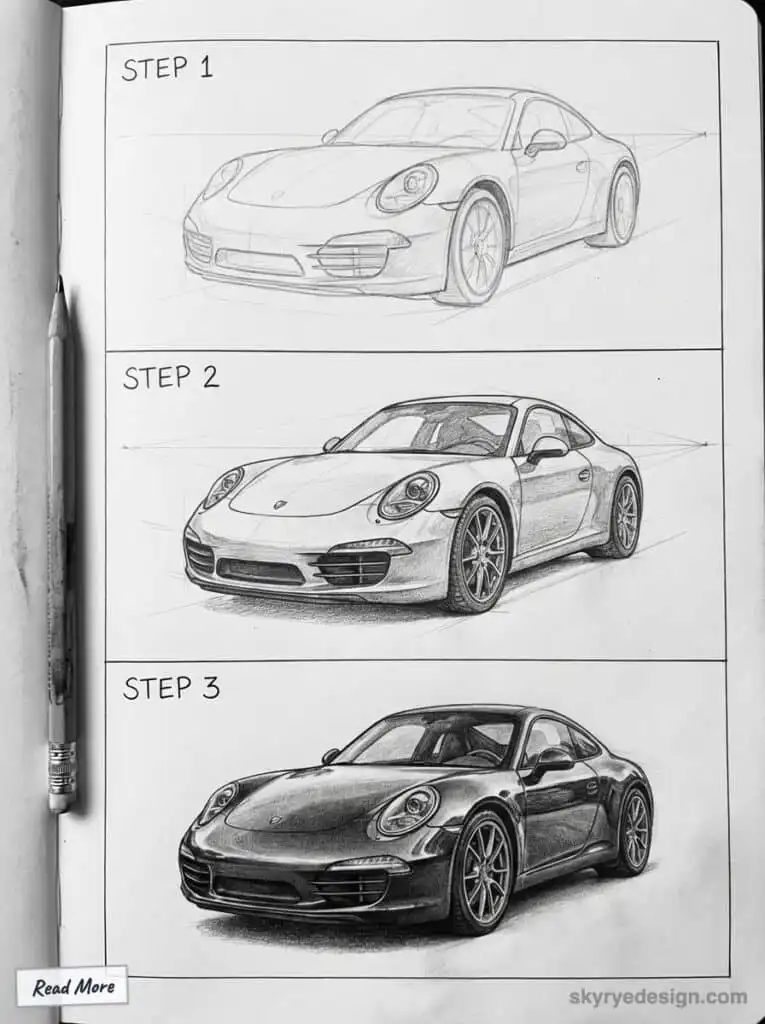
To start a Porsche drawing, choose the model before you draw details. Place the wheels on a clean baseline, block the cabin and hood, then ask what makes that model readable in silhouette. A 356 needs soft curves, a 911 needs rear visual weight, a 914 needs a low wedge, and a Panamera needs a long roof gesture. Once the outline works, add headlights, glass, rims, and reflections. I keep the first pass light because one small roof or wheelbase correction can save the whole sketch.
| Model cue | What to draw first | Quick check |
|---|---|---|
| 356 | Rounded cabin and small lamps | The body feels soft, compact, and simple. |
| 911 | Roof arc and rear fender | The rear carries more weight than the nose. |
| 914 | Low beltline and flat cabin | The car reads as a mid-engine wedge. |
| 944 / 928 | Longer front-engine mass | The nose does not look like a 911. |
| Boxster / Cayman | Cabin between the axles | The side intake and short deck stay clear. |
| Cayenne / Panamera | Taller or longer body gesture | The Porsche face stays recognizable without shrinking the car. |
Why Porsche proportions matter across models
Porsche design is useful to study because it keeps returning to automotive history, blending timeless style with purposeful engineering. The 911 is the easiest reference point, but the same discipline applies across the whole model list: read the wheelbase, roof gesture, glass shape, and fender weight before you chase details. Every element, from the side window to the rear lamp, is drawn around one main relationship: roof arc, rear weight, wheel placement, and glass shape.
The silhouette of a car is referred to as the “Y zero section” in design discussions. The daylight opening (DLO) is a term used to describe the window area in car design.
Whether you are new to car sketching or already comfortable with perspective, the useful move is to compare models instead of copying one car over and over. Each Porsche changes the drawing problem.
For artists, understanding these key elements is essential when you set out to draw a Porsche. The way the side window curves into the body, the placement of the rear lamp, and the subtle transitions between surfaces all play a role in capturing the spirit of a classic Porsche on paper. Those details are what make the car read as a Porsche before the badge appears.
When you sketch a Porsche model, pay close attention to how these elements interact. The lines are clean yet powerful, and every curve serves a purpose. Study those features first and the drawing will feel more accurate before you add reflections, badges, or wheel detail. If you want a stronger portfolio study, compare this car sketch with portfolio examples that stand on clear silhouettes, controlled values, and one strong visual idea.
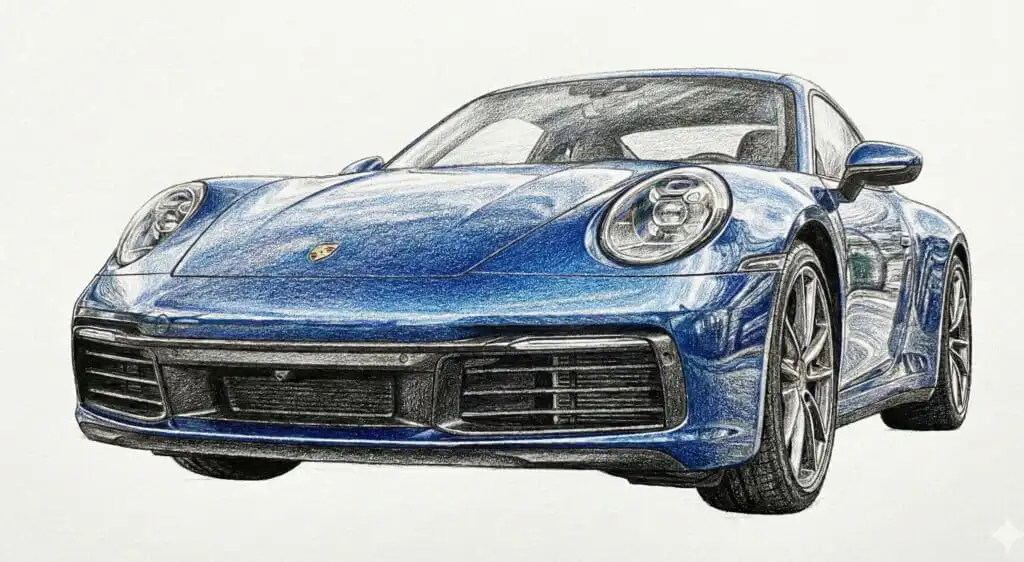
What makes a Porsche model worth drawing?
Before diving in, it’s worth defining success through a broader lens. For Porsche, success is rarely just about numbers.
A truly successful Porsche model tends to check several boxes:
- Longevity: Produced across multiple generations or decades
- Design Consistency: Instantly recognizable, even in outline form, thanks to characteristic features like the sloping roofline, pronounced fenders, and signature headlights that define Porsche’s visual identity
- Cultural Impact: Appears in racing, film, posters, and art
- Brand Influence: Shapes the look of future models
- Artist Appeal: Strong proportions, readable lines, and visual tension
For example, the Porsche 911 is the obvious classic reference, but the 356, 914, 944, Boxster, Cayman, Cayenne, and Panamera each teach a different drawing lesson.
With that in mind, here are the nine models that best represent Porsche’s success—both on the road and on the page.
Porsche drawing proportions to check first
Achieving the right proportions is the foundation of any successful Porsche drawing. The relationship between the front wheel and rear wheel, the length of the hood, and the sweep of the windshield all contribute to the unmistakable silhouette of a classic Porsche.
Defining Key Terms:
- Teardrop silhouette: This refers to the unique, flowing shape of Porsche cars, where the roofline arcs smoothly from the front windshield to the rear, creating a profile reminiscent of a teardrop. This shape is a hallmark of Porsche design and is especially prominent in the 911.
- Key lines: These are the essential lines that define the car’s character and identity, such as the roof arc, the beltline, and the fender curves. Understanding key lines is essential for creating a strong car identity in design.
- Proportions: Correct proportions are what make the car look like a Porsche. This means accurately capturing the relationship between the wheels, the length of the hood, the width of the rear fenders, and the overall stance.
Take the Porsche 911 for the teardrop roof, the 356 for softer early curves, the 914 for a low wedge, and the Cayenne for the SUV version of the same brand language. Porsche drawings should focus on the model-specific silhouette first, then the lights, rims, badges, and reflections.
When you draw a Porsche, start by lightly sketching the positions of the front wheel and rear wheel. Notice how the side skirt and air intake are integrated into the lower body, adding both visual interest and aerodynamic function. The door, hood, and windshield should be proportioned to maintain the car’s balanced look—too long or too short, and the drawing loses its realism.
Pay special attention to the way the body curves over the wheels and how the skirt runs along the lower edge. The proportions of these elements are what make a Porsche instantly recognizable, even in a simple outline. By carefully observing reference photos and practicing your sketches, you’ll develop an eye for these subtle relationships and be able to create drawings that are both realistic and true to the spirit of the car.
With these proportions in mind, let’s explore the most iconic Porsche models and what makes them so appealing to artists.
Easy Porsche drawing checklist
Whether you’re drawing a classic 911 or a modern Cayenne, follow these steps and tips to create a realistic Porsche drawing:
- Gather Your Tools
- Pencils (HB, 2B, 4B)
- Eraser
- Ruler or grid for proportions
- Fine liners or pens for inking
- Colored pencils or markers for finishing touches
- Blending stump or tissue for shading
- Step 1: Sketch the Outline
- Start with a light sketch of the car’s outline, focusing on the teardrop silhouette and powerful rear proportions.
- Use the grid method to help with proportions.
- Establish the correct proportions: the wheelbase should be roughly two and a half times the diameter of the wheels.
- Exaggerate certain features (like the muscular rear fenders) to convey character.
- Step 2: Add Key Features
- Draw the front and rear wheels, making sure they are aligned and sized correctly.
- Add the side window (DLO), mirrors, and air intakes.
- Sketch the headlights: classic models use simple ellipses, while modern versions have detailed inner modules like the four-point LED signature.
- Outline the roof arc, beltline, and fender curves (key lines).
- Step 3: Refine Details
- Gradually add layers of detail, such as the grille, license plate holder, and rear lamp.
- Finalize the tires and carefully draw the spokes of the rims to make them look natural.
- Add large brake discs and visible calipers for performance models.
- Step 4: Shading and Depth
- Use varying line thicknesses to convey depth and volume.
- Shade with hatching or cross-hatching to make your drawing look natural and three-dimensional.
- Blend shadows and highlights for a realistic effect, especially on metal, glass, and paint surfaces.
- Step 5: Color and Final Touches
- Color the body after completing the sketch, using colored pencils or markers.
- Add details and refine realism with additional layers and highlights.
Tips:
- The sketch is the most important part of your drawing if you want it to look realistic.
- Dynamic sketching with quick, expressive lines can help capture the sleek lines and flowing forms of Porsche design.
- Focus on the unique teardrop silhouette and powerful rear proportions.
- Use the key lines to lock in the car identity before details.
If the Porsche silhouette feels too familiar, switch to Lexus sports car sketches for a contrast exercise. The LC 500 and LFA ask for sharper front graphics and heavier rear haunches, which makes them useful after practicing Porsche curves.
1. Porsche 356 (1948–1965): The Origin Story
Drawing note: Keep the 356 soft and almost egg-shaped. Use one clean roof curve, small round headlights, and a gentle rear slope; if you add too many hard creases, it stops feeling like an early Porsche.
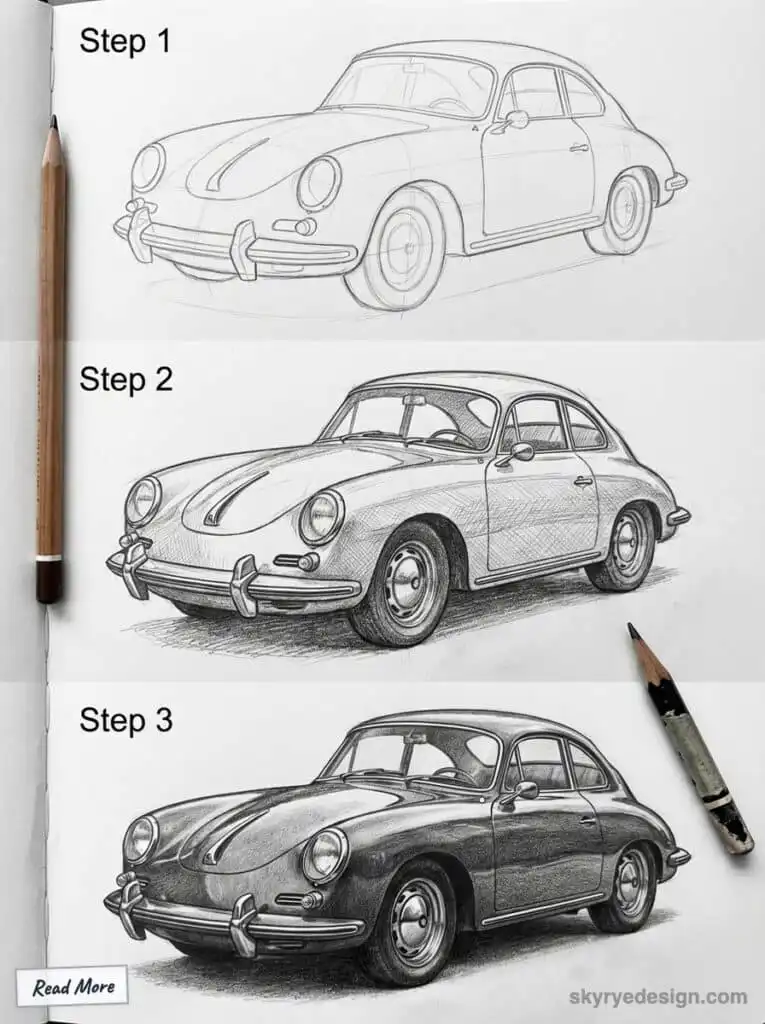
Every Porsche drawing lineage starts here. The Porsche 356 wasn’t just the company’s first production car—it was the visual thesis for everything that followed.
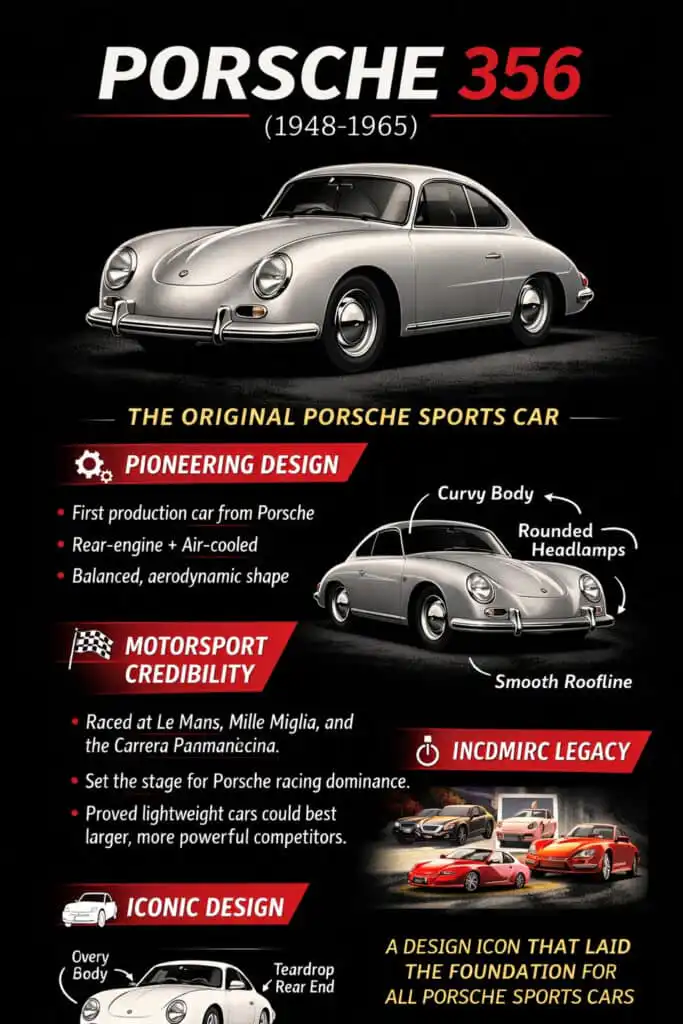
Why it mattered:
The 356 established Porsche’s rear-engine layout, lightweight philosophy, and love of aerodynamic curves. Its success in motorsport and growing popularity in post-war Europe and the U.S. set the brand’s foundation.
Why artists love drawing it:
- Simple, uninterrupted curves
- Minimal surface detail
- Strong egg-shaped side profile
- Perfect for ink, pencil, and minimalist line drawings
The 356 teaches artists restraint. There’s nowhere to hide mistakes, which is why it’s often used in design schools and sketch practice.
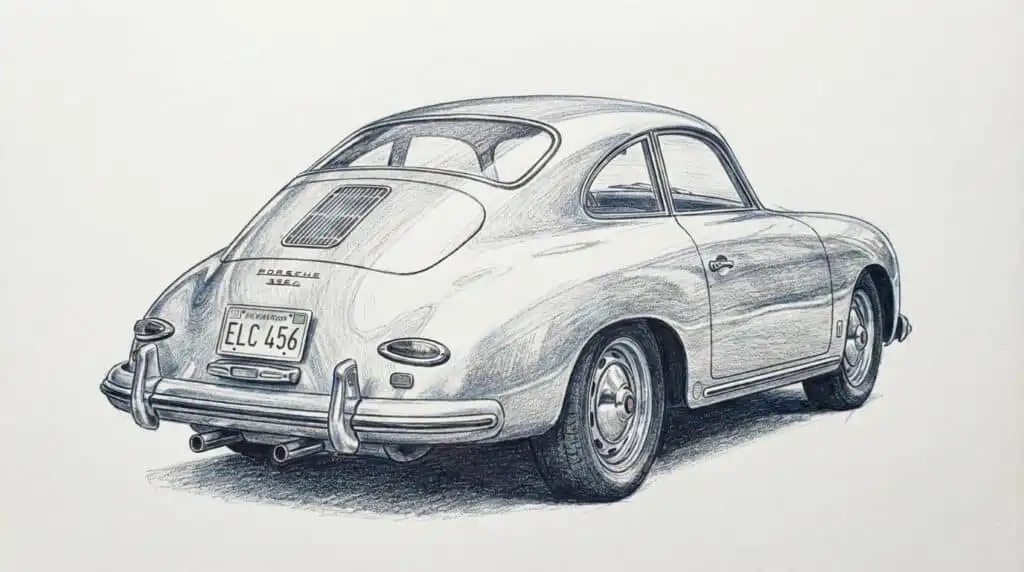
With the 356 as a foundation, let’s move on to the model that defined Porsche’s identity for generations.
2. Porsche 911 (1964–Present): The Eternal Silhouette
Drawing note: For a Porsche 911 drawing, the roof arc and rear fender are the identity. I usually place the wheel centers first, then pull the roofline from windshield to tail in one controlled curve.
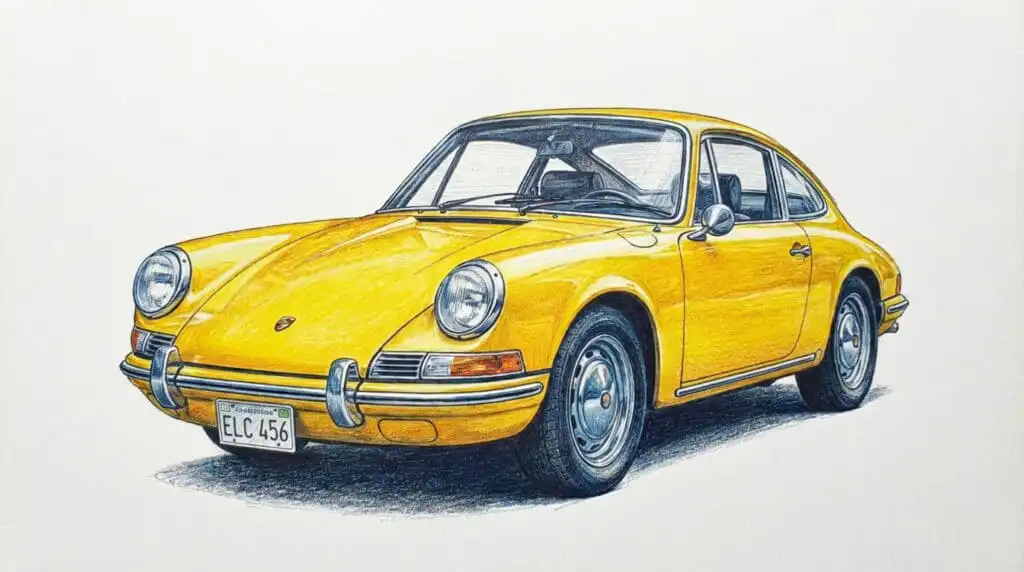
No car in history has stayed so visually consistent while evolving so completely. The Porsche 911 is not just Porsche’s most successful model—it may be one of the most successful car designs ever.
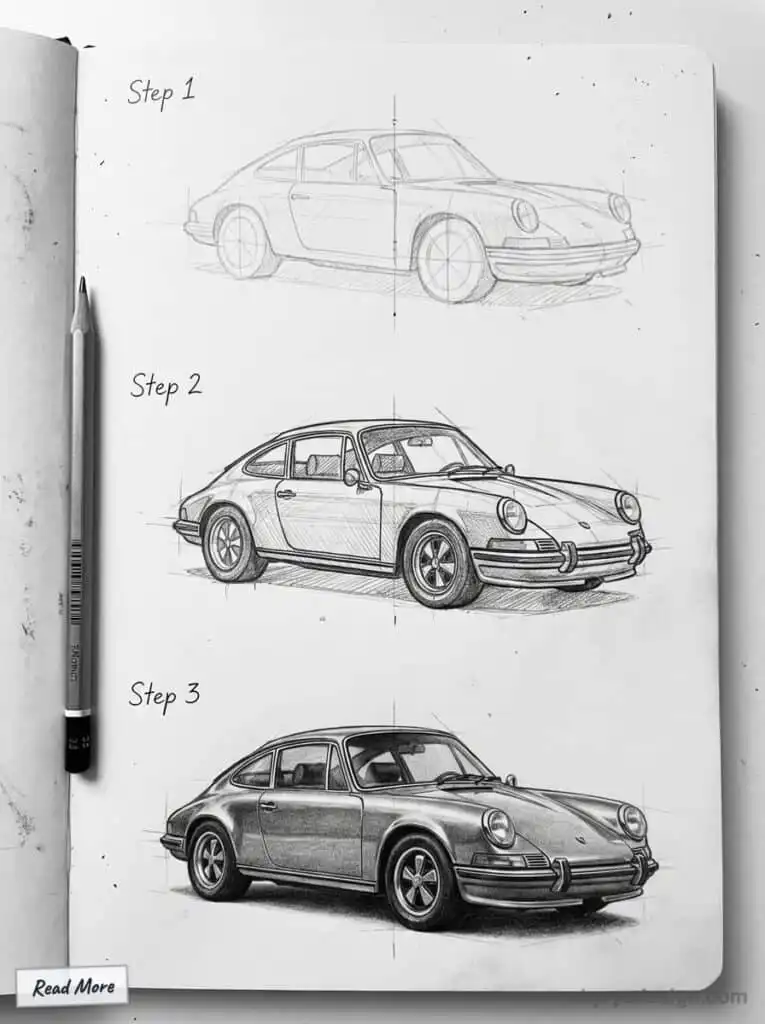
Why it mattered:
- Over 60 years of continuous production
- Backbone of Porsche’s racing and road identity
- Cultural icon across generations
Why artists love drawing it:
- Instantly recognizable from a single line
- Signature roof arc flowing into the rear
- Circular headlights as visual anchors
- Endless variation (classic, modern, race-spec)
The sketch is the most important part of your drawing if you want it to look realistic.
If you draw cars long enough, you will draw a 911. It’s unavoidable—and that’s exactly why it’s successful.
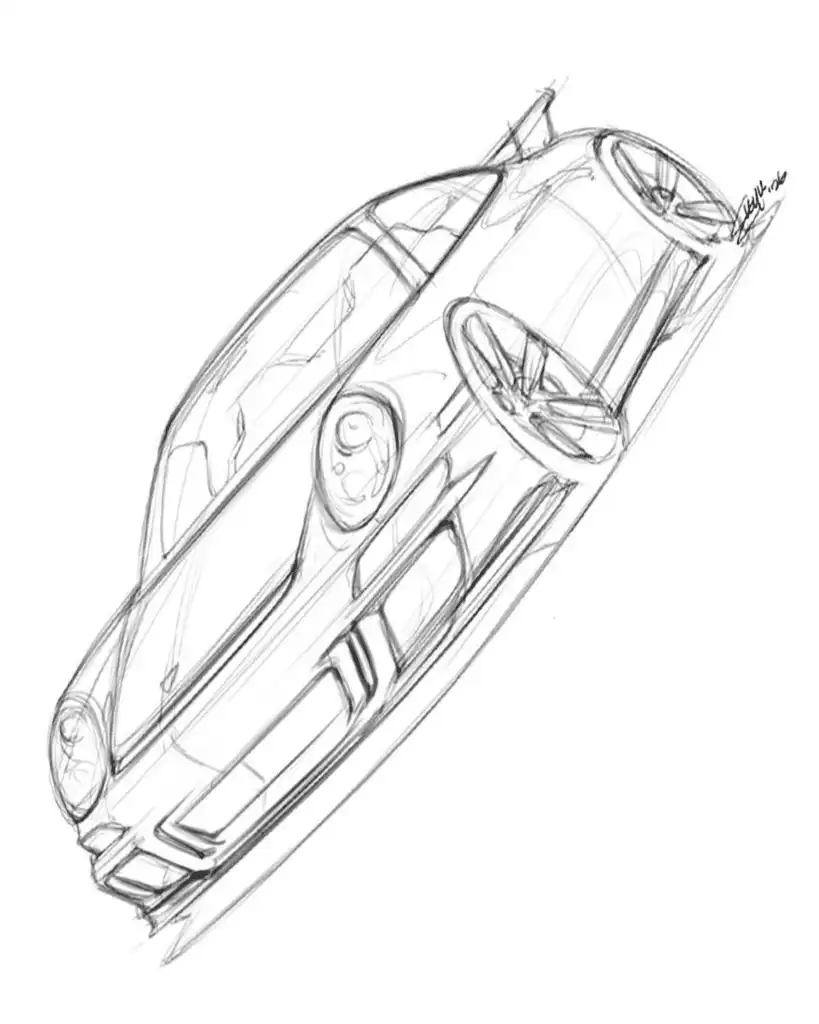
When sketching the 911, pay close attention to its proportions. Using a grid method can help you accurately capture the car’s dimensions and maintain correct proportions in your Porsche drawing.
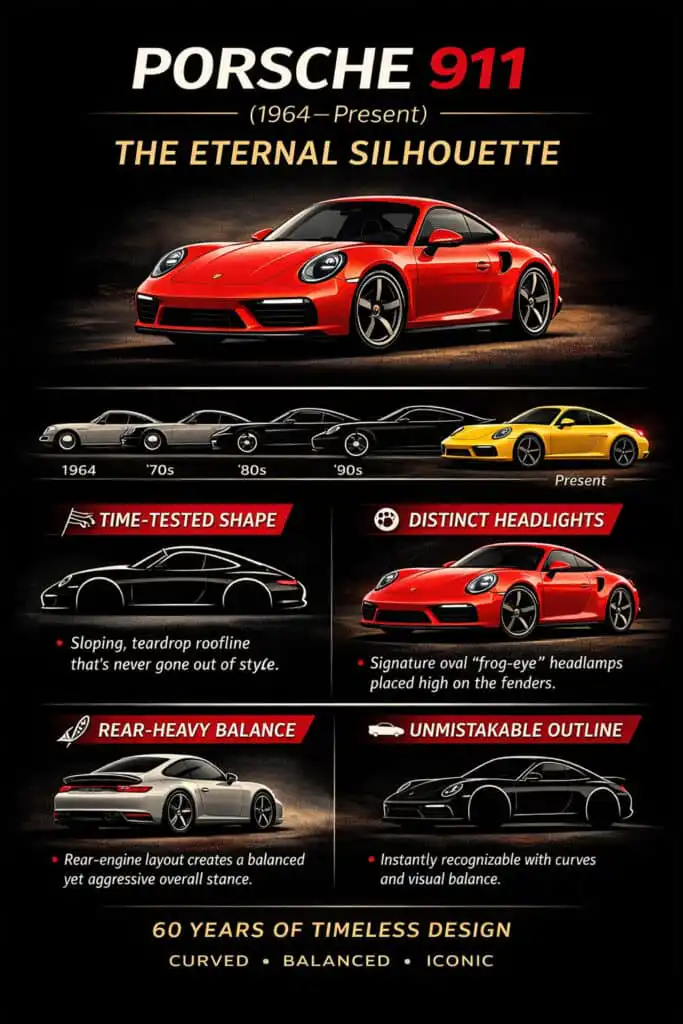
Porsche drawings should focus on the unique teardrop silhouette and powerful rear proportions that define the 911’s iconic look.
The 911’s design has evolved over decades, and since 2004, Michael Mauer has been in charge of design at Porsche, guiding its modern interpretation.
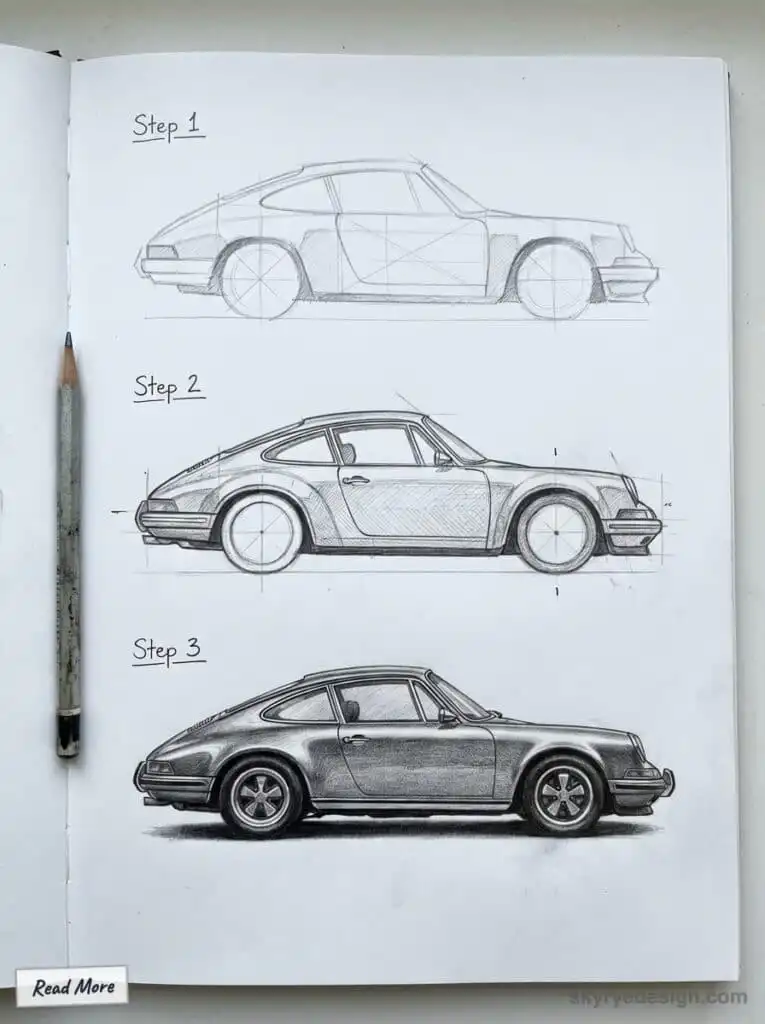
The process of sketching a Porsche involves iterative refinement—don’t be afraid of error. Trial and error is a natural part of the creative process, and learning from mistakes will help you improve your skills and achieve a more authentic result.
With the 911’s legacy in mind, let’s look at the models that expanded Porsche’s design language.
3. Porsche 914 (1969–1976): The Mid-Engine Experiment
Drawing note: The 914 needs flatter, squarer thinking than the 911. Keep the beltline low, the cabin compact, and the mid-engine proportions clear so it does not turn into a generic wedge.
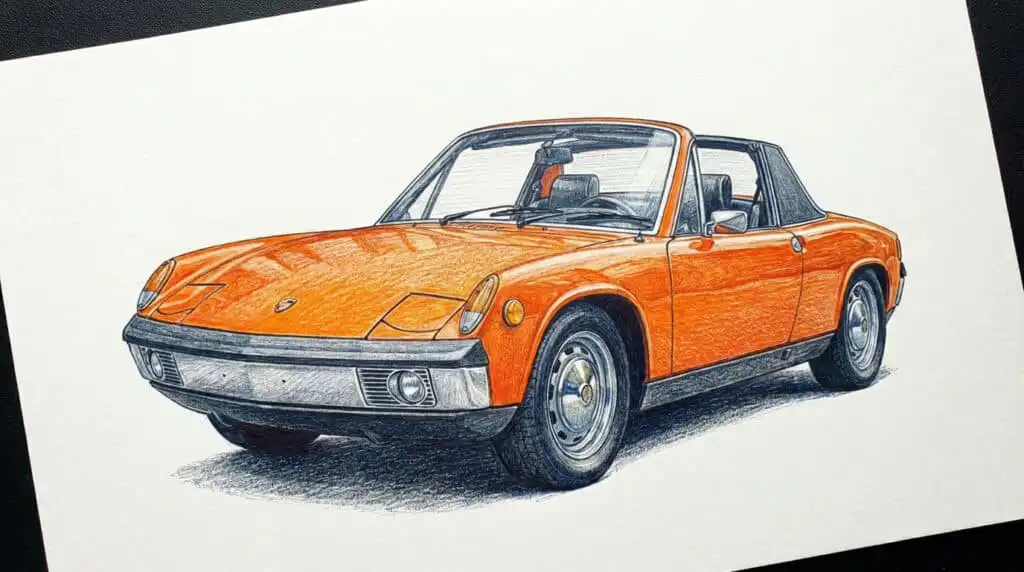
Often overlooked in conversation, the 914 played a critical role in Porsche’s evolution.
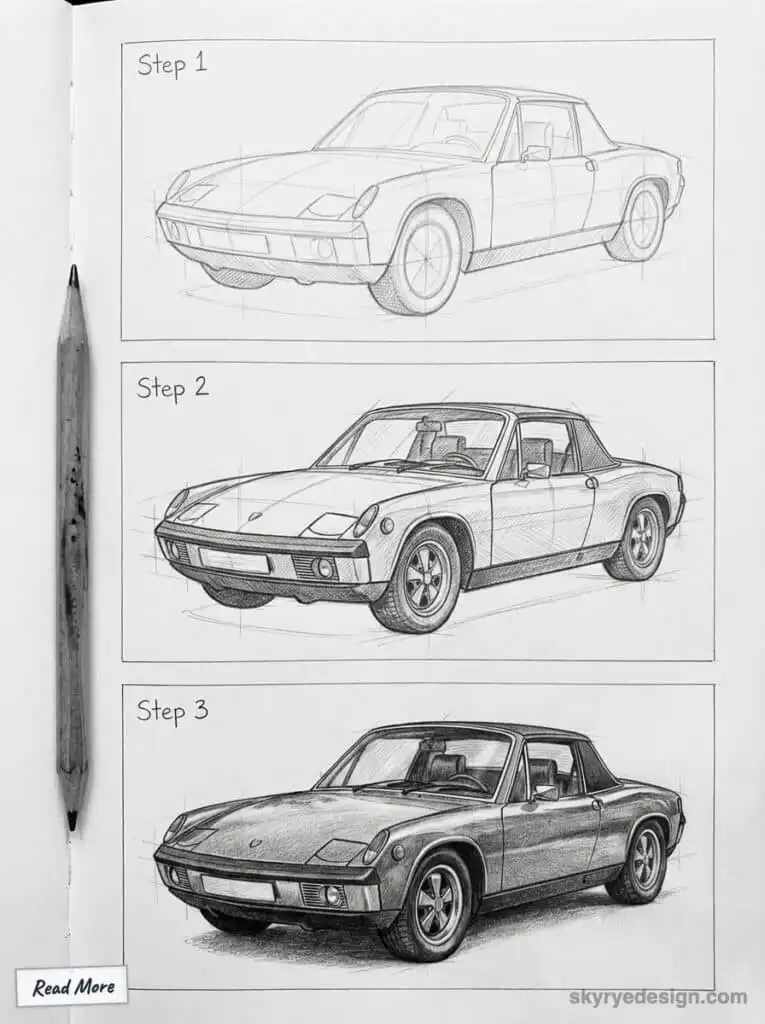
Why it mattered:
- Introduced affordable mid-engine layout
- Expanded Porsche’s customer base
- Influenced future mid-engine platforms
Why artists love drawing it: See more house drawing ideas to inspire your own creations.
- Sharp angles contrast classic Porsche curves
- Targa roof adds architectural interest
- Boxy proportions suit perspective practice
For illustrators, the 914 offers a rare chance to draw a Porsche with edges instead of waves.
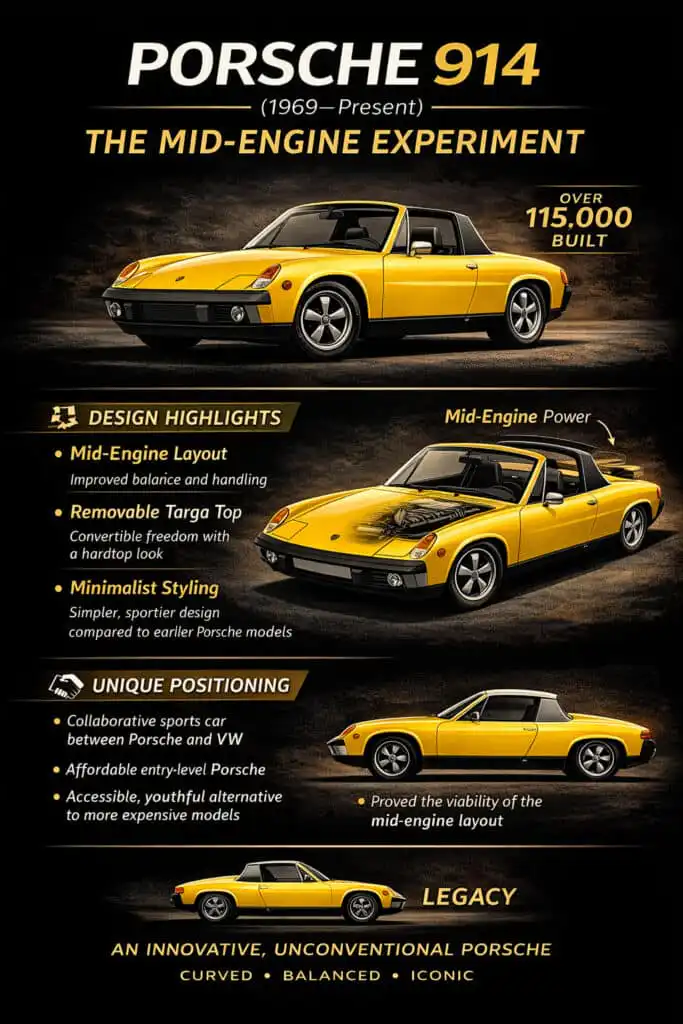
Let’s continue with the model that challenged Porsche’s traditions.
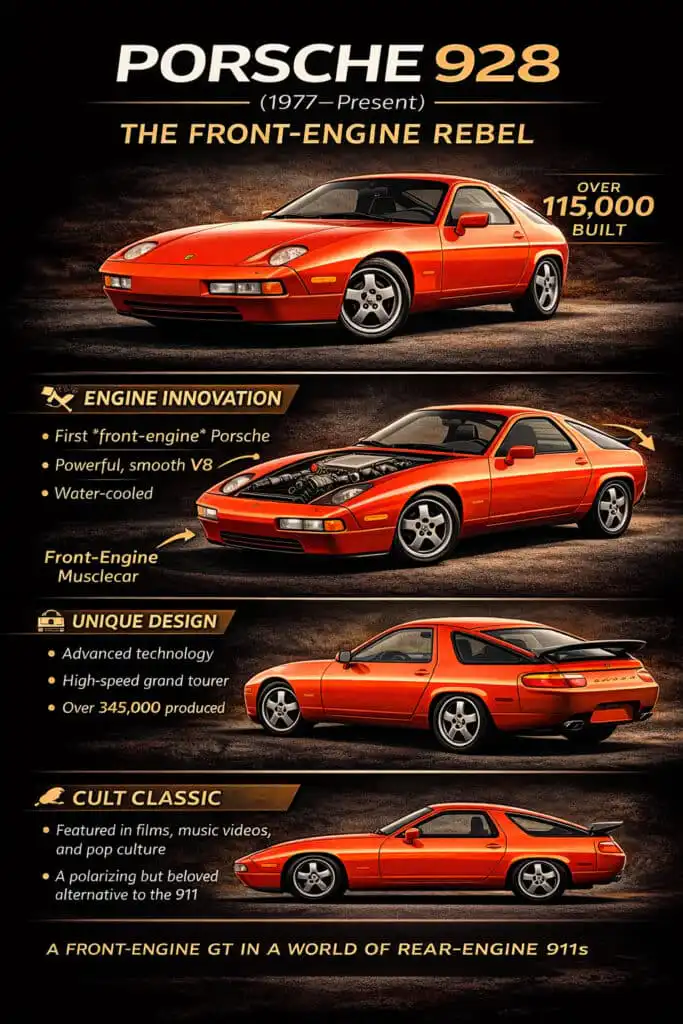
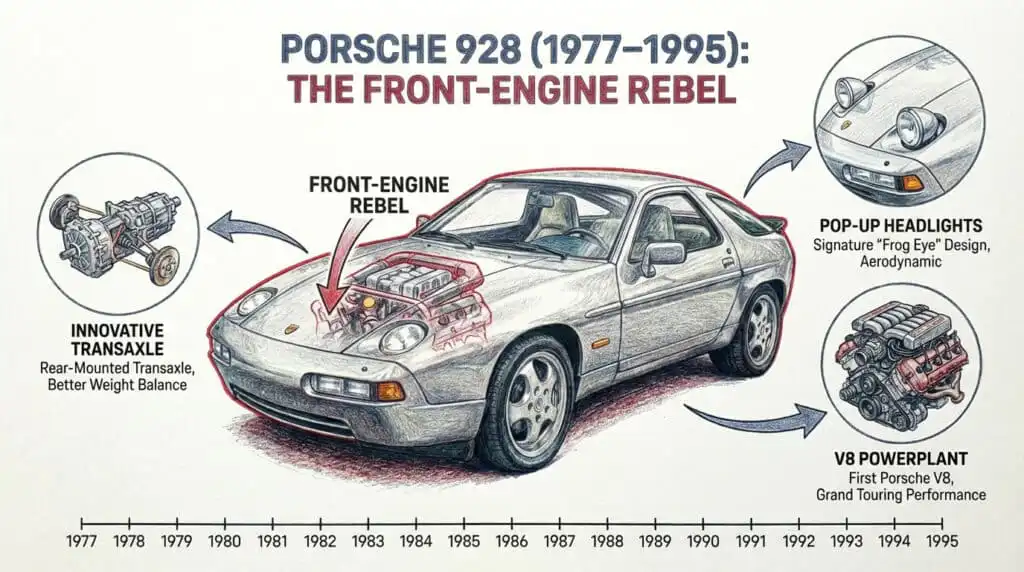
4. Porsche 928 (1977–1995): The Front-Engine Rebel
Drawing note: The 928 is all about the long nose, rounded rear glass, and pop-up headlight rhythm. Treat it like a grand tourer first and a Porsche second.
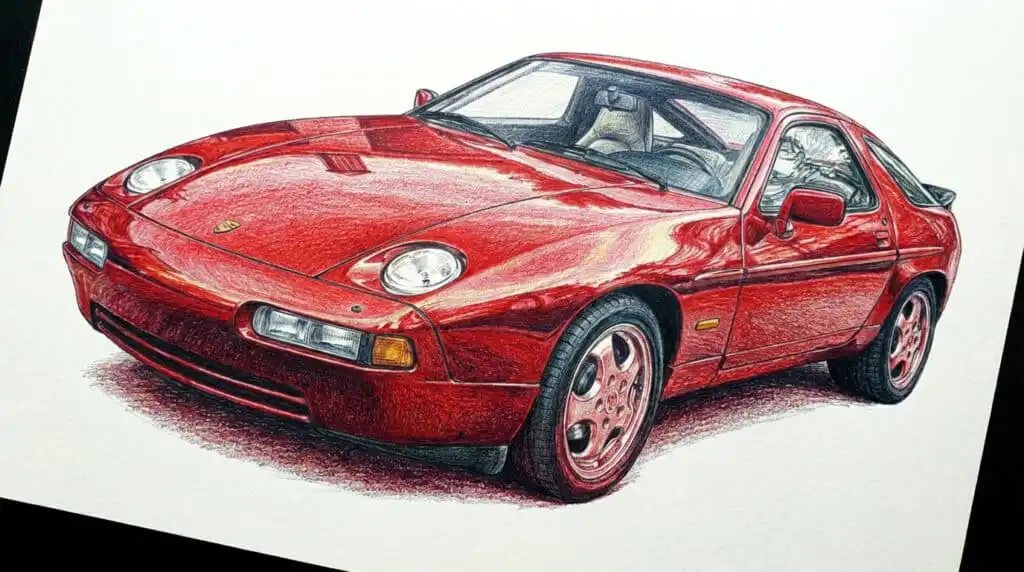
Designed to potentially replace the 911, the 928 ended up becoming a cult classic instead.
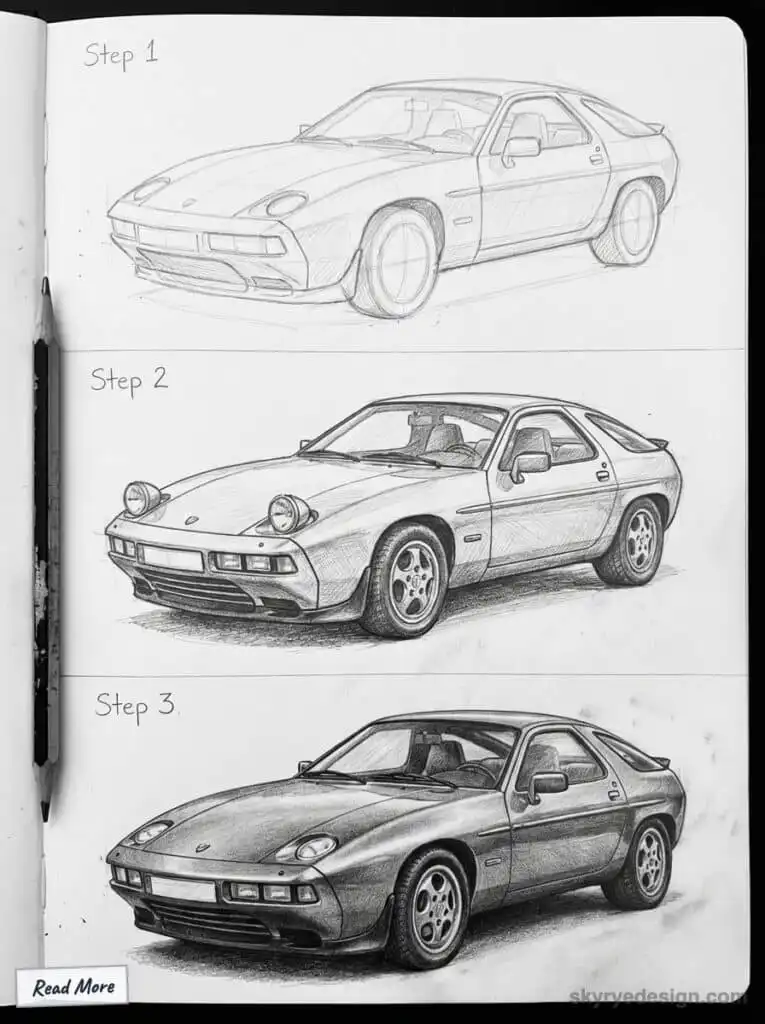
Why it mattered:
- Porsche’s first V8 production car
- Luxury + performance balance
- Radical design shift for the brand
Why artists love drawing it:
- Pop-up headlights (visual drama)
- Wide stance and long hood
- Smooth, muscular surfaces
The 928 feels cinematic on paper—especially in three-quarter views where its proportions shine. Its design features many complicated details, such as the unique headlight mechanism and subtle body curves, which can make it harder to sketch but also more rewarding for artists seeking a challenge.
Let’s move to the model that brought Porsche to a wider audience.
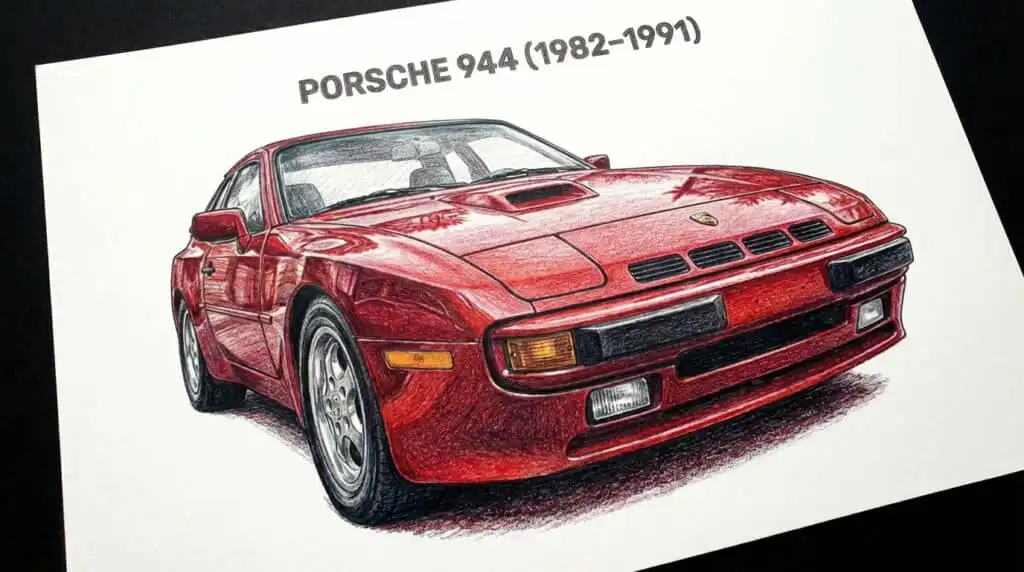
5. Porsche 944 (1982–1991): The People’s Porsche
Drawing note: The 944 is useful for practicing front-engine balance. Watch the wider fenders and the sharper hood line; those details separate it from the rounder 911 family.
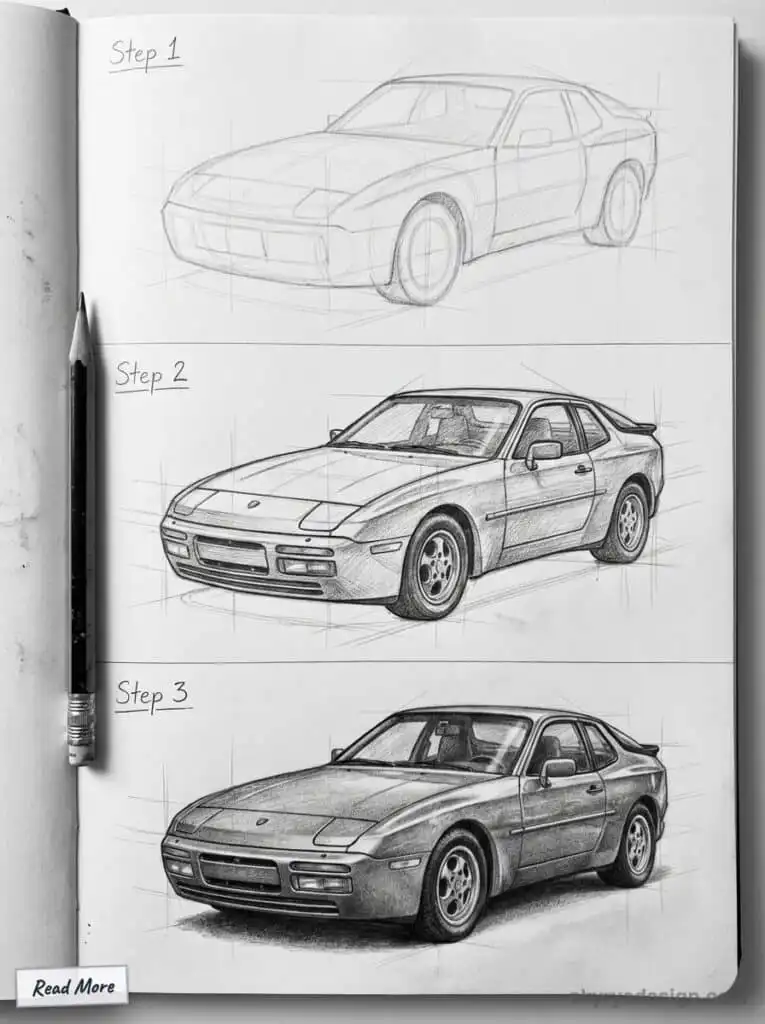
The 944 became one of Porsche’s best-selling models of the 1980s.
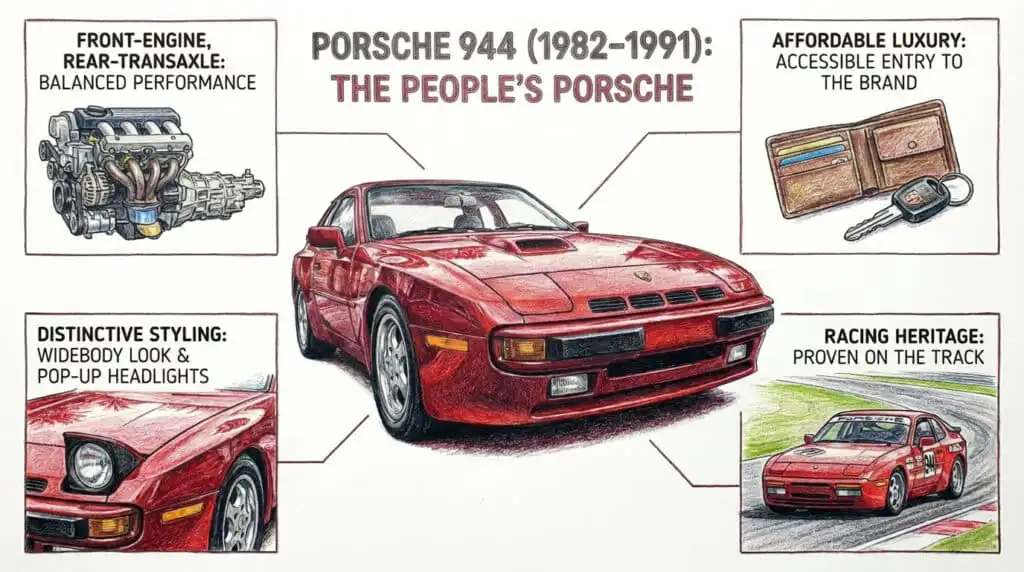
Why it mattered:
- More accessible price point
- Balanced handling and usability
- Huge global sales success
Why artists love drawing it:
- Clean, geometric shapes
- Strong horizontal beltline
- Excellent for marker rendering
For many artists, the 944 is nostalgic—the Porsche they first saw in posters, magazines, or childhood memories.
Next, let’s see how Porsche reinvented itself in the 1990s.
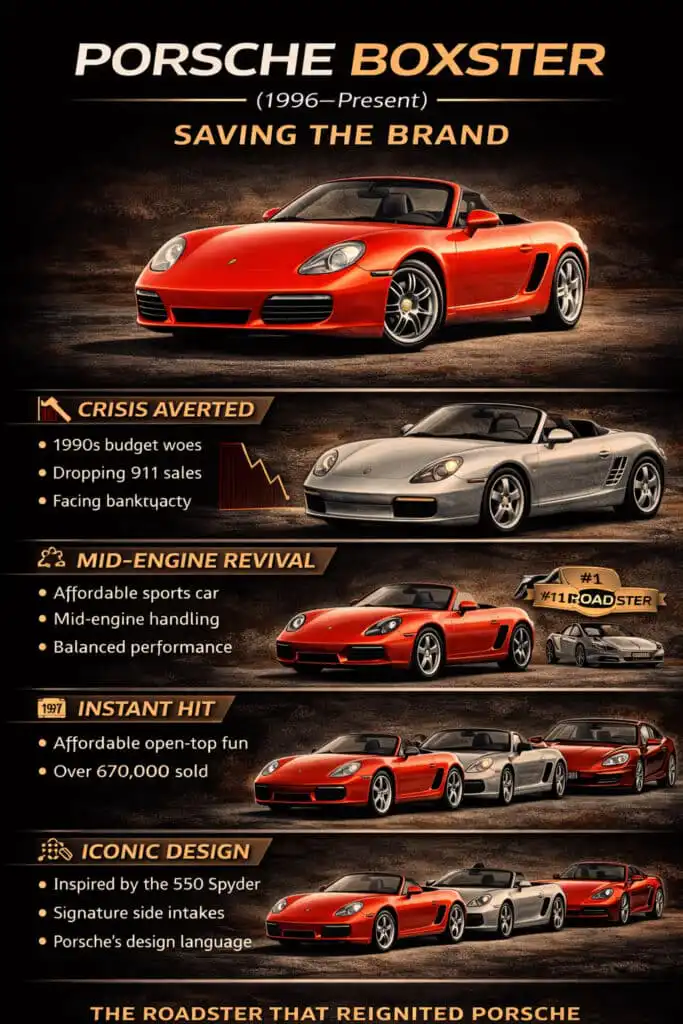
6. Porsche Boxster (1996–Present): Saving the Brand
Drawing note: The Boxster works best when the cockpit sits between the axles. Draw the side intake and short rear deck lightly before committing to the final outline.
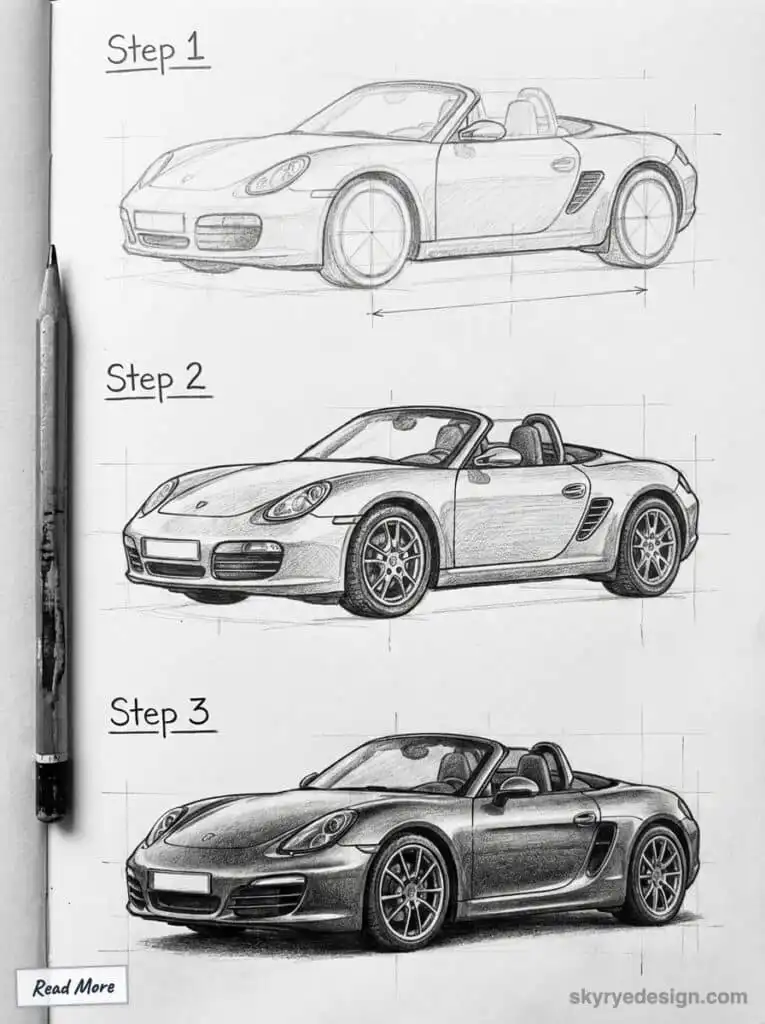
The Boxster didn’t just succeed—it helped save Porsche financially.
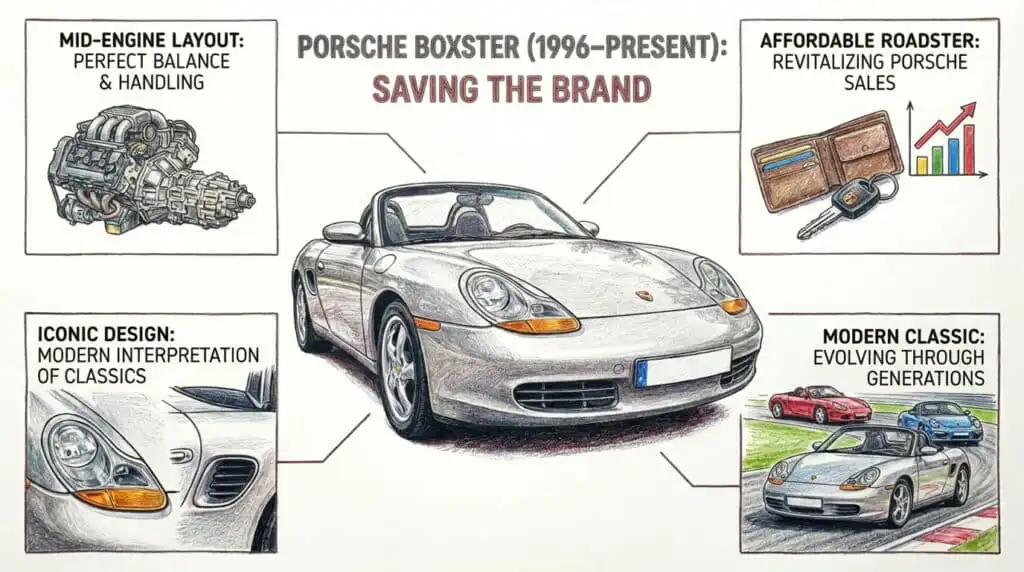
Why it mattered:
- Introduced modern mid-engine roadster formula
- Shared development with the 996-generation 911
- Revitalized Porsche in the 1990s
Why artists love drawing it:
- Balanced proportions
- Open-top compositions
- Modern curves with classic DNA
The Boxster is often used in digital illustration and concept-style art due to its clean surfaces.
Let’s look at the coupe that became a driver’s favorite.
7. Porsche Cayman (2006–Present): The Driver’s Choice
Drawing note: The Cayman rewards clean side-view sketching. Keep the roof compact, the rear shoulder tight, and the side intake readable without making the body too busy.
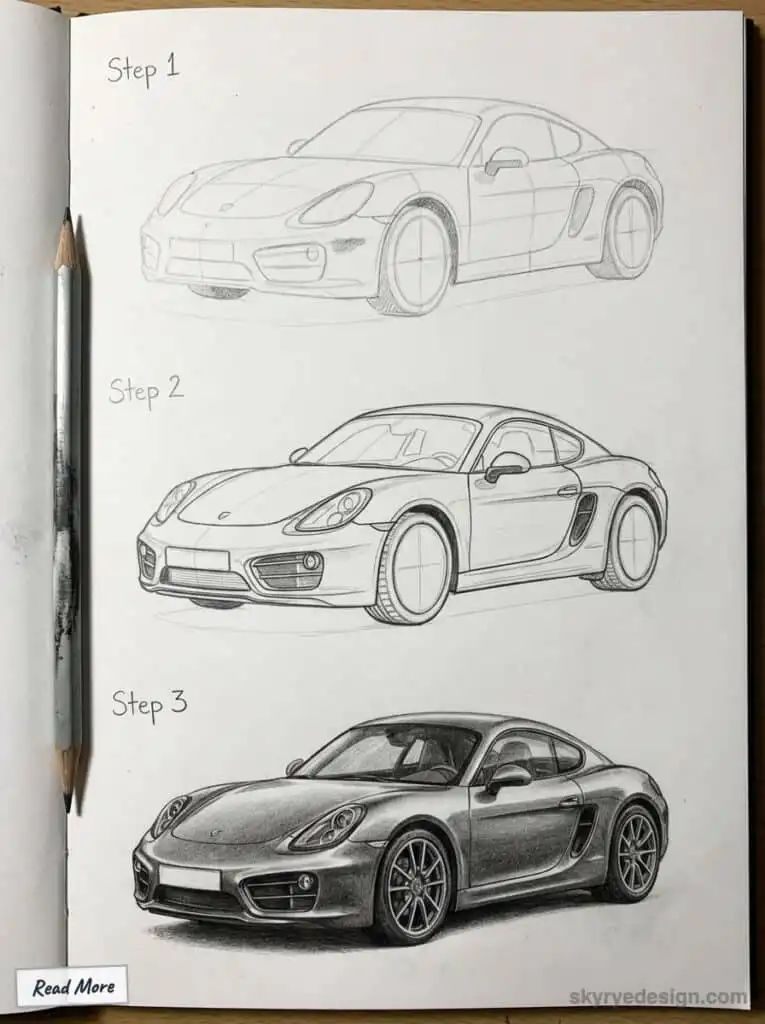
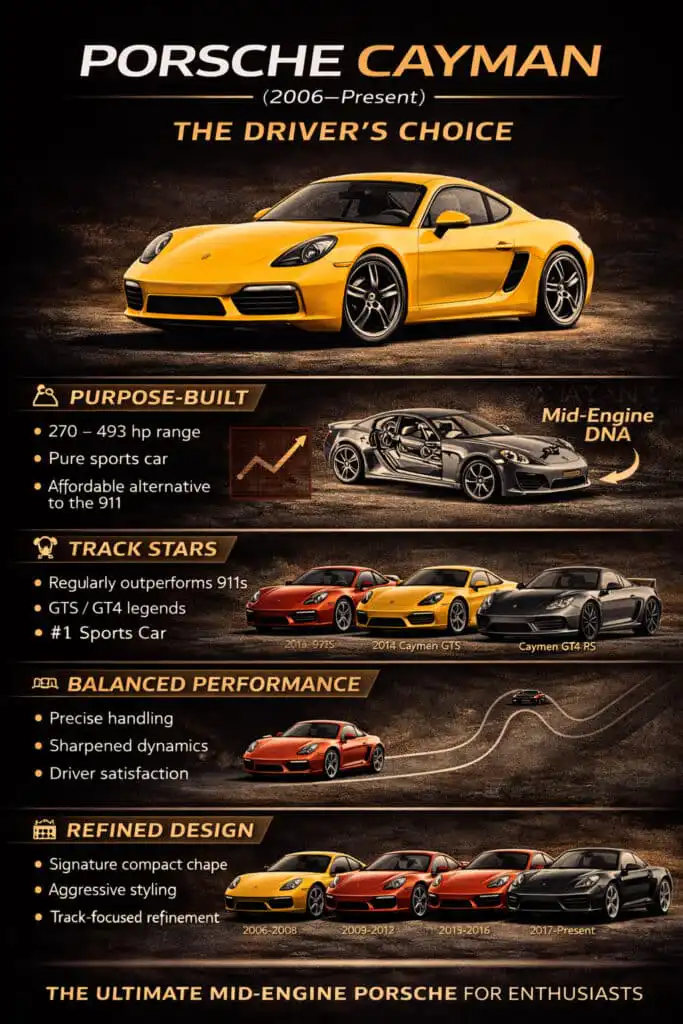
Often called the “perfectly balanced” Porsche, the Cayman refined the mid-engine coupe idea.
Why it mattered:
- Precision handling benchmark
- Strong motorsport presence
- Cult following among enthusiasts
Why artists love drawing it:
- Tight, compact form
- Aggressive stance
- Ideal for dynamic action sketches
The Cayman looks fast even standing still—an illustrator’s dream.
Now, let’s see how Porsche redefined success with an SUV.
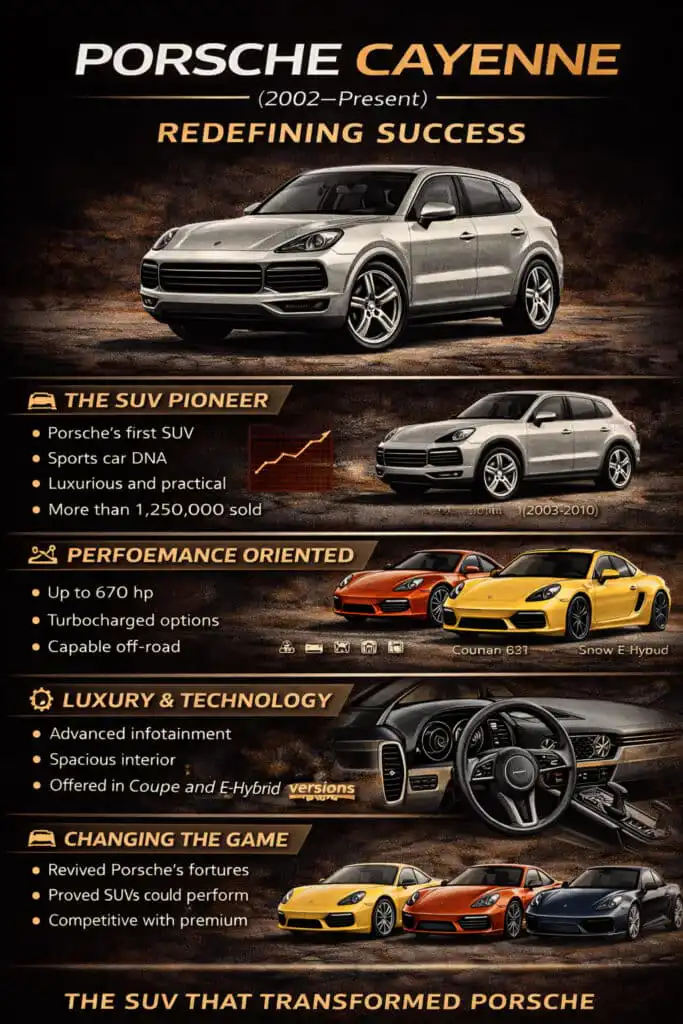
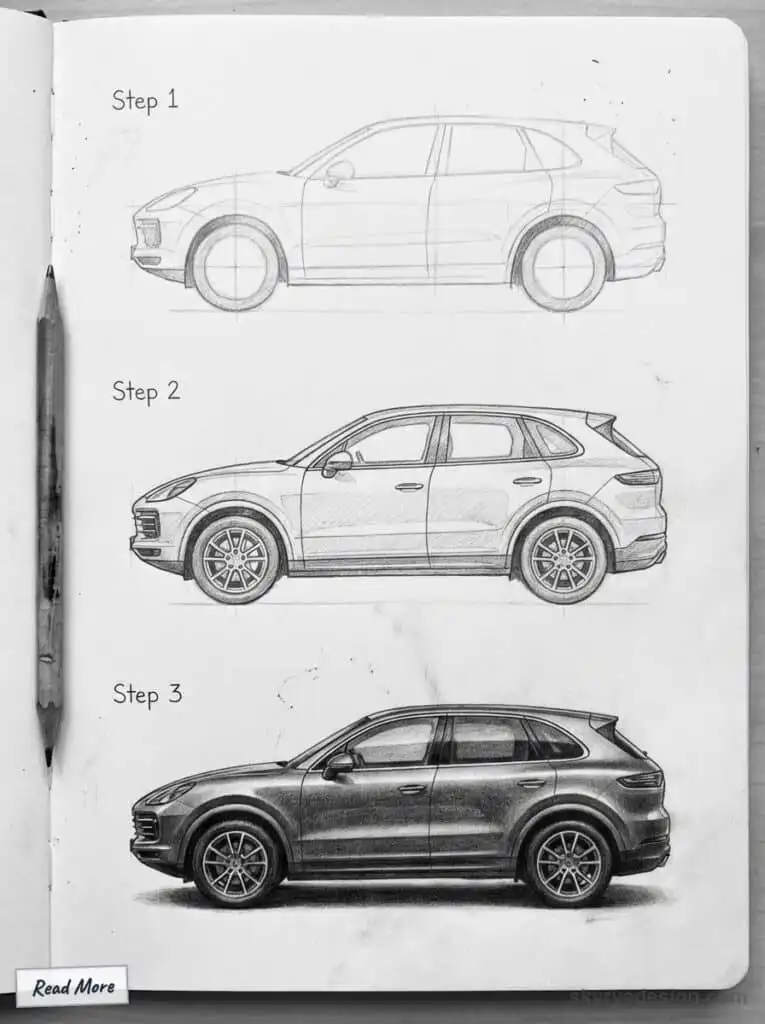
8. Porsche Cayenne (2002–Present): Redefining Success
Drawing note: The Cayenne is harder than it looks because it mixes SUV height with Porsche face language. Start with the tall cabin and wheelbase, then soften the front corners.
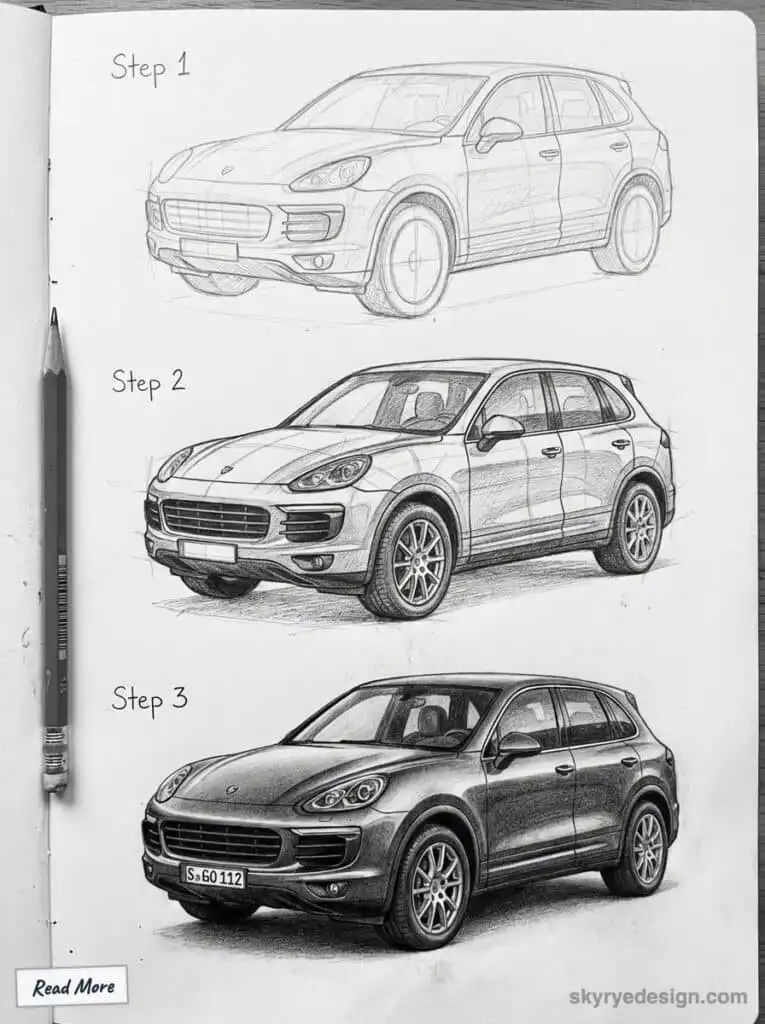
Designers often use sketches to solve problems during the design process.
Purists complained. Artists were skeptical. The Cayenne went on to become one of Porsche’s most important vehicles ever.
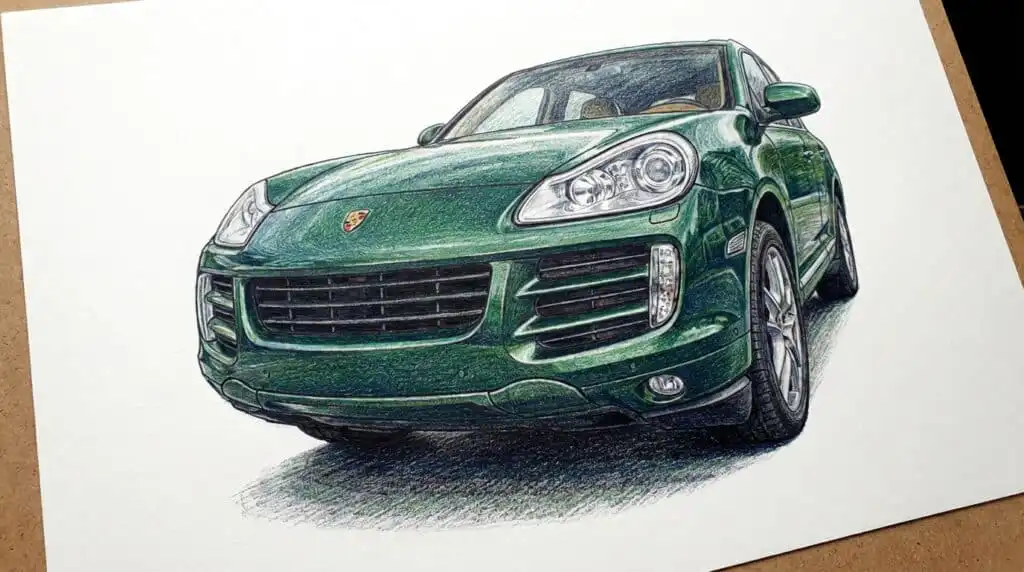
Why it mattered:
- Financial backbone of modern Porsche
- Proved brand DNA could scale
- Opened the door for SUVs in luxury performance
Why artists love drawing it:
- Muscular mass
- Elevated stance
- Unique challenge translating Porsche lines to an SUV
- Accurately drawing the wheels, tires, and spokes is crucial for achieving a realistic and impressive look, as these elements stand out on the Cayenne’s bold profile.
- Finalizing the tires and carefully drawing the spokes of the rims helps make them look natural and enhances the overall effect. After this step, add details with colored pencils to refine the drawing and enhance realism.
- Large brake discs and visible calipers inside the wheels emphasize the car’s performance character, a detail that should not be overlooked.
- Even though the Cayenne is an SUV, it shares performance characteristics with a sportscar, especially in the design of its wheels and brake components.
- When you complete the rear features, such as the taillights, bumper, and exhaust, attention to detail is key to finishing the drawing.
- A good rule of thumb for a sportscar’s side profile is that the wheelbase is roughly two and a half times the diameter of the wheels, which helps maintain correct proportions in your sketch.
- After completing the sketch, color the body of the Porsche 911 GT3 RS to bring the drawing to life and showcase the car’s dynamic lines.
Drawing a Cayenne well is a test of understanding Porsche’s design language.
Let’s finish with the model that brought Porsche into the executive world.
9. Porsche Panamera (2009–Present): The Four-Door Debate
Drawing note: The Panamera needs a long, stretched gesture line. If the roof drops too fast, the car feels cramped; if it stays too flat, it loses the Porsche family shape.
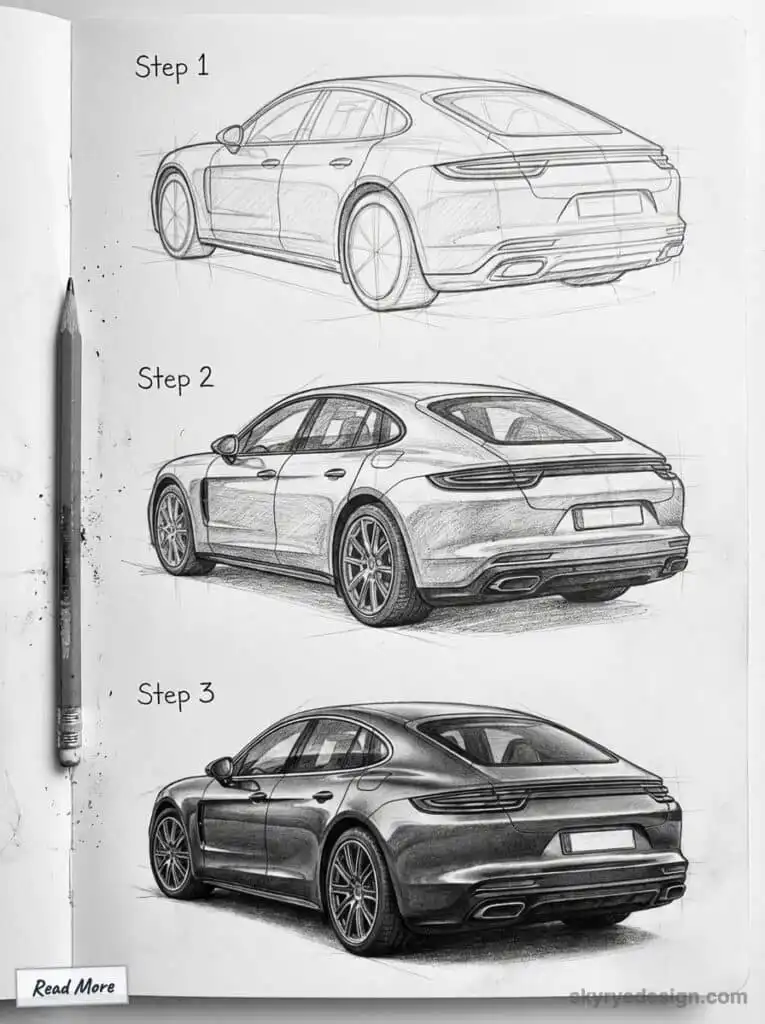
The Panamera expanded Porsche into the executive sedan world—controversially, but successfully.
Why it mattered:
- Broadened Porsche’s market reach
- Strong global sales
- Continued funding for sports cars
Why artists love drawing it:
- Unusual proportions
- Long roofline experimentation
- Modern lighting signatures
It’s often drawn as a design study rather than a pure beauty sketch.
Drawing the Front Section
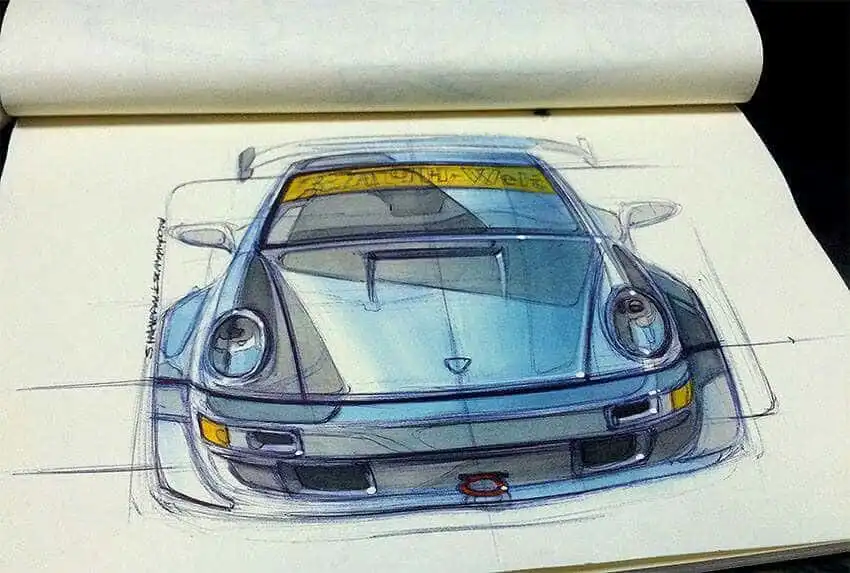
Capturing the front section of a Porsche 911 is where the magic of this classic Porsche truly comes to life on paper. The front end is not just a collection of parts—it’s a statement of the car’s history, spirit, and unmistakable presence in the world of automotive design. When you set out to draw a Porsche 911, starting with the front wheel and air intake is essential. These elements anchor your proportions and set the stage for the rest of the bodywork, ensuring your outline feels balanced and true to the model’s iconic stance.
Step 1: Sketch the Outline
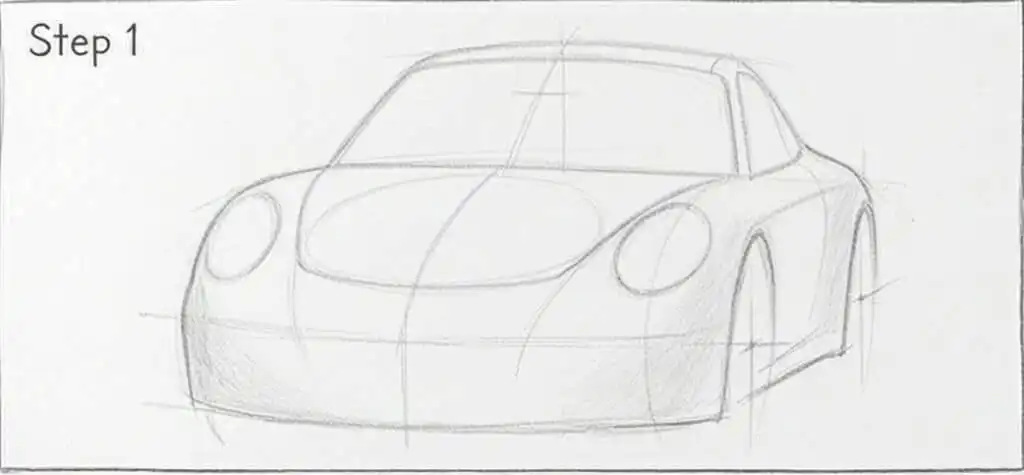
Begin by sketching the outline of the front wheel, paying close attention to its placement and size. The front wheel is a visual anchor, and getting its proportions right will help you capture the 911’s athletic, rear-wheel-driven posture.
Step 2: Add Key Features
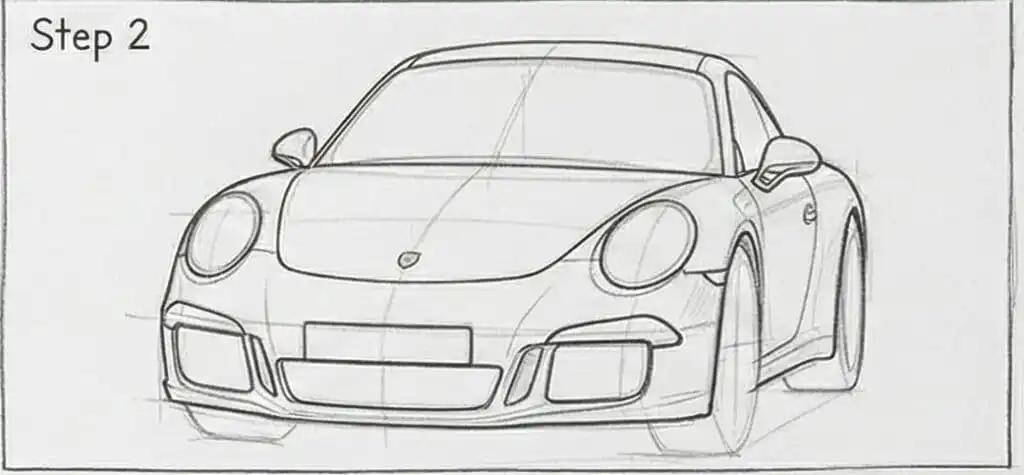
Next, add the air intake—an element that not only cools the car but also adds a sense of purpose and aggression to the front fascia. Use reference photos to study the subtle curves and lines that define the air intake and how it integrates with the bumper.
Step 3: Refine the Bumper and Headlights
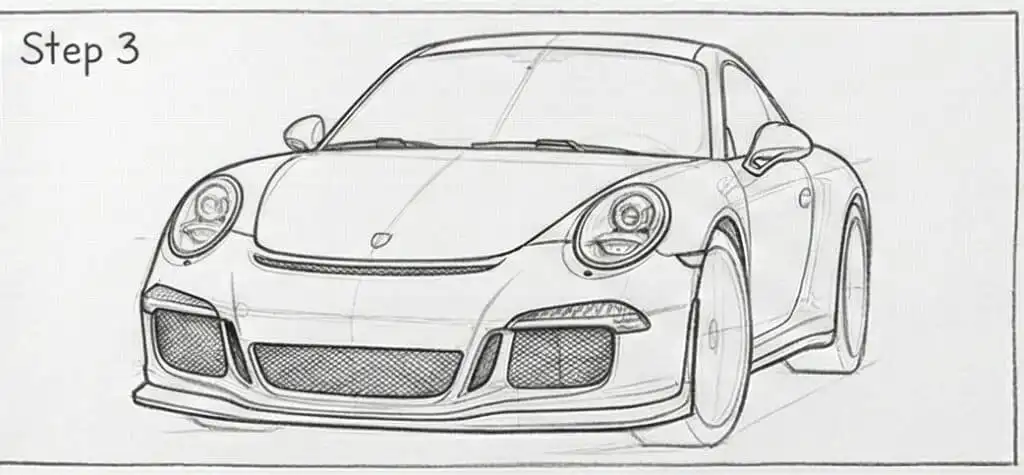
With the foundation set, move on to the bumper and headlights. The Porsche 911’s bumper is sleek yet muscular, and the headlights—those classic round lamps—are a hallmark of the model’s design language. Carefully outline the headlights, making sure they sit just right above the bumper, and add details like the grille and license plate holder to bring authenticity to your drawing. Don’t forget the subtle split between the hood and the bumper, which adds depth and realism.
Step 4: Add Windows and Mirrors
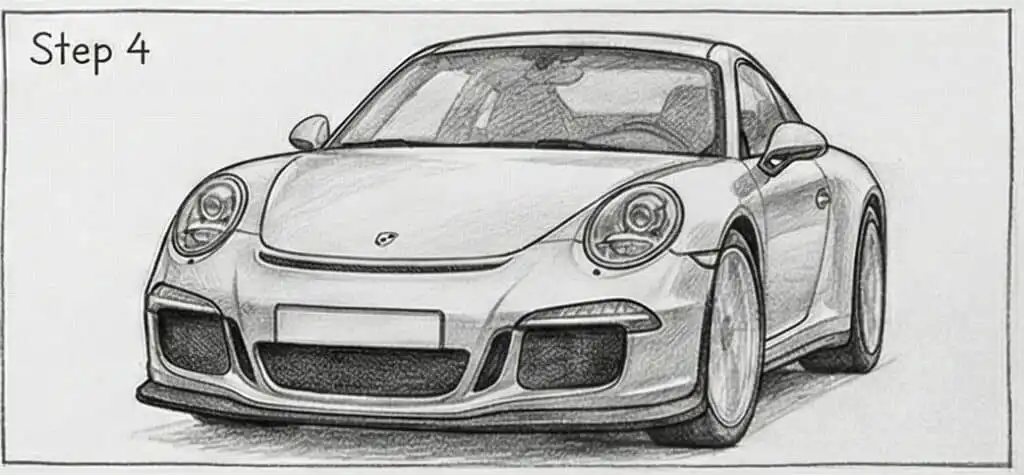
As you continue, add the side window and mirror. These elements are more than just functional—they’re part of the 911’s flowing lines and help define the upper part of the car’s silhouette. The side window, with its gentle curve, and the mirror, perched just so, contribute to the car’s harmonious proportions. Take your time to capture the reflections and highlights in the glass, using light shading to suggest depth and the play of light across the bodywork.
Step 5: Final Details
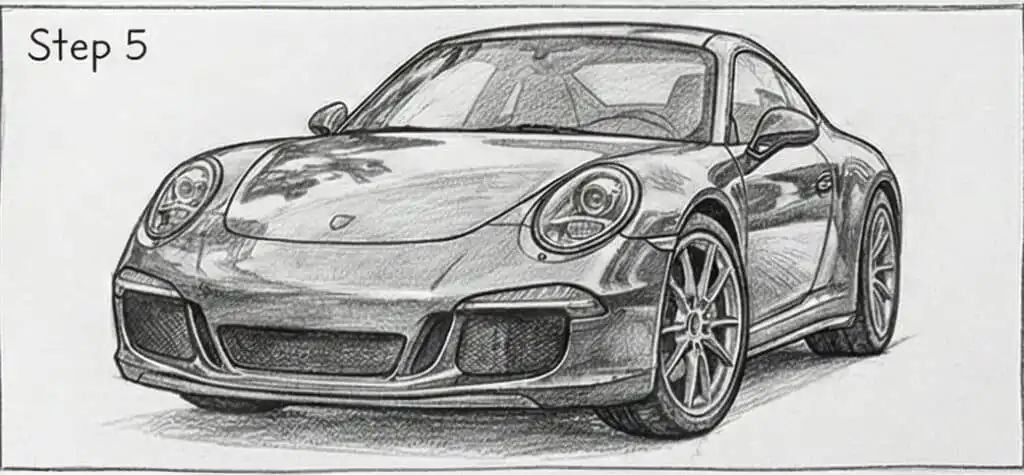
Adding the rear lamp, even if only hinted at from the front three-quarter view, can help ground your drawing in the real world of Porsche design. These details, along with the side skirt and subtle body lines, give your sketch a sense of completeness and realism. Don’t worry if your first attempt isn’t perfect—drawing a Porsche 911 is as much about practice and passion as it is about technical skill. Each line you draw brings you closer to understanding the proportions and spirit that have made this car a legend for decades.
Step 6: Shading and Depth
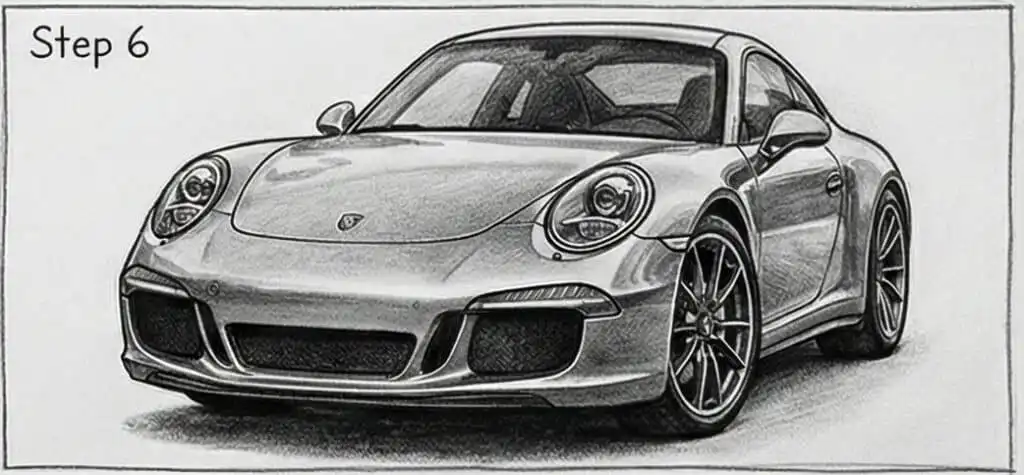
To add depth and dimension, use a range of shading techniques. Shade the lower part of the bumper and under the air intake a bit darker to suggest shadow, and use lighter strokes to capture the highlights on the hood and fenders. Pay attention to the reflections in the windshield and side window, and don’t be afraid to experiment with different pencils or even digital tools like Photoshop to achieve the effect you want.
Remember, the Porsche 911 is a masterpiece of automotive history, and drawing it is about more than just copying a photo—it’s about capturing the essence of a model that has inspired generations of artists, engineers, and car lovers. Let your passion for cars and art guide your hand, and don’t be afraid to add your own creative twist. Whether you’re sketching for fun or aiming for a realistic rendering, each attempt helps you develop your skills and deepen your appreciation for the lines and details that make the Porsche 911 so iconic.
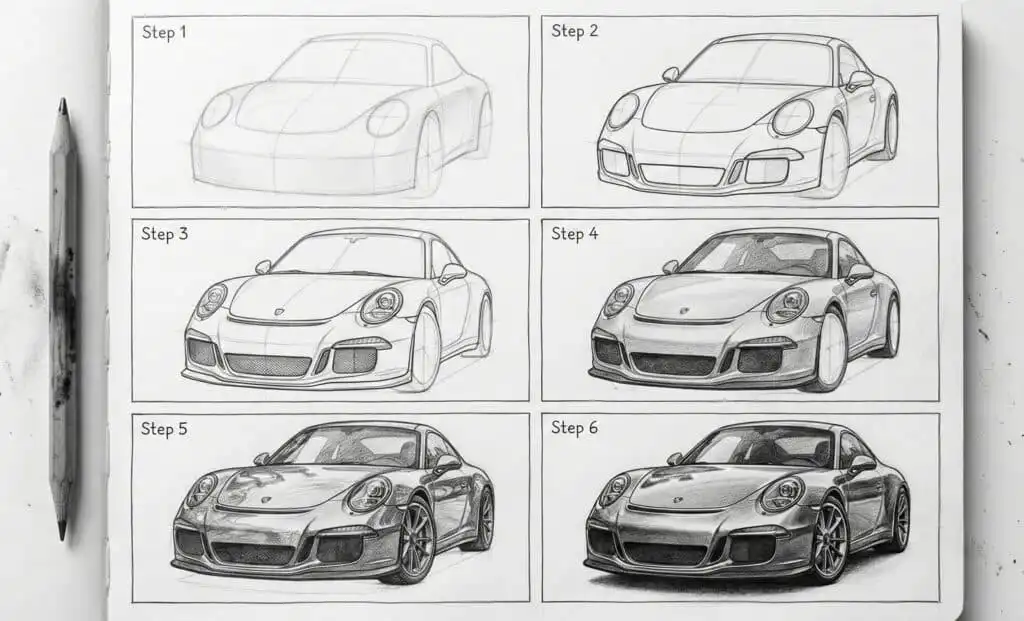
So grab your paper, find your favorite reference photo, and start with that confident outline. With patience, practice, and a bit of inspiration from the world of classic Porsche design, you’ll soon be able to create artwork that captures the cool, timeless spirit of the 911—one line at a time.
With the front section mastered, let’s look at how the design process brings a Porsche to life.
The Design Process
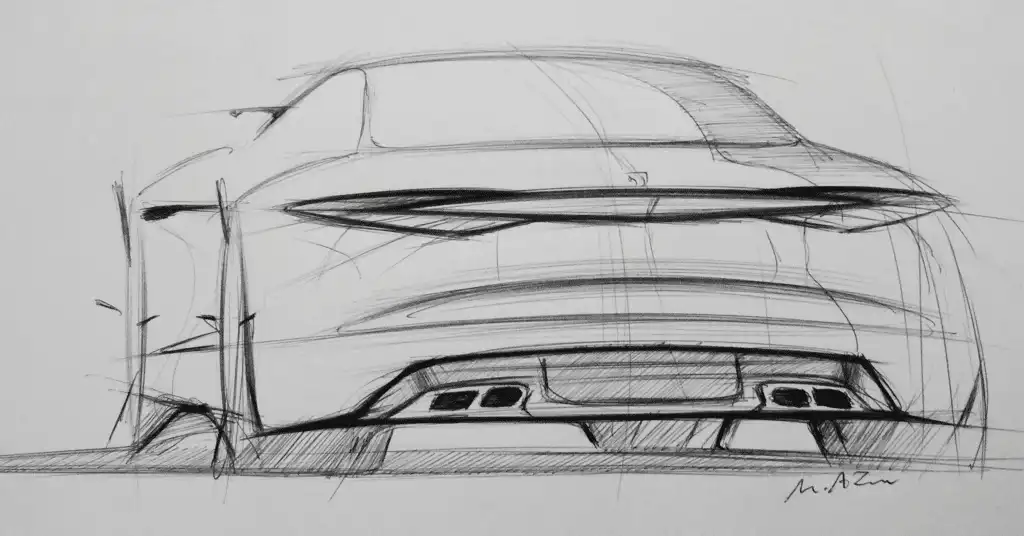
A Porsche sketch gets better when you slow down, compare angles, and redraw the same curve until it sits right.
Step 1: Rough Sketches
It all begins with rough sketches—quick, expressive lines that capture the initial idea of the car. These early drawings are where designers experiment, make mistakes, and refine their vision.
Step 2: Detailed Renderings
As the process continues, sketches evolve into more detailed renderings, and eventually, digital tools like CAD software and 3D modeling come into play.
Step 3: Iteration and Refinement
For artists drawing a Porsche, this process is a valuable lesson. Expect the first sketch to be wrong. Fix the wheel spacing and roof arc before you polish anything. The best results usually come from comparing your drawing against the reference, then moving one line at a time. Just as Porsche engineers iterate on their designs to create a car that’s both beautiful and functional, you can use the same approach to develop your own skills and create artwork that captures the essence of the brand.
A good Porsche drawing is usually the result of several quiet corrections. Take your time with the rough pass, because the clean rendering only works if the structure underneath is right.
With the design process in mind, let’s see how Porsche’s visual language remains consistent across generations.
How Porsche Design Evolves Without Breaking the Line
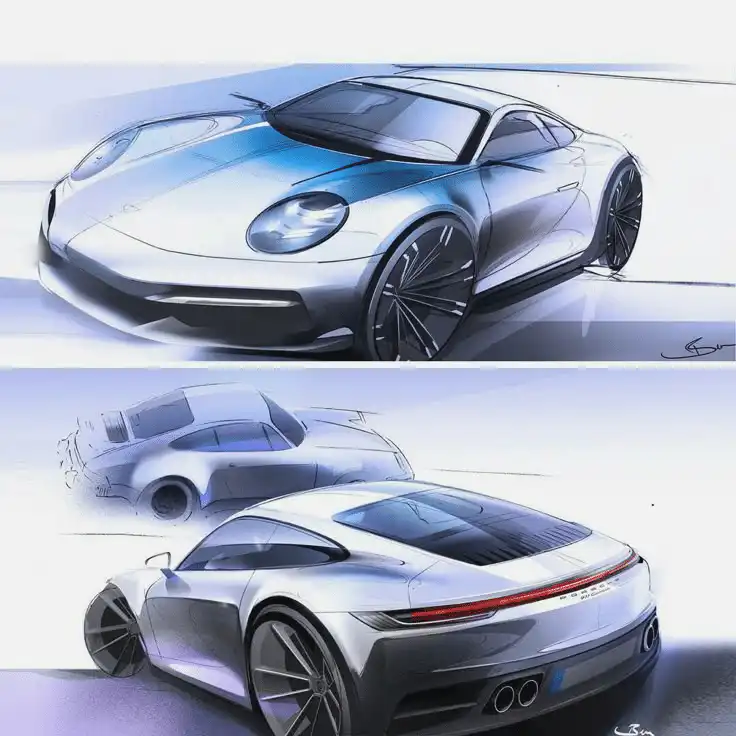
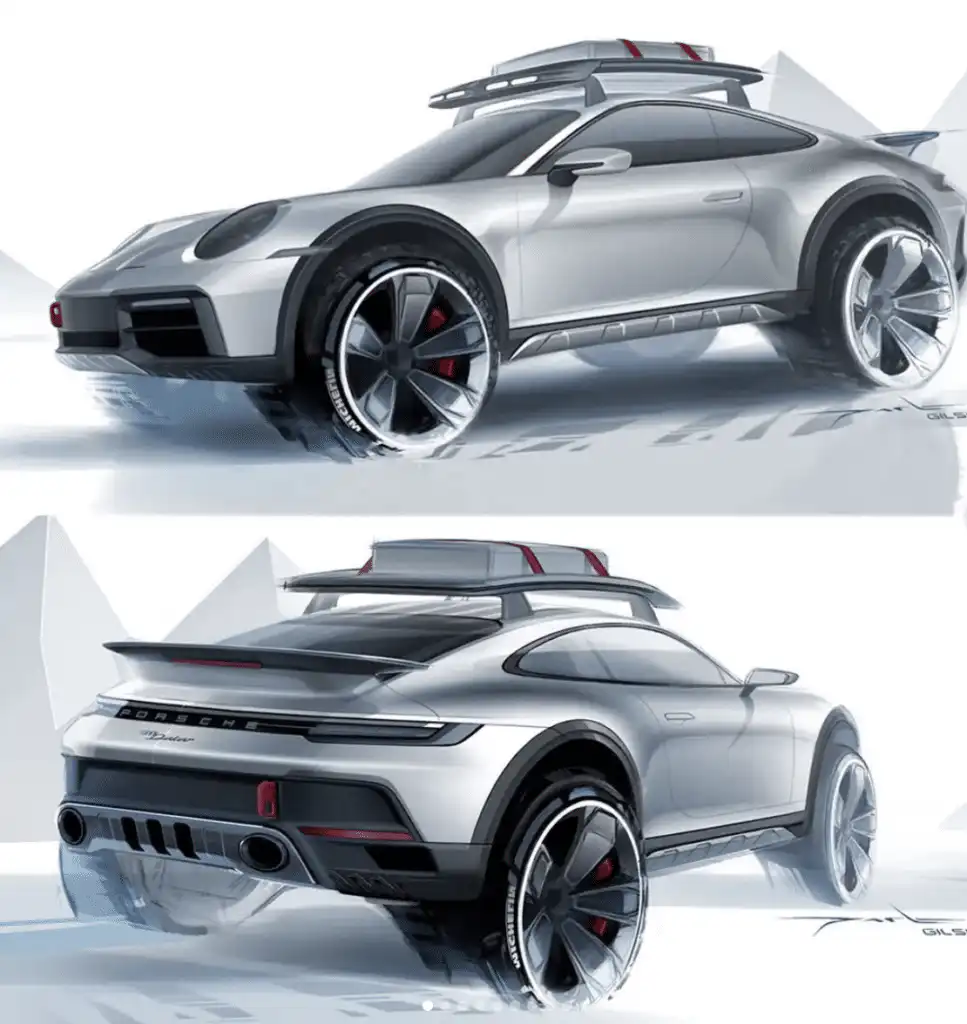
What makes Porsche uniquely powerful for artists is design continuity. A 356, a classic 911, and a modern 992 share a visual relationship that few brands maintain. The characteristic design elements—such as the iconic roof arc, rounded fenders, and rear-weighted mass—define Porsche’s visual identity and make each model instantly recognizable.
Key Visual Constants
- The roof arc
- Rear-weighted mass
- Rounded fenders
- Emphasis on stance over ornament
This continuity makes Porsche drawings instantly readable—even when abstracted. For realistic portrayals of Porsches, capturing the look of metal, glass, and paint is crucial to convey the true essence of the car.
With this understanding, let’s review some essential tips for drawing Porsche cars.
Source notes for Porsche drawing research
For dates, model codes, and historical context, I cross-check Porsche references instead of relying on memory. Useful starting points include Porsche Newsroom 60 years of the 911, Porsche historical background, Porsche code guide, and the Porsche Classic model overview. For 911-specific context, compare the one-millionth Porsche 911 story, original Porsche 911 history, and current Porsche 911 model range.
Porsche car drawing tips that actually help
If you’re sketching Porsche models or Formula 1 cars, keep these principles in mind:
- Start with the silhouette: If the outline works, the drawing works.
- Respect the rear weight: Porsche proportions are never front-heavy.
- Simplify curves: One confident line beats five hesitant ones.
- Use wheel arches as anchors: Everything flows from them.
- Avoid over-detailing early: Porsche design rewards restraint.
- Focus on the teardrop silhouette and powerful rear proportions.
- Use varying line thicknesses: This helps convey depth and volume in your drawing.
- Shading with hatching: This will help your drawing look natural and three-dimensional.
- Gradually add layers of detail: Don’t try to finish everything at once.
- Use the grid method: This helps maintain accuracy in proportions.
- Capture the look of metal, glass, and paint: Essential for realism.
Many great Porsche drawings succeed with shockingly few lines.
With these tips, let’s look at common mistakes to avoid.
Common Porsche drawing mistakes to avoid
Even experienced artists can stumble when drawing a Porsche, but being aware of common mistakes can help you create more convincing models.
- Misjudging proportions: Especially the spacing and size of the wheels. If the front and rear wheels aren’t aligned correctly, the car can look awkward or unbalanced.
- Neglecting key details: Such as the unique shape of the headlights, the design of the mirrors, or the placement of the air intakes.
- Overcomplicating lines: Adding too many unnecessary details can detract from the clean, purposeful look that makes Porsche design so appealing.
- Ignoring the teardrop silhouette: Failing to capture the signature roof arc and rear proportions can make the drawing look generic.
- Not using reference images: This can lead to inaccuracies in the car’s stance and features.
To avoid these mistakes, focus on capturing the essential lines and proportions first. Use reference images to study the model you’re drawing, and pay close attention to the relationship between the wheels, body, and key features. By keeping your lines confident and your details purposeful, you’ll create drawings that are both accurate and full of character.
With common pitfalls in mind, let’s explore advanced techniques to take your Porsche drawings to the next level.
Advanced Porsche sketch techniques
Once the basics are steady, use advanced techniques to add realism and depth without burying the silhouette.
Layering for Depth
- Start with light pencil strokes to establish the main shapes.
- Gradually add darker layers to create contrast and volume.
- Layering helps build up shadows and highlights, giving your car a three-dimensional feel.
Blending Techniques
- Use a blending stump, tissue, or even your finger to smooth transitions between light and dark areas.
- Focus on the bodywork and glass for the most realistic effect.
- Blending helps achieve the look of metal, glass, and paint.
Adding Texture
- Use hatching, cross-hatching, or stippling to bring out the subtle differences in materials.
- Emphasize the smooth paint of the hood, the rubber of the tires, and the texture of the interior.
- Adding texture makes your drawing more dynamic and lifelike.
Gradual Detailing
- Add layers of detail gradually, refining features like headlights, grilles, and wheels.
- Don’t rush—building up details over time leads to a more polished result.
Dynamic Sketching
- Use quick, expressive lines to emphasize the sleek lines and flowing forms of Porsche design.
- Dynamic sketching can help capture the energy and movement of the car.
Don’t be afraid to experiment with different tools and techniques, whether you’re working with traditional media or digital platforms like Photoshop. A realistic Porsche drawing improves through repeated proportion checks, not decoration. Each new attempt should make one thing cleaner: wheel placement, roof arc, shadow shape, line weight, or reflection control.
Why Porsche remains one of the most illustrated car brands
Porsche sits at the intersection of:
- Engineering precision
- Emotional storytelling
- Visual consistency
That’s rare. It’s why Porsche drawings feel timeless, whether done in graphite, ink, vector, or pixels. Each sketch becomes part of a larger visual tradition that stretches back more than 75 years.
From Stuttgart to Sketchbook
The nine models we’ve explored didn’t just build Porsche’s success—they built its visual language. For artists, drawing Porsche is less about copying cars and more about understanding form, balance, and restraint.
Every successful Porsche model teaches the same lesson: great design doesn’t need to shout—it just needs to be right.
And that’s why, decades later, these cars still look just as good on paper as they do on the road.
More Porsche and car drawing practice
Keep this Porsche drawing page as the model-comparison guide, then use how to draw cars if your wheelbase still feels shaky. For focused practice, move into the Porsche 911 GT3 RS drawing tutorial, compare it with sports cars to sketch, and study the different surface language in the Ferrari drawing guide, Mercedes drawing reference, BMW M3 drawing tutorial, and Dodge Charger drawing guide.
Porsche drawing FAQ
What is the easiest Porsche model to draw?
The easiest Porsche model to draw is usually a side-view Porsche 356 or early 911. Both have clean silhouettes, round headlights, and fewer aggressive aero details than a GT3 RS or 918 Spyder. Start with the wheels and roof curve, then add the fenders, glass, and small trim only after the outline reads clearly.
How do you start a Porsche drawing?
Start a Porsche drawing by choosing the model first. A 356 needs a soft oval body, a 911 needs the long roof arc and rear fender weight, and a Cayenne needs a taller SUV mass. Place the wheels on one baseline, block the cabin, then refine the hood, fenders, headlights, and glass before shading.
Why are Porsche drawings hard to get right?
Porsche drawings are hard because small proportion mistakes change the whole identity of the car. If the roof arc is too high, the rear fender is flat, or the headlights sit too far apart, the sketch turns generic. Work lightly at first and compare the big silhouette before adding rims, badges, or reflections.
Which Porsche models are best for sketch practice?
The 356, 911, 914, 944, Boxster, and Cayman are strong practice models because each teaches a different shape problem. The 356 is rounded, the 911 is rear-weighted, the 914 is flat and low, and the Boxster or Cayman helps with mid-engine balance. Save complex race cars and SUVs for later practice.
What tools do you need for a Porsche drawing?
A 0.5mm mechanical pencil, HB or 2B pencil, kneaded eraser, ruler, and smooth sketchbook paper are enough for most Porsche drawing practice. Add fineliners when the proportions are settled, markers for body color, and a blending stump only if you want softer reflections on the glass and body panels.
How do you make a Porsche sketch look realistic?
Use a real reference photo, keep both wheels on the same baseline, and make the darkest values sit under the car, inside the tires, and in the glass. Leave the body curves cleaner than you think. Porsche sketches usually look more convincing when the main silhouette is accurate and the details stay controlled.
- 842shares
- Facebook0
- Pinterest842
- Twitter0
- Reddit0