Shoe drawing ideas are useful because footwear forces you to think about shape, weight, material, and style at the same time. A sneaker has a different silhouette from a loafer, a hiking boot, or a heel, so each sketch teaches a slightly different drawing problem.
I would start with the side profile before chasing details. If the sole, toe box, heel, and opening feel believable in light pencil, the laces and texture become much easier to place. Use the ideas below as small studies rather than finished portfolio pieces.
- Shoe drawing ideas: quick start
- 1. Classic sneaker shoe drawing ideas
- 2. Lace-up boot drawing ideas
- 3. Ballet flats and soft shoe sketches
- 4. High heel shoe design sketch
- 5. Running shoes and athletic soles
- 6. Cowboy boot design ideas
- 7. Sandals and open footwear concepts
- 8. Loafer shoe drawing ideas
- 9. Slip-ons and canvas shoes
- 10. Hiking boots and rugged footwear
- Basic techniques for drawing shoes
- Useful shoe sketch references
- Related drawing practice
- Shoe drawing ideas FAQ
- Final shoe drawing practice plan
Shoe drawing ideas: quick start
The easiest way to practice shoe drawing ideas is to pick one shoe type, draw the large outline first, then add only the details that explain its function. For sneakers, that might be a thick sole, laces, and a padded collar. For boots, it may be the shaft, tread, and stitching.
For heels, the balance point matters more than decoration. Keep the first sketch light, compare angles often, and save texture for the end. This approach works for realistic footwear studies, fashion design sketches, and quick sketchbook prompts because it gives every mark a job.
| Shoe type | Best first focus | Detail to add last |
| Sneakers | Side profile and sole thickness | Laces, panels, logo marks |
| Boots | Shaft height and toe angle | Eyelets, stitching, tread |
| Flats | Low profile and soft opening | Bow, seam, fabric texture |
| Heels | Heel angle and arch curve | Straps, shine, cast shadow |
| Sandals | Footbed and strap path | Buckles, pattern, edge shadows |
1. Classic sneaker shoe drawing ideas
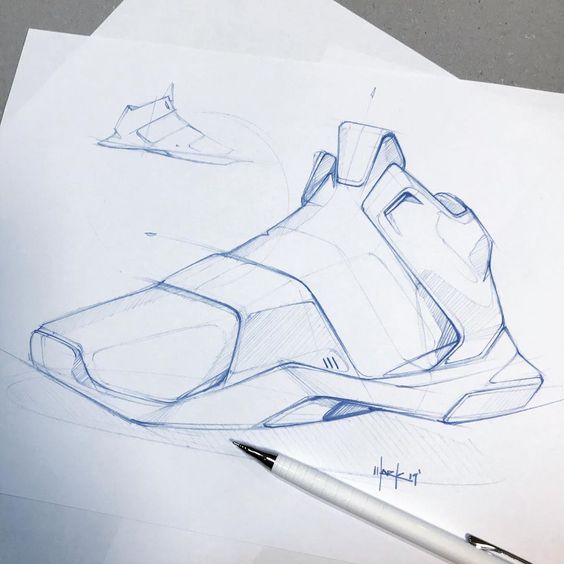
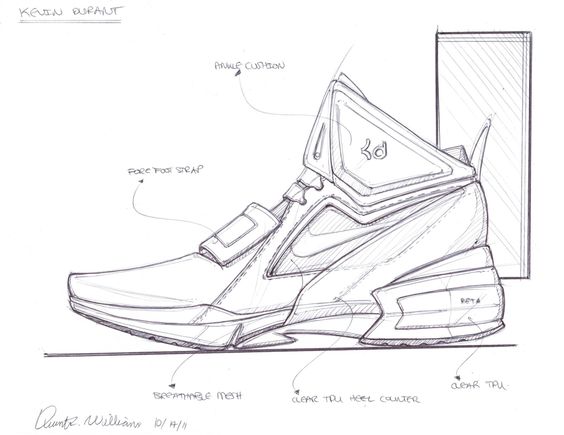
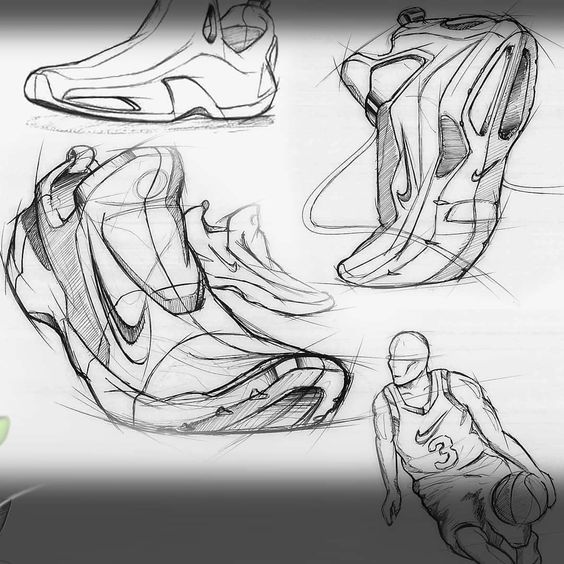
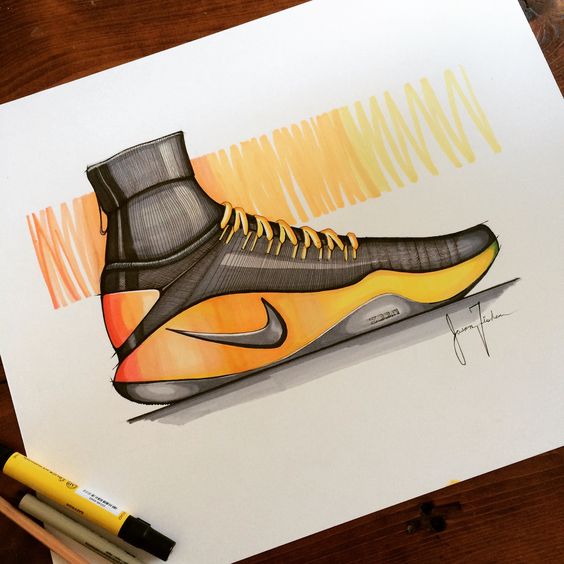
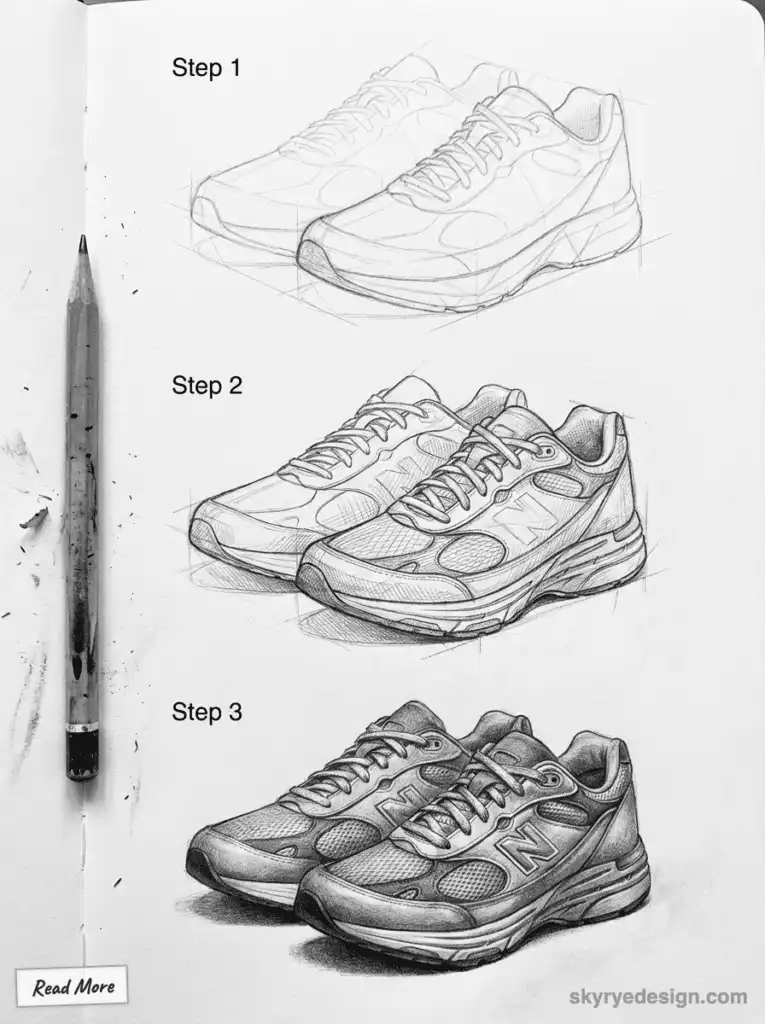
Classic sneakers are the best place to begin because the shape is familiar and forgiving. Block the shoe as a long wedge first: toe box in front, heel counter in back, sole underneath. Do not draw the laces until the opening and tongue sit in the right place.
For a cleaner drawing hacks warm-up, sketch the same sneaker three times: side view, three-quarter view, and cropped detail. This shows whether your shoe design sketch depends on one lucky angle or actually has solid form.
A good sneaker sketch should show cushioning, panel breaks, and the attitude of the shoe without turning every seam into noise. If the profile reads from across the room, the smaller details can stay simple.
2. Lace-up boot drawing ideas
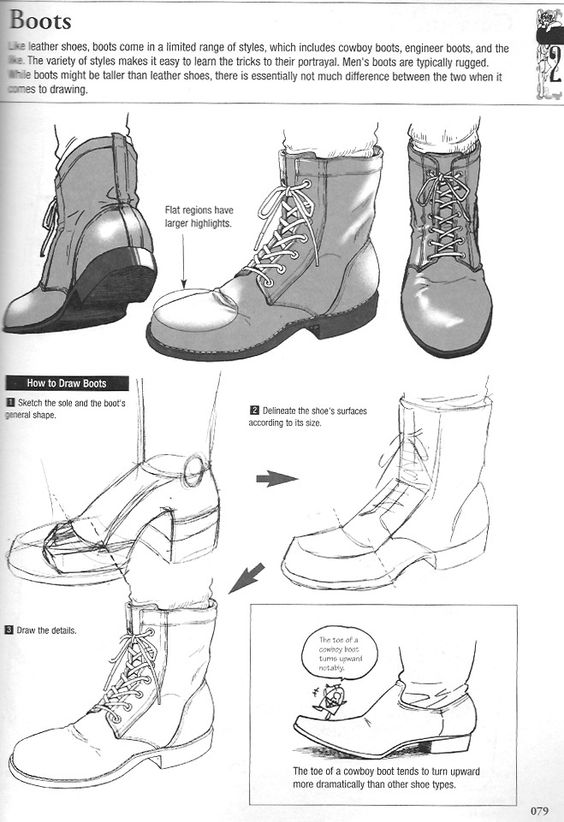
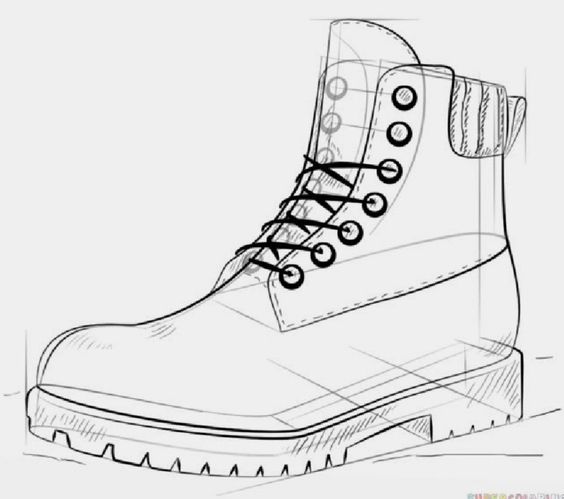
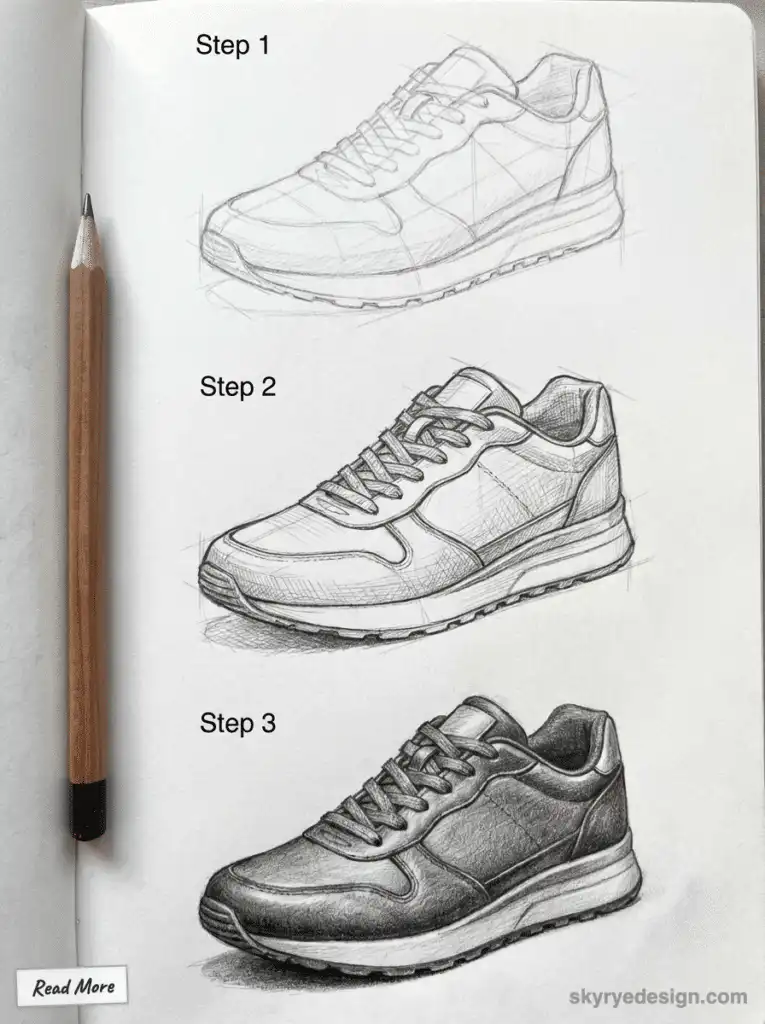
Lace-up boots are all about structure. Start with a tall shaft, a heavier sole, and a toe shape that feels planted. The laces should follow the curve of the boot, not float as a flat zigzag across the front.
If you are drawing boots as part of an outfit, compare the ankle opening with the pant hem or skirt length. The drawing clothes guide is useful here because footwear only looks natural when it belongs to the figure or costume around it.
For construction reference, the shoe last explanation from The Design Sketchbook is a helpful reminder that every shoe wraps around a foot-shaped volume. That one idea makes boot drawings much less flat.
3. Ballet flats and soft shoe sketches
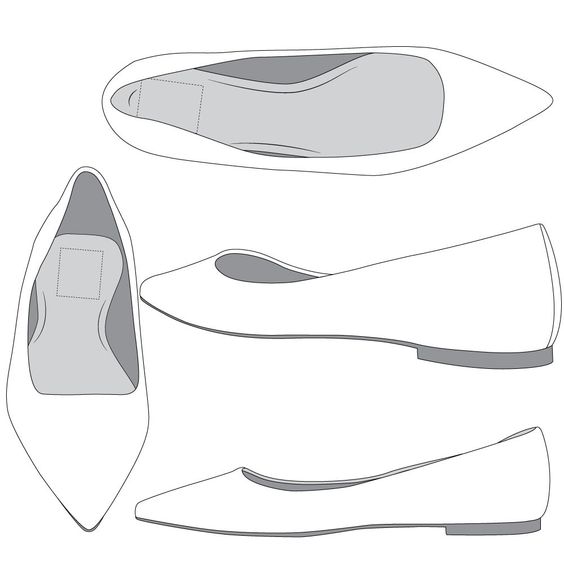

Ballet flats look simple, which is exactly why they expose weak proportion. There are no chunky soles or heavy laces to distract the eye. Keep the upper low, soften the opening, and let the toe shape do most of the character work.
I like to draw the inside edge slightly lighter than the outside edge so the shoe feels soft instead of cut from cardboard. A small bow or strap can help, but it should follow the curve of the toe rather than sit like a sticker on top.
For a separate beginner sequence, Easy Drawing Guides has a ballet shoe walkthrough that is useful for seeing how ribbons and soft toe shapes can be staged step by step.
4. High heel shoe design sketch
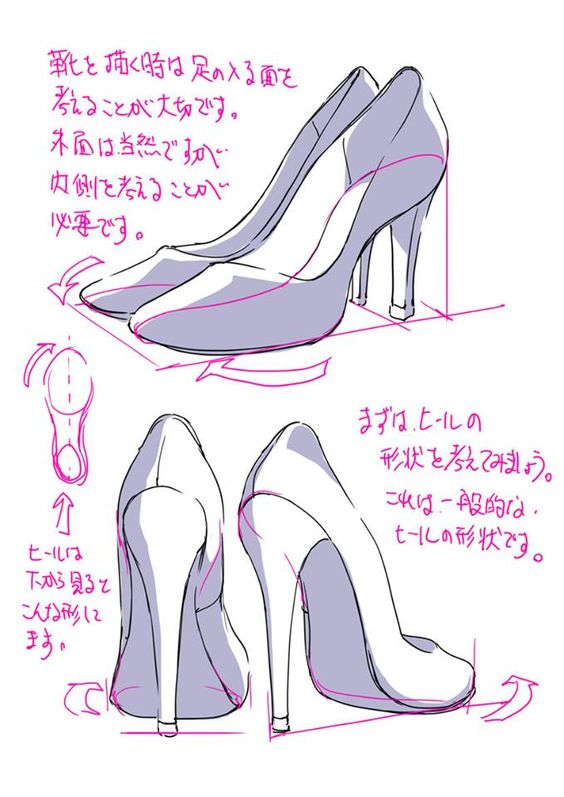
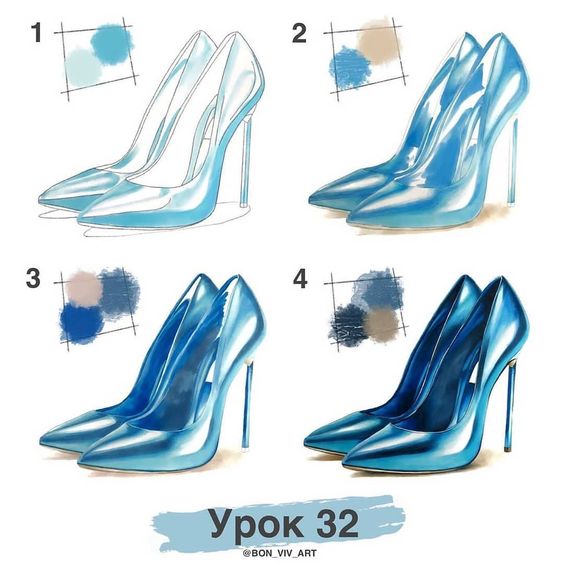
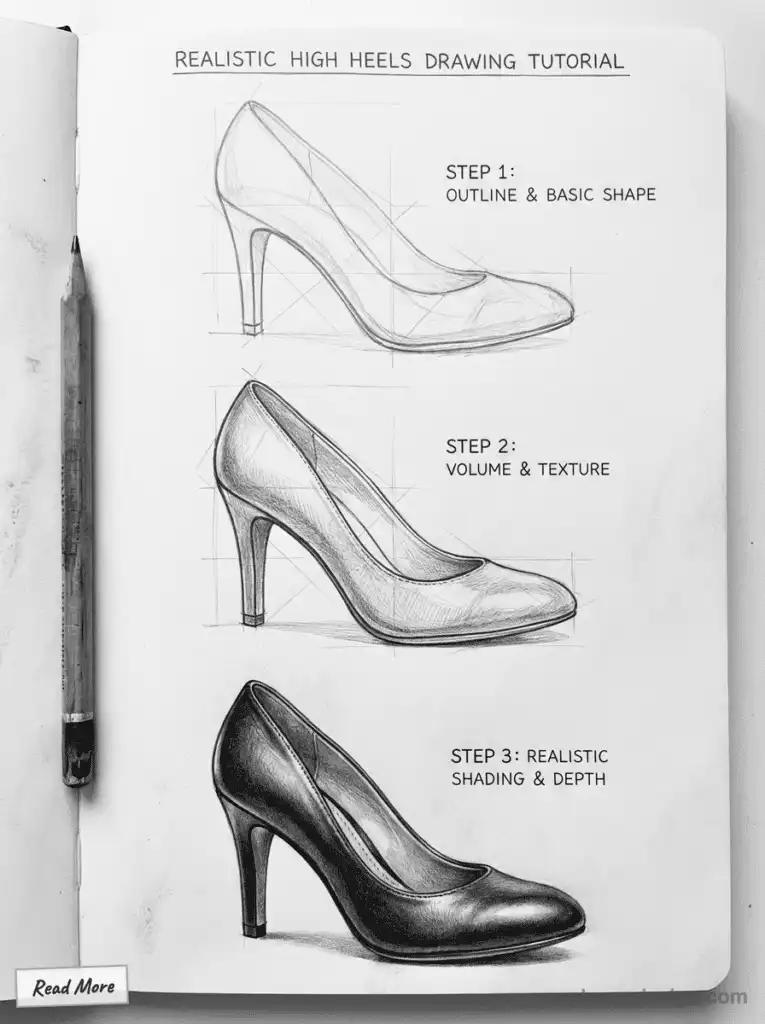
High heels are less about decoration and more about balance. Before adding shine, straps, or color, check whether the heel actually supports the shoe. The arch curve should lead naturally from the toe to the heel, and the heel tip should land under the weight of the foot.
Use a long, confident line for the sole and a smaller shadow under the heel. If the heel is too vertical or too far back, the drawing starts to feel unstable. Fix that before adding buckles.
The broader product design sketches workflow also applies here: draw the side view, mark the function, then add material notes only where they clarify the idea.
5. Running shoes and athletic soles
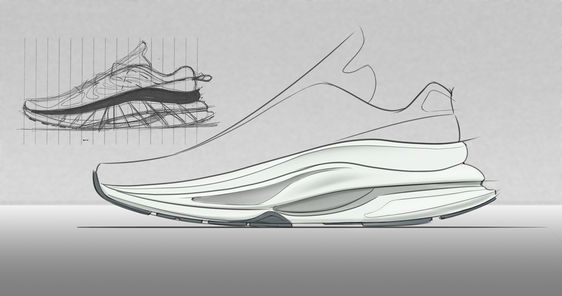
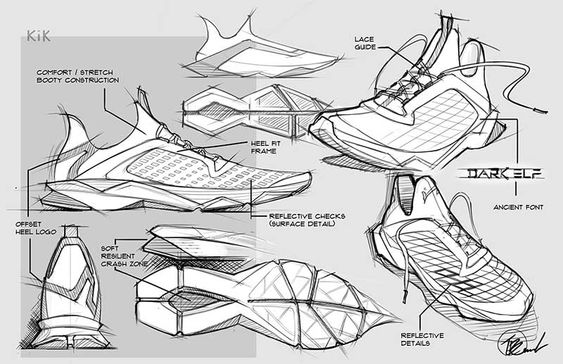
Running shoes are great for practicing layered design. You have the upper, the midsole, the outsole, mesh areas, heel support, and sometimes reflective strips. Sketch those as separate zones instead of one busy outline.
The sole is usually the hero. Make it thick enough to feel cushioned, then add tread in a few visible places. You do not need to draw every groove. Three or four well-placed tread marks can say more than a crowded pattern.
For more practice with graphite control, use the pencil drawing ideas page after this and try the same running shoe in light, medium, and dark values.
6. Cowboy boot design ideas
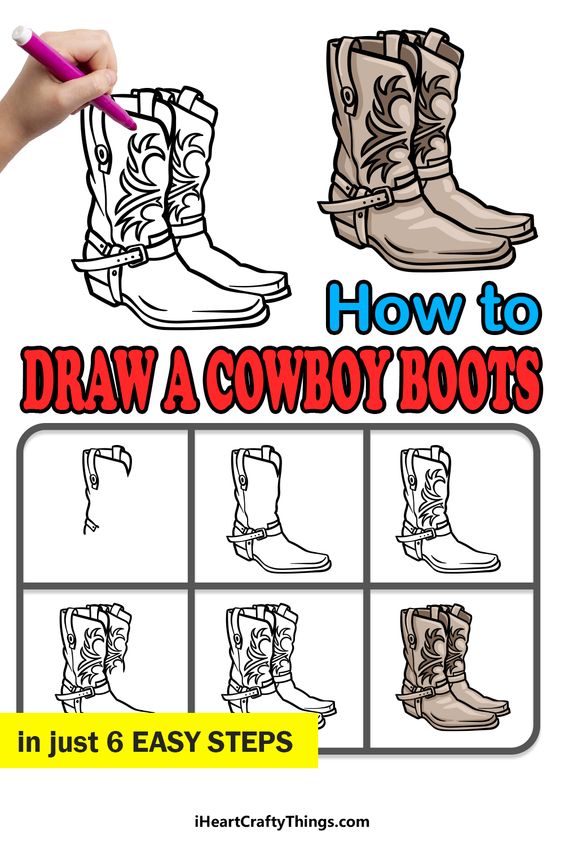
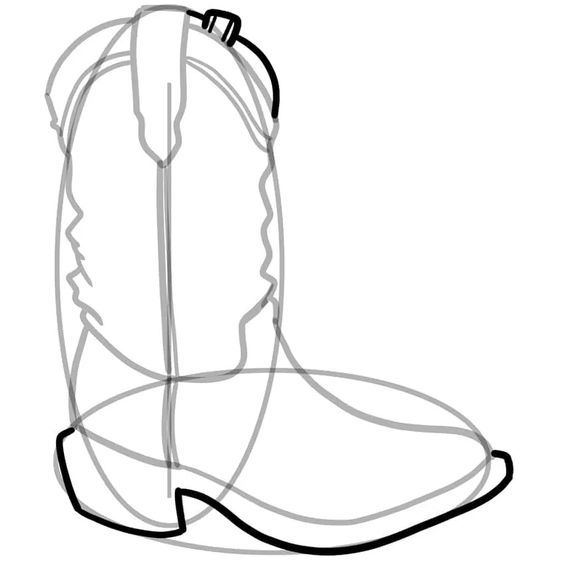
Cowboy boots need a clear shaft, pointed or rounded toe, angled heel, and decorative stitching. If you draw the shaft too straight, the boot can look stiff. Add a slight curve through the top opening and let the stitch pattern follow the form.
The trick is to keep decoration secondary. Draw the boot shape first, then choose one detail to emphasize: stitched panels, tooling, pull straps, or the heel. Too many details at once can flatten the drawing.
A simple boot outline also pairs well with texture drawing practice, especially if you want leather, suede, rubber, and worn edges to feel different.
7. Sandals and open footwear concepts
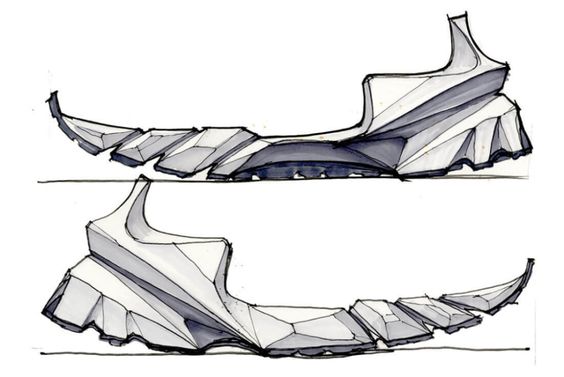
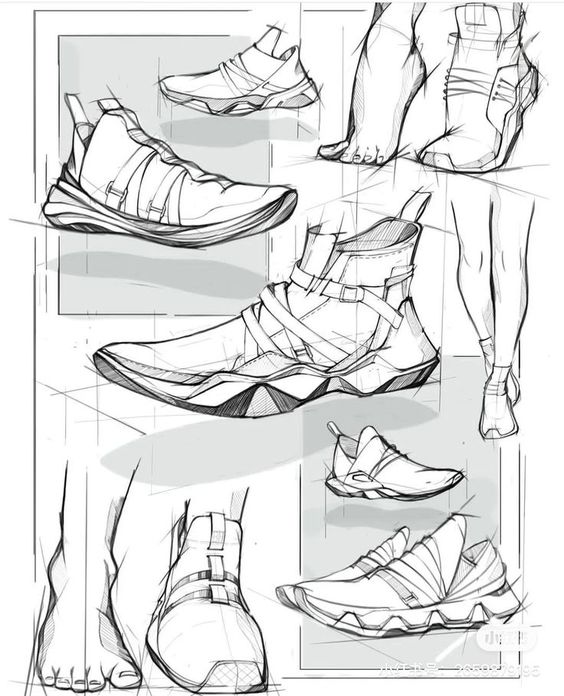
Sandals look easy until the straps start drifting away from the foot. Draw the footbed first, then wrap each strap around the volume. Think of the straps as bands with thickness, not flat lines.
For drawing on shoes ideas, sandals are useful because they show how much design can happen with very little material. A strap angle, buckle placement, or patterned footbed can change the whole mood.
If you want classroom-style inspiration, Arte a Scuola has shoe design examples that show how simple footwear silhouettes can become art lessons without losing structure.
8. Loafer shoe drawing ideas
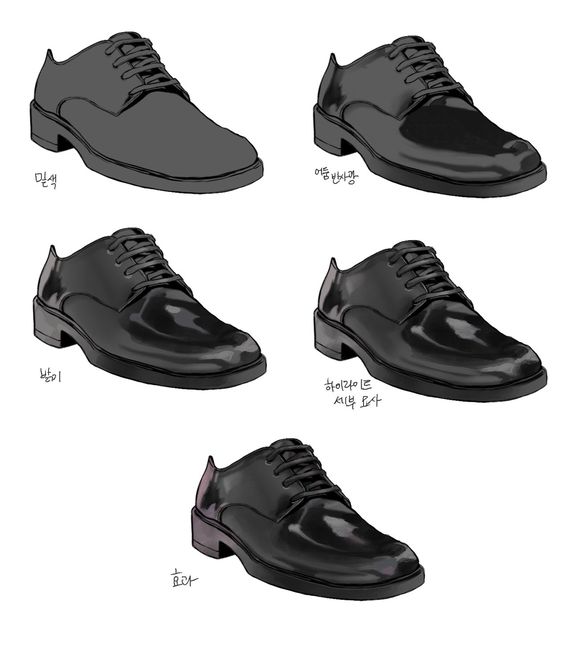
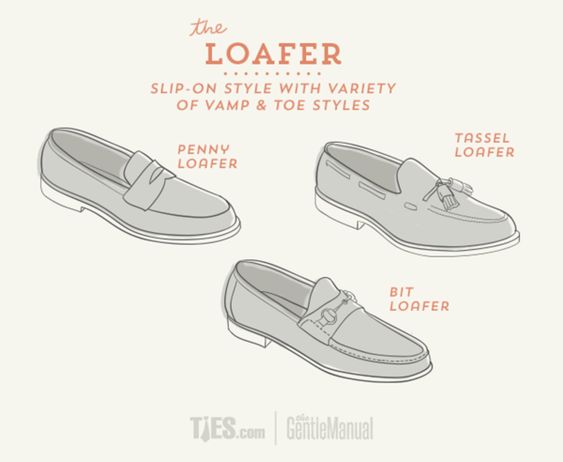
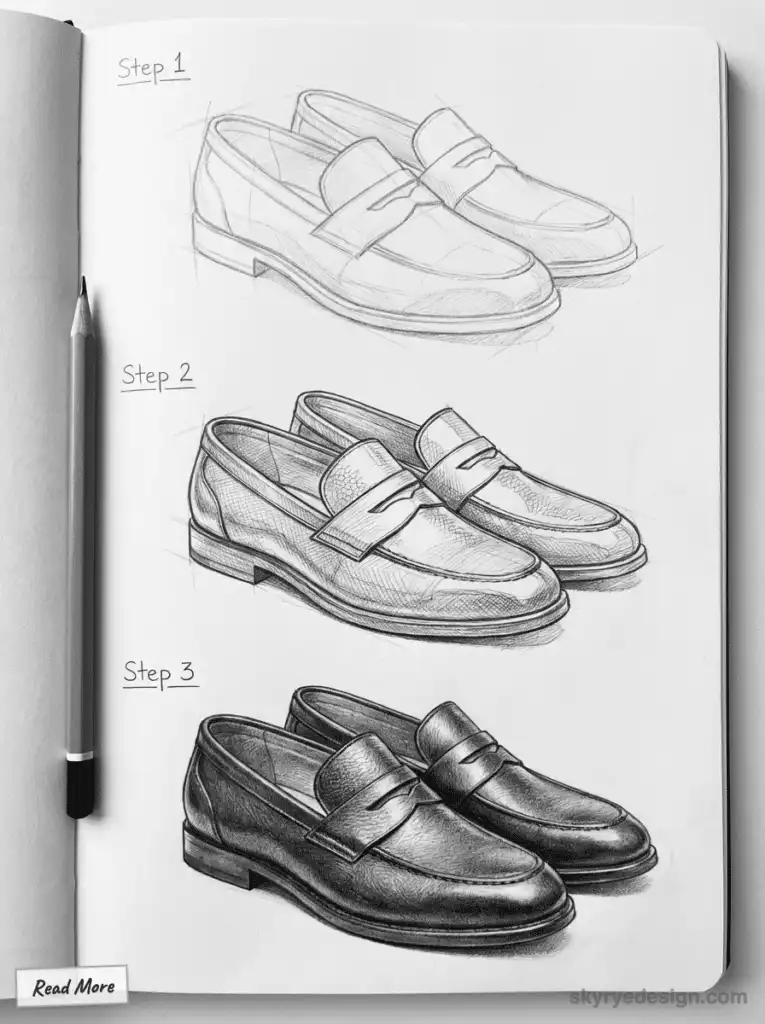
Loafers are quiet shoes, so the details need to be sharp. Draw the low opening, the vamp, and the sole first. Then decide whether it is a penny loafer, tassel loafer, or bit loafer, because each one has a different focal point.
Use edge shadows around the sole and a small highlight on polished leather. For matte suede, avoid hard white highlights and build the texture with soft, broken pencil strokes.
The Shoemakers Academy shoe drawing guide is useful here because it treats shoes as structured objects, not only fashion shapes.
9. Slip-ons and canvas shoes
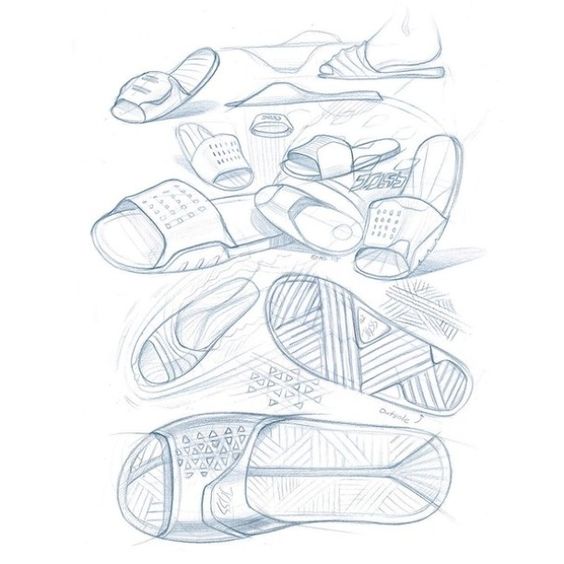
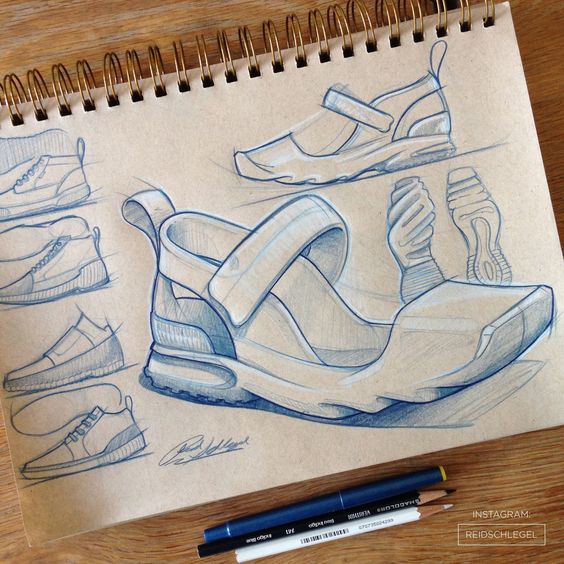
Slip-ons are good cool shoes to draw when you want a clean form with just enough detail. The opening, elastic side panels, and rounded toe should read before you add patterns or logos.
If you draw canvas, keep the texture softer than leather. Short hatching, a few seam lines, and a slightly dull edge usually work better than heavy outlines everywhere.
For color and marker practice, the marker drawing doodles guide can help you test small pattern ideas before putting them onto a finished shoe sketch.
10. Hiking boots and rugged footwear
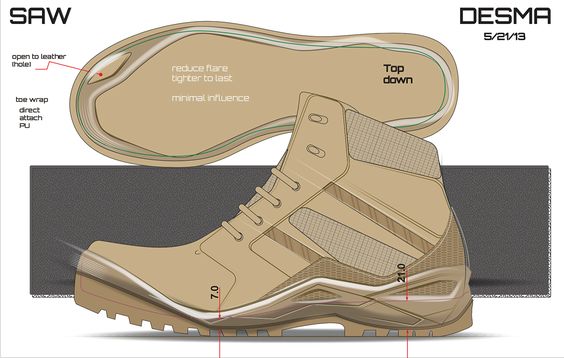
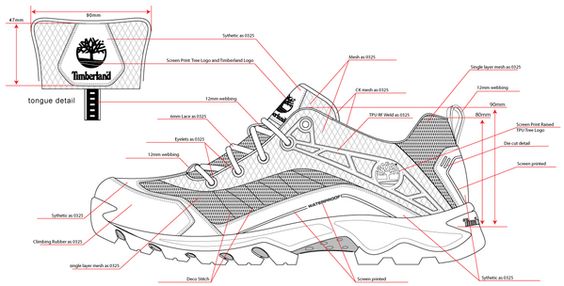
Hiking boots should feel heavy, protective, and practical. Start with a raised ankle, thick sole, reinforced toe, and a clear heel. These parts matter more than a perfect logo or brand detail.
The tread is where beginners often overdo it. Draw the large sole shape first, then add only the visible tread blocks. Put darker values under the boot and near the seams so the form feels grounded.
For an art-class angle on shoe value, Create Art with ME has an abstract shoe value lesson that can help you think about lights and darks before texture.
Basic techniques for drawing shoes
Good shoe drawings begin with structure. Break the subject into toe box, upper, opening, heel, and sole. Once those parts sit in the right relationship, details like eyelets, panels, stitching, and tread become much easier to control.
Understand shoe anatomy
Every shoe has a front volume, a heel volume, an opening, and some kind of sole. Sneakers exaggerate the sole. Flats minimize it. Boots raise the ankle. Heels shift the balance point. Name those parts while you draw and you will catch proportion mistakes faster.
- Use the toe box to set the direction of the shoe.
- Use the heel counter to keep the back of the shoe solid.
- Use the sole as a separate band, not just a line under the drawing.
- Use seams and stitching only after the big form works.
Choose simple drawing tools
You do not need a perfect kit. A 2B pencil, kneaded eraser, fine black pen, and one gray marker can carry most footwear sketches. Use pencil for searching, pen for the final contour, and marker for shadow planes.
The iHeartCraftyThings shoe drawing tutorial is a beginner-friendly reference if you want a very simple step sequence before tackling more detailed footwear.
Check proportions before texture
Before you shade, compare the shoe length to the heel height, toe height, and opening. This is the boring check that saves the drawing. If the big proportions are wrong, beautiful stitching will not rescue it.
| Mistake | What it looks like | Quick fix |
| Tiny sole | The shoe feels weightless | Thicken the midsole and add a contact shadow |
| Floating laces | The laces ignore the tongue curve | Draw the tongue plane first |
| Flat side view | The shoe looks like a sticker | Add heel thickness and inner opening shadow |
| Too much texture | The design looks noisy | Keep texture in one or two focal areas |
Useful shoe sketch references
For more outside study, compare your sketches with a few focused references: Skip To My Lou shoe drawing, Art With Trista shoe art lesson, and Shutterstock shoe sketch references. Use them for form and variety, then make your own version instead of copying one image exactly.
Related drawing practice
Once these shoe drawing ideas feel comfortable, move into nearby practice: try easy drawings step by step for simpler warm-ups, sketching ideas for your sketchbook for daily prompts, and fantasy drawing ideas if you want to turn footwear into character or worldbuilding details.
For character work, connect shoes to pose and costume: the anime pose reference guide helps with foot placement, while the Sonic drawing guide is a useful example of oversized cartoon shoes carrying a character silhouette.
Shoe drawing ideas FAQ
Q: What are good shoe drawing ideas for beginners?
A: Start with side-view sneakers, simple slip-ons, ballet flats, and chunky boots. These shapes teach the main footwear forms without forcing you into difficult perspective too early. Once the outline feels steady, add laces, seams, soles, and small shadow edges.
Q: How do you make a shoe drawing look realistic?
A: Use a light construction sketch first. Mark the toe box, heel, opening, sole, and center line before adding logos or texture. Realism usually comes from proportion and shadow direction, not from drawing every stitch on the shoe.
Q: What should I draw on custom shoes?
A: Good drawing on shoes ideas include clean line art, checker patterns, small flowers, flames, stars, cartoon patches, and simple character details. Keep the design readable from a distance and avoid tiny details on bend points where the material creases.
Q: What tools work best for shoe sketches?
A: A 2B pencil, kneaded eraser, fineliner, and a few gray markers are enough for most shoe sketches. Use pencil for proportion, ink for the final edge, and markers for quick material notes such as rubber, leather, suede, or mesh.
Q: How do you draw sneaker soles and treads?
A: Draw the sole as a separate band under the upper, then split it into heel, midsole, and toe zones. Add tread marks only after the angle is correct. If the tread is too detailed too soon, the shoe often looks busy but not solid.
Q: Are shoe design sketches different from normal shoe drawings?
A: A shoe design sketch explains an idea, while a normal shoe drawing may simply copy what you see. Design sketches often include side views, callouts, material notes, and small construction details so the footwear concept is clear.
Final shoe drawing practice plan
Pick three shoe types from this list and draw each one for ten minutes. First sketch the side profile, then a three-quarter view, then one close-up detail such as laces, tread, or stitching. That small routine trains proportion, construction, and texture without turning the page into homework.
The best shoe drawing ideas are the ones that make you notice form. Once the shoe feels solid in pencil, color and style choices become fun instead of frustrating.
- 2.2Kshares
- Facebook0
- Pinterest2.2K
- Twitter0
- Reddit0