Super hero drawing gets easier once you stop starting with the cape. The body has to carry the idea first: line of action, ribcage, pelvis, limb cylinders, then costume, shadows, and line weight.
A dynamic figure still needs a head that holds its volume as the pose turns. This guide to the Loomis method for drawing heads builds that structure from a sphere, side plane and centre line across multiple angles.
A Catwoman costume, for example, only reads clearly when the silhouette, seams, mask, and pose work together instead of competing for attention.
I learned this the slow way by trying to draw Batman over and over in secondary school. Every attempt failed in the same places: weightlifter proportions, a pose that looked like it was waiting for a bus, and a cape that hung like a curtain taped to the shoulders.
If your superhero looks stiff, the problem is usually not the mask or emblem. It is the body underneath: proportions too realistic, shoulders too narrow, no weight shift, or a cape that ignores gravity.
- Why Superhero Drawing Has Its Own Rules
- Materials You Need
- Superhero Anatomy: The Proportion System That Governs Every Figure
- How to Draw a Superhero: 6 Steps
- Three Superhero Body Types
- Making Poses Dynamic: Weight and Foreshortening
- 5 Drawing Superheroes Mistakes and Their Fixes
- Resources Worth Studying
- The Cape Follows the Figure
- FAQ: Drawing Superheroes
- Q: What is the best way to start drawing superheroes for beginners?
- Q: What proportion system do superhero figures use?
- Q: How do you draw superhero muscles correctly?
- Q: What makes superhero poses look dynamic instead of stiff?
- Q: How do you draw a superhero cape realistically?
- Q: Should I draw anatomy before the costume?
Super hero drawing starts with the body
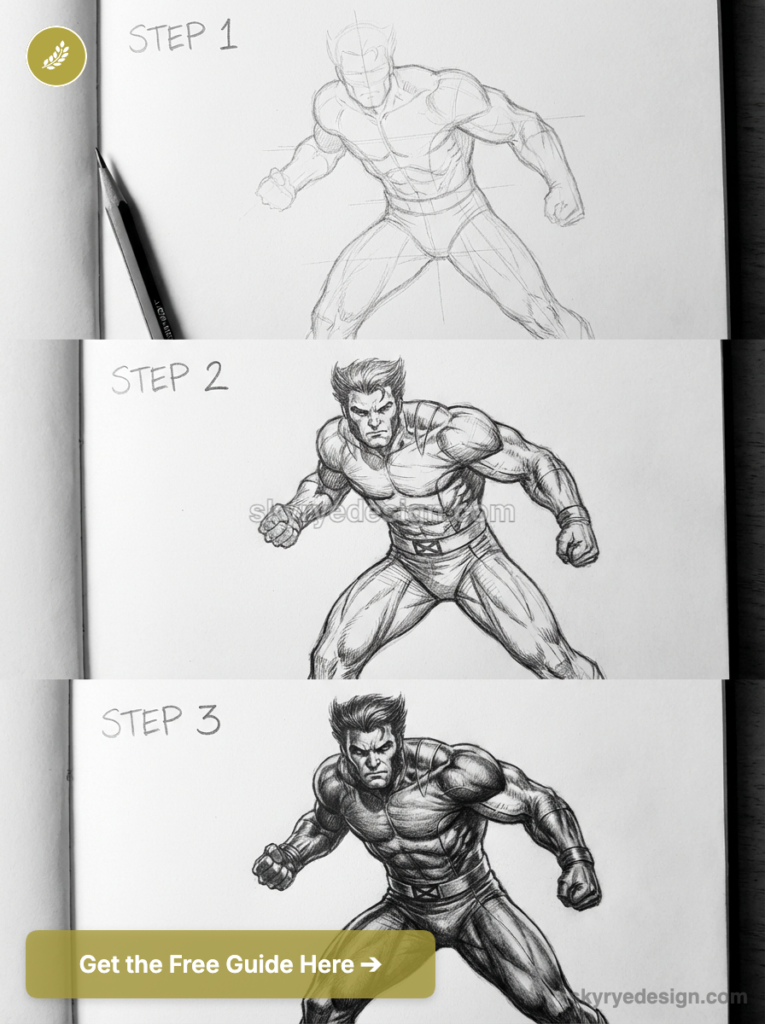
Super hero drawing is comic figure drawing with deliberate exaggeration. Start with a single line of action, then block the head, ribcage, and pelvis before you touch the costume. Build the arms and legs as cylinders with clear joints, push the shoulder width slightly beyond realism, and keep the hands large enough to read in action poses. After that, add simplified muscle groups, cape attachment points, belts, gloves, and final line weight. If the silhouette works before the costume, the finished hero will feel powerful. If the body is stiff, no amount of mask detail will save it.
| Drawing stage | What to check | Common fix |
|---|---|---|
| Gesture | One clear action line | Redraw the pose as a curve, not a stick figure |
| Proportion | 8-head heroic body | Lengthen the legs and widen the shoulders |
| Muscle masses | Simple chest, shoulder, arm, and thigh forms | Group anatomy into readable shapes |
| Costume | Suit follows the body | Wrap seams and emblems around the form |
| Cape | Attachment and gravity make sense | Start folds at the shoulders or collar |
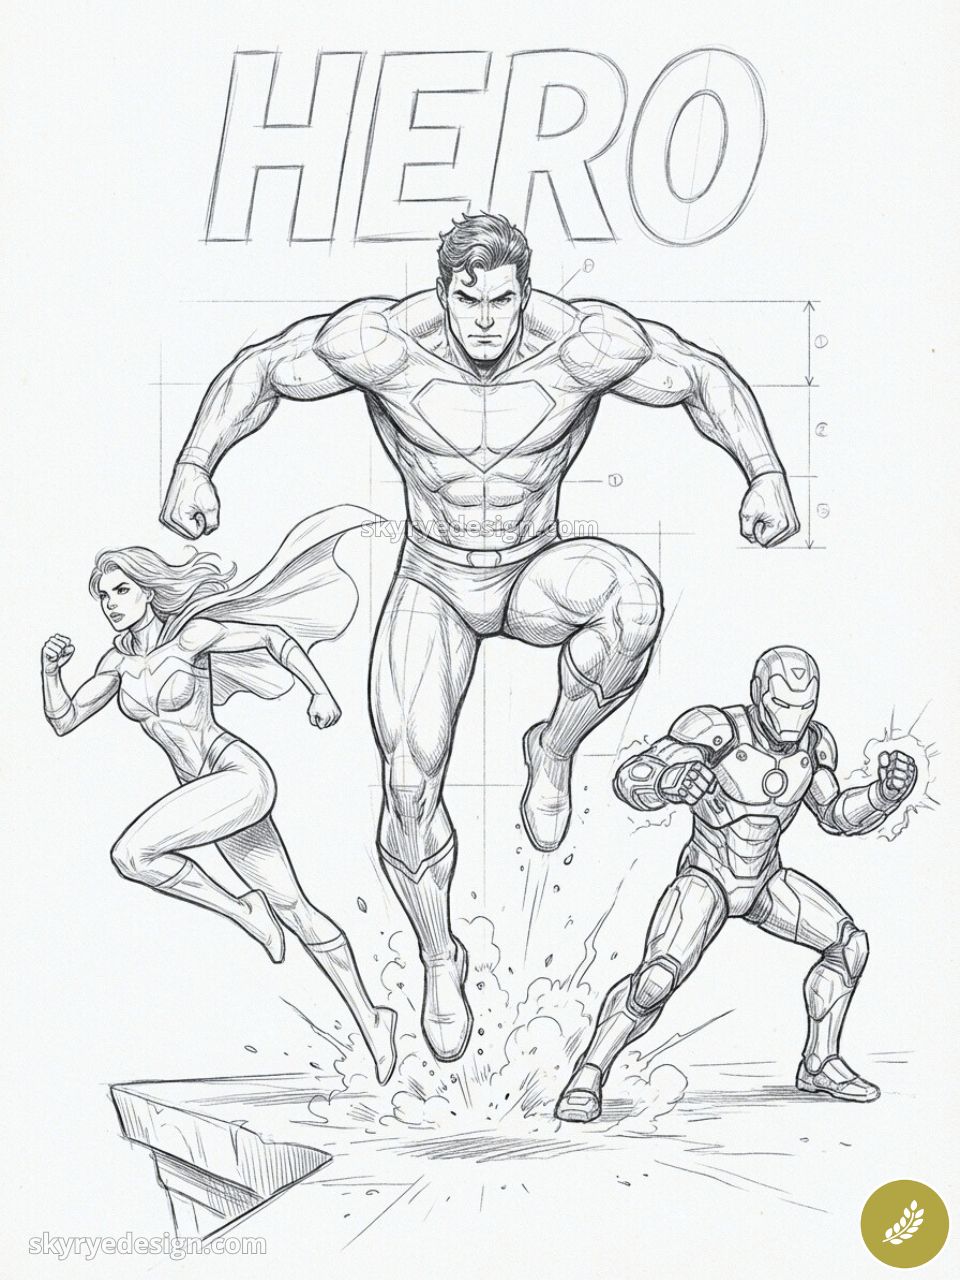
After Batman, I had the same problem with Superman, but after I started studying proportions and the specifics of figure construction and hyperbolization, things improved. The turning point was studying references from the most famous artists working in the comics industry.
Why super hero drawing has its own rules
The core problem beginners run into is treating superhero drawing as realistic figure drawing with added muscle. It isn’t. The entire visual language was developed to solve specific problems that don’t exist in realistic drawing.
The comic art tradition
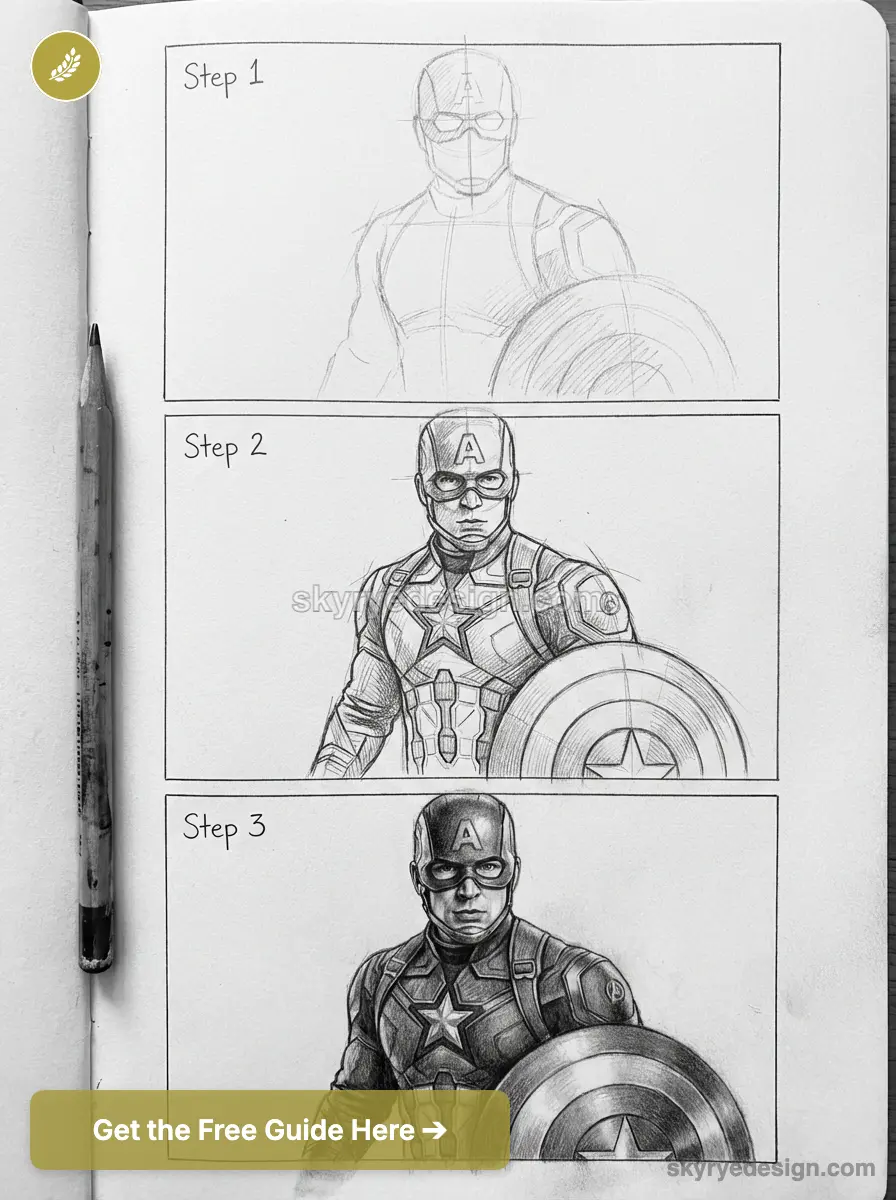
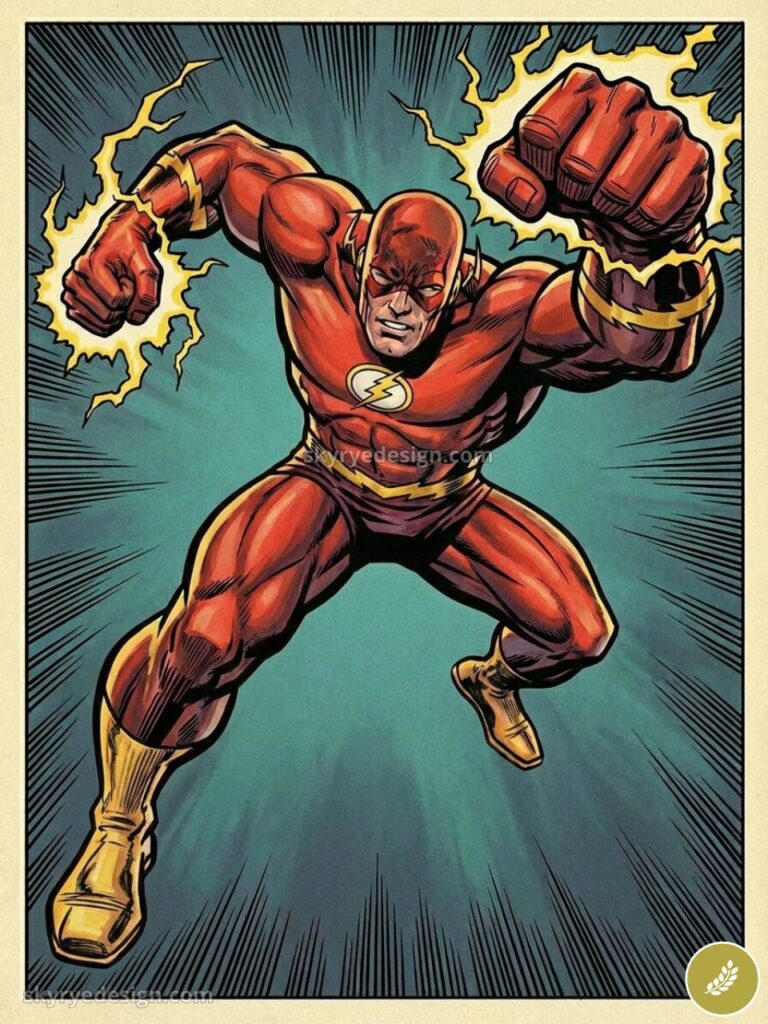
Jack Kirby — co-creator of Captain America, the Fantastic Four, and the New Gods — built a figure-drawing approach around simplified muscle masses and exaggerated perspective that could communicate power and motion clearly even at two inches square on a printed page. His anatomy is wrong by realistic standards and exactly right for the medium.
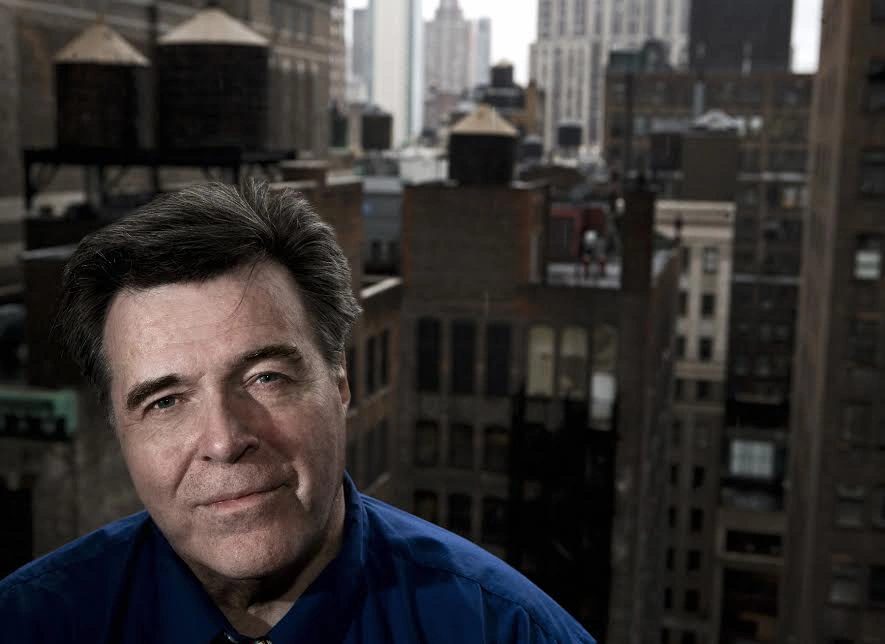
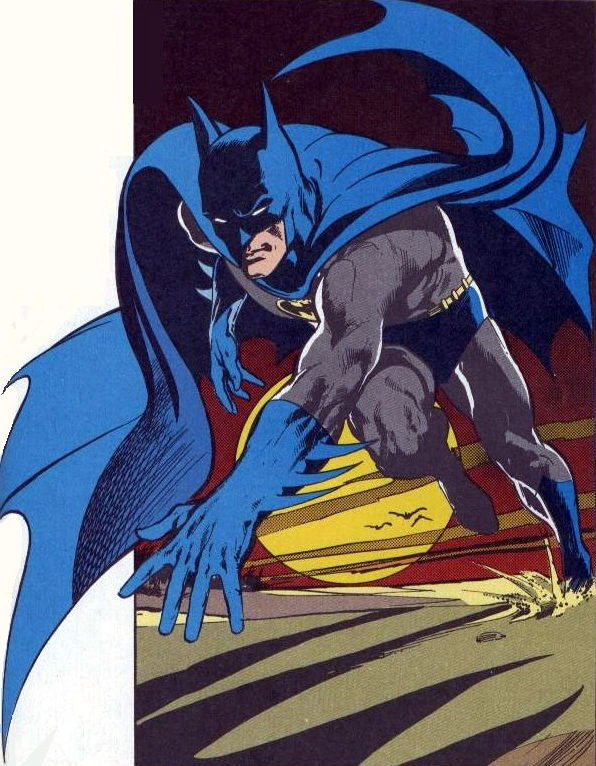
Neal Adams, in the early 1970s, brought more realistic draftsmanship to Batman and Green Arrow while maintaining heroic exaggeration — his figures are anatomically informed but never anatomically literal.
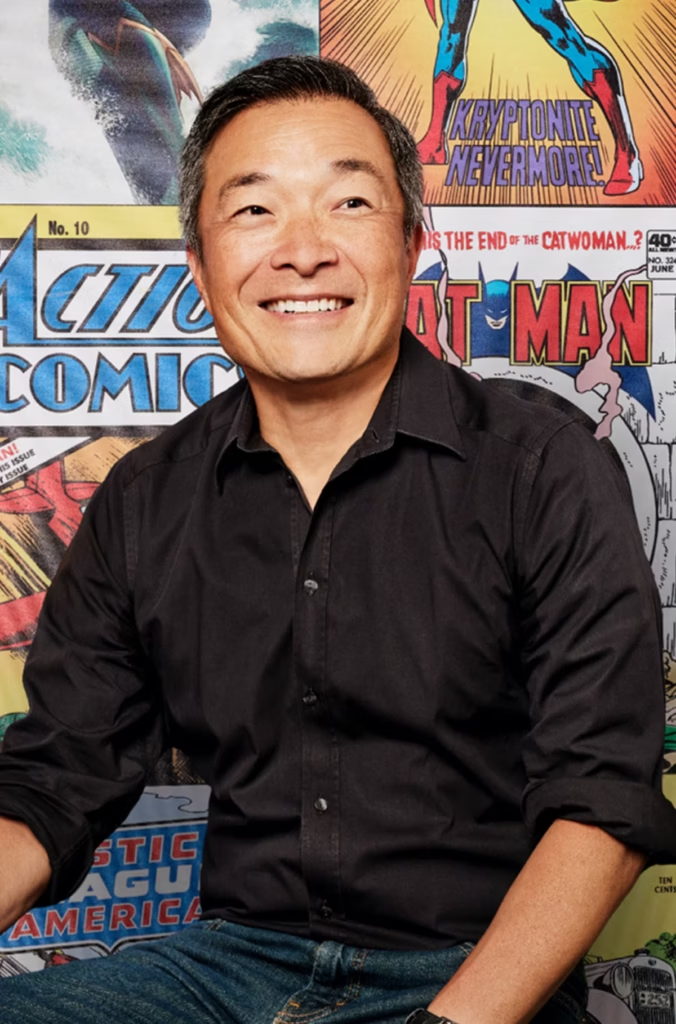
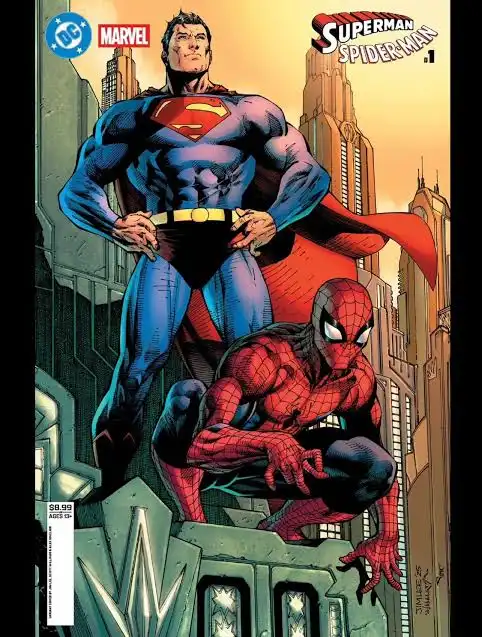
Jim Lee’s X-Men run in the early 1990s added sculptural muscle definition and a dynamic line quality that shaped how an entire generation draws superheroes. These three artists define the tradition you’re working in. Their specific choices about proportion and pose are not arbitrary — they’re solutions to real visual problems.
Three reasons superhero drawings fail
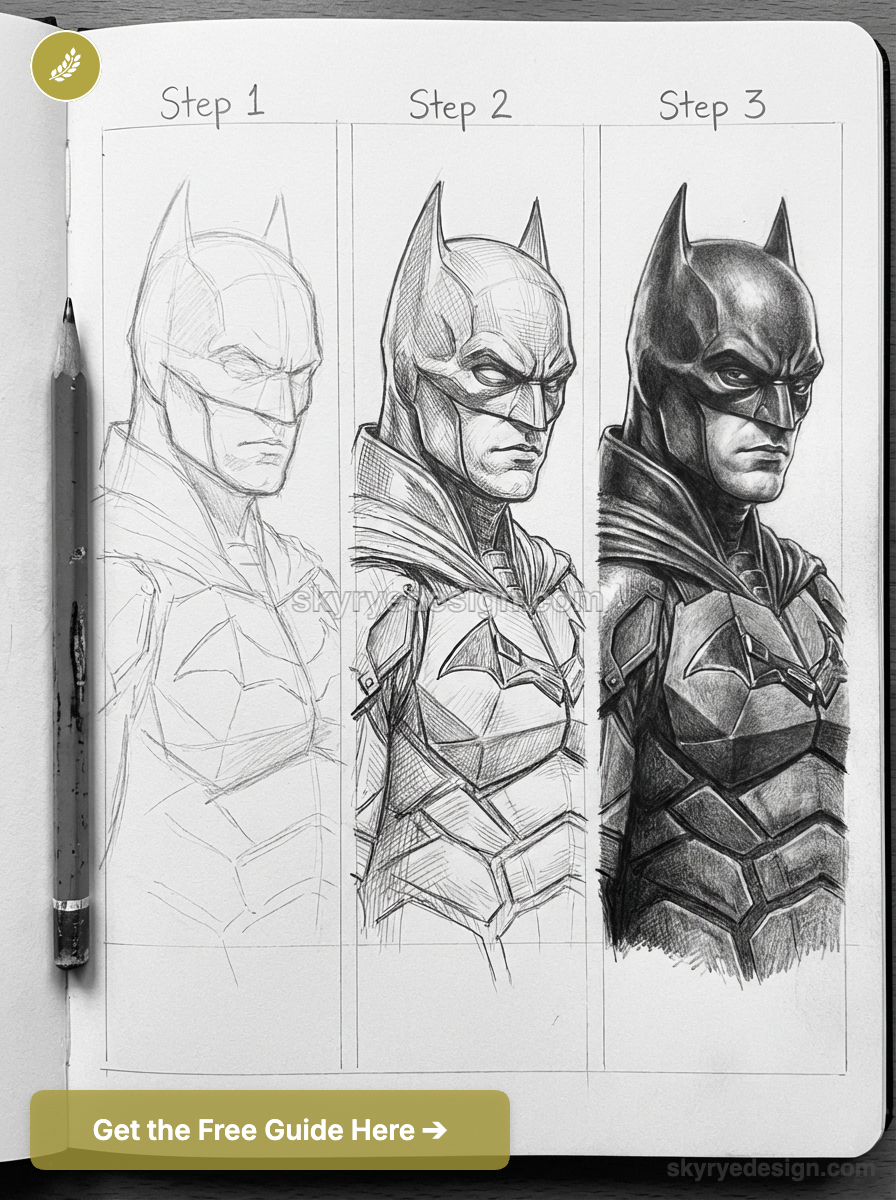
Every weak superhero drawing has one of three problems. Wrong proportions: the figure is drawn at realistic human proportions instead of the heroic 8-head ideal, and the result looks ordinary rather than powerful. No line of action: the figure is assembled from correctly-positioned parts without a governing energy curve, and the pose reads as static even with perfect anatomy.
Costume drawn flat: the suit sits on the surface as a pattern rather than responding to the three-dimensional body underneath it. Each of these has a specific fix, covered in the steps below.
Pro tip: Before starting any superhero drawing, look up three specific artists: Jack Kirby, Fantastic Four page, Neal Adams, Batman issue 251, and Jim Lee Uncanny X-Men 268 cover. Don’t copy them — study what is anatomically wrong by realistic standards and why those wrong choices make the figures more powerful, not less. This is the fastest way to understand what superhero anatomy actually is.
Materials you need
- HB pencil — all construction: action line, head oval, torso box, limb cylinders. Very light pressure; these disappear under final linework.
- 2B pencil — confirmed anatomy, musculature, and initial costume lines.
- 4B pencil — deep shadows: muscle separation, costume folds under joints, cape shadow masses.
- Staedtler Pigment Liner 0.5mm (~$4) — inking final lines. The 0.5mm handles both body outline and muscle definition. Use 0.3mm for fine costume detail.
- Copic Sketch markers — BV08 dark shadow tone (~$8-9 each). B02 mid-blue and R29 crimson complete a workable superhero palette.
- Canson XL Bristol 270gsm (~$15 for a pad) — smooth surface for clean inks and marker work without bleed-through.
- Kneaded eraser (Faber-Castell, ~$3) — lifts HB construction after inking is dry.
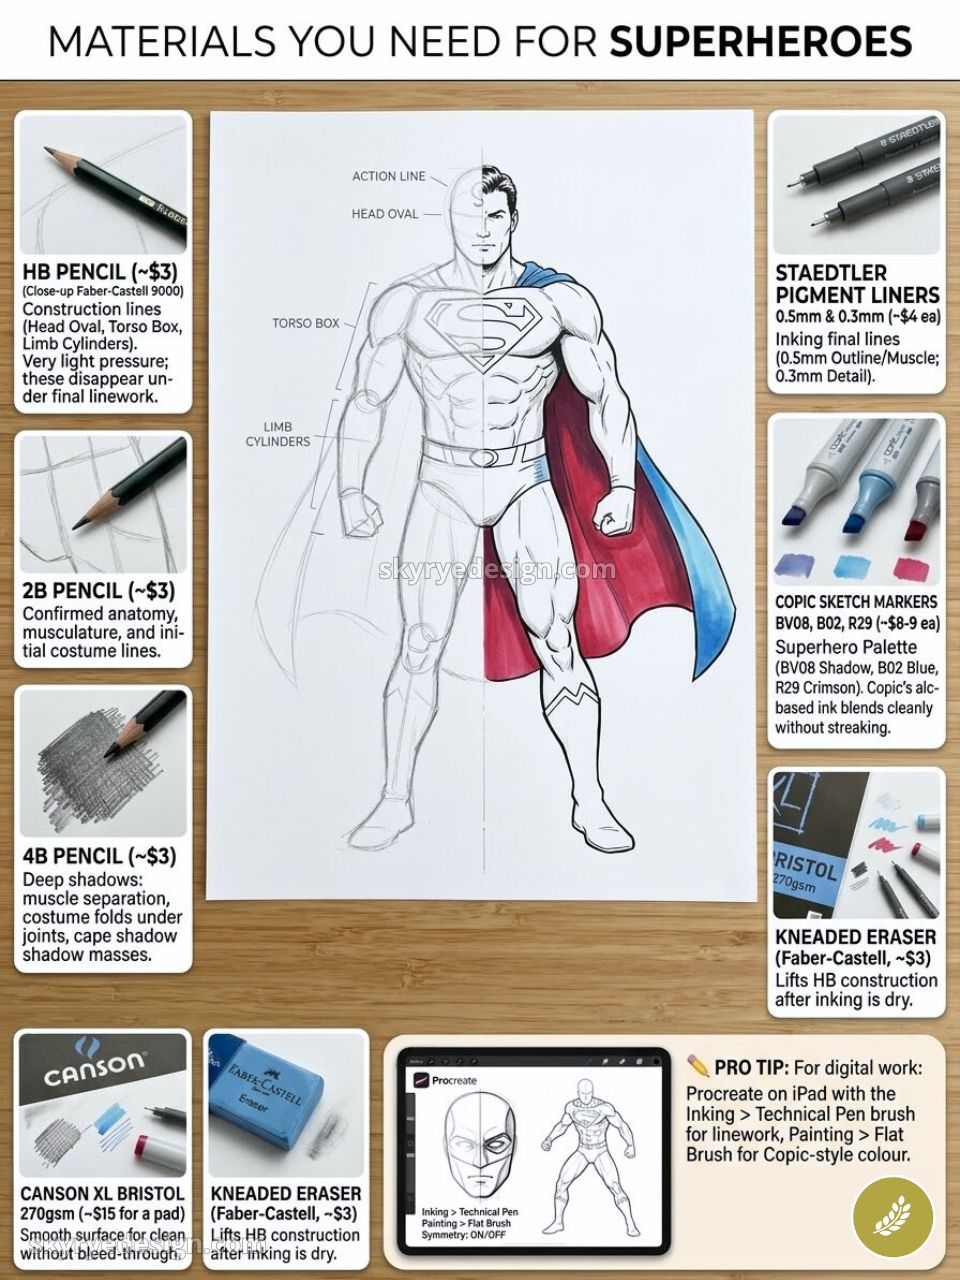
Pro tip: For digital work: Procreate on iPad with the Inking > Technical Pen brush for linework, Painting > Flat Brush for Copic-style colour. Use the symmetry tool for face and mask construction but turn it off for body poses — symmetric bodies look robotic.
Superhero anatomy and the 8-head proportion system
The 8-Head Height System
Real adults measure roughly 7 to 7.5 heads tall. Superhero figures use 8 heads as the standard, with powerhouse characters like the Hulk or Thor at 8.5 to 9 heads.
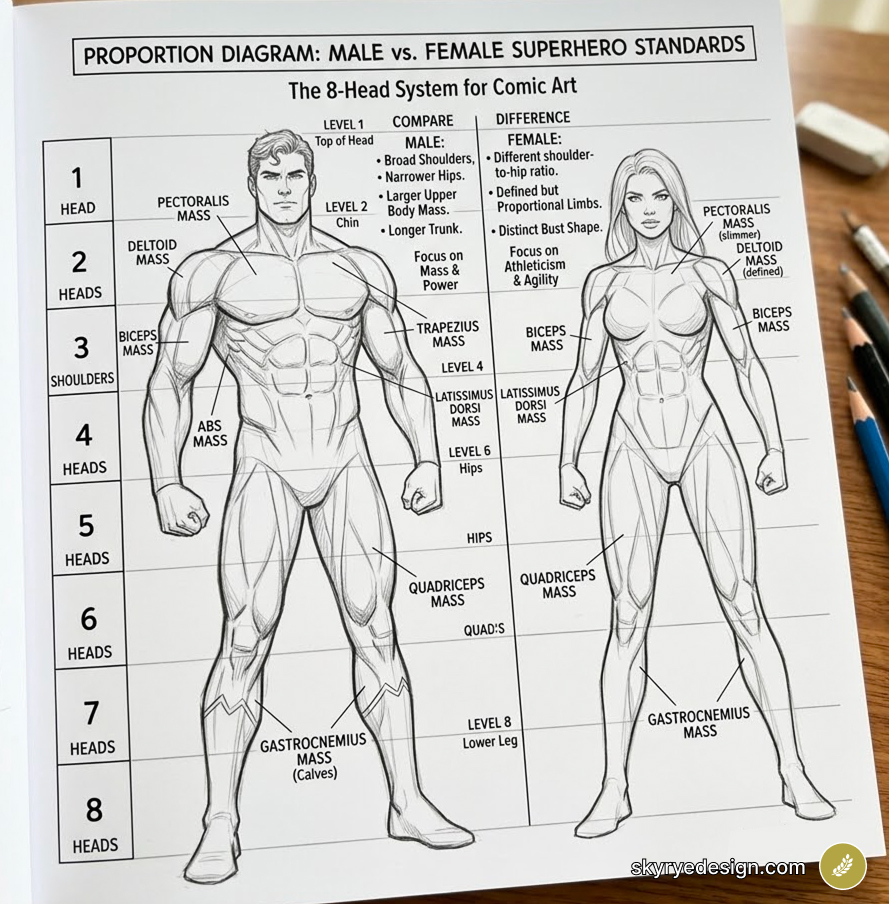
The extra height comes primarily from longer legs — the torso stays roughly human-sized, but the legs are extended, creating physical superiority without distorting the upper body. To use this system: draw eight equal circles stacked vertically. Head occupies circle 1. Chin-to-chest at circle 2. Nipple line at 2.5, navel at 3, crotch at 4. Fingertips reach mid-thigh at circle 5. Knees at 5.5, mid-shin at 6.5, feet at 8. Mark these before drawing any anatomy and proportions will be structurally correct from the start.
Simplified Muscle Groups
Superhero musculature is not realistic anatomy — it’s a simplified version designed for visual impact and legibility at small print sizes. The key principle: treat each muscle group as one clear geometric form rather than a collection of individual muscles. The chest is two egg-shaped masses separated by a vertical sternum line.
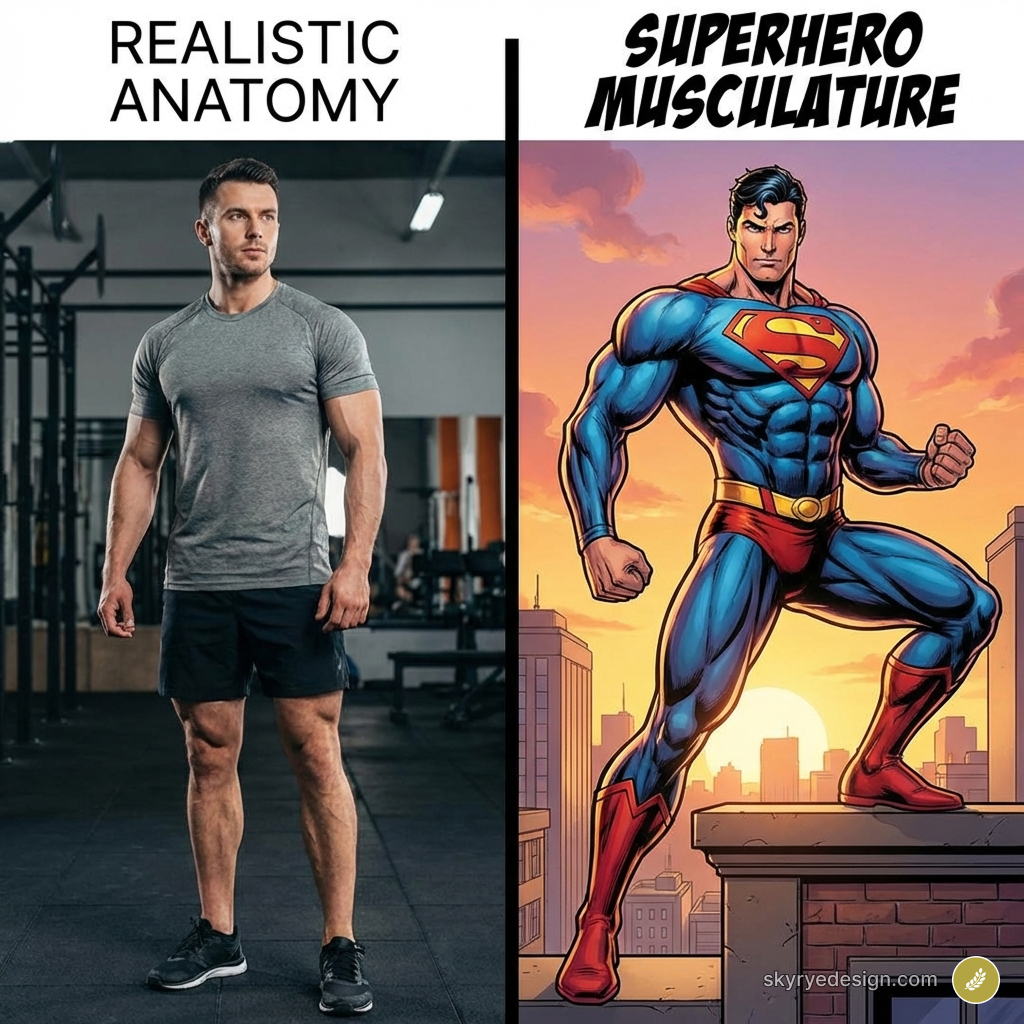
The shoulder is a single sphere. The bicep is a single elongated oval when extended, a compressed sphere when flexed. The thigh is a thick, tapered cylinder with three distinct masses visible on its front surface. The calf is a diamond shape from behind. This geometric simplification is what gives superhero figures their power and readability — it’s not a shortcut, it’s the correct approach for the medium.
Female Heroic Proportion
Female superheroes use a different structural system. Hips are wider relative to shoulders (inverted from male heroes, where shoulders dominate). Waist-to-hip ratio is more pronounced. Musculature is defined as athletic rather than heavily bulked.
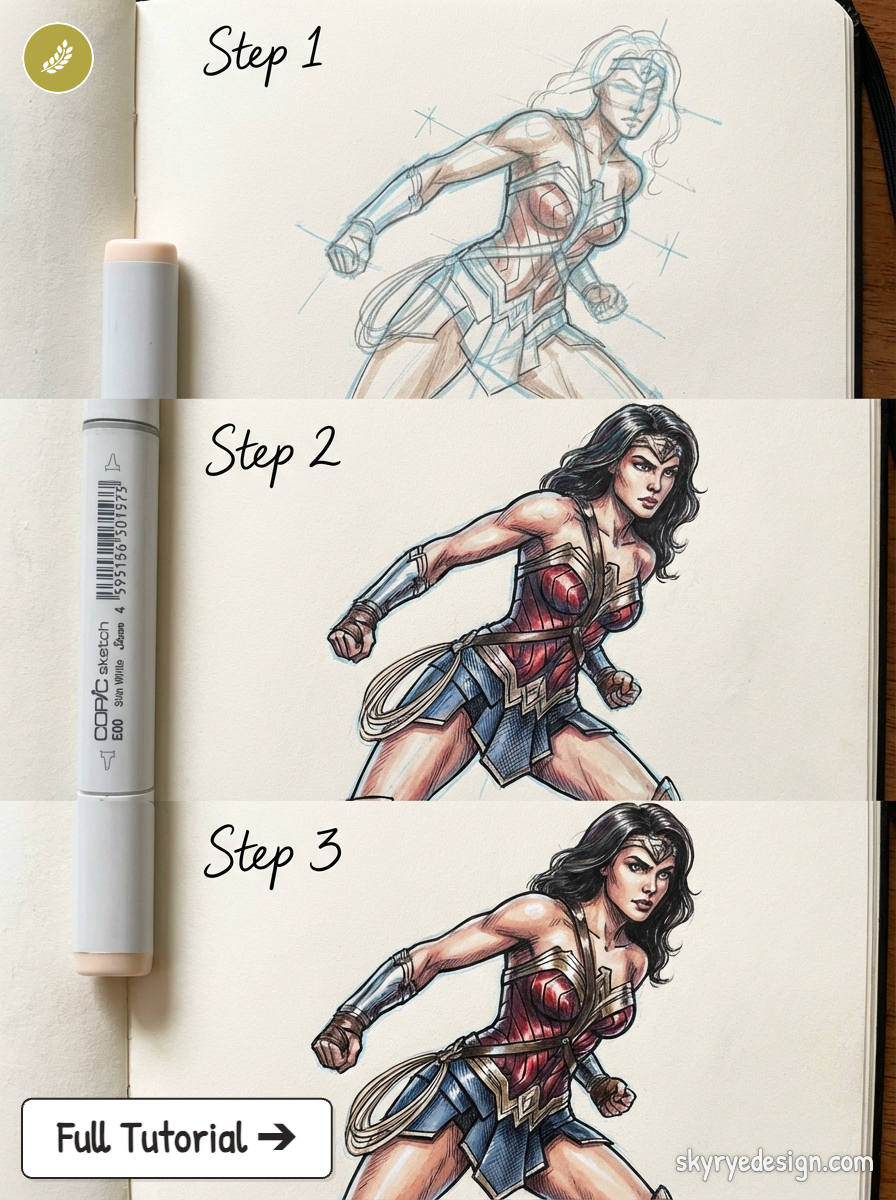
The most common error is applying the male proportion system to a female figure — the result looks like a male hero with different features rather than a structurally different body.
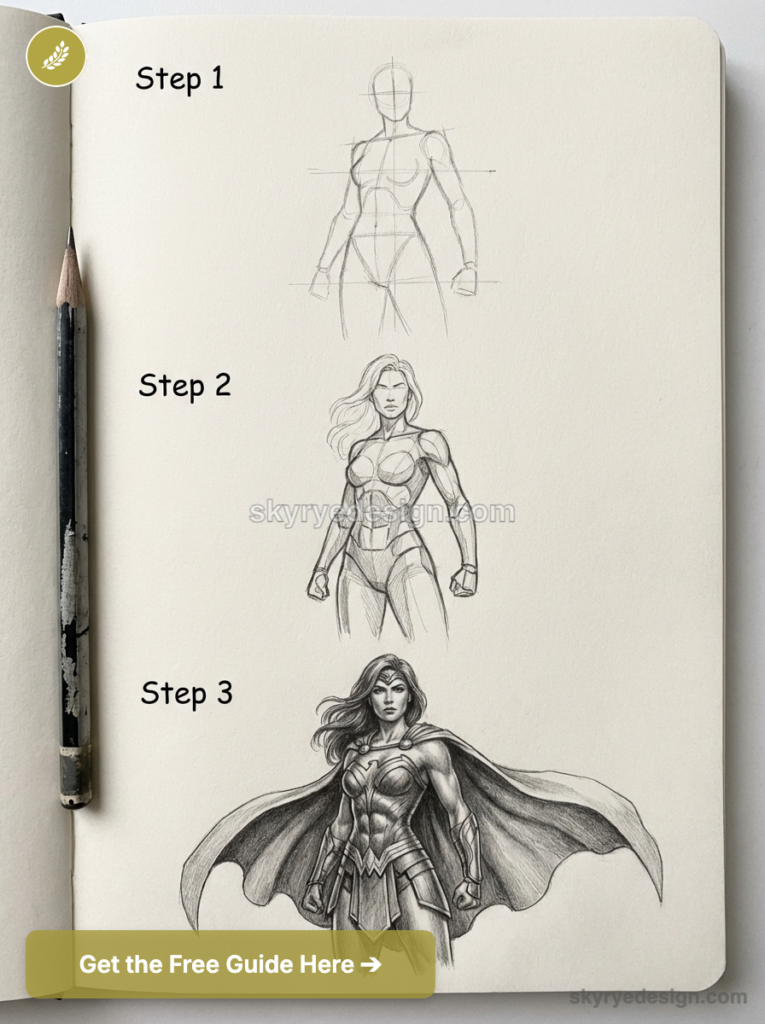
Wonder Woman is built differently from Superman at the armature level, not just the silhouette level. Study Phil Jimenez’s Wonder Woman, Nicola Scott’s work, or Fiona Staples’s Saga for correctly handled female heroic proportions.
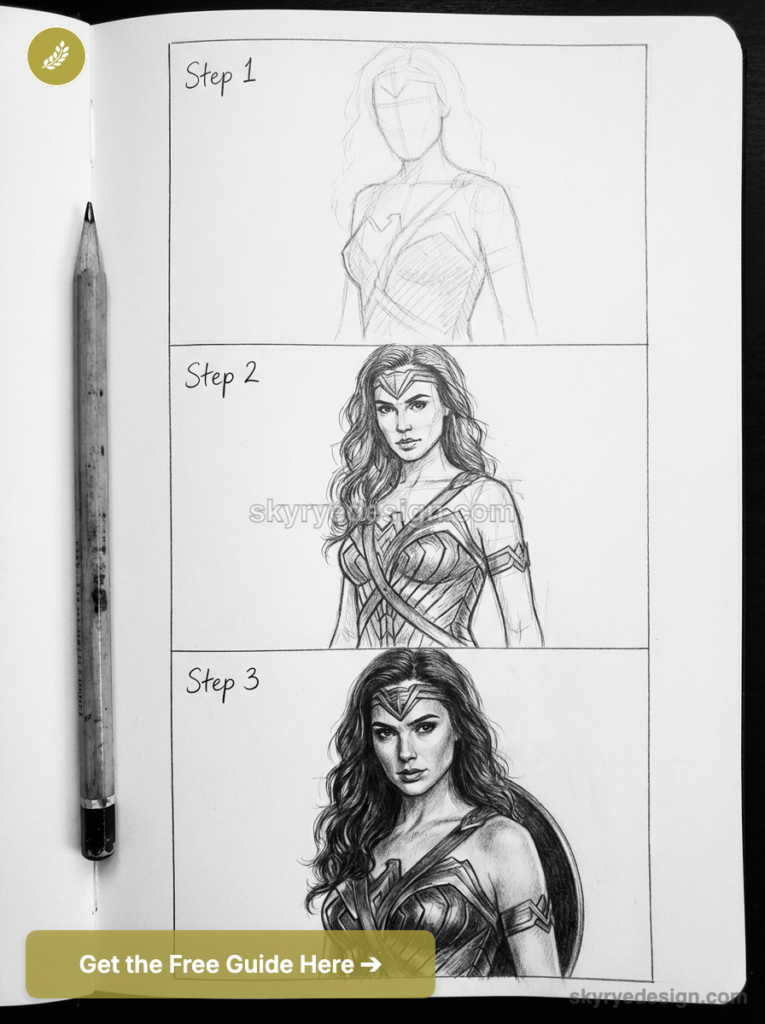
How to draw a superhero in 6 body-first steps
Steps 1 through 4 are all HB pencil at very light pressure — construction only. Step 5 is the committed drawing. Step 6 is inks.
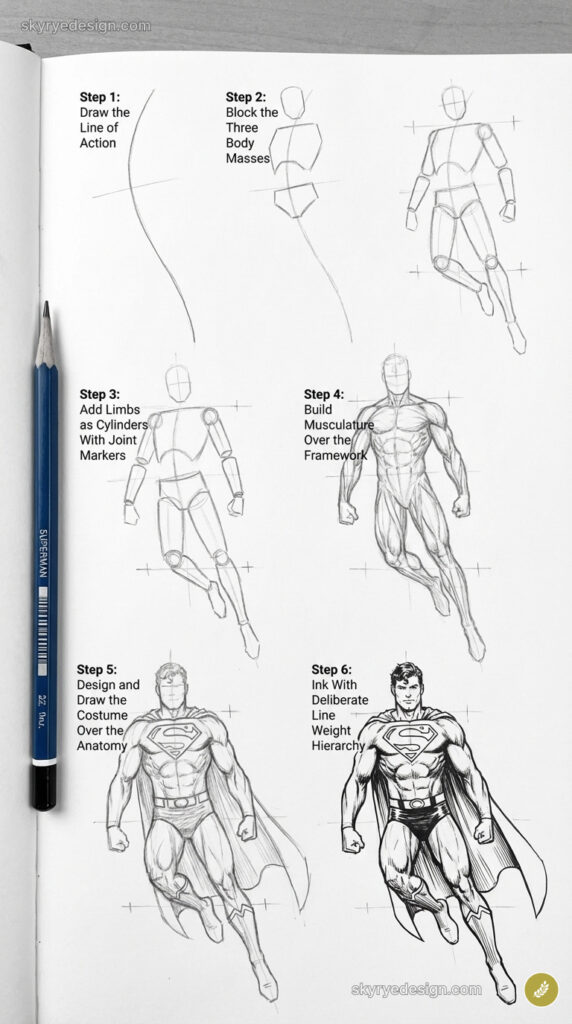
Step 1: Draw the Line of Action
Before drawing any anatomy, draw a single flowing curved line that represents the energy and direction of the entire pose. A vertical straight line produces a static figure. A C-curve produces a leaning or relaxed pose. An S-curve produces dynamic movement.
A sharp, angular line produces aggression or impact. Everything you draw in the following steps should follow and reinforce this curve. If the leg placement, shoulder angle, and head position all reinforce the same curve, the figure will look dynamic. If any body part contradicts the line of action, the figure will look stiff even if every individual part is anatomically correct. Draw the line of action before anything else — every time, without exception.
Step 2: Block the Three Body Masses
On the line of action, place three geometric shapes: an oval for the skull, a modified wedge-shaped box for the ribcage and chest (wider at the shoulder line, narrower at the waist), and a smaller box for the pelvis. These three masses are the armature of the figure.
The ribcage box is the largest single mass in the body and governs where the shoulders, arms, and neck attach. The pelvis box governs leg attachment and hip width. The three masses together already determine the entire figure’s pose — you know where everything will go before drawing a single limb. Do not add arms, legs, or costume details until these three masses are correctly positioned relative to each other and to the line of action.
Pro tip: The ribcage and pelvis boxes should be at slightly different angles — if both are perfectly horizontal and parallel, the figure looks like a diagram rather than a living body. Tilt the ribcage one way and the pelvis the opposite way. This contrapposto principle applies to every standing superhero figure regardless of how dramatic the pose.
Step 3: Add Limbs as Cylinders With Joint Markers
Add arms and legs as simplified cylinders attached to the ribcage and pelvis boxes. Each limb is two cylinders joined at a joint — upper arm and forearm, thigh and lower leg. Before drawing any limb surface, mark each joint as a small sphere: shoulder, elbow, wrist, knee, ankle. The joint spheres determine whether the limb looks correctly articulated or robotically straight. The most critical angle to get right: the elbow on the foreleg bends backward (like a dog or cat), not forward. For superhero figures: forearms and shins are drawn slightly thicker than a real human’s, hands slightly larger than realistic (gestures read more clearly), feet in strong perspective especially in power stances and landing poses.
Step 4: Build Musculature Over the Framework
Add muscle masses over the cylinder framework using the geometric simplification principle. Chest: two overlapping egg shapes separated at the sternum. Shoulders: spheres at each end of the collarbone. Bicep: single oval, compressed to near-sphere in flexion. Forearm: tapering cylinder with a slight inner-outer mass distinction near the elbow. Abdominals: six rectangular panels arranged in two vertical columns with a central line and two horizontal separators. Lats: wide sweeping masses from under the armpit to the waist, most visible from a back three-quarter view. Quadriceps: three distinct masses on the thigh front surface. Draw only the muscles relevant to the pose — avoid drawing every muscle group regardless of whether the pose makes them visible, which produces cluttered anatomy.
Step 5: Design and Draw the Costume Over the Anatomy
The costume goes over the anatomy, never instead of it. This is the rule that separates superhero costume drawings that work from ones that look like flat patterned fabric. For fitted costume sections — spandex, bodysuit panels — draw the costume surface following the muscle masses underneath exactly, with creases appearing at the elbows, knees, armpits, and anywhere the fabric compresses against the body. For hard elements — boots, gloves, belt, armour sections — these have their own structural form that sits over the body rather than conforming to it. For capes: the cape attaches at specific points on the shoulders and collar. Fold lines originate at these attachment points. The cape falls according to gravity plus whatever movement or wind the pose implies — heavier at the bottom, thinning at the trailing edge.
Step 6: Ink With Deliberate Line Weight Hierarchy
Inking superhero figures requires three distinct line weights used consistently. Heaviest lines for the outermost body contour — this defines the silhouette and is what the eye reads first. Medium lines for major internal anatomy: muscle separation lines, costume panel edges, boot and glove tops. Fine lines for costume detail, facial features, and texture. The shadow areas — under the chin, in the armpits, behind the cape, under furniture or ground — use thick strokes or filled blacks. The lit surfaces use thin or no interior strokes. This three-level hierarchy makes a flat ink drawing read as three-dimensional without any grey shading. Uniform line weight throughout a superhero drawing is the most common inking mistake — everything reads at the same visual depth and the figure looks flat.
Three superhero body types
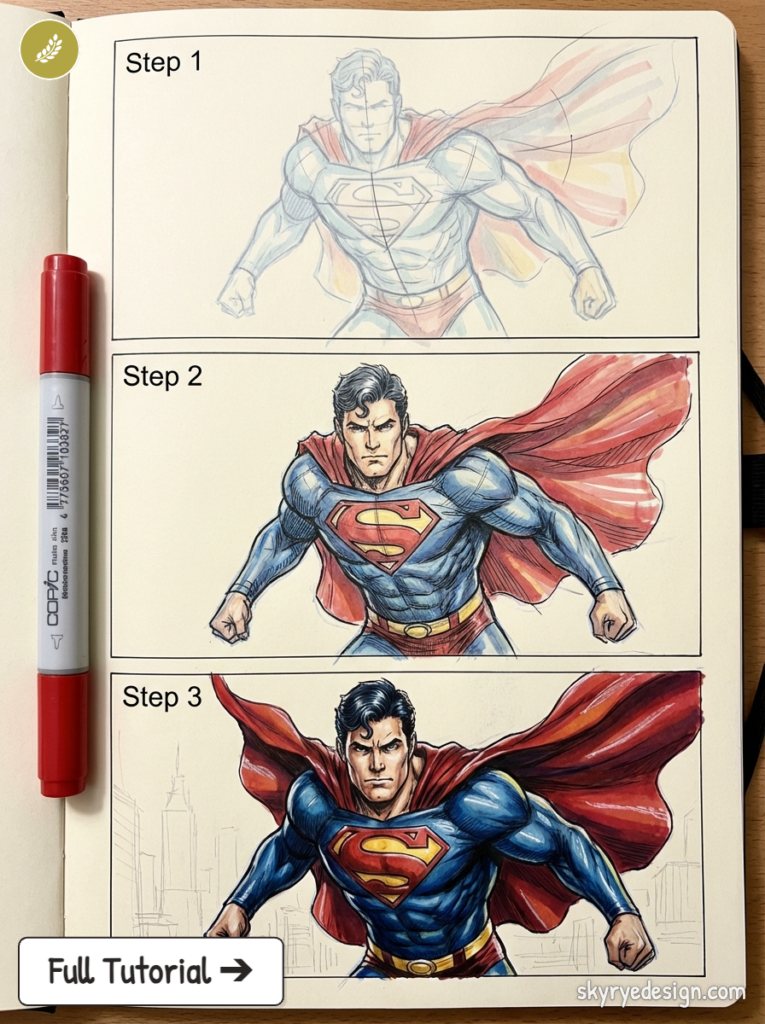
The Powerhouse: Hulk, Thor, Superman
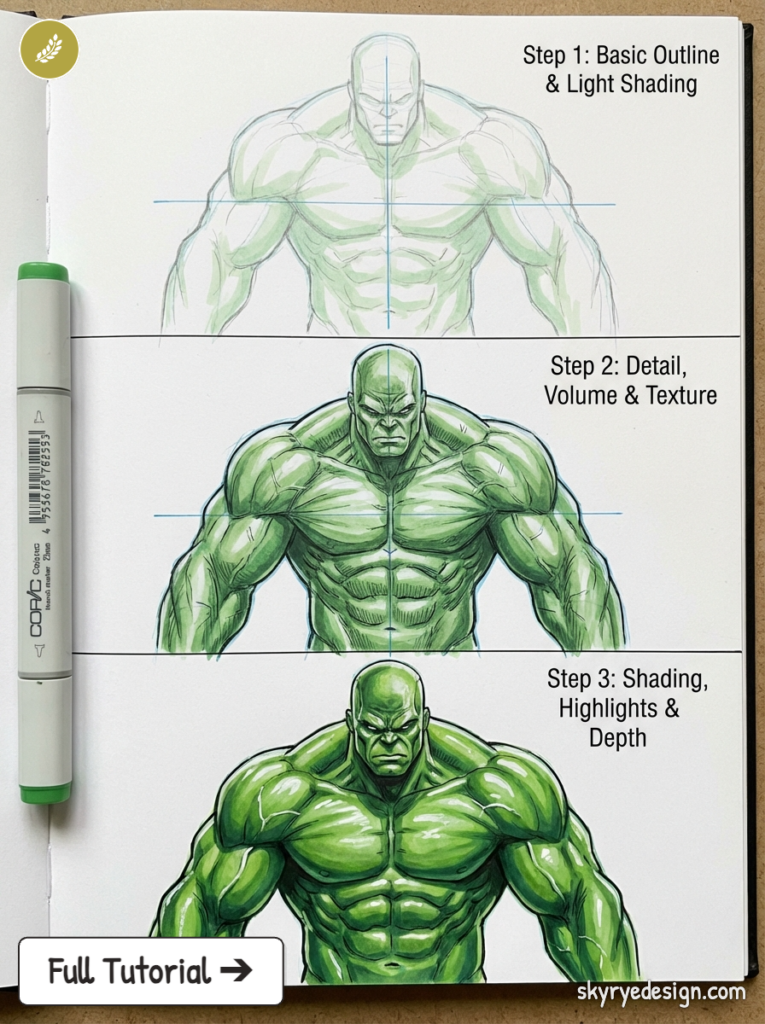
Powerhouse heroes use 8.5 to 9 head proportions with exaggerated shoulder width — four to five head-widths across versus three for a realistic figure. The neck is thick and shorter than realistic, nearly disappearing into the trap muscles on the most extreme characters.
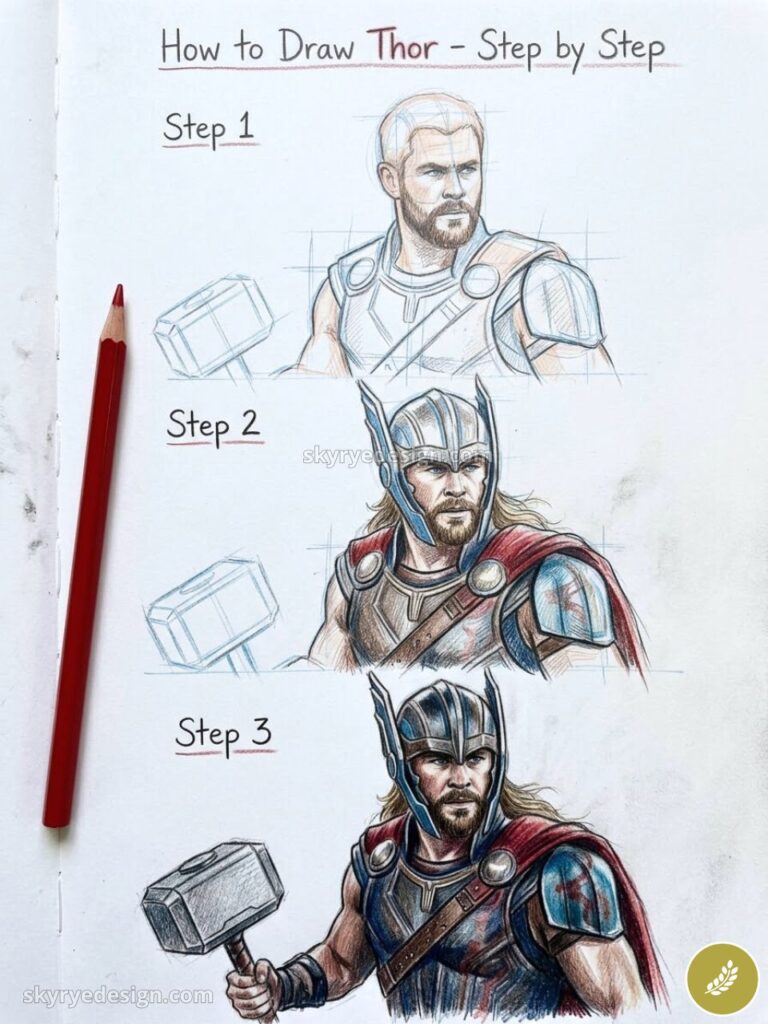
The chest and back are the dominant visual masses: the back drawn as a wide trapezoid from shoulder to waist, the chest as two large overlapping egg shapes. Forearms disproportionately large — this is the single most important detail for communicating physical power. For the Hulk specifically: push all these proportions further.
Shoulders nearly as wide as total height. Jaw wider than cranium. Neck absent. These are intentional distortions communicating transformation beyond human limits, not anatomical mistakes.
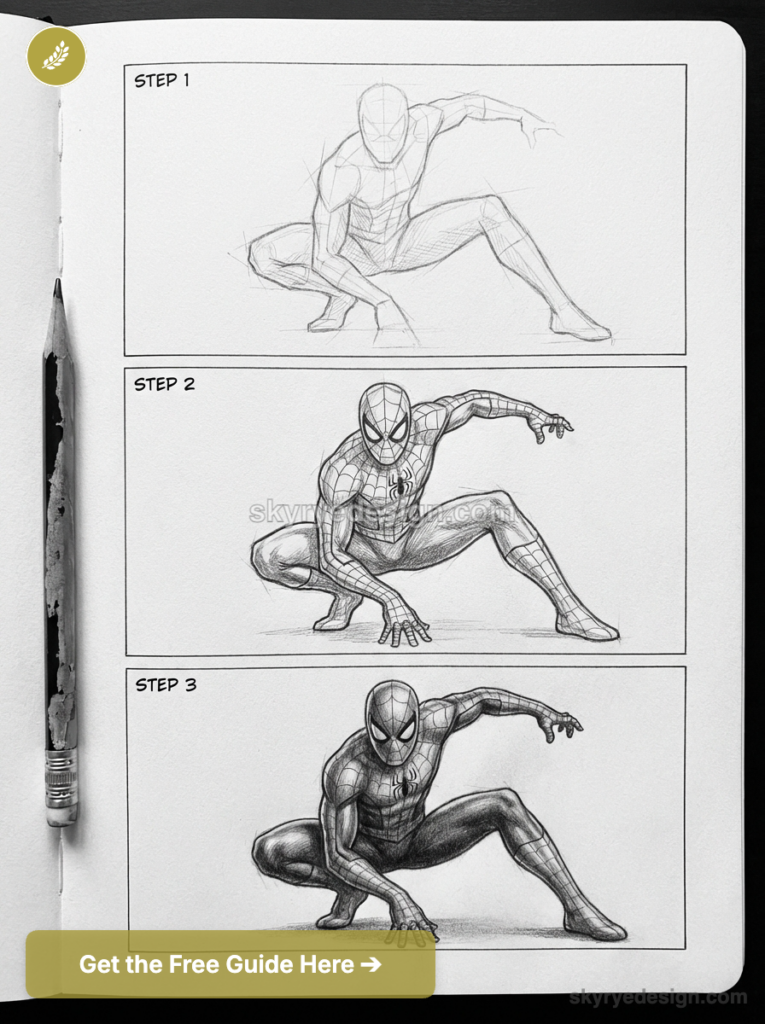
The Athlete: Spider-Man, Batman, Black Panther
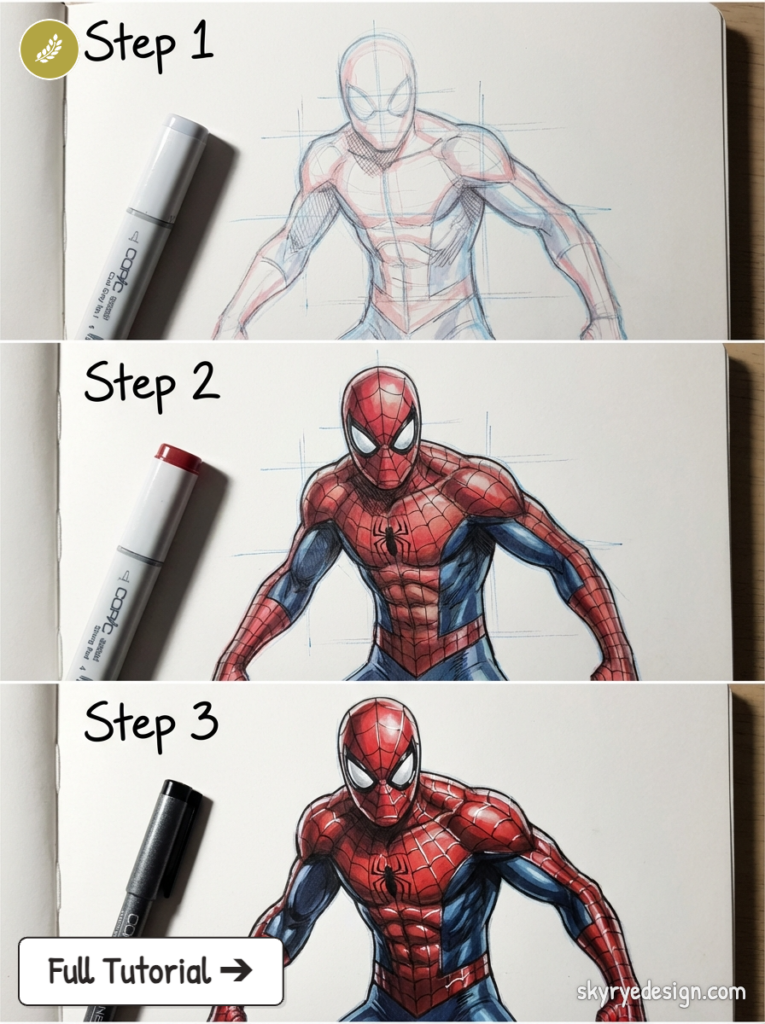
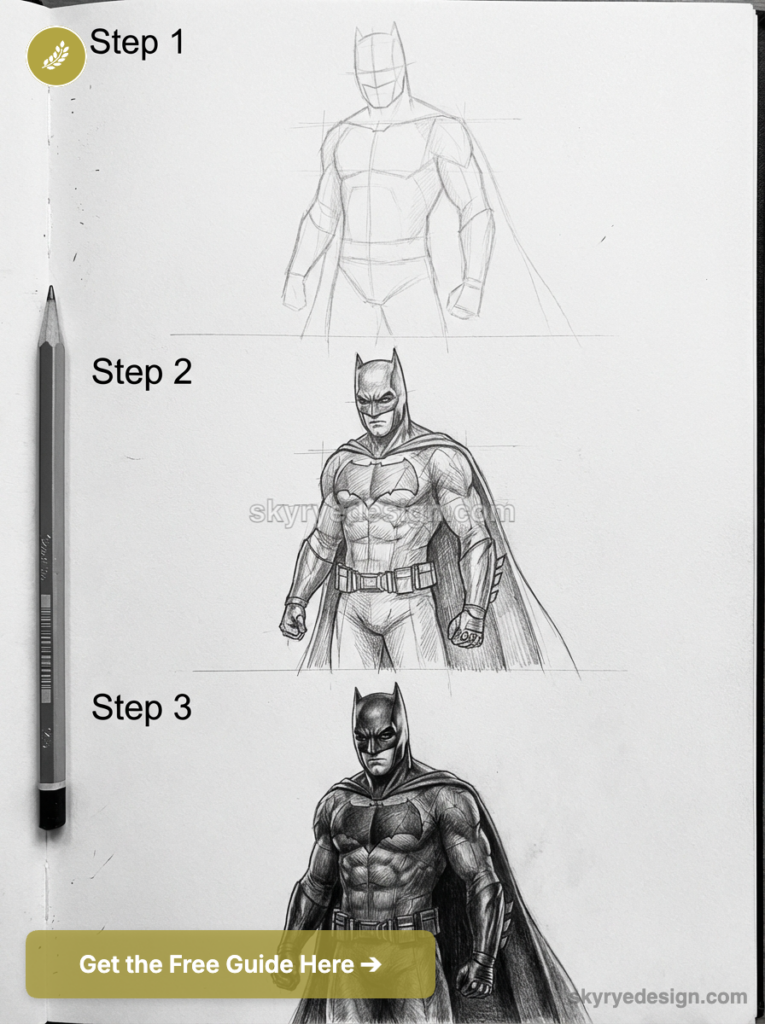
Athletic heroes use exactly the 8-head proportion system without exaggeration. What distinguishes them is pose quality and line of action rather than mass. Spider-Man is drawn with longer limbs relative to torso than any other hero — emphasising reach and flexibility — and his poses always involve a strong diagonal or S-curve line of action. He is never drawn symmetrically upright.
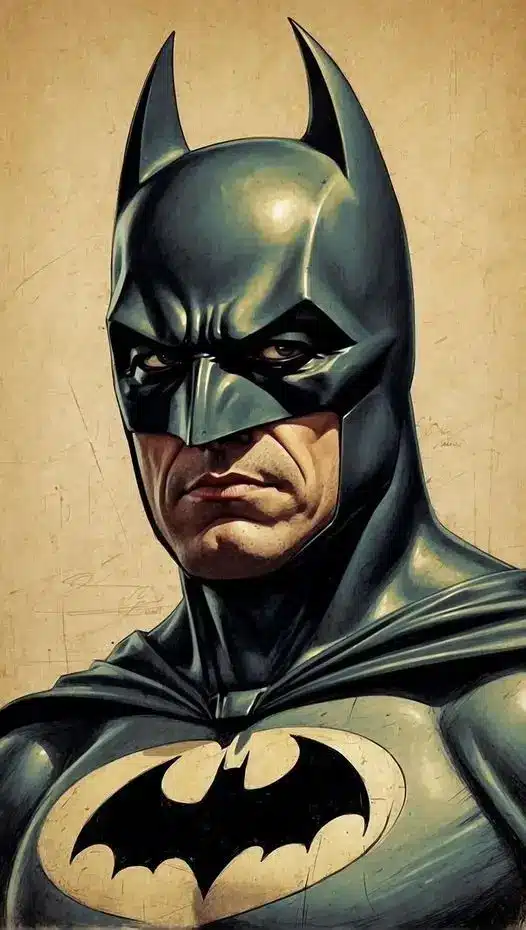
Batman’s challenge is silhouette: the cowl ears extend the head height, the cape adds width at the base, and the utility belt anchors the midpoint. Draw Batman’s complete silhouette in solid black as a test — if it reads as Batman without any interior detail, the design is working.
The Tech Hero: Iron Man, Cyborg, War Machine
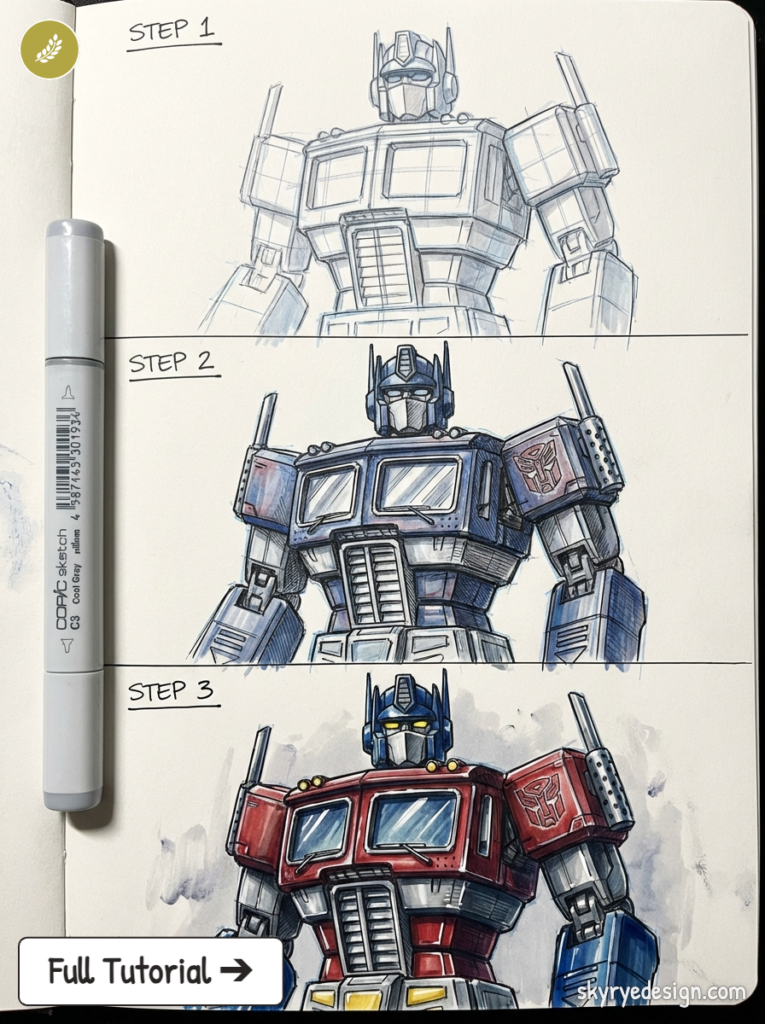
For armoured heroes the costume is the anatomy — you are drawing a mechanical shell that implies a body inside rather than a body with covering. Start with the 8-head armature as always, but instead of adding musculature, add armour panels.
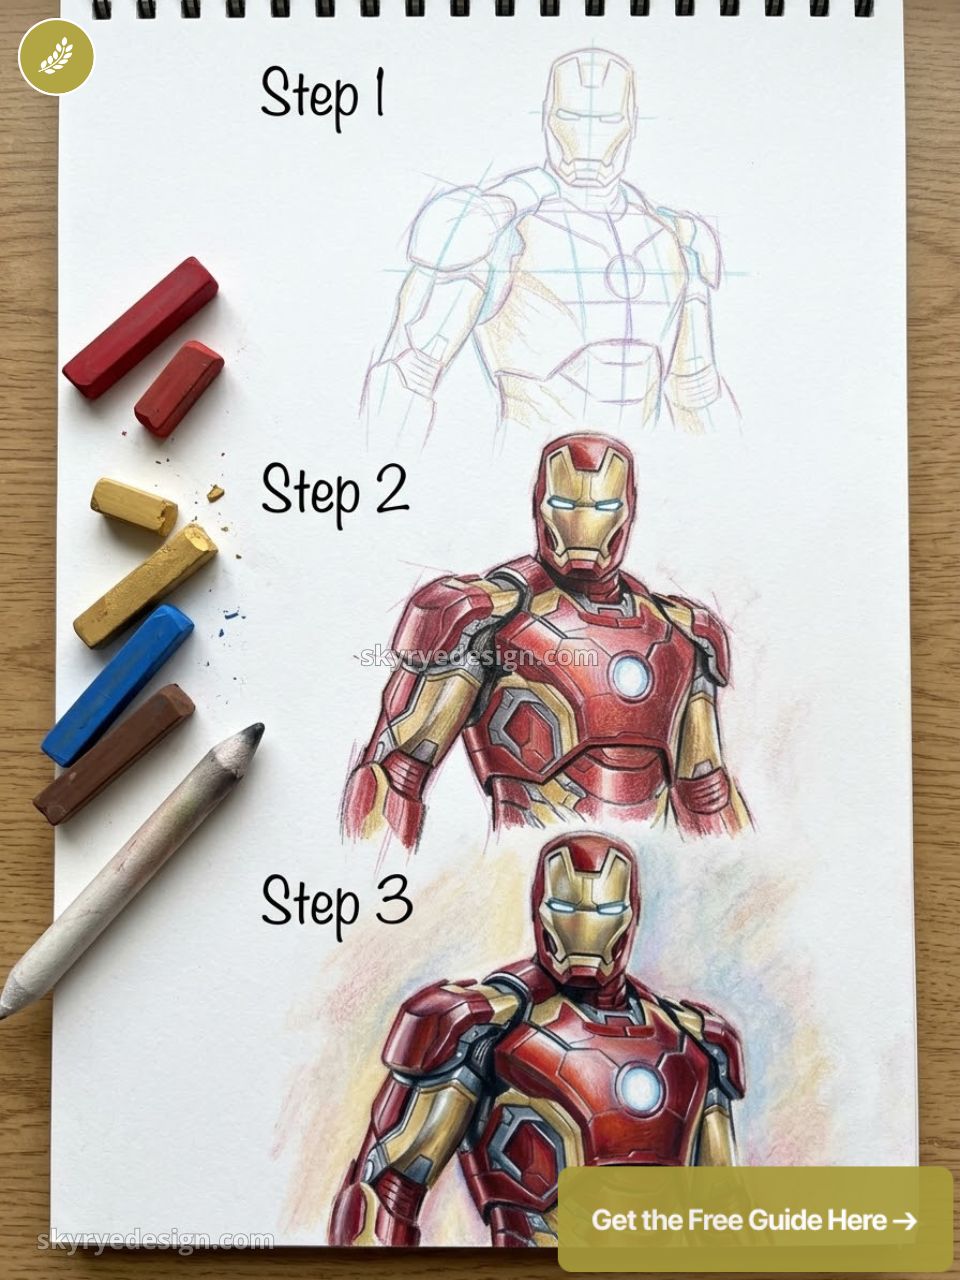
Armour follows body contour at joints where it needs to flex, and adds mass over muscle areas where it provides protection. Iron Man’s design logic: circular elements (repulsor housings, arc reactor) contrast with angular armour plates. Seam lines between panels follow the body’s anatomical divisions. Use a ruler for armour panel edges and freehand for curved or organic sections. Reference motorsport protective gear (Alpinestars Tech-Air) and CIRAS military plate carriers for how hard panels articulate on a moving body.
Pro tip: For any body type, test the silhouette before adding detail. Cover all interior lines with a piece of paper and look only at the outline. Does the silhouette communicate the character type and the pose energy immediately? If not, fix the outline before adding anatomy or costume detail. Interior detail cannot fix a silhouette problem.
Making superhero poses dynamic with weight and foreshortening
Weight Distribution
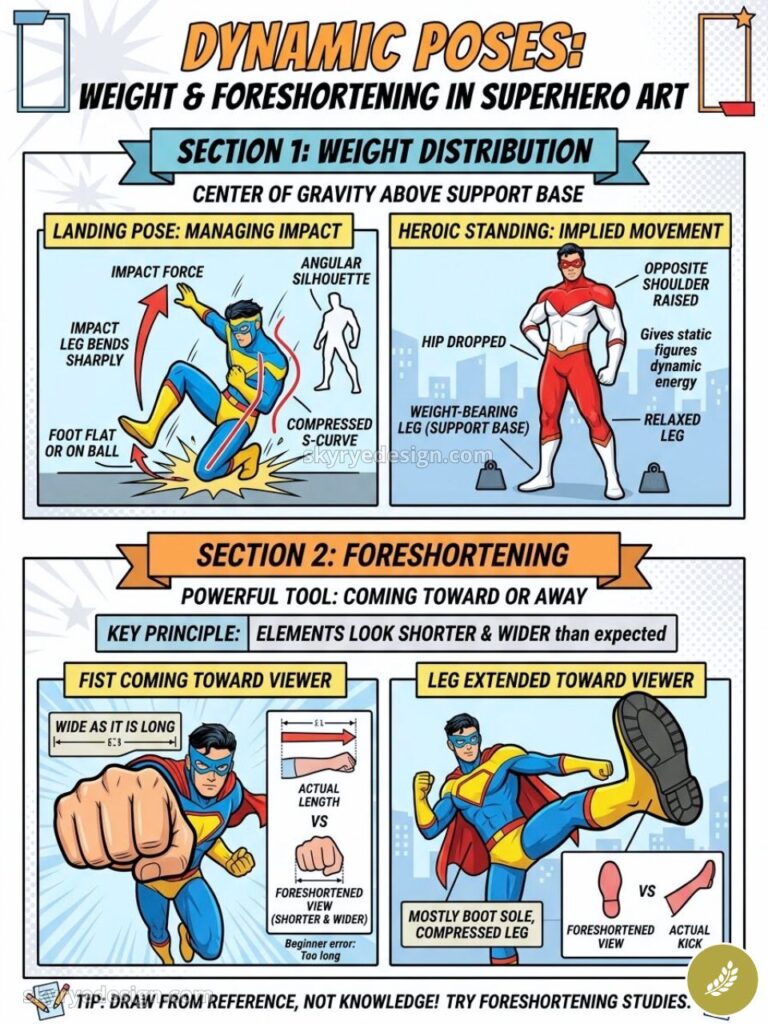
Every standing superhero exists in a specific relationship with gravity. The centre of gravity must sit above the support base — usually one or both feet. For landing poses, extremely common in superhero art: the impact leg bends sharply at the knee, the foot is flat or on the ball, and the impact force travels up through the body as a compressed S-curve — bent torso, possibly one arm touching the ground. The silhouette of a landing pose creates a strong angular shape. For heroic standing poses: one hip dropped, the opposite shoulder raised, weight clearly on one leg with the other relaxed — this gives even a static standing figure implied movement.
Foreshortening
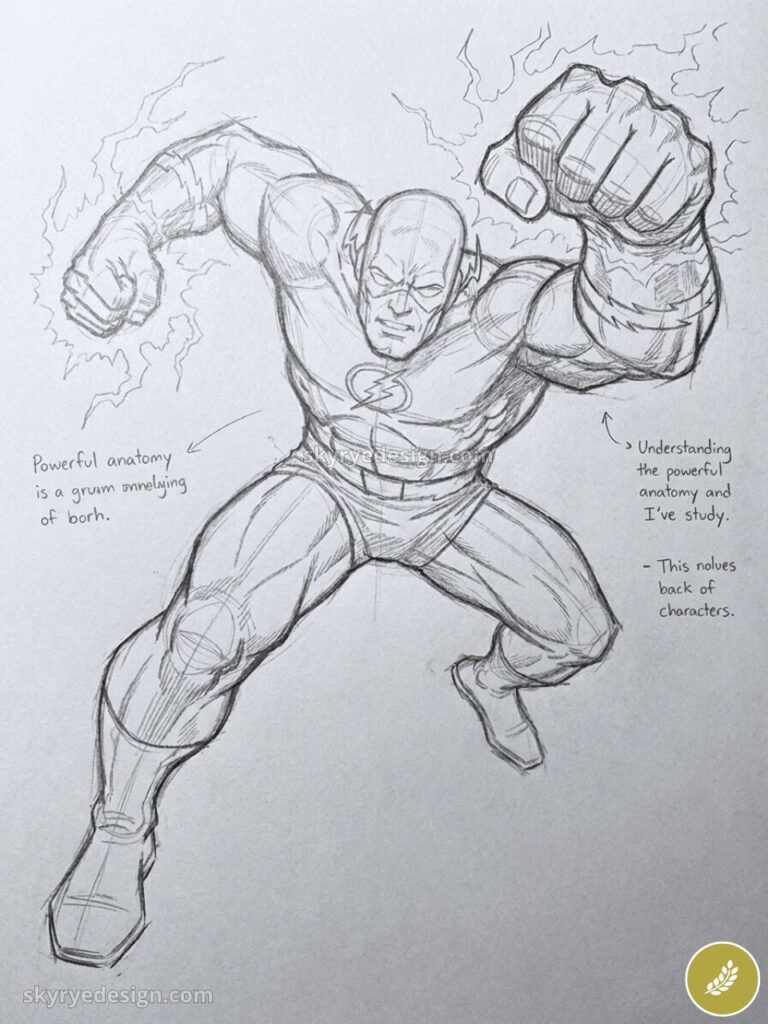
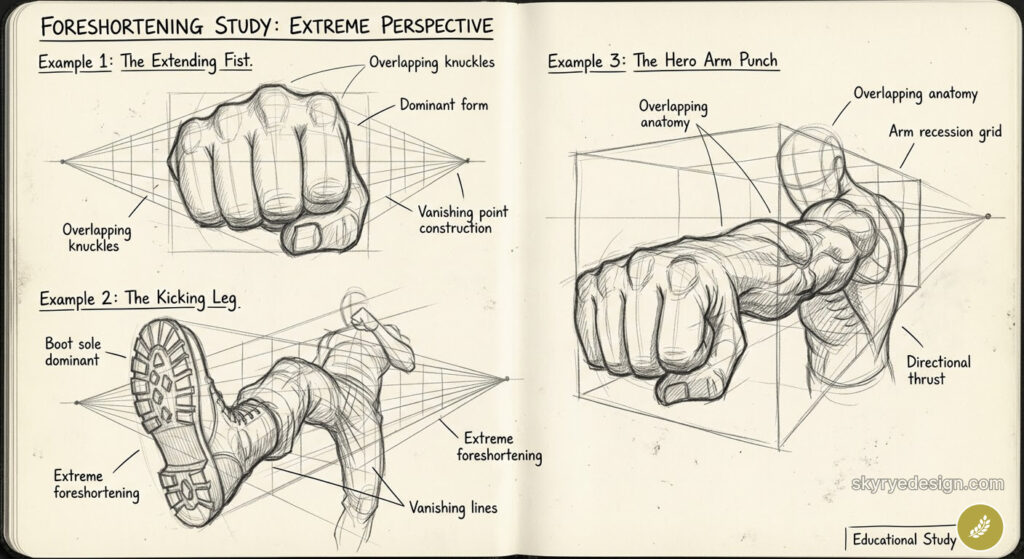
Foreshortening — drawing limbs coming toward or away from the viewer — is the most powerful tool for dynamic superhero poses. A fist coming toward the viewer appears almost as wide as it is long. A leg extended toward the viewer shows mostly the boot sole with the rest compressed behind it. The key principle: foreshortened elements look shorter and wider than you expect. Beginners consistently draw them too long because they know how long an arm actually is and let that knowledge override what they see. Draw from reference, not from knowledge. Ten foreshortening studies from your own hand in different positions will develop this skill faster than any written explanation.
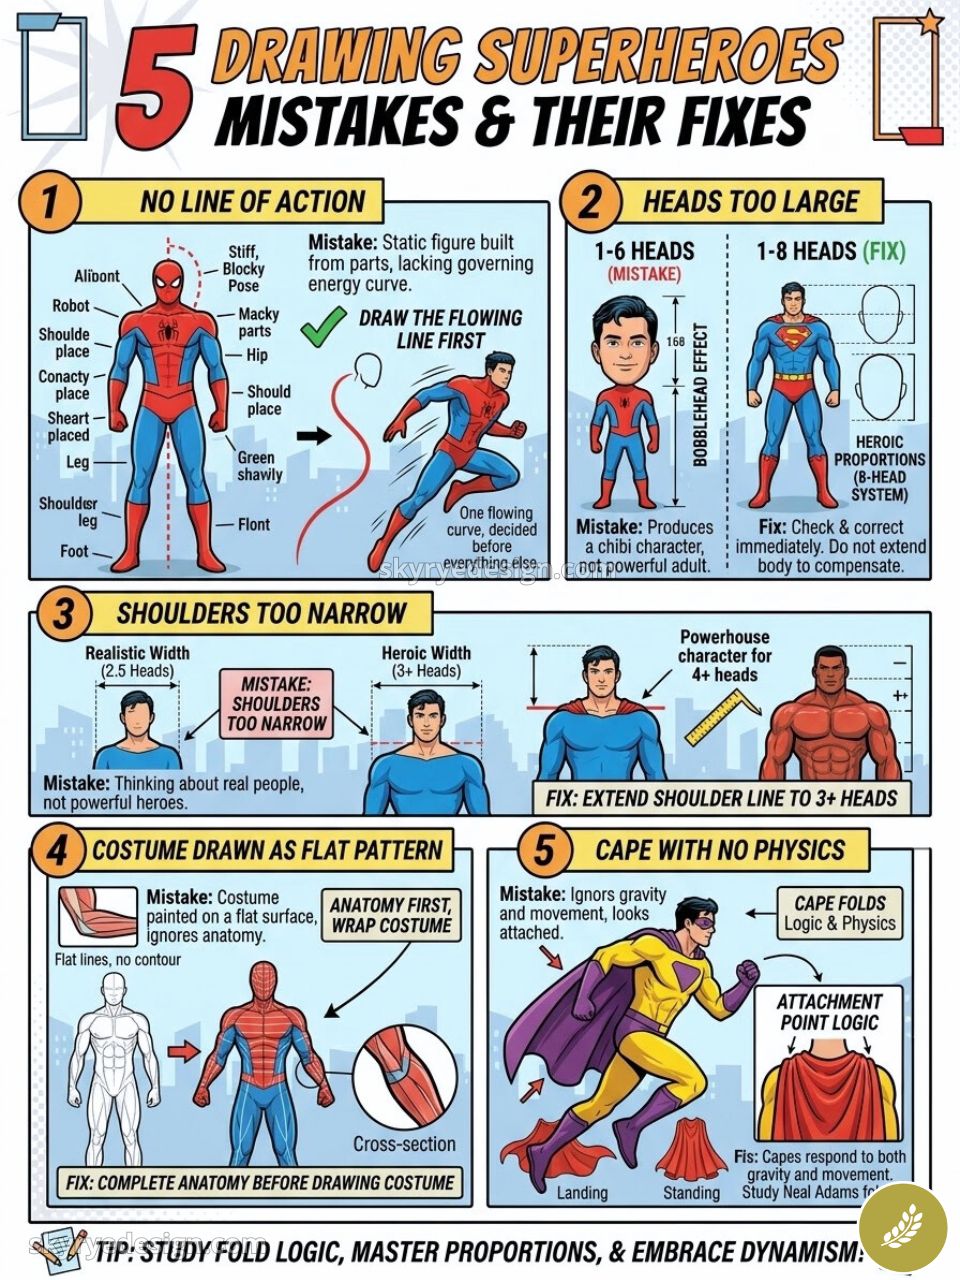
5 super hero drawing mistakes and fixes
1. No Line of Action
The most common reason superhero drawings look stiff: the figure was built from correctly-positioned parts without a governing energy curve. Every part is right, the whole reads as static. Fix: draw the line of action before touching the figure. One flowing curve, decided before everything else. Every subsequent decision is made in service of this curve.
2. Heads Too Large
Beginner superhero drawings typically have heads at one-sixth of body height instead of one-eighth. This produces a bobblehead or chibi character rather than a powerful adult. Fix: draw the head, then immediately check it against the 8-head system before drawing anything else. If the head is too large, reduce it now. Do not extend the body to compensate — that creates a different proportion problem.
3. Shoulders Too Narrow
Realistic shoulder width is two-and-a-half head-widths. Heroic shoulder width is three minimum, with powerhouse characters at four or five. Beginners draw realistic shoulders because they’re thinking about real people. Fix: after drawing the ribcage box, check shoulder width against head width before adding arms. Less than three heads wide means extending the shoulder line before proceeding.
4. Costume Drawn as Flat Pattern
A costume ignoring the three-dimensional form underneath looks painted onto a flat surface. Fix: complete the anatomy first, in full. Draw the costume over the anatomy — lines curve around muscle masses, crease at joints, bunch in the concave areas between muscles. The anatomy should be fully resolved beneath the costume even though it will be erased or covered in the final drawing.
5. Cape With No Physics
A cape hanging straight down with no relationship to the figure’s movement looks like a curtain attached to someone’s back. Fix: fold lines must originate at the attachment points on the shoulders and collar, not at random positions along the edge. The cape responds to both gravity and movement simultaneously — in a running pose it trails behind; in a landing pose it fans around the impact; in a standing pose heavy folds fall from the attachment points to the hem. Study Neal Adams’s Batman cape drawings for the technical benchmark on consistent fold logic.
Resources worth studying
- Drawing Comics the Marvel Way by Stan Lee and John Buscema is still useful for heroic proportion and clean action poses.
- DC Comics Guide to Pencilling Comics by Klaus Janson is stronger for line weight, storytelling clarity, and inking discipline.
- Study Jack Kirby for simplified muscle masses and explosive perspective. His anatomy is not realistic, but it reads instantly.
- Use Proko figure drawing lessons for gesture and mass practice, then exaggerate those forms for a superhero body.
- Run timed studies on Line of Action. Thirty-second and one-minute studies build the reflex you need before a polished super hero drawing.
- For Sky Rye practice, pair this page with gesture drawing poses, body types drawing, and the body drawing base guide.
The Cape Follows the Figure


The three months of failed Batman drawings eventually produced one that worked. Not because drawing skill suddenly improved — but because I learned the line of action. Once the pose had a governing curve before any anatomy was placed, the figure stopped looking like a collection of body parts. The cape stopped looking like a curtain because the figure it was attached to finally had energy and direction.
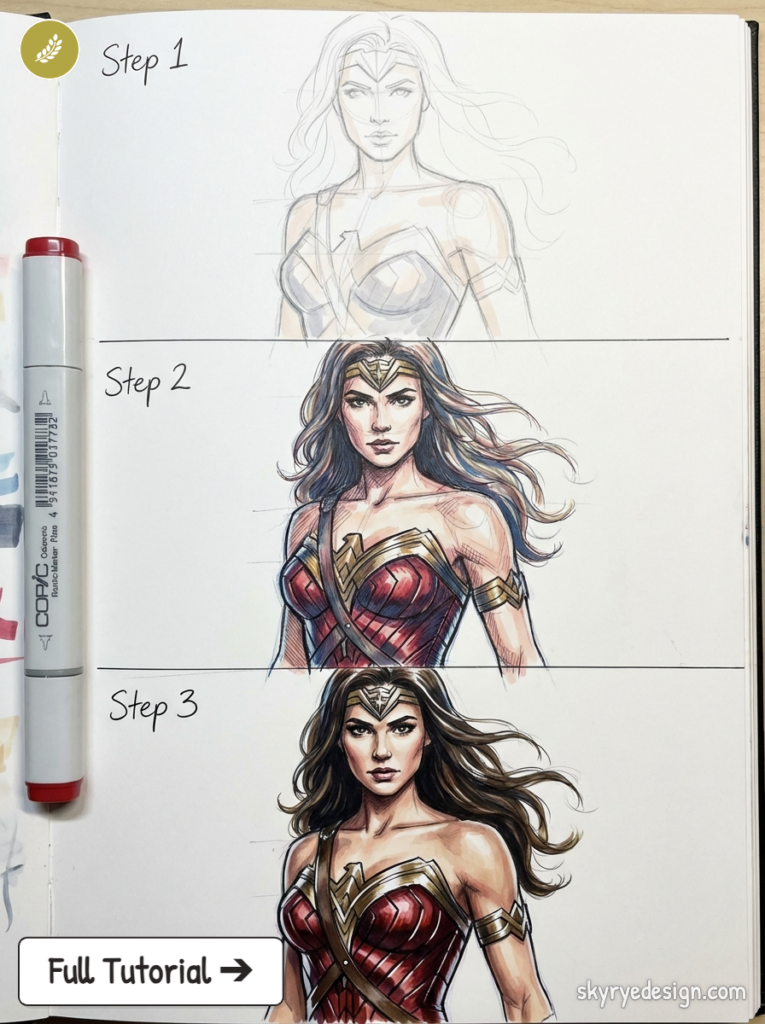
Superhero drawing is a specific skill set, distinct from portrait drawing and distinct from life drawing. The conventions developed by Kirby, Adams, and Lee are solutions to the problem of communicating power, motion, and character in two dimensions at small scale. Learning those solutions takes the guesswork out of every drawing decision.
Start with the line of action. Block the three masses. Draw the joints before the limb surfaces. The cape will follow once the figure knows where it’s going.
Super hero drawing FAQ
Q: What is the best way to start a super hero drawing?
Start with the body, not the costume. Draw one clear line of action, place the ribcage and pelvis as simple masses, then add limb cylinders with visible joints. Once that base has weight and direction, the cape, mask, emblem, and costume seams can follow the form instead of floating on top of it.
Q: How do you draw a superhero body step by step?
Use a body-first order: line of action, head shape, ribcage, pelvis, limb cylinders, hands and feet, simplified muscle groups, costume, then final line weight. Keep the first pass light with an HB pencil. The point is not perfect anatomy; it is a readable heroic figure that has balance before the details arrive.
Q: What proportions should a super hero drawing use?
Most classic superhero figures sit around 8 heads tall, with shoulders wider than a realistic figure and hands slightly larger for action poses. Bigger powerhouse characters can push closer to 8.5 or 9 heads. Keep the exaggeration consistent, or the character will look stretched instead of heroic.
Q: How do you make superhero poses less stiff?
Stiff poses usually come from drawing the body as separate parts. Tilt the ribcage and pelvis in opposite directions, bend the spine into a single gesture curve, and make one side of the body compress while the other stretches. Even a standing hero needs weight on one leg and a clear shoulder-to-hip relationship.
Q: What is the easiest superhero body type to draw?
The athletic hero is usually easiest: think Spider-Man or a lean Batman rather than a giant powerhouse. The shapes are still heroic, but the muscles can stay simpler and the pose can carry more of the drama. Start with running, crouching, or landing poses before attempting extreme foreshortening.
Q: Should I draw anatomy before the costume?
Yes. Draw the full figure first, including the chest, shoulders, pelvis, elbows, knees, and main muscle masses. The costume should wrap around those forms. If you draw the suit first, folds, emblems, belts, and gloves often look flat because they have no body structure underneath them.
Q: How do you draw a cape that looks attached to the body?
Choose two clear attachment points near the shoulders or collarbone. Fold lines should begin there and travel toward the hem. In a static pose, gravity pulls the cape down; in a jump or landing, the trailing edge lifts opposite the movement. The cape should describe the action, not cover up a weak pose.




Related super hero drawing practice
- 3.2Kshares
- Facebook0
- Pinterest3.2K
- Twitter1
- Reddit0