My first resin pour cured sticky on one side, cloudier than I expected on the other, and had a crater in the center from a bubble I missed. The table I was making it for is still in the garage, covered with a cloth. I could have sanded and repoured. I didn’t.
That piece taught me more than any tutorial I watched before starting. The bubble appeared because I poured too fast. The sticky patch happened because I didn’t scrape the side of the mixing cup when combining the hardener. The clouding was moisture — I’d been working near an open window in humid weather without thinking about it.
This guide covers how resin art actually works, from the chemistry behind the material to the techniques that produce professional-looking results. It includes twelve project ideas across different skill levels, honest notes on what goes wrong at each stage, and the tools worth buying versus the ones you can skip. No preamble about expressing yourself. Just the craft.
What Resin Art Actually Is: The Material and the Chemistry
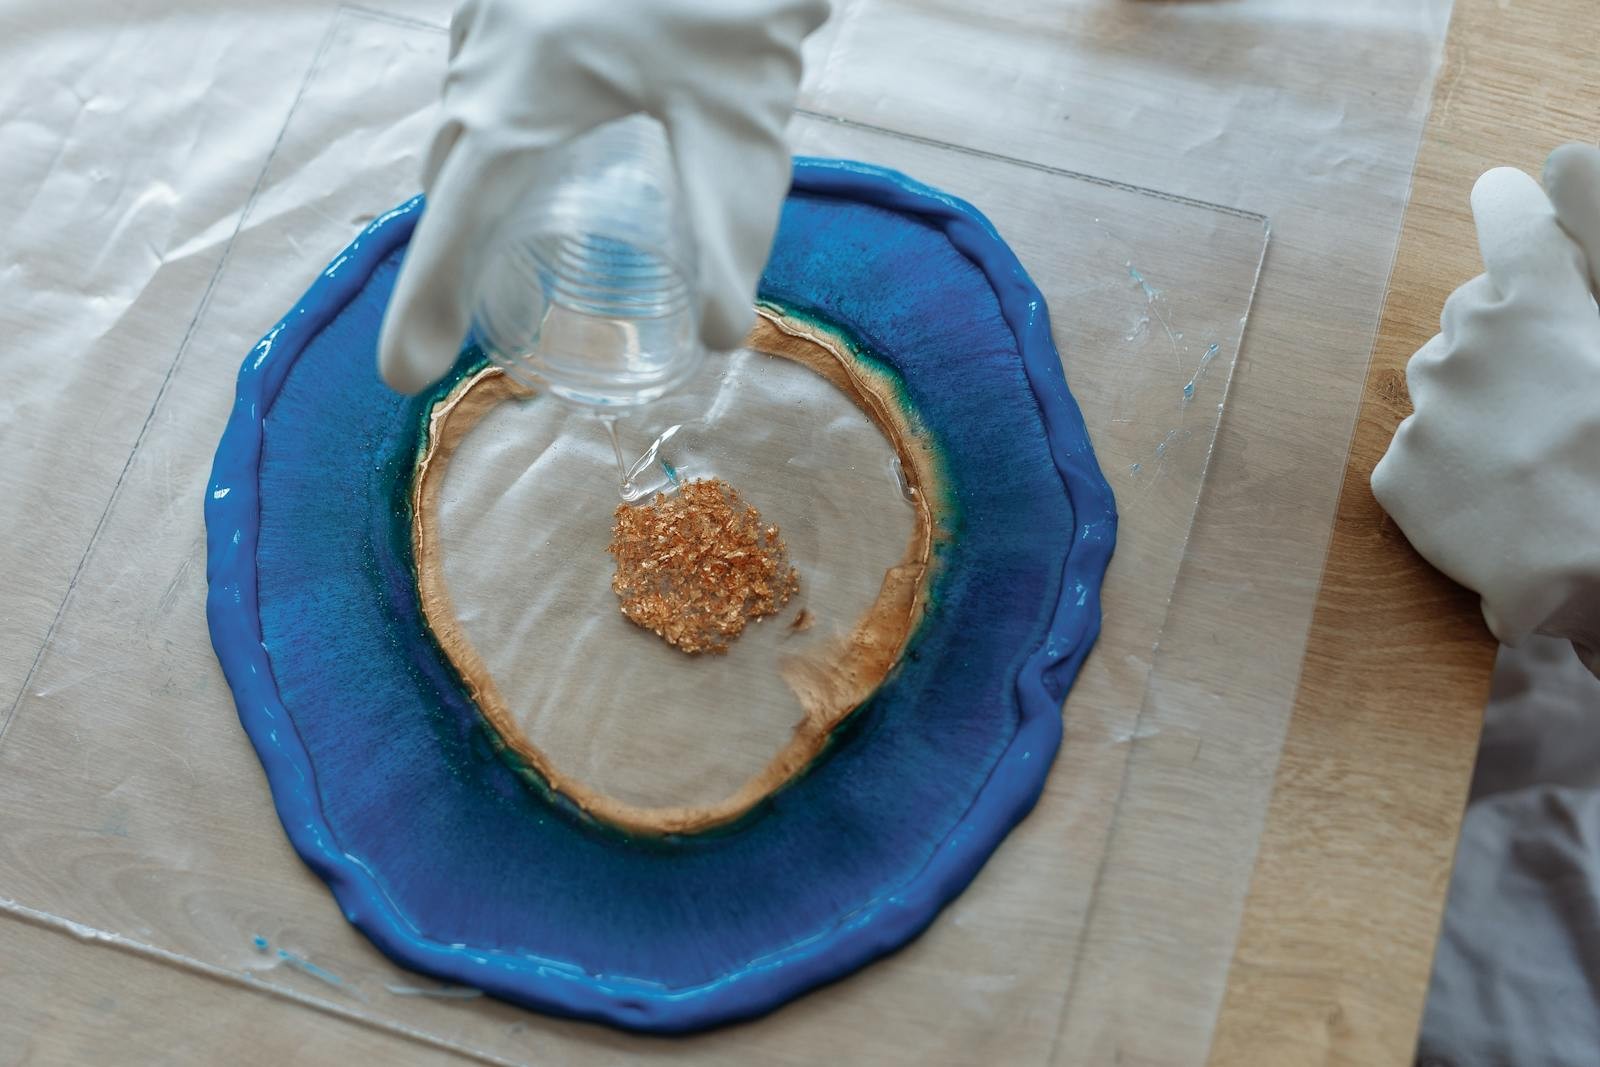
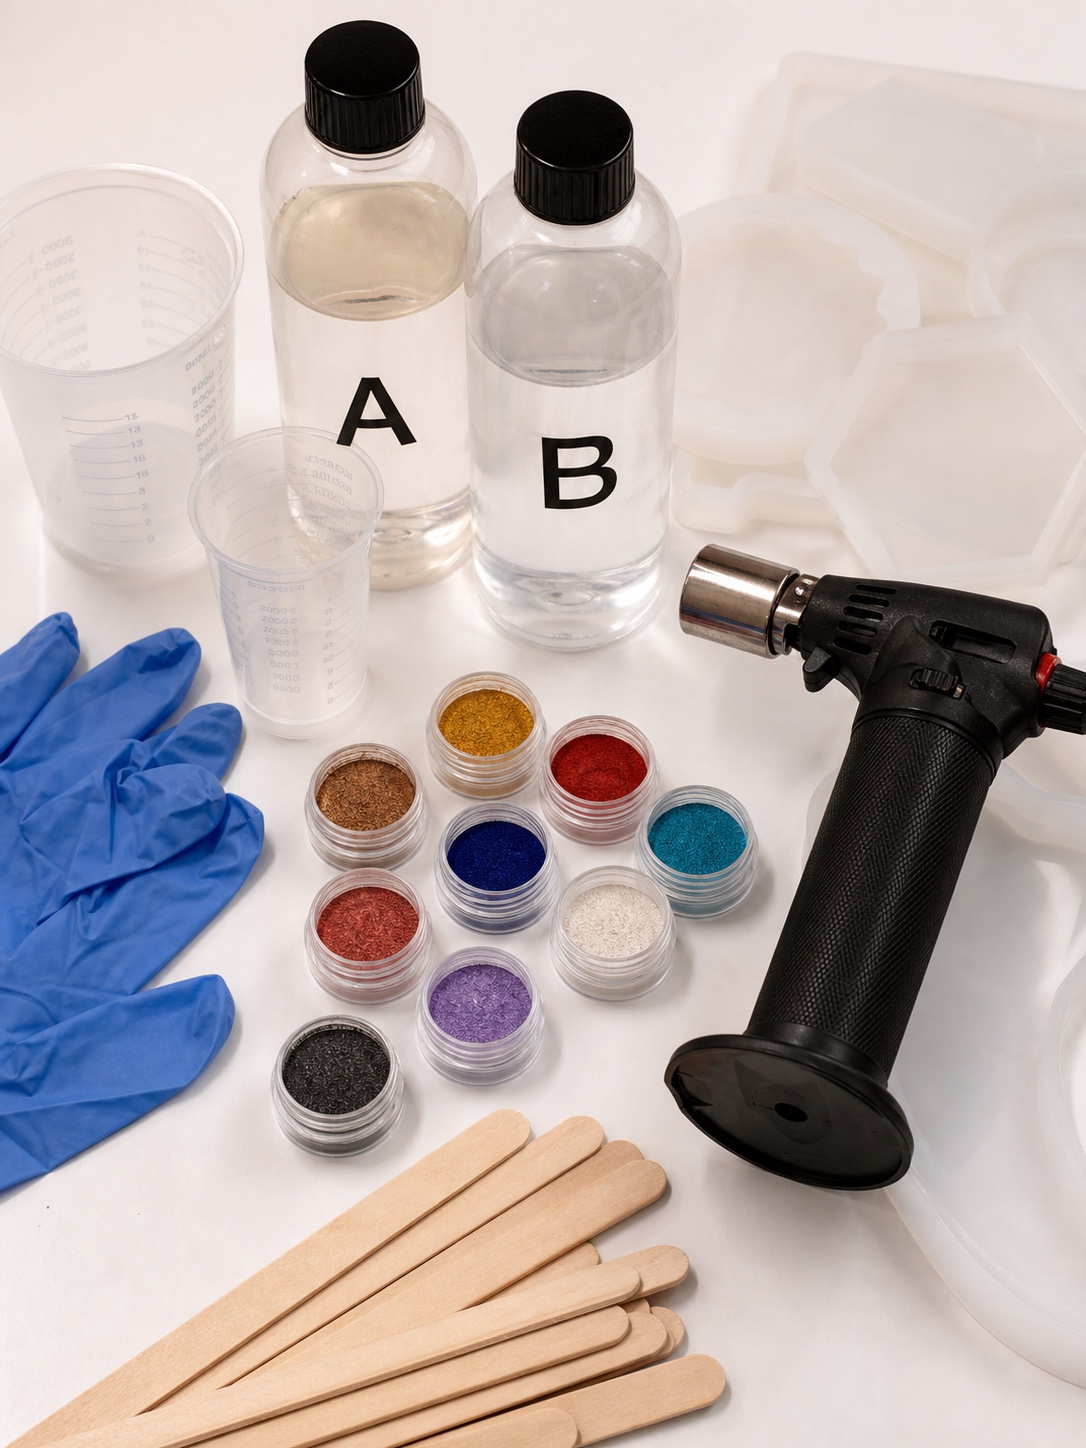
Epoxy resin is a two-component system: Part A (the resin) and Part B (the hardener). When you combine them, they begin a chemical reaction called curing. The result, once the reaction completes, is a hard, glossy, rigid solid. The ratio in which you mix them matters precisely, which is why resin art has a higher failure rate than most craft projects: the chemistry doesn’t forgive approximation.
Most art resins mix at a 1:1 ratio by volume (equal parts resin and hardener) or a 2:1 ratio (two parts resin to one part hardener). Some systems measure by weight rather than volume. Check your specific product. Using a kitchen scale for weight-based systems is more accurate than measuring cups for volume-based ones, though both work when done carefully.
If you already like working with poured materials, this DIY candle making tutorial is a good companion project for wax, scent, and container design.
Artists working with resin can also study modern sculptures to see how transparency, frozen motion, and unexpected scale change the mood of a physical object.
Temperature affects cure time and final quality significantly. Resin cures faster in warm conditions and slower in cold ones. Below about 18°C (65°F), the cure slows to the point where bubbles that would normally rise and pop remain trapped as the resin thickens. The commonly recommended working temperature is 21–24°C (70–75°F). Warming your resin bottles in a bowl of warm water for 5 to 10 minutes before mixing reduces viscosity and helps bubbles release more easily.
Types of Resin Used in Art
Art epoxy resins are formulated for thin coats and surface work. They self-level, cure clear, and are designed for the color saturation and UV resistance that art applications need. ArtResin and Entropy Resins Super Sap are examples of art-specific epoxies with low-VOC formulations.
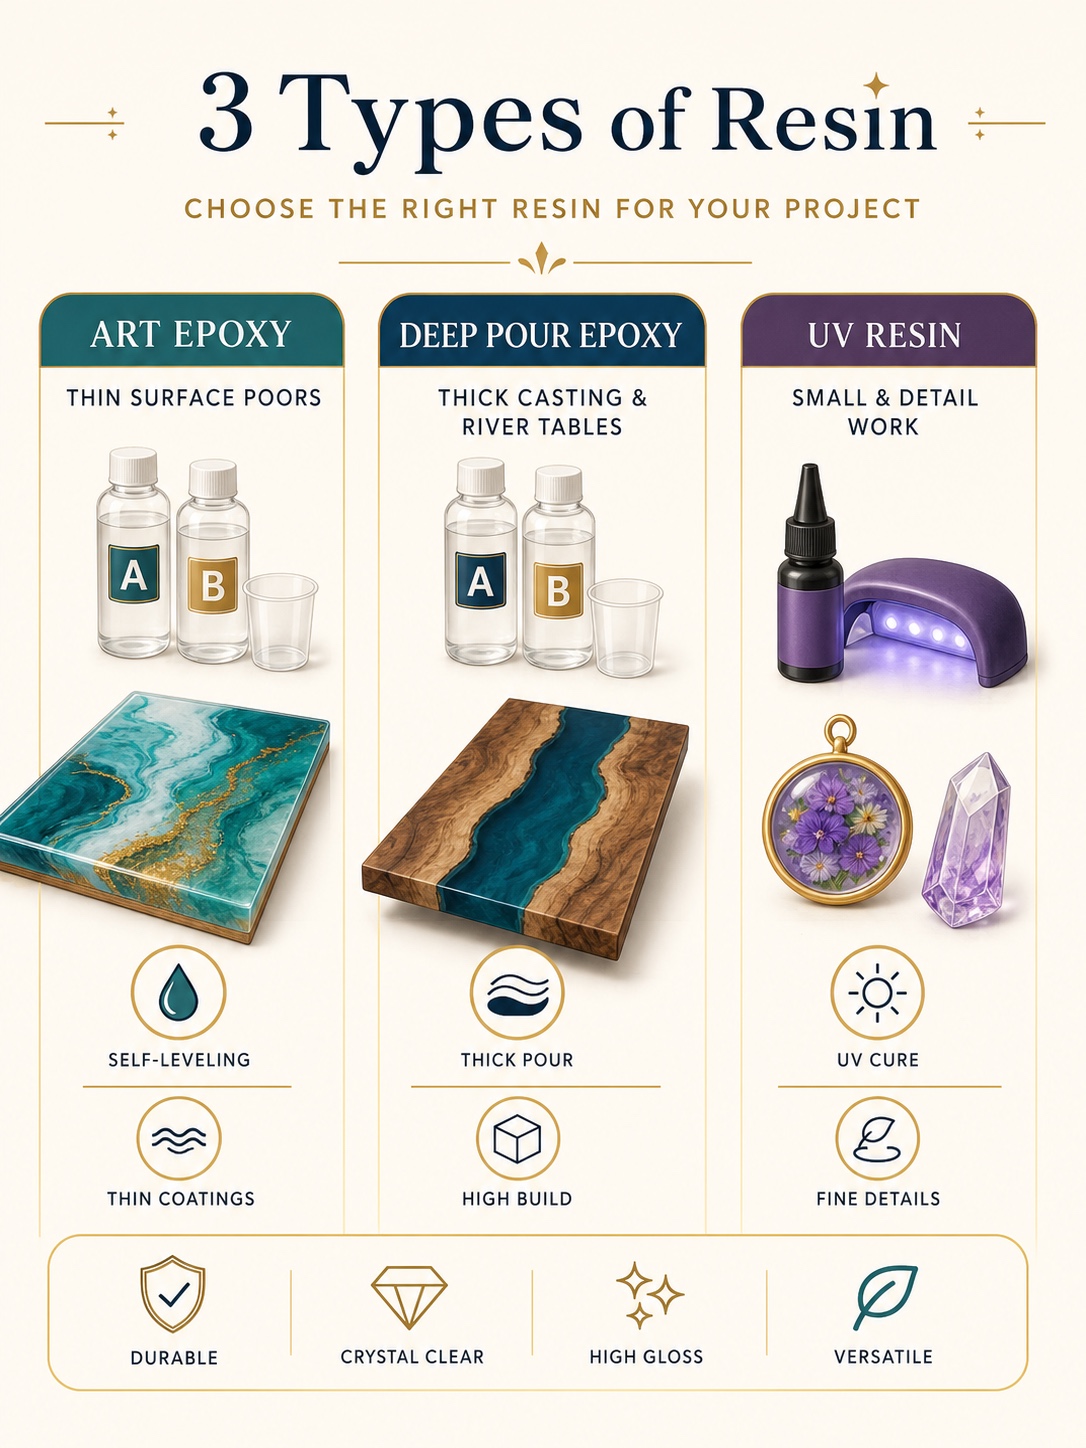
Deep pour resins are designed for casting thick sections (up to 2 inches or more in a single pour) without the excessive heat buildup that regular epoxy generates at that thickness. These cure more slowly, typically 48 to 72 hours rather than 24, and are the right choice for river tables, thick coasters, and encapsulation projects.
UV resin cures rapidly under UV light rather than through a chemical reaction over time. It’s useful for small jewelry pieces and detail work where you want to cure one small section before adding the next. It’s more expensive per gram than two-part epoxy and not practical for large-format work.
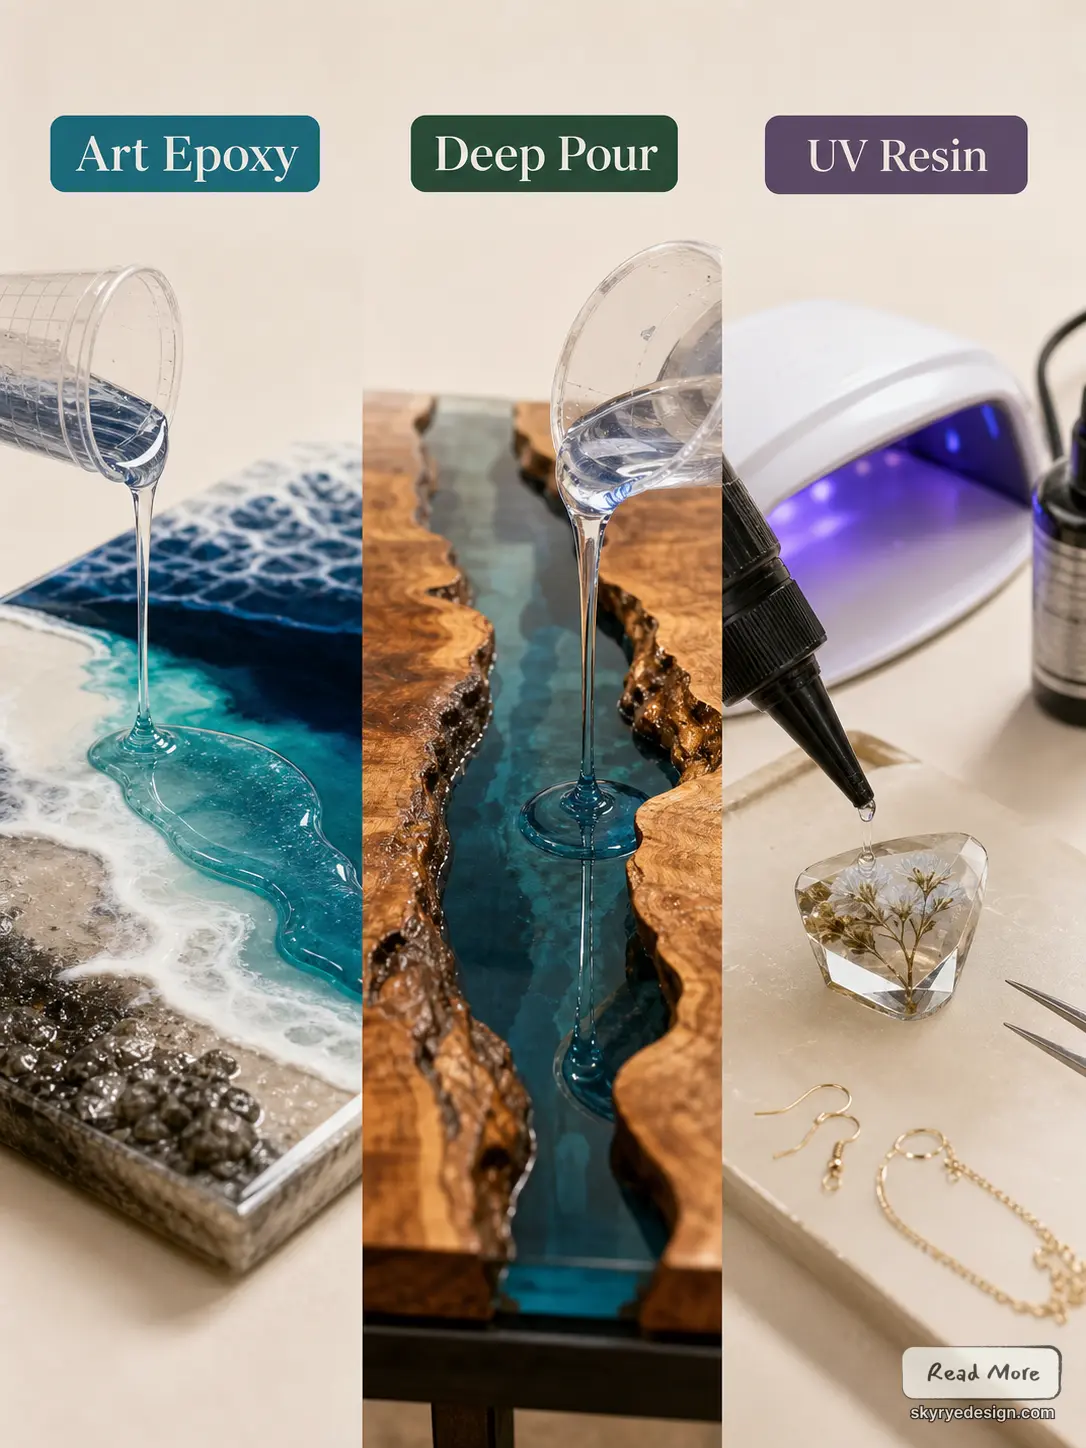
Resin Type Quick Reference
- Art epoxy: thin surface pours, paintings, coasters, trays. Cure time 24–72 hours. Deep pour epoxy: thick castings, river tables, encapsulated objects. Cure time 48–72+ hours. UV resin: small jewelry, layered detail work, repairs. Cure time 30 seconds to 3 minutes under UV lamp.
Essential Tools: What You Actually Need vs. What You Can Skip
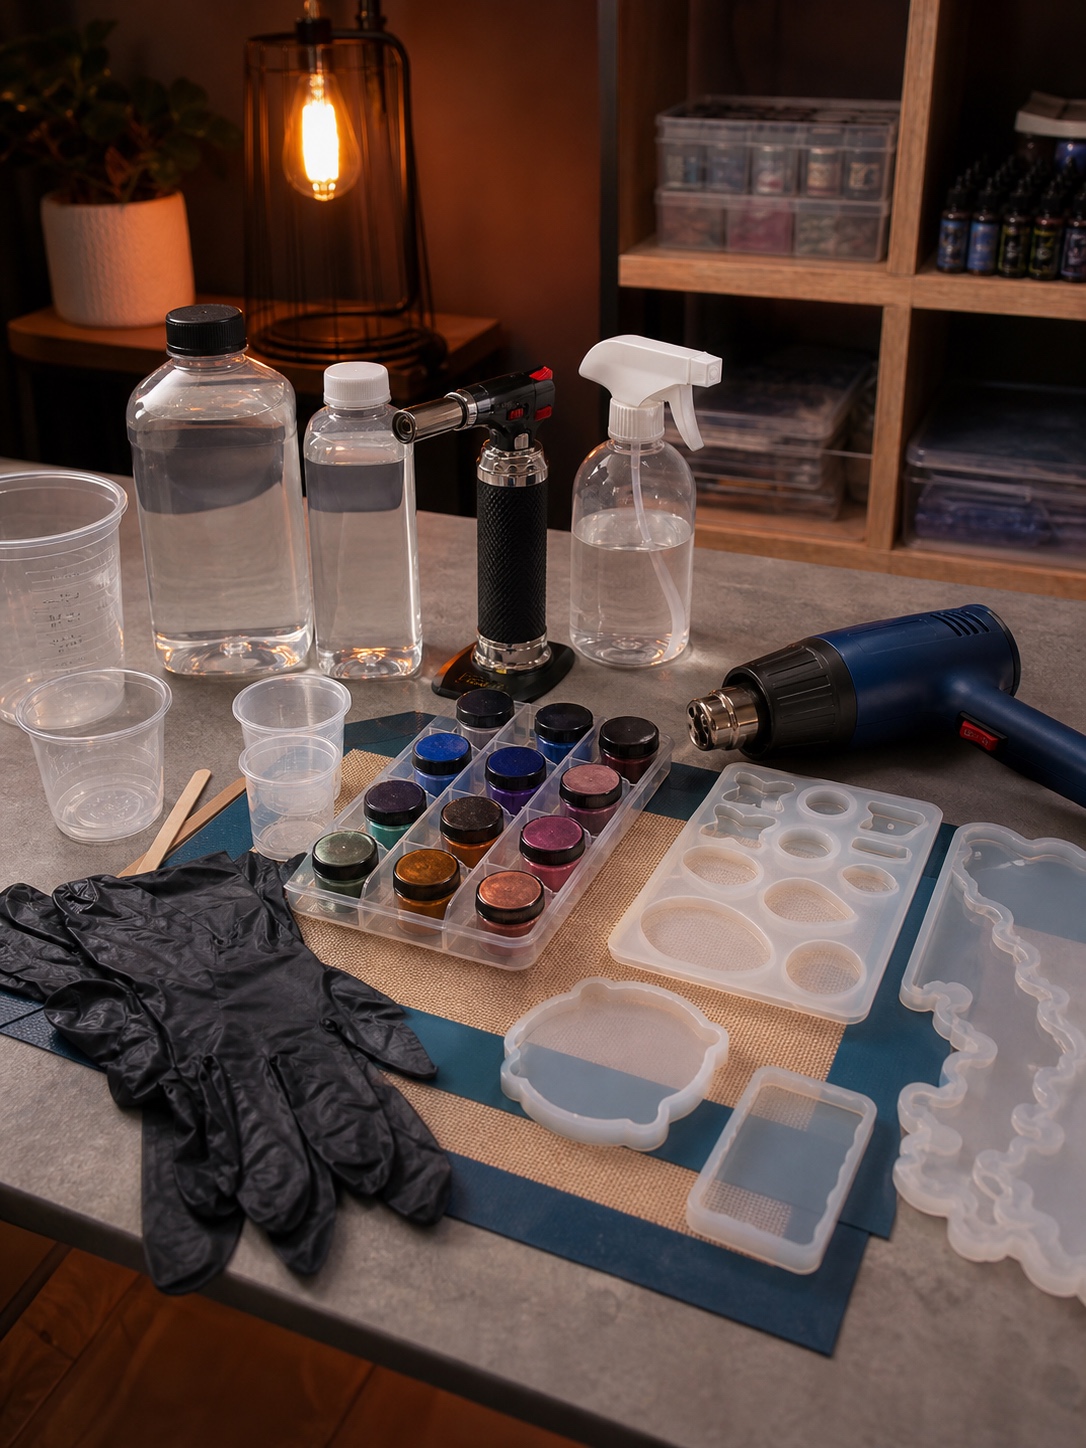
Most resin beginner kits include things you won’t use much and leave out things you’ll need immediately. This list separates them.
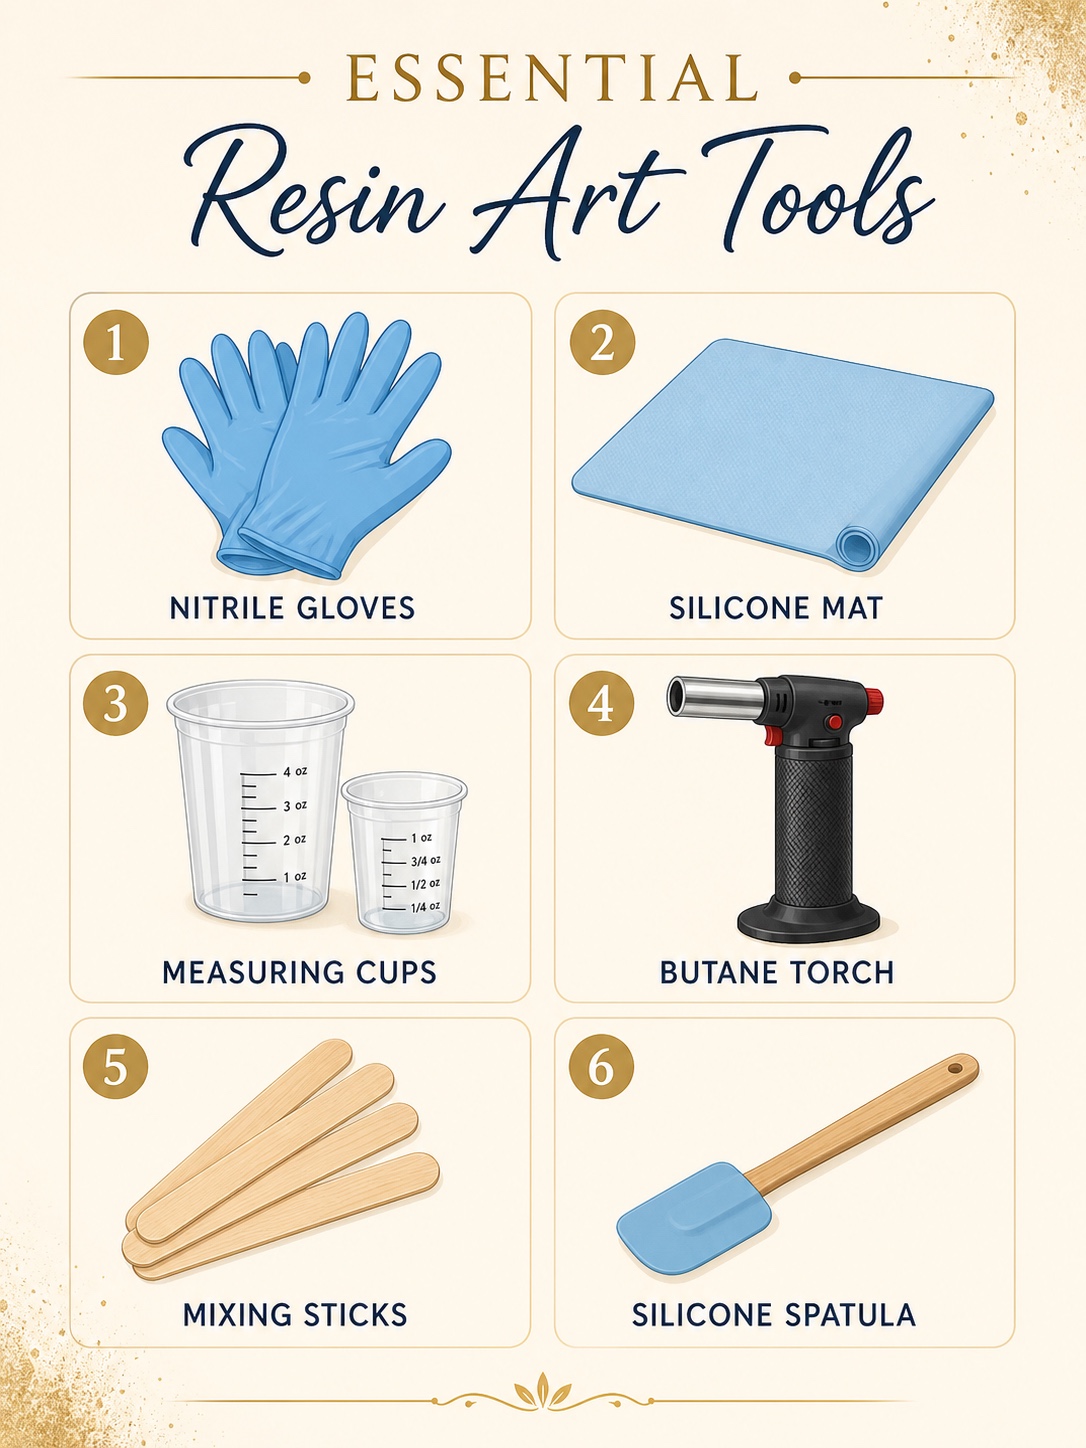
What You Need From Day One
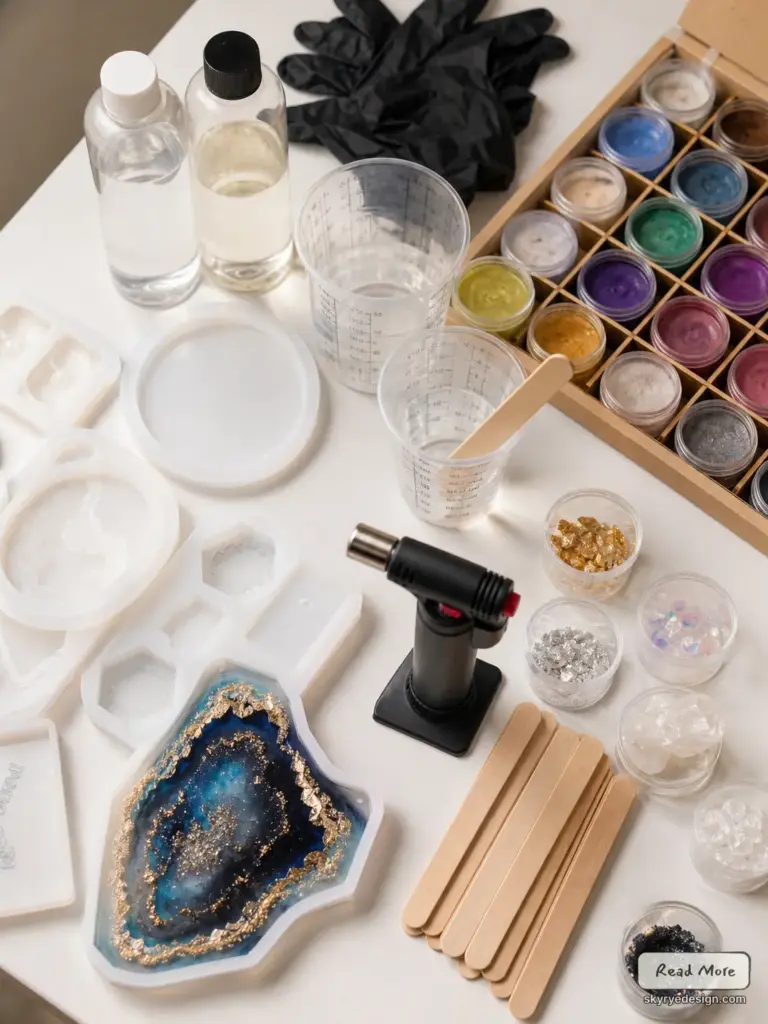
- Nitrile gloves: Non-negotiable. Uncured resin is a skin sensitizer that can cause allergic reactions with repeated exposure. Standard latex gloves are not sufficient. Buy nitrile in bulk.
- Silicone mat: Cured resin peels cleanly off silicone. A silicone mat under your workspace makes cleanup simple and protects your work surface. Resin doesn’t peel off wood, fabric, or most plastics.
- Measuring cups with clear volume markings: Accurate ratio measurement is the foundation of a successful pour. Cheap unmarked cups introduce the most common beginner error.
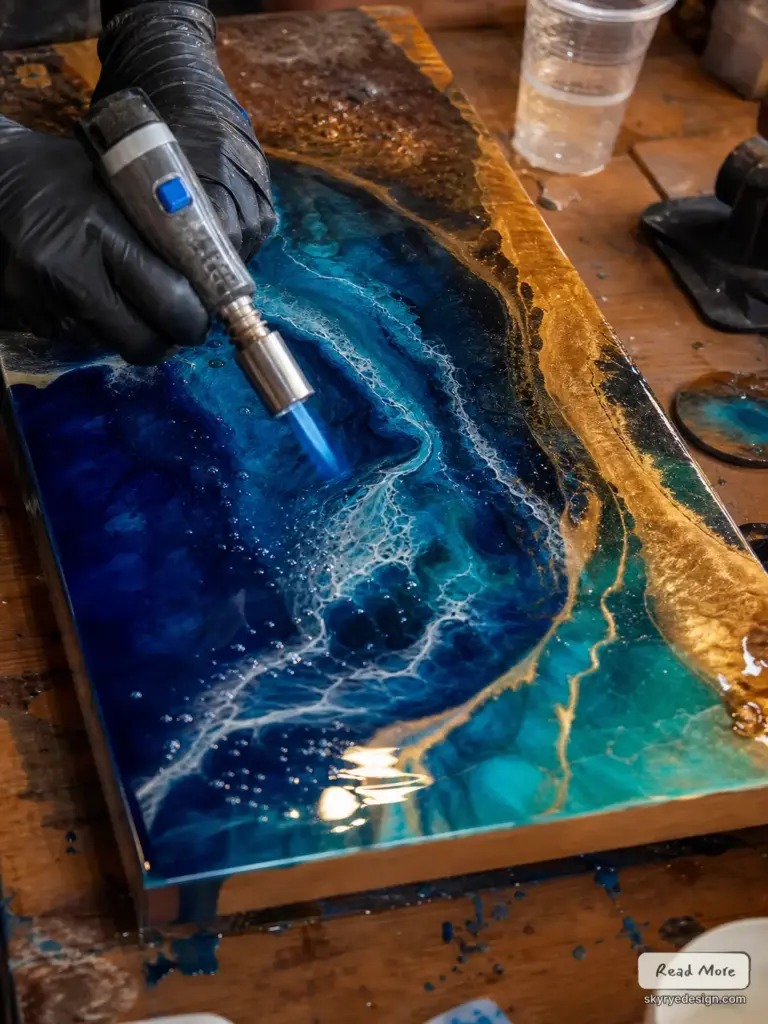
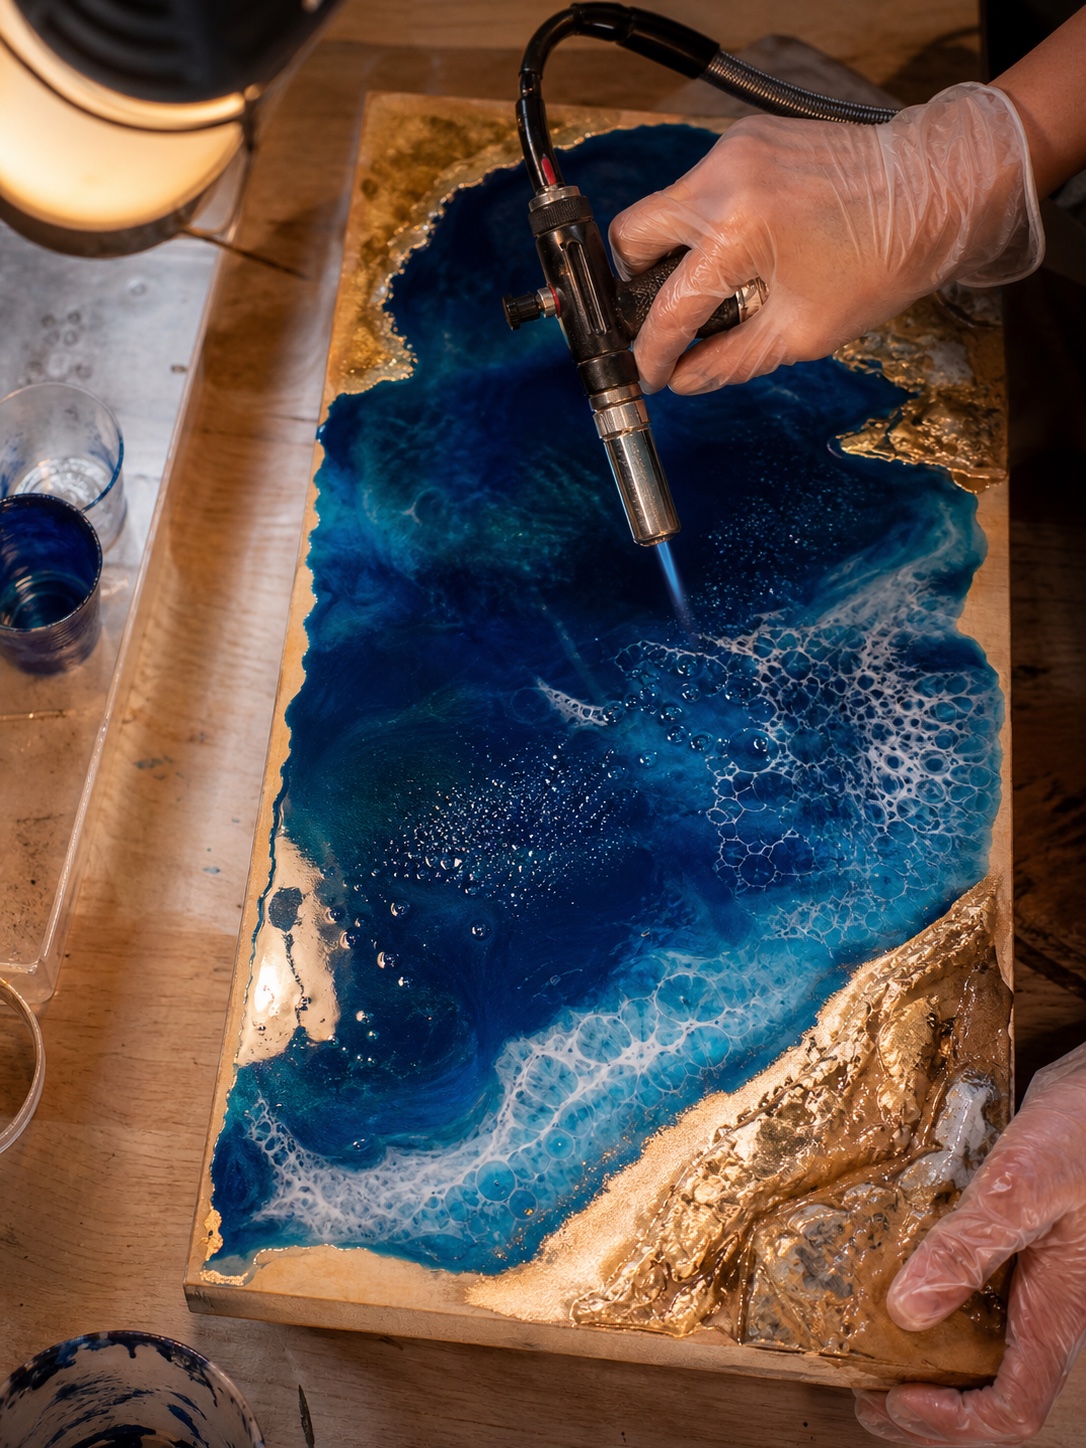
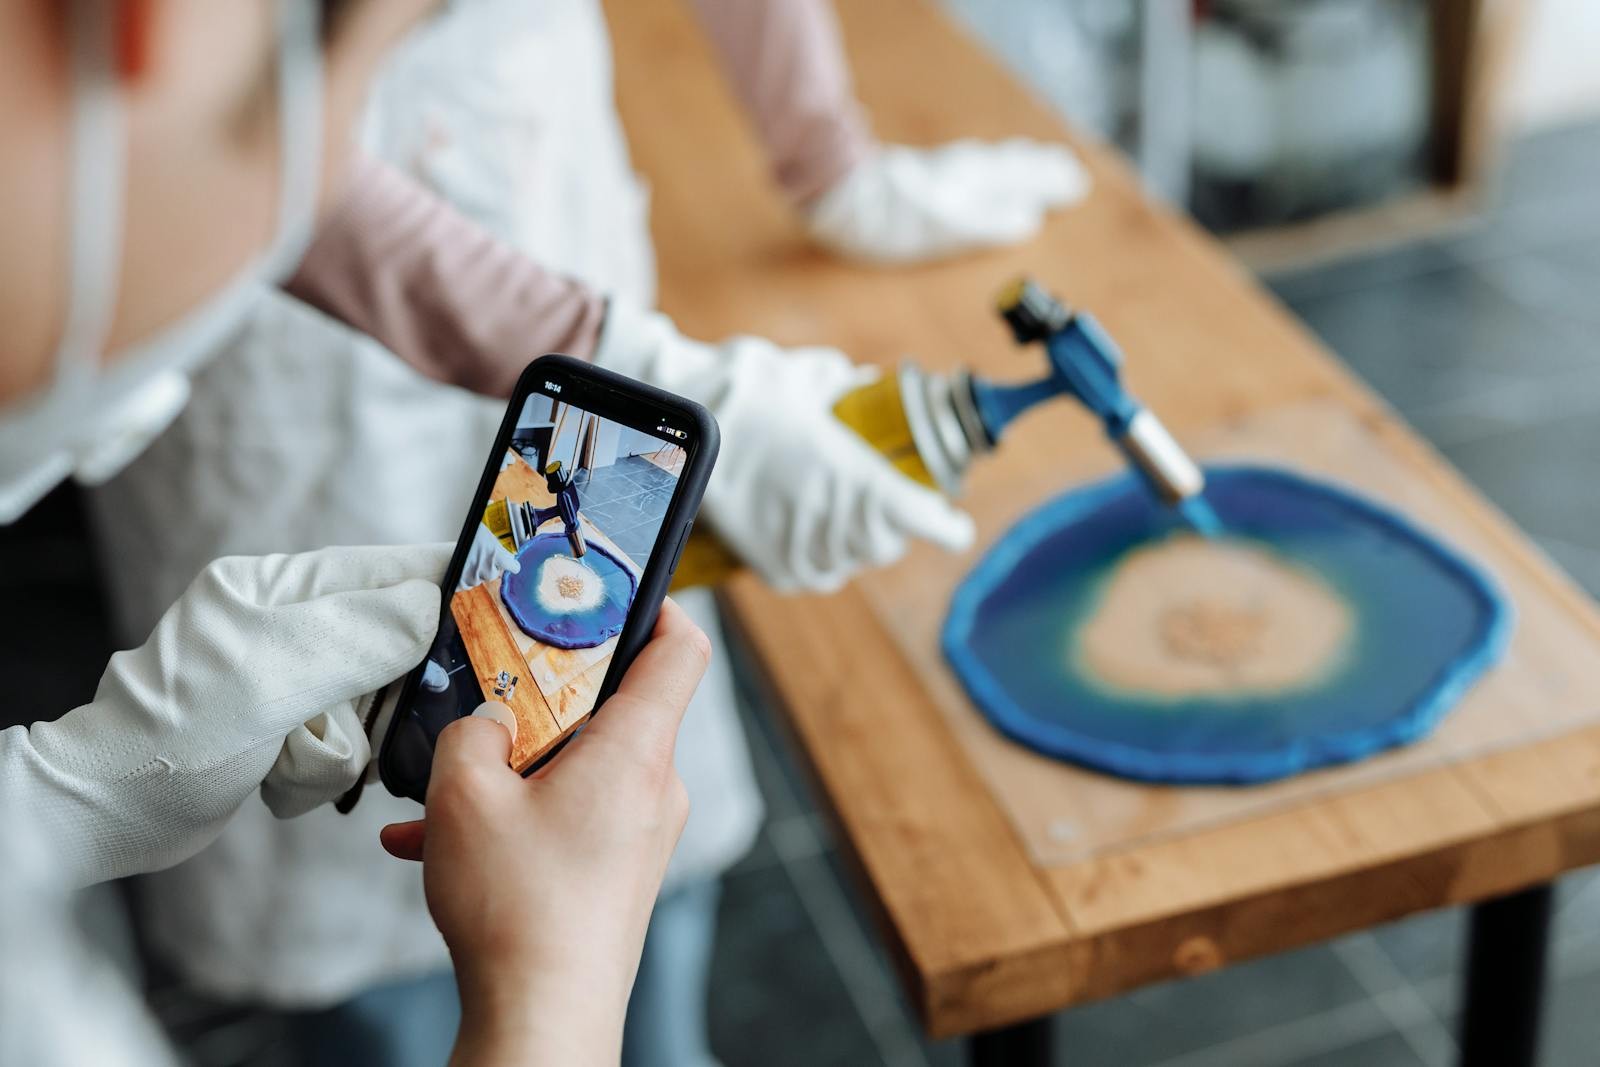
- Butane torch or heat gun: For bubble removal. The torch is faster and more precise for most work. The heat gun covers broader areas but has less control. Most artists use both. A regular lighter does not work well for this.
- Mixing sticks: Wooden stir sticks or silicone spatulas. Silicone is reusable (peels clean after curing), wood is cheap and disposable. For accurate mixing, you need to scrape the sides and bottom of the cup thoroughly, not just stir the center.
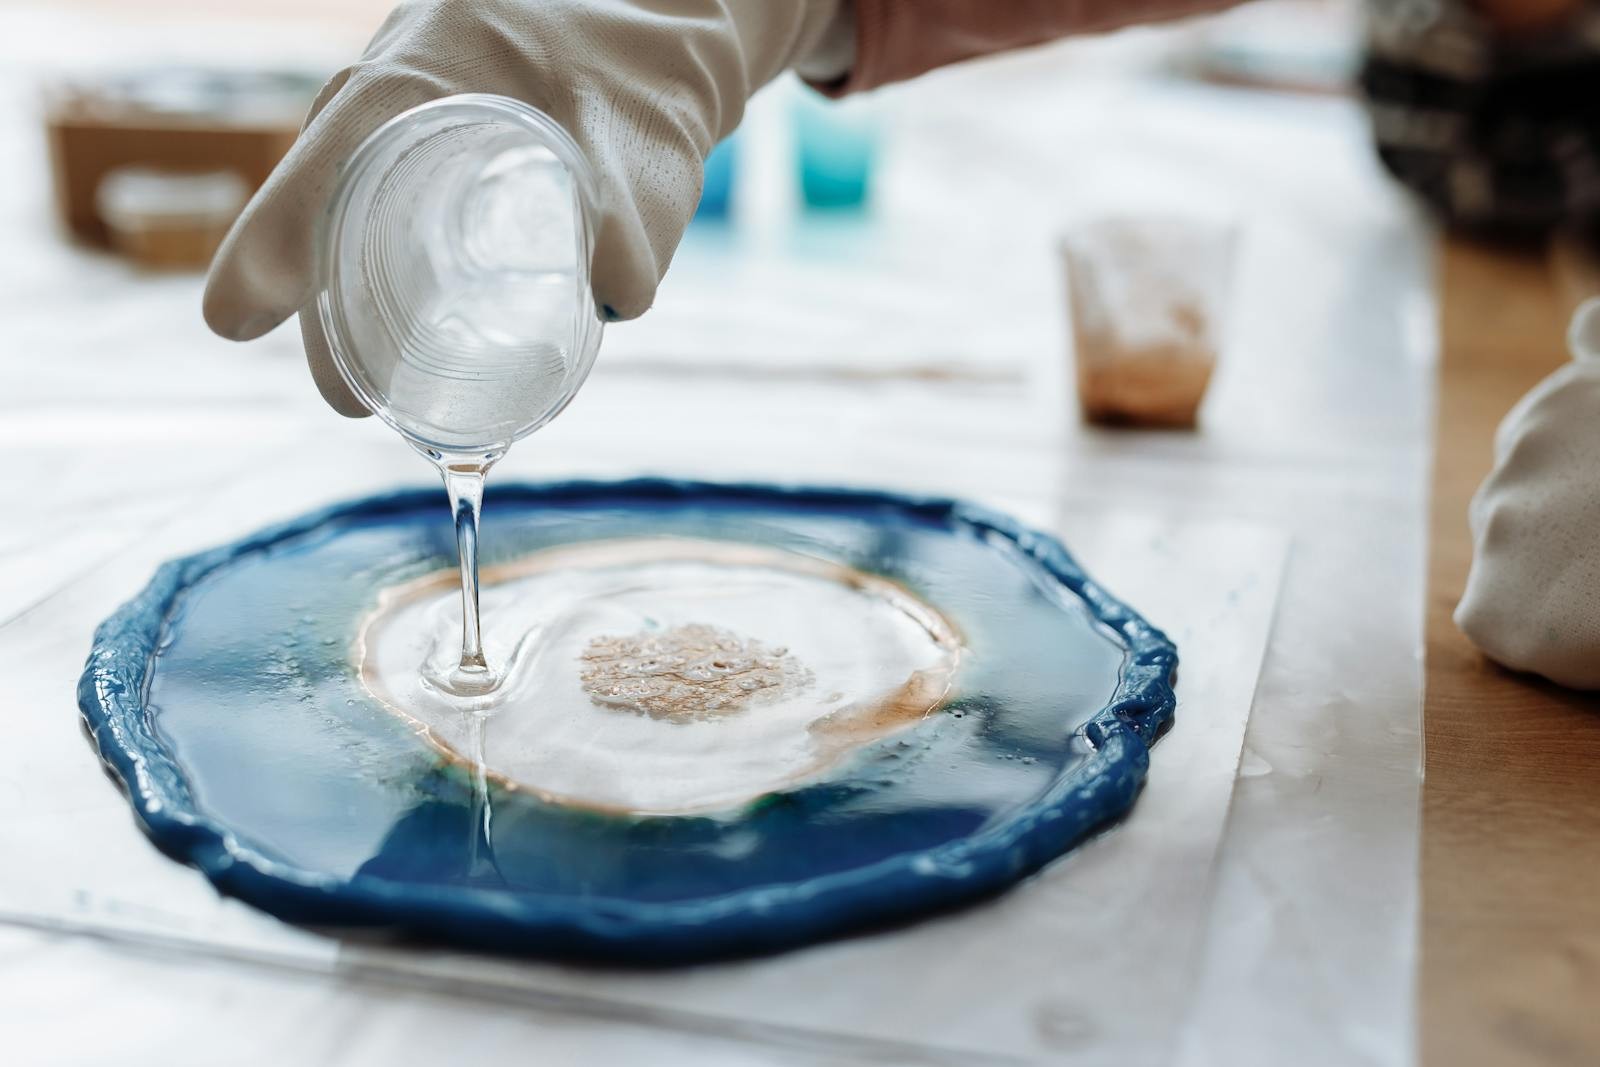
When mixing, stir slowly for at least 3 to 4 minutes, scraping the sides and bottom of the cup every 30 seconds. Under-mixing is the primary cause of sticky patches and soft spots in cured resin. Speed is not helpful here.
What You Can Buy Later
- Specialty molds: start with basic round and square silicone molds before investing in complex shapes. Alcohol inks: useful for creating color effects, but mica powders and resin pigments are easier to control for beginners. Heat-activated glitter and phosphorescent powder: worth exploring once you understand how your resin behaves with standard colorants first. Resin doming tools and precision applicators: helpful for jewelry work but unnecessary for poured panels and table projects.
Safety note: work in a well-ventilated space regardless of the resin’s VOC classification. Many artists wear a respirator with organic vapor cartridges, particularly for larger pours or extended sessions. The fumes from uncured epoxy are not pleasant to breathe even when ventilation is good.
Core Techniques: How the Best Resin Art Looks the Way It Does
The Ocean Pour
The ocean pour is the most recognizable resin art style: layers of blue, teal, and white that mimic ocean waves with organic cell formations at the surface. The cells form when pigments of different densities interact at the surface, pulling apart to create the white foam pattern.
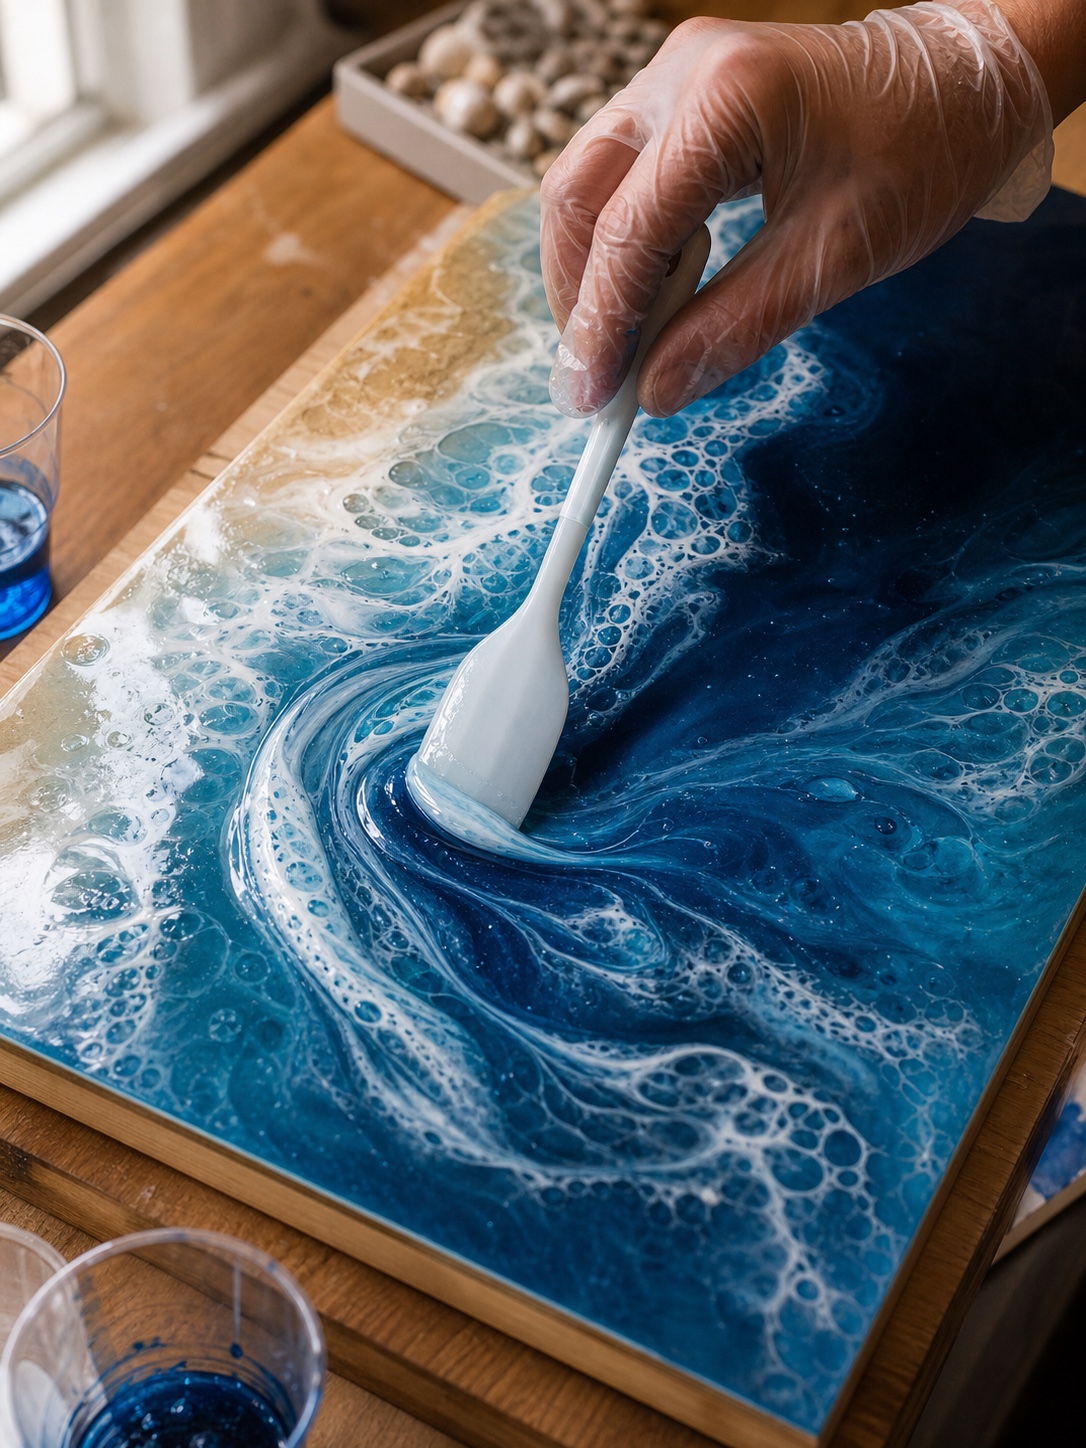
To create cells reliably: add a small amount of silicone oil (1 to 3 drops per cup of resin) to your white pigmented layer before pouring. Pour white over the tinted layers and tilt the panel. As the layers move, the silicone creates surface tension differences that separate the pigments into cell patterns. A brief pass with a torch makes cells larger and more defined. Too many torch passes close them up again.
Don’t add silicone oil to every layer, only the white. Silicone in all layers prevents adhesion between them, which can cause delamination as the piece cures.
Geode and Crystal Art
Geode resin art mimics the interior of mineral geodes: irregular cavities lined with crystal formations, typically in translucent colors with metallic or white quartz-like edges. The effect is created by building up multiple resin pours in layers, adding color and glass glitter or crystal powder between pours.
The current trend in geode art has moved toward minimalism. In 2025 and 2026, artists working at the highest level are using two colors maximum, simple panel shapes rather than agate outlines, and gold ink pens for fine detail rather than thick glitter lines. Less color gives the translucent quality of the resin more room to show. The trick that often separates competent geode work from excellent geode work is leaving deliberate white space where the resin cures clear, with no pigment at all.
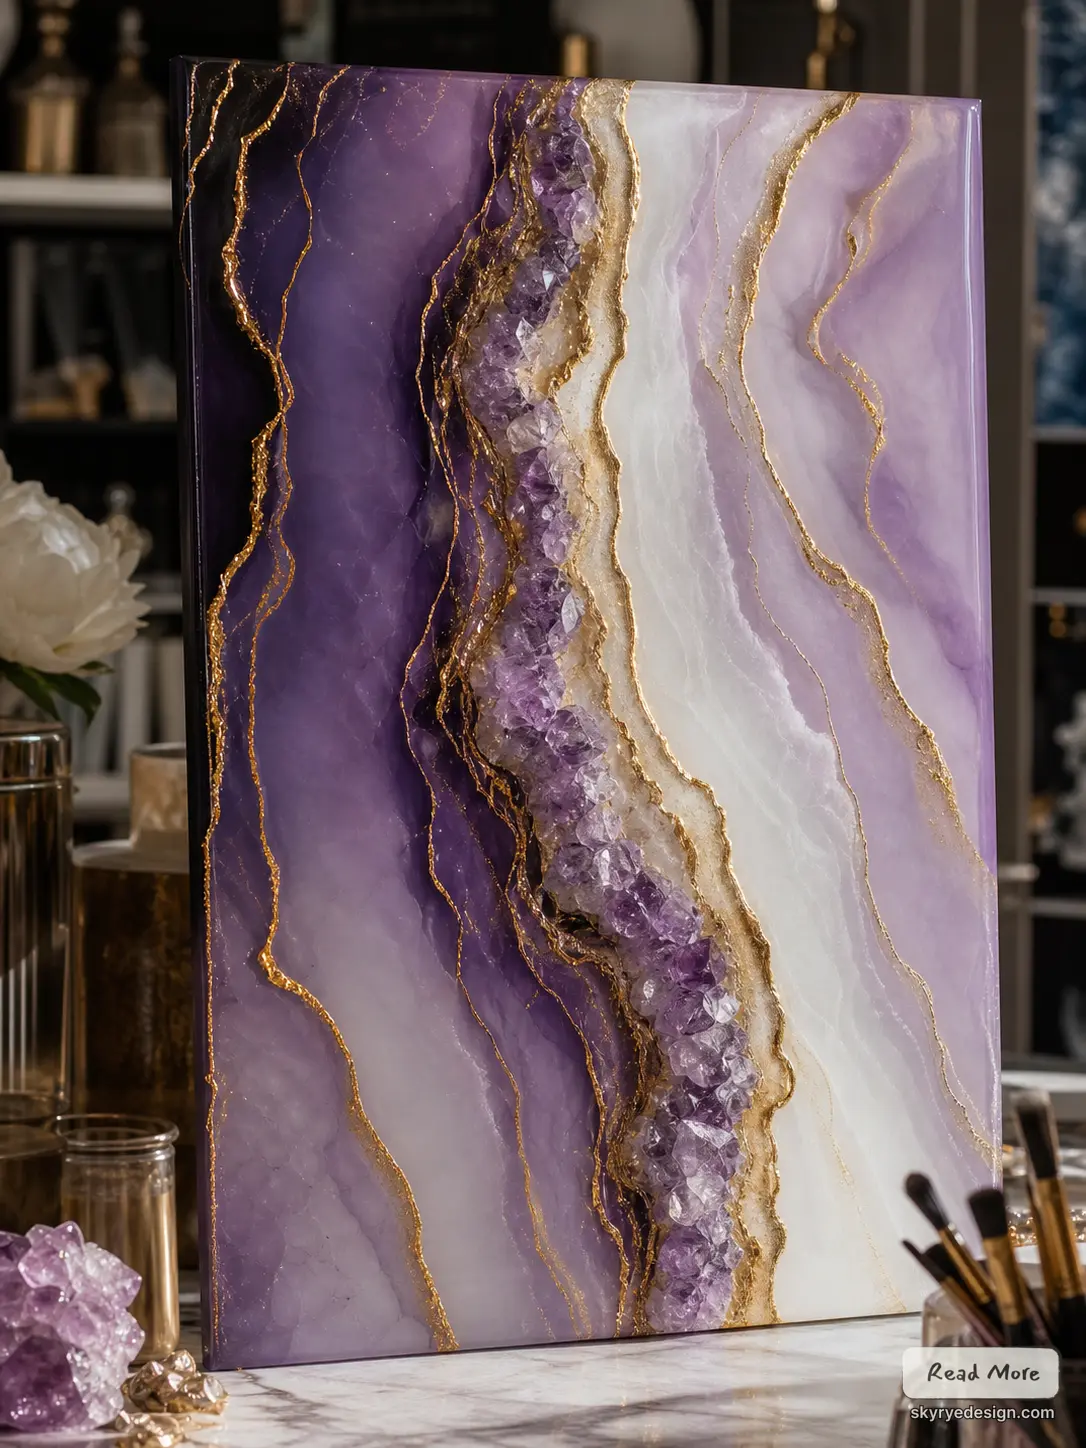
Build geode art in sections, curing each partial pour before adding the next. This lets you control the shape of each colored zone precisely rather than having them blend during cure. Working time for most art resins is 30 to 45 minutes before the mix begins to thicken, so plan each section’s color and shape before mixing the resin.
Acrylic Pour on Resin (Dirty Pour and Flip Cup)
Some artists combine acrylic paint techniques with resin, using acrylic pours as the color base and then sealing with a resin topcoat for gloss and protection. The dirty pour mixes multiple acrylic colors loosely in one cup and pours them over the surface simultaneously. The flip cup inverts a mixed cup directly onto the canvas.
The resin topcoat goes on after the acrylic layer is completely dry, typically 24 to 48 hours later. Do not add resin over wet or tacky acrylic — the water content in acrylic paint affects the resin’s cure and can cause bubbling or cloudiness. A thin, even resin coat self-levels to produce the high-gloss finish that makes acrylic pour paintings look dramatically different from their uncoated state.
Resin with Inclusions: Flowers, Objects, Pigments
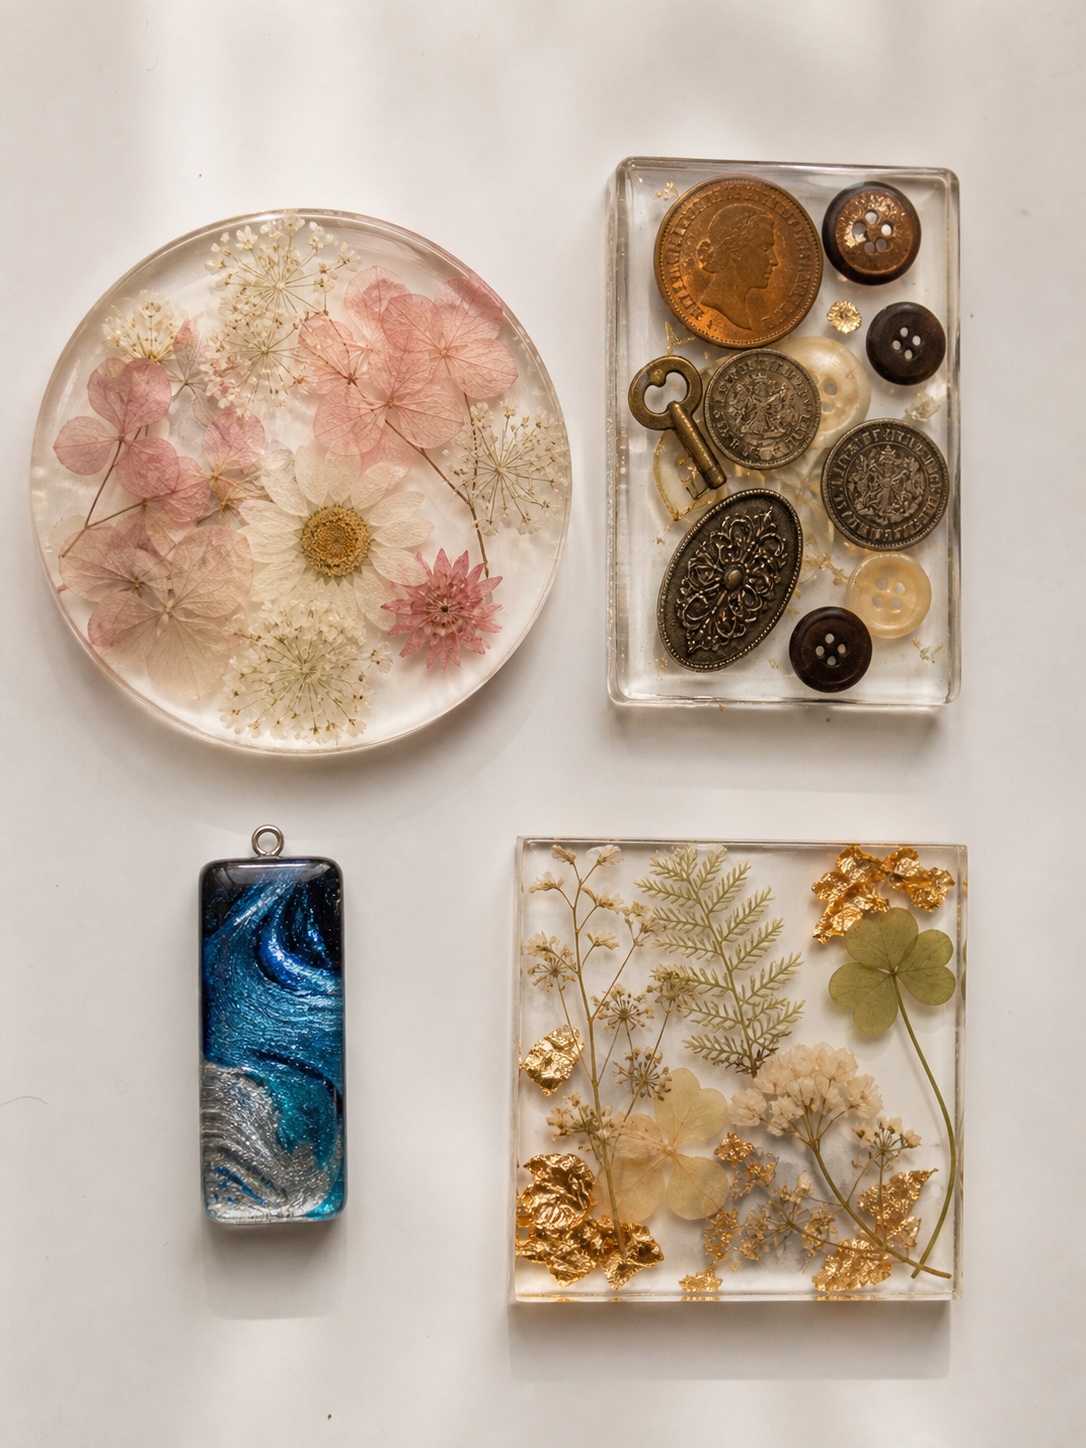
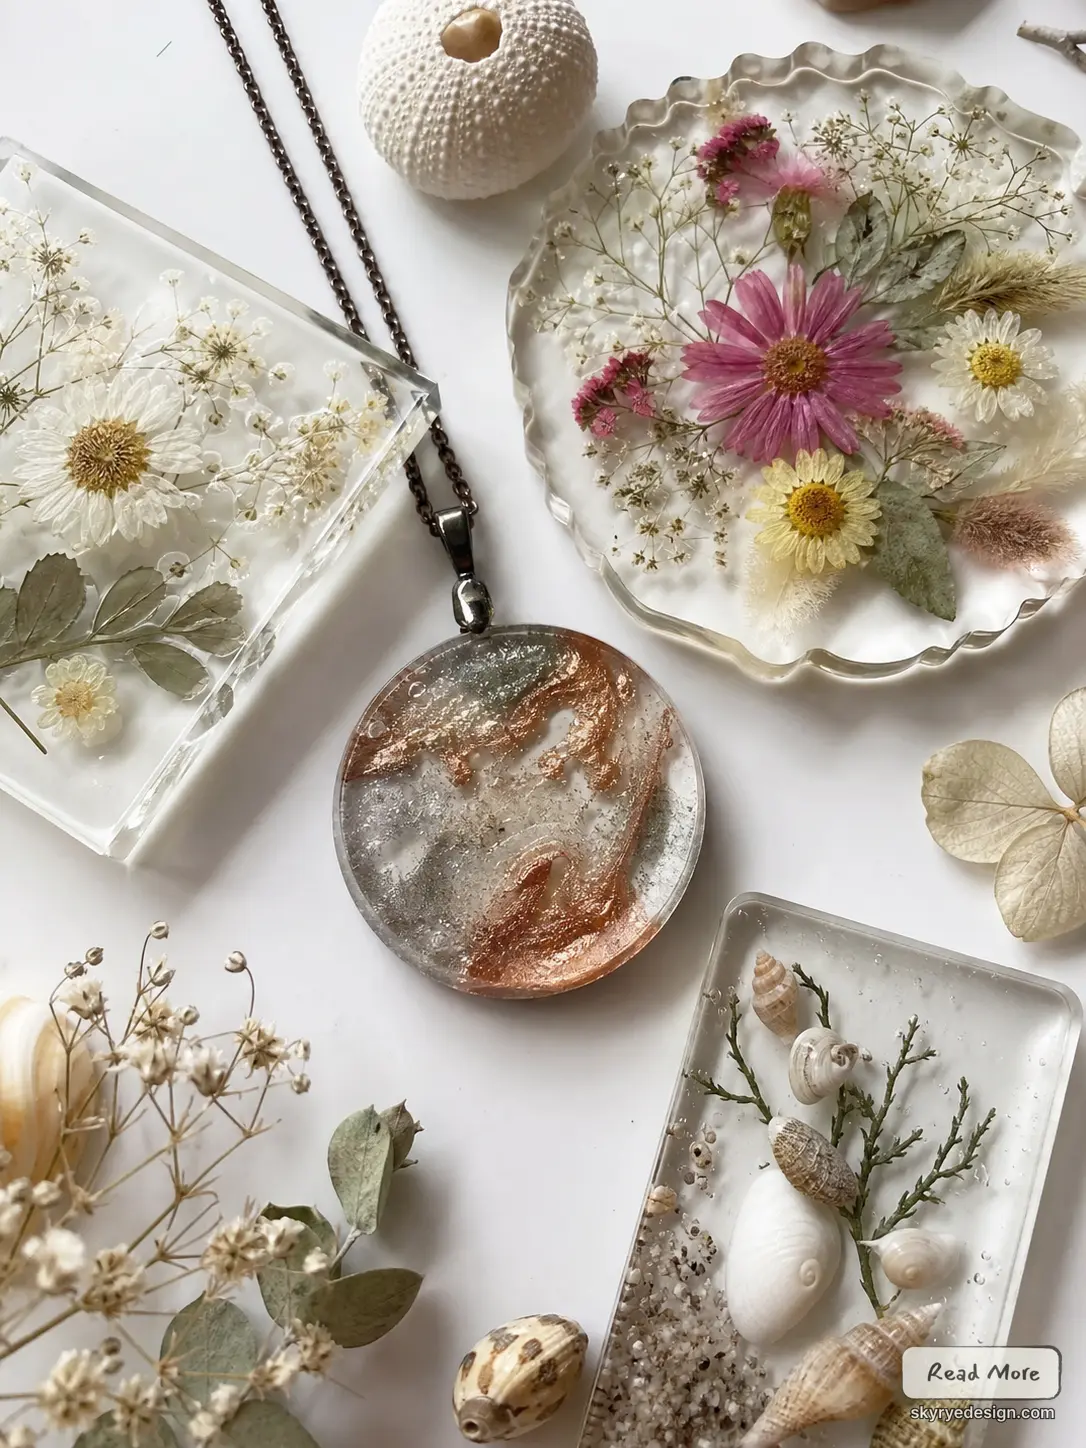
Embedding objects in resin is one of its most compelling uses. Dried flowers, coins, natural stones, shells, fabric scraps, and photographs can all be preserved in clear resin. The process requires full encapsulation: the object needs resin on all sides, not just underneath, to prevent air pockets that cloud around it over time.
For dried flowers: make sure they are completely dry before embedding. Any moisture in the petals will create cloudiness in the cured resin around them. A 24-hour desiccant treatment before embedding is standard practice. Fresh flowers cannot be embedded directly — they will rot inside the resin.
Mica powder pigments produce metallic and iridescent effects that alcohol inks and resin dyes don’t. They’re mixed directly into the resin before pouring and produce consistent, controllable color. Start with no more than 6% pigment by total resin volume — exceeding this can prevent proper curing, particularly with opaque pigment pastes.
12 Resin Art Project Ideas by Difficulty
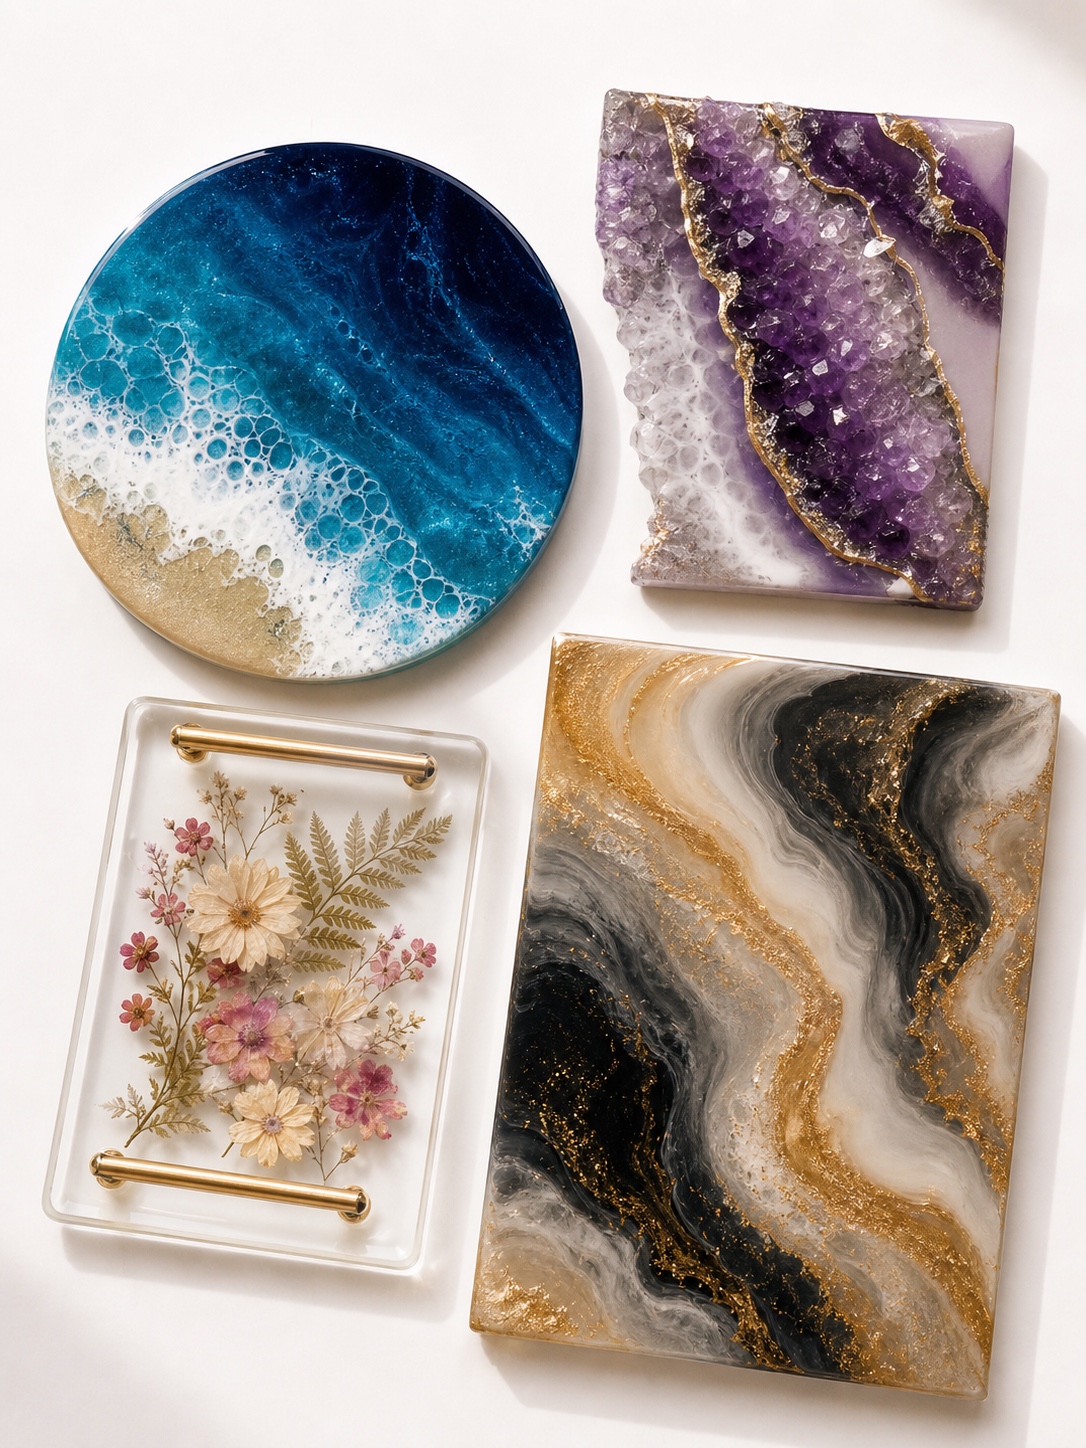
These twelve projects are organized by the skill level they require. The first four need only basic equipment. The middle four introduce more technique. The final four are serious projects that benefit from practice with the earlier ones.
Beginner Projects
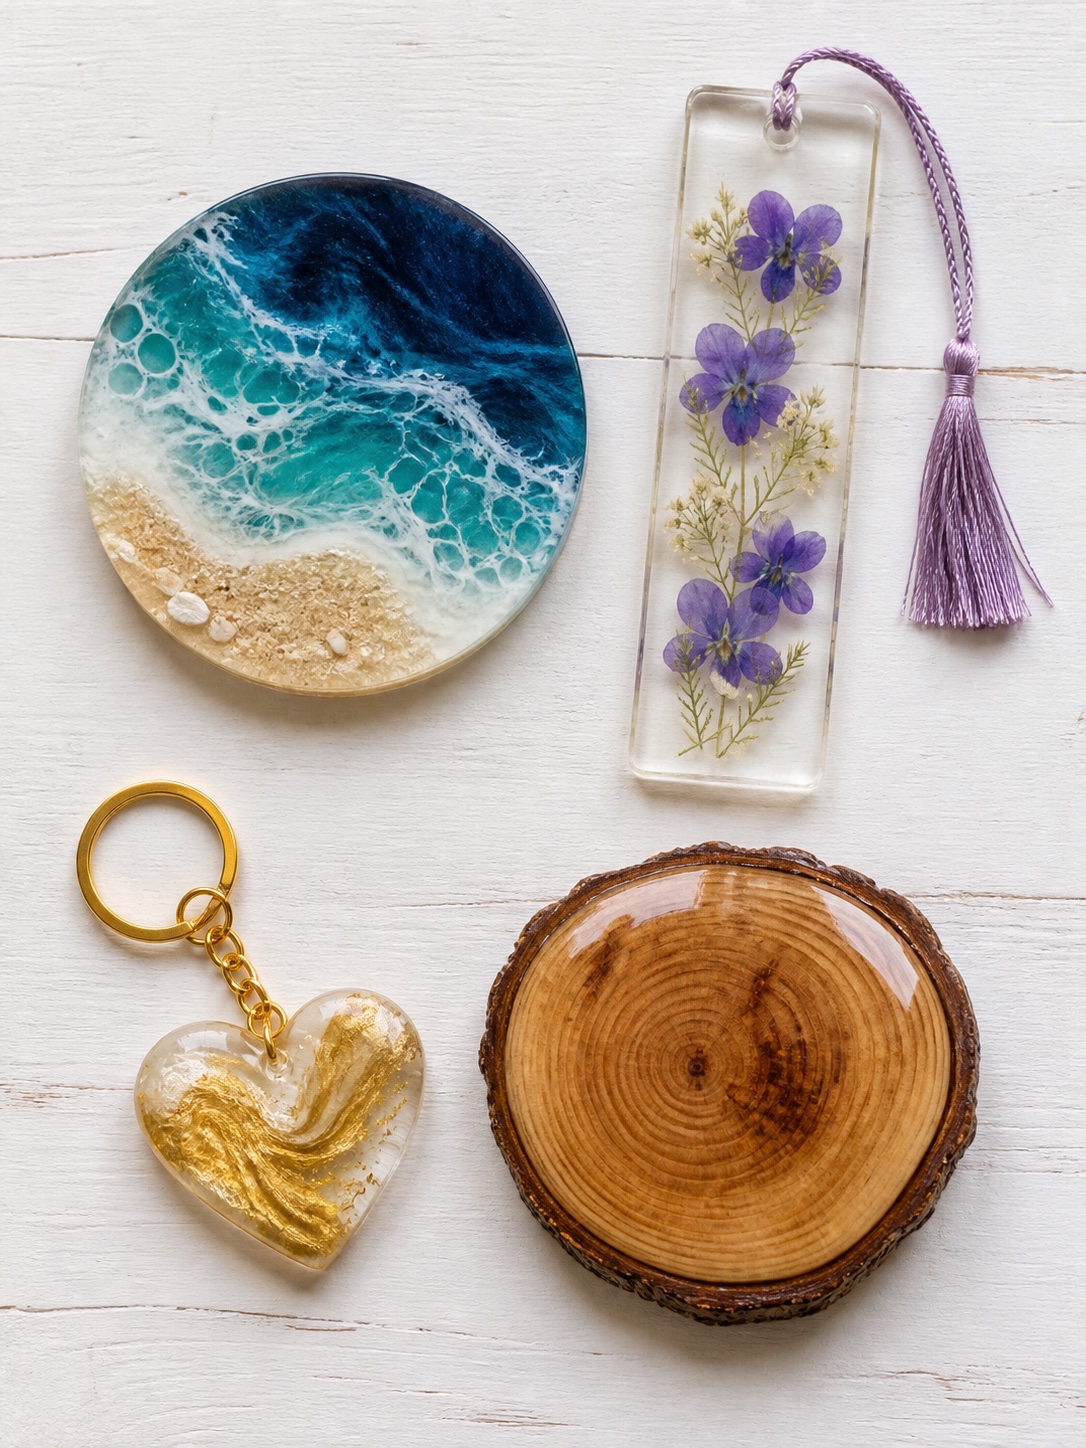
1. Simple pour coasters: Round or square silicone molds, one or two colors plus metallic powder. These are the best first project because the small scale means small mistakes. Cure time 24 hours, demolding time 48 hours. Cost of materials: under $20 for four coasters.
2. Resin bookmarks: Narrow rectangular molds with dried flowers, pressed leaves, or metallic foil. Clear or lightly tinted resin shows the inclusions best. The thin shape means they cure quickly and demolding is easy.
3. Resin keychains: Small molds in various shapes (hearts, circles, geometric forms). A great format for experimenting with alcohol ink swirling techniques without committing large quantities of resin.
4. Resin coated wood slice: Pour clear epoxy over a natural wood slice to seal and gloss it. No mold required, minimal colorant needed. The wood grain shows through the resin with excellent clarity. Simple but visually impressive.
Intermediate Projects
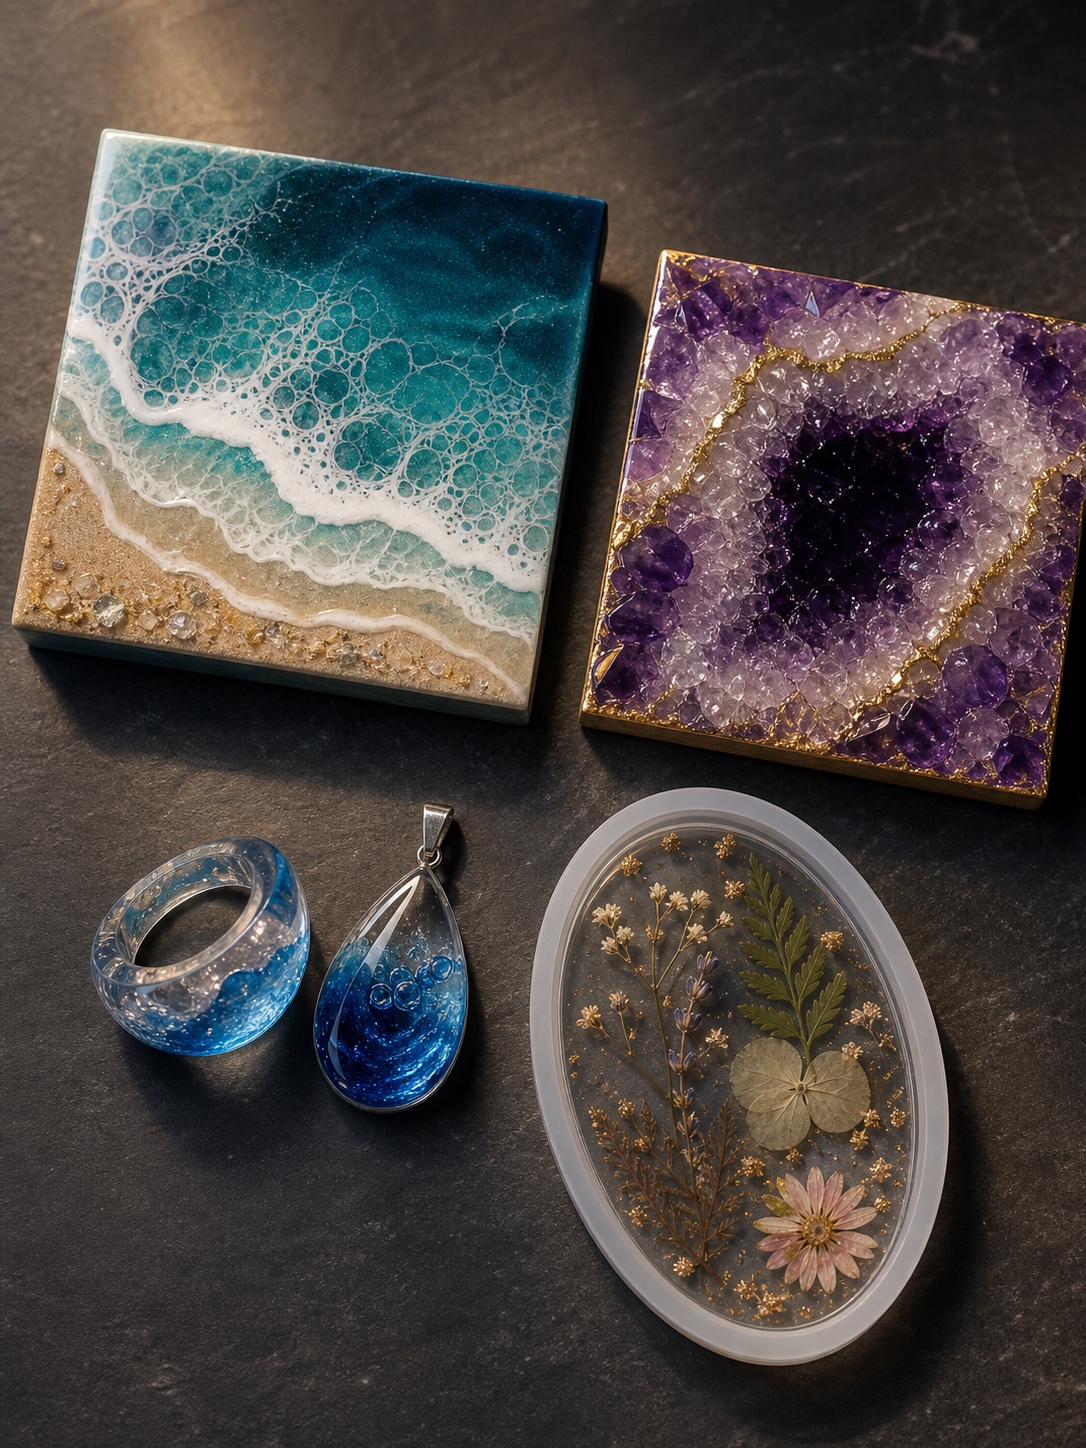
5. Ocean pour panel: A small canvas or wooden panel (8×10 inches works well for practice) with layered blues, teals, and white cells. Requires silicone oil for cell formation and confident torch work.
6. Geode panel: A panel in any shape with layered colors built up over 2 to 3 pours. Plan the color placement before mixing anything. The patience of waiting for partial cures between pours is what makes or breaks this project.
7. Resin jewelry (rings and pendants): Small jewelry molds cast with colored or transparent resin. Sanding and polishing the cured piece to jewelry-grade clarity is a separate skill from the pour itself. Wet sanding from 400 grit through 3000 grit followed by resin polish produces optically clear surfaces.
8. Resin tray with dried botanicals: A rectangular or oval silicone tray mold with embedded dried flowers arranged before pouring. Requires a light first layer to set the flowers in position before filling the mold completely.
Advanced Projects
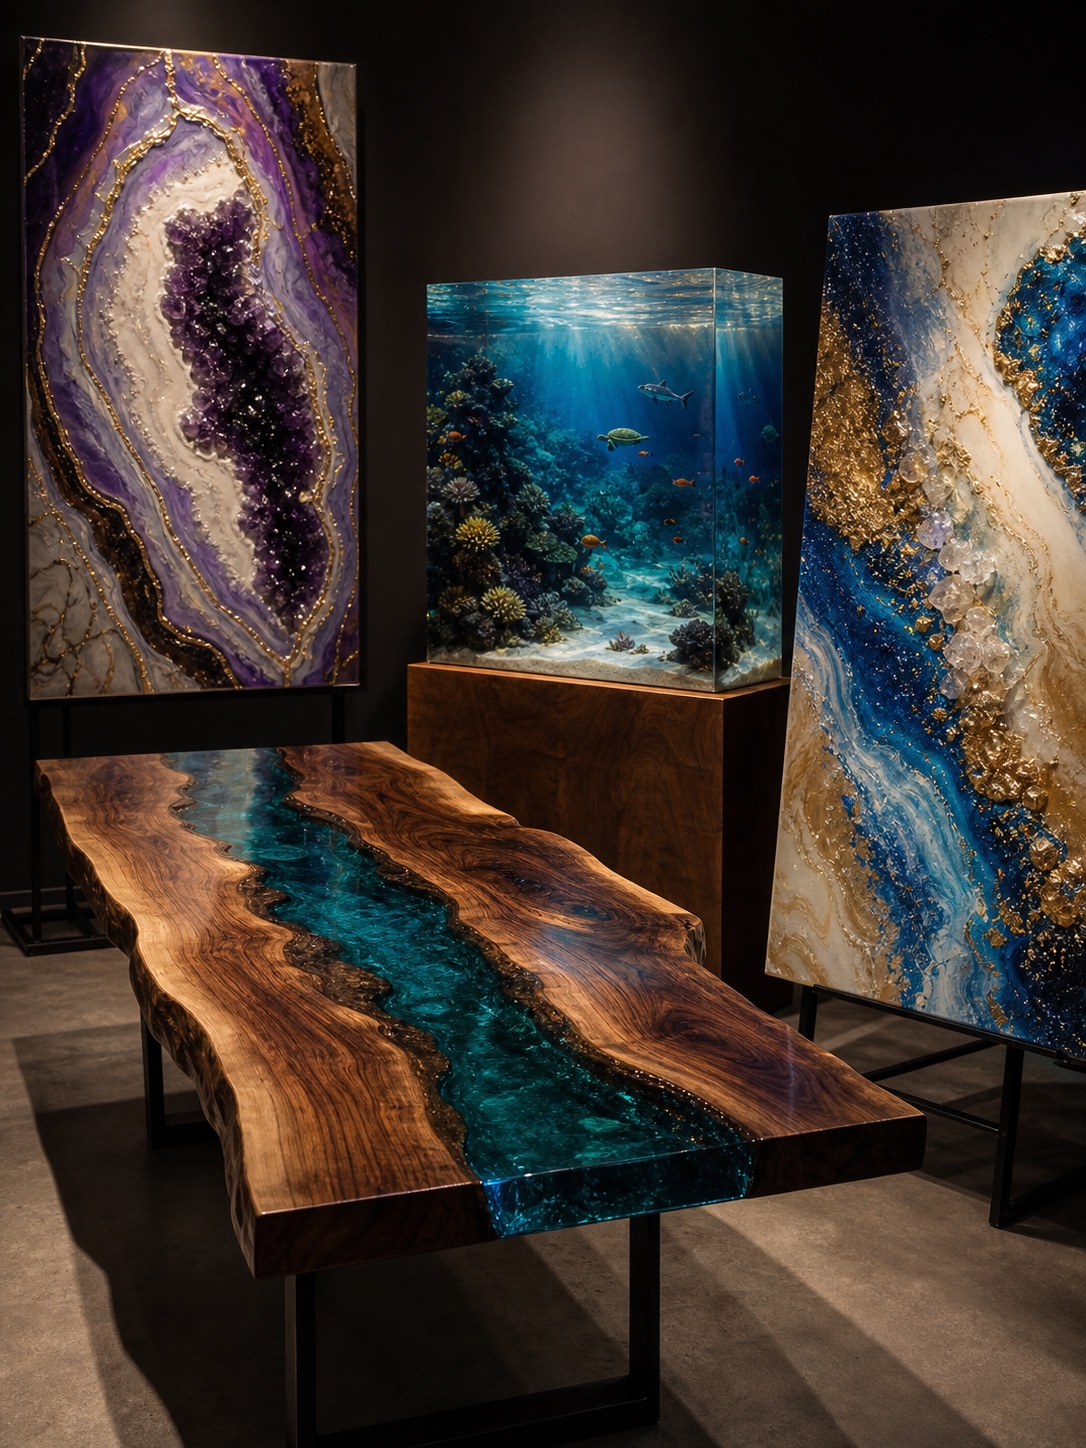
9. River table: A wooden table with a resin river running between two live-edge wood slabs. Requires deep pour resin, proper mold construction to prevent leaks, and multiple pours over several days. The most technically demanding woodworking-resin hybrid project.
10. Large-format geode painting: A 24×36 inch or larger panel with full geode composition. Requires careful planning of the entire composition before any resin is mixed, because the working time is too short to improvise at this scale.
11. 3D layered ocean scene: Multiple cured layers building up a three-dimensional underwater scene with different elements (fish, coral, sand) at different depths. Each layer cures clear before the next is added on top. A single piece can take 5 to 7 days to complete.
12. Resin on canvas with mixed media: Combining acrylic painting, resin pours, and physical inclusions (gold leaf, crystal chips, shells) on a large canvas. The integration of multiple materials and techniques into a coherent composition is the challenge. This is where resin art crosses into fine art territory.
The Most Common Mistakes and How to Fix Them
Sticky or Soft Spots in Cured Resin
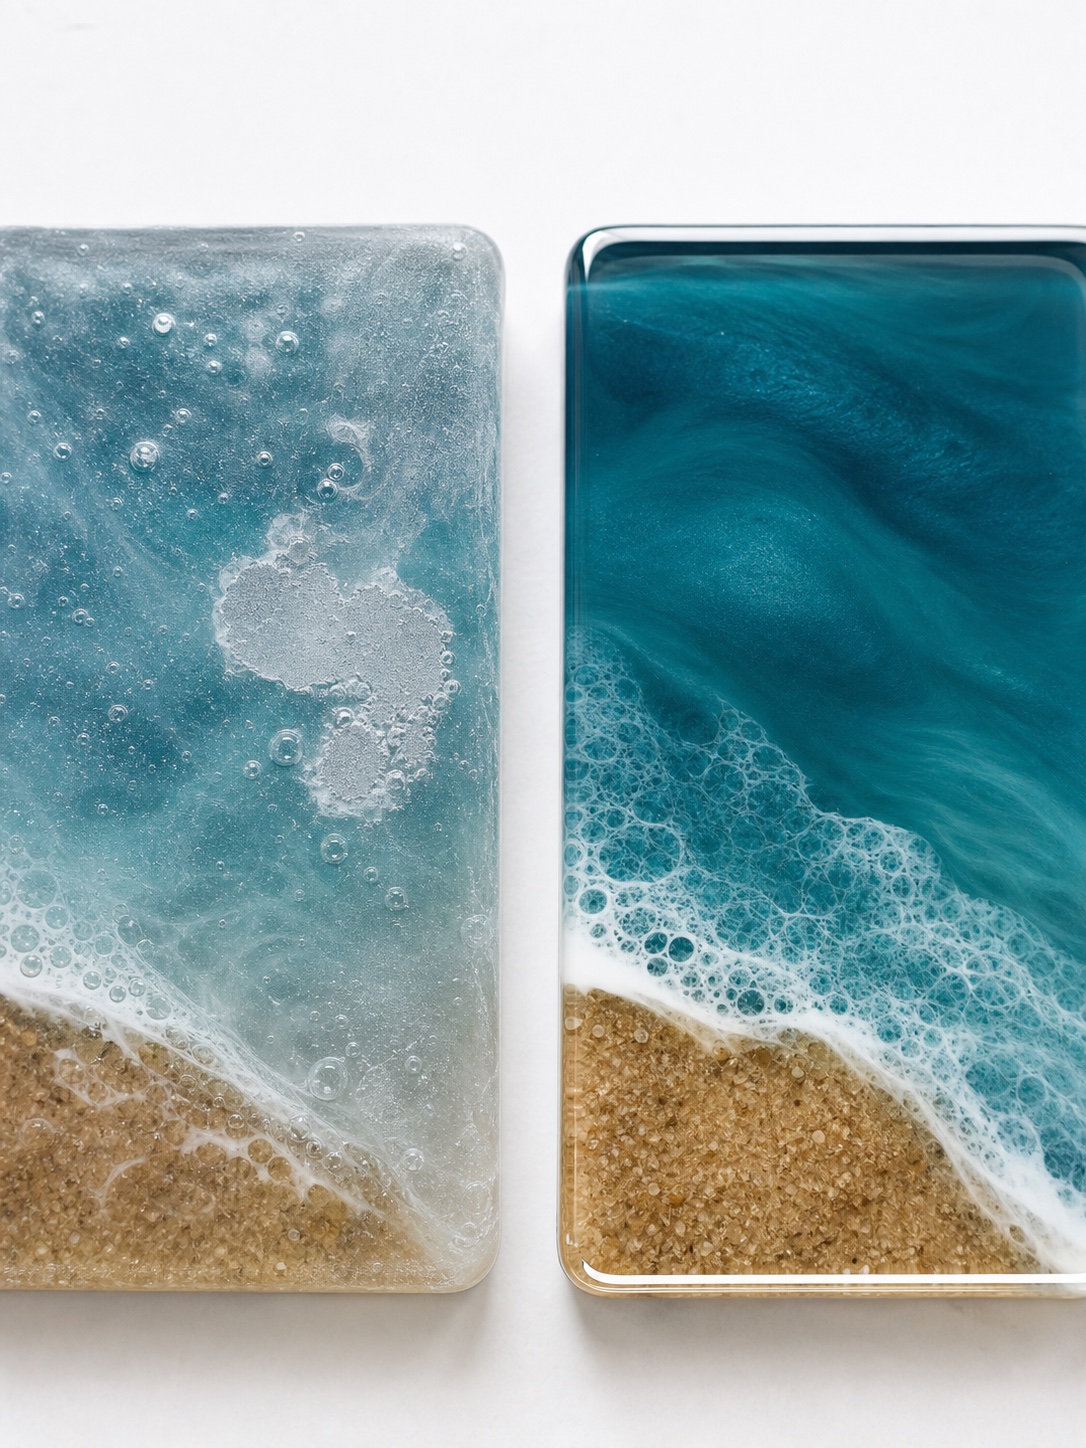
This comes from three sources: incorrect mixing ratio, under-mixing, or working in cold temperatures. Check the ratio first, then review your mixing process. For a ratio problem: if the piece is only slightly sticky, move it to a warmer environment for 24 hours. For serious under-cure: remove any liquid resin, sand the surface, and apply a properly measured and mixed fresh coat. It will bond to the slightly tacky surface beneath.
Scraping the sides and bottom of the mixing cup is the part most beginners rush. The resin and hardener separate toward the edges during pouring, so any unmixed material lurking at the sides of the cup goes directly into your pour. Scrape thoroughly, every pass, for the full mixing time.
Bubbles That Won’t Go Away
Surface bubbles respond to heat. A butane torch held 15 to 20 cm above the surface, moved continuously rather than held in one spot, pops surface bubbles within seconds of application. Don’t hold the torch over one spot for more than a second at a time. Burning the surface leaves yellowing that doesn’t cure out.
Deep bubbles that form below the surface are harder. Warming the resin before mixing reduces initial bubble formation significantly. Pouring from lower height (closer to the surface) introduces fewer bubbles than pouring from high up. If deep bubbles appear after pouring, gently drawing a toothpick through the area can bring them to the surface where the torch can pop them, but only during the first 30 minutes while the resin is still fluid.
Cloudy or Hazy Finish
Three causes: moisture exposure during curing, temperature shock, or surface contamination. Humidity above 80% during curing causes the surface to blush milky white. Work in a climate-controlled space during humid seasons. Temperature shock (for example, moving a curing piece from a warm room to a cold garage) can cause internal stress that reads as haziness.
If the cloudiness is a surface issue only, wet sanding from 800 through 3000 grit followed by a resin polish (Meguiar’s PlastX or dedicated resin polishing compound) brings the surface back to clarity. If the haziness is throughout the depth of the piece, there’s no recovering it without stripping and repouring.
Resin That Yellows Over Time
UV yellowing is a real issue with lower-grade epoxy resins. It’s caused by UV radiation breaking down the epoxy molecules. Art-specific resins like ArtResin use UV and HALS stabilizers to slow this significantly. Even so, keeping finished resin art out of direct sunlight extends its clear life considerably. Yellowing that has already occurred cannot be reversed, which is why the choice of resin brand matters as much as technique.
For pieces that will be displayed in naturally lit rooms, choose a UV-resistant art resin rather than construction or hardware store epoxy. The cost difference is real (art resins run $30–60 for 32 oz versus $15–20 for hardware epoxy) but so is the longevity difference.
2026 Resin Art Trends Worth Knowing
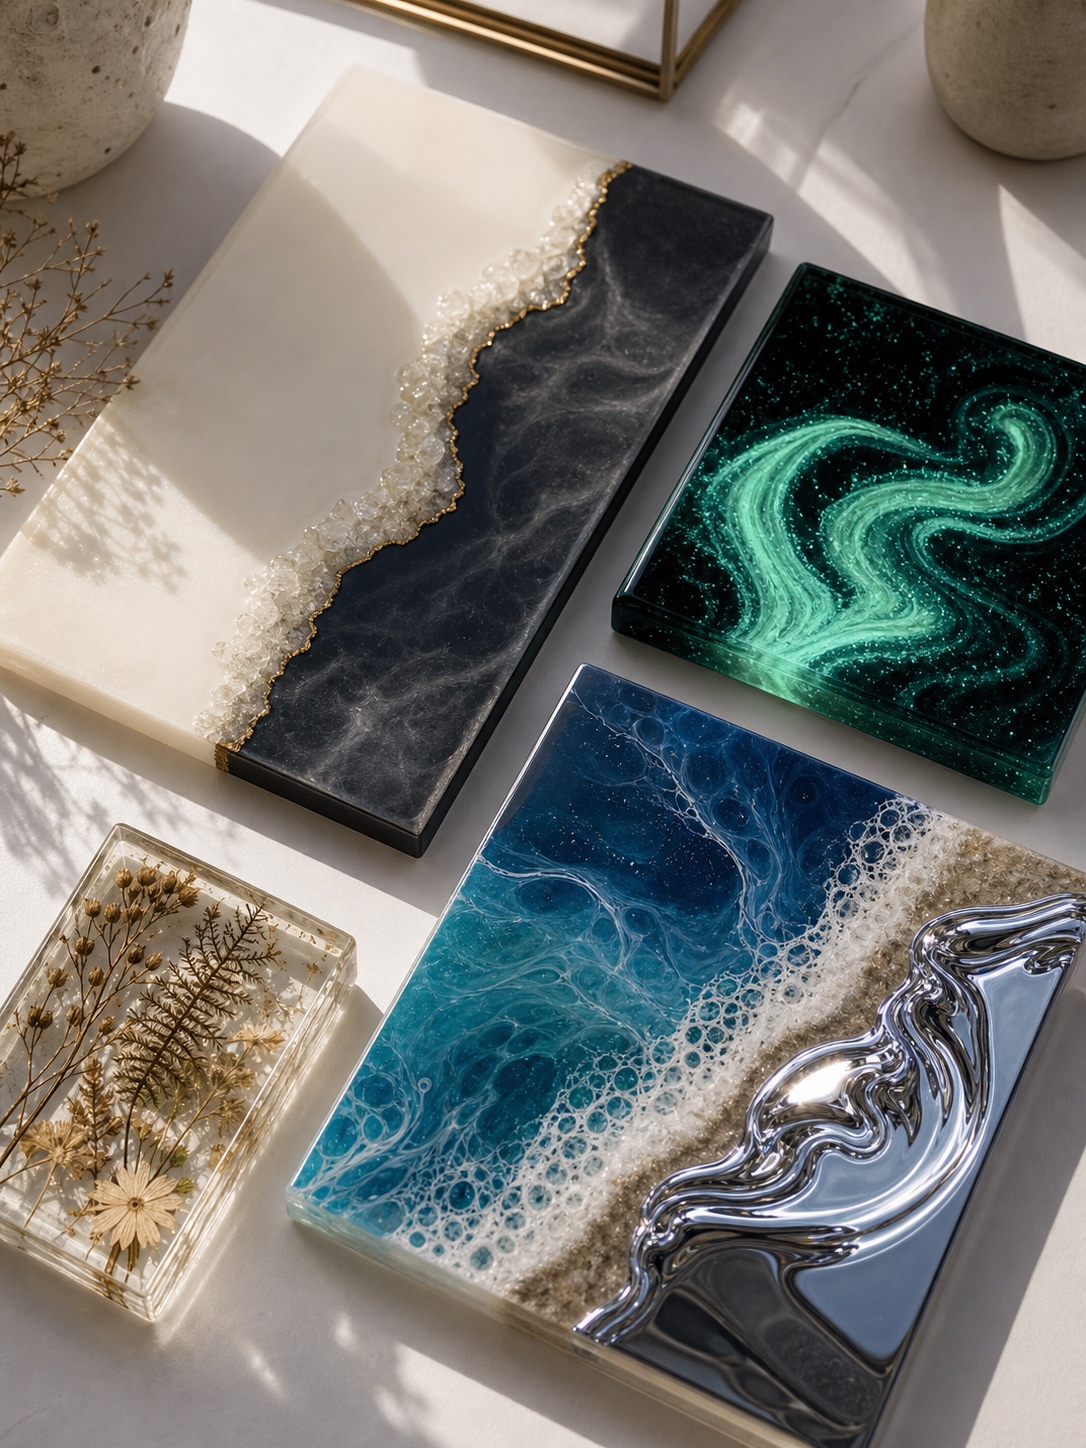
Resin art in 2025 and 2026 has moved away from maximalism toward restraint. The aesthetic shift happening in studios and on social media is toward fewer colors, cleaner compositions, and more intentional use of the material’s natural properties.
Minimalist Geode
The oversaturated, five-color geode with thick glitter lines has given way to two-color compositions with thin gold ink details and deliberate negative space. The resin itself, when poured clear with no pigment, has a beautiful translucent depth that saturated pieces obscure. Artists working in this direction use simple panel shapes (square or rectangular) and restrict themselves to one dominant color and one accent. The result reads as intentional rather than busy.
Functional Resin Art
The trend toward pieces that have a use beyond hanging on a wall has continued into 2026. River tables, serving trays, cheese boards, display shelves with resin accents, and jewelry organizers are all strong categories in the functional resin market. Etsy data from late 2025 showed functional resin pieces selling at consistently higher price points than purely decorative panels of comparable size. If you’re considering resin art as a side income, functional pieces are worth prioritizing.
Nature Inclusions and Botanical Preservation
Embedding preserved moss, dried flowers, natural stones, shells, and seeds directly into resin has been one of the most consistent trends over three years. The appeal is straightforward: resin can preserve something organic in perfect clarity, making a piece that is simultaneously a craft object and a time capsule. Moss terrarium panels, flower preservation paperweights, and seed-encapsulated jewelry are all strong in this category.
Glow-in-the-Dark and UV-Reactive
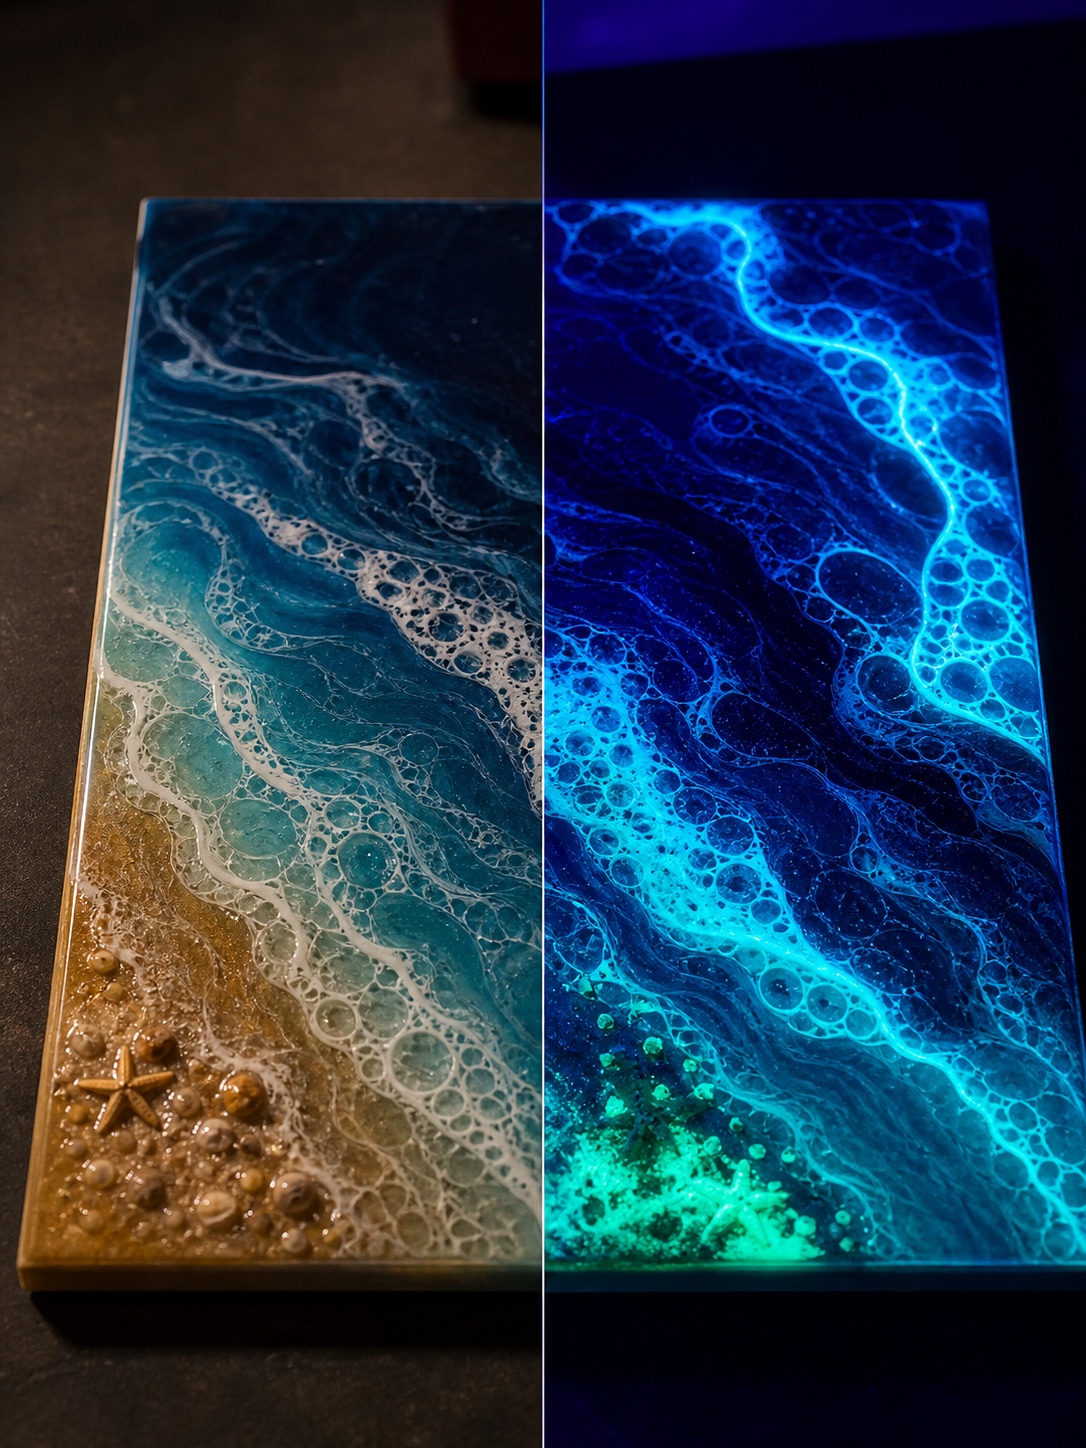
Phosphorescent powder (glow-in-the-dark) and UV-reactive pigments mixed into resin create pieces that look one way under ambient light and completely different under UV or in the dark. These are strong sellers in the novelty gift category and work well in ocean pour compositions where the glow mimics bioluminescence. The effect requires concentrated pigment and works best in pieces with some transparent resin areas to let the glow read clearly.
Eco-Conscious Materials
Plant-based and bio-derived epoxy resins have been gaining ground. Brands like Entropy Resins’ Super Sap use plant-derived hardener components and lower VOC formulations. These resins are not identical in working properties to petroleum-based epoxies (they can have shorter working times and require more precise temperature control) but the gap has narrowed considerably over the past two years. For artists who want to reduce environmental impact, this is now a practical option rather than a compromise.
Resin has its own surface language, but wooden art sculptures like Paul Kaptein’s show how grain, cuts, and voids can carry the concept without color.
FAQ: Resin Art
How do I get started with resin art?
Start with small projects, simple molds, and two colors. Coasters and keychains are the right first projects because the scale is manageable and the material cost is low if something goes wrong. Buy a two-part art epoxy from a reputable brand (ArtResin, Entropy Super Sap, or similar), nitrile gloves, silicone molds, and basic pigments. Work at room temperature in a well-ventilated space. Read your specific resin’s instructions for the correct mixing ratio before opening anything.
Why is my resin sticky after curing?
Sticky resin almost always comes from incorrect mixing: wrong ratio, insufficient mixing time, or not scraping the sides of the mixing cup. Move the sticky piece to a warmer environment for 24 hours first, in case the issue is temperature. If it’s still tacky, remove any liquid resin, sand the surface lightly, and apply a fresh properly mixed coat. The fresh coat bonds to the under-cured surface and cures correctly on top of it.
How long does resin take to cure?
Surface-dry (touch without sticking): 24 hours for most art resins. Demolding safe: 48 hours minimum, 72 hours to be safe. Fully cured and food-safe: 72 hours. Deep pour resins take longer: 48 hours to touch-dry, 5 to 7 days for full cure in thick castings. Temperature speeds or slows these times significantly. At 15°C, expect cure times to roughly double.
Can I use resin art outdoors?
Finished resin art can be used outdoors with precautions. UV exposure degrades most epoxy resins, causing yellowing over months to years. For outdoor pieces, use a UV-resistant marine-grade epoxy or a UV-blocking sealer over the finished piece. Keep in mind that thermal expansion from temperature swings can cause delamination on panels with wood substrates if the bond isn’t solid. Fully enclosed, well-bonded pieces handle outdoor conditions much better than poured panels.
What can I add to resin to create color?
Mica powder pigments: metallic and pearlescent effects, easiest to control. Alcohol inks: translucent, vibrant effects that create organic swirling patterns. Resin pigment pastes: opaque or semi-opaque colors, strong and reliable. Acrylic paint: works but can affect cure if overused (water content). Do not use watercolor, food coloring, or oil-based paints. Keep total colorant volume under 6% of the resin mixture to avoid affecting the cure.
How do I remove bubbles from resin?
A butane torch held 15 to 20 cm above the surface, moved continuously. Brief passes are more effective than holding the torch still. For deep bubbles in the mix before pouring, warm the resin bottles in warm water for 5 to 10 minutes before mixing. Pour from low height to minimize air introduction. Work at the recommended temperature range (21 to 24°C) for the most naturally bubble-free result. Check the surface every 10 to 15 minutes during the first hour and torch any new bubbles that appear.
Is resin art safe to make at home?
Yes, with proper precautions. Wear nitrile gloves every time you handle uncured resin. Work in a well-ventilated space, ideally with a window open or a fan running. Wear a respirator with organic vapor cartridges for extended sessions or large pours. Dispose of cured resin scraps as solid waste (once cured, resin is inert and non-hazardous). Liquid uncured resin is a skin sensitizer: repeated skin contact without protection can cause allergic reactions that worsen with each exposure.
Starting Your First Pour
The piece in my garage is still there. I could have fixed it at any stage: a second pour over the sticky patch, sanding the cloudy section, warming the workspace before starting. I didn’t know enough to fix it then. Now I do.
Every resin artist has a failure story. The useful ones are the ones where you identify exactly what caused the problem, not just that the problem happened. Write down your ratio, your mixing time, your room temperature, and your working time for every pour. When something goes wrong, that record tells you which variable to change.
Start with coasters. Pour two at a time so you can test variables between them. Get comfortable with the material’s working time before attempting anything that requires precision timing. The first five pours teach you more than ten articles. The craft rewards patience over speed, and observation over assumption.
- 1.2Kshares
- Facebook0
- Pinterest1.2K
- Twitter3
- Reddit0