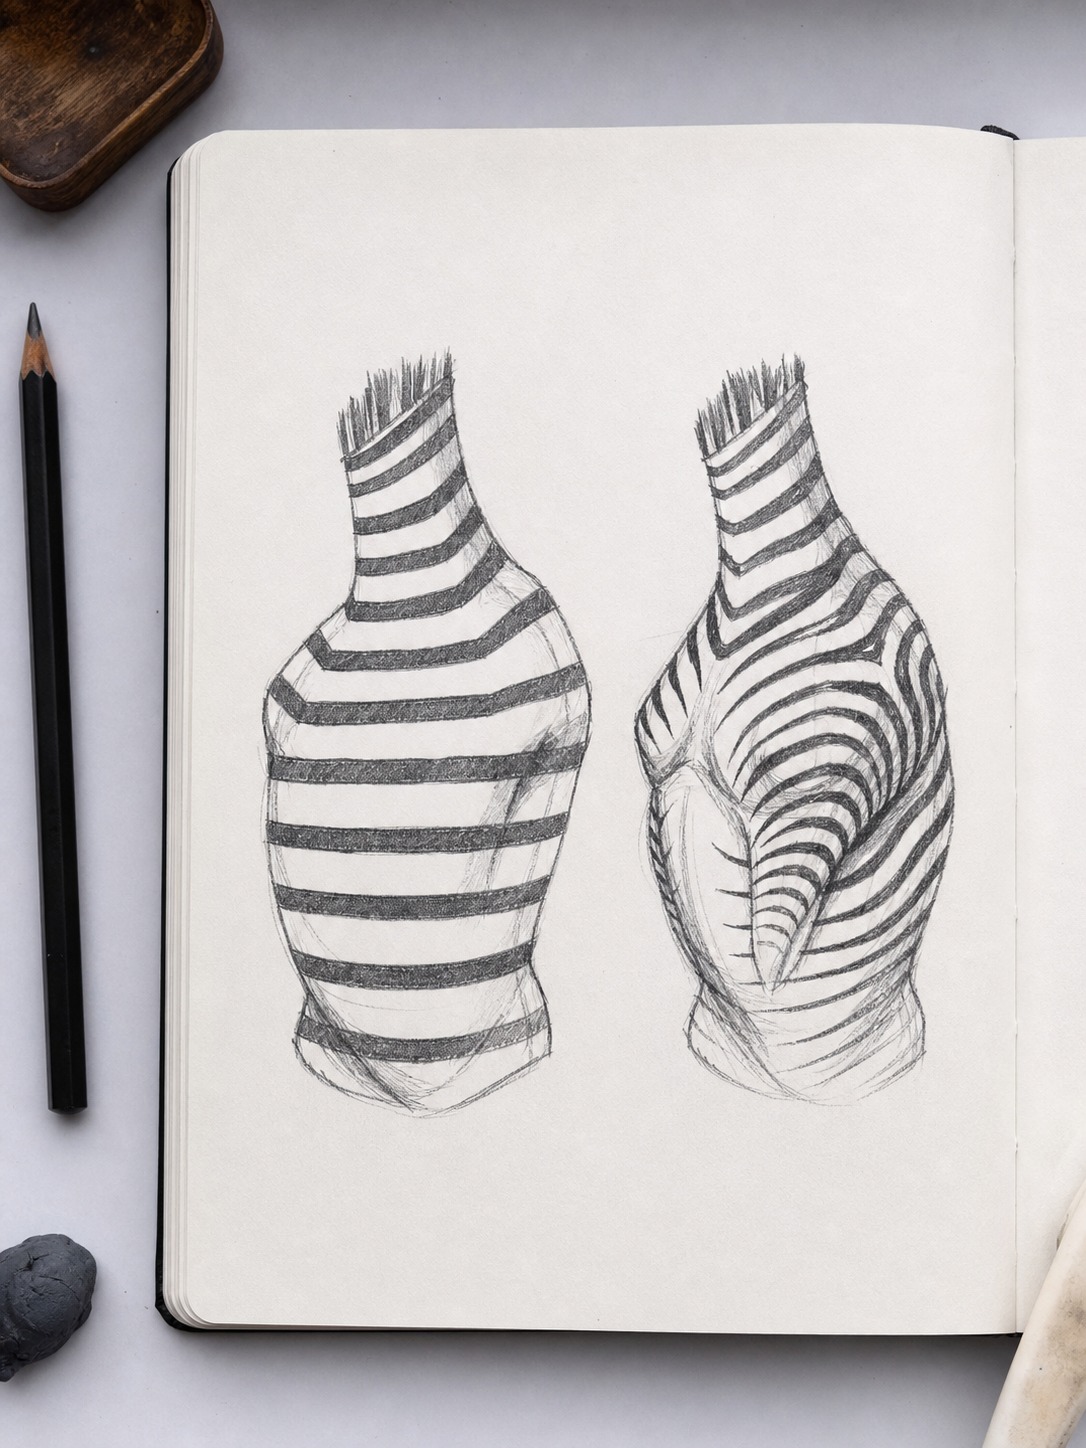
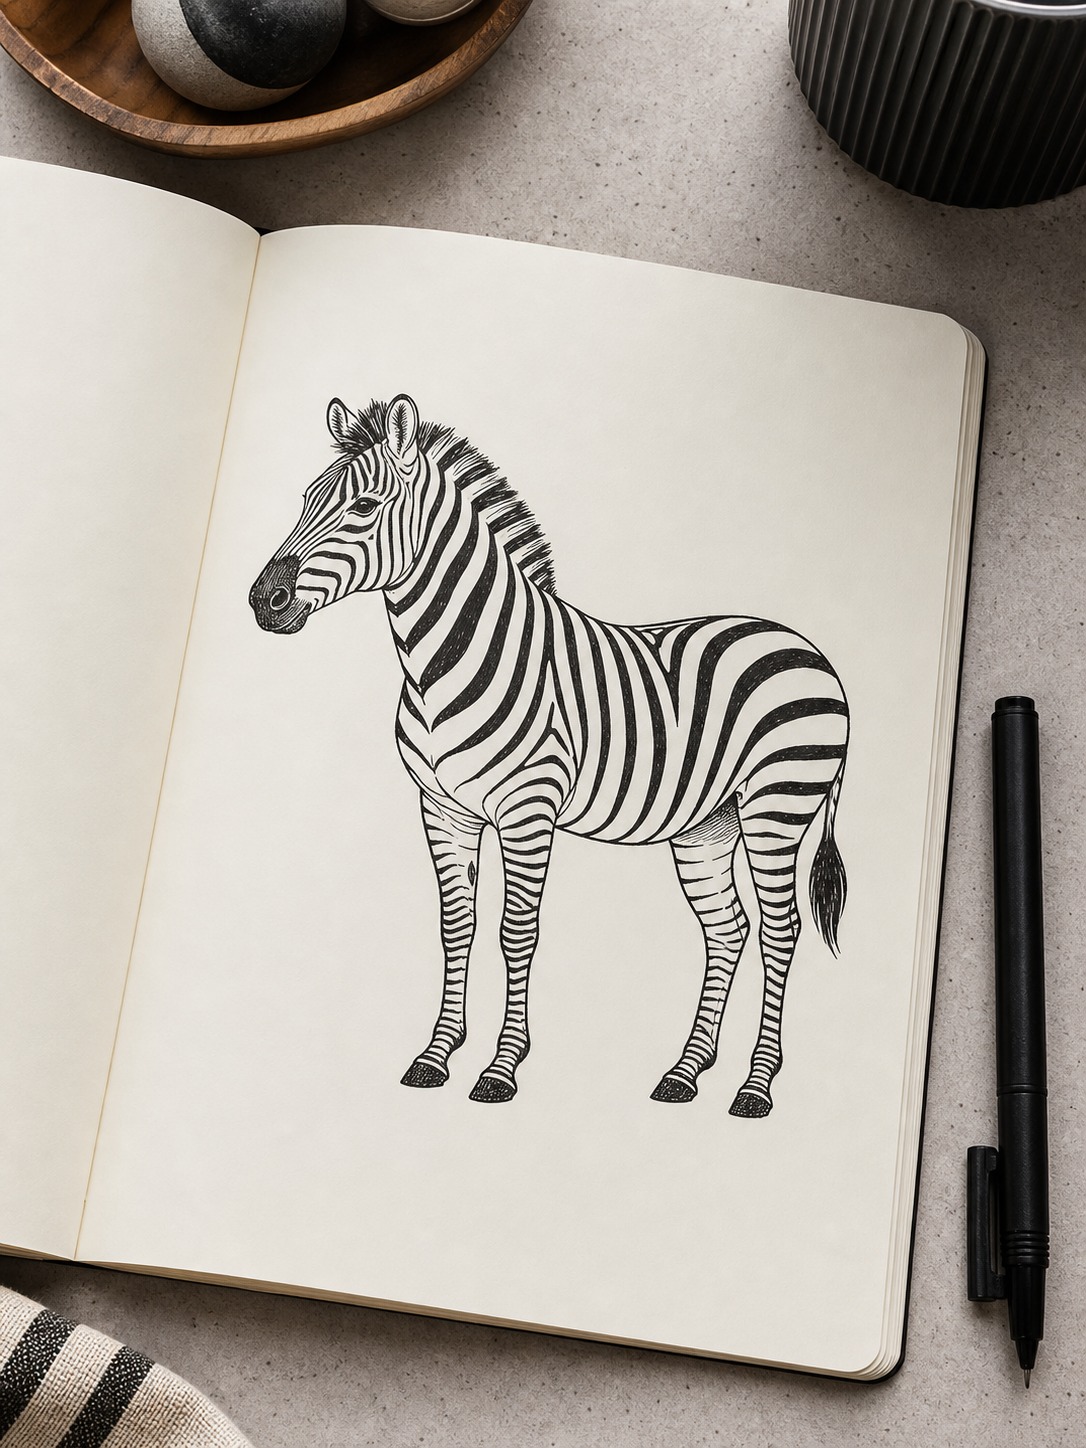
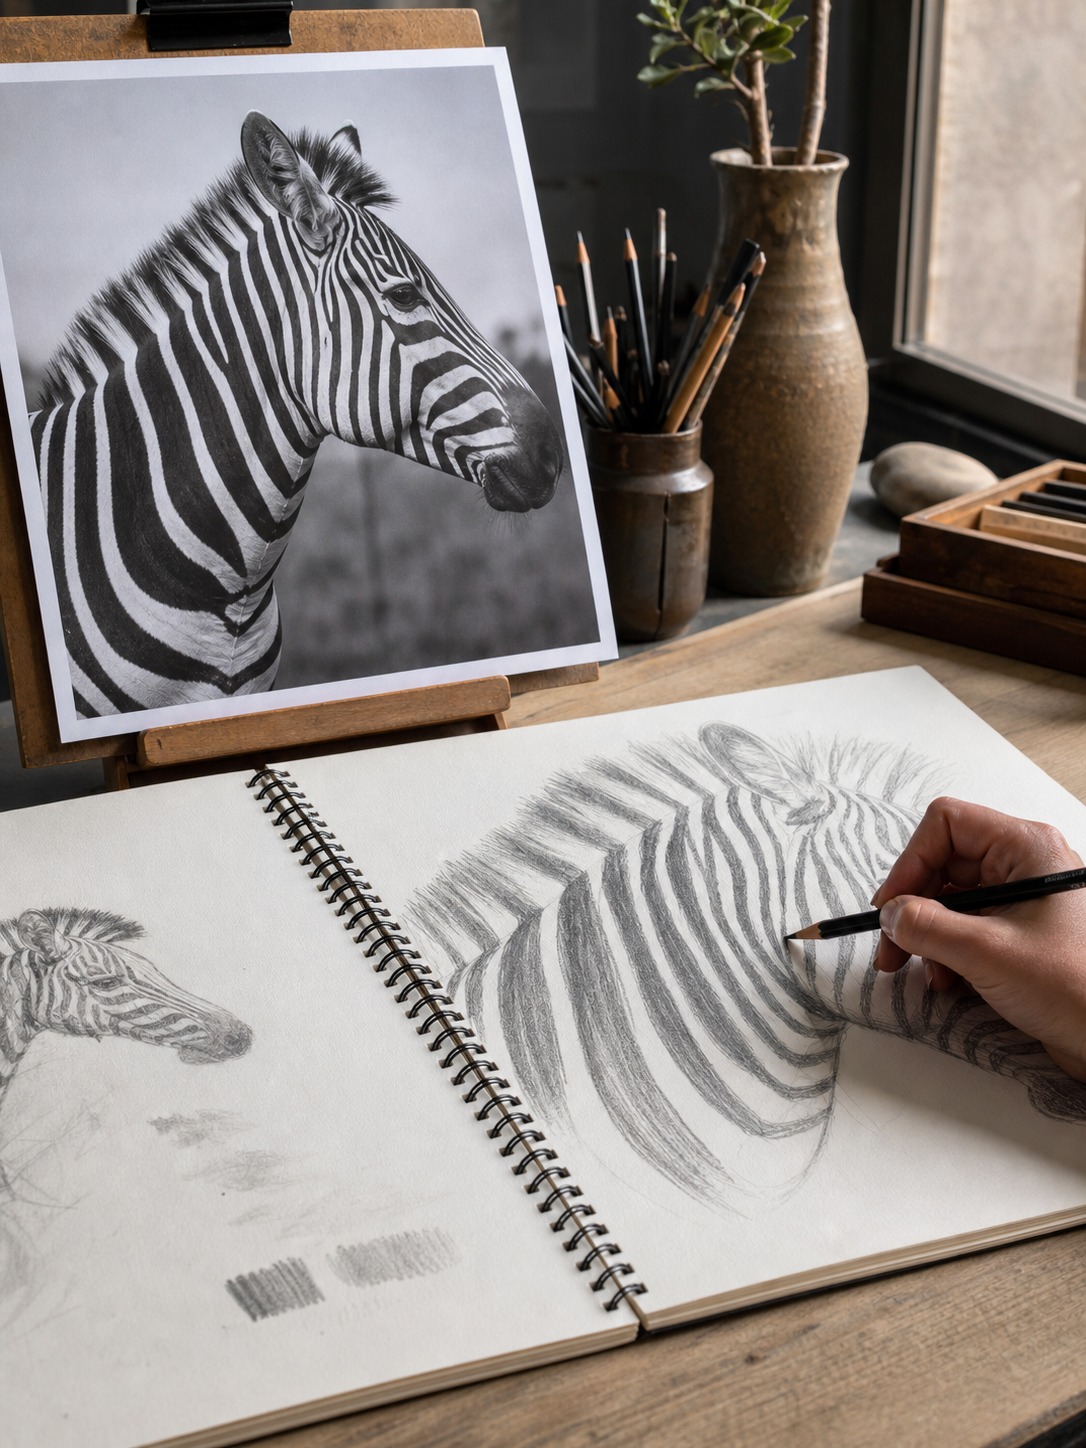
I remember a still-life and animal-study session where an instructor pointed at a student’s zebra sketch — technically fine oval body, careful even stripes — and asked why it still looked like a striped balloon rather than an actual animal. The answer was that every stripe ran flat and parallel, describing nothing about the barrel-shaped torso underneath. The stripes were decoration. They weren’t doing any of the work a good cross-contour line would do.
- Why Zebra Drawings Look Flat No Matter How Careful the Stripes Are
- How to Draw a Zebra Step by Step
- Stripes as Cross-Contour Lines, in Depth
- Stripe Pattern Individuality and Placement Logic
- Realistic vs. Stylized/Cartoon Zebra Stripes
- Common Zebra-Drawing Mistakes (and the Fix)
- Materials That Actually Matter
- Final Thoughts
- Frequently Asked Questions
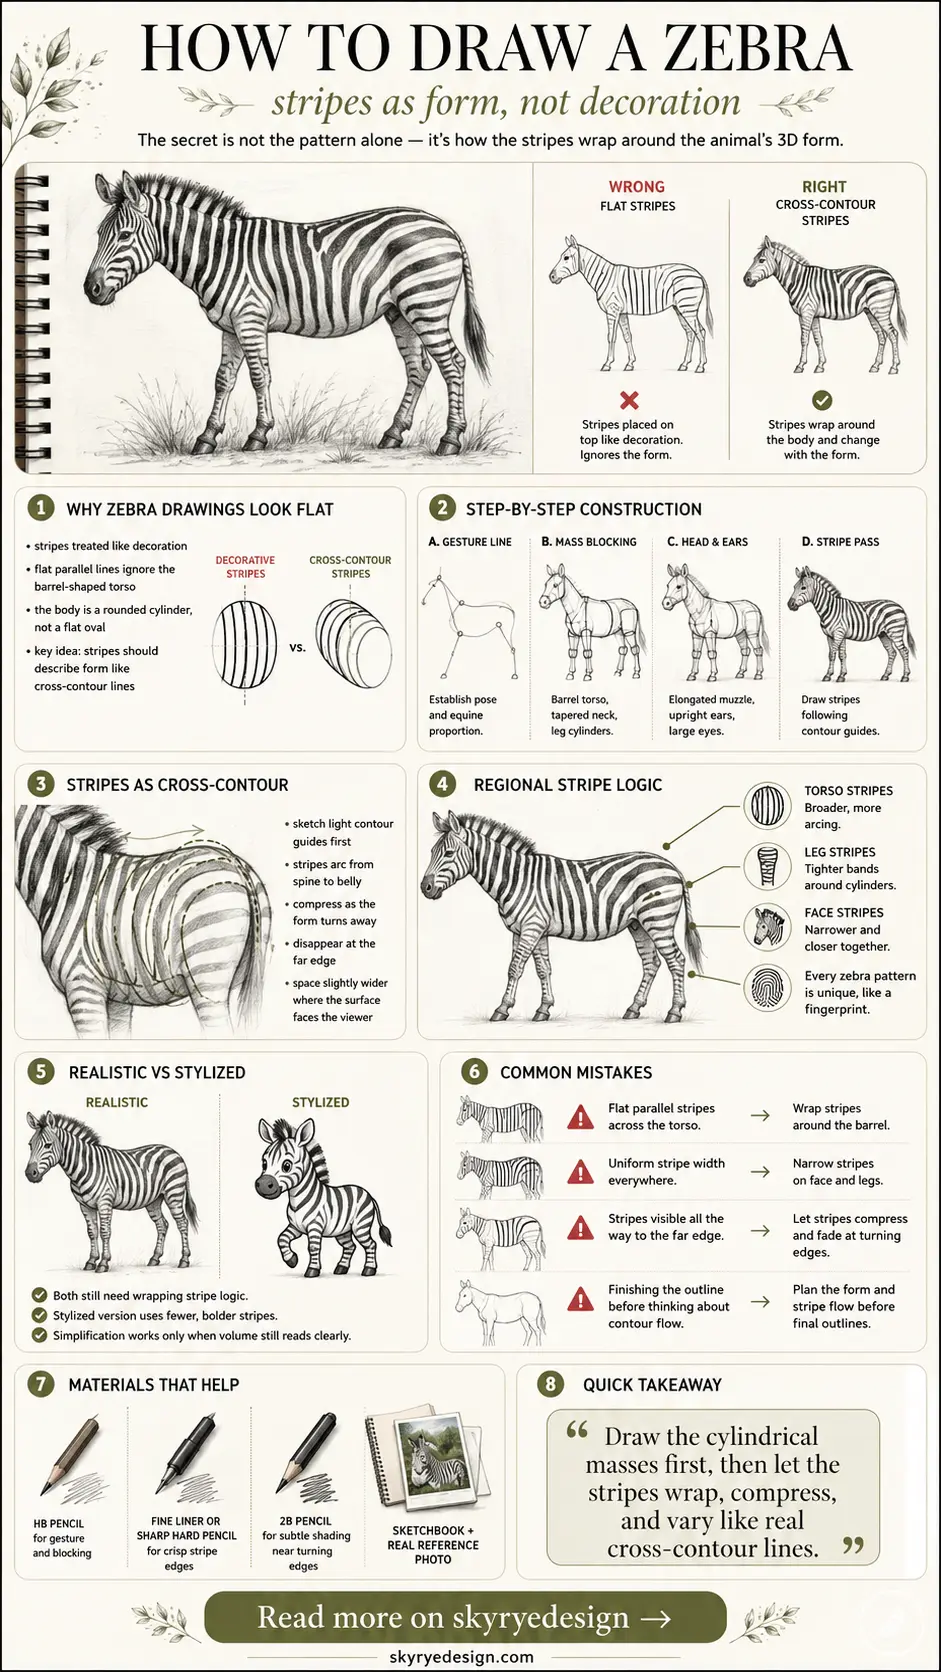
That’s the gap in essentially every zebra tutorial currently available. Every one of them treats stripes as a final coloring step, applied after the body’s outline is already finished. This guide treats stripes the way they actually function visually: as the single most useful tool available for describing how a zebra’s rounded, cylindrical form curves through space, drawn as wrapping cross-contour lines rather than flat decoration glued on top of a shape.
Why Zebra Drawings Look Flat No Matter How Careful the Stripes Are
Search “how to draw a zebra” and every result follows the same sequence: oval for the body, circle for the head, legs, then stripes added at the very end as a decorative pattern. Even careful, evenly-spaced stripe work can’t fix what’s already gone wrong by that stage — the underlying shape was built and finished before stripes ever entered the process, so there’s no structural reason for any given stripe to sit where it sits.
The Decoration Problem
A stripe applied as decoration is just a curved line drawn somewhere on an already-complete shape. It doesn’t respond to anything — not the barrel’s curvature, not the leg’s cylindrical form, not how the surface is turning away from the viewer at any given point. Compare that to a cross-contour line in life drawing, which exists specifically to describe a form’s curvature by wrapping around it and compressing where the surface turns. A zebra’s actual stripes function exactly like cross-contour lines already, which is genuinely useful — you don’t have to invent a technique, you just have to draw the stripes as if they’re doing that job instead of ignoring it.
What a Zebra’s Form Actually Does
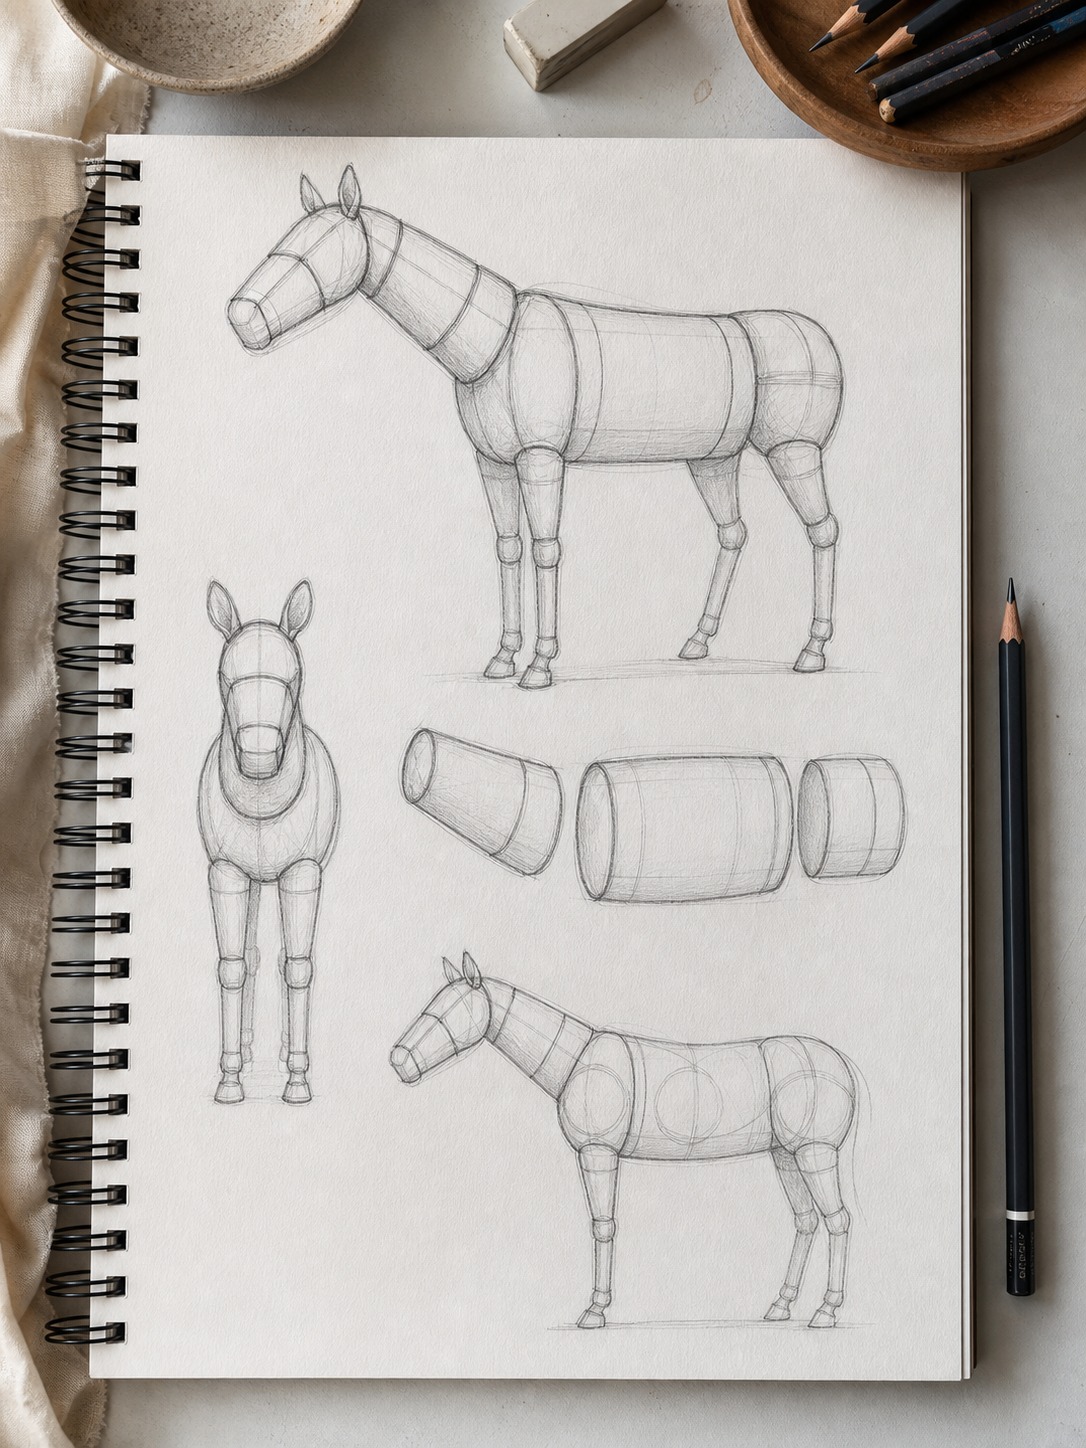
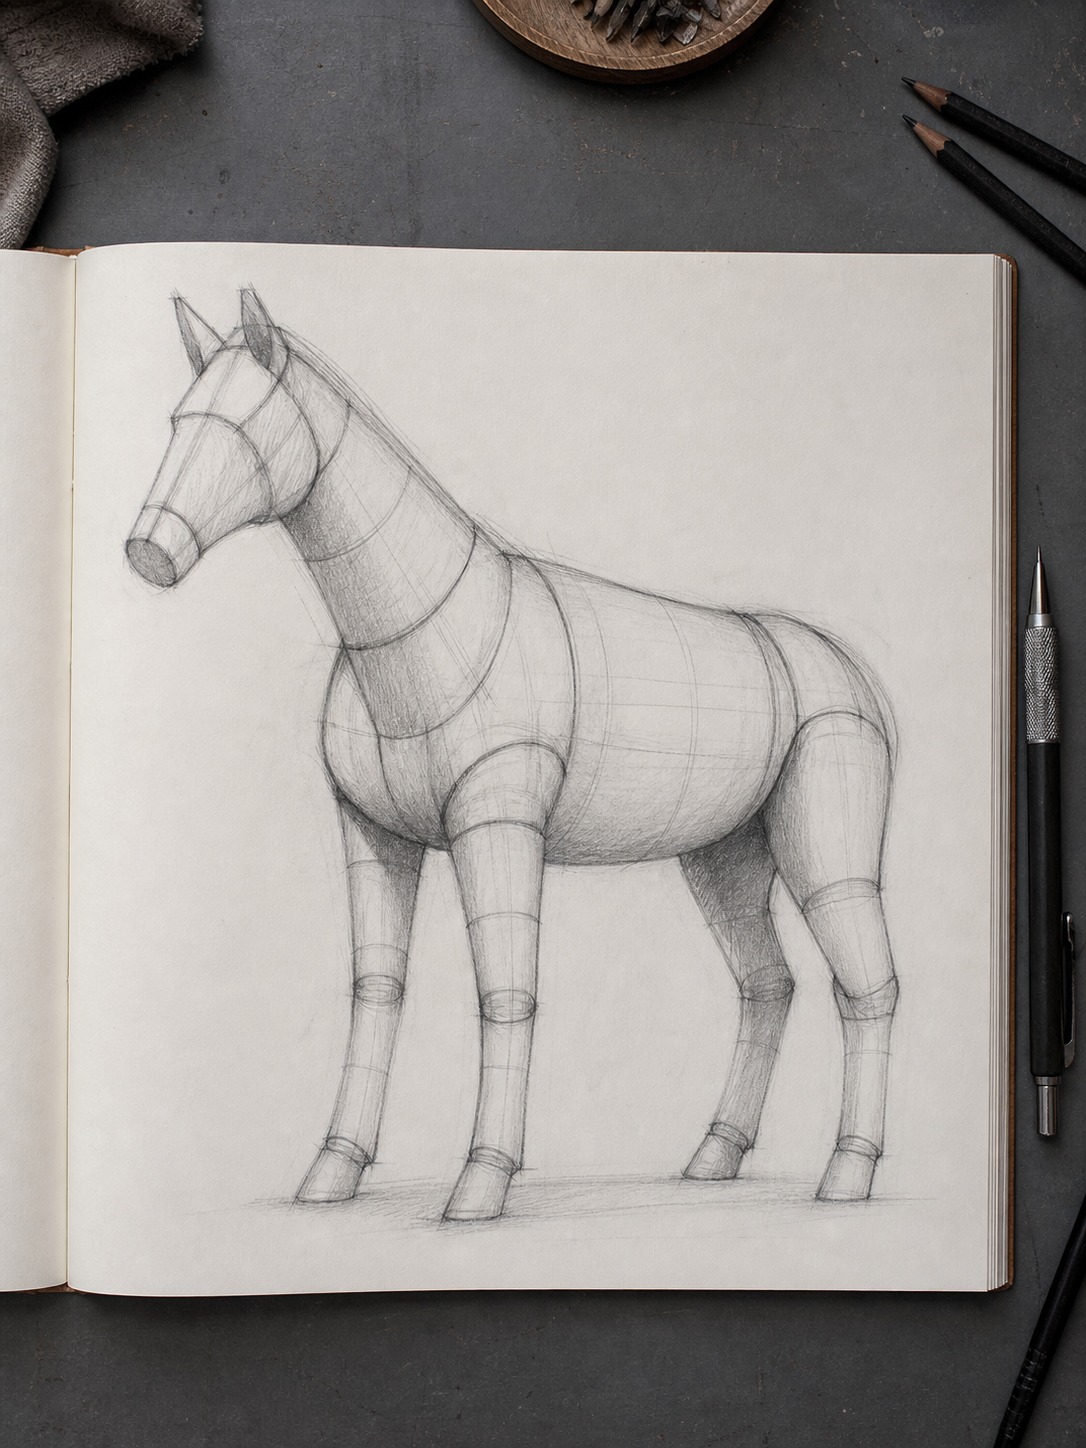
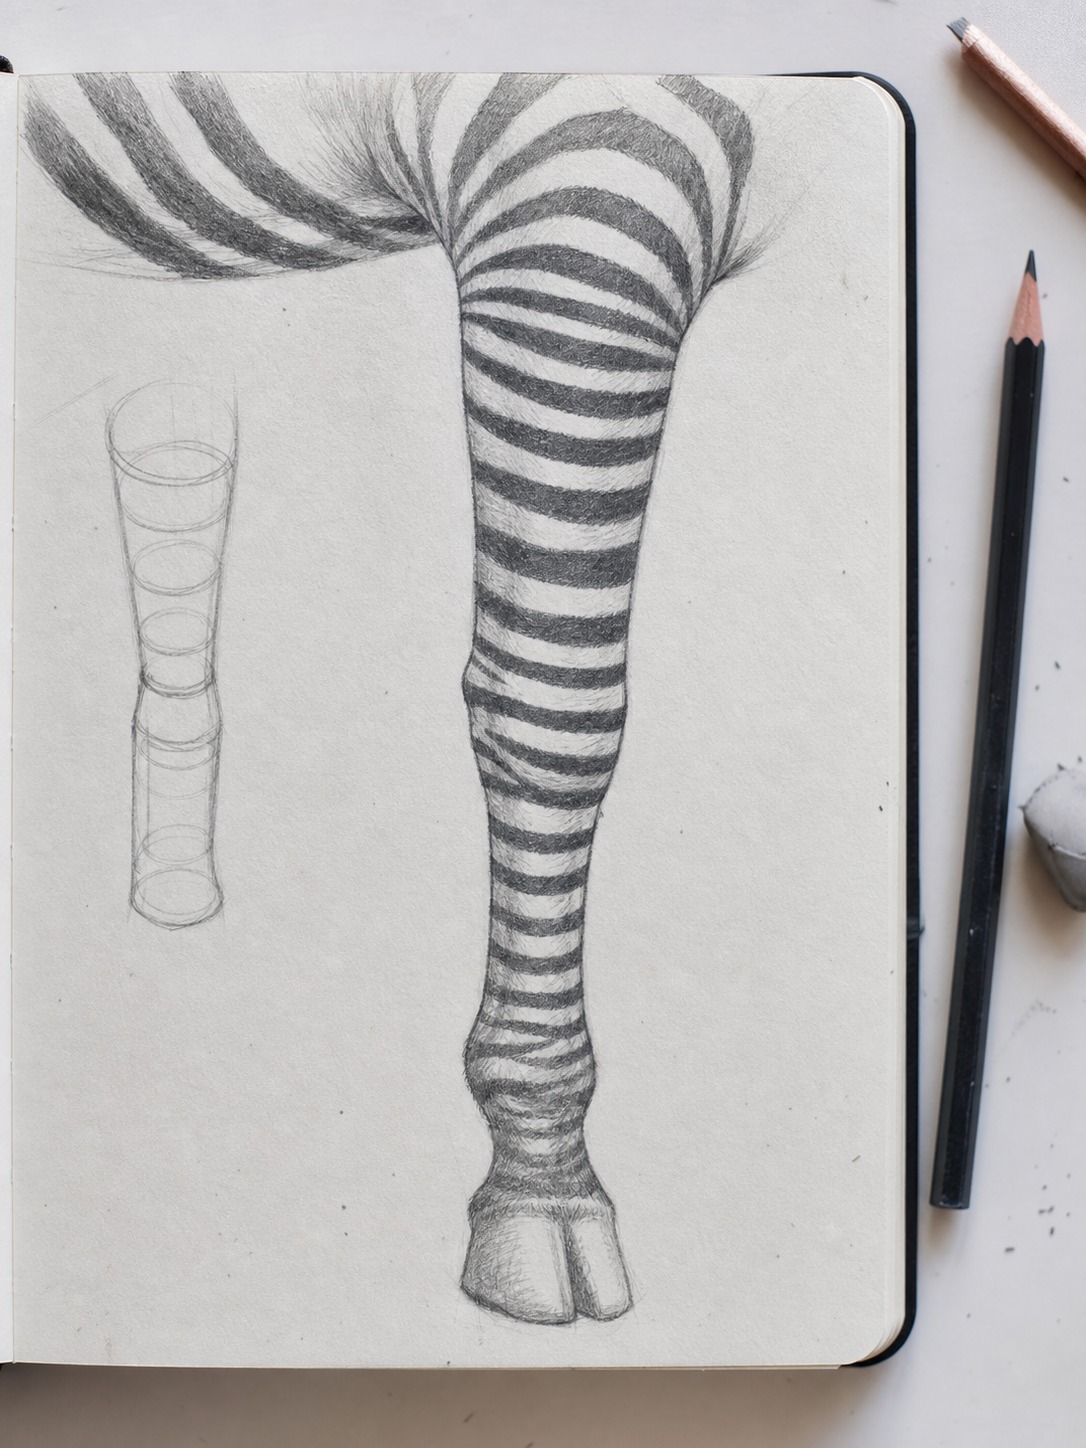
The torso is essentially a barrel — a wide, rounded cylinder — and each leg is a narrower cylinder attached at specific joint points. The neck curves as its own tapered cylinder connecting the barrel to the head. Every one of these forms turns away from the viewer at its edges, and a stripe wrapping around any of them has to compress, curve, and eventually disappear around that turning edge exactly the way a contour line would. Get the underlying cylindrical forms roughly right before adding a single stripe, and the stripes that follow have real structure to respond to.
How to Draw a Zebra Step by Step
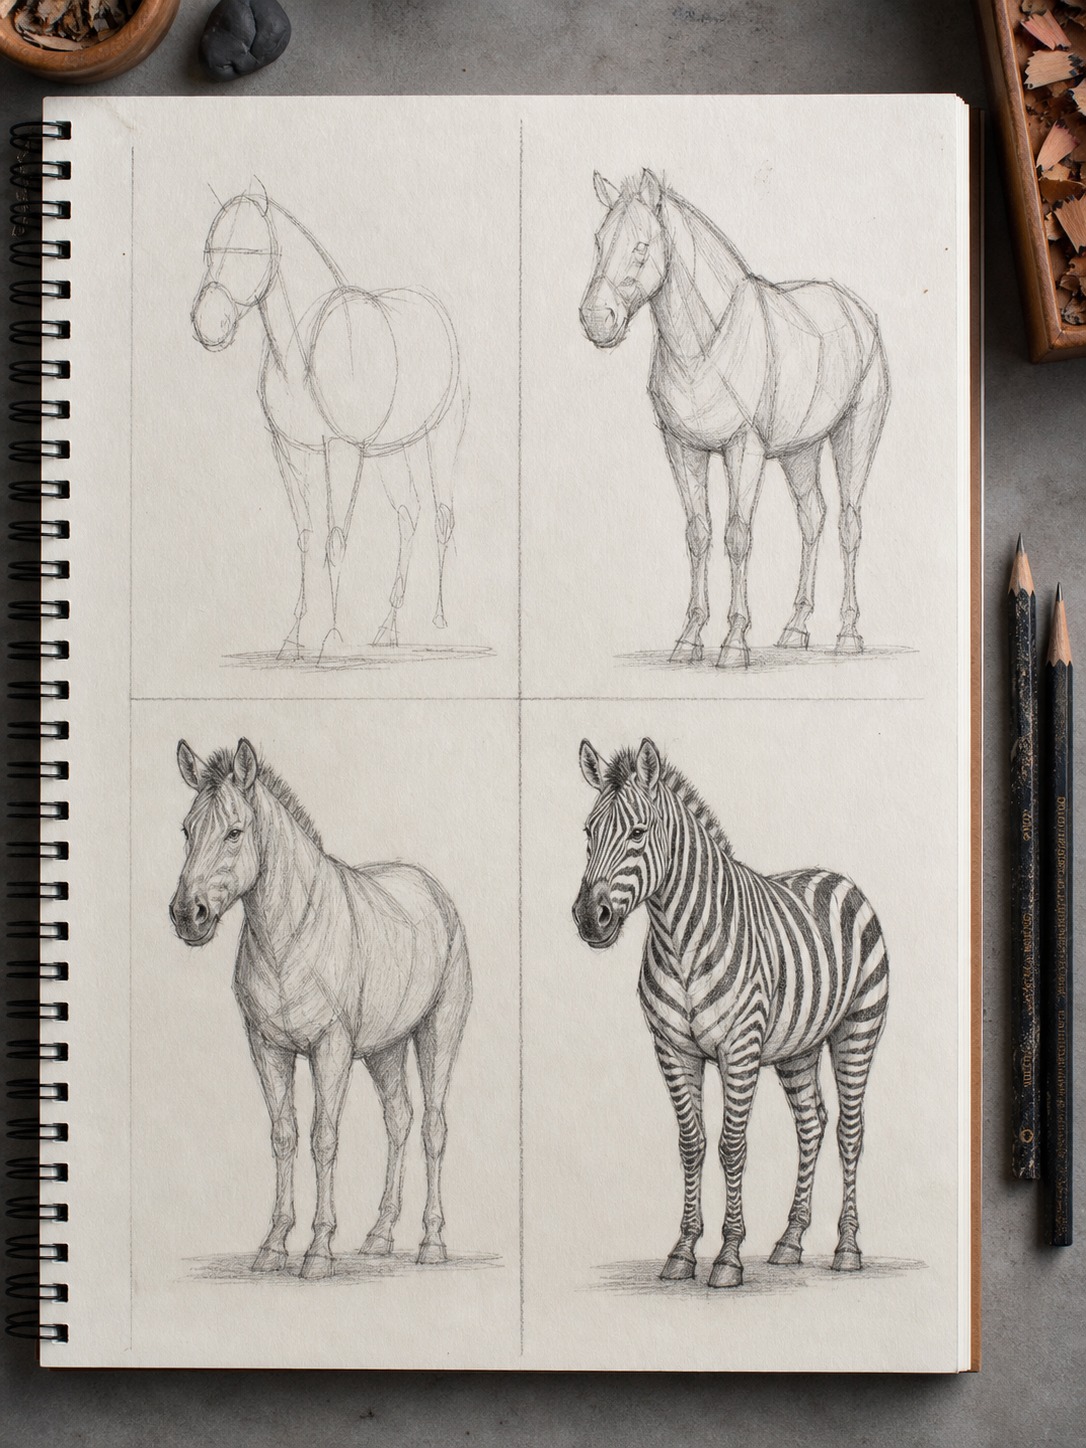
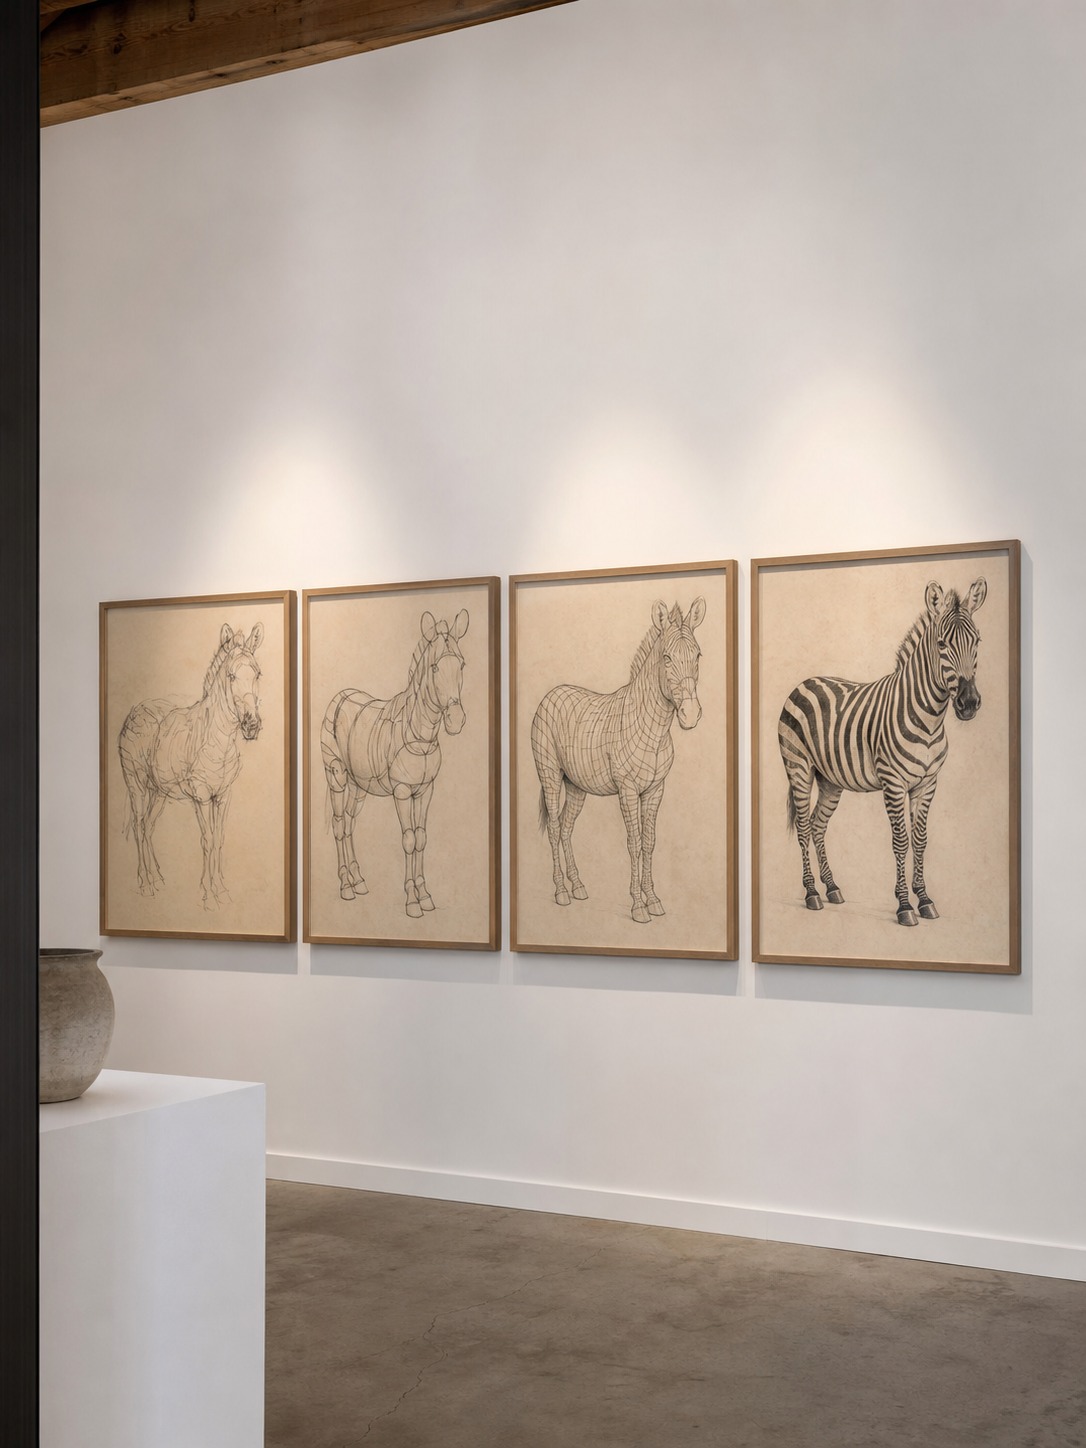
Four steps, same order every time — this replaces the oval-then-stripes method most tutorials default to.
Step 1 — Gesture Line and Equine Proportion
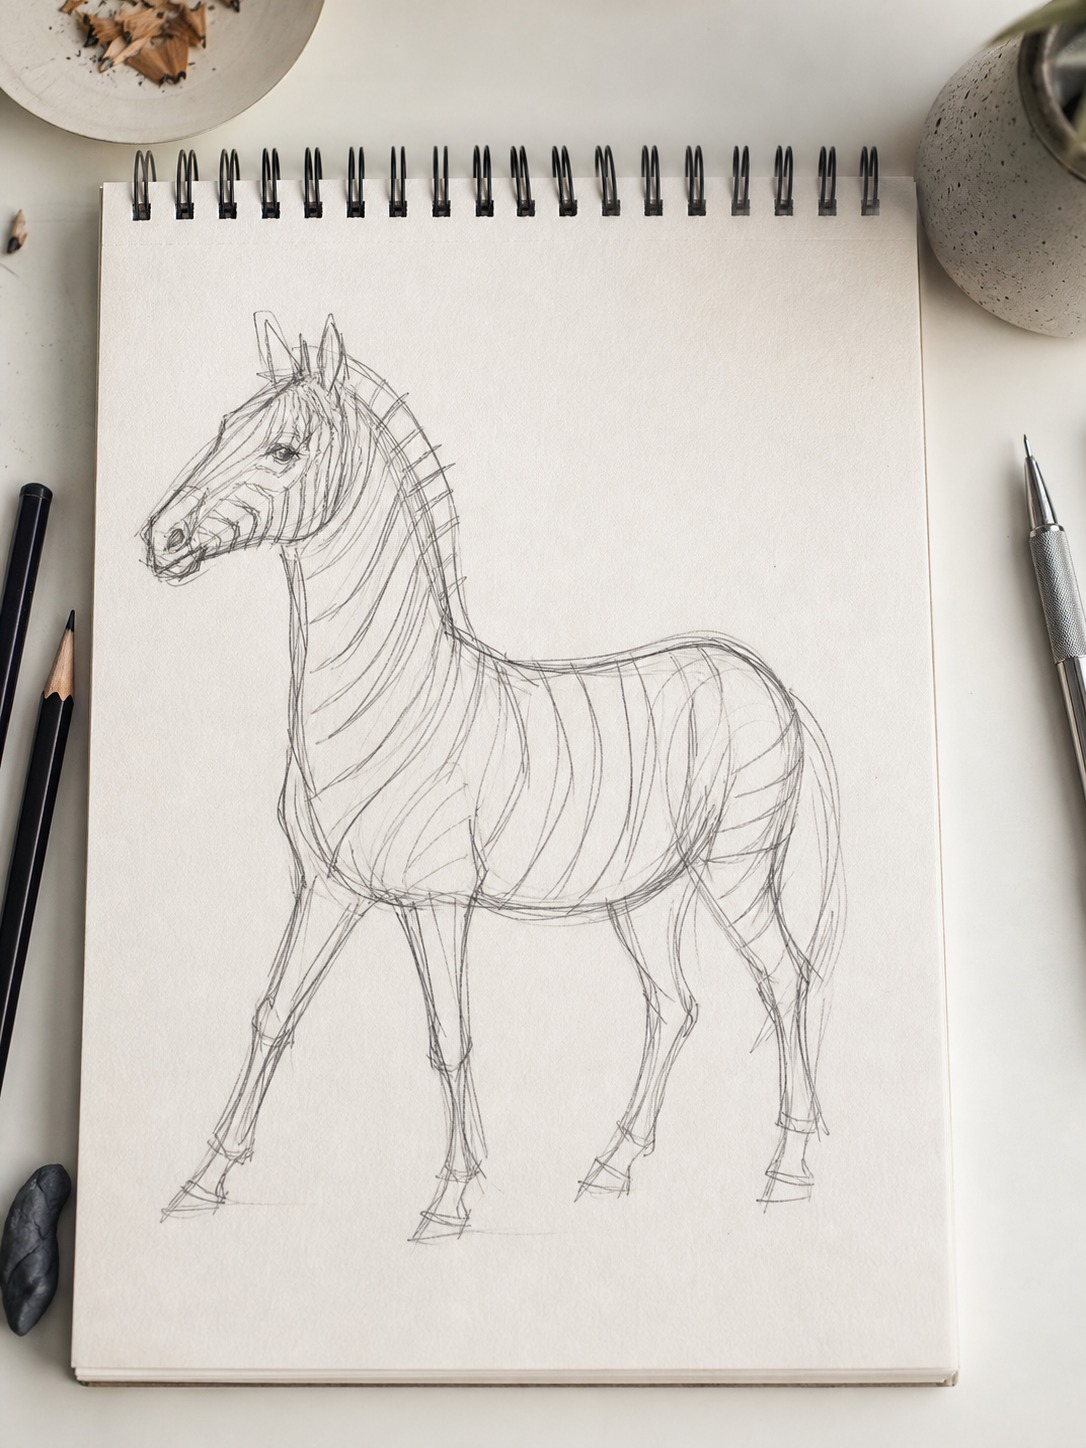
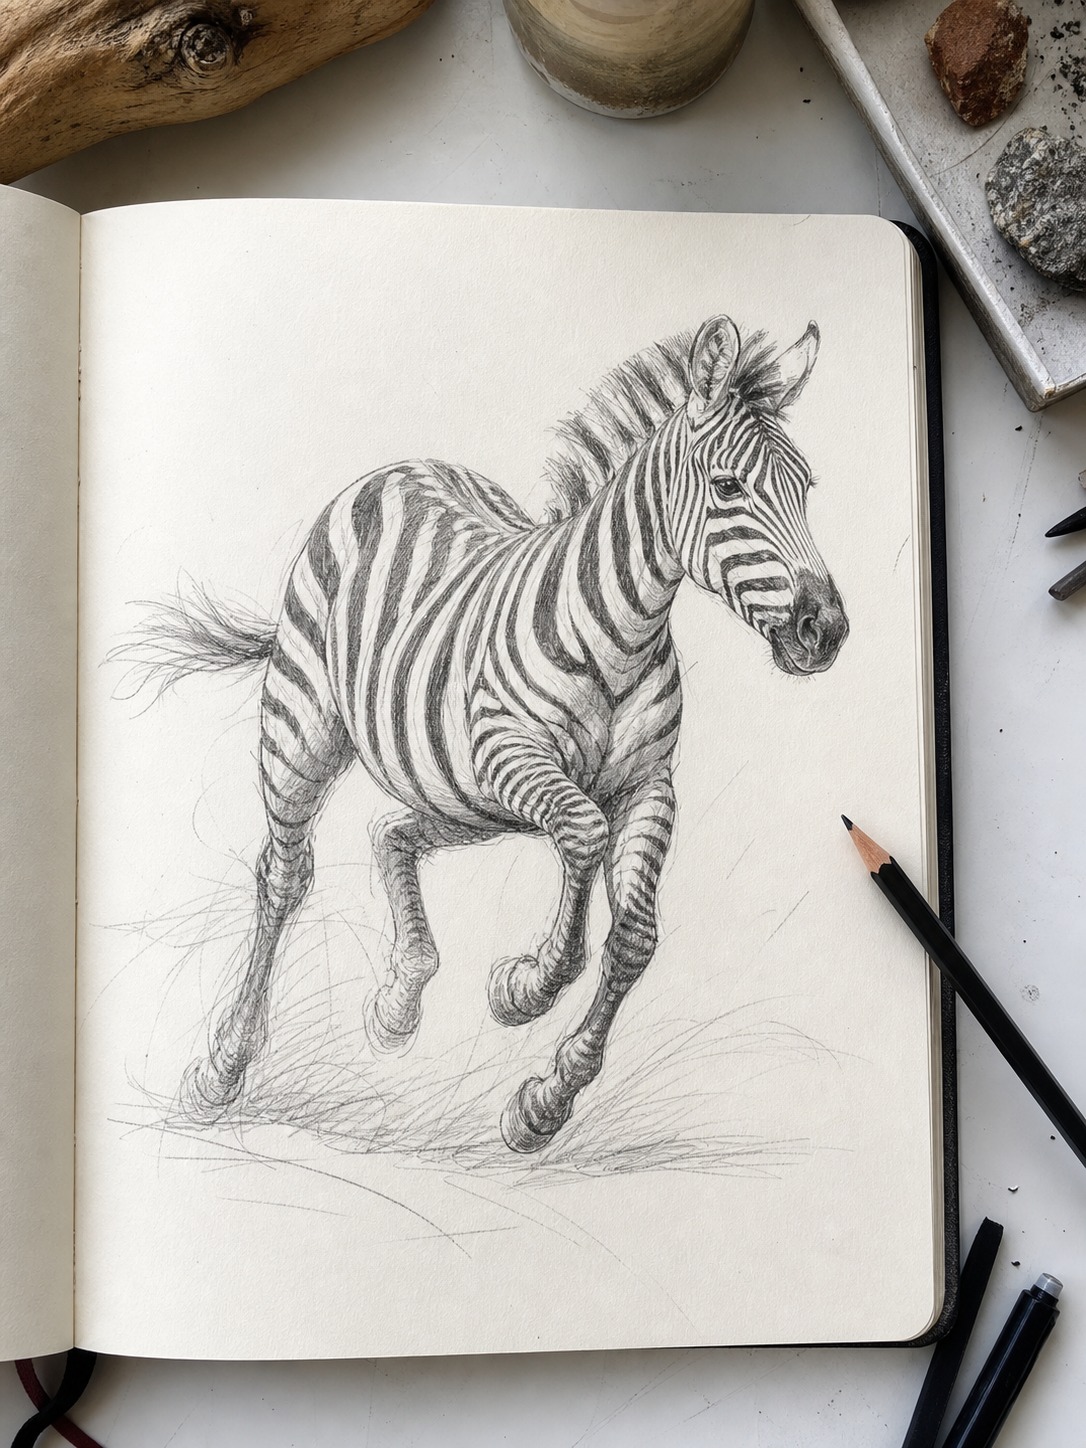
Start with a single flowing gesture line establishing the pose — zebras share their basic proportional logic with horses and donkeys, so the same equine construction principles apply: a relatively long neck, a substantial barrel-shaped torso, and legs that are proportionally longer and thinner than most people initially draw them. Commit to a specific pose here — grazing with the head lowered, standing alert, or mid-stride — since that decision shapes every subsequent step the same way a rabbit’s gesture line shapes everything that follows it.
Step 2 — Mass Blocking
Block the barrel-shaped torso, the tapered neck cylinder, and the head as simple volumes before refining any contours. Treat the torso specifically as a genuine cylinder rather than a flat oval — this single mental shift is what makes the stripe work in Step 4 actually function, since you can’t wrap a contour line around a shape you’ve drawn as flat.
Step 3 — Head, Ears, and Facial Features
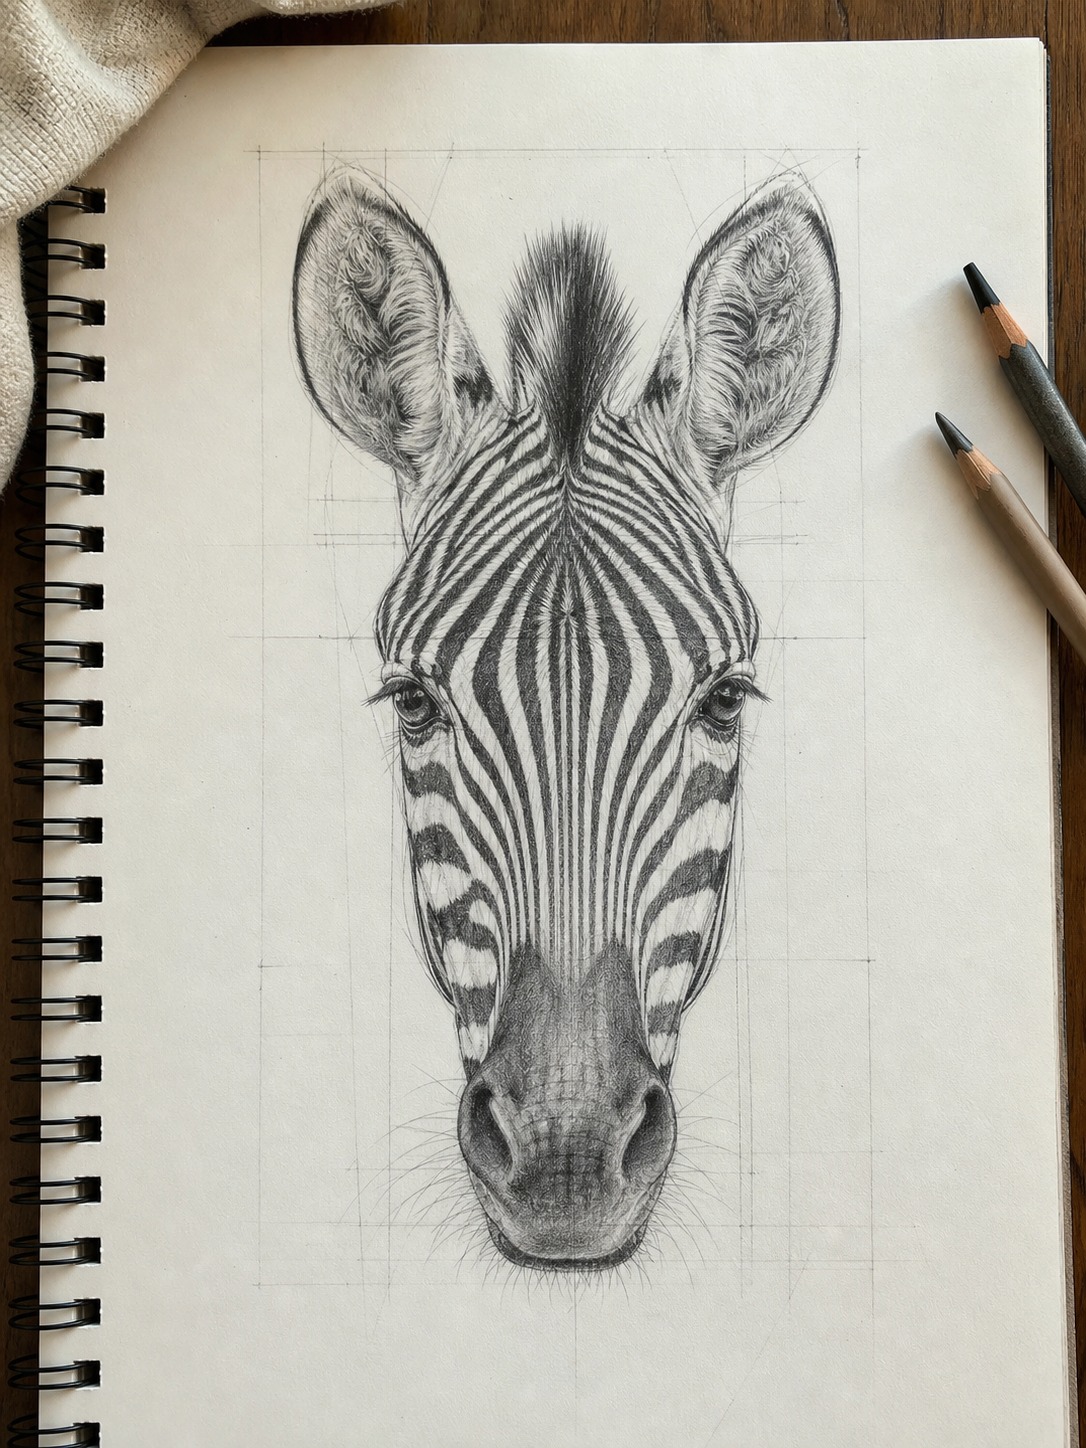
Zebra faces carry distinct proportions worth getting right: large, expressive eyes set relatively far apart, an elongated muzzle, and upright, mobile ears that sit noticeably higher and more forward than a horse’s. Block these as simple shapes first, refining only once the basic placement is confirmed against the head’s overall proportion.
Step 4 — Stripe Direction as Cross-Contour
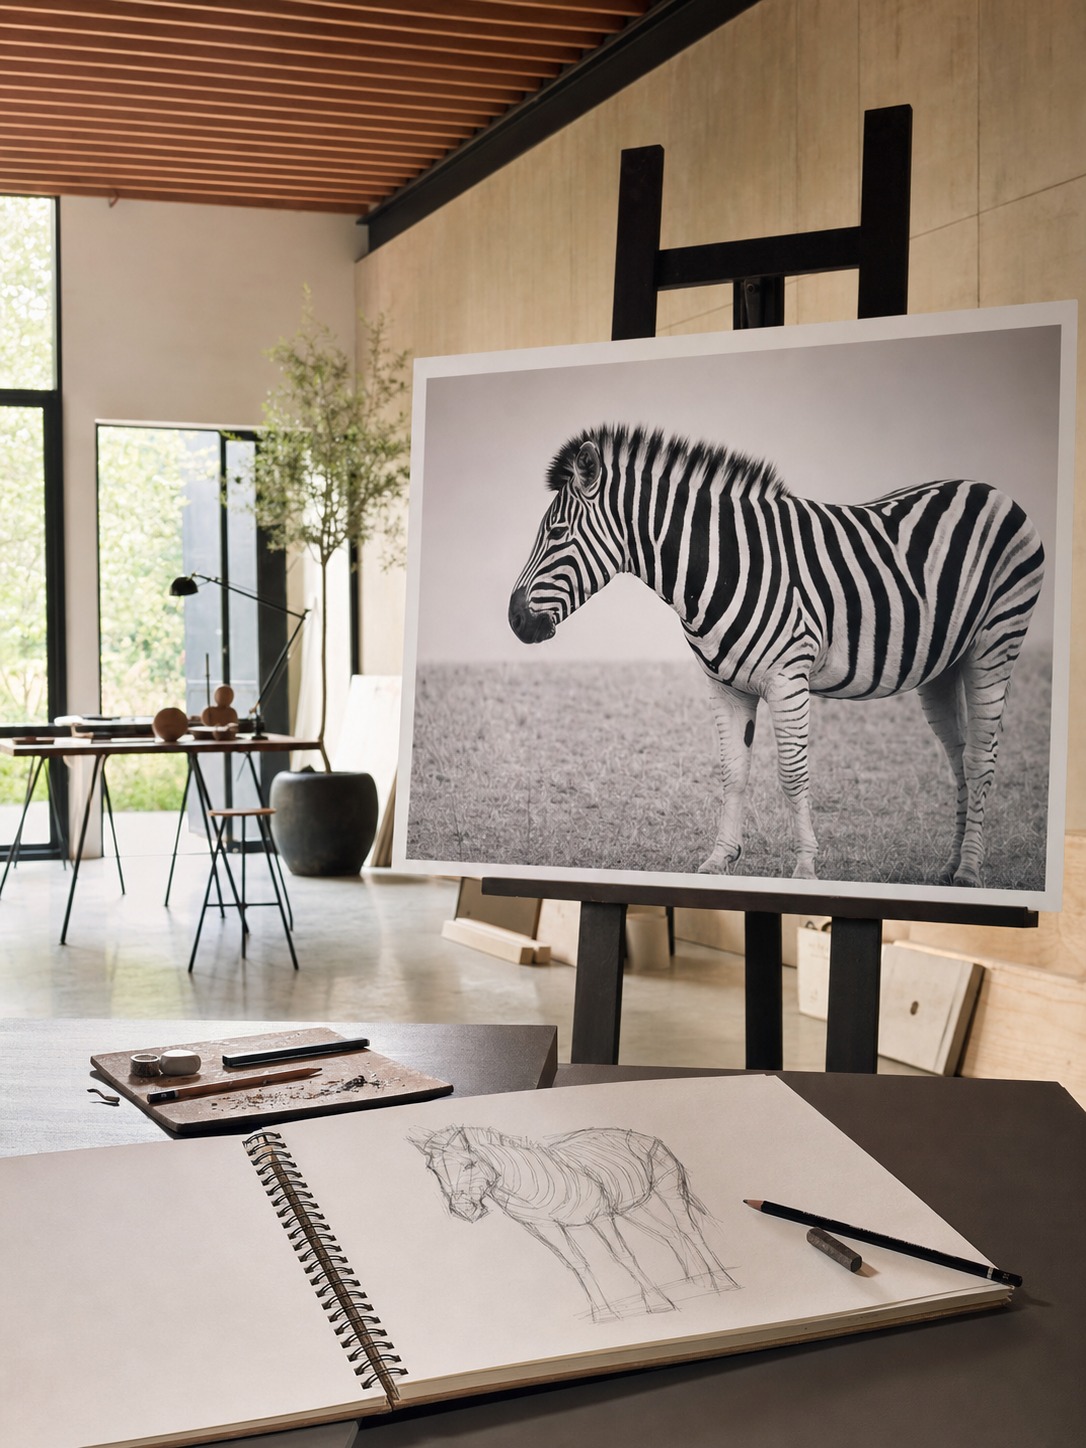
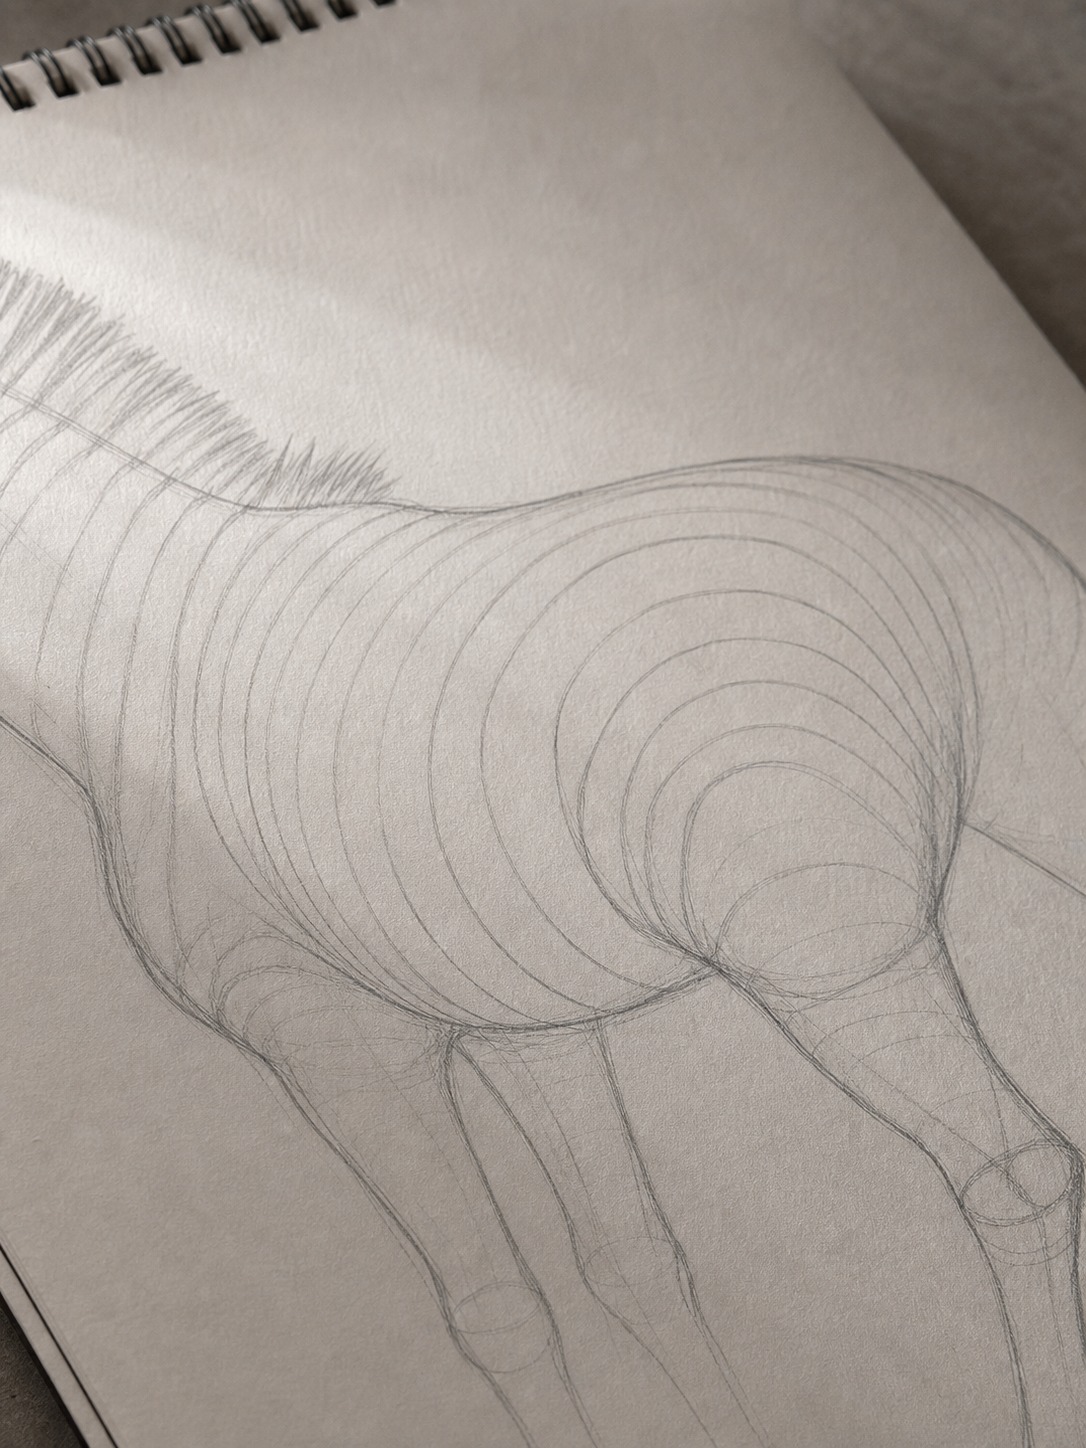
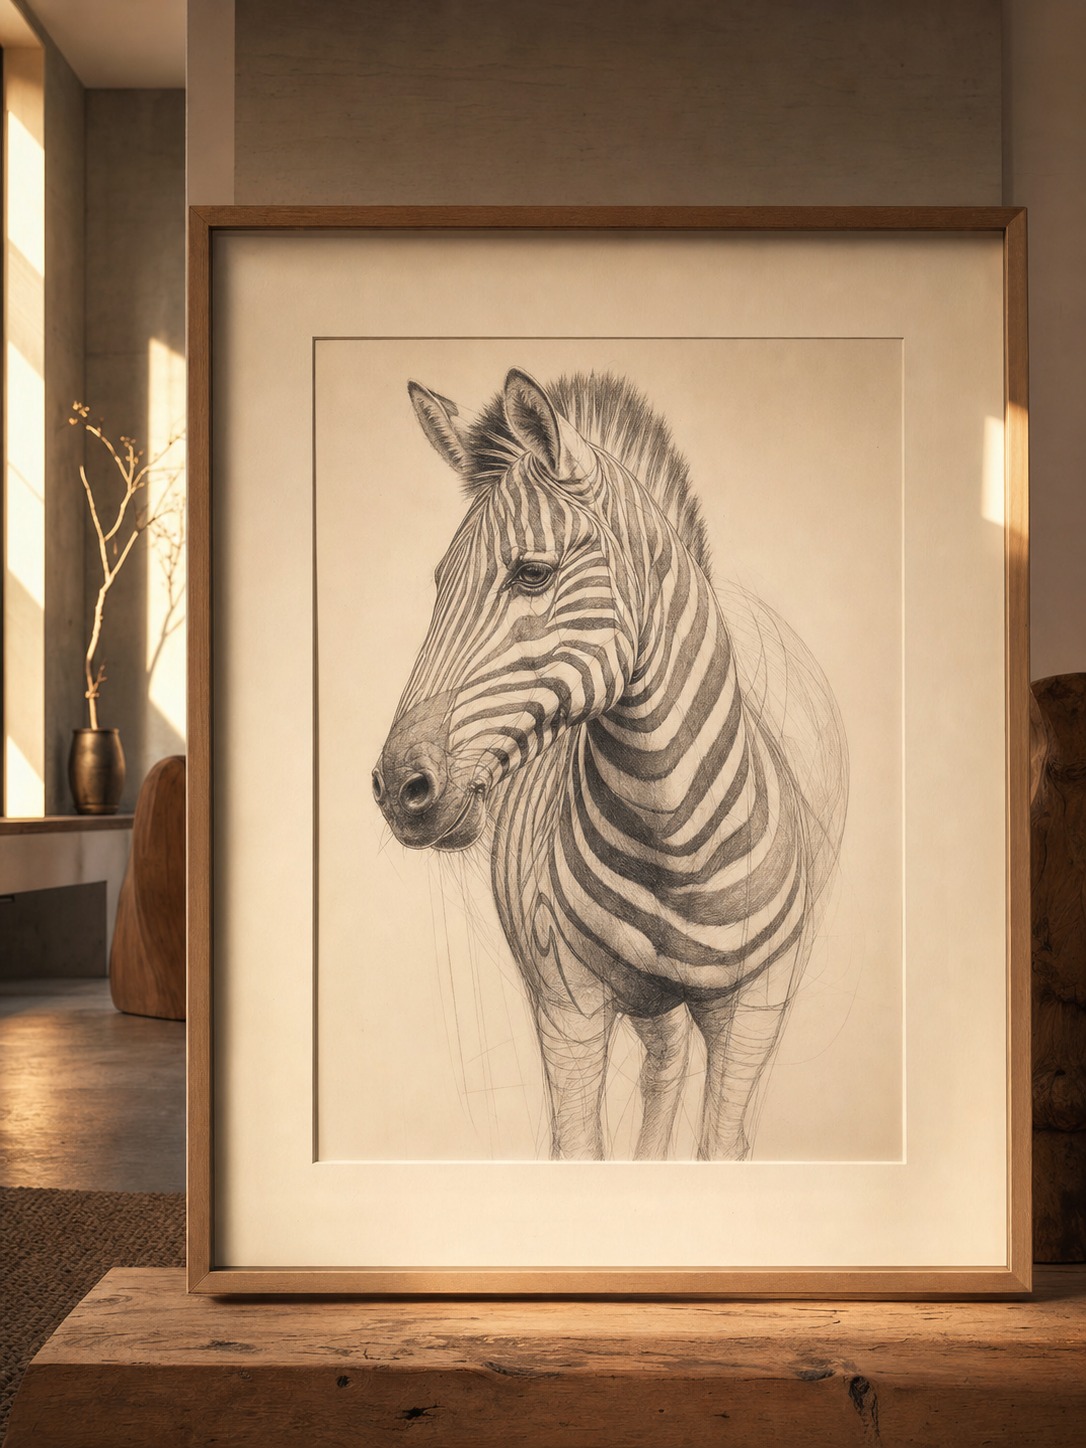
This is the step every other tutorial skips or flattens into decoration. Before drawing a single stripe, lightly sketch a few cross-contour guide curves wrapping around the torso cylinder, the neck, and each leg — the same kind of guideline you’d use to check a cylinder’s form in a still-life study. Then draw the actual stripes following those guide curves, letting them compress and curve tighter as they wrap around the far side of each form, and space slightly wider where the surface faces the viewer more directly.
Tip: Resist finishing the whole outline before touching stripes at all. Sketch the cross-contour guide curves as part of Step 2’s mass-blocking pass, even faintly — that habit alone prevents almost every flat-stripe mistake covered later in this guide.
Stripes as Cross-Contour Lines, in Depth
This deserves its own section because it’s the single technique separating a zebra that reads as a real animal from one that reads as a striped shape.
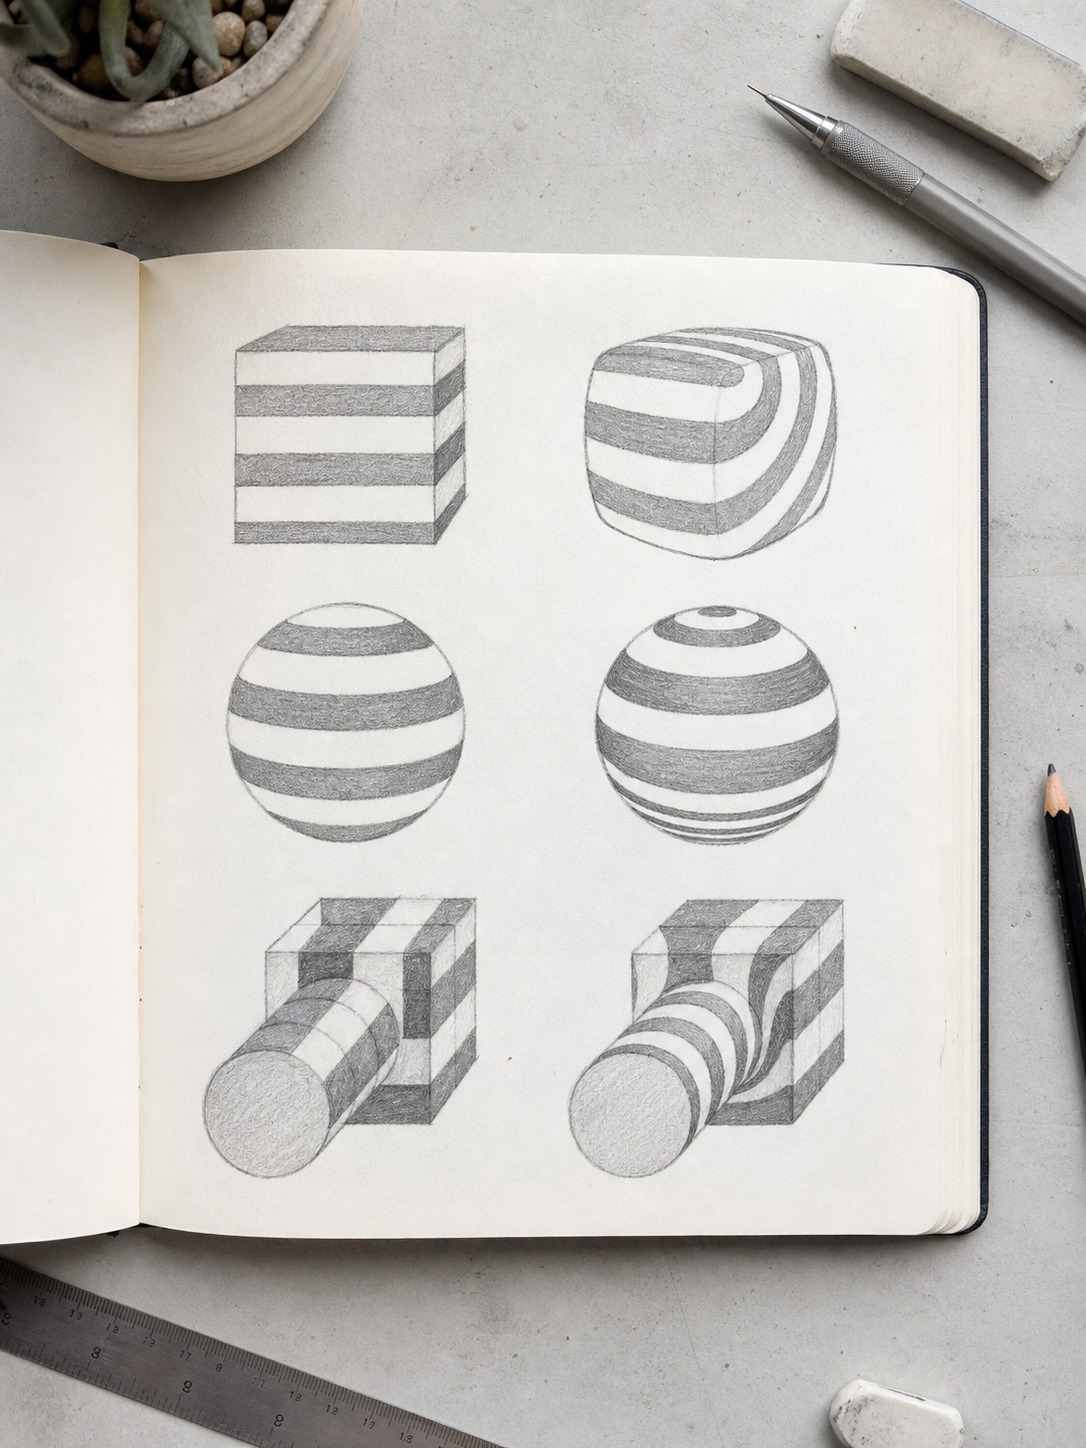
A cross-contour line, in any life-drawing context, is a line drawn across a form specifically to describe its curvature — think of the lines on a topographic map showing elevation, or the way a sculptor might mark guide lines around a cylindrical form before carving.
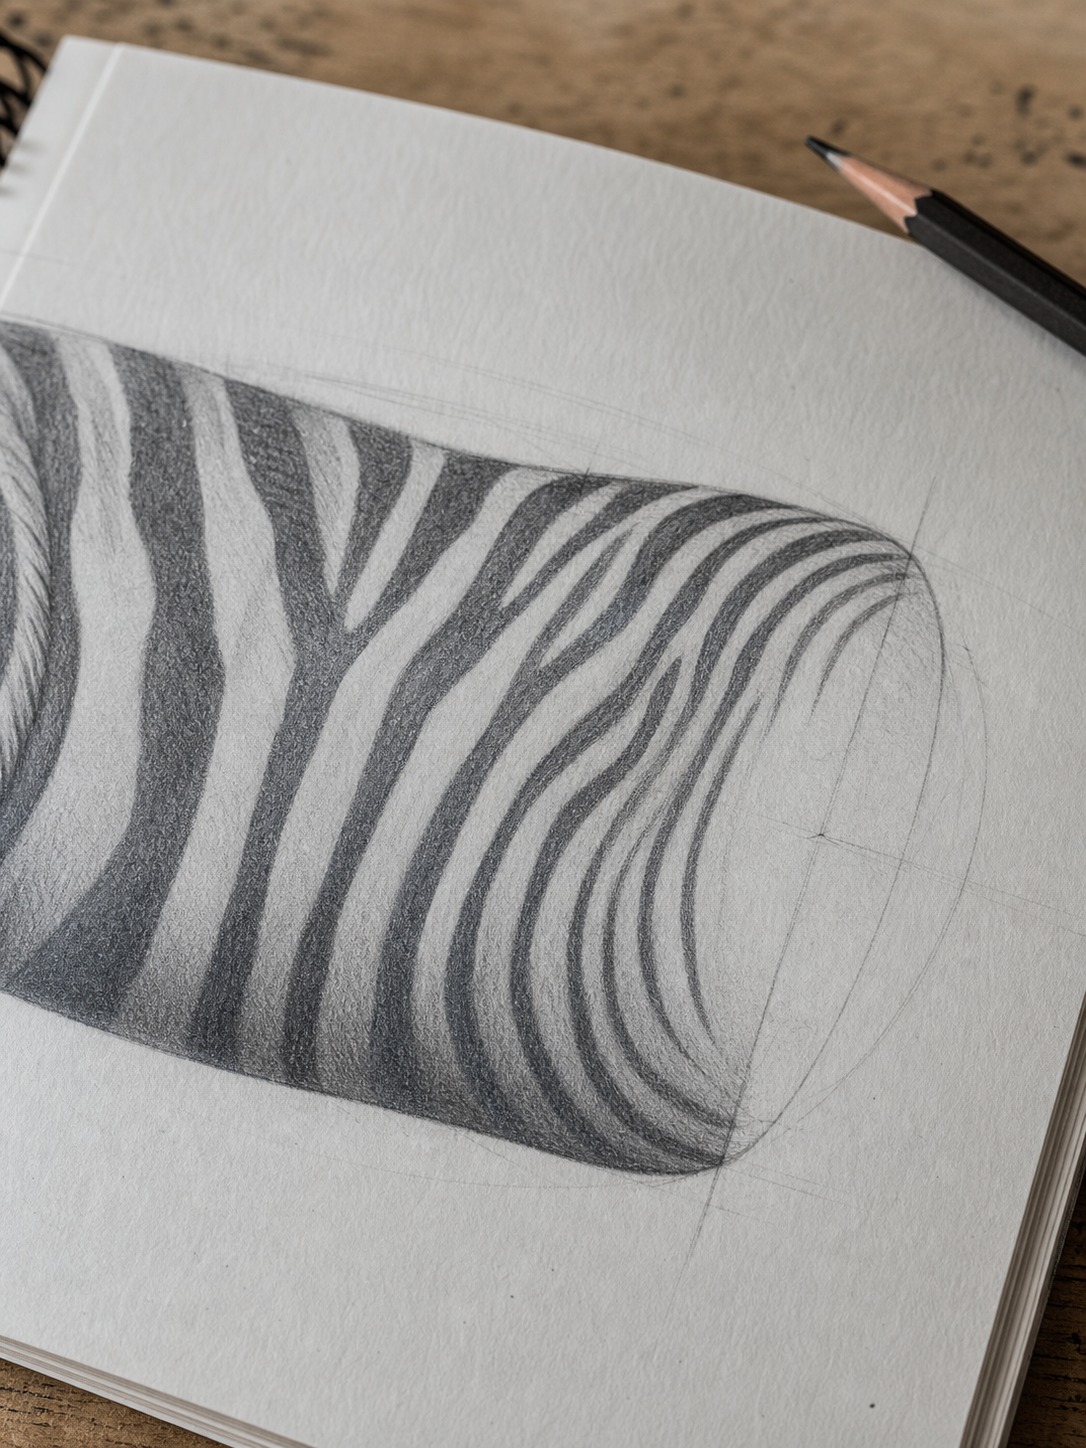
Zebra stripes are, structurally, already doing this job in real life: they wrap around the barrel of the torso, compress toward the spine and belly where the form curves away fastest, and space out more where the surface is most directly facing the viewer.
The practical technique: draw each stripe as a curve that follows the form’s cross-section at that point, not as an independently invented squiggle. On the torso, stripes should arc from spine to belly, curving to match the barrel’s roundness rather than running as straight diagonal lines.
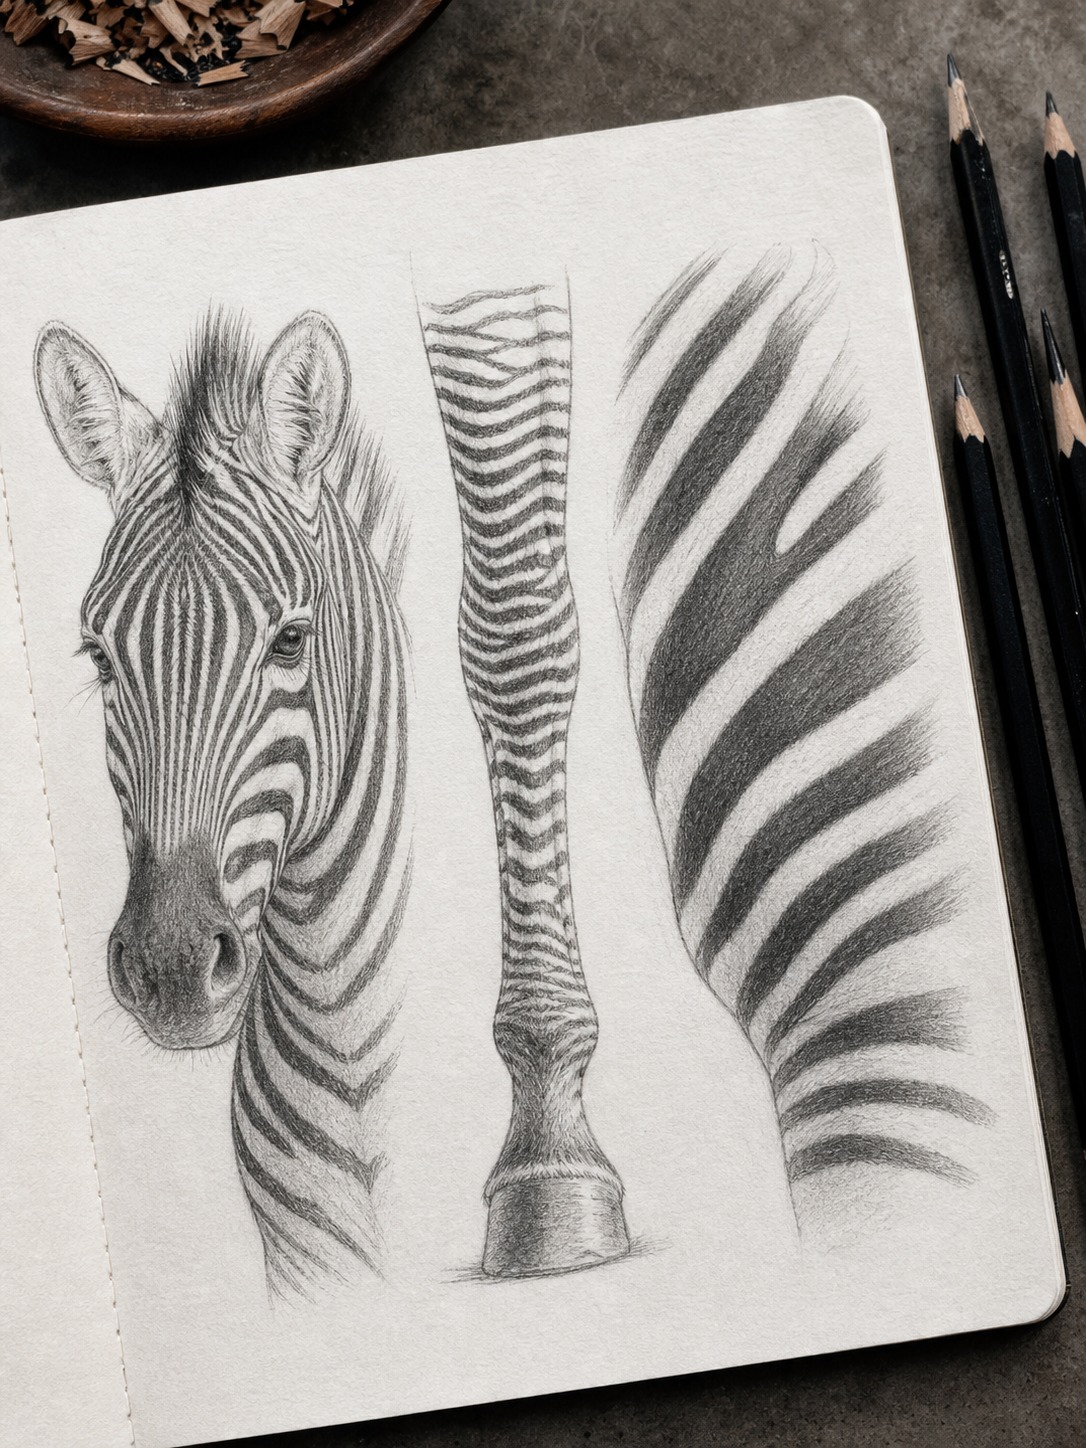
On a leg, stripes wrap as tight horizontal bands around the cylinder, spacing changing slightly as the leg’s diameter changes from the top to the ankle. Where a form turns sharply away from view — the far side of the barrel, the underside of the neck — stripes should compress and eventually disappear from view entirely, exactly the way a contour line would at a form’s edge.
Stripe Pattern Individuality and Placement Logic
Every zebra’s stripe pattern is genuinely unique, functioning almost like a fingerprint — no two individuals share an identical arrangement, which is worth knowing both as an interesting fact and as permission to vary your own stripe placement rather than trying to copy a “correct” reference pattern exactly.
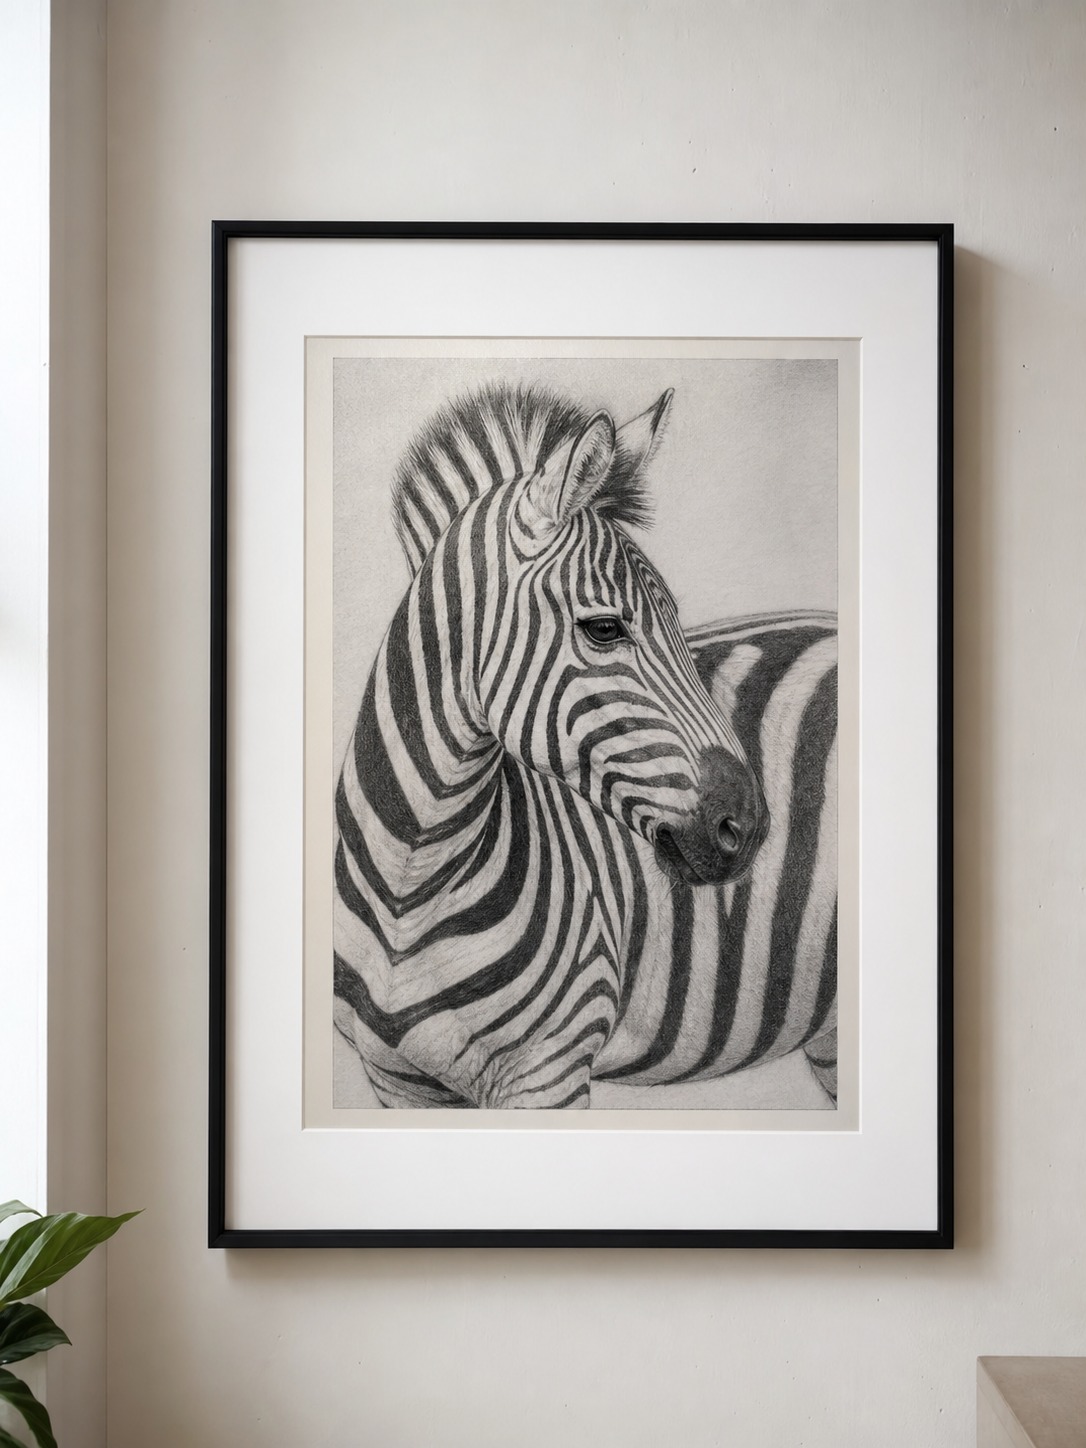
Stripe width and spacing also change meaningfully by body region, and getting this regional variation right adds real believability. Face and leg stripes run noticeably narrower and closer together than the broader stripes across the main torso. The stripes also generally narrow and become more vertical toward the legs, transitioning from the torso’s broader, more horizontal-arcing bands. Building this regional variation in, rather than using one uniform stripe width across the whole animal, is one of the fastest ways to move a drawing from “generic striped animal” to “specifically observed zebra.”
Realistic vs. Stylized/Cartoon Zebra Stripes
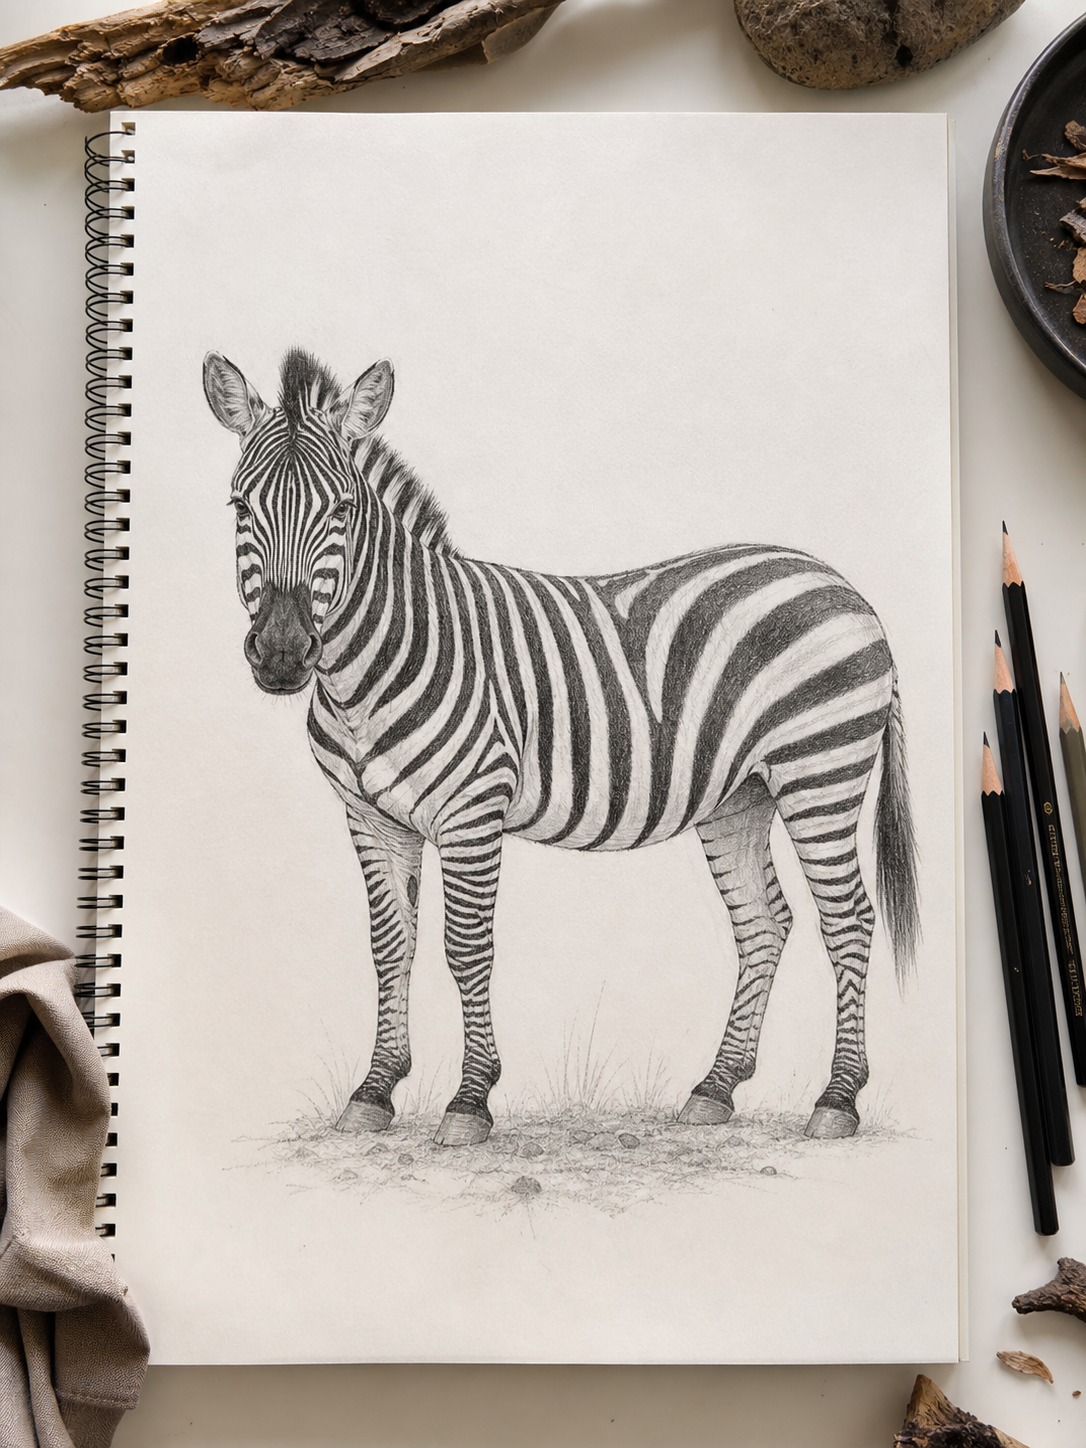
Once the cross-contour logic from the sections above is solid, it pushes cleanly into a more stylized or cartoon rendering without losing what makes it convincing.
What stays the same: the underlying cylindrical construction and the basic principle that stripes should wrap and compress around form, not run flat. A stylized zebra with simplified, bolder stripes still needs that wrapping logic, or it falls into the same flat-decoration trap as the realistic version done wrong.
What simplifies: stripe count and width variation typically reduce significantly in a cartoon or stylized approach — fewer, bolder stripes rather than the dozens of narrow, regionally-varied stripes a realistic study would include. Facial proportions also often shift toward larger eyes and simplified features. None of this simplification is wrong; it only reads as intentional stylization, rather than as skipped steps, when the wrapping cross-contour logic survives the simplification.
Common Zebra-Drawing Mistakes (and the Fix)
Flat, Parallel Stripes Ignoring the Barrel Curve
The mistake: stripes drawn as straight or gently curved lines running in one consistent direction across the whole torso, regardless of the form underneath. The fix: return to the cross-contour guide curves from Step 4 before committing to final stripe linework — every stripe should be answering to a specific point on the torso’s curvature, not running on autopilot.
Uniform Stripe Width and Spacing Everywhere
The mistake: identical stripe width and spacing across the face, body, and legs, which reads as a repeated pattern rather than an observed animal. The fix: deliberately narrow stripe width and tighten spacing on the face and legs relative to the broader torso stripes, matching the regional variation covered above.
Stripes That Don’t Disappear at the Form’s Edge
The mistake: stripes visible all the way around a form’s silhouette edge, even where the surface has turned fully away from the viewer. The fix: let stripes compress and fade out as they approach the edge of any cylindrical form — the far side of the barrel, the underside of the neck — the same way a contour line naturally reaches a vanishing point at a form’s edge.
Materials That Actually Matter
Pencil Grades for Stripe and Form Work
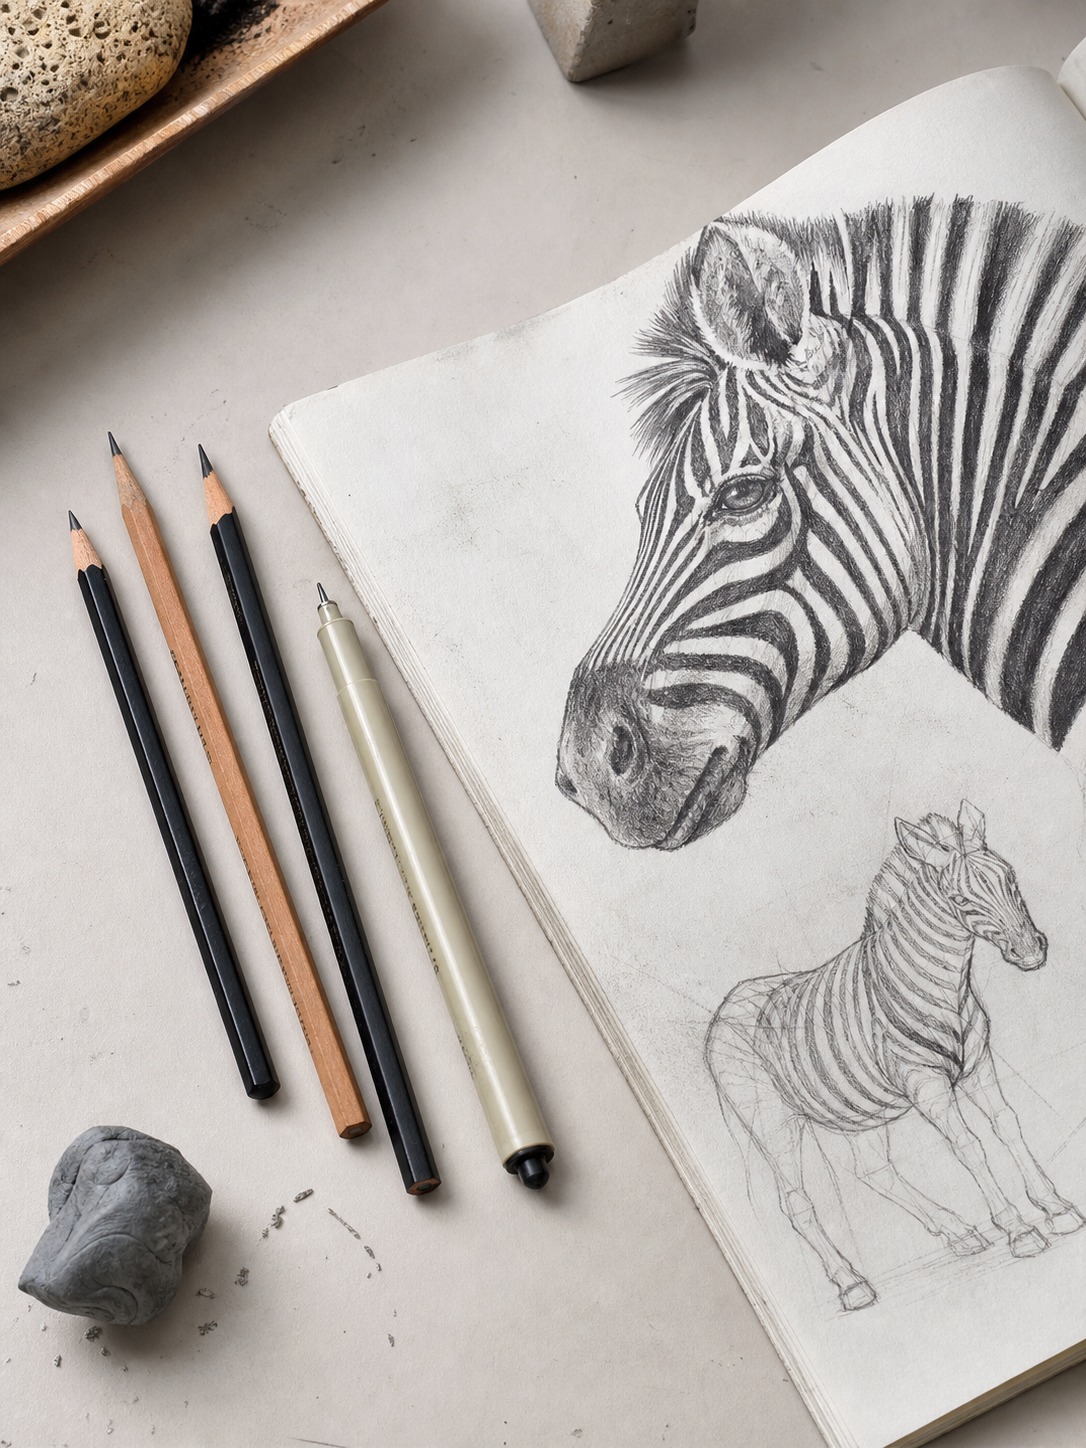
An HB handles the initial gesture line and cylindrical mass blocking, where control matters more than tonal depth. Switch to a sharper, harder pencil or fine liner for the actual stripe linework in Step 4, since stripe edges benefit from crisp, controlled lines rather than the softer edge a 2B would produce. Keep a 2B in reserve specifically for adding a touch of shading within the white stripes themselves near the form’s turning edges — a subtle addition that reinforces the cross-contour logic even in the “white” areas between stripes.
Final Thoughts
A zebra is one of the clearest possible demonstrations of a principle that’s run through every drawing guide in this series — the same mass-before-detail logic I used building a rabbit’s gesture line in my bunny drawing guide and rotating an ear correctly with a turning skull in my ears drawing guide: surface pattern only reads as convincing when it’s actually describing the form underneath rather than sitting on top of it as decoration.
Draw the cylindrical masses first, then let the stripes wrap, compress, and vary the way real cross-contour lines would — the same logic works whether you’re rendering fur, fabric, or, in this case, one of the most recognizable coat patterns in the animal kingdom.
Frequently Asked Questions
What’s the easiest way to draw a zebra?
Start with a gesture line establishing the pose, then block the torso as a barrel-shaped cylinder rather than a flat oval before adding any stripes. Draw stripes last, following the form’s curve rather than as a flat decorative pattern — that single change does more to make the drawing convincing than careful stripe spacing alone.
How do you draw realistic zebra stripes?
Sketch light cross-contour guide curves wrapping around the torso, neck, and legs before drawing any actual stripes, then follow those guides so each stripe compresses and curves to match the form’s curvature. Vary stripe width by region — narrower on the face and legs, broader across the torso — rather than using one uniform width throughout.
Are zebra stripe patterns unique to each animal?
Yes, each zebra’s stripe pattern is genuinely unique, similar to a human fingerprint, with no two individuals sharing an identical arrangement. This means there’s no single “correct” reference pattern to copy exactly, and some natural variation in your own stripe placement is accurate rather than a mistake.
What’s the difference between drawing a zebra and a horse?
The underlying proportional and cylindrical construction is nearly identical, since zebras share close equine proportions with horses and donkeys. The main differences are the stripe pattern itself, generally more upright and forward-set ears, and a slightly more compact overall build depending on the specific zebra species.
How big is a zebra compared to a horse?
It varies by species — Grevy’s zebras stand roughly 4 to 5 feet at the shoulder and are the largest zebra species, while Plains zebras are smaller, around 3.6 to 4.8 feet at the shoulder. Both are somewhat smaller than an average riding horse, which is worth keeping in mind when setting proportions from a reference photo.
What’s the most common mistake people make drawing zebra stripes?
Treating stripes as a flat, evenly-spaced pattern applied after the body shape is already finished, rather than as lines that describe the form’s actual curvature. This is why so many technically neat zebra drawings still read as a striped balloon rather than a convincingly three-dimensional animal.
- 479shares
- Facebook0
- Pinterest479
- Twitter0
- Reddit0