Why the Raccoon’s Mask Is the Real Drawing Challenge
A raccoon is one of those animals that looks simple to draw and isn’t. The body is a straightforward oval-and-limbs construction — most animals are. What trips people up is the face: get the dark mask a fraction too symmetrical, too flat, or too perfectly shaped, and the whole drawing reads as a Halloween cutout instead of an actual animal. The mask is a value problem before it’s a shape problem, and that’s the part almost every tutorial online skips past.
I’ve spent years training my eye on exactly this kind of problem — where does the eye land first, what’s doing the visual work, what happens if you simplify too much. Academic drawing training spends a lot of time on value relationships before it ever gets to detail, and a raccoon’s face is a perfect small case study in that principle. The mask isn’t decoration sitting on top of a generic animal head. It’s the structure the whole face reads through.
- How to Draw a Raccoon in 4 Steps
- What You'll Need Before You Start
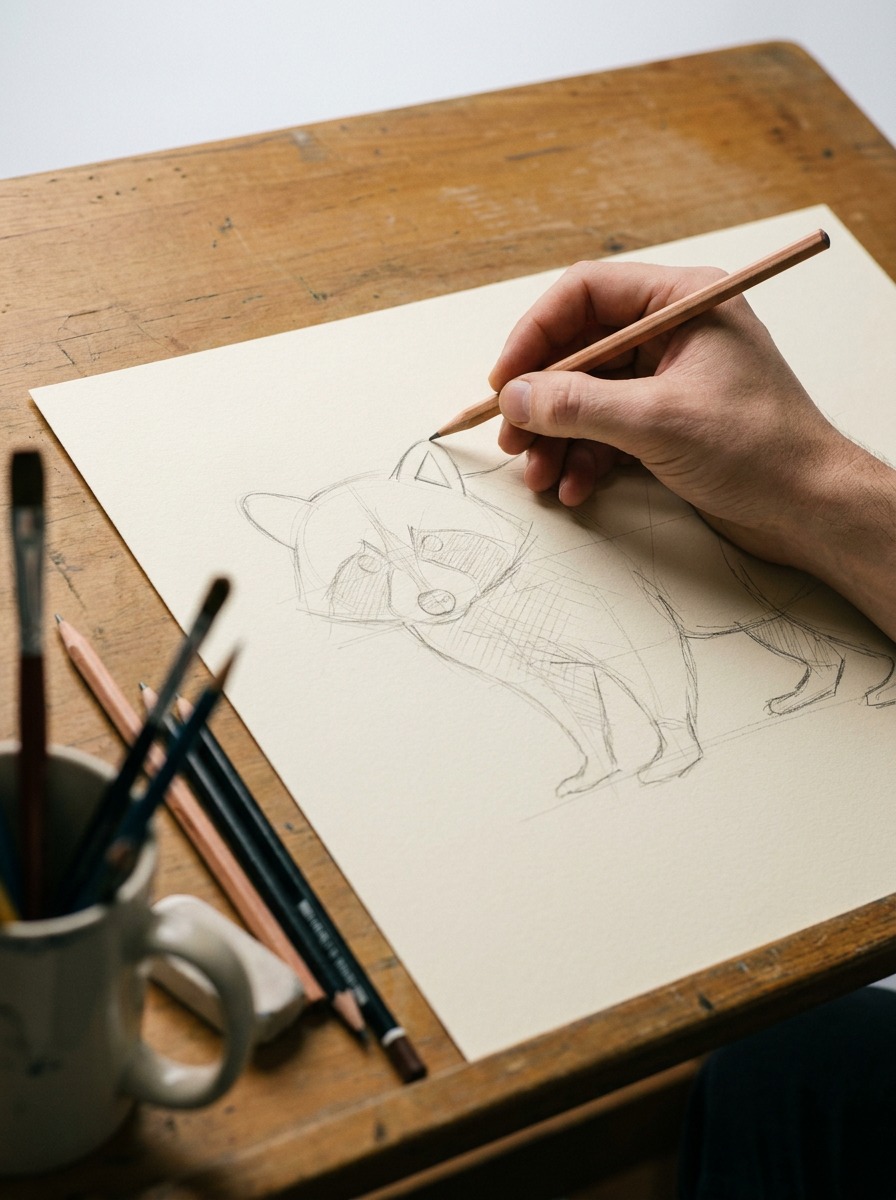
- Block In the Raccoon's Structure With Simple Forms
- Draw the Mask, Eyes, and Facial Features That Read as "Raccoon"
- Render Fur Texture Without Overworking It
- Draw the Ringed Tail as a Pattern Exercise
- Common Mistakes That Make a Raccoon Drawing Look Off
- Give the Raccoon Personality Through Pose and Expression
- FAQ
- How do you draw a raccoon step by step for beginners?
- What's the hardest part of drawing a raccoon?
- How do you make raccoon fur look realistic?
- Do raccoon tail rings need to be perfectly even?
- What art supplies work best for a raccoon drawing?
- Can you draw a raccoon without a reference photo?
- How long does a detailed raccoon drawing take?
This guide walks through building a raccoon from simple forms, then treating the mask, fur, and ringed tail as the three specific problems that actually make or break the drawing — not as steps to rush through on the way to “add fur texture” the way a lot of tutorials do.
How to Draw a Raccoon in 4 Steps
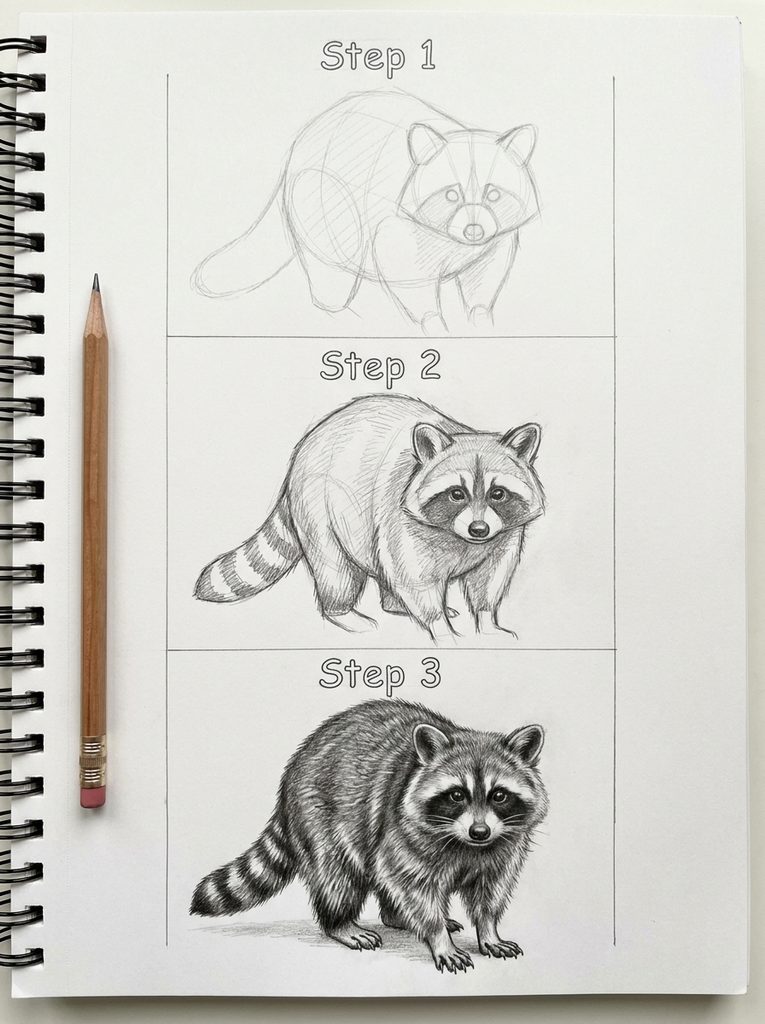
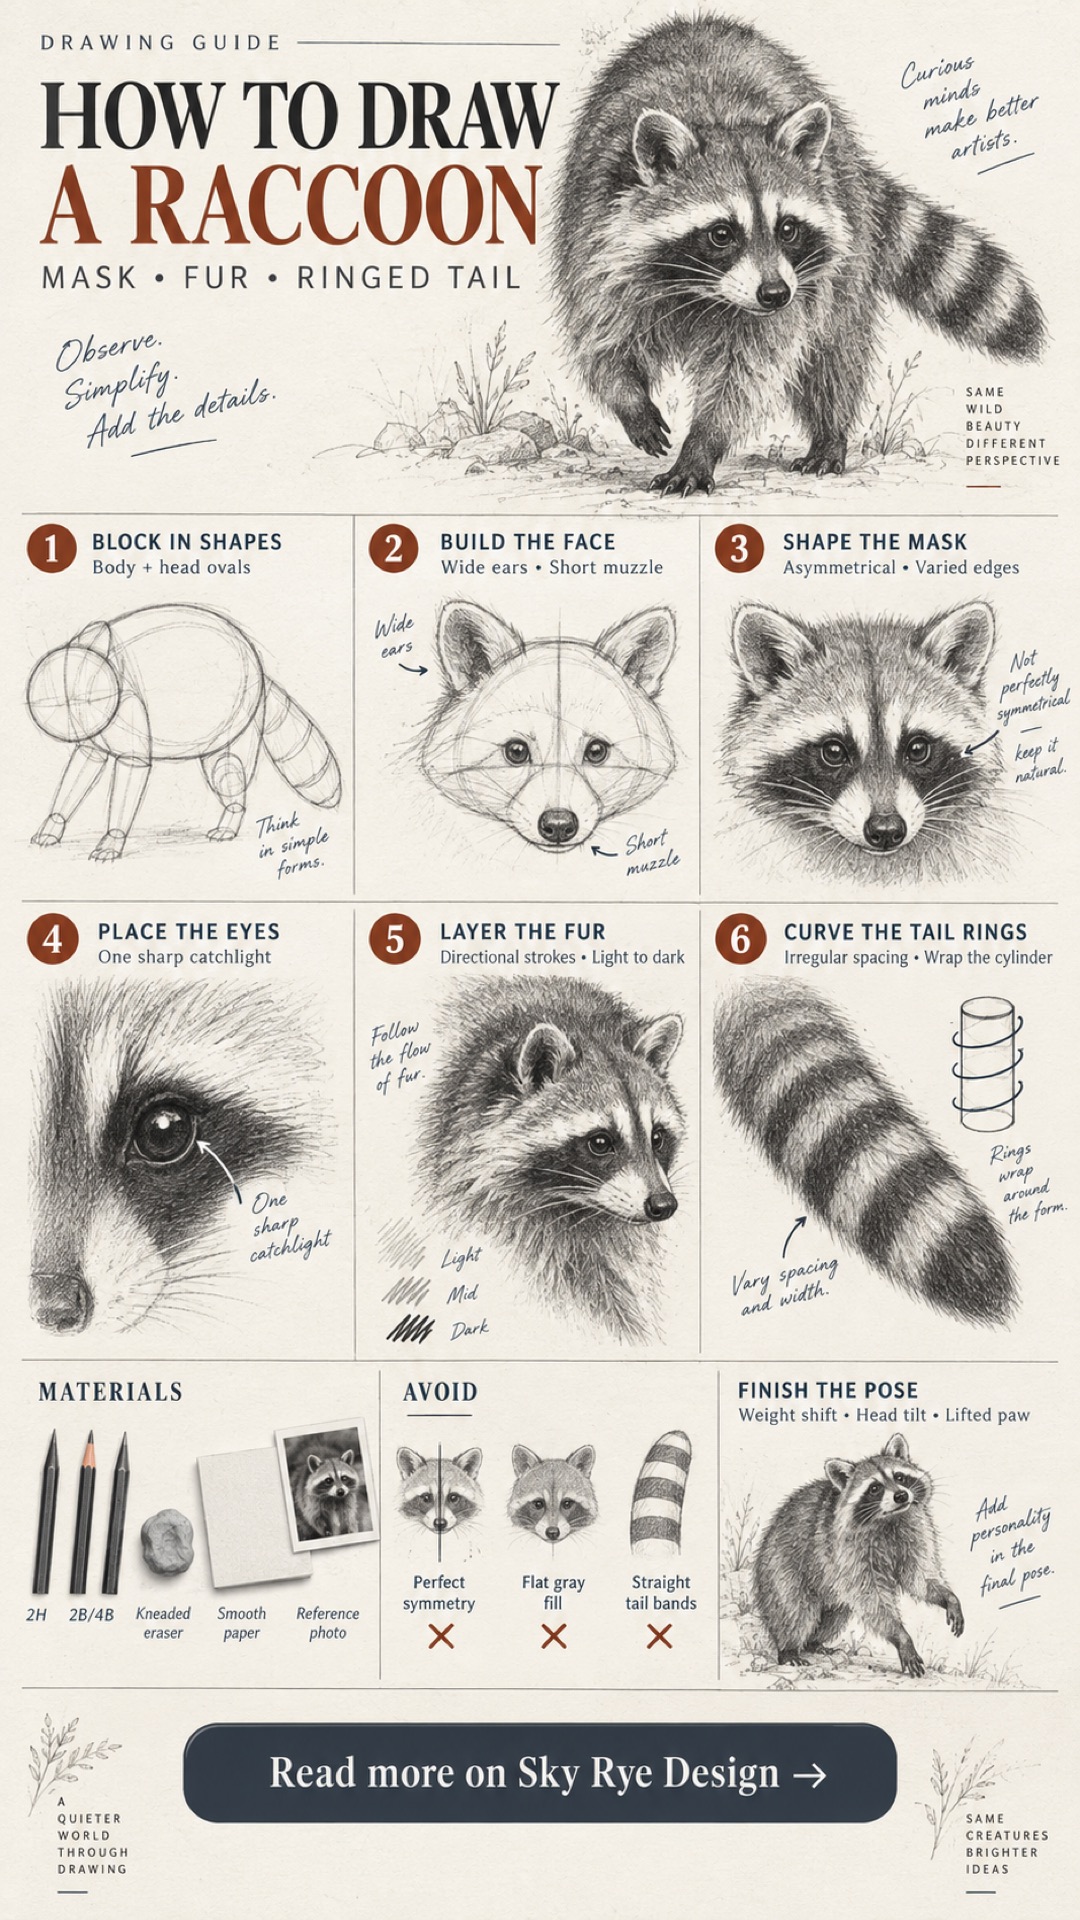
If you just want the process at a glance before working through the detail sections below, here’s the whole drawing in four stages.
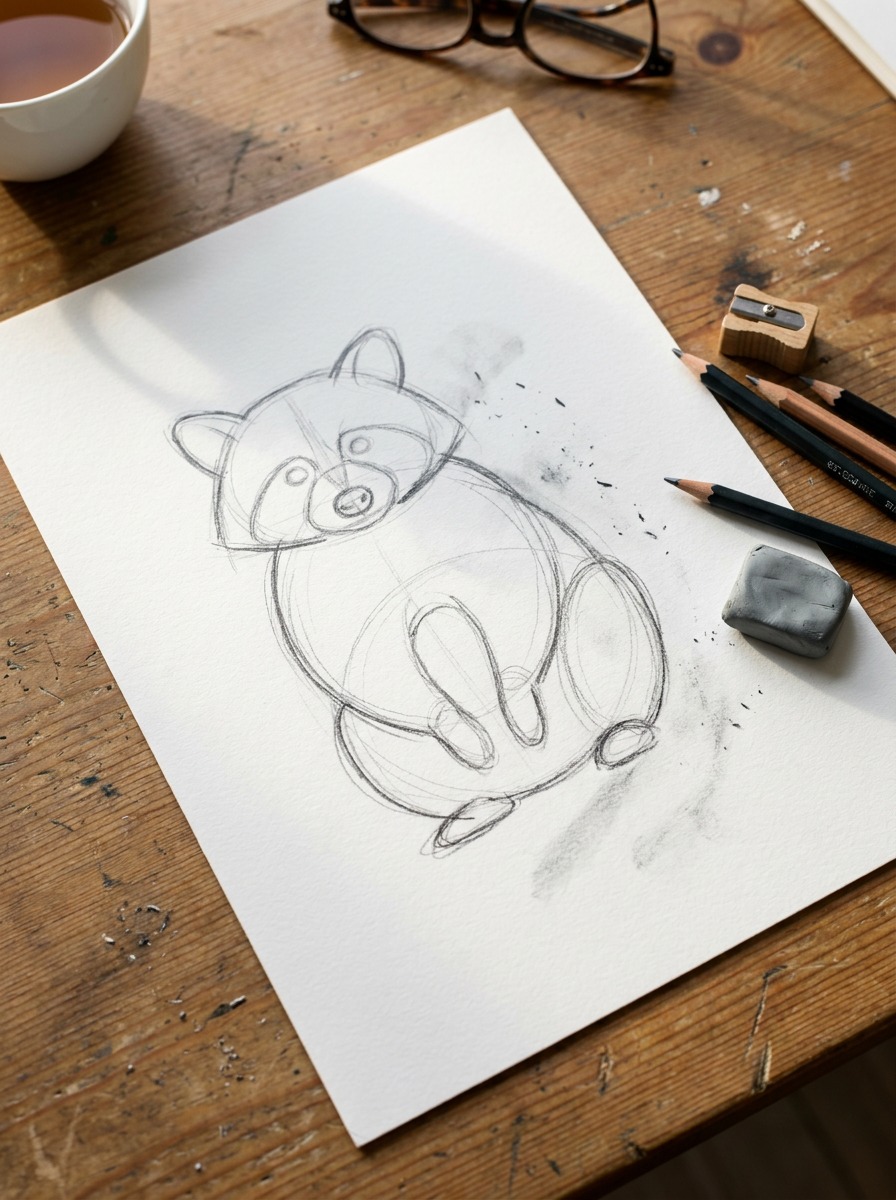
Step 1: Block in the basic shapes
Sketch two overlapping ovals — a larger one for the body, a smaller rounder one for the head — then add the legs, tail base, ears, and muzzle as simple rounded forms on top. Keep every line loose and light at this stage; you’re establishing proportion and gesture, not finished edges. The full breakdown of where each shape goes is covered below in “Block In the Raccoon’s Structure With Simple Forms.”
Step 2: Draw the mask and facial features
Build the mask as an irregular, slightly asymmetrical dark shape across both eyes, leaving the muzzle and the area around the nose pale. Place the eyes inside the darkest part of the mask with a single sharp highlight in each, then add the nose and a handful of whiskers last. This step is where most raccoon drawings succeed or fail — see “Draw the Mask, Eyes, and Facial Features That Read as ‘Raccoon'” below for the full value logic.
Step 3: Add fur texture
Layer in short, curved, directional strokes that follow the body’s form, working from a light initial pass toward progressively darker values in the shadowed areas. Keep the edge where fur meets the mask varied rather than perfectly clean. Full technique in “Render Fur Texture Without Overworking It” below.
Step 4: Draw the ringed tail and finish the pose
Sketch the tail rings as a slightly irregular, curving sequence rather than flat even stripes, then step back and adjust the overall pose — weight shift, head tilt, a lifted paw — before calling the drawing finished. Both are covered in more depth further down.
What You’ll Need Before You Start
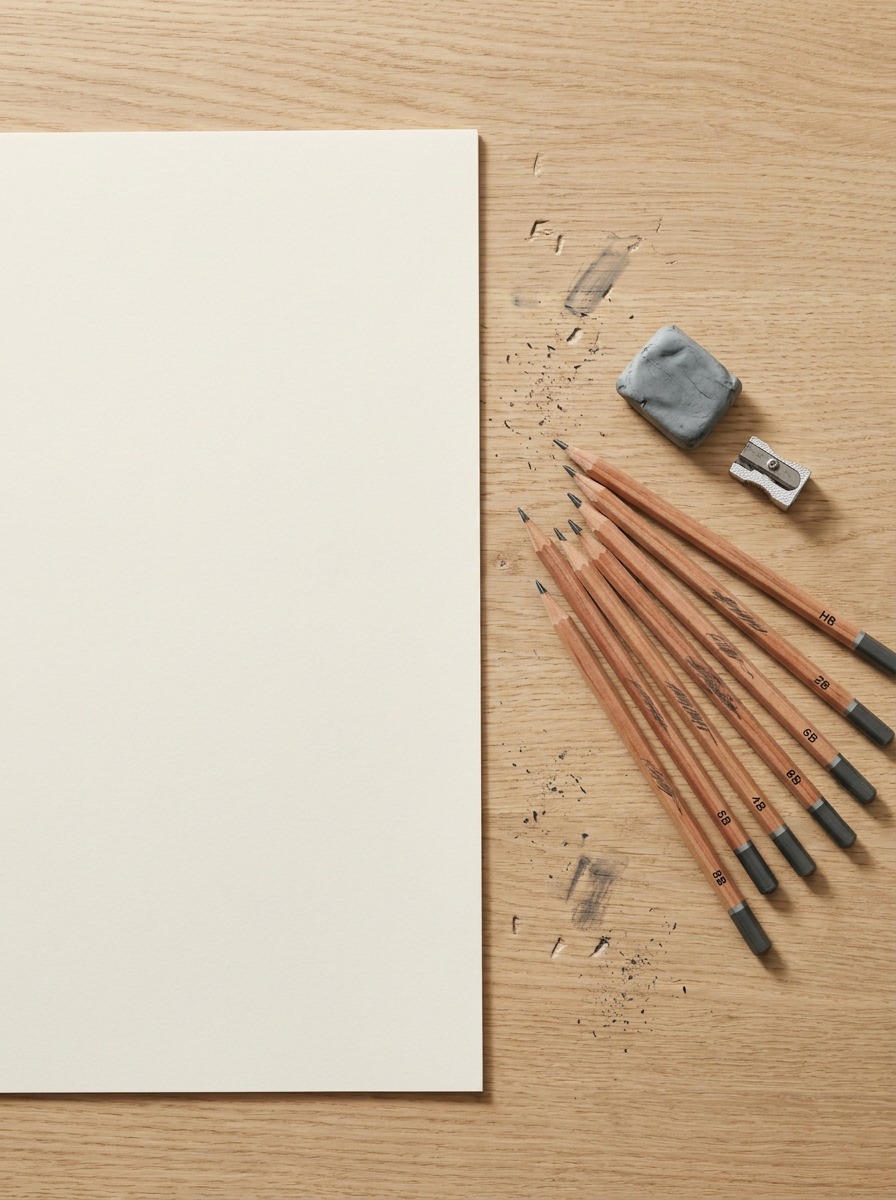
A raccoon drawing doesn’t need much equipment, and I’d actually argue against reaching for color too early. Start with:
- A graphite pencil in at least two hardnesses — something like a 2H for the initial construction lines and a 2B or 4B for the darker values in the mask and fur. One pencil forces you to fight the paper for contrast you don’t have.
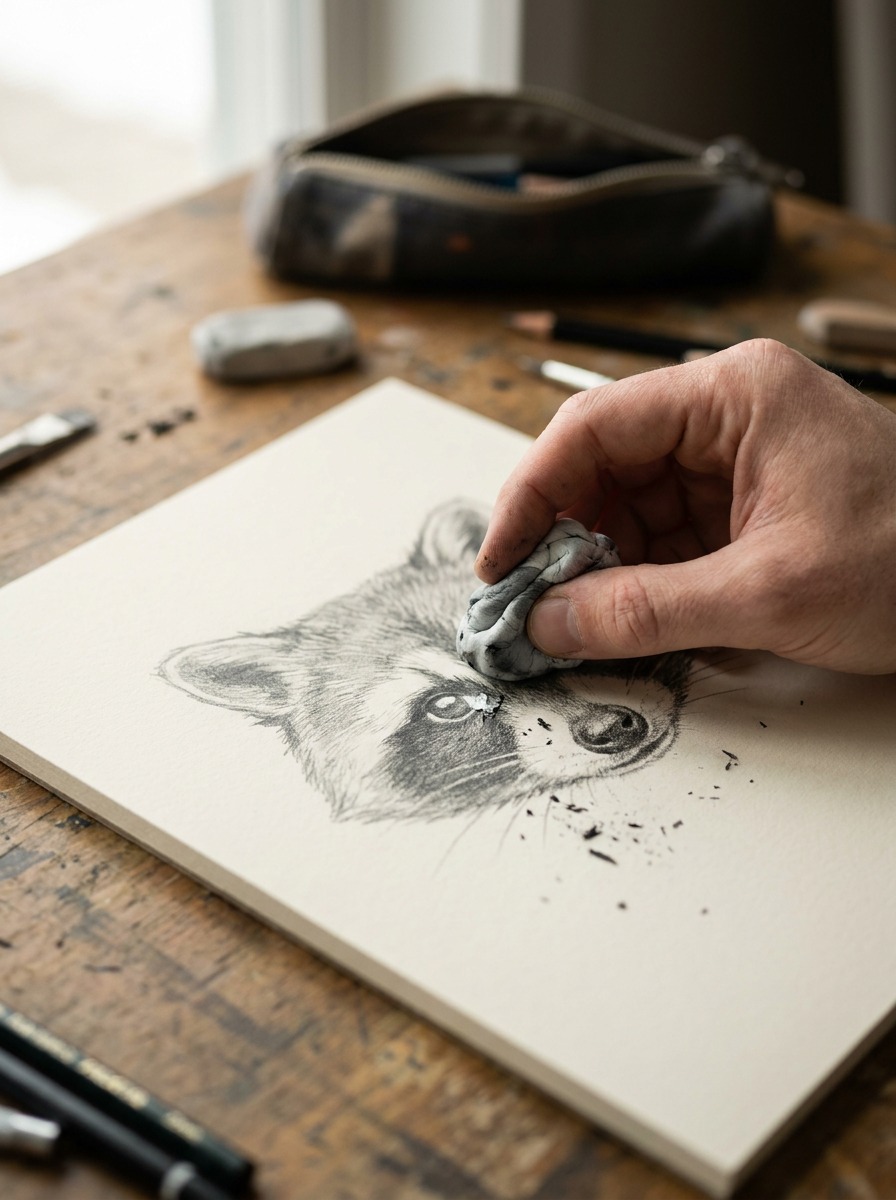
- A kneaded eraser, not a standard rubber one. You’ll be lifting graphite out of the mask area to suggest highlights, and a kneaded eraser shapes to a point for that.
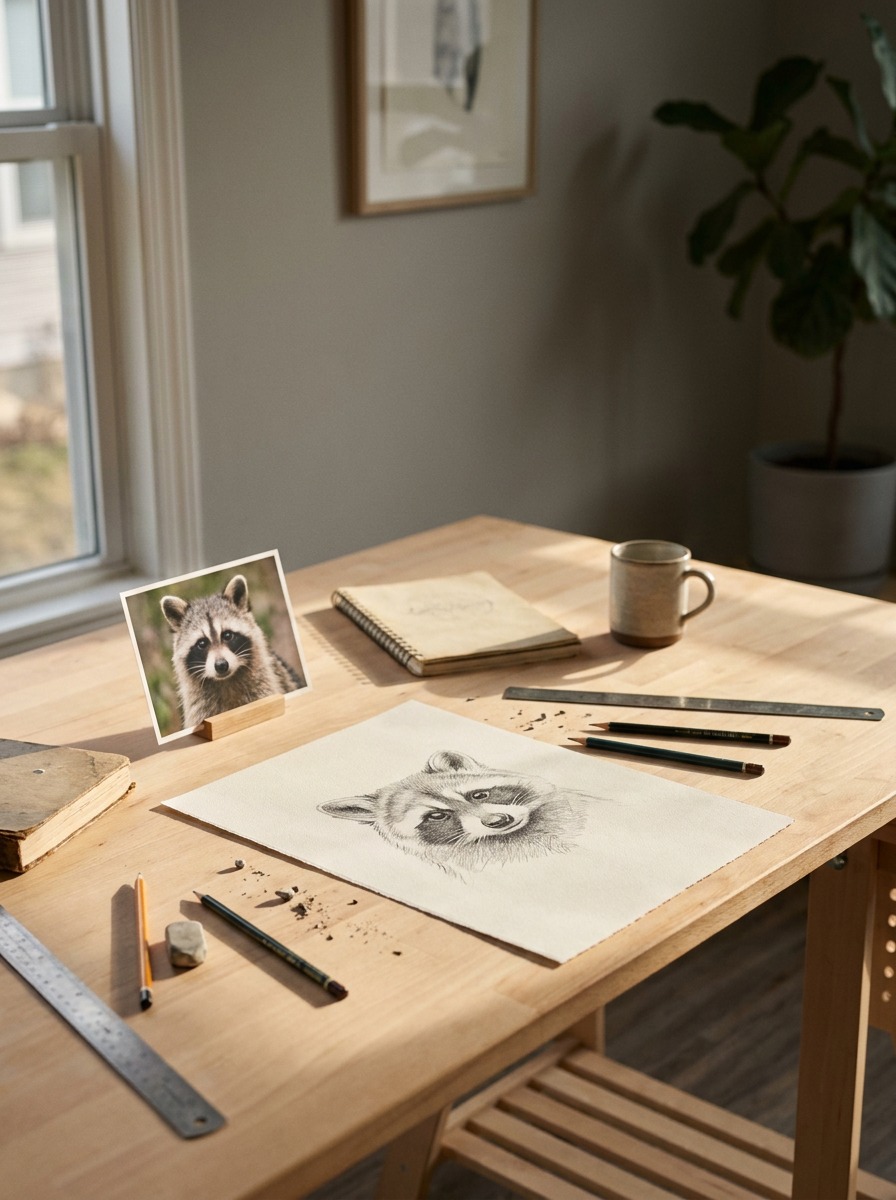
- A reference photo, not a memory of what raccoons look like. Most people’s mental image of a raccoon mask is more symmetrical and more perfectly oval than the real thing — actual raccoon masks are lopsided, a little smudged at the edges, and vary a lot between individuals.
- Smooth or medium-tooth paper if you’re going to render fur texture with any density of strokes; heavy-tooth paper fights fine directional linework.
If you’re working digitally instead, the same value logic applies — you’re just working with a soft round brush and layers instead of a pencil and an eraser. The construction and value-planning steps below don’t change.

Working from a photo versus working from life
A reference photo is the practical choice for most people, and there’s no reason to feel like that’s cheating — plenty of professional wildlife and character illustration work starts from photo reference. What matters is picking a photo with clear, directional light, since flat overcast lighting flattens exactly the value information you need for the mask and fur. If you ever get the chance to sketch a raccoon from life, even briefly at a rescue center or a nature park, it’s worth doing once: watching how the mask actually catches light as the head turns teaches you more about the edge variation than a dozen photos will, the same way a single life-drawing session teaches more about how light wraps a form than hours of working from flat references.
Block In the Raccoon’s Structure With Simple Forms
Body, head, and the overlap between them
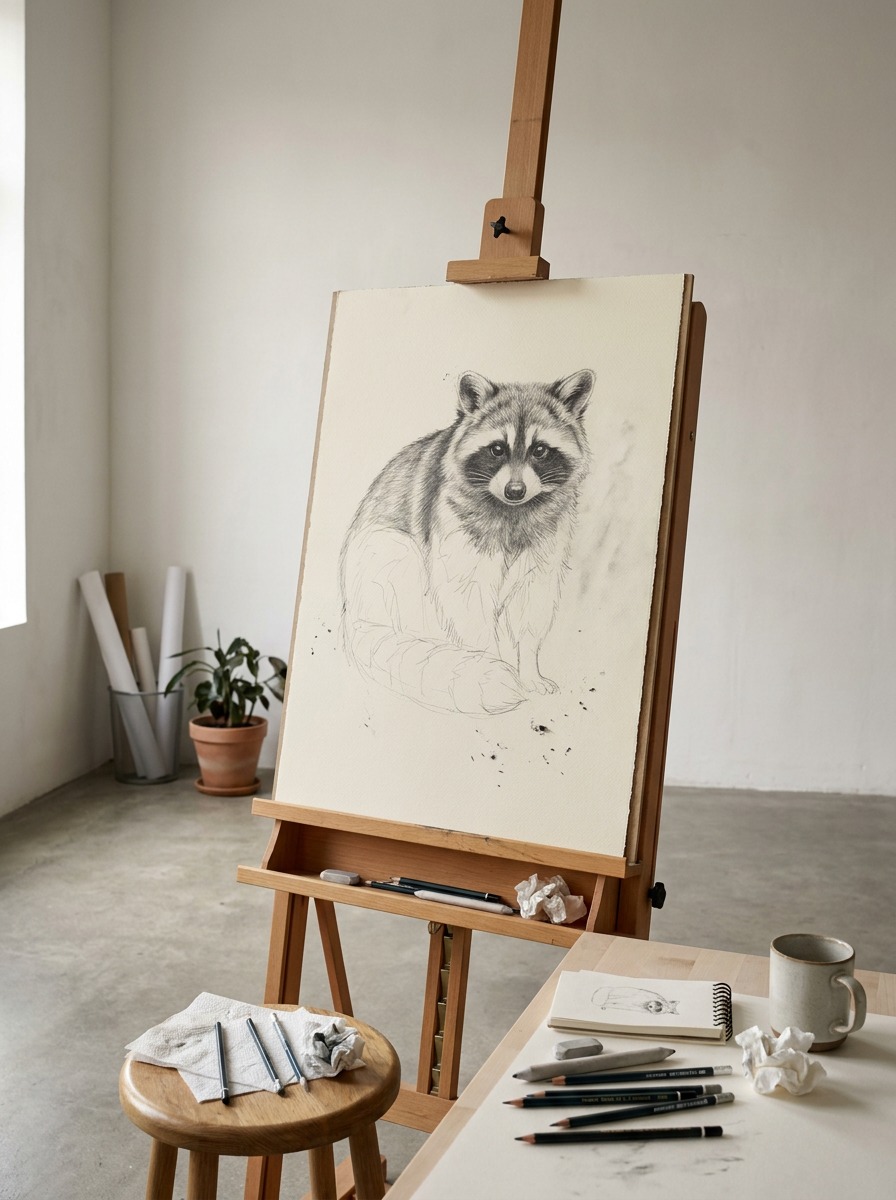
Start with a vertical-leaning oval for the body and a smaller, rounder shape for the head, overlapping the two rather than placing the head as a separate circle sitting on top. Raccoons carry their weight low and their shoulders slightly hunched, so the head-to-body overlap should feel like it’s settling into the shoulders, not perched above them. This is the same gesture-first habit that carries over from any life-drawing practice — block in the big relationship between masses before you touch a single detail, because no amount of careful mask rendering fixes a body that’s proportioned wrong underneath it.
Legs, tail base, and where the weight sits
Raccoons have noticeably longer, more powerful-looking rear legs than front legs, which is part of why a stationary raccoon often looks like it’s about to spring even when it’s just standing still. Sketch the rear legs as slightly larger ovals than the front pair, and place the tail base low, at the rear of the body oval, angled outward before it curves. Getting this angle right early matters more than it seems — a tail that starts too high on the back reads as a squirrel, not a raccoon.
Placing the ears and muzzle
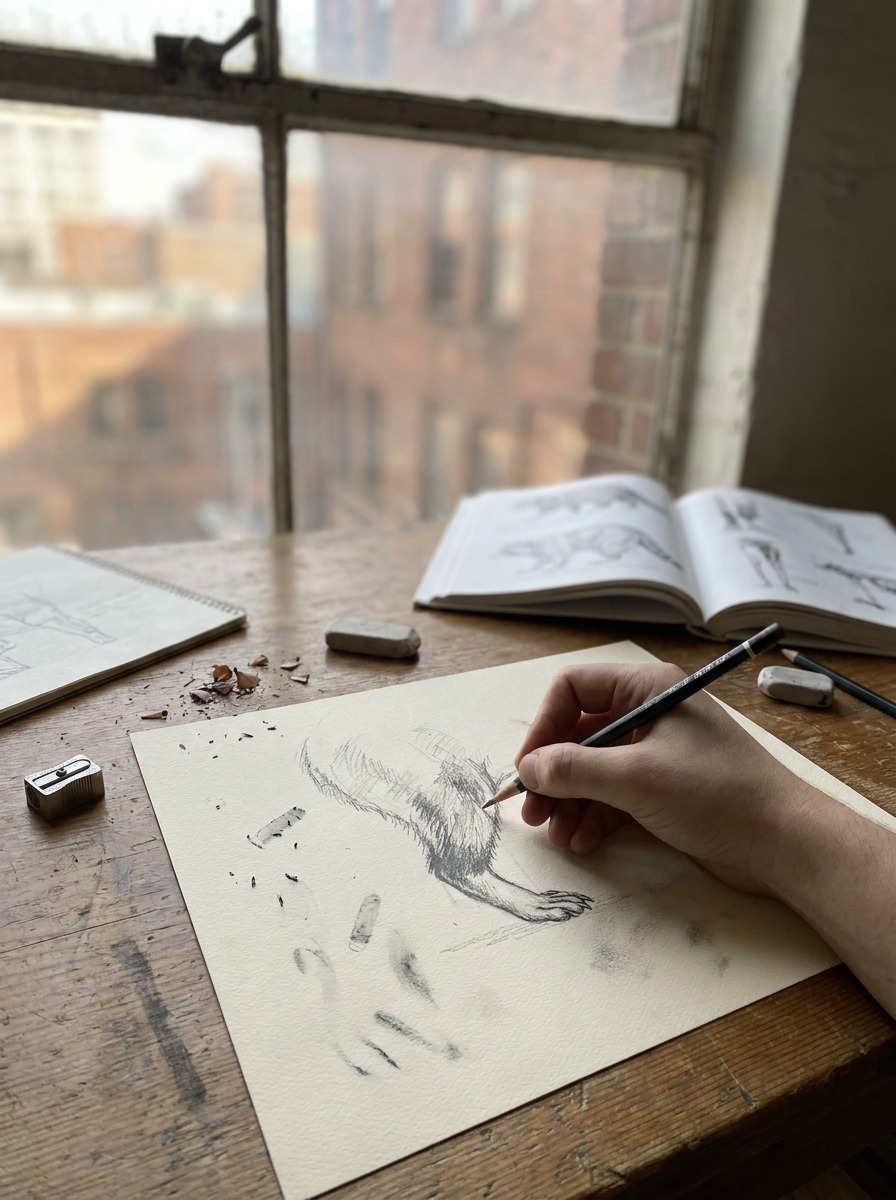
The ears sit rounded and relatively small on top of the head oval, spaced wider than most people initially draw them — raccoon ears read almost owl-like in their placement when you look closely at a reference. The muzzle is short and blunt, more like a fox’s shortened cousin than a dog’s longer snout. Sketch it as a small rounded wedge extending from the lower-front of the head oval, and resist the urge to lengthen it — an overlong muzzle is one of the fastest ways to accidentally draw a different animal entirely.
Draw the Mask, Eyes, and Facial Features That Read as “Raccoon”
The mask shape and why it shouldn’t be symmetrical
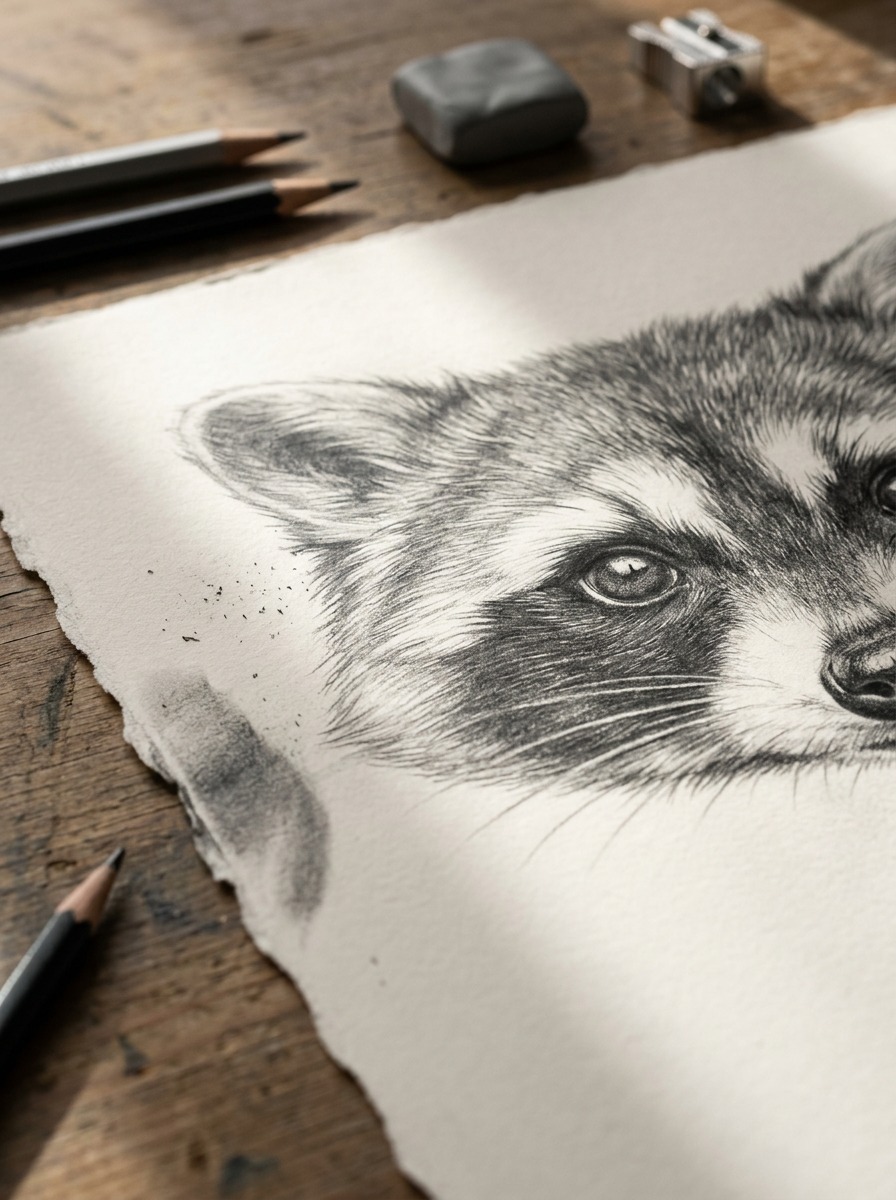
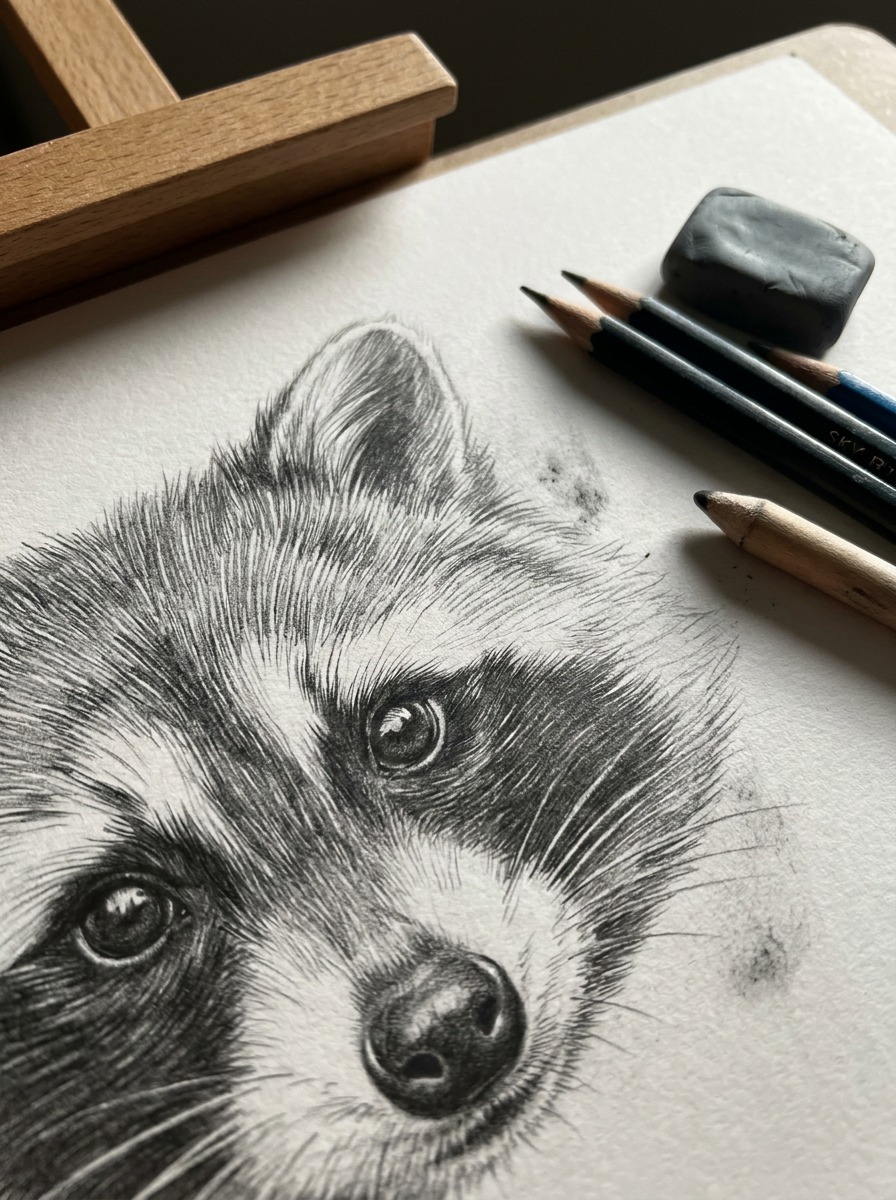
This is the section every other tutorial treats as decoration and I’d argue is the actual subject of the drawing. The mask reads convincingly when it’s asymmetrical and a little irregular at the edges — not a clean oval stamped over each eye, but a shape that varies in width, sits slightly differently on each side of the face, and fades rather than stops cleanly at some edges while staying crisp at others.
I think about this the same way I’d think about a shadow falling across a car’s body panel in a rendering — a shadow edge is never uniformly hard all the way around. Where the light source is closest and most direct, the edge sharpens; where it’s grazing or bouncing off a nearby surface, it softens. A raccoon’s mask has that same variation built into it, mostly because of the fur direction underneath, and drawing it with one uniform edge everywhere is the single biggest reason a raccoon mask ends up looking like a costume prop instead of an animal.
Eye placement inside the mask
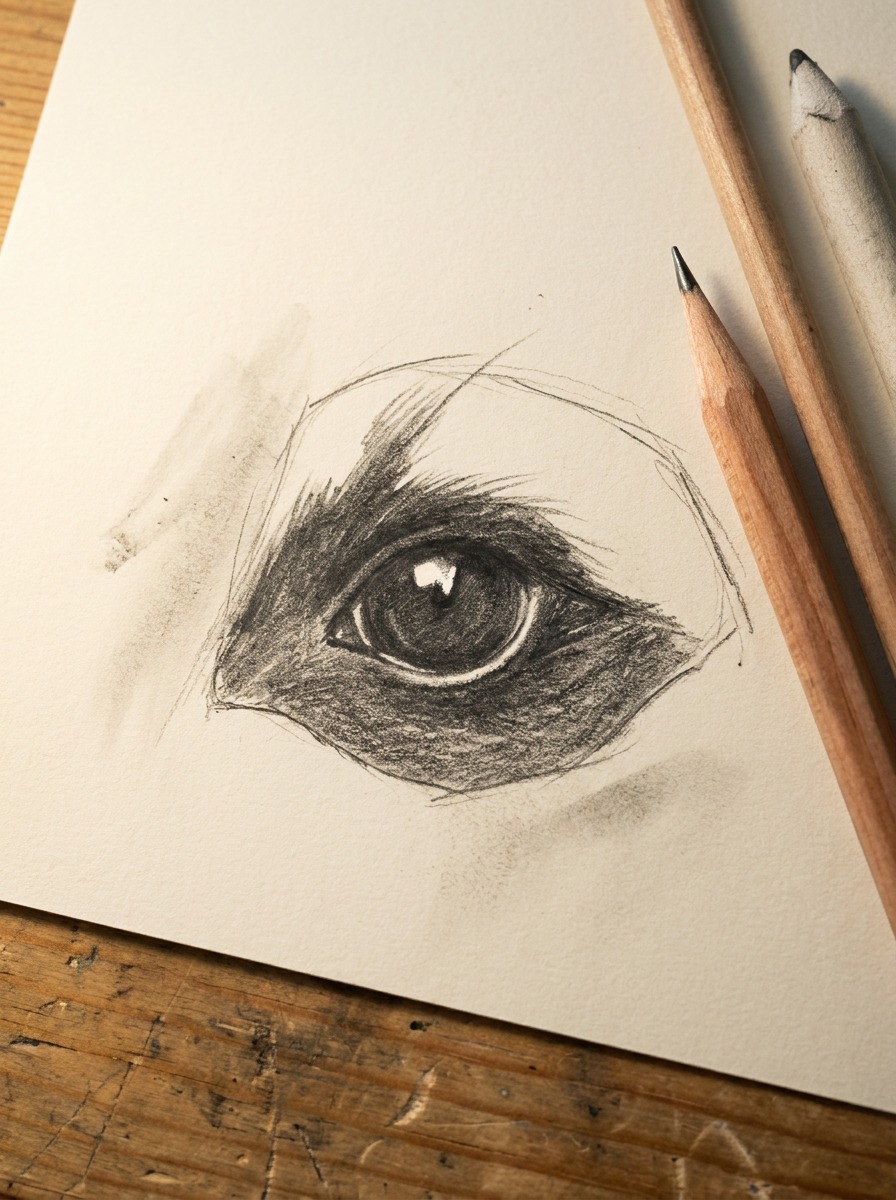
The eyes sit inside the darkest part of the mask, which creates a genuinely useful problem: you need to keep them visually distinct from the mask’s darkness without making them pop out unnaturally. The trick is a small, precise highlight — a single sharp catchlight dot, left as untouched white paper or lifted cleanly with a kneaded eraser point — surrounded by a slightly less saturated dark than the deepest part of the mask around it. The eye doesn’t need to be lighter than the mask overall. It needs one small area of real contrast, and everything else can stay close in value.
Nose, whiskers, and the pale muzzle patch
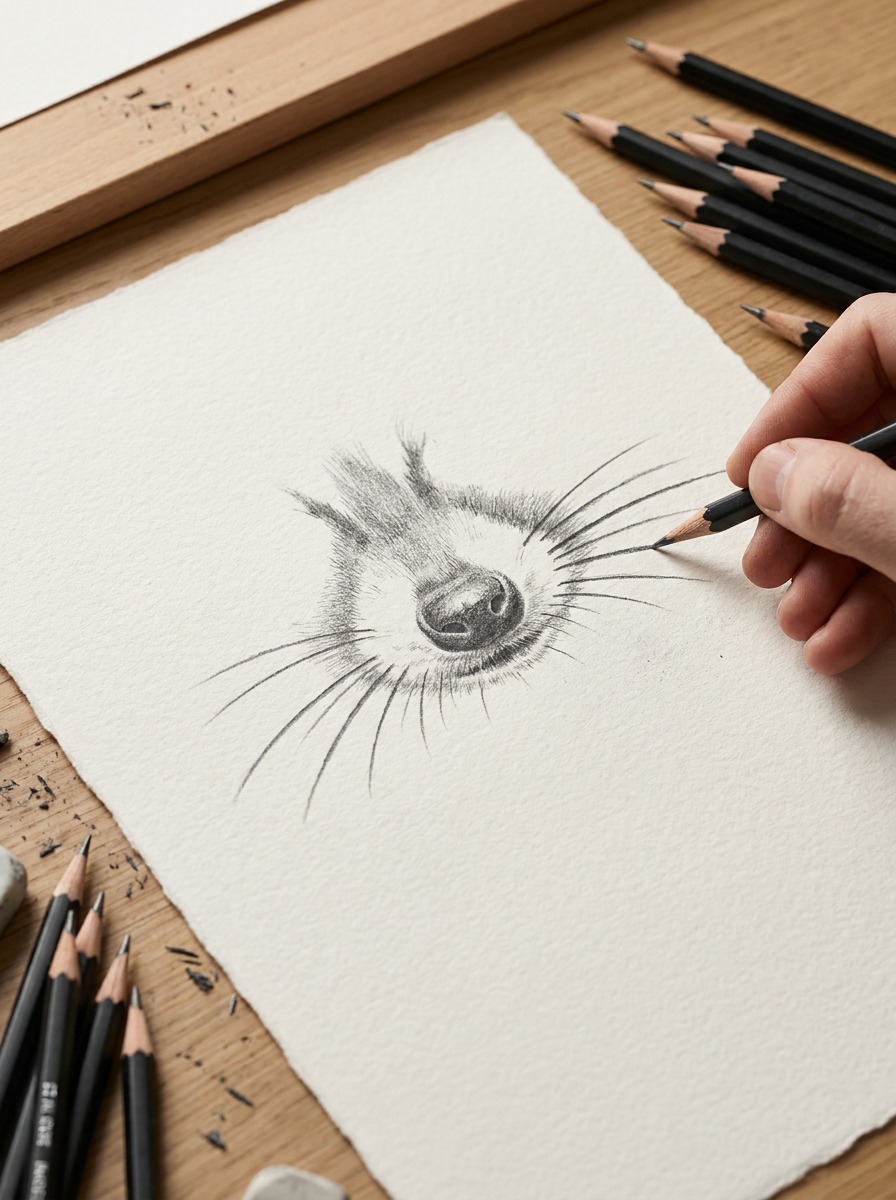
The area directly around the nose and mouth stays pale, almost white in most lighting, which is what makes the mask read as a mask rather than just “the face is dark.” Keep this patch clean and mostly untouched by graphite before you start laying in fur strokes elsewhere, because it’s doing real compositional work — it’s the brightest value on the whole face, and everything else on the head should read relative to it. Whiskers go in last, as a handful of confident single strokes rather than a dense cluster; four or five well-placed whiskers per side read as more convincing than fifteen tentative ones.
A note on how much variation is too much
There’s a balance point worth naming, because it’s easy to overcorrect once you start deliberately breaking symmetry. The mask should read as clearly asymmetrical up close, but at a normal viewing distance it still needs to register instantly as “raccoon mask” — the variation lives in the details, not in the overall silhouette. I run into the same balance constantly in product sketching: enough irregularity to feel handmade and specific, not so much that the underlying form gets lost. If a viewer has to study the drawing to figure out what animal it is, the variation has gone too far.
Render Fur Texture Without Overworking It
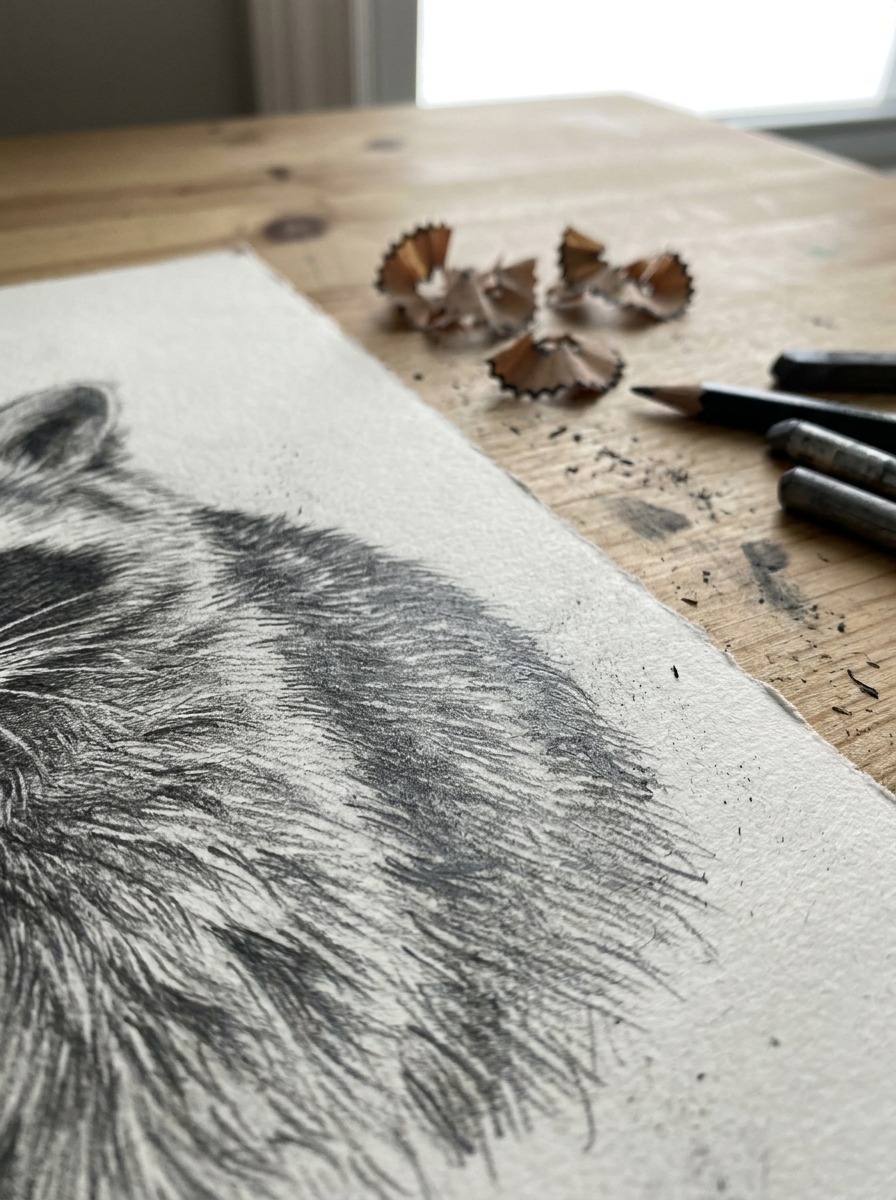
Work in directional stroke groups, not individual hairs
Nobody draws every hair on a raccoon, and trying to is exactly how a drawing ends up looking stiff and overworked. Fur reads through grouped, directional strokes — short curved marks that follow the form of the body, changing direction where the body’s surface changes direction, the same way cross-hatching on a sculpted form has to follow the plane it’s describing rather than running in one flat direction across the whole drawing.
I’d compare this directly to rendering a textured surface in an industrial design sketch — brushed metal, say, or a knurled grip. You’re never drawing the individual texture element. You’re drawing a pattern of marks dense and directional enough that the eye fills in the rest. Fur works on exactly the same principle, just with organic curved strokes instead of straight ones.
Layer values light to dark, not dark to light
Build the fur in passes — a light initial layer establishing the overall value and direction, then progressively darker, denser strokes layered on top in the shadowed and recessed areas. Going dark too early leaves you with no room to push the deepest shadows any further, which flattens the whole drawing. This is the same reason a painter blocks in a mid-value underpainting before committing to the darkest darks — you need somewhere left to go.
Edge control where fur meets the mask
The transition where lighter body fur meets the dark mask is where most of a raccoon drawing’s character lives, and it needs variation, not a single consistent edge treatment. Let some fur strokes break slightly into the mask’s edge, and let the mask’s edge stay a little soft in places rather than perfectly cut. A hard, clean line all the way around the mask is the single fastest way to make a fur-covered animal look like it’s wearing a sticker.
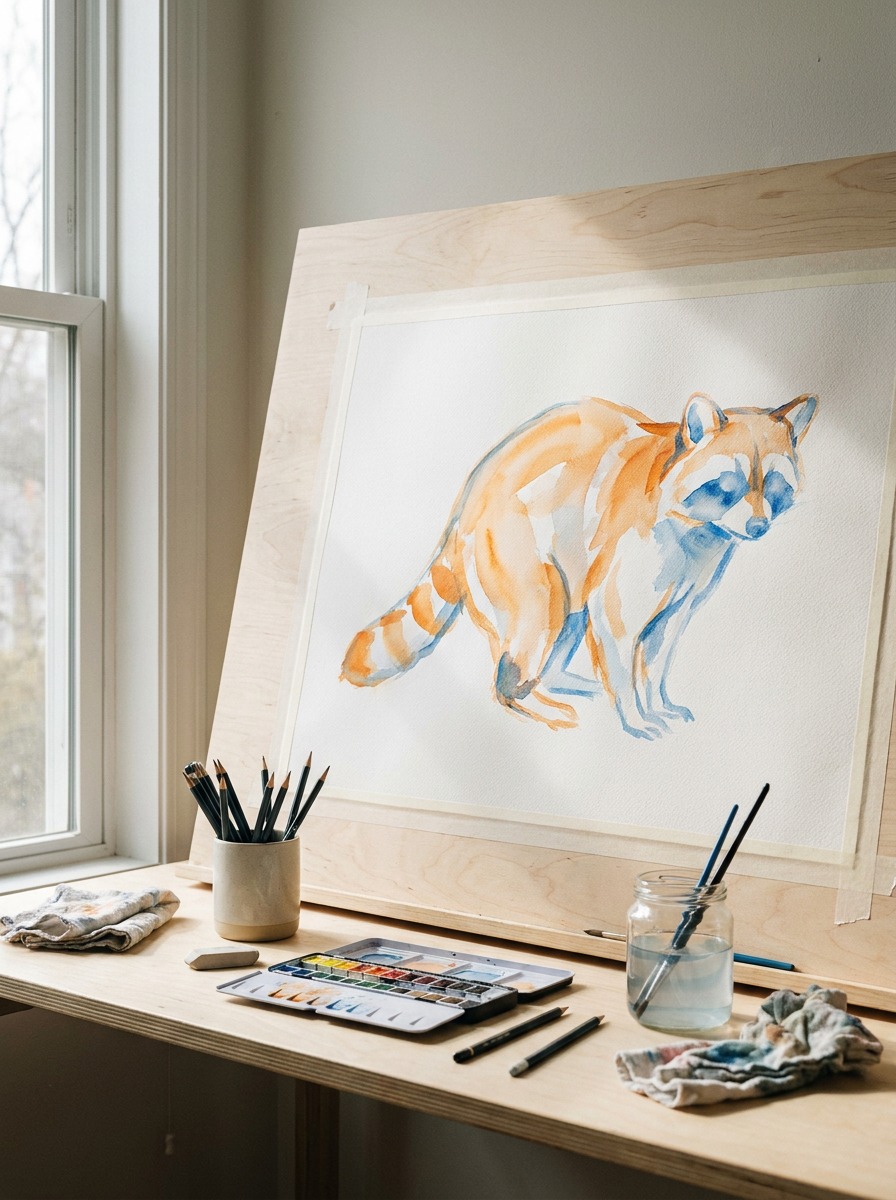
Moving beyond graphite: colored pencil and watercolor washes
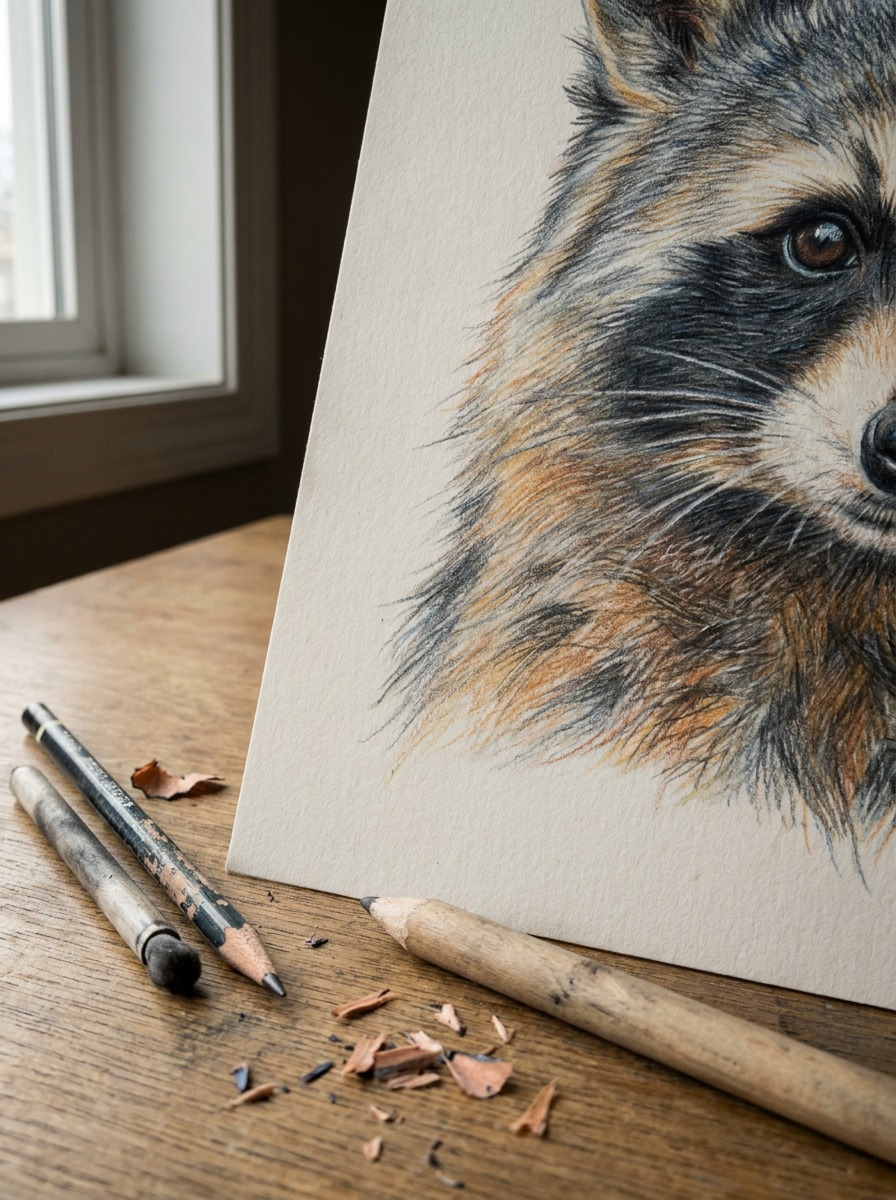
If you want to push the drawing past graphite, colored pencil is the most forgiving next step, and the raccoon’s palette runs deeper than “gray and black.” Real raccoon fur runs through warm ochre and tan undertones in the body coat, cooling toward blue-gray in the mask and the darkest parts of the tail rings.
Laying a light warm undertone across the whole body before adding gray on top gives the fur a depth that pure gray-on-white never achieves — it’s the same underpainting logic that applies to rendering skin tones or weathered metal, where a flat single color reads as artificial no matter how carefully it’s shaded. A thin watercolor wash does the same job even faster, as a loose warm-to-cool base layer before any pencil detail goes on top.
Draw the Ringed Tail as a Pattern Exercise
Spacing the rings so they don’t look mechanical
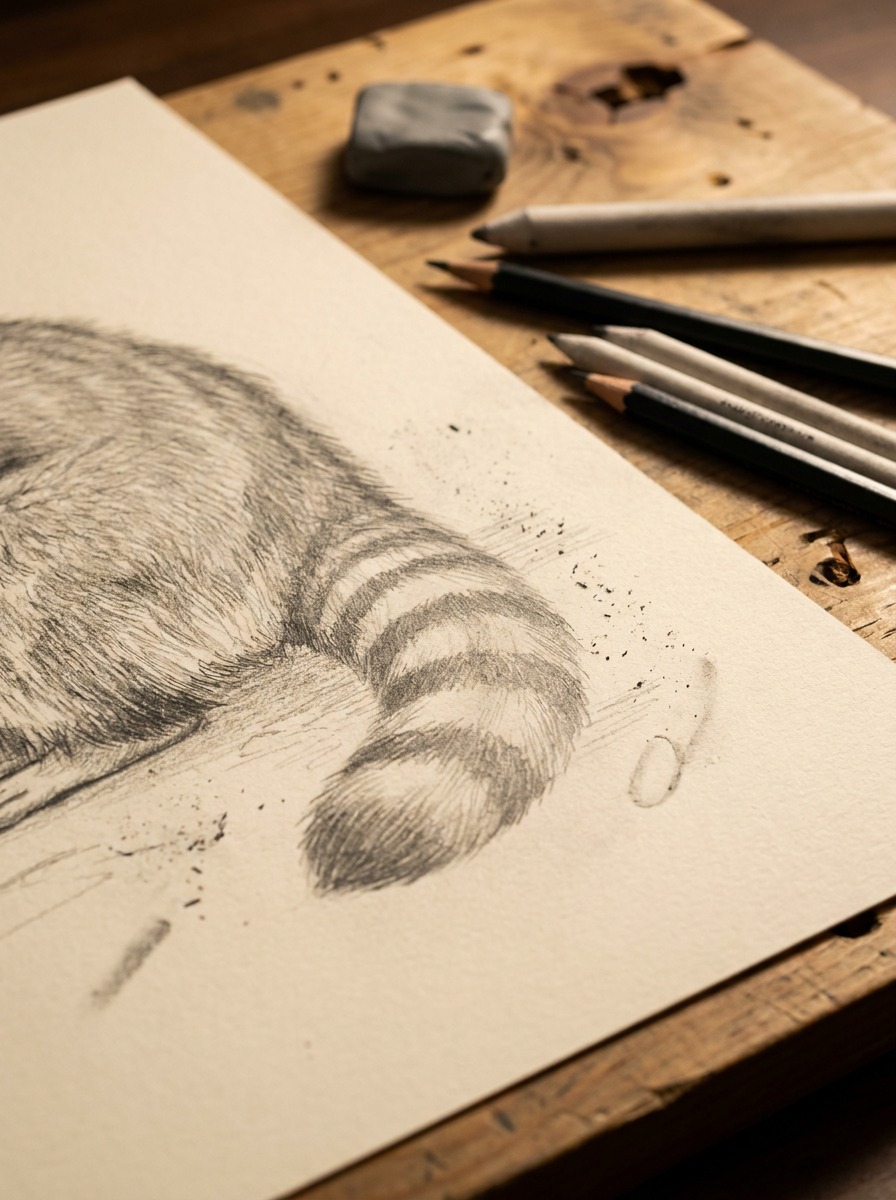
The tail’s alternating light and dark rings are a rhythm problem more than a drawing problem. Evenly spaced rings of identical width read as artificial almost instantly — actual raccoon tail rings vary slightly in width and spacing, usually tightening a little toward the tip. Sketch the ring boundaries as a loose, slightly irregular sequence before committing to any of them in dark graphite, the same way you’d rough out a repeating pattern in a textile or product design before locking the final spacing.
Keeping the rings believable as the tail curves
Because the tail is a cylindrical form, not a flat ribbon, each ring needs to curve with the tail’s form rather than sit as a flat horizontal band. Draw the near edge of each ring boundary slightly lower than the far edge as the tail curves away from you, which is the same basic cylinder-wrapping logic that applies to drawing a label wrapped around a bottle or a stripe running around a car’s body. Skip this and the tail reads as a flat strip pasted onto the body rather than a rounded form.
Common Mistakes That Make a Raccoon Drawing Look Off
A few recurring issues account for most raccoon drawings that don’t quite land, even when the individual steps were followed reasonably closely.
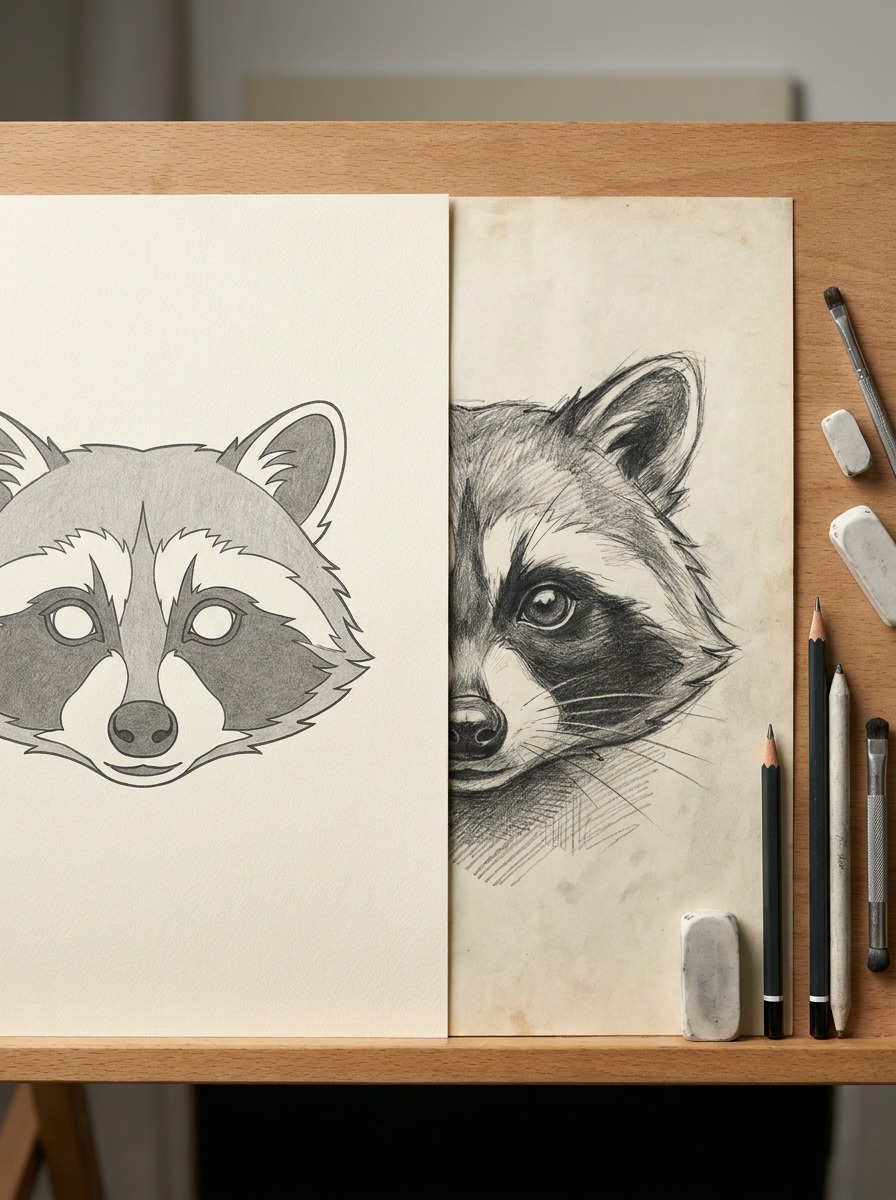
A perfectly symmetrical mask. This is the most common issue by a wide margin. Real raccoon masks vary between the two sides — different width, different edge softness, sometimes even a slightly different tilt. A mirror-perfect mask is the fastest way to make the drawing look like clip art.
Fur rendered as a flat gray fill. Shading the body with an even tone and calling it fur skips the entire point of the texture — fur needs directional variation and value layering to read as fur rather than as a smooth gray shape with an animal outline.
A tail drawn as a straight stack of bands. Ignoring the cylindrical curve of the tail and drawing the rings as flat horizontal stripes is a quiet but consistent giveaway that the underlying form wasn’t considered before the pattern was added on top.
An overlong or narrow muzzle. Stretching the muzzle even slightly past a raccoon’s actual short, blunt proportions pulls the whole drawing toward looking like a different animal, most often a fox or a dog.
Ears placed too close together. This one is subtle but consistent — narrow ear placement makes the skull read as too rounded and generic, closer to a bear cub than a raccoon. Pushing the ears slightly wider than feels natural at first is usually closer to correct.
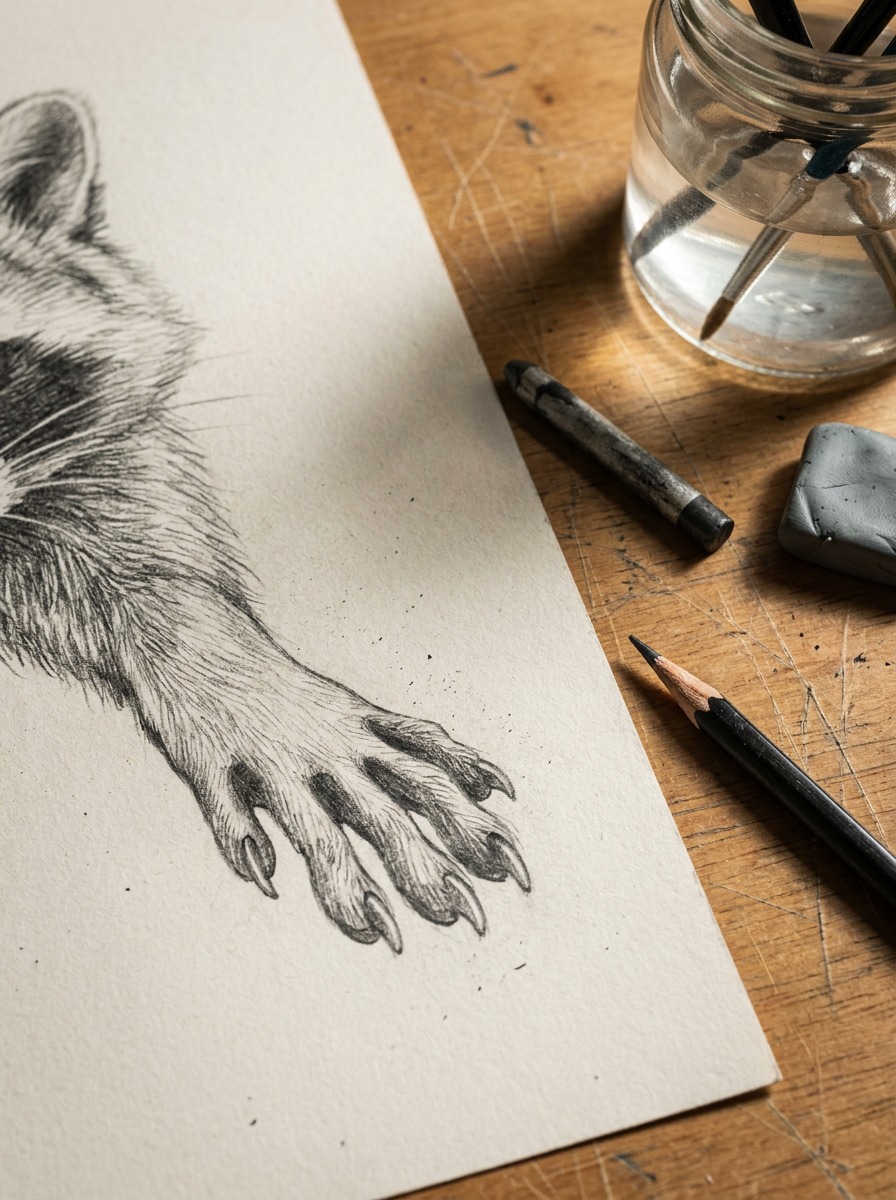
Ignoring the front paws. A raccoon’s front paws are almost hand-like, with long dexterous digits, and drawing them as generic rounded animal paws throws away one of the most identifying features of the whole animal. Even a loose, gestural pass at individual digits reads as more convincing than a smooth paw shape.
Give the Raccoon Personality Through Pose and Expression
Once the construction, mask, fur, and tail are solid, pose is what separates a technically correct raccoon from one that actually feels alive on the page. Raccoons have a distinctive low, slightly hunched stance and famously dexterous front paws — drawing the front paws gripping, reaching, or holding something (a stick, food, the edge of a trash can lid, whatever fits the scene) does more for the drawing’s personality than almost any amount of additional rendering elsewhere.
I think about pose the same way I’d think about a gesture sketch for a vehicle concept — the first few lines should already suggest what the subject is doing, before any detail gets added. A raccoon standing flat-footed and facing straight ahead reads as a diagram. The same raccoon with weight shifted onto one hip, head turned slightly, and one paw lifted reads as a moment, not a specimen.
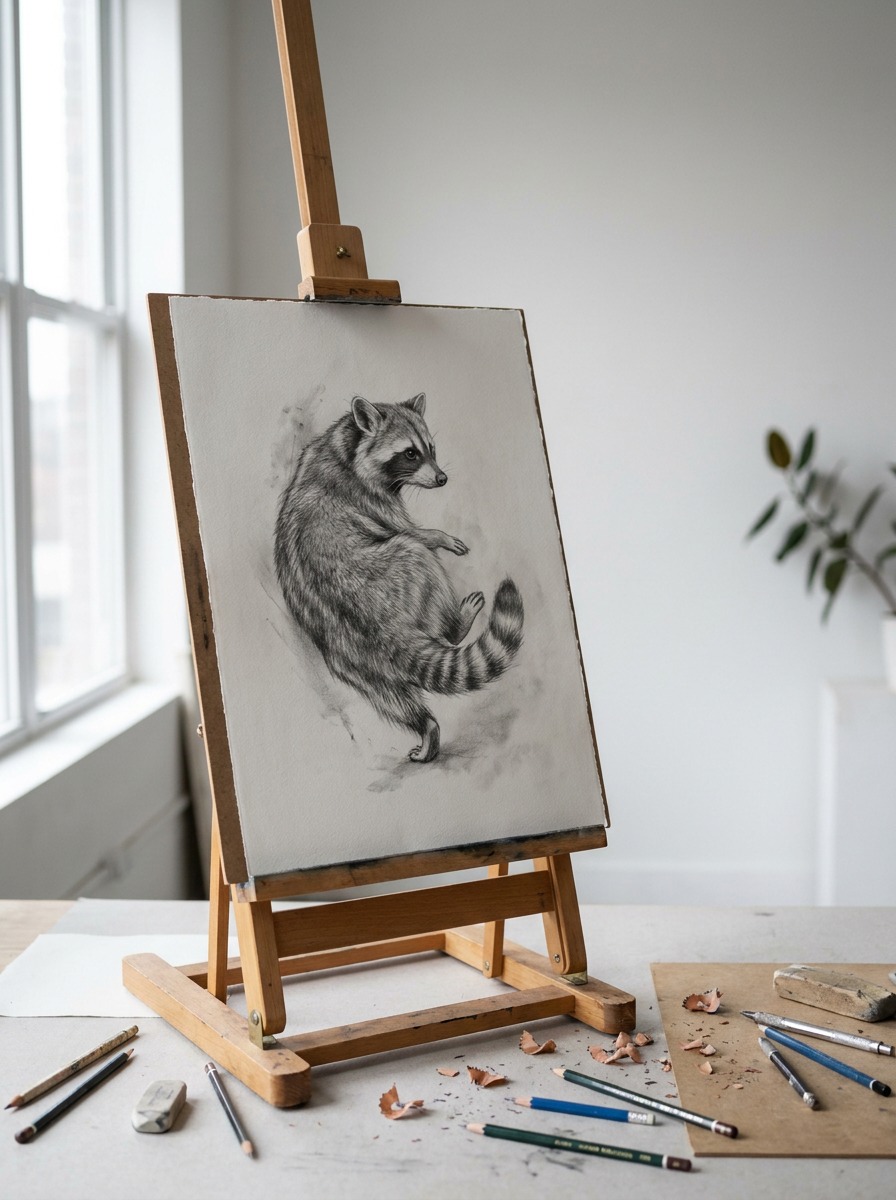
The tilt of the head matters more than people expect, too. Raccoons investigate things with real curiosity — a slightly cocked head, ears turned toward whatever has their attention, does more to sell “this is a specific animal in a specific moment” than any additional rendering on the fur or mask ever will. If you’re deciding between spending another twenty minutes refining fur texture or adjusting the head angle and paw position, the pose adjustment almost always earns more visual payoff. That’s a lesson that holds across disciplines — a strong silhouette and a clear moment of intent will carry a piece further than surface polish on a stiff pose, whether you’re sketching an animal, a product, or a vehicle.
FAQ
How do you draw a raccoon step by step for beginners?
Start with two overlapping ovals for the body and head, block in the legs and tail base, then place the ears and muzzle before adding any detail. Build the mask and eyes next, then layer in fur texture and the ringed tail last. Working in that order — big shapes before small details — keeps proportions from drifting as you add detail.
What’s the hardest part of drawing a raccoon?
The mask, by a clear margin. It’s easy to draw it too symmetrical and too clean-edged, which makes the whole animal look flat or cartoonish. Treating the mask as a value and edge-variation problem, not just a dark shape, is what makes it convincing.
How do you make raccoon fur look realistic?
Use short, directional strokes that follow the body’s form rather than a flat gray fill, and build the values in layers from light to dark rather than committing to dark tones too early. Let the edge where fur meets the mask stay slightly irregular instead of drawing one hard clean line around it.
Do raccoon tail rings need to be perfectly even?
No — and they shouldn’t be. Real tail rings vary slightly in width and spacing, and they curve with the cylindrical form of the tail rather than sitting as flat horizontal bands. Perfectly even, flat rings are one of the more common giveaways of a rushed drawing.
What art supplies work best for a raccoon drawing?
A couple of pencil hardnesses (something like a 2H and a 2B or 4B), a kneaded eraser for lifting highlights in the mask and eyes, and a reference photo rather than memory. Smooth to medium-tooth paper holds fine directional fur strokes better than a heavily textured sheet.
Can you draw a raccoon without a reference photo?
You can, but most people’s mental image of a raccoon mask is more symmetrical and more evenly shaped than an actual raccoon’s, so working from a photo reference makes a real difference in how convincing the final mask and fur pattern end up looking.
How long does a detailed raccoon drawing take?
For a rendered graphite piece with full fur texture and mask shading, plan on somewhere between ninety minutes and a few hours depending on size and how much fur detail you’re layering in. The construction and mask stages go quickly; the fur layering is where most of the time goes.
For more construction-from-simple-forms practice, see my How to Draw a Honda guide. If you want more on value and detail rendering specifically, Model Car Interior Detailing covers the same light-to-dark layering logic applied to a very different subject. And if animal or character drawing practice is what you’re after next, 50 Anime Coloring Pages is a good next stop.
- 231shares
- Facebook0
- Pinterest231
- Twitter0
- Reddit0