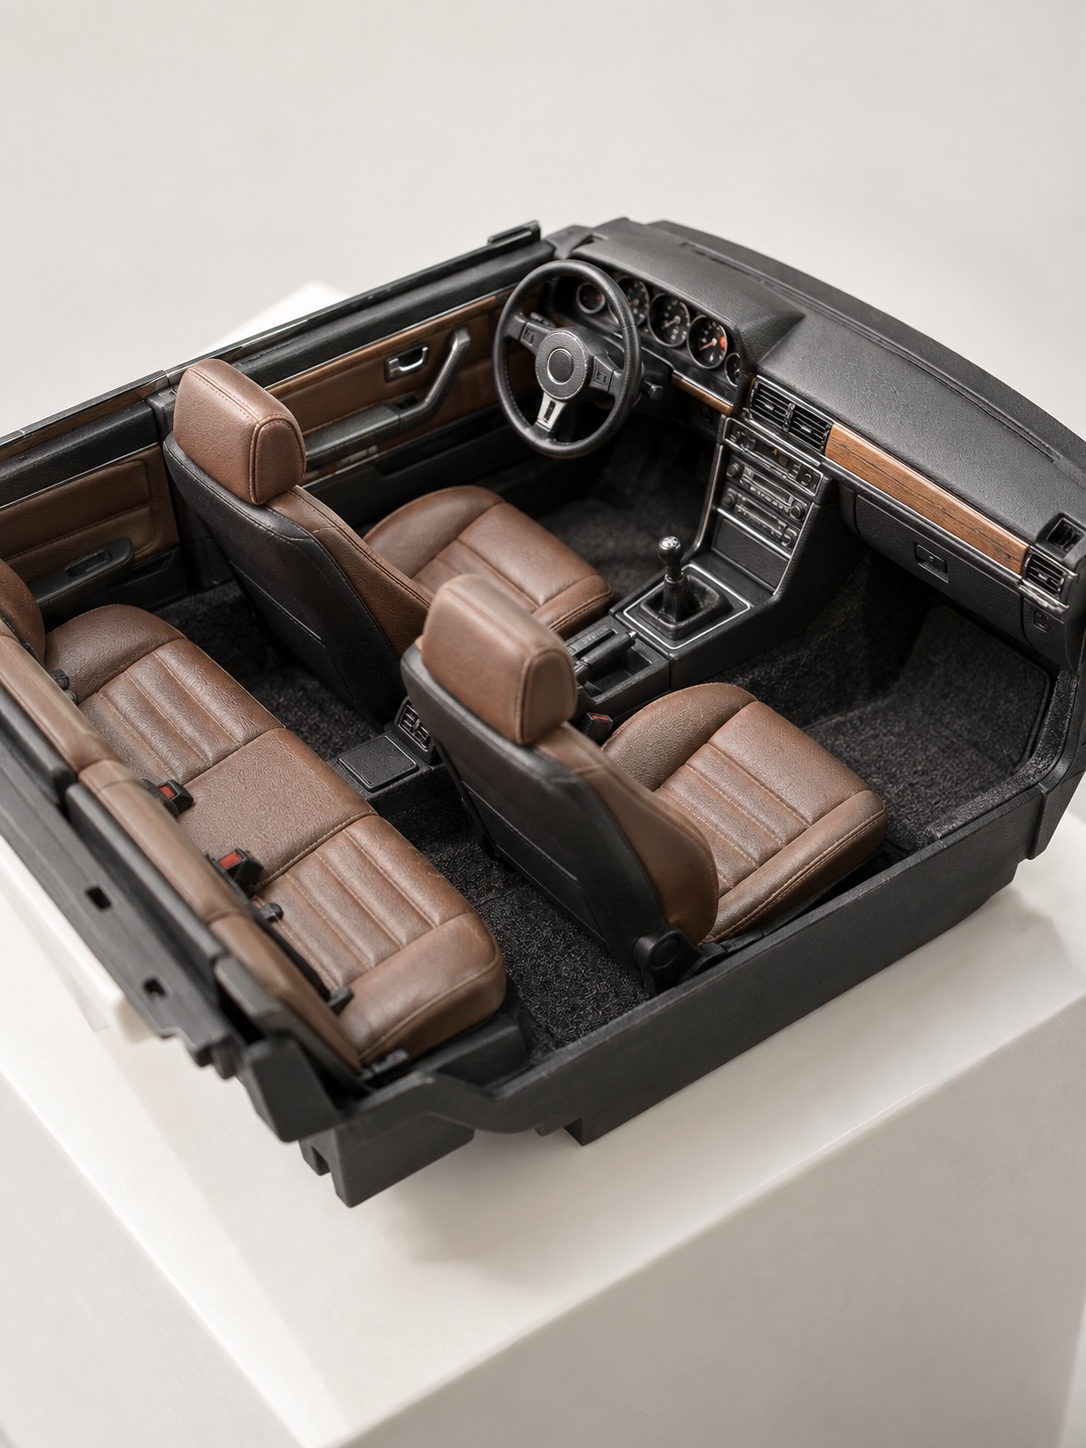
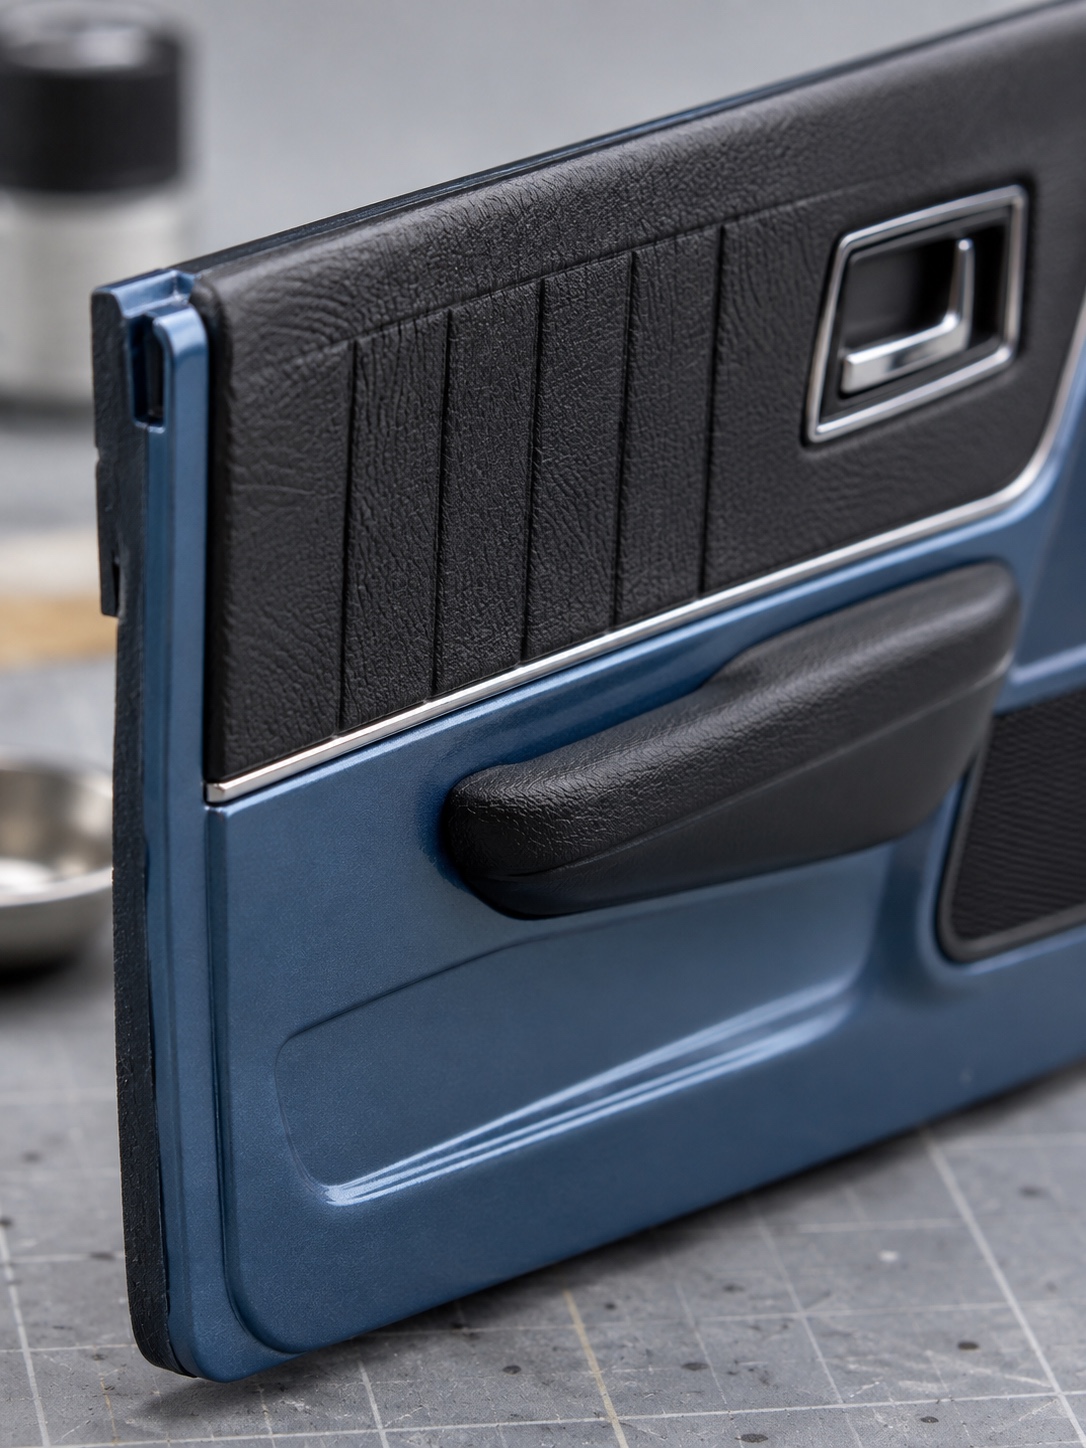
Most model builders pour their attention into the exterior paint and leave the interior as an afterthought, a scrap of felt glued to the seats and called done. That’s backward. The interior is usually the first thing a viewer’s eye lands on in a three-quarter shot, and it’s also the part of the build most likely to expose a rushed material choice, since cabin details sit so close to the camera.
I spent years doing surfacing and interior work on full-size vehicles, including early concept work on one of Ukraine’s first production electric car projects, and the lesson that translates most directly to scale modeling is this: a material that reads correctly at one size can look completely wrong at another. Real leather grain, real stitch thread, real carpet pile, all of it has a physical scale built in, and shrinking the vehicle around it without adjusting for that scale is exactly why so many otherwise well-built interiors look like toys instead of miniatures.
- Why model car interiors look wrong: understanding the scale effect
- Design the interior before you build it
- Prepare the interior tub, seats and door cards
- Choose scale-appropriate upholstery materials
- Build model car seats that look genuinely upholstered
- Detail the model car dashboard and gauges
- Create realistic model car carpet with flocking
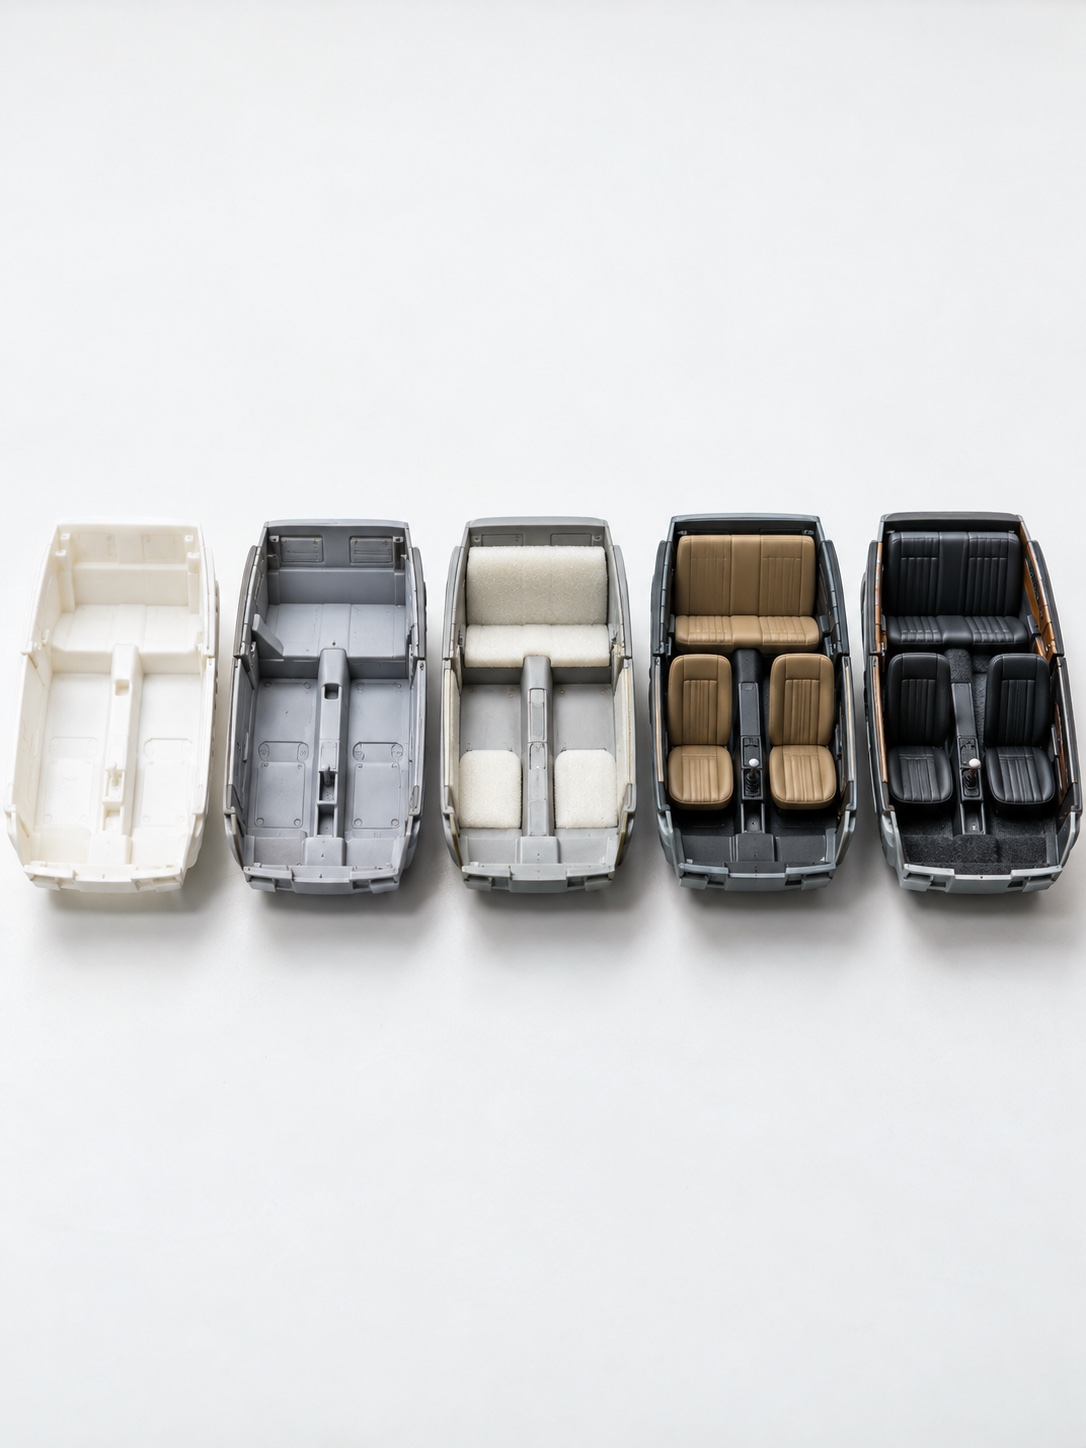
- Use an assembly order that protects the finish
- Add subtle weathering without making the interior look dirty
- Adapt the process for diecast restorations and plastic kits
- Common model car interior detailing mistakes
- FAQ
- Final thoughts
This piece walks through building a model car interior that actually reads as upholstered, from picking the right material down to the order you glue things in, so a smaller build doesn’t mean a less convincing one.
None of what follows requires exotic tools or a professional workshop. Most of the difference between an interior that photographs well and one that doesn’t comes down to material choice and sequence, both of which cost nothing extra to get right once you know what to look for.
Why model car interiors look wrong: understanding the scale effect
Texture, grain and material thickness at 1/18 and 1/24 scale
The scale effect is the reason a material that looks completely ordinary at full size reads as exaggerated once shrunk down. A leather grain pattern sized for a real car seat, viewed at 1/24 scale, looks less like fine leather and more like tree bark, since the eye has no reference point telling it the grain should be smaller too. The same distortion hits fabric weave, vinyl texture, and especially stitching, where thread sized for a real seam looks like rope once it’s glued onto a seat an inch and a half long.
This isn’t a subtle effect. It’s the single biggest reason a technically well-assembled interior still photographs as unconvincing, and it’s almost always a material problem, not a skill problem.
I think about it the same way I’d think about detailing a full-size concept interior for a photo shoot: the camera exaggerates whatever it’s pointed at, and a scale model’s viewer is essentially always shooting close-up, magnified footage of a tiny space. Material choices that would go unnoticed on a real dashboard from across a showroom floor become the first thing anyone notices on a model photographed six inches away.
Why real thread, coarse leather and heavy vinyl break the illusion
Full-size materials fail at scale for a simple reason: their texture and thickness were never designed with a camera lens or a magnified viewing distance in mind. Coarse leather off-cuts, heavy-gauge vinyl, and actual sewing thread all carry a physical scale that only makes sense at arm’s length on a real seat. Bring that same material down to 1/18 or 1/24, and its thickness alone starts fighting every curve you try to wrap it around, while its texture reads as wildly oversized under any kind of close inspection or photography.
Design the interior before you build it
Reference photos, color palette and visual hierarchy
Pull reference photos before touching any material, and decide early which elements should carry the most visual weight. Seats and the dashboard read first in almost any interior shot, so they deserve the most planning attention, while door card details and floor mats can follow a simpler, more consistent treatment. A tight two- or three-color palette, one primary upholstery tone, one accent, one neutral for trim, reads as considered; a cabin built from five unrelated colors reads as improvised regardless of how well each individual part is finished.
Matching the finish to a showroom, race or weathered vehicle
Decide upfront whether the build represents a pristine showroom car, a stripped-down race interior, or a weathered daily driver, since that decision changes almost every material and finish choice downstream. A showroom interior wants clean, unbroken material with minimal visible wear. A race-spec cabin can run sparser trim and harder-wearing surface textures. A weathered daily driver earns the scuffing and graphite polish covered later in this piece, but only after the clean base build is finished, not as a substitute for doing that base work properly.
Prepare the interior tub, seats and door cards
Removing mold lines, sink marks and rough edges
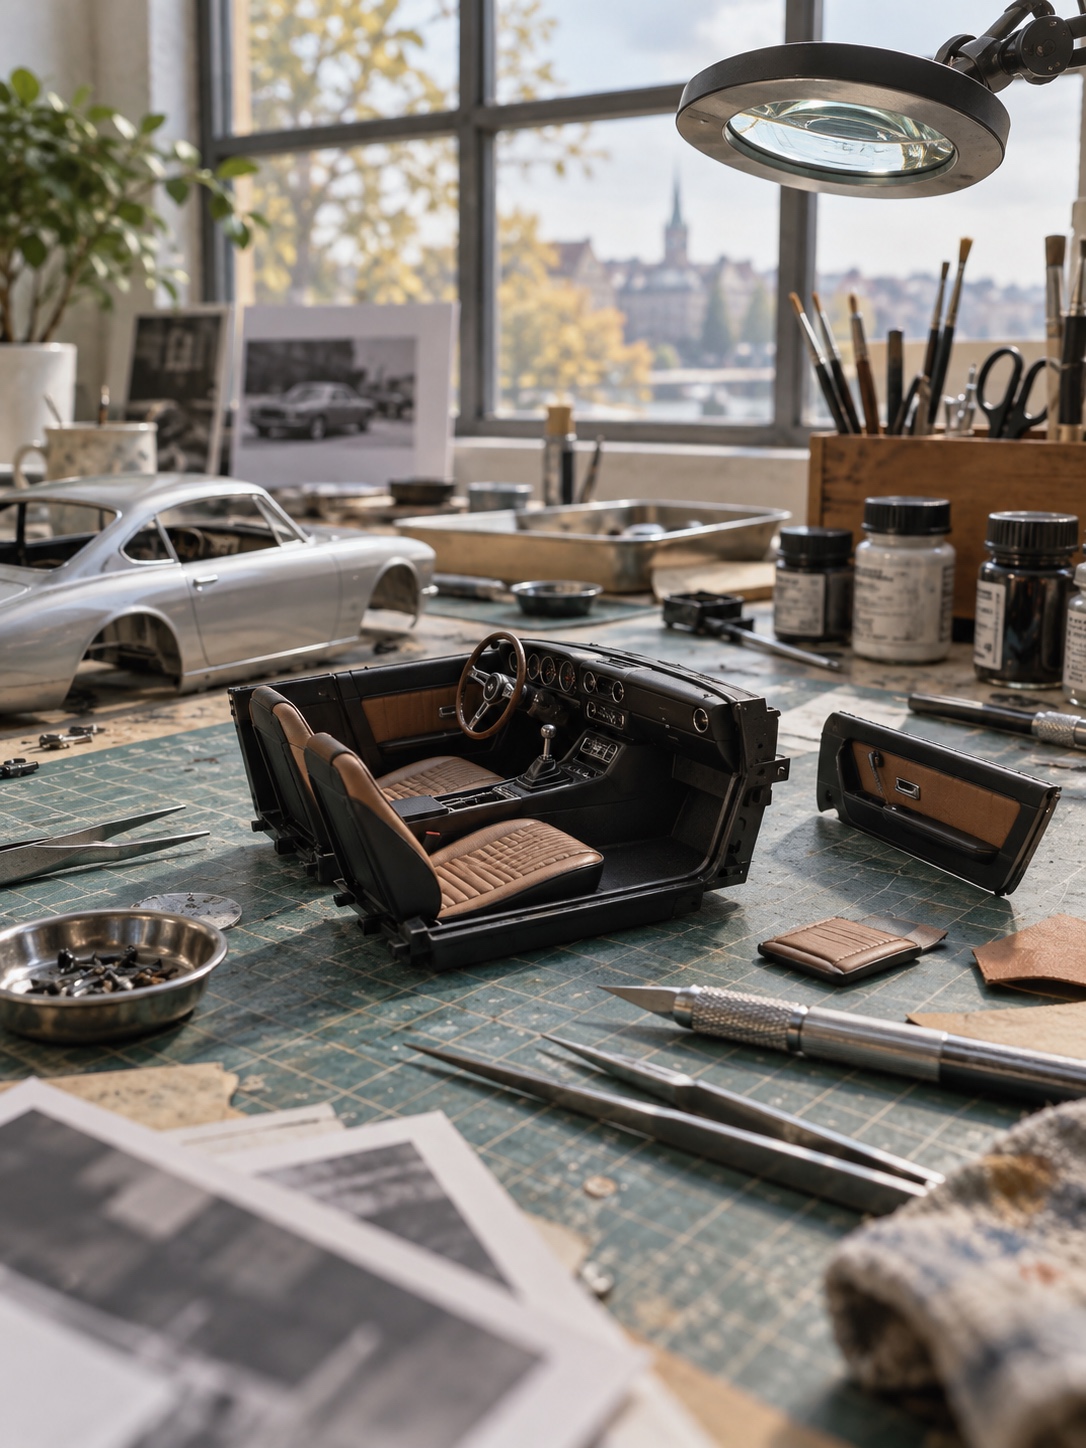
Always handle cosmetics last. Deal with mold lines and sink marks before any upholstery, carpet fiber, or paint goes anywhere near the tub. Diecast interiors typically arrive close to finish-ready, but injection-molded plastic kits almost always carry a seam down the seat backs, a shallow dimple where a sprue attached, or a rough parting line along the door cards. Sand these out with progressively finer grits, fill any remaining low spots with a light skim of putty, and sand again until the surface reads clean under raking light.
Priming for consistent color and adhesion
Prime the entire tub once the surface is clean. This does two things at once: it reveals any flaw you missed during sanding, while there’s still time to fix it, and it gives upholstery material and paint something consistent to grip instead of bare, slightly glossy injection-molded plastic. Skip this step and every imperfection in the base surface telegraphs straight through even excellent upholstery material once it’s glued down.
Choose scale-appropriate upholstery materials
Thin leather, vinyl, paper and painted plastic
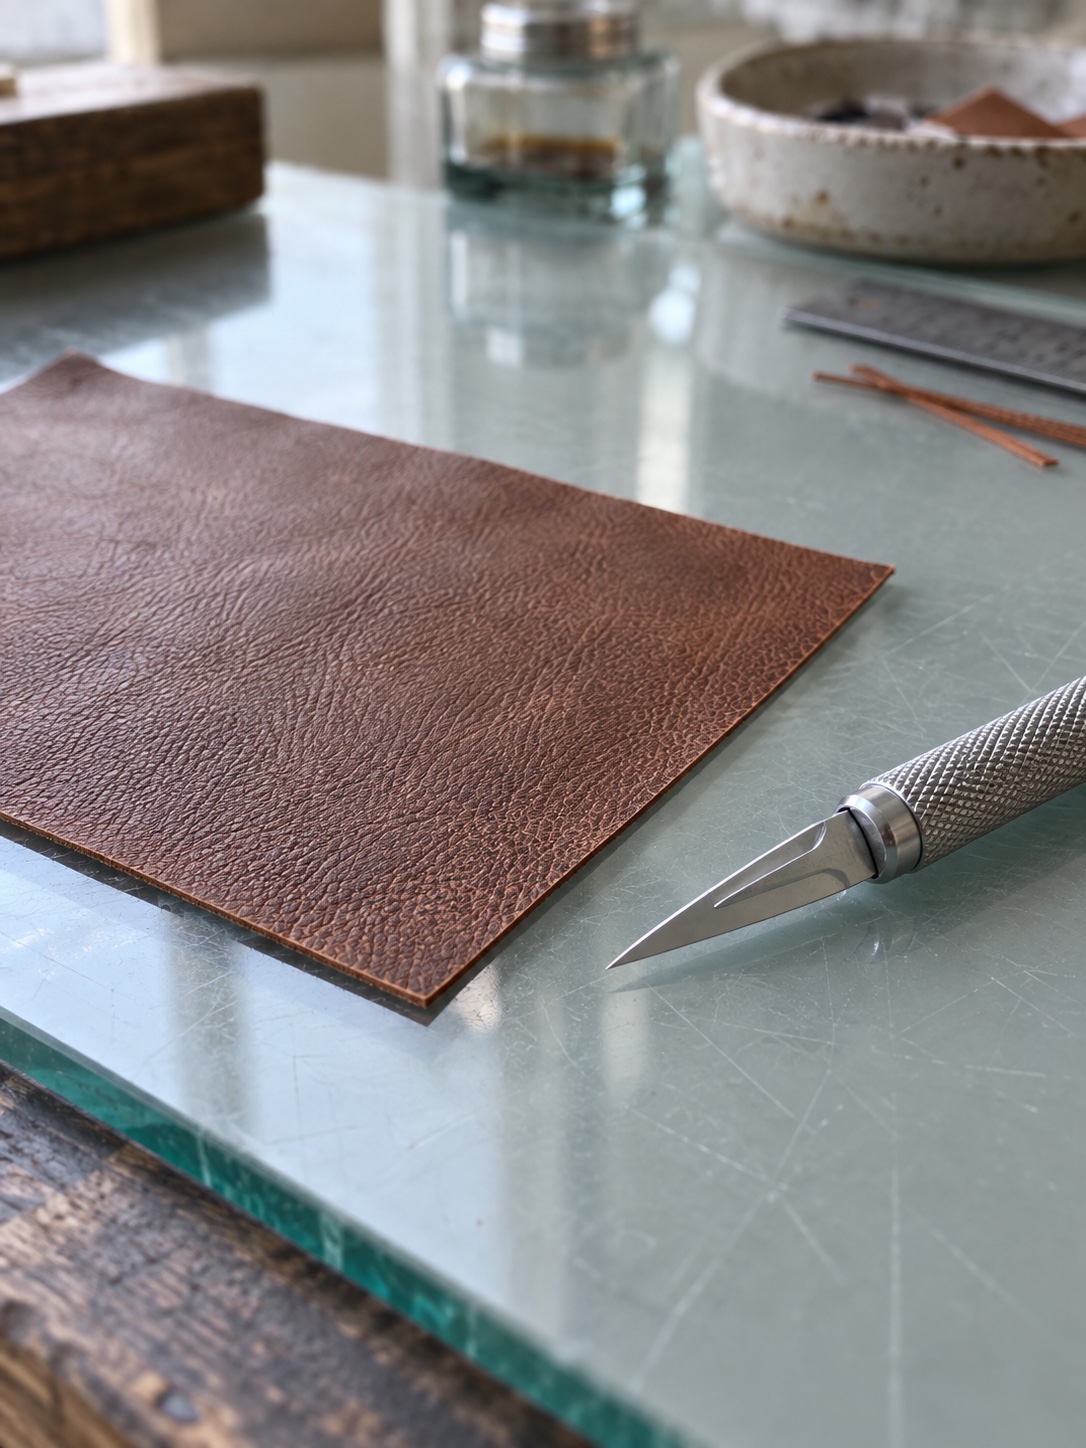
The material choice here either makes the rest of the build straightforward or turns it into a fight. You want something thin enough to wrap a tight bolster curve without bunching, supple enough to conform to a seat shape without springing back, and fine-grained enough that its texture doesn’t read as a mountain range once it’s glued in place and magnified. Craft-store leather off-cuts and thick vinyl fail on all three counts: they crease instead of curving, fray at cut edges, and carry a grain pattern sized for furniture, not a model seat.
Purpose-graded leather for miniatures, thinned and finished specifically for small-scale upholstery work, solves this directly: it takes a clean cut straight from a fresh blade with no fraying, and it wraps a seat bolster smoothly without the pull lines you’d get from a repurposed full-size hide.
PVA vs CA glue and how to avoid frosting
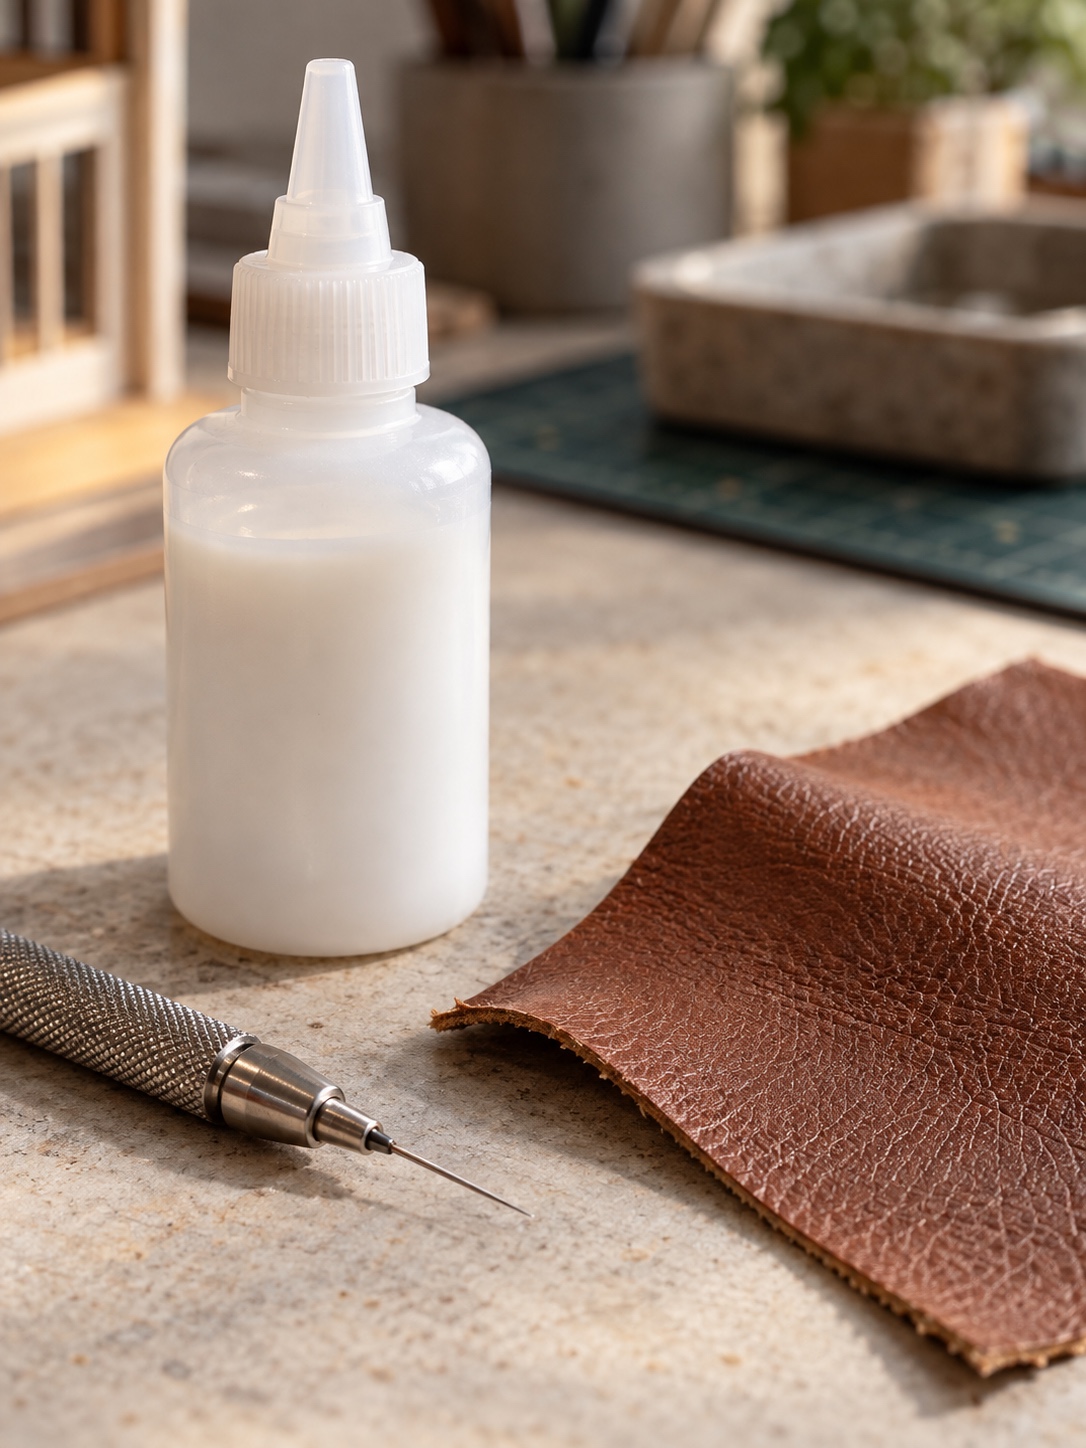
CA glue sets fast, but it can eat into foam padding and cause a white haze called frosting if it touches any clear plastic nearby, which is a real risk given how close gauge lenses and seat padding often sit to each other. PVA adhesive sets slower, which sounds like a downside until you’re trying to reposition a piece of upholstery skin for the third time to get a bolster wrap sitting right; that extra working time is what actually saves an interior build, not a faster bond.
Build model car seats that look genuinely upholstered
Shaping the base and adding scale-correct padding
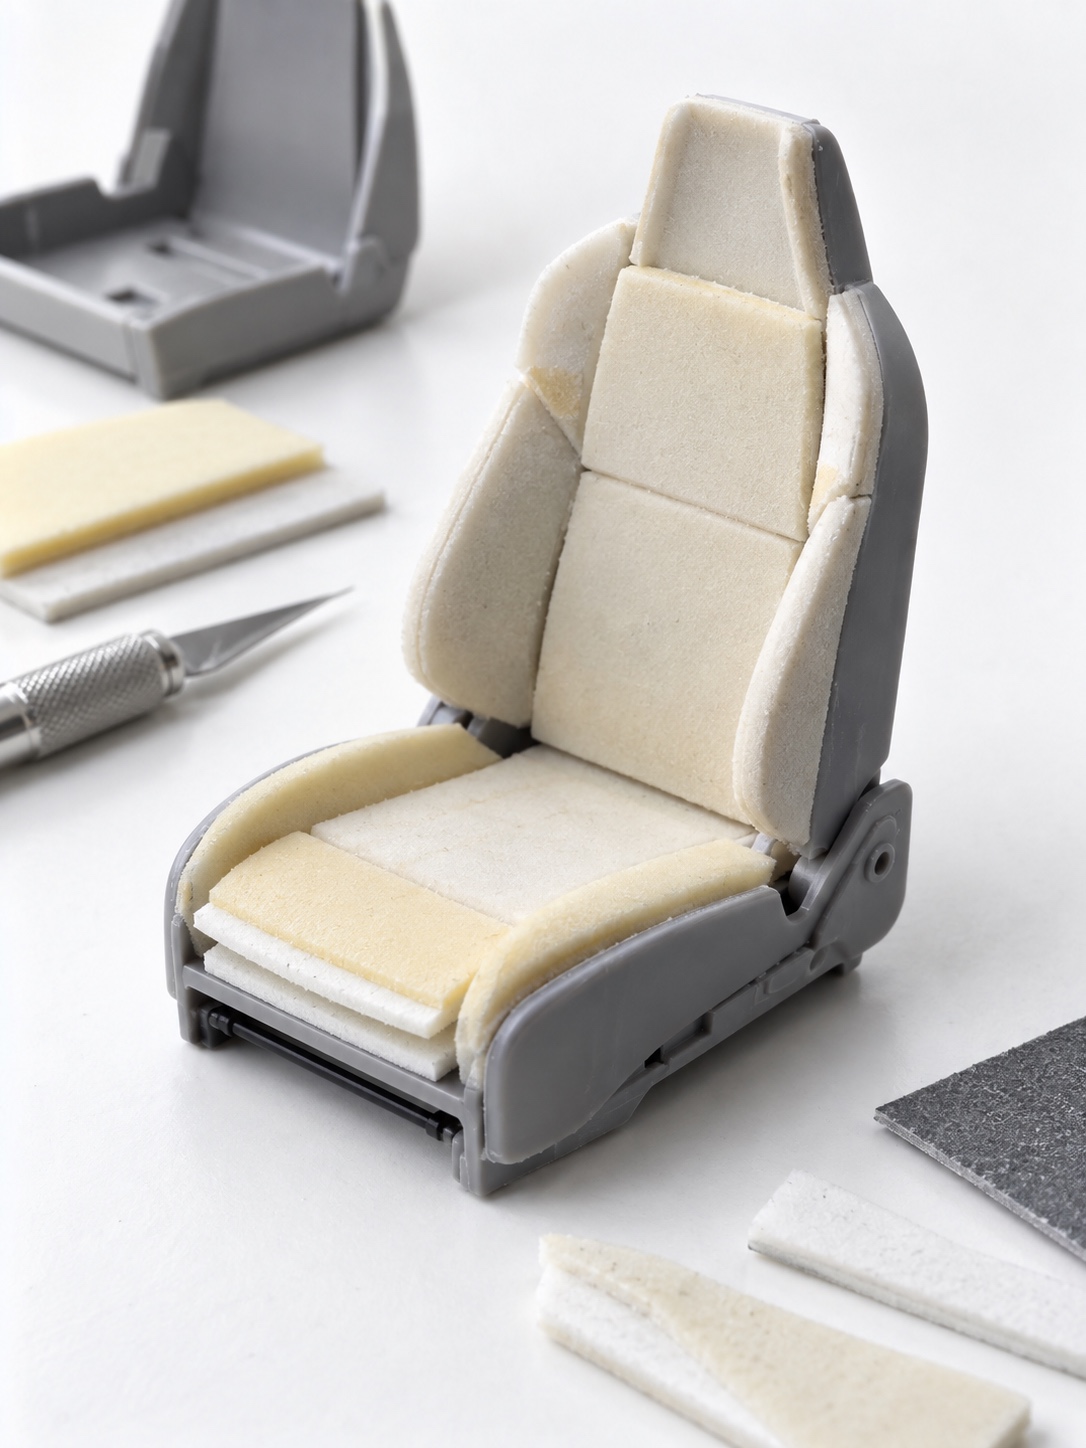
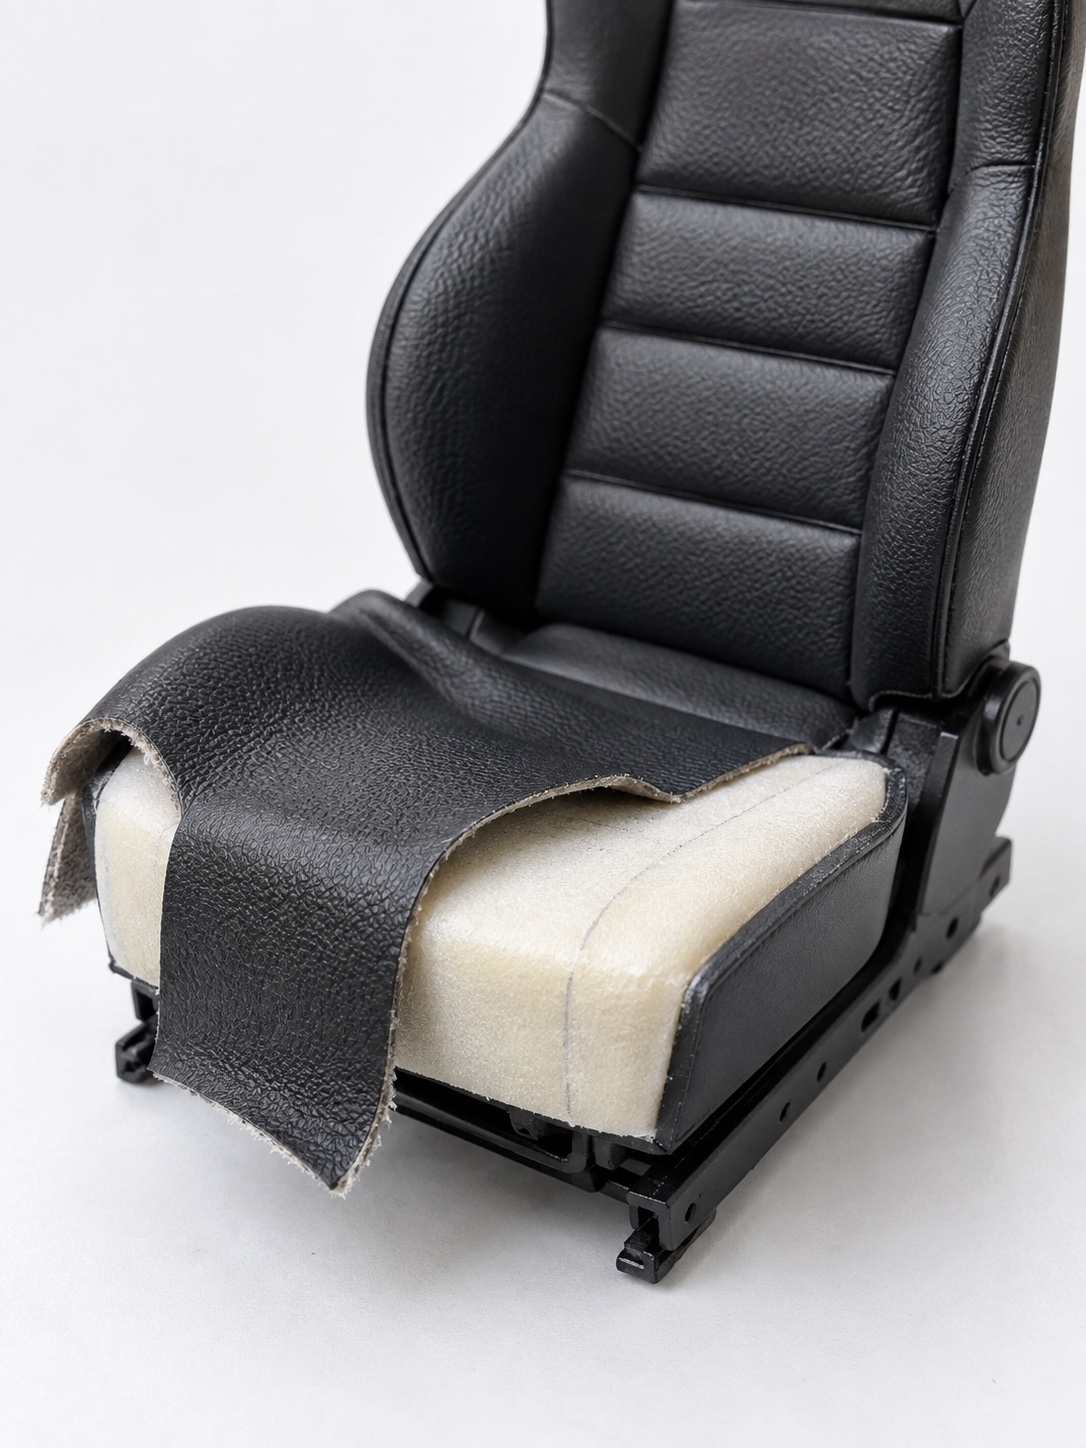
Start from the kit’s plastic seat base if it’s usable, sanding away any overly sharp bolster edges first. If the kit doesn’t provide a usable base shape, build one from styrene sheet and block, then sand the bolsters to a believable profile. Add a thin padding layer next, either several thin coats of white glue built up gradually or a sliver of thin foam if the scale allows it, so the upholstery skin has something to mold gently around rather than stretching flat over bare plastic.
Wrapping bolsters, trimming edges and embossing stitch lines
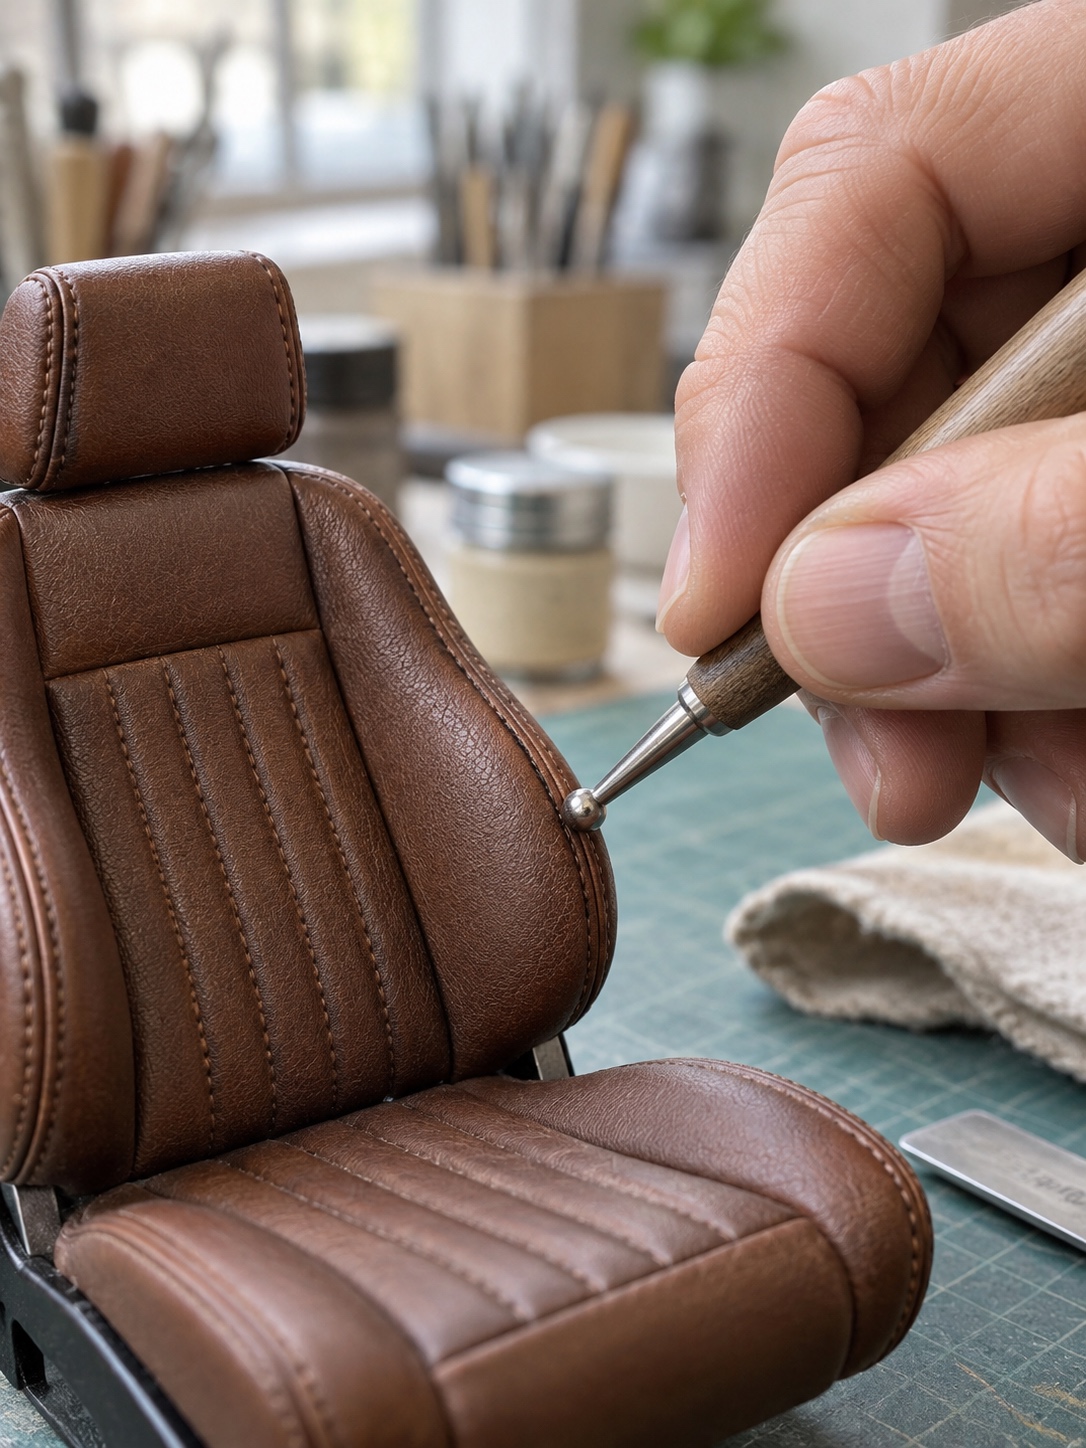
Wrap the upholstery skin from the center of the seat outward, pulling gently so the material sits tight without thinning out or distorting at the corners. Trim any excess on the underside, where it won’t be visible in the finished assembly. For stitching, skip actual thread entirely; at this scale it always reads as oversized rope rather than fine seam work. Use a blunt needle or a dedicated burnishing tool to press stitch lines directly into the material instead. From normal viewing distance, the resulting shadow line reads convincingly as stitching without adding any physical bulk to the seam.
Detail the model car dashboard and gauges
Decals, photo-etched faces and clear gauge lenses
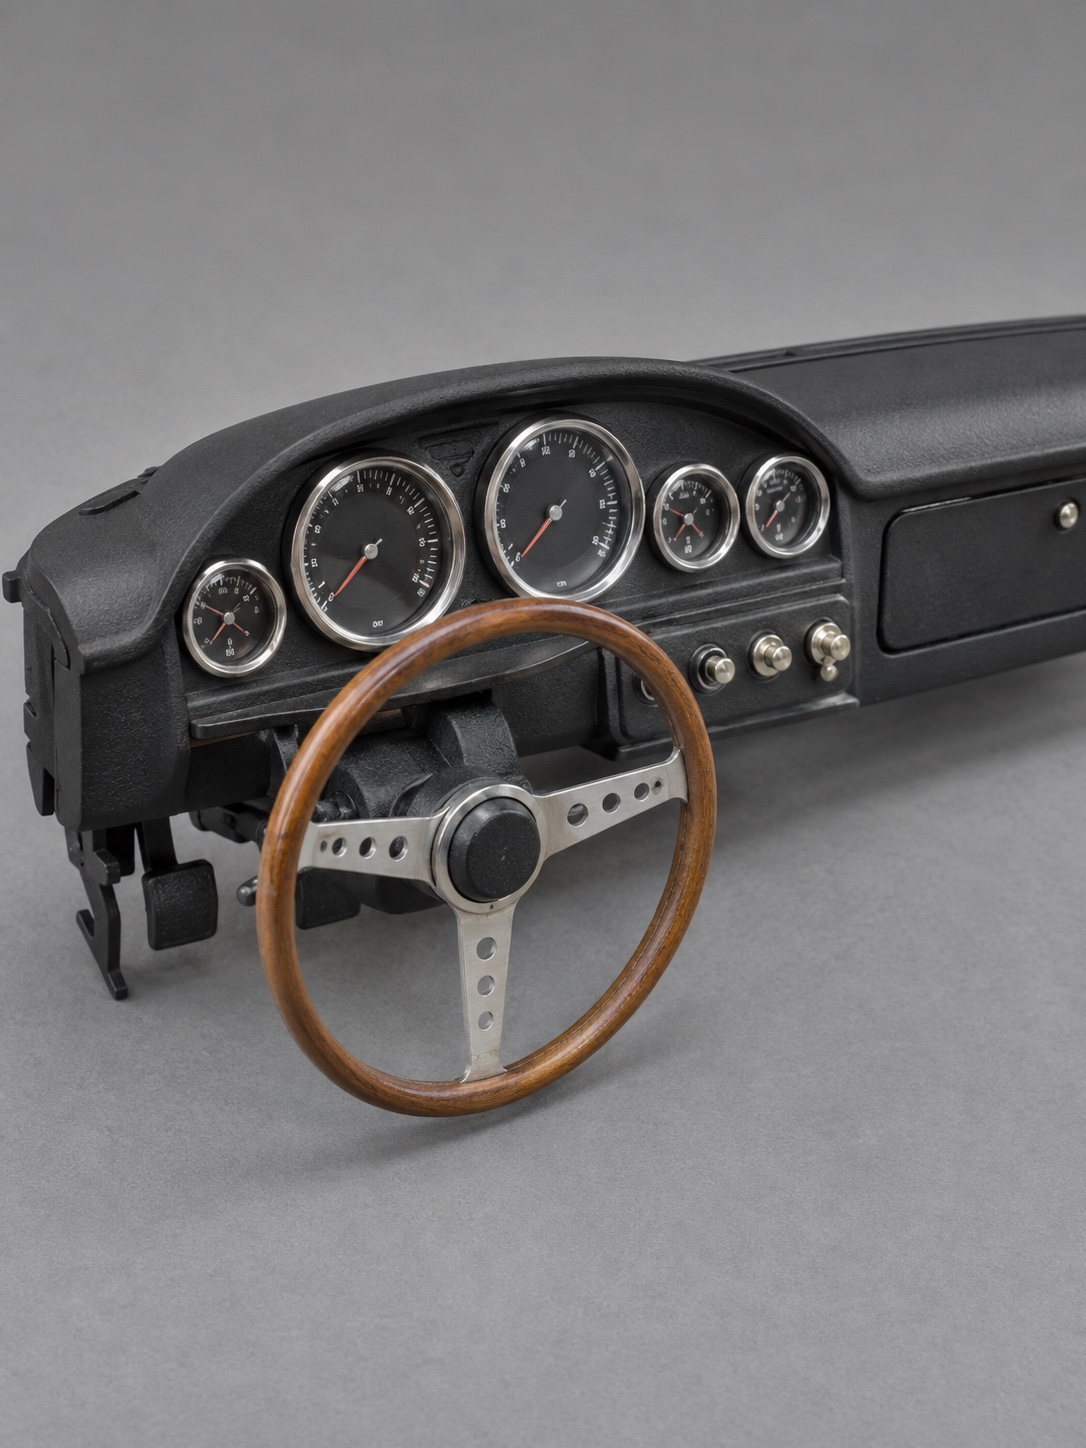
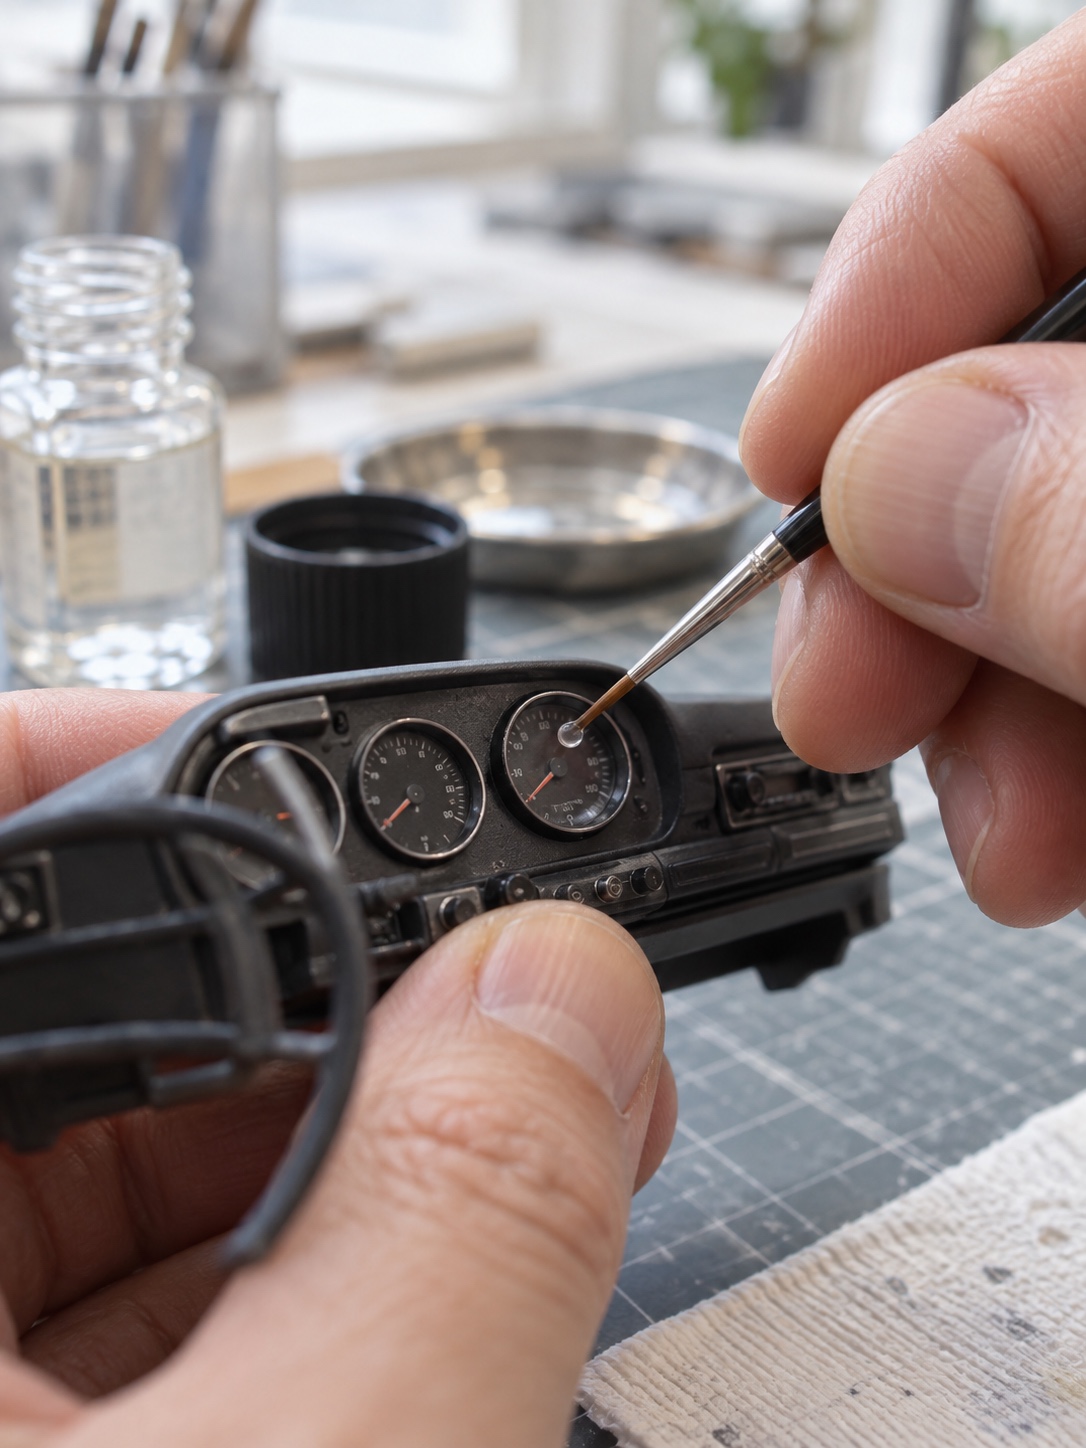
Photo-etched gauge faces give the sharpest needle and number detail available, though dry transfers and printed decals remain a solid, budget-friendly option as long as you’re careful with the setting solution, since it can fog transparent ink if applied too heavily. Add a small droplet of clear gloss, or a thin sliver of clear sprue, over each gauge face afterward to act as a lens. This single step sells the illusion of depth on a dashboard more effectively than almost any other detail in the build.
Using matte, satin and gloss to create depth
Paint the bezels around each gauge in a slightly different sheen than the surrounding dash body, satin for the bezel ring, matte for the dash plastic itself, so the eye picks out the instrument cluster naturally without needing a magnifying glass to locate it. Sheen contrast does more work here than color contrast alone; two surfaces in the same color but different finishes still read as visually distinct.
Create realistic model car carpet with flocking
Electrostatic flocking vs hand-applied fibers
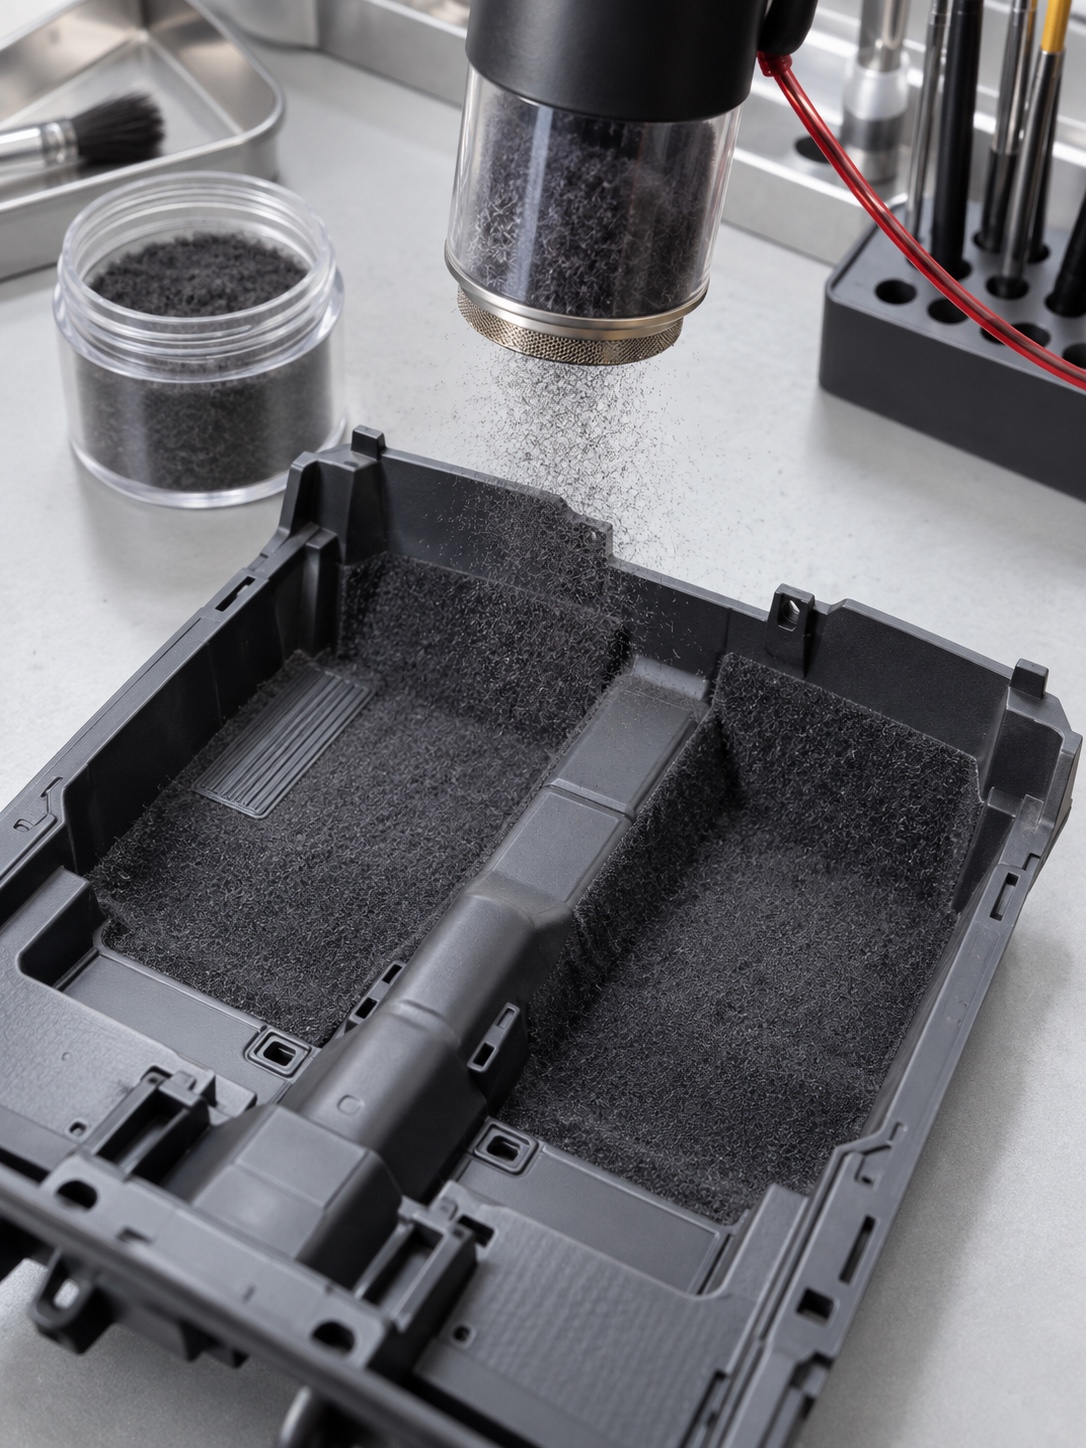
An electrostatic flocking device is the most reliable tool for realistic carpet texture, since it charges fine fibers so they stand upright as they land, closely mimicking the pile structure of real carpet. Without one, a coat of spray adhesive followed by finely cut polyester fiber, worked in with a small brush using a circular motion, gets you most of the way to the same result. That circular motion matters more than it sounds like it should: it distributes fiber unevenly enough to look natural, whereas fiber laid down in one direction reads immediately as a rushed job.
Floor mats, pile direction and clean edges
Keep flocked edges clean and contained to where actual carpet would sit; fiber that strays onto door sills or pedal areas reads as sloppy rather than textured. If you’re adding separate floor mats, vary their pile direction slightly from the main carpet underneath, the same way a real aftermarket mat sits at a slightly different weave angle than the factory carpet beneath it.
Design tip: Hold intended upholstery, carpet fiber, and trim material against the actual seat, and judge it at the viewing distance a finished photo would be seen at, not at arm’s length while working.
Use an assembly order that protects the finish
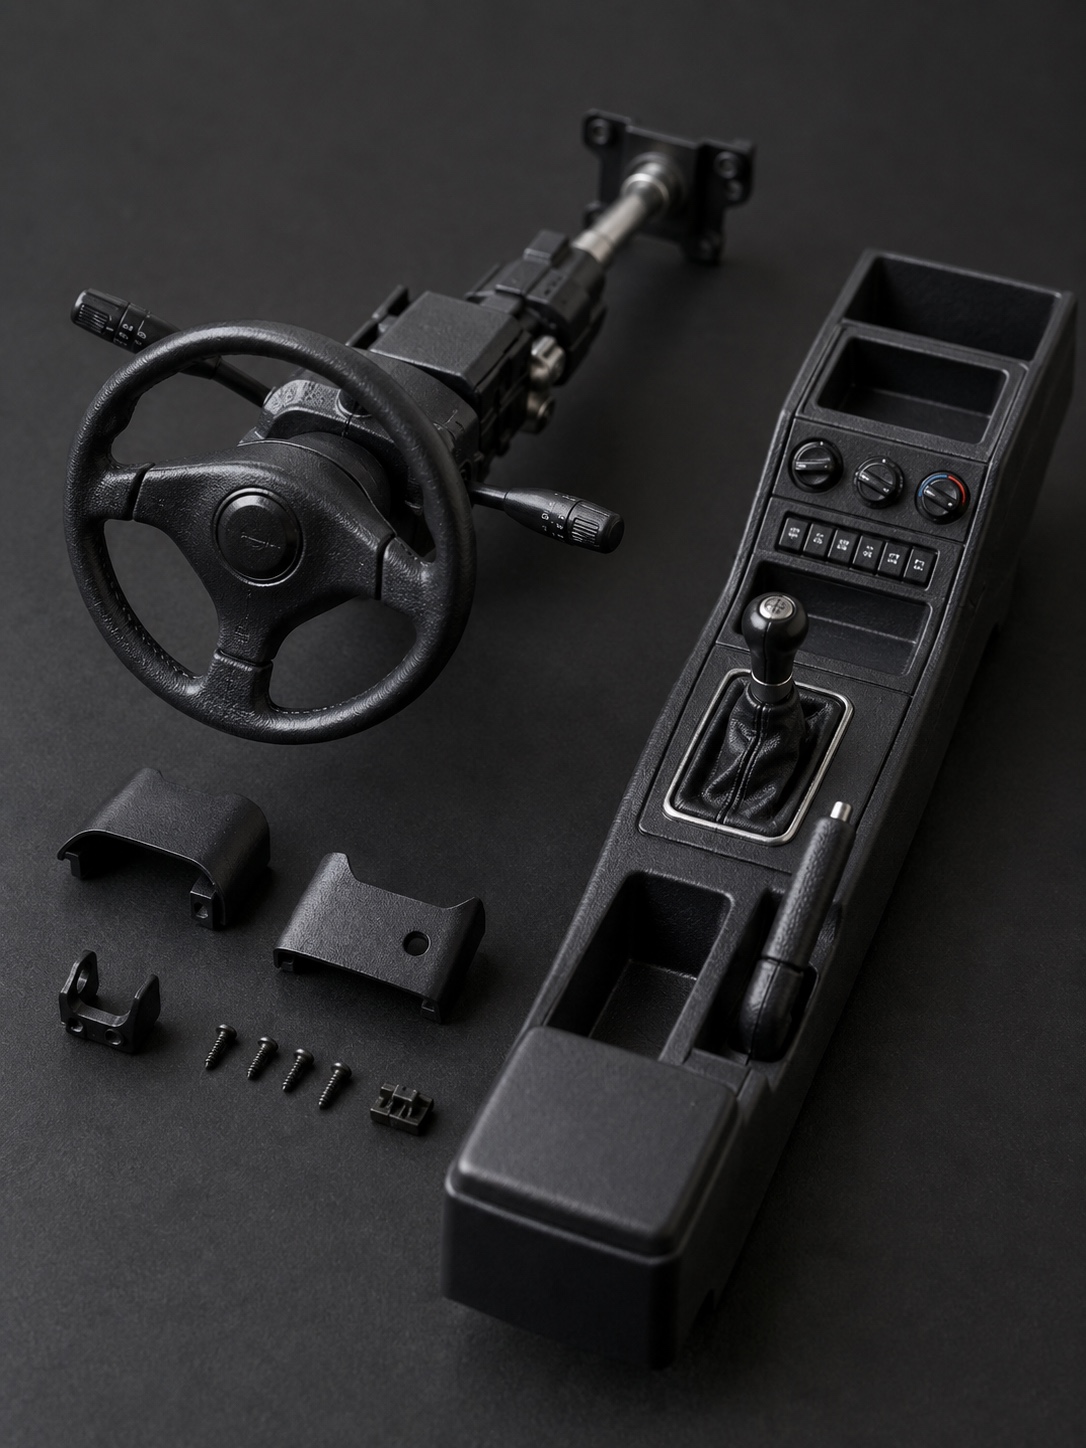
The sequence you glue components in largely determines whether the build goes smoothly or turns into a rescue operation halfway through. A dependable order: interior tub first, then floor inserts, then seats, then center console, then steering column, and the dashboard last. Large, steeply angled panels need to go in before smaller components get in their way; installing the dashboard early all but guarantees you’ll spend the rest of the build maneuvering seats and console pieces around it, risking scratched paint or a knocked-loose gauge lens in the process.
Add subtle weathering without making the interior look dirty
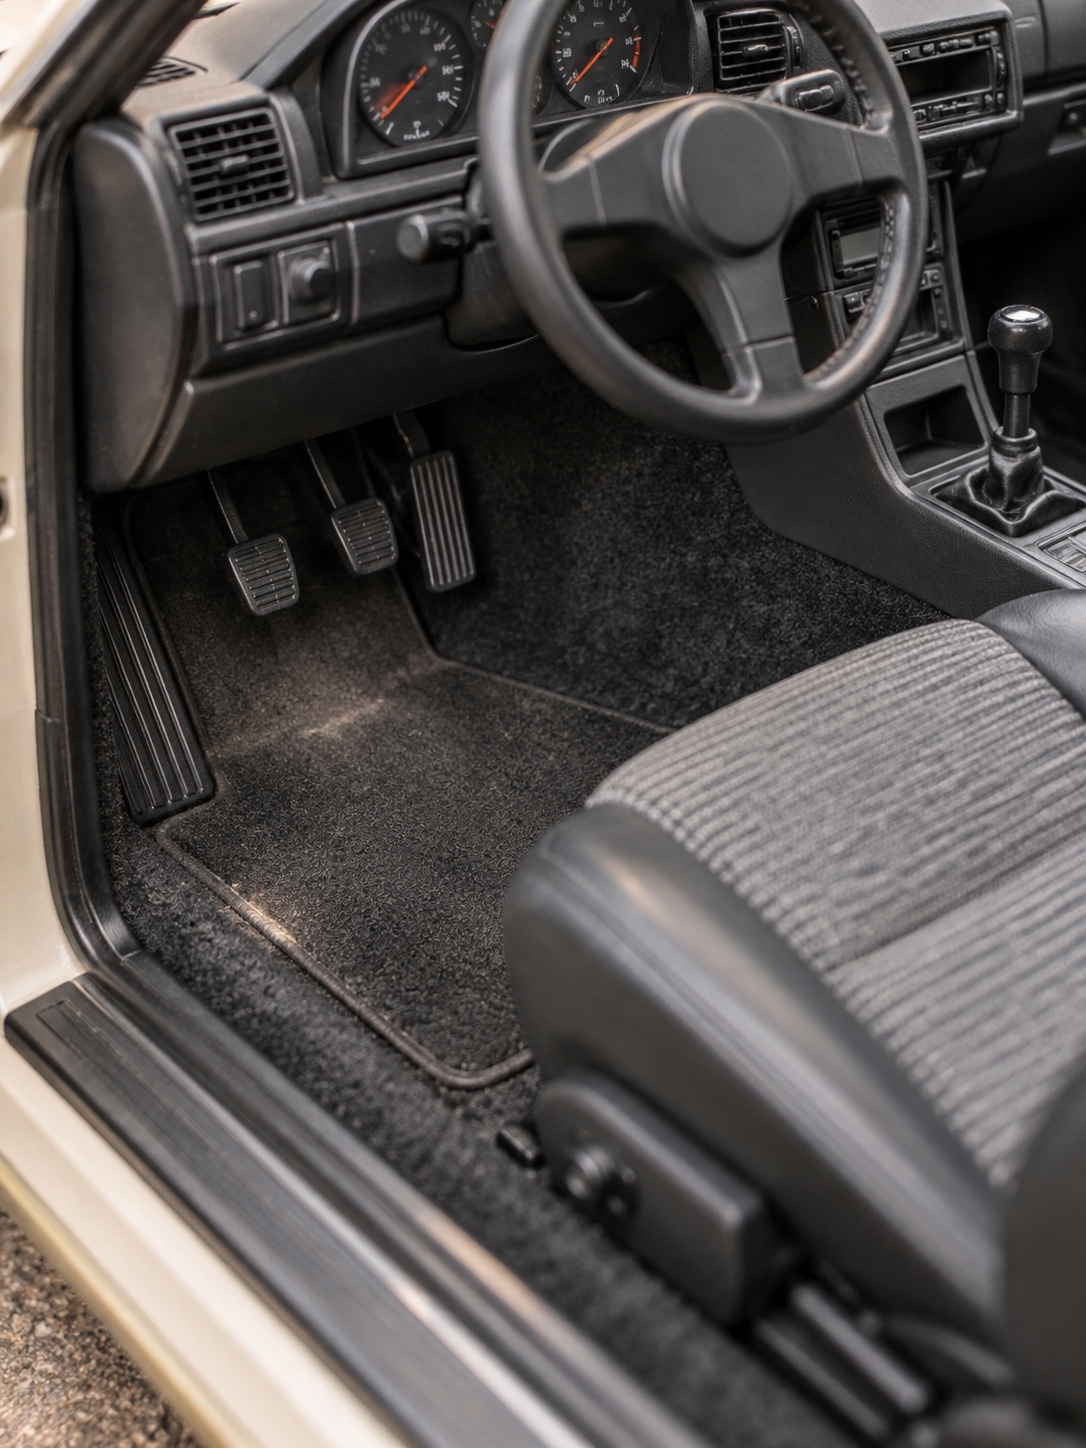
A completely spotless interior can read as sterile, almost toy-like, under close inspection. A light weathering pass fixes that without tipping into “beat-up junker” territory. Dry-brush a faint gray along the footwells to suggest scuffed carpet, since that’s exactly where feet would naturally wear material down over time. A light touch of graphite on the driver-side floor mat replicates the subtle shine that builds up from years of shoe contact near the pedals. Finish with a thin matte clear coat over the whole interior; beyond unifying every material and finish under one consistent sheen, it also kills the slightly plastic shine that reads as “unfinished model” under bright photography lighting.
Adapt the process for diecast restorations and plastic kits
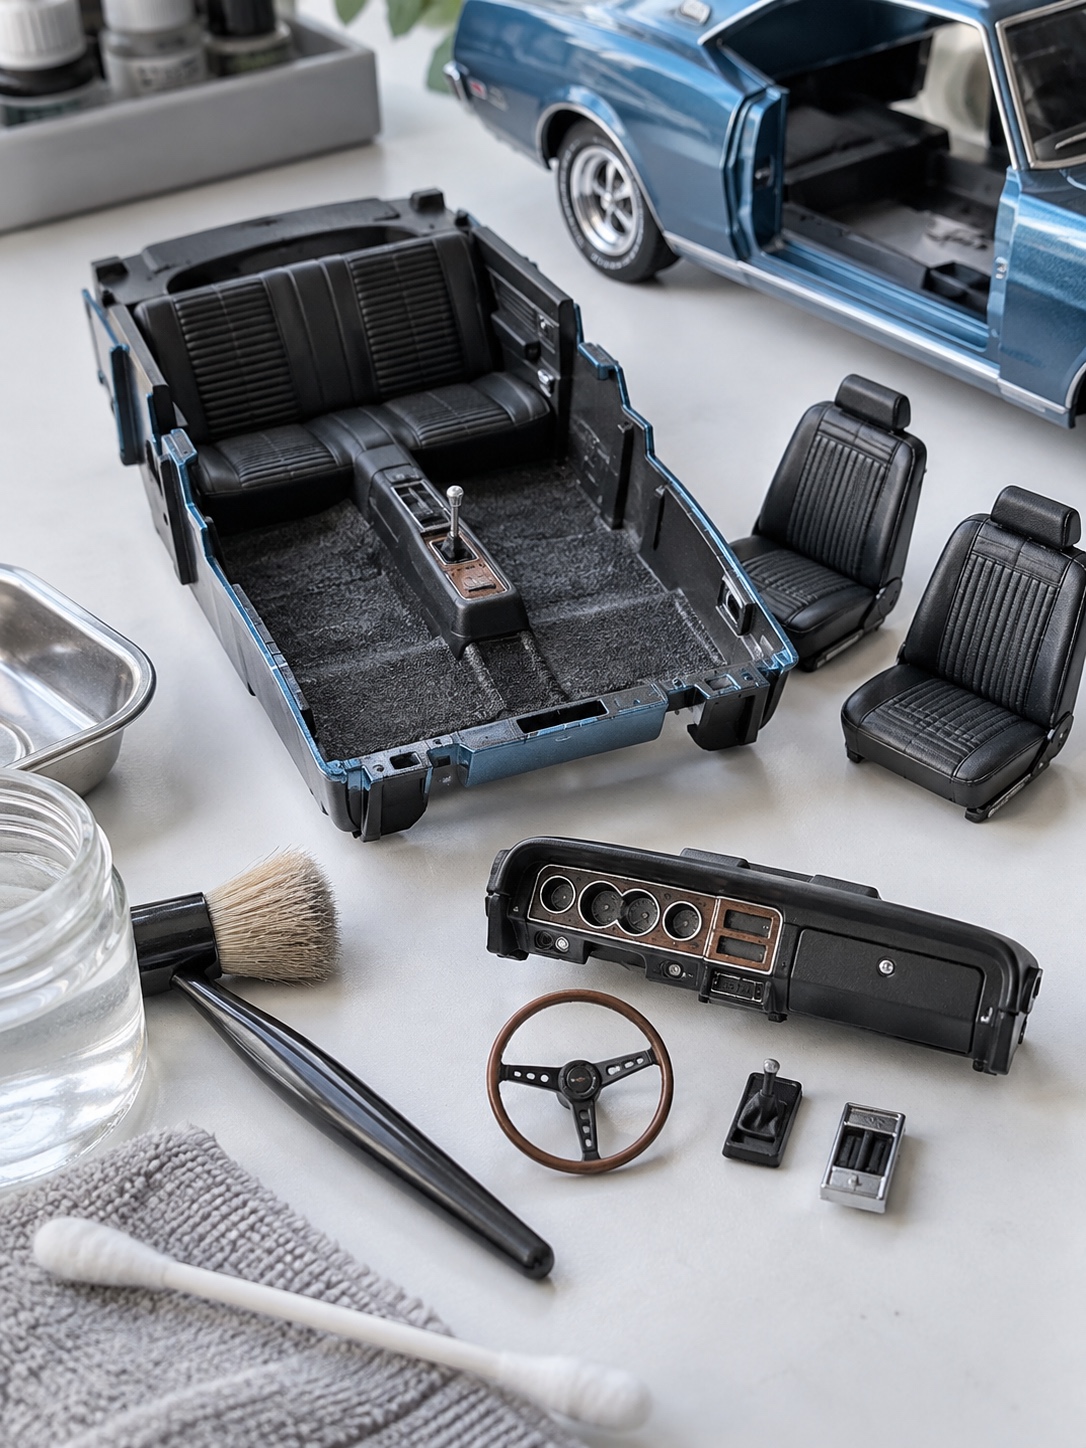
Diecast and plastic kit interiors call for close to opposite instincts. Diecast interiors typically arrive with a reasonably convincing factory finish already in place, so the priority is careful disassembly, cleaning, and preserving as much of the original detail as possible; forcing a mounting tab too hard is an easy way to snap a point that’s nearly impossible to replace. Plastic kits are the reverse case: many mold in minimal interior detail, and getting a convincing result means expecting to add styrene sheet, putty, and scratch-built parts rather than hoping the kit’s stock detail will be enough. Treat a plastic kit interior as a blank canvas from the start rather than something to merely dress up, and the result comes out noticeably stronger.
Common model car interior detailing mistakes
Glue ooze tops the list by a wide margin: any adhesive that seeps out from under upholstery or trim hardens into a pale, obvious crust, especially with PVA. Wipe it away immediately with a damp brush before it has any chance to set. Fingerprint smudges on a freshly painted dash or console panel are the telltale sign of handling parts before the paint has fully cured; let paint cure completely, and always hold parts by an edge that won’t be visible in the finished assembly.
Over-scaled stitching is another instant giveaway: if pressed stitch lines look more like rope than fine thread, they’re spaced too widely or pressed too deep for the scale you’re working in. And any exposed, unpainted edge, wherever upholstery meets raw plastic or an unsealed door card edge, breaks the illusion immediately; every visible transition needs paint, a folded seam, or a trim strip to cover it cleanly.
FAQ
What material is best for model car upholstery?
Thin, purpose-graded leather made specifically for miniature work holds up best, since it takes clean cuts without fraying and wraps tight bolster curves smoothly. Repurposed full-size leather or craft-store off-cuts almost always carry too much thickness and grain scale to read convincingly once glued into a small seat.
How do you make carpet for a model car interior?
Electrostatic flocking gives the most realistic pile texture, since it charges fibers to stand upright as they land. Without that equipment, spray adhesive followed by finely cut polyester fiber worked in with a circular brushing motion gets you a close approximation, as long as you avoid laying the fiber flat in one direction.
What glue should you use for miniature leather and fabric?
PVA-based adhesive is generally safer than CA glue for upholstery work, since it won’t eat into foam padding or cause frosting on nearby clear parts, and its slower set time gives you room to reposition material before it locks in place.
How do you add realistic stitching at 1/24 scale?
Skip actual thread entirely, since it always reads as oversized rope at this scale. Press stitch lines directly into the upholstery material using a blunt needle or a dedicated burnishing tool; the resulting shadow line reads as fine stitching from a normal viewing distance without adding physical bulk.
Should you paint or assemble a model car interior first?
Handle surface prep, sanding, filling, and priming before any upholstery or carpet goes in, since flaws in the bare tub telegraph through even high-quality cosmetic materials. Paint components separately where possible, and let every painted part fully cure before handling or fitting it into the assembly.
Final thoughts
A convincing model car interior doesn’t require a complicated process, just the right material for the scale you’re working at, a genuinely clean prep job underneath everything, and an assembly order that doesn’t force you to fight your own build halfway through. Get those three fundamentals right, and stitching, gauges, and weathering all fall into place far more easily than most builders expect going in.
Before starting your next build, run the interior through the same scale-effect check covered at the start of this piece: hold your intended upholstery, carpet fiber, and any trim material up against the actual seat or panel it’s meant to cover, and judge it at the viewing distance a finished photo would actually be seen at, not at arm’s length while you’re working on it. That single habit catches more scale-effect problems before they’re glued in place than any amount of careful technique afterward can fix.
If model building as a broader hobby interests you beyond this one build, I covered the wider appeal of the craft in building models as a creative pursuit. For the design thinking behind full-size cabins that this same scale logic draws from, see automotive interior sketches, creating a cozy, functional car interior, and why luxury car interiors define comfort and style.
- 3shares
- Facebook0
- Pinterest3
- Twitter0
- Reddit0