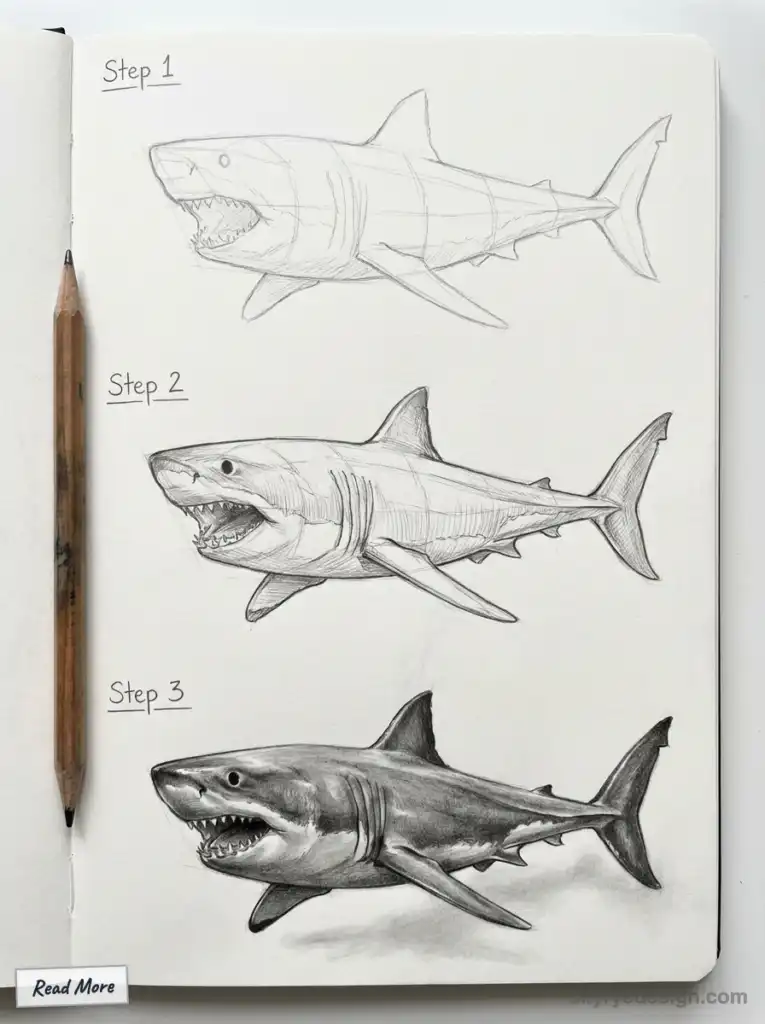
Shark drawing gets easier when you build the body before the teeth. Start with a curved gesture line, wrap it in a tapered oval, then place the head, fins, tail, eye, mouth, and gill slits before adding texture or shading.
The six-step method below works for great white, hammerhead, tiger, whale, and mako sharks. You will also find anatomy checks, species comparisons, pencil and watercolor options, plus specific fixes for a stiff pose, an oversized mouth, or a tail that does not look as if it is pushing through water.
- Why Shark Drawings Often Look Stiff
- Shark Anatomy Reference for Artists
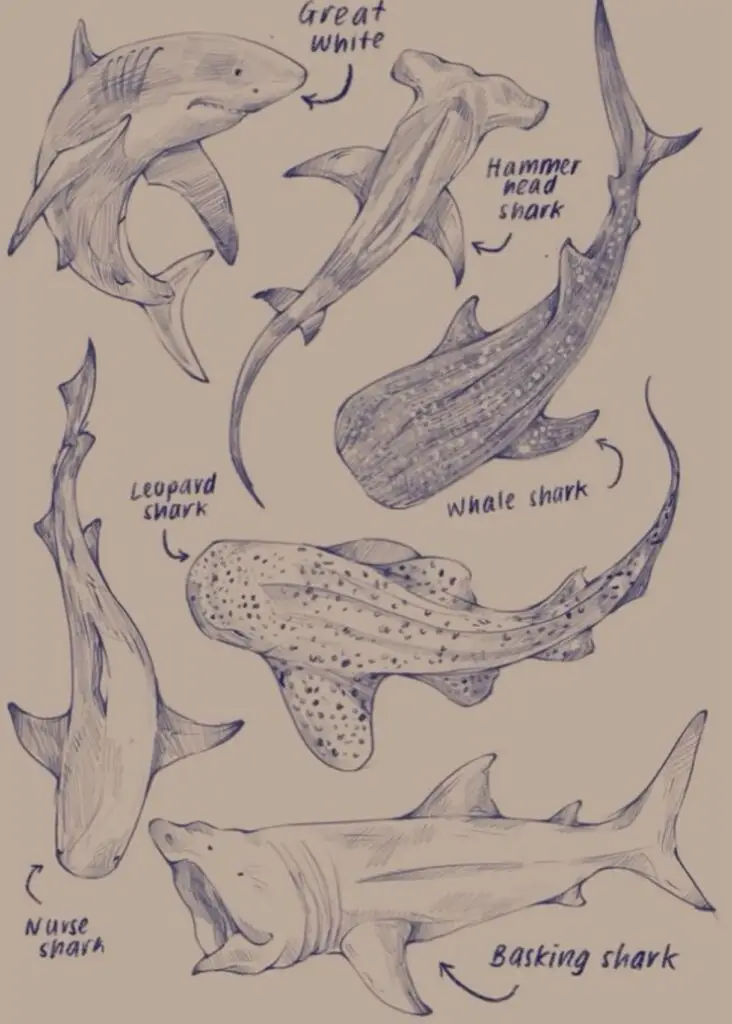
- 5 Shark Species to Draw: Key Visual Differences
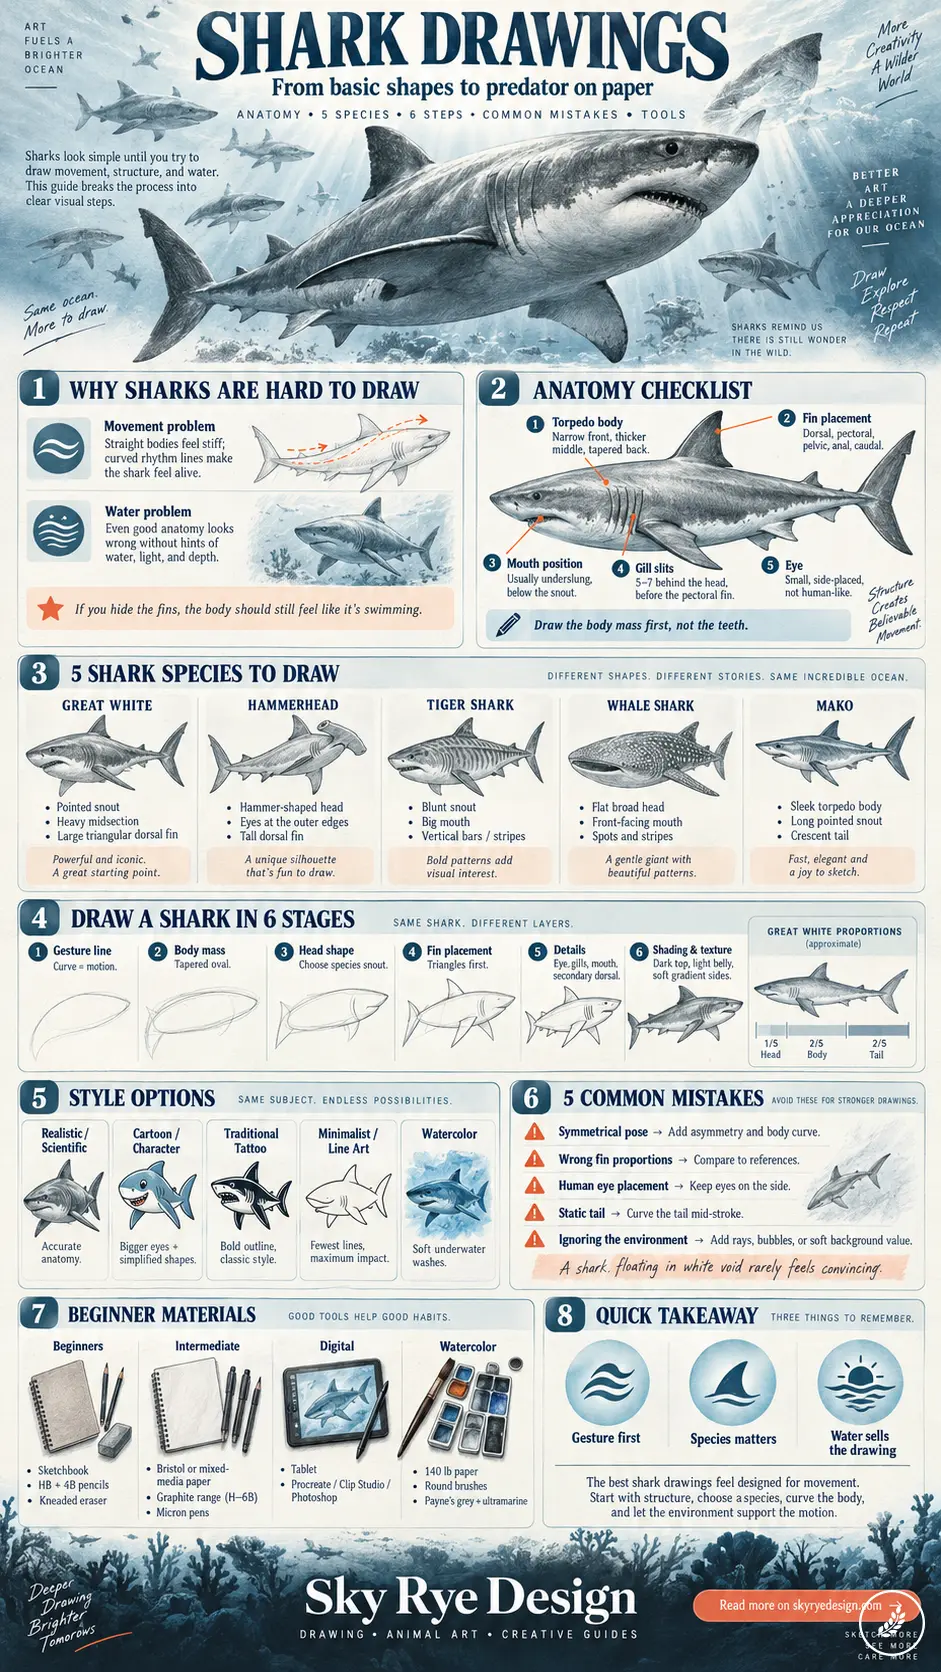
- How to Draw a Shark Step by Step in 6 Stages
- Shark Drawing Styles: Realistic, Cartoon, Line Art & Watercolor
- 5 Common Shark Drawing Mistakes and Fixes
- Shark Drawing Materials
- Sharing Your Shark Drawings
- Shark Drawing FAQ
- Practice Plan for Your Next Shark Drawing
Quick answer: use light construction lines first. A convincing shark needs a clear gesture, tapered body mass, species-specific snout, correctly placed fins, and a tail that bends away from the centerline. Teeth, spots, stripes, and skin texture come last.
Why Shark Drawings Often Look Stiff
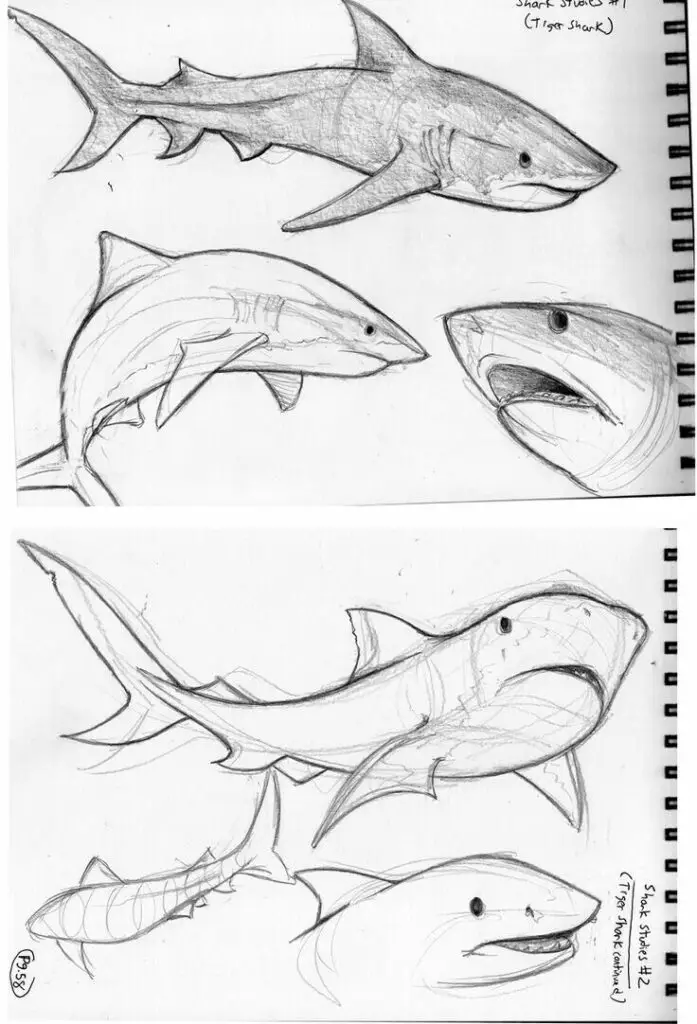
The basic oval is useful, but it cannot carry the drawing by itself. A shark reads through the taper from head to tail, the angle of the pectoral fins, the species-specific snout, and the curve of the body. Miss those relationships and the result looks like a generic fish with a dorsal fin.
The Movement Problem
Some sharks rely on forward motion to move oxygen-rich water over their gills, while many others can pump water while resting. The Smithsonian shark anatomy overview explains that difference. For drawing, the useful lesson is simpler: a curved body and offset fins suggest swimming more clearly than a rigid side profile.
Start with one long curve for the spine, then build the body around it. Let the tail and pectoral fins respond to that curve instead of mirroring each other. If the silhouette still feels alive after you hide the teeth and markings, the gesture is doing its job.
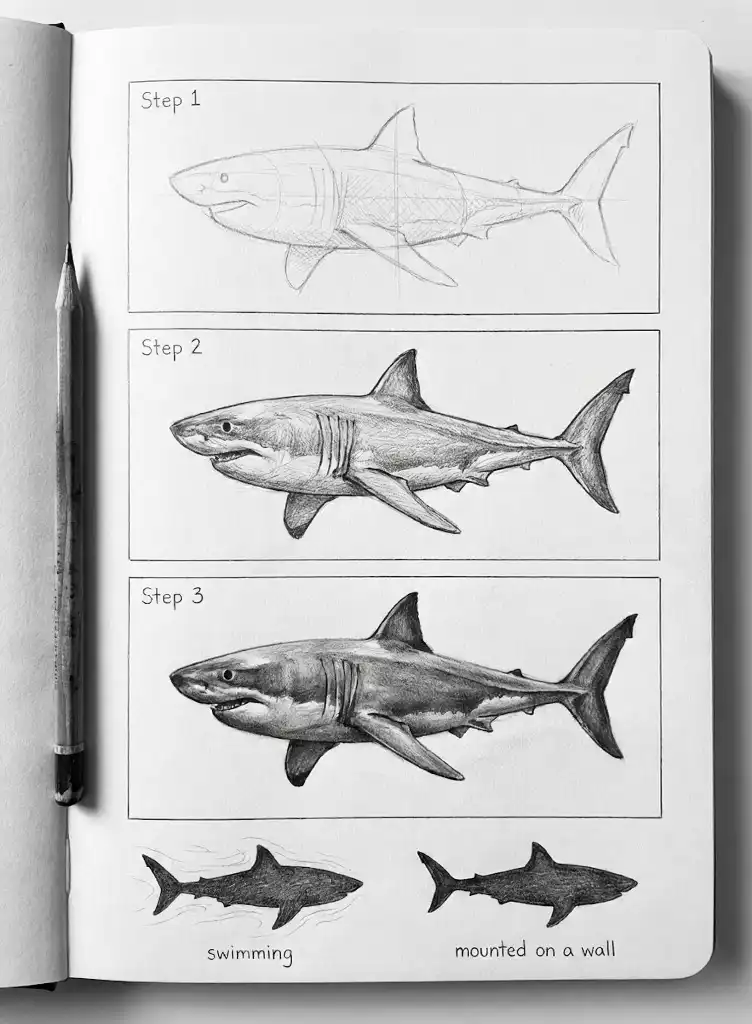
Quick test for your own work: Cover the fins with your hand. Does the body still look like it’s moving? If yes, you’re on the right track.
If the body still feels flat, pause the anatomy details and practice a few fish drawing ideas built from the same gesture-and-mass approach. The goal is to make the form turn in space before the species details go on top.
The Water Problem
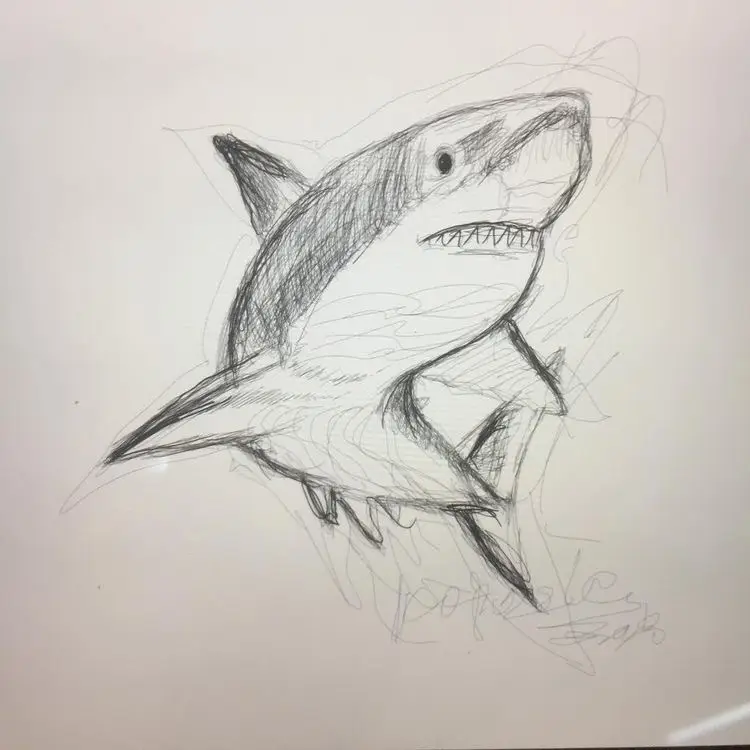
Water changes the value pattern and the sense of depth around the animal. Light usually comes from above, distant edges lose contrast, and fins or the tail can overlap the body as the shark turns. The same light-and-depth logic is covered in our ocean drawing guide.
You don’t need to draw an entire ocean. But you need to imply water through:
- A lighter upper plane where light reaches the body, with softer and darker values underneath
- Trailing movement lines near fins and tail
- Slight blur on background elements
- Color temperature shifts (cooler in shadows, warmer where light penetrates)

Shark Anatomy Reference for Artists
Five checks cover most shark anatomy drawing errors: body taper, fin placement, snout and mouth position, gill slits, and the eye. Use the NOAA shark identification guide when a species-specific silhouette feels uncertain.
1. The Torpedo Body
Every shark species shares a basic body plan: a torpedo. Front end narrow, middle thick, back end tapered. But the exact proportions vary dramatically.
Great white: Bulkier, more mass in the middle third. Think linebacker.
Mako: Sleeker, more evenly distributed. Think Olympic swimmer.
Whale shark: Massive, blunt head, body stays thick almost to the tail. Think school bus.
Start with a simple oval, then push and pull it toward the proportions of your chosen species. Spend the first 30 seconds correcting this body mass before adding fins or surface detail.
2. The Fin Placement
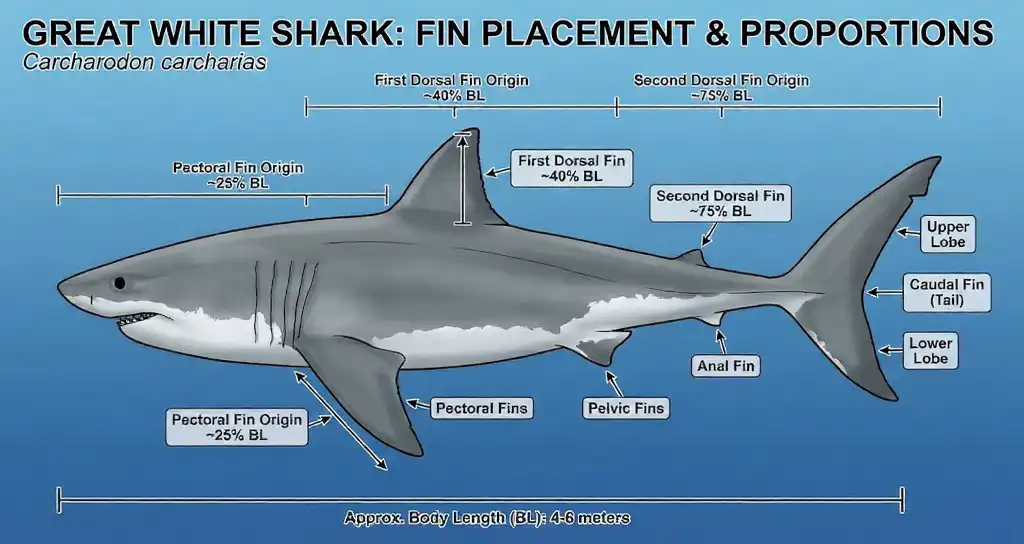
Fin placement carries both anatomy and movement. Block each fin in as a simple plane before refining the outline, and compare its base position with a species reference rather than using one generic shark template.
Dorsal fin: Check where its base begins relative to the pectoral fins. The size and curve vary by species, so use it as an identification feature rather than a generic triangle.
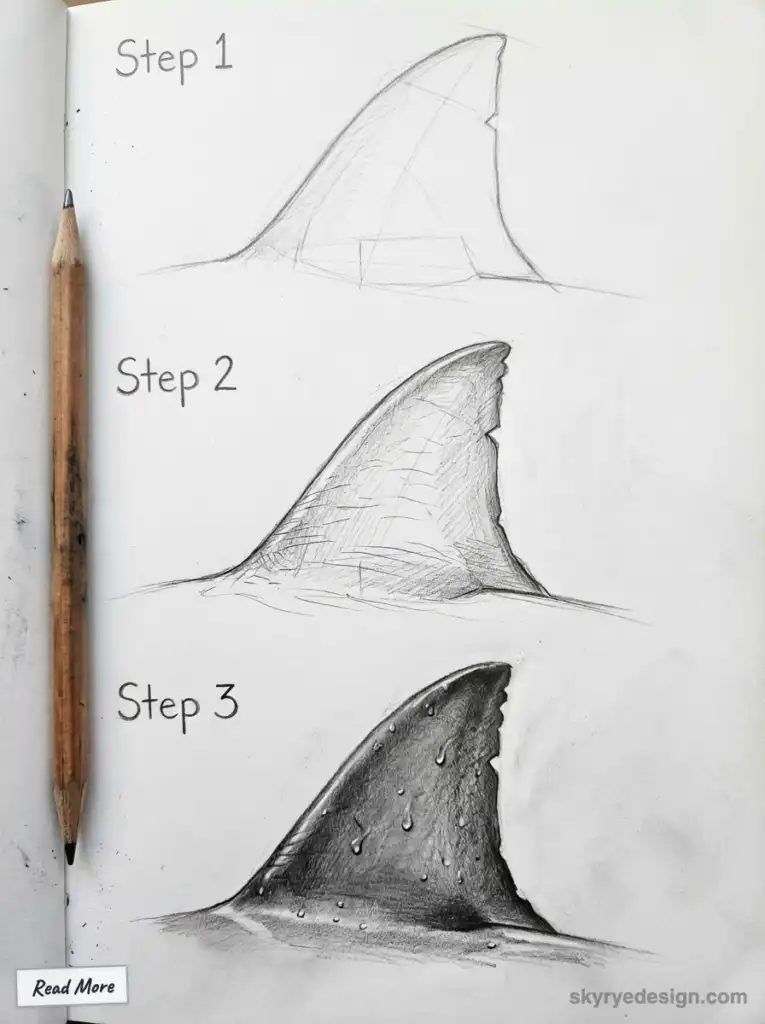
Pectoral fins: Treat them as foreshortened planes. Their angle helps show whether the shark is banking, rising, or turning, but perspective can make one fin appear much shorter than the other.
Caudal fin (tail): The engine. Upper lobe typically larger than lower in most species. The angle of the tail indicates thrust direction.
Common mistake: Placing the dorsal fin too far forward. Check reference photos—it’s usually further back than you expect.
3. The Shark Mouth and Snout
Sharks have underslung mouths—they sit below the snout, not at the front of the head like many fish. This matters most in the side and three-quarter views used for many shark studies.
The exact mouth position varies by species:
- Great white: Relatively forward, visible from the side
- Hammerhead: Underneath the cephalofoil (the hammer), barely visible from above
- Whale shark: Massive, at the front of a flattened head
- Tiger shark: Blunt snout, mouth relatively forward
4. The Gill Slits
Sharks have 5-7 gill slits (depending on species) on each side, just behind the head. These vertical lines are a dead giveaway of “shark” versus “generic fish.” Include them.
Position: Behind the eye, before the pectoral fin. They follow the curve of the body, not straight vertical lines.
5. The Eye
In a realistic side view, the eye is usually small and sits on the side of the head. Its exact position changes with the species and head shape, especially in hammerheads, so place it from reference rather than centering it by habit.
Drawing check: in a side view, show one eye. In a three-quarter view, the far eye may be partly hidden by the snout. Avoid adding a large white sclera unless the style is intentionally cartooned.
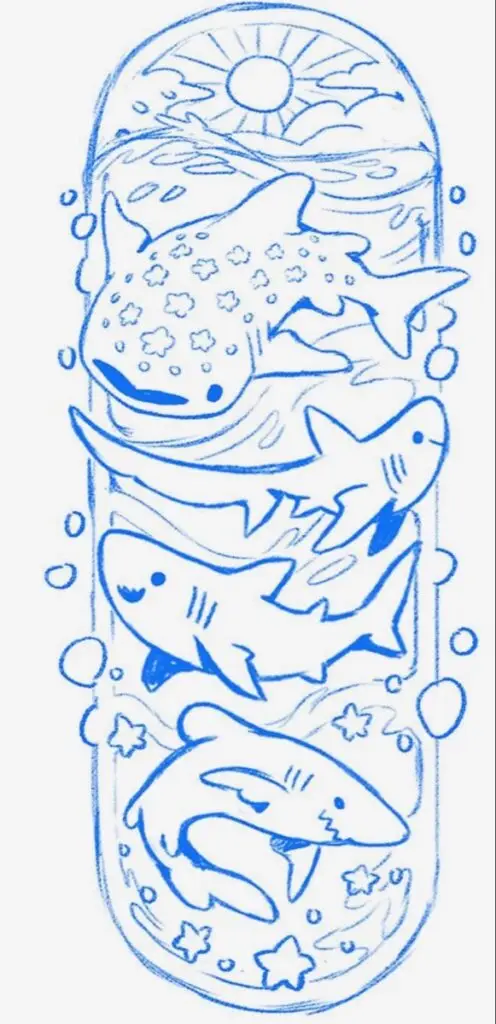
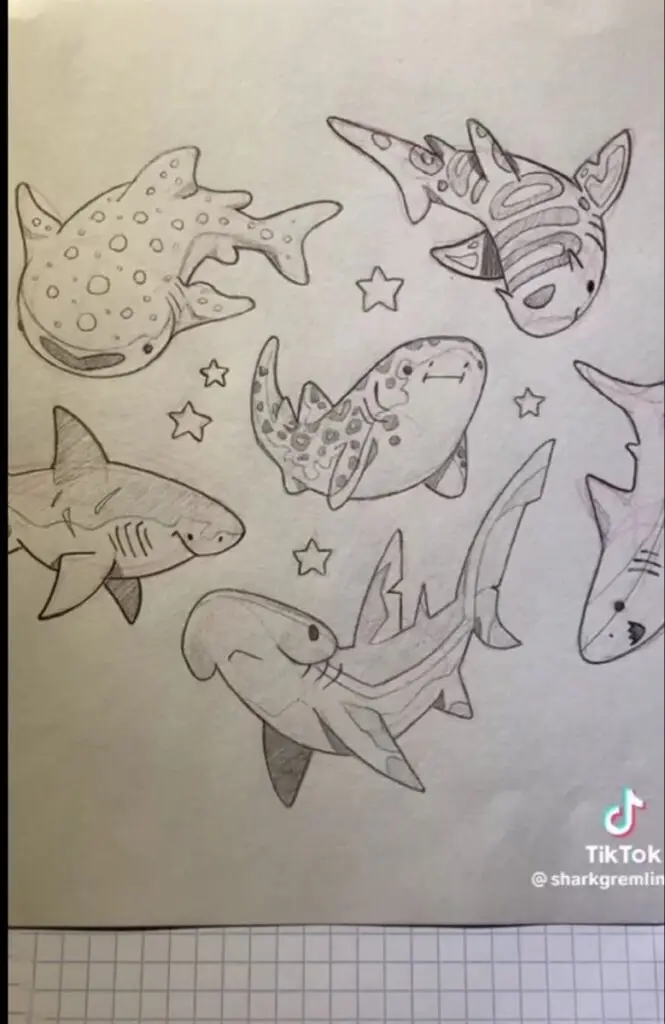
5 Shark Species to Draw: Key Visual Differences
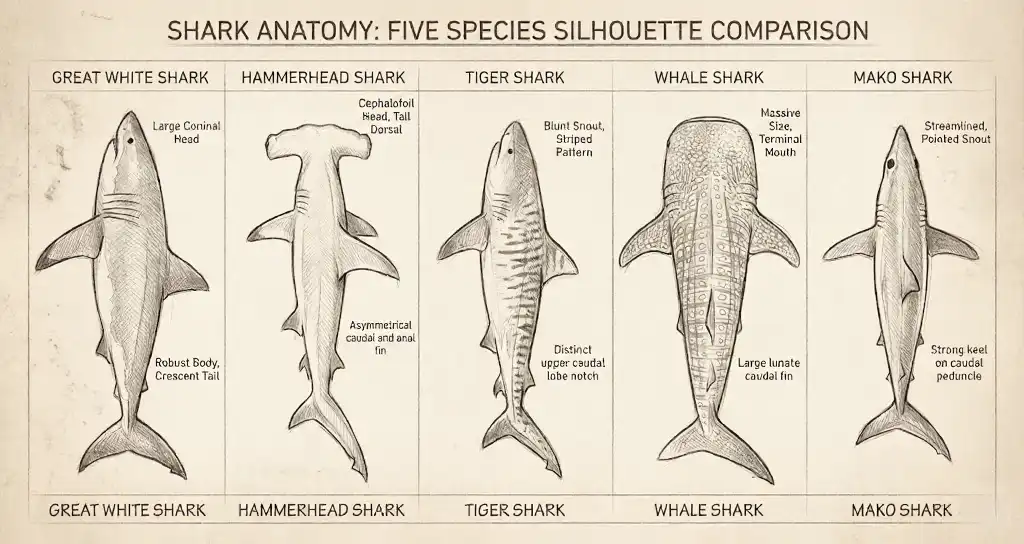
Great White Shark
The white shark profile from the Florida Museum shows a conical snout, large triangular dorsal fin, heavy body, and a sharp transition from dark upper surface to pale underside.
Key features:
- Conical snout, relatively pointed
- Heavy body, particularly in the mid-section
- Triangular, serrated teeth (visible even when mouth closed)
- Dark gray-blue on top, stark white below (countershading)
- Black eyes—no visible sclera
- First dorsal fin large and triangular
Artist’s tip: The great white’s power comes from its bulk. Don’t make it too streamlined—it should look heavy and muscular.
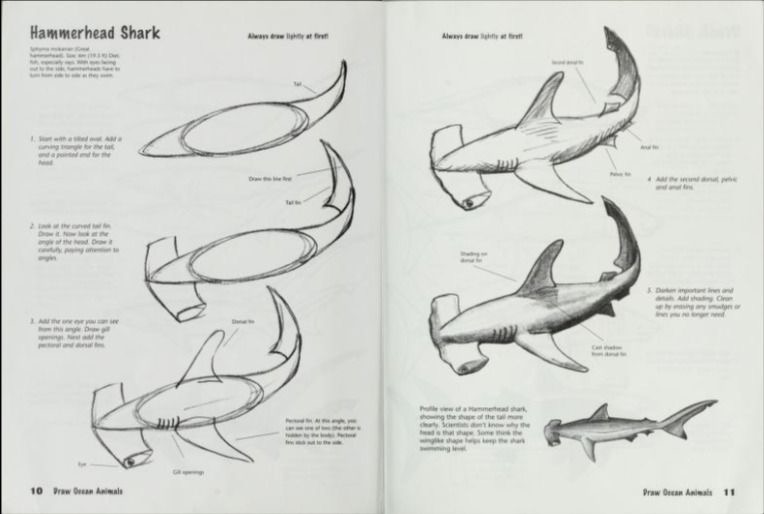
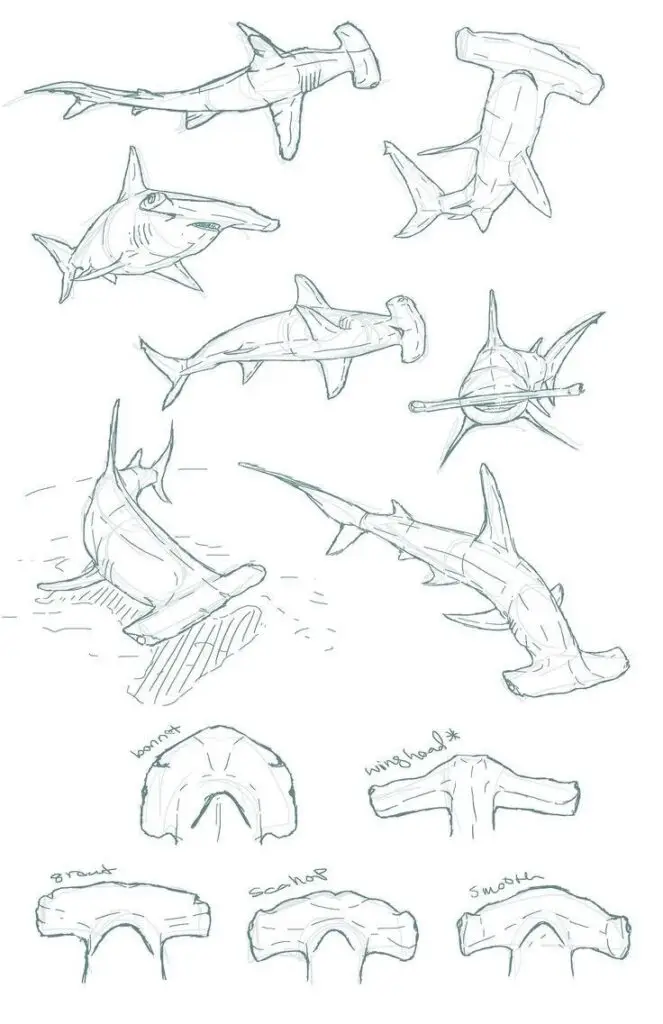
Hammerhead Shark
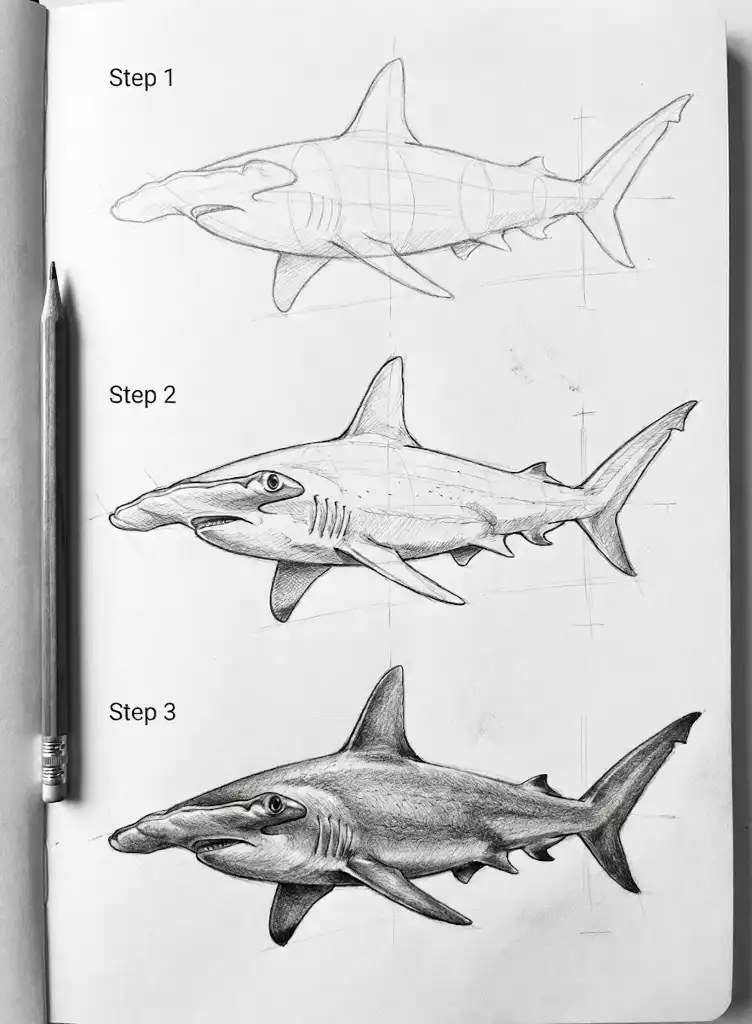
Impossible to misidentify thanks to that distinctive head shape.
Key features:
- Cephalofoil (hammer-shaped head) varies by species: T-shaped in great hammerhead, rounded with central notch in scalloped hammerhead
- Eyes positioned at the outer edges of the hammer
- More slender body than great white
- Tall, curved first dorsal fin
- Gray-brown coloring, lighter underneath
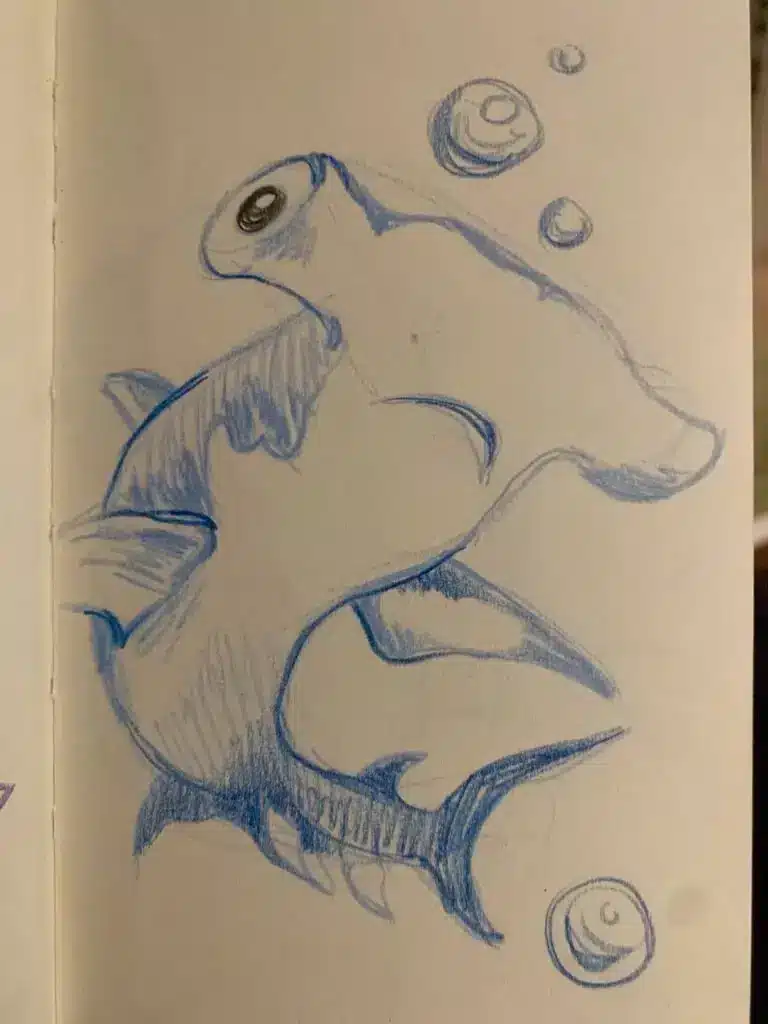
Artist’s tip: The hammer isn’t flat—it has depth. Draw it as a 3D form, not a 2D cutout. The underside of the hammer is particularly important in three-quarter views.
Cultural note: In Torres Strait Islander culture, the hammerhead (beizam) represents law and order. Artist Ken Thaiday Snr creates stunning sculptural representations of hammerheads in traditional headdresses called dhari.
Tiger Shark
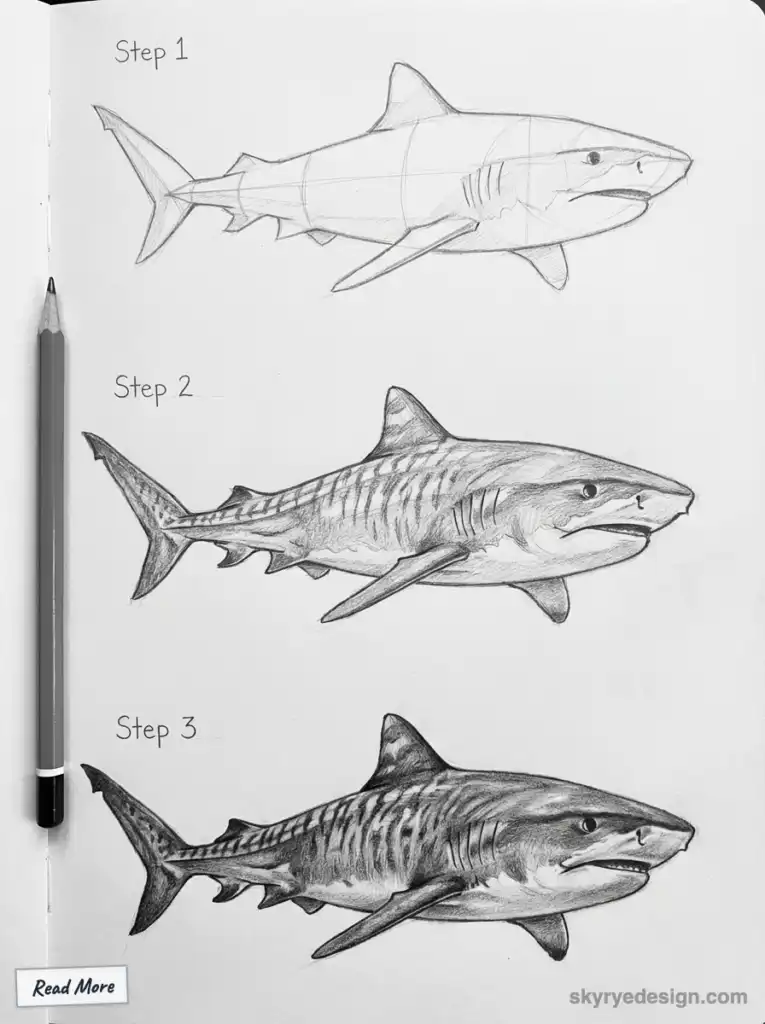
The Florida Museum tiger shark profile highlights the blunt snout and dark vertical bars, which are strongest in juveniles and become less distinct with age.
Key features:
- Blunt, rounded snout
- Very large mouth relative to head size
- Vertical stripes/bars that fade with age
- Broad, flat head when viewed from above
- Distinctive notched upper tail lobe
Artist’s tip: Tiger sharks are scavengers with massive mouths. Emphasize that gaping jaw—it’s their defining feature after the stripes.
Whale Shark
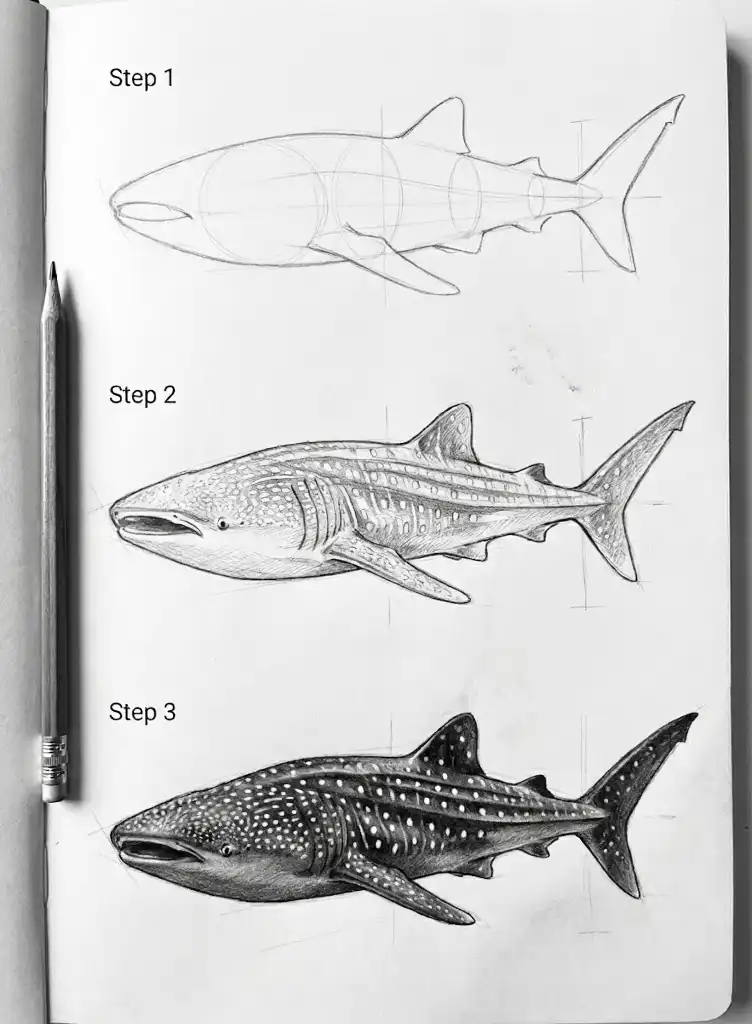
The whale shark is the largest living fish. Its species profile is especially useful for drawing the broad flat head, near-front mouth, three side ridges, and checkerboard pattern.
Key features:
- Flat, squared-off head with mouth at the front (not underslung)
- Distinctive checkerboard pattern of white spots and stripes on dark background
- Extremely wide body
- Small eyes relative to massive head
- Three prominent ridges along each side of the body
Artist’s tip: The whale shark’s pattern is its signature. Take time to suggest the spots and stripes—even a few well-placed marks communicate “whale shark” instantly.
Mako Shark
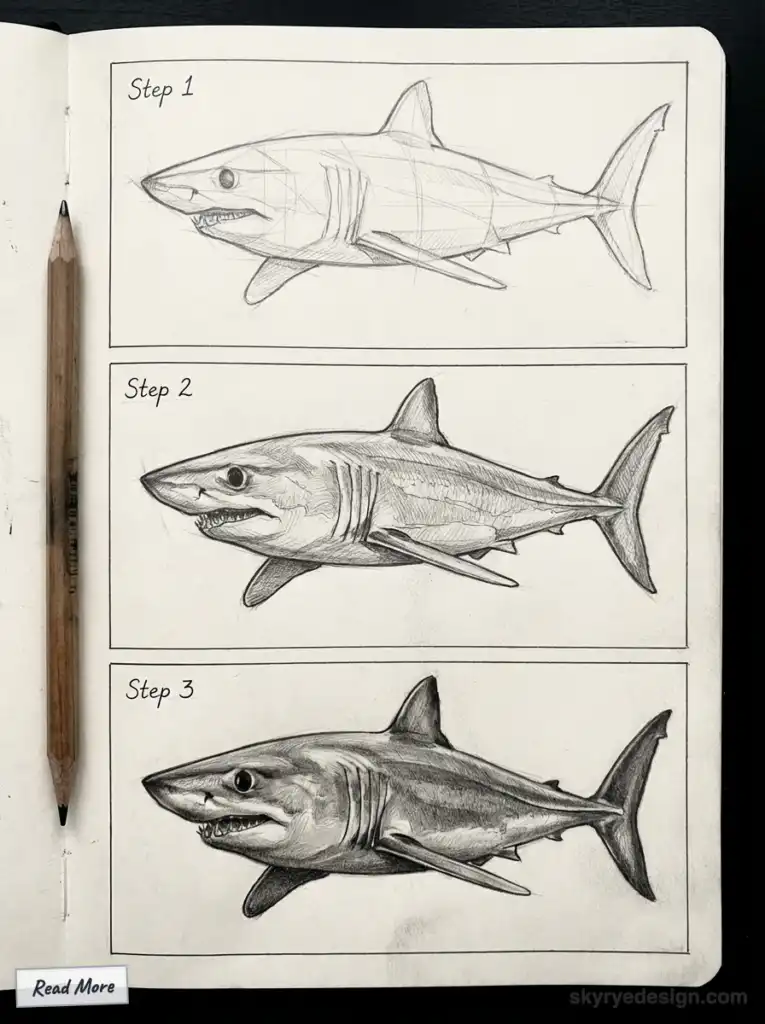
The shortfin mako has a long pointed snout, metallic-blue back, streamlined body, and crescent tail. The Florida Museum shortfin mako profile reports burst speeds up to about 43 mph.
Key features:
- Extremely streamlined, torpedo-shaped body
- Long, pointed snout
- Large, visible teeth even when mouth closed
- Bright blue coloring on top (often called “shortfin mako blue”)
- Crescent-shaped tail with nearly equal lobes
Artist’s tip: Everything about the mako says “speed.” Use long, flowing lines and an aggressive forward lean to capture this.
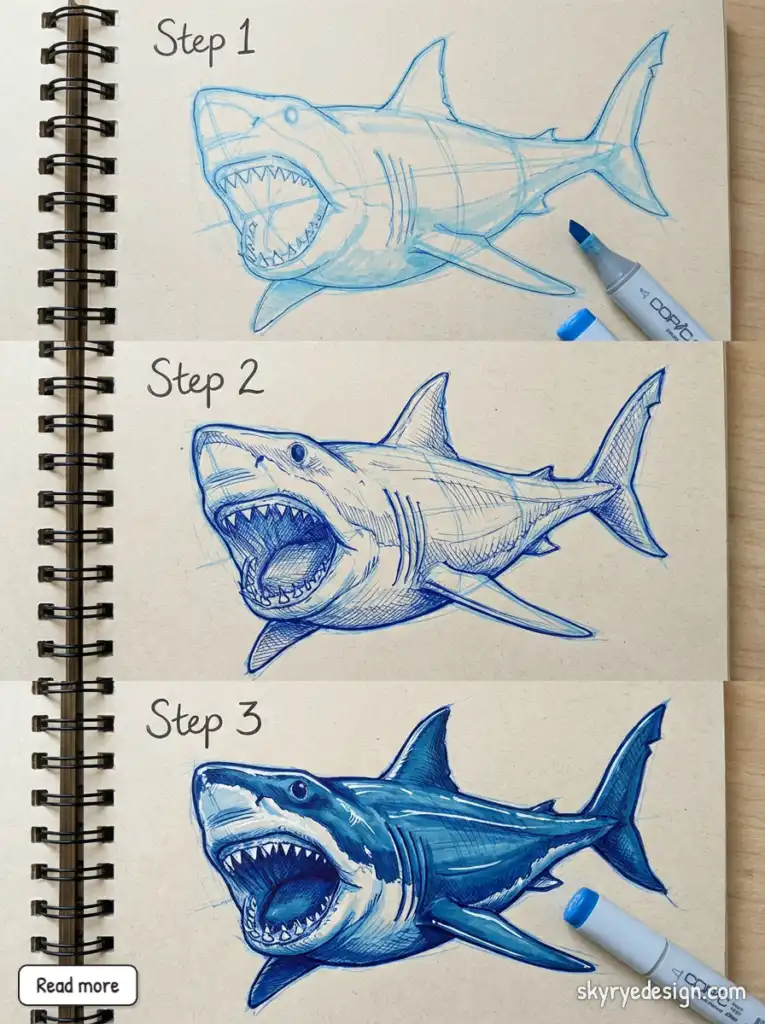
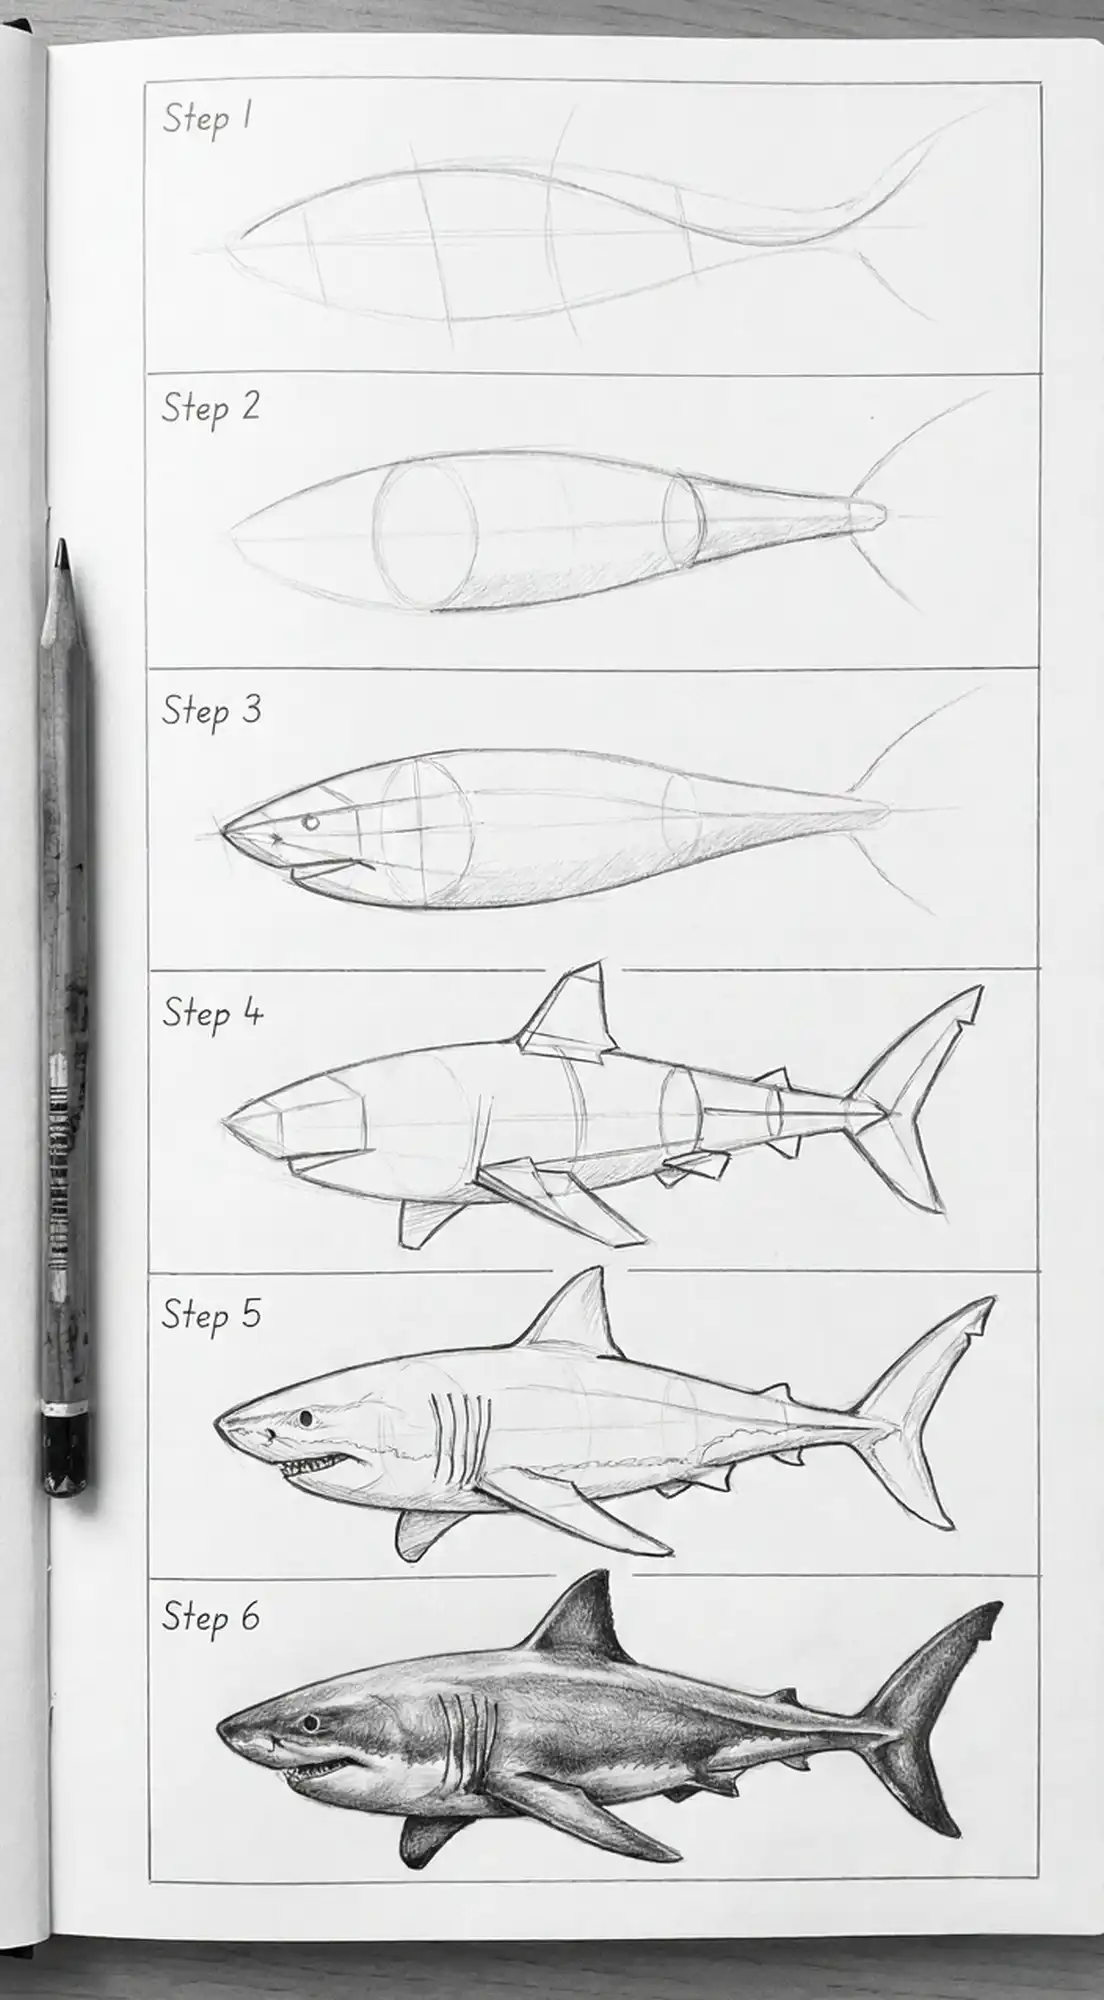
How to Draw a Shark Step by Step in 6 Stages
This six-stage method works as a construction sequence for several species, but the proportions must still come from reference. For a printable beginner variation, the Monterey Bay Aquarium shark drawing activity also starts with basic shapes before adding detail.
Step 1: The Gesture Line (10 seconds)
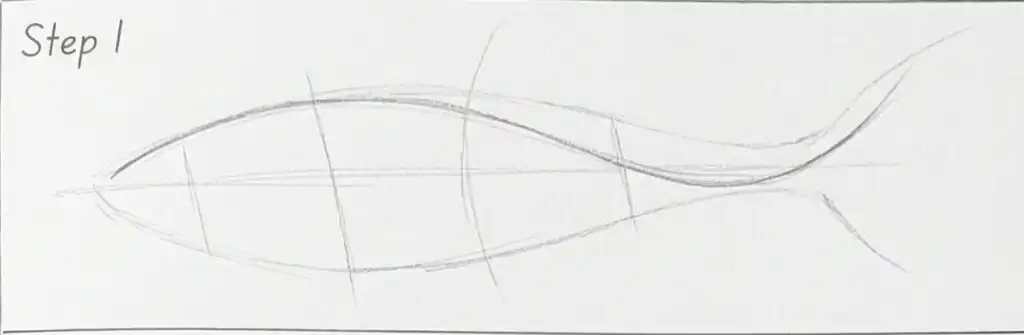
Draw a single curved line representing the shark’s spine and direction of movement. This is your foundation. A straight line = static shark. A curved line = dynamic shark.
The curve should follow the motion: an S-curve for turning, a gentle arc for cruising, a tight curve for attacking.
Step 2: The Body Mass (30 seconds)
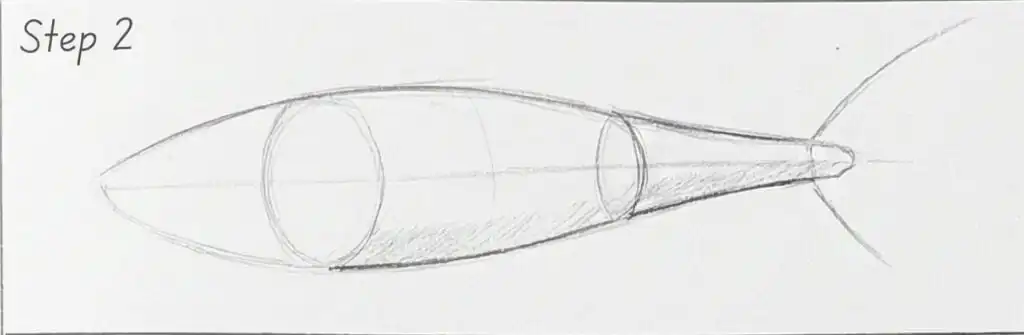
Build a tapered oval around your gesture line. Thicker in the middle, narrowing toward both ends. Don’t worry about being precise—you’re establishing volume, not detail.
Proportions for a great white:
- Head = roughly 1/5 of total length
- Body (thickest part) = middle 2/5
- Tail section = remaining 2/5
Step 3: The Head Shape (20 seconds)
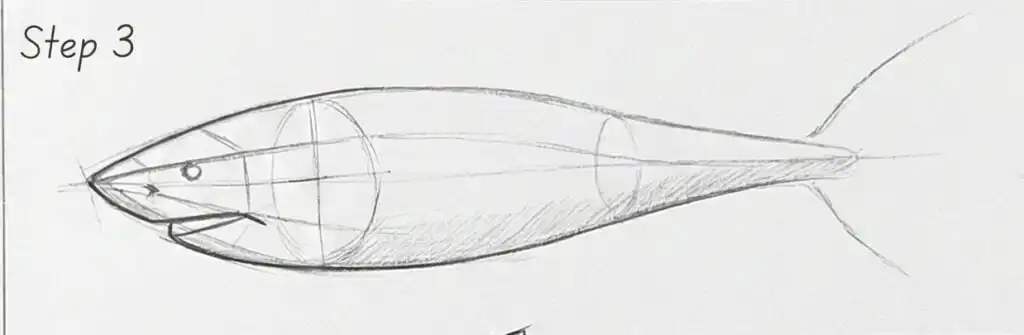
Refine the front of your oval into the snout. Different species = different shapes:
- Great white: pointed cone
- Tiger: rounded, blunt
- Hammerhead: add the cephalofoil perpendicular to the body
- Whale shark: flatten and widen
Add a horizontal line across the head for eye placement. For most species, this line sits at the widest part of the head.
Step 4: Fin Placement (30 seconds)
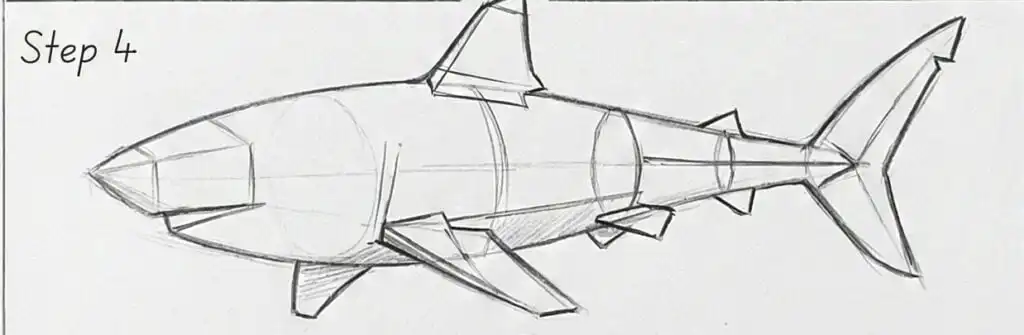
Add fins as simple shapes first:
- Dorsal fin: triangle at the highest point of the body
- Pectoral fins: angled triangles below and behind the gills
- Pelvic fins: smaller triangles behind pectorals
- Anal fin: small triangle on underside
- Caudal fin: crescent shape at the tail
Remember: Fin angles communicate movement. All fins swept back = speed. Fins extended = cruising or maneuvering.
Step 5: Details (2-3 minutes)
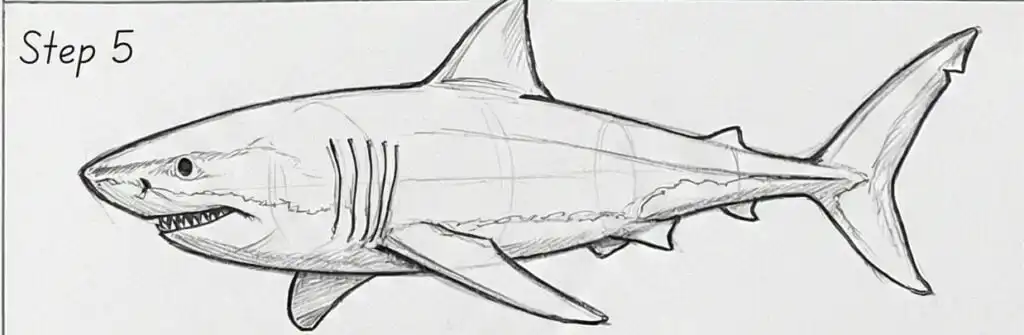
Now add:
- Eye (on that horizontal line you drew earlier)
- Gill slits (5-7 vertical lines behind the eye)
- Mouth line (curved, underslung)
- Refine fin shapes with curves rather than straight edges
- Add secondary dorsal fin (smaller, further back)
Step 6: Shading and Texture (varies)
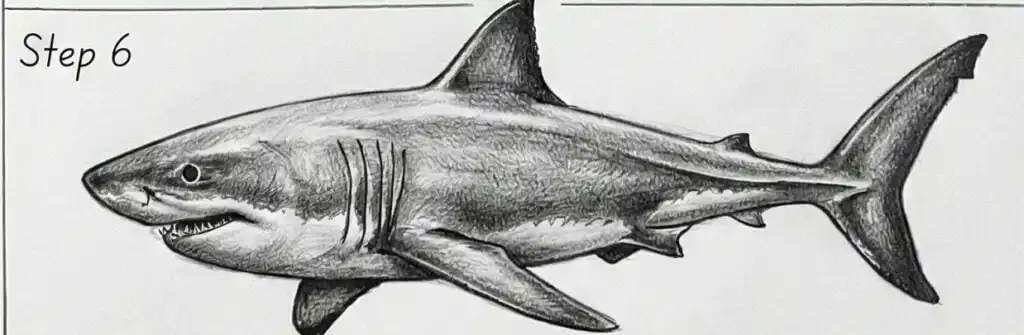
Basic shading rules for sharks:
- Darkest on top (back)
- Lightest on bottom (belly)
- Gradient transition on the sides
- Fins slightly darker than body
- Highlight on the snout and dorsal fin
For texture, suggest rather than draw every detail. A few curved lines along the body imply the direction of dermal denticles (shark “scales”). Rows of dots near the snout suggest the ampullae of Lorenzini (electroreceptors).
Shark Drawing Styles: Realistic, Cartoon, Line Art & Watercolor
Realistic/Scientific
Focus on accurate proportions and anatomical detail. Study reference photos extensively. Use subtle value gradations and precise line work.
Best for: Educational materials, scientific illustration, portfolio pieces
Tools: Graphite pencils (2H-6B range), blending stumps, reference images
Time investment: 3-10+ hours per drawing
Artists to study: Aaron Blaise, Mark Carwardine’s wildlife guides
Cartoon/Character Design


Exaggerate distinctive features. Simplify shapes. Add personality through expression.
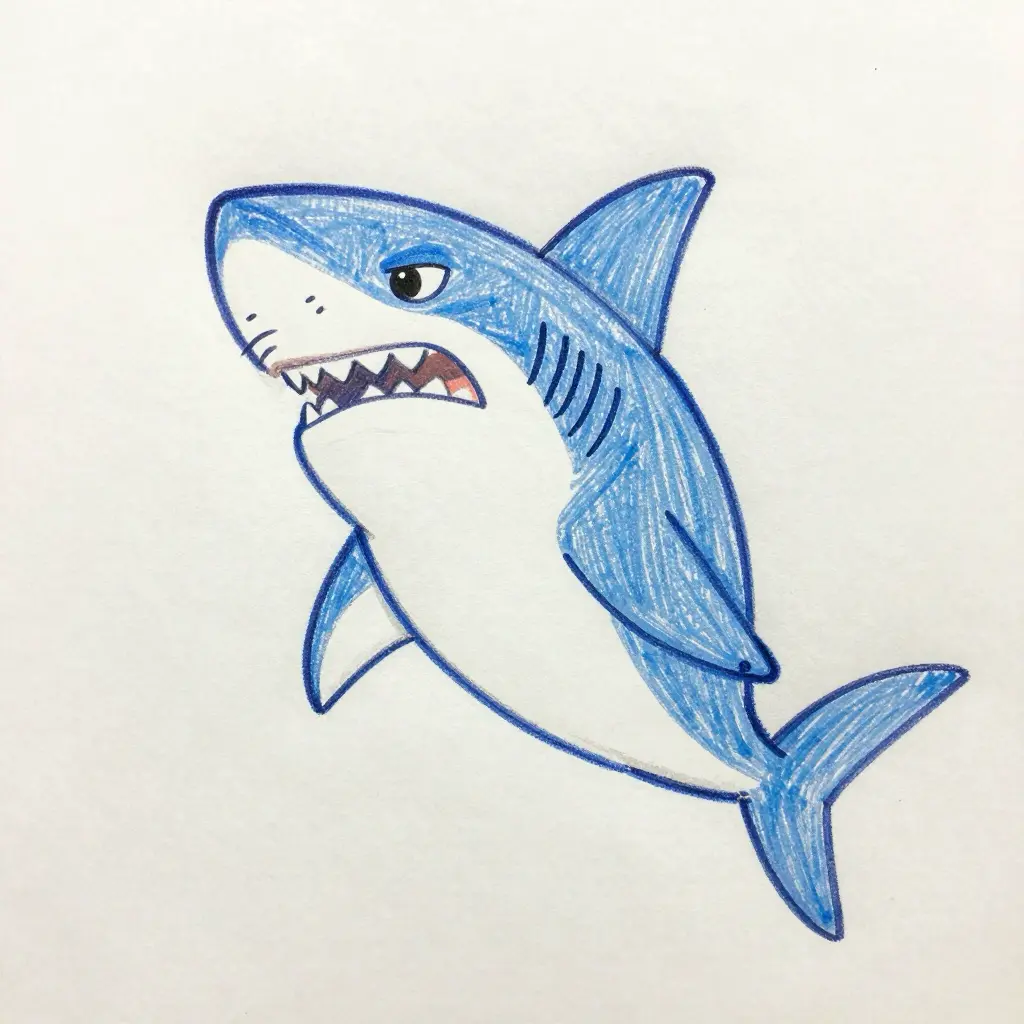
Best for: Children’s books, animation, merchandise, social media
Tools: Markers, digital drawing tablets, bold colors
Key adjustments:
- Larger eyes (move toward front of head for “friendly”)
- Simplified fin shapes
- Exaggerated teeth for menacing, hidden teeth for friendly
- Rounder body for cute, angular for villainous
Traditional Tattoo Style
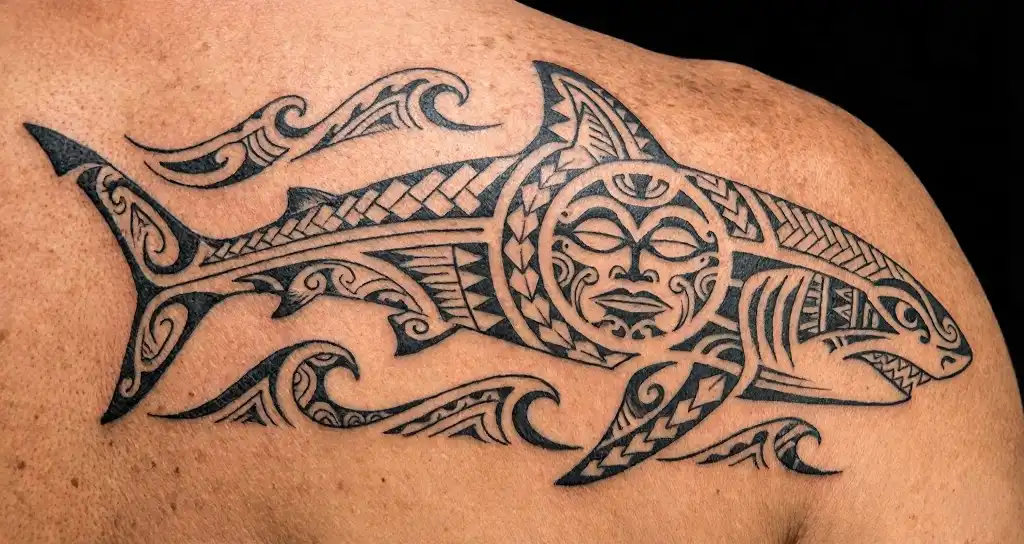
Bold outlines, limited shark tattoo design palette, stylized forms. Think Sailor Jerry meets marine biology.
Best for: Tattoo flash, bold graphic design, vintage aesthetics
Key elements:
- Thick, consistent outlines
- Limited shading (usually just solid fills)
- Classic color palette: navy, teal, red, gold
- Often shown in aggressive pose with open mouth
Minimalist/Line Art
Single-weight lines, no shading, essential forms only.
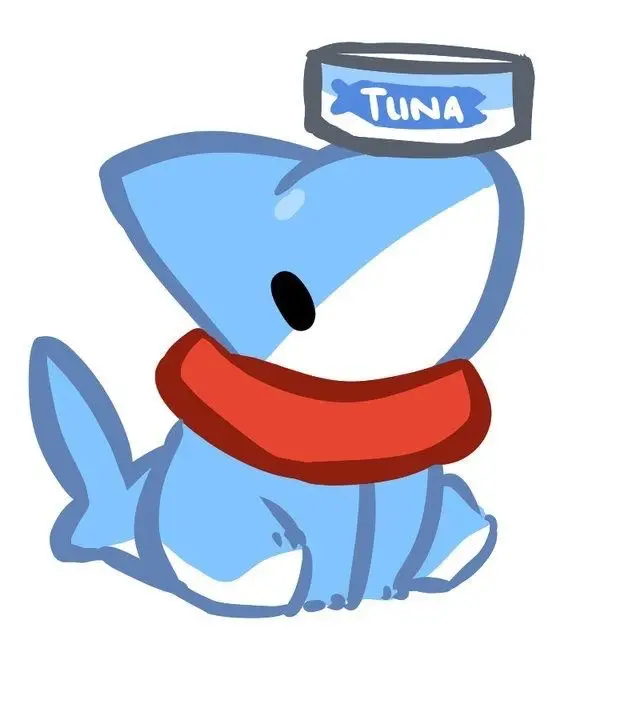
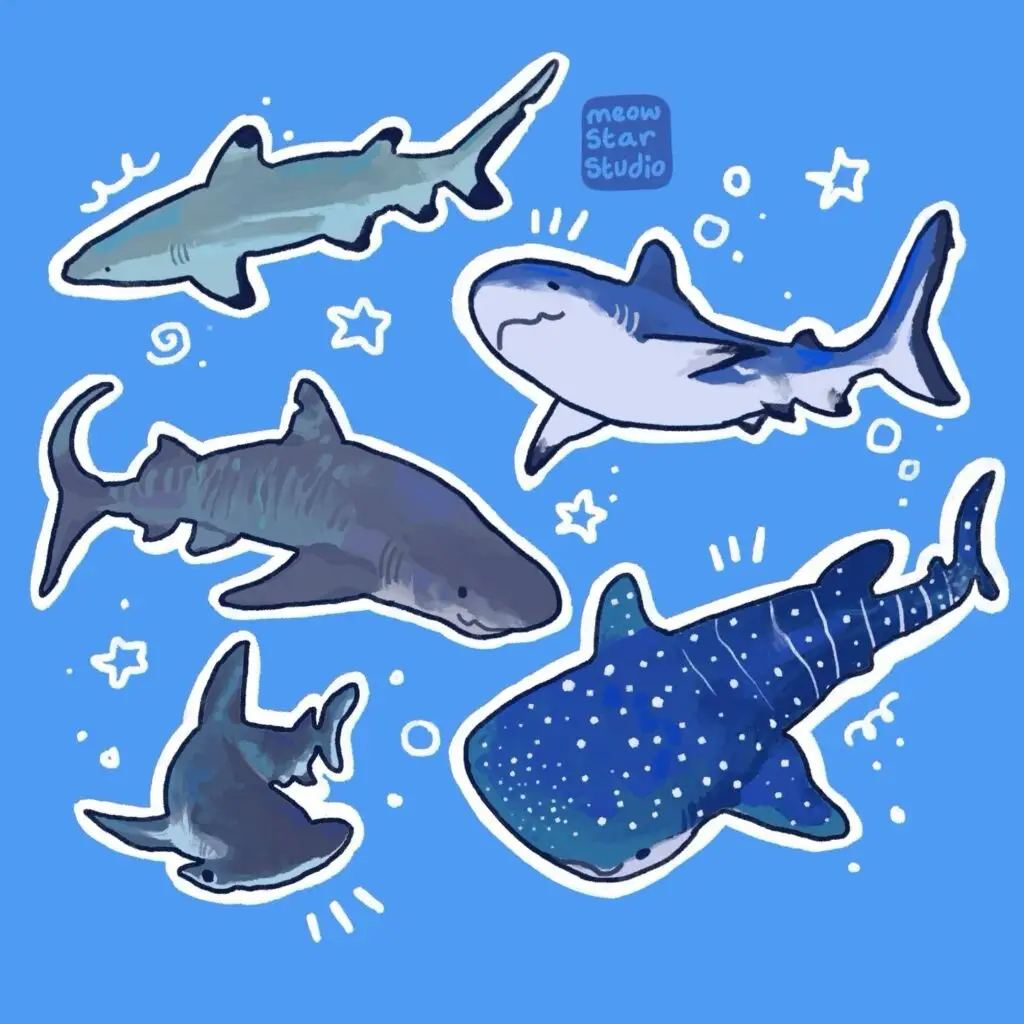
Best for: Logos, minimalist line art, quick sketches, social media icons
Challenge: Communicating “shark” with the fewest possible lines. The silhouette does all the work.
Watercolor
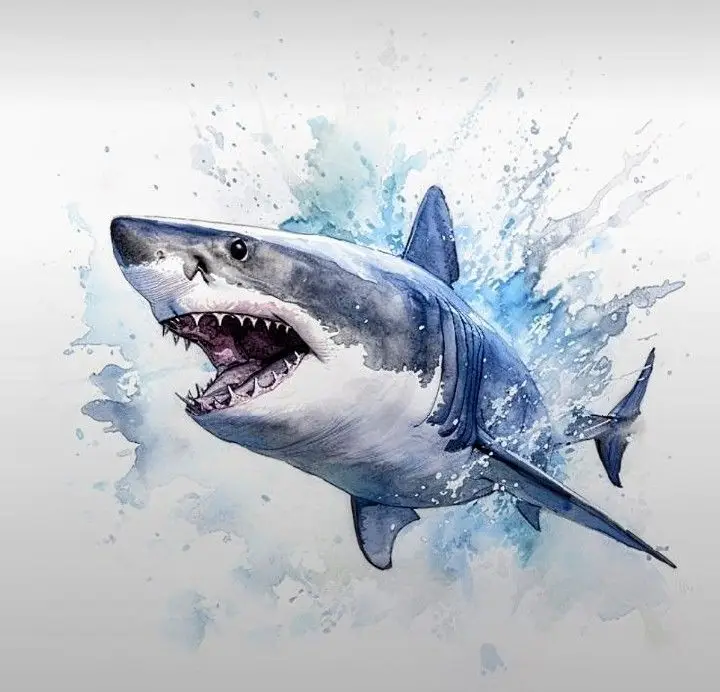
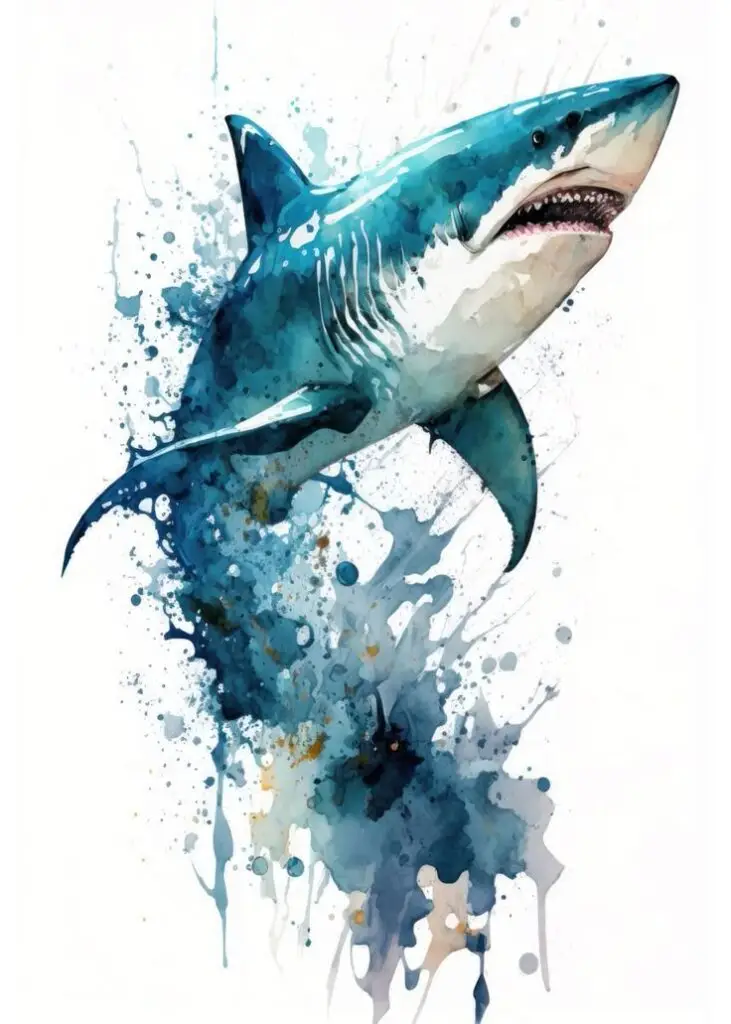
Soft edges, color bleeding, luminous quality that suggests underwater environment.
Best for: Fine art, greeting cards, children’s books
Technique tips:
- Wet-on-wet for the body (soft edges)
- Wet-on-dry for details like eye and gill slits
- Let white paper show through for highlights
- Layer blues and grays for depth
5 Common Shark Drawing Mistakes and Fixes
Mistake 1: Symmetrical Poses
The problem: Drawing sharks perfectly straight-on, both sides identical. Looks stiff and artificial.
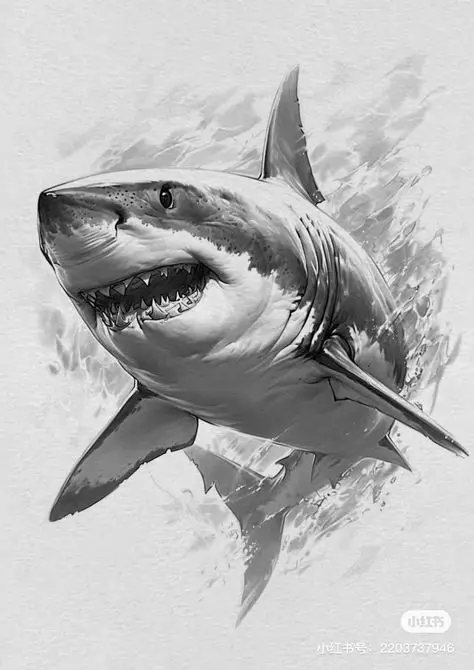
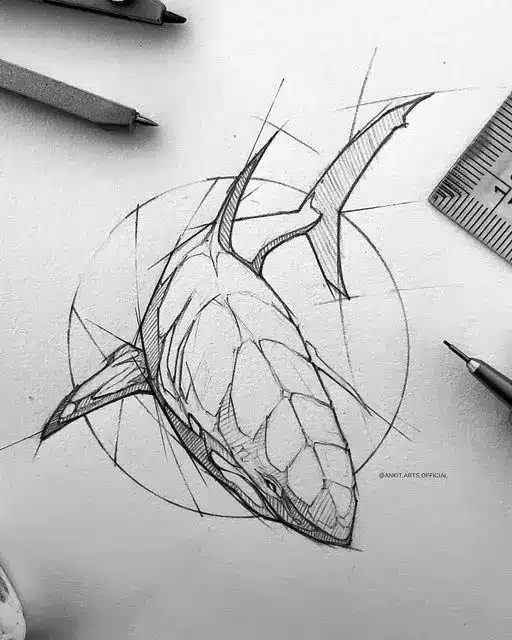
The fix: Always include some asymmetry. One pectoral fin angled differently than the other. Body slightly curved. Tail pushing in one direction.
Mistake 2: Wrong Fin Proportions
The problem: Dorsal fin too large (the “Jaws poster syndrome”) or pectoral fins too small.
The fix: Use references. In most sharks, the pectoral fins are actually larger than the first dorsal fin. The Jaws poster exaggerated for dramatic effect—that’s movie magic, not biology.
Mistake 3: Human Eye Placement
The problem: Drawing shark eyes facing forward like a human. Sharks have eyes on the sides of their heads.
The fix: In a side view, you should only see one eye. In a three-quarter view, the far eye is barely visible or hidden by the snout.
Mistake 4: Static Tail
The problem: Tail drawn as a stiff, symmetrical shape.
The fix: The tail is always mid-stroke. Curve it. Show the direction of thrust. The upper and lower lobes should rarely be mirror images.
Mistake 5: Ignoring the Environment
The problem: Shark floating in white void.
The fix: Add one or two environmental cues: light rays from above, a soft ocean-floor value, bubbles near the gills, or distant fish with lower contrast. For more scene options, use these beach and underwater drawing ideas.
Shark Drawing Materials
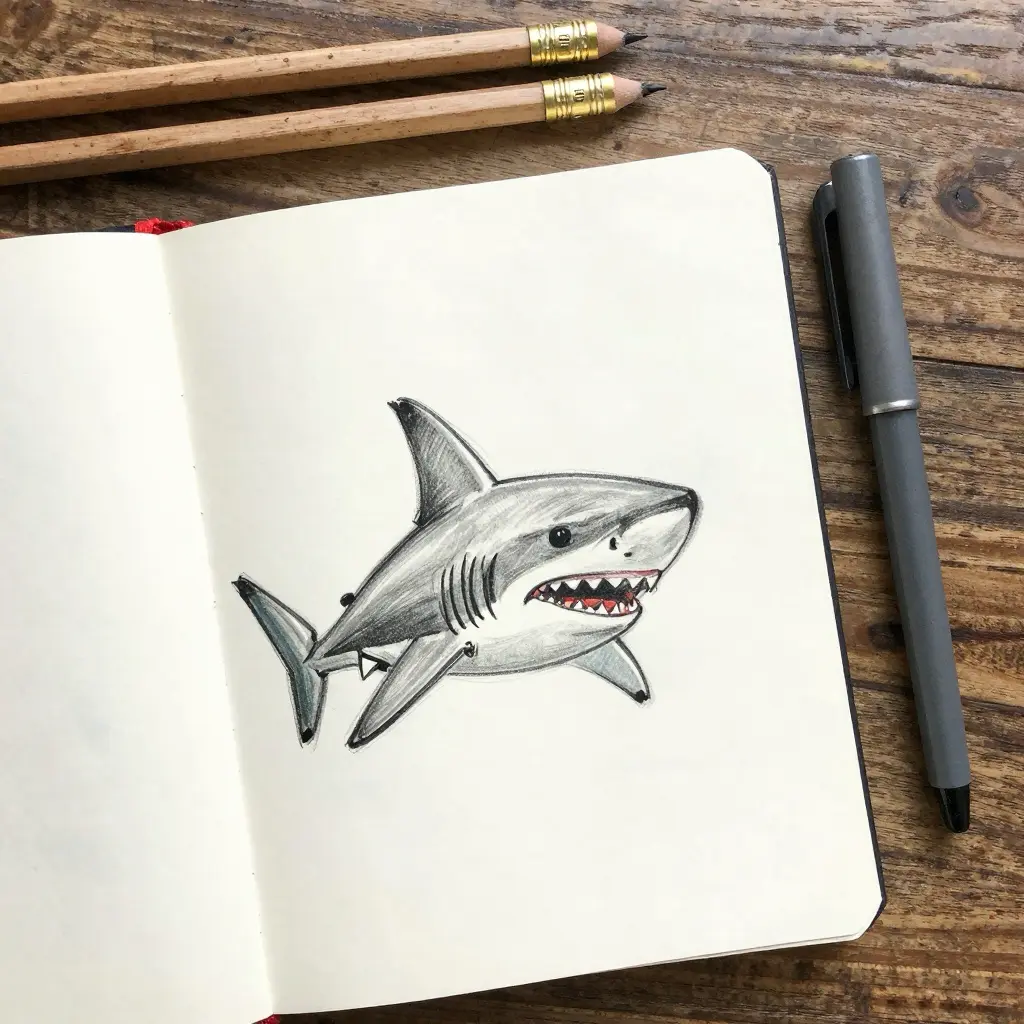
For Beginners
- Sketchbook: Any 80+ GSM paper works for practice
- Pencils: One HB and one 4B covers most needs
- Eraser: Kneaded eraser for lifting, white eraser for clean removal
- Reference photos: Tattoodo, Adobe Stock, or nature documentaries paused
Budget: Under $20 gets you started
For Intermediate Artists
- Paper: Bristol board (smooth) for detailed work, mixed media paper for experiments
- Pencils: Full graphite range (2H-8B) or mechanical pencils with varying leads
- Blending tools: Stumps, tortillons, tissue paper
- Inking: Micron pens (0.1, 0.3, 0.5) for linework
Budget: $40-80 for a solid kit
For Digital Artists
- Hardware: drawing tablet for beginners (Wacom Intuos at entry level, Cintiq or iPad Pro for serious work)
- Software: Procreate (iPad), Clip Studio Paint (all platforms), Photoshop
- Brushes: Look for natural pencil and ink brushes; Kyle Webster’s brushes for Photoshop are industry standard
Budget: $300+ for tablet, $0-50 for software
For Watercolor
- Paper: 140 lb cold press minimum (hot press for detailed work)
- Paints: Student grade is fine for practice; Winsor & Newton Cotman is good value
- Brushes: Round brushes in sizes 2, 6, and 10 cover most needs
- Essential colors: Payne’s grey, ultramarine blue, burnt sienna, Prussian blue
Budget: $50-100 for a starter kit
Sharing Your Shark Drawings
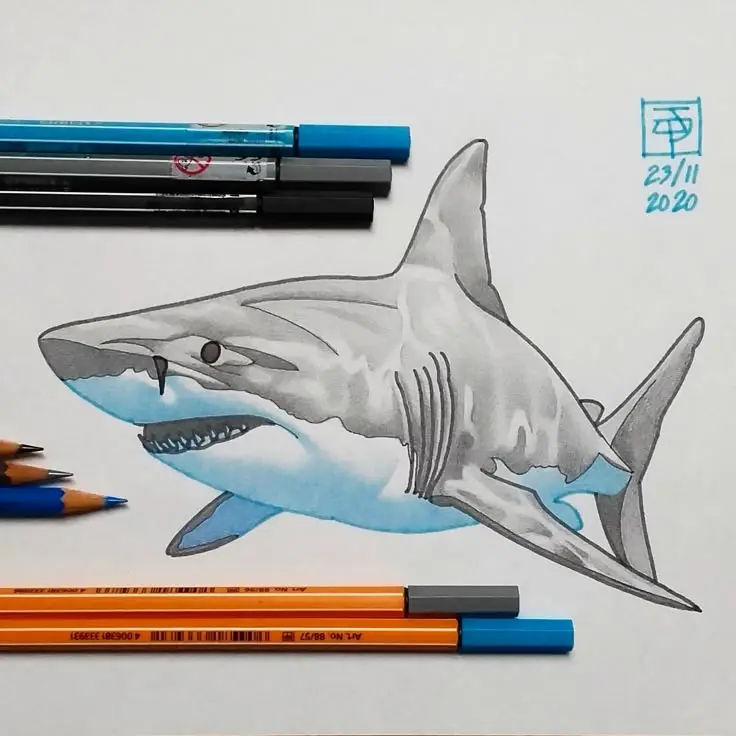
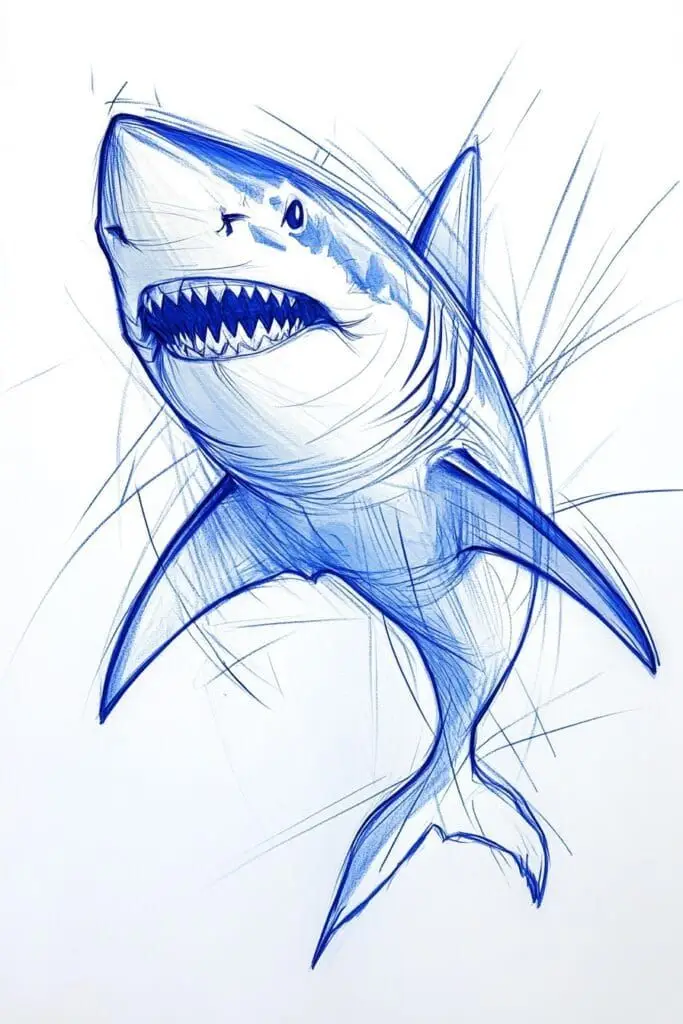
Best Platforms by Style
Instagram: All styles work here. Use hashtags like #sharkdrawing, #sharksofinstagram, #marineart, #wildlifeart. Reels showing your process perform well.
Pinterest: Gallery-style posts with multiple views of the same shark. Surprisingly strong engagement for marine art. Good for driving traffic to portfolios.
DeviantArt: Still active for wildlife and fantasy art. Good for detailed, realistic work and getting feedback from other artists.
Tattoodo: If you’re creating tattoo-style sharks, this is where potential clients and collaborators look.
Selling Your Work
Print-on-demand: Redbubble, Society6, and TeePublic let you sell shark designs on products without inventory. Margin is low, but it’s passive income.
Stock illustration: Submit vector shark designs to Shutterstock, Adobe Stock, or iStock. Scientific/educational styles sell consistently.
Commissions: Build a portfolio first, then offer custom shark drawings. Pricing typically starts at $50-100 for digital work, higher for traditional media.
Original art: Etsy and Instagram are primary channels for selling original drawings. Frame and present professionally. Signed, limited-edition prints can work as a middle price point.
Shark Drawing FAQ
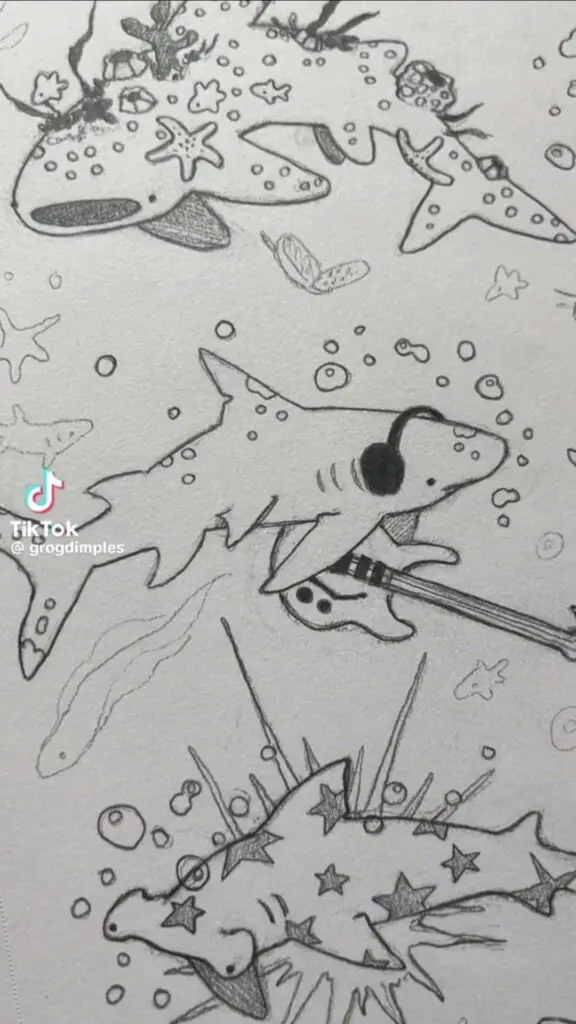
What is the easiest shark to draw for beginners?
Start with a side-view great white. Its body can be reduced to a tapered oval, a conical snout, a large triangular dorsal fin, two pectoral fins, and a crescent-shaped tail. Keep the first sketch light and leave the teeth until the body, fins, gills, and mouth line are in place.
How do I make my shark look like it is swimming?
Draw a curved gesture line before outlining the body. Let the body follow that curve, angle the pectoral fins differently, and turn the tail slightly to one side. A perfectly straight body with mirrored fins feels static. A few bubbles, light rays, or a darker background value can suggest water without filling the page.
How do you draw a shark mouth?
Place the mouth below the snout instead of at the very front of the head. Draw the jaw opening as a shallow curve first, check it against the head angle, and add the inner mouth only after the outer shape works. Keep the teeth small and varied; oversized identical triangles make a realistic shark look cartoonish.
How do you draw a shark tail?
Narrow the body into a slim tail base, then build the upper and lower lobes around it. The upper lobe is larger in many species, while a mako has a more crescent-like tail. Curve the tail away from the body centerline to show a swimming stroke, and avoid making both lobes perfectly symmetrical.
What references are best for shark drawing?
Use clear side, top, and three-quarter photographs of the same species. Aquarium and museum species profiles are useful because they show reliable proportions and identifying features. Compare several images instead of copying one dramatic frame, and check the snout, mouth position, gill slits, fin placement, and tail before adding texture.
What is the most common shark drawing mistake?
The most common problem is adding teeth and surface detail before the body reads as a moving three-dimensional form. Start with gesture, mass, and silhouette. Then place the fins, tail, eye, mouth, and gills from reference. If the shark still reads clearly as a dark silhouette, the underlying drawing is working.
Practice Plan for Your Next Shark Drawing
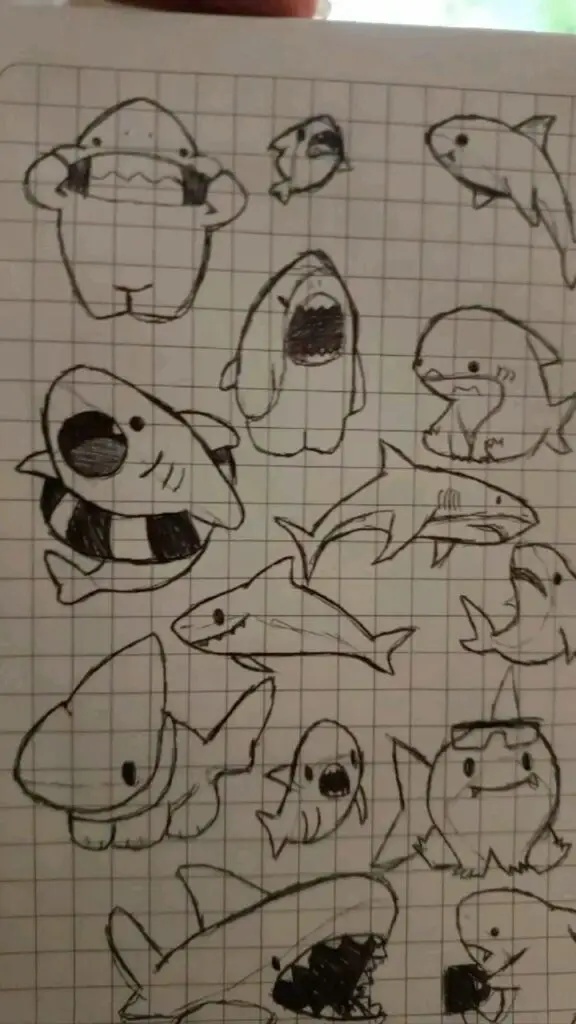
1. Pick one species. A great white is a practical starting point because the silhouette is familiar and reliable references are easy to find.
2. Save three useful references. Choose a side view, a top or three-quarter view, and one swimming pose. More images are not automatically better if the angles do not answer a drawing problem.
3. Draw six one-minute gestures. Use only the centerline and body mass. Change the tail direction and fin angles each time.
4. Develop one sketch. Add the species-specific snout, mouth, gill slits, fins, and eye. Compare the silhouette with your reference before shading.
5. Finish with value, not extra outlines. Darken the back, keep the belly lighter where appropriate, soften distant edges, and use a few marks for denticles or spots instead of covering the body with texture.
If you want a looser subject after the anatomy study, return to our broader fish drawing ideas and reuse the same gesture-first workflow with koi, betta fish, or goldfish.
- 15.8Kshares
- Facebook0
- Pinterest15.8K
- Twitter3
- Reddit0