Every cowboy hat tutorial I’ve seen teaches the same trick: draw an oval, stick a curved line under it, call it done. It works right up until you try to put that hat on a head — and suddenly the brim looks like a flying saucer instead of a piece of felt.
That’s a proportion problem, not a drawing-skill problem. The brim is an ellipse in perspective, not a flat oval, and the crown has to sit into it, not float above it. Once you see that, the whole shape clicks — the same way a rounded object in any life-drawing exercise clicks once you stop drawing what you think it looks like and start drawing what the form is actually doing in space.
- The anatomy you need before you draw a single line
- Draw a cowboy hat step by step
- Drawing the hat from different angles
- Putting the hat on a head
- Rendering felt vs. straw for realism
- Common mistakes (and quick style variations)
- Conclusion
- Frequently asked questions
- What shape is a cowboy hat brim really?
- How do you draw a cowboy hat on a person’s head?
- What’s the easiest way to draw a cowboy hat for beginners?
- How do you shade a cowboy hat to look realistic?
- What’s the difference between a Stetson and a gambler hat shape?
- How do you draw a cowboy hat from the side?
- What’s the most common mistake when drawing cowboy hats?
Here’s what you’ll walk away with: how to build the hat’s real anatomy (crown, brim, curl, pinch), how to draw it from any angle, how it sits on an actual head, and how to shade felt or straw so it reads as material instead of a flat cartoon.
The anatomy you need before you draw a single line
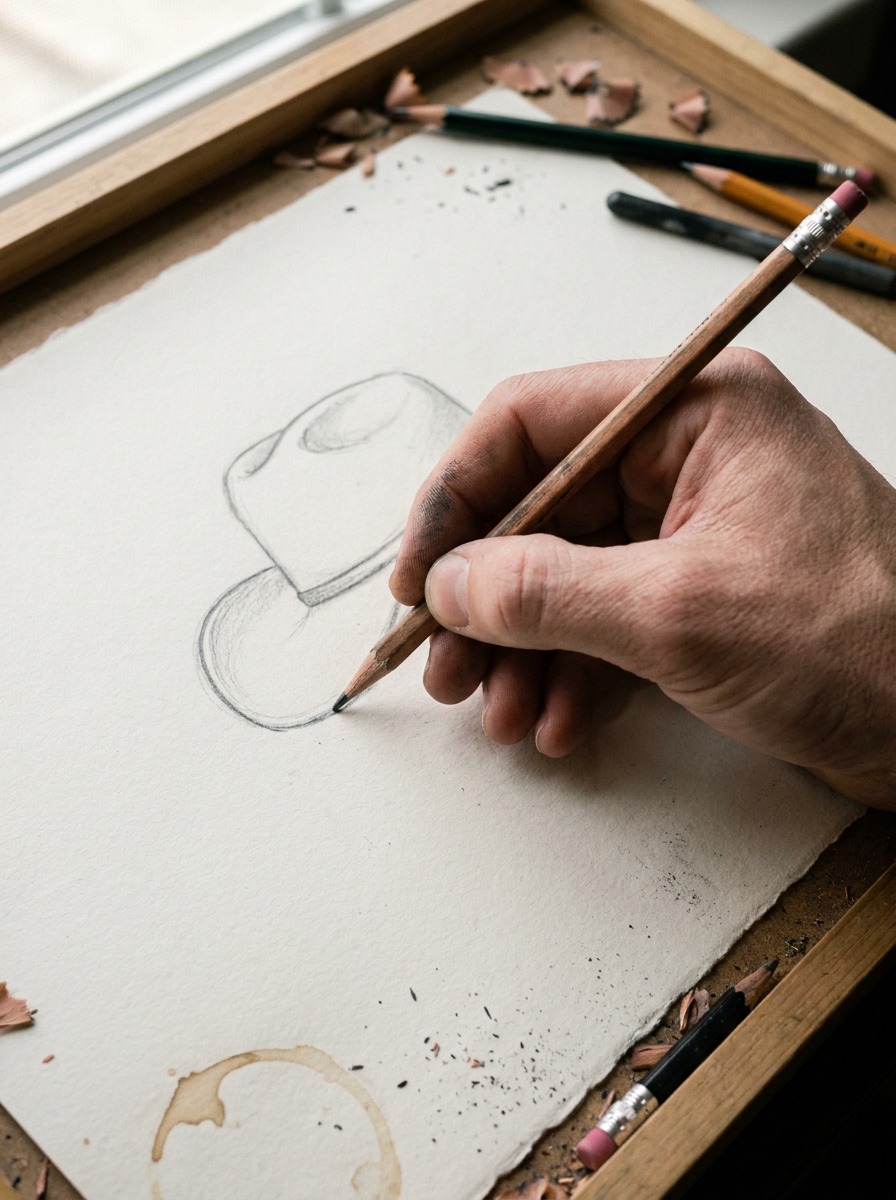
Before you touch a pencil, look at an actual cowboy hat for thirty seconds. Not a cartoon one — a real Stetson or a $40 straw hat from a feed store. You’ll notice it’s built from four parts working together: crown, brim, curl, and pinch. Skip understanding these and you’ll draw the same flat oval-and-U shape everyone else does.
Crown shapes
The crown is the tall part that sits on the head, and its shape tells you what kind of hat you’re drawing. A cattleman crown has two creases running front to back with a center dent — that’s the classic silhouette most people picture. A gambler crown is flatter on top, rounder, less structured. A teardrop crown pinches to a point at the front. Pick one before you start; mixing features from two crown styles is why a lot of beginner drawings look “off” without the artist knowing why.
Brim curl and the front pinch
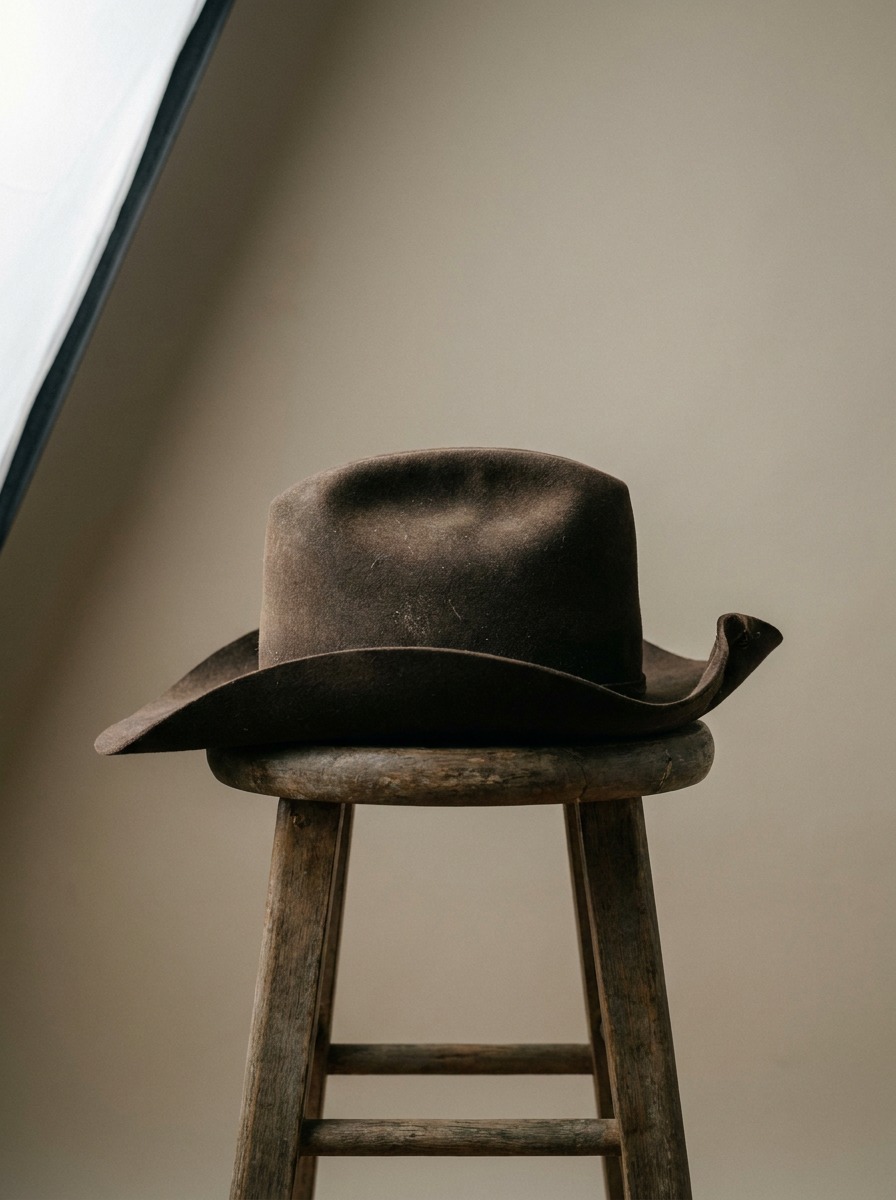
Here’s the detail that separates a real hat from a cartoon: the brim isn’t flat. It curls upward at the sides (Western hat makers call this the “roll”) and often has a slight downward dip at the front and back. In my own life-drawing days, this was the exact lesson that took the longest to internalize — a curved surface catches light differently at every point along its curve, so a brim’s edge is never one continuous line. It’s a series of short arcs that change direction.
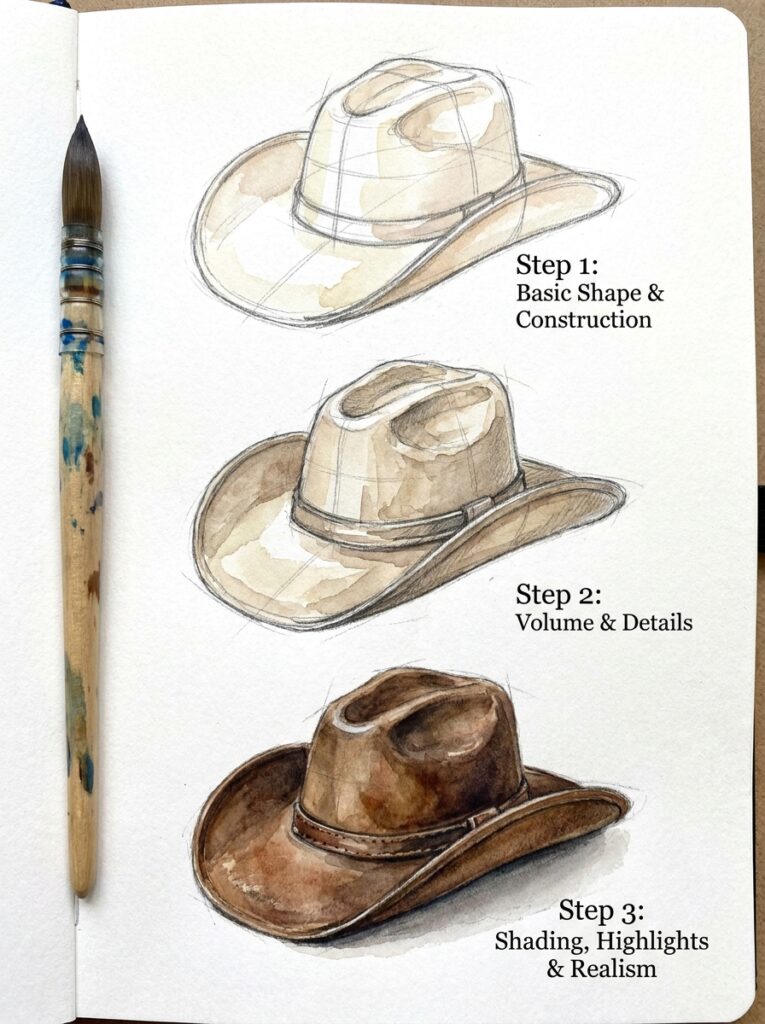
Proportion
Rough rule of thumb: crown height runs about a third of the total hat height, and the brim extends roughly 2-3 inches past the head on each side for a standard Western cut (wider for a rancher-style hat, narrower for a rodeo hat). Sketch a horizontal guideline for where the brim sits relative to the head first — everything else builds off that one line.
Tip: before drawing the whole hat, practice just the brim as an isolated ellipse in three different tilts. Get comfortable with that shape alone and the rest of the hat stops fighting you.
Draw a cowboy hat step by step
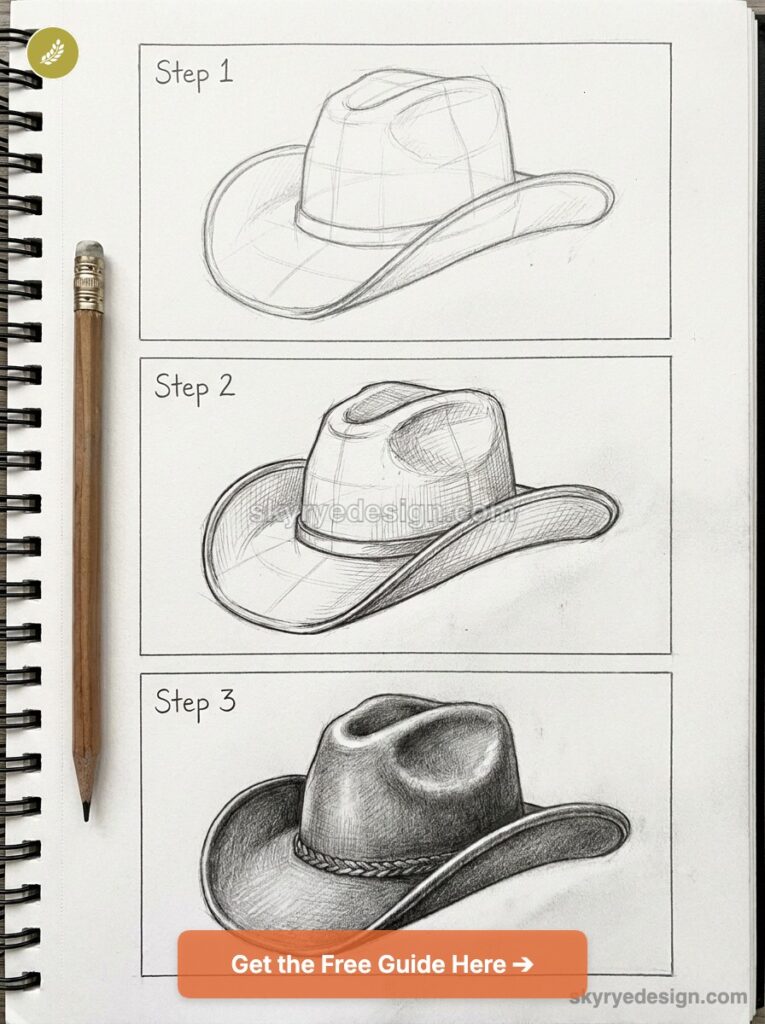
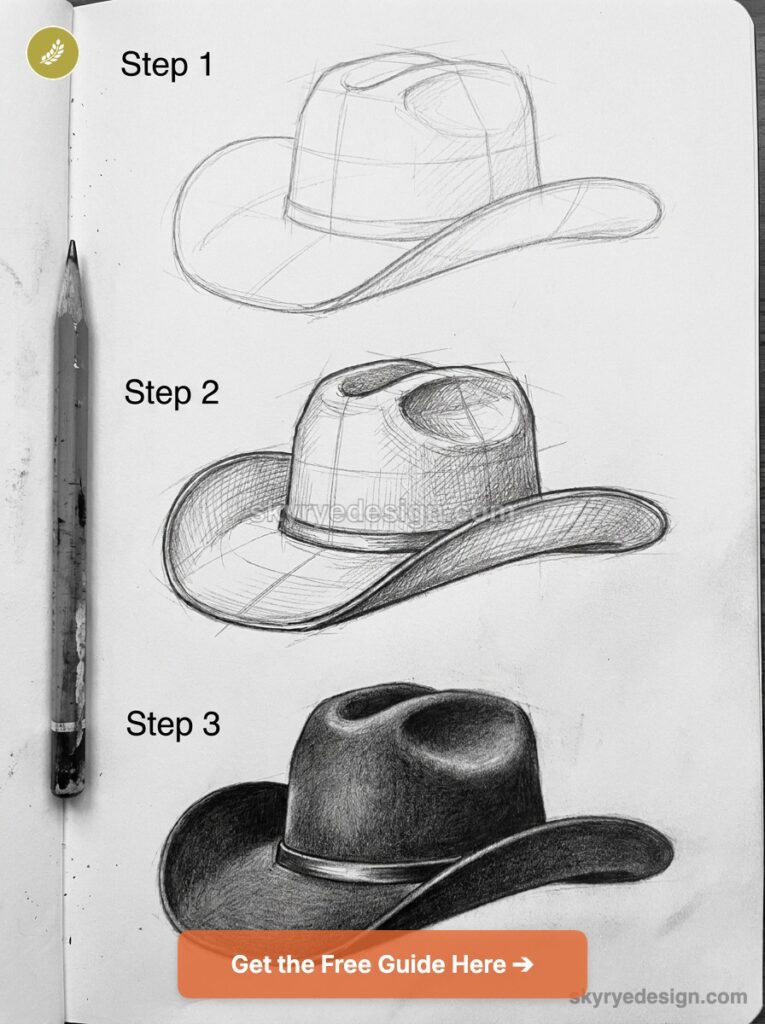
Once you know what you’re building, the actual drawing comes together fast — six steps, no wasted motion.
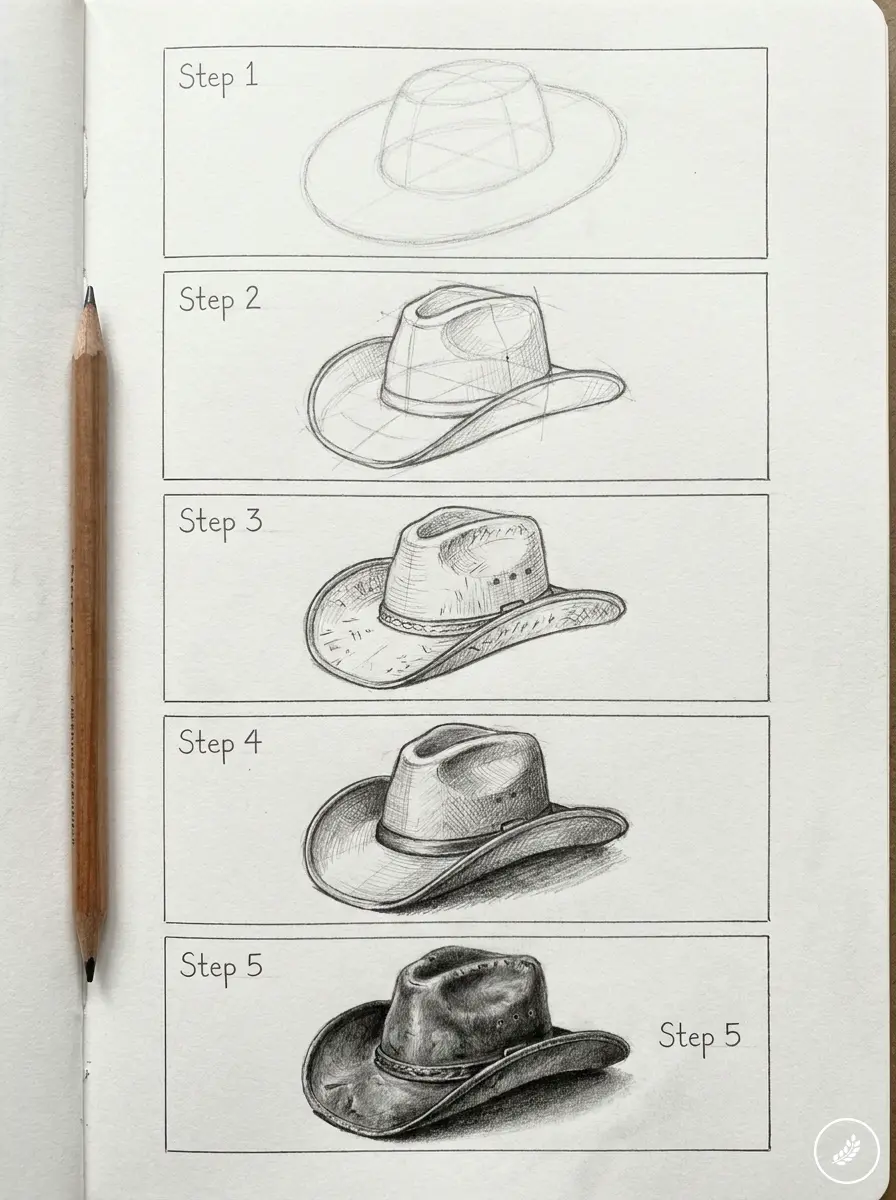
Step 1 — Block in the head or reference ellipse: If you’re drawing the hat on its own, start with a simple ellipse floating in space as your sizing guide. If it’s going on a head, sketch a rough head shape first and treat the hat as sitting on top of it, not separate from it. This single decision — hat-first vs. head-first — is where most tutorials go wrong. They draw the hat in isolation and it never fits anything afterward.
Step 2 — Sketch the brim as a tilted ellipse: Draw the brim as a full ellipse, even the part that would be hidden behind the crown. I always rough in the entire ellipse first, then erase what’s covered — trying to draw only the visible arc from the start almost always warps the perspective.
Step 3 — Build the crown on top: The crown sits inside the brim’s inner edge, not balanced above it. Give it some height right away; a crown that’s too short reads as a boater hat, not a cowboy hat.
Step 4 — Add the curl at the brim edges: This is the step that makes or breaks realism. Curve the outer edge of the brim upward at the sides using short, confident strokes — not one long smooth line. Real felt doesn’t curl in a perfect arc; it has small irregularities.
Step 5 — Refine the band and crease lines: Add the hatband (a thin strip wrapping the base of the crown) and the crown’s crease lines based on whichever style you picked earlier.
Step 6 — Clean up and finalize: Erase your construction lines, darken the final contours, and check the brim ellipse one more time before you commit to ink or heavier pencil. If something looks wrong at this stage, it’s almost always the brim angle — go back to Step 2 before you fix anything else.
Drawing the hat from different angles
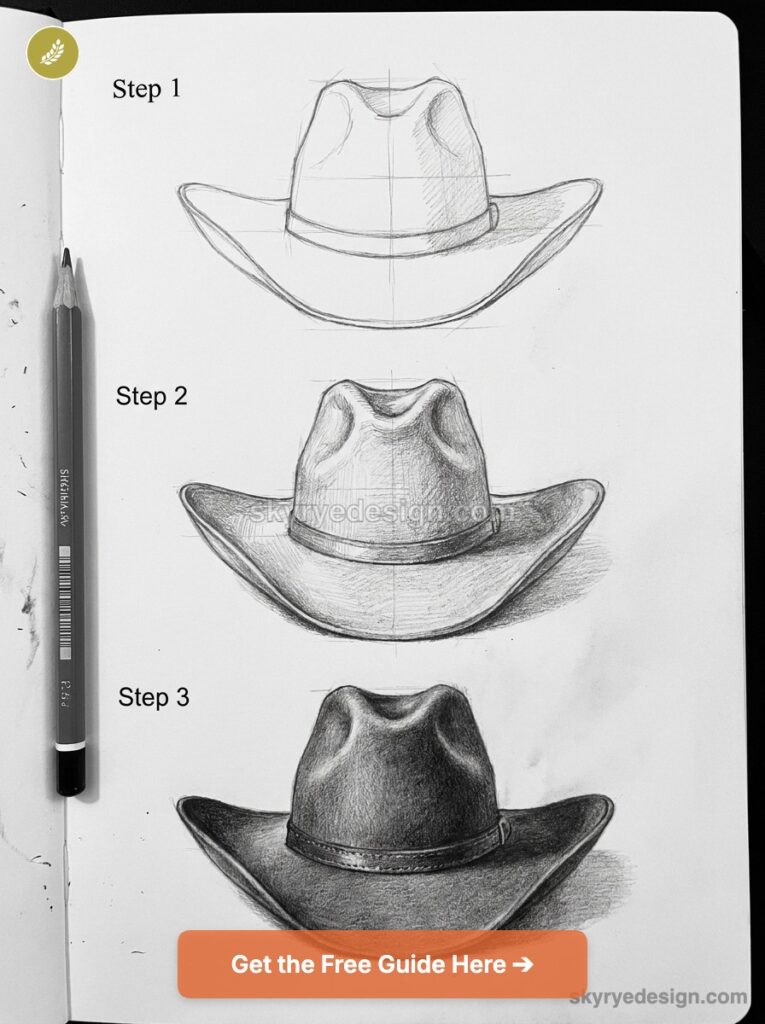
Front view is where every tutorial stops. That’s a mistake — the moment you draw a hat from any other angle, the front-only method falls apart, because you’re suddenly relying on a real understanding of the brim’s ellipse instead of a memorized flat shape.
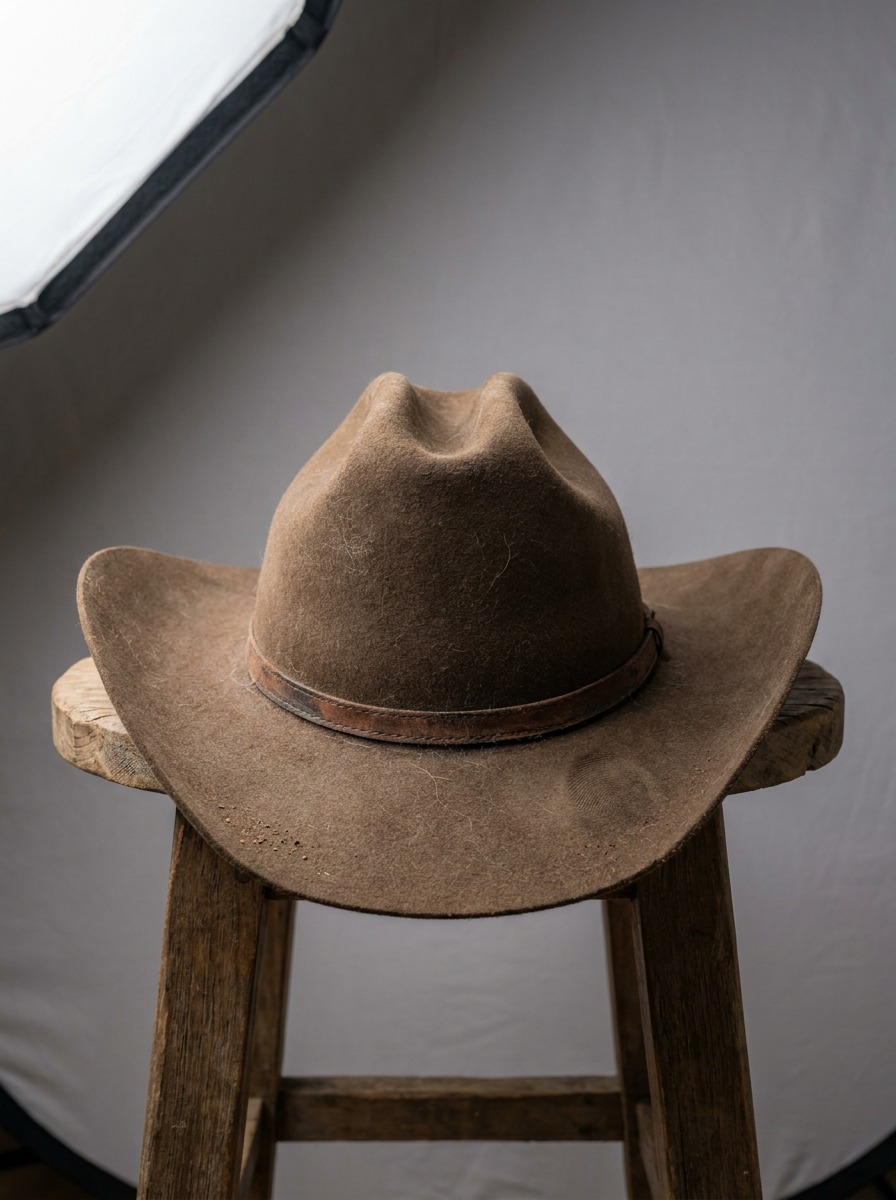
Front view
This is the trap. Drawn straight-on, the brim ellipse looks almost like a simple curve, which is exactly why beginners default to a flat oval here and then can’t adapt it later. Force yourself to still draw it as a full ellipse with real width top-to-bottom, even though most of that width is barely visible from this angle.
Three-quarter view
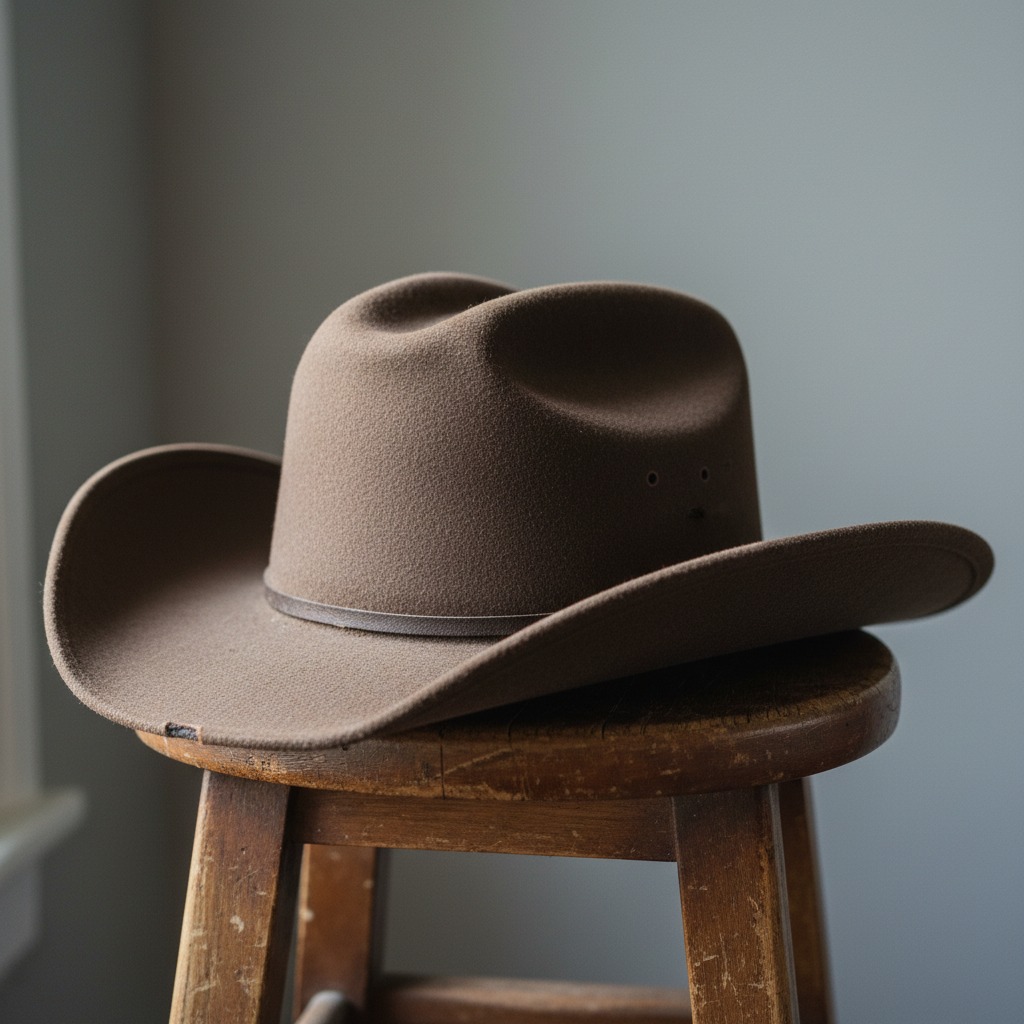
This is the angle you’ll actually use most — it’s how nearly every reference photo, film still, or portrait is framed. The brim ellipse tilts and compresses on one side while opening up on the other. I treat this as the “real test” angle: if your hat looks convincing at three-quarter view, you’ve actually understood the form.
Side and back view
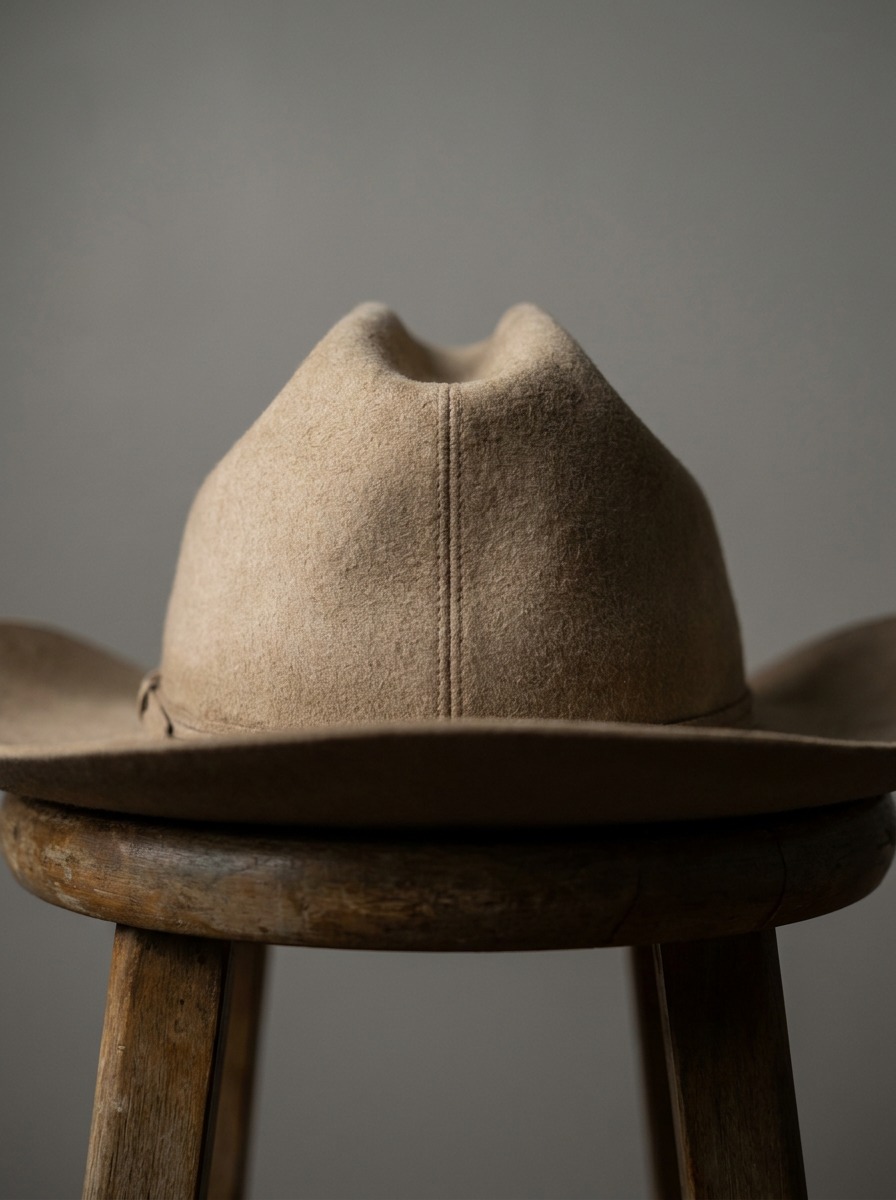
From the side, the brim’s front dip and back curl become the whole story — you’re drawing two overlapping arcs instead of a full ellipse. From the back, the crown’s crease pattern becomes the focal point instead of the brim. Both angles expose sloppy crown proportion instantly, since there’s no front brim to distract from a crown that’s the wrong height.
Putting the hat on a head
This is the search people actually run into after they’ve mastered the hat alone and then can’t figure out why it looks like it’s floating an inch above the scalp. It’s the most underserved part of this topic — every kids’ tutorial skips it entirely.
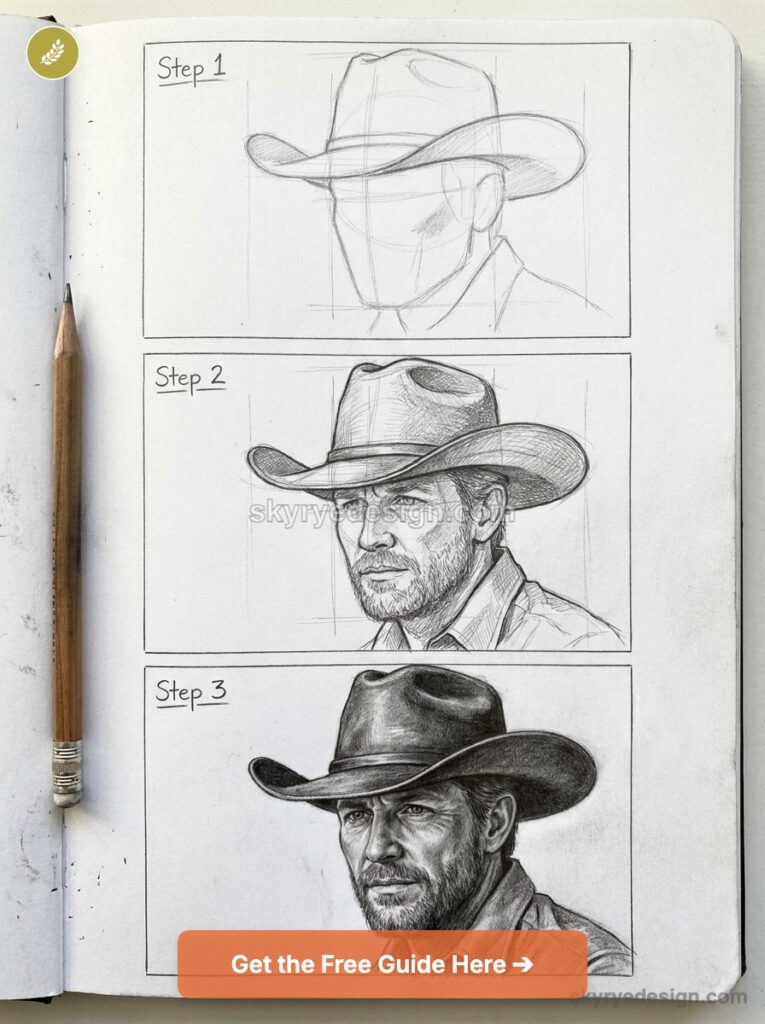
Matching the brim ellipse to head tilt
The brim’s ellipse angle has to match the head’s tilt exactly, or the hat reads as pasted on. Tilt the head down slightly and the brim ellipse opens up more; tilt it up and the ellipse narrows. I treat the head’s centerline as the anchor — draw that first, then build the brim ellipse perpendicular to it, not to the page.
Where the crown sits relative to the hairline
A common instinct is to draw the hat sitting right at the hairline, like a baseball cap. Real cowboy hats sit noticeably higher, with the crown covering most of the upper skull and the brim’s back edge often clearing the head entirely at a downward angle. Leave more space between the eyebrows and the brim’s front edge than feels natural at first.
The floating-hat problem
If a hat looks like it’s hovering, it’s almost always one of two things: the brim ellipse doesn’t match the head’s tilt, or there’s a visible gap between the crown’s base and the scalp where hair or shadow should be. A thin line of shadow right under the brim’s inner edge does more to “seat” a hat than almost any other single mark you can add.
Tip: draw the head-tilt centerline in every reference photo you study before drawing the hat. Once that habit’s automatic, this whole section becomes intuitive instead of guesswork.
Rendering felt vs. straw for realism
A well-constructed hat still reads as a cartoon if the shading doesn’t match the material. Felt and straw behave completely differently under light, and treating them the same is the last thing separating a technically correct hat from a convincing one.
Felt
Felt is soft and light-absorbing, so its shadows have almost no hard edge — everything blends. Build the crown’s shading with a smooth gradient, darkest where the curve turns away from the light source, and avoid any crisp line inside the form itself.
Straw
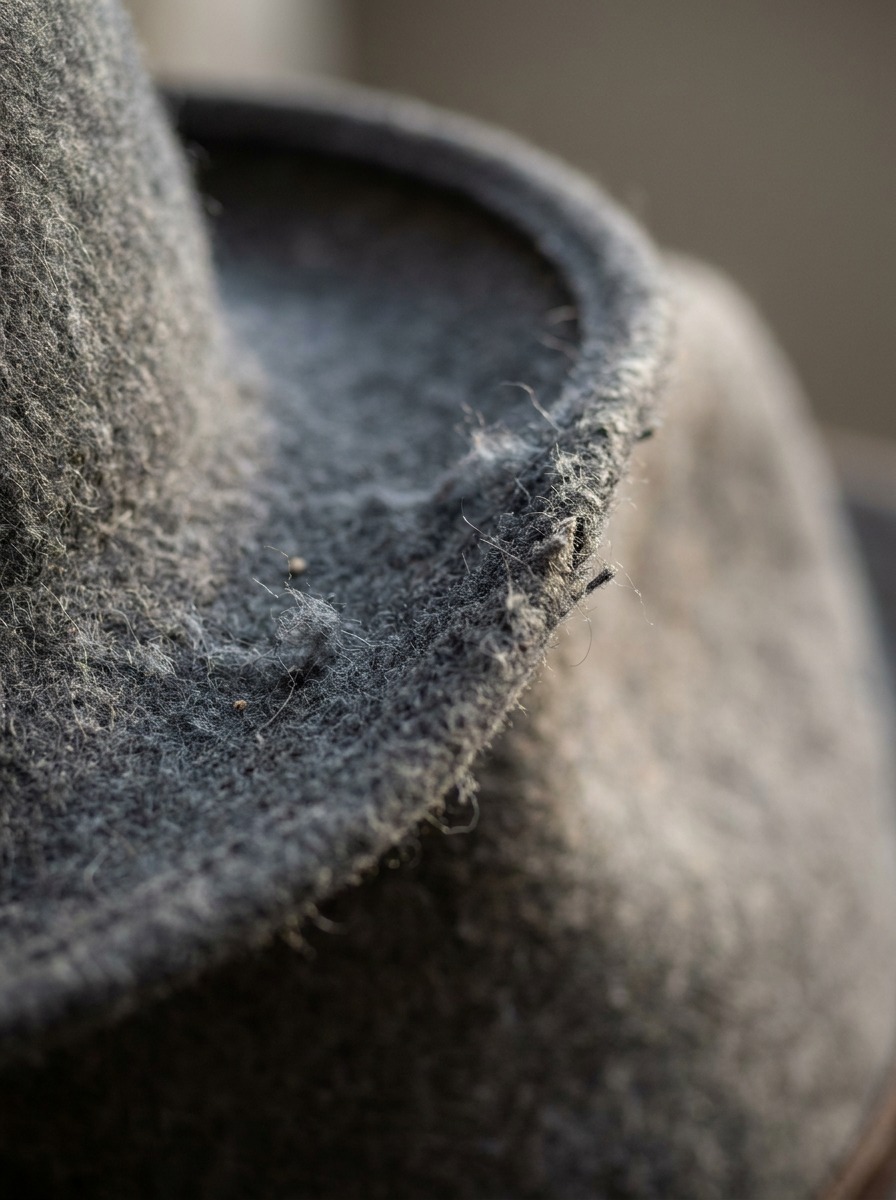
Straw is the opposite: directional, textured, full of small value jumps from the woven pattern. Instead of a smooth gradient, use short parallel strokes following the curve of the brim — the texture itself should imply the form, the same way cross-hatching implies volume in life drawing.
Shading the curved brim
Regardless of material, the brim’s curl creates a value shift that most beginners skip: the top surface catches the most light, the underside of the curl goes darkest, and the flat outer rim in between sits at a mid-value. Map those three zones first, loosely, before adding any texture.
Common mistakes (and quick style variations)
Most cowboy hat drawings fail for one of two reasons, and both trace back to skipping the anatomy section.
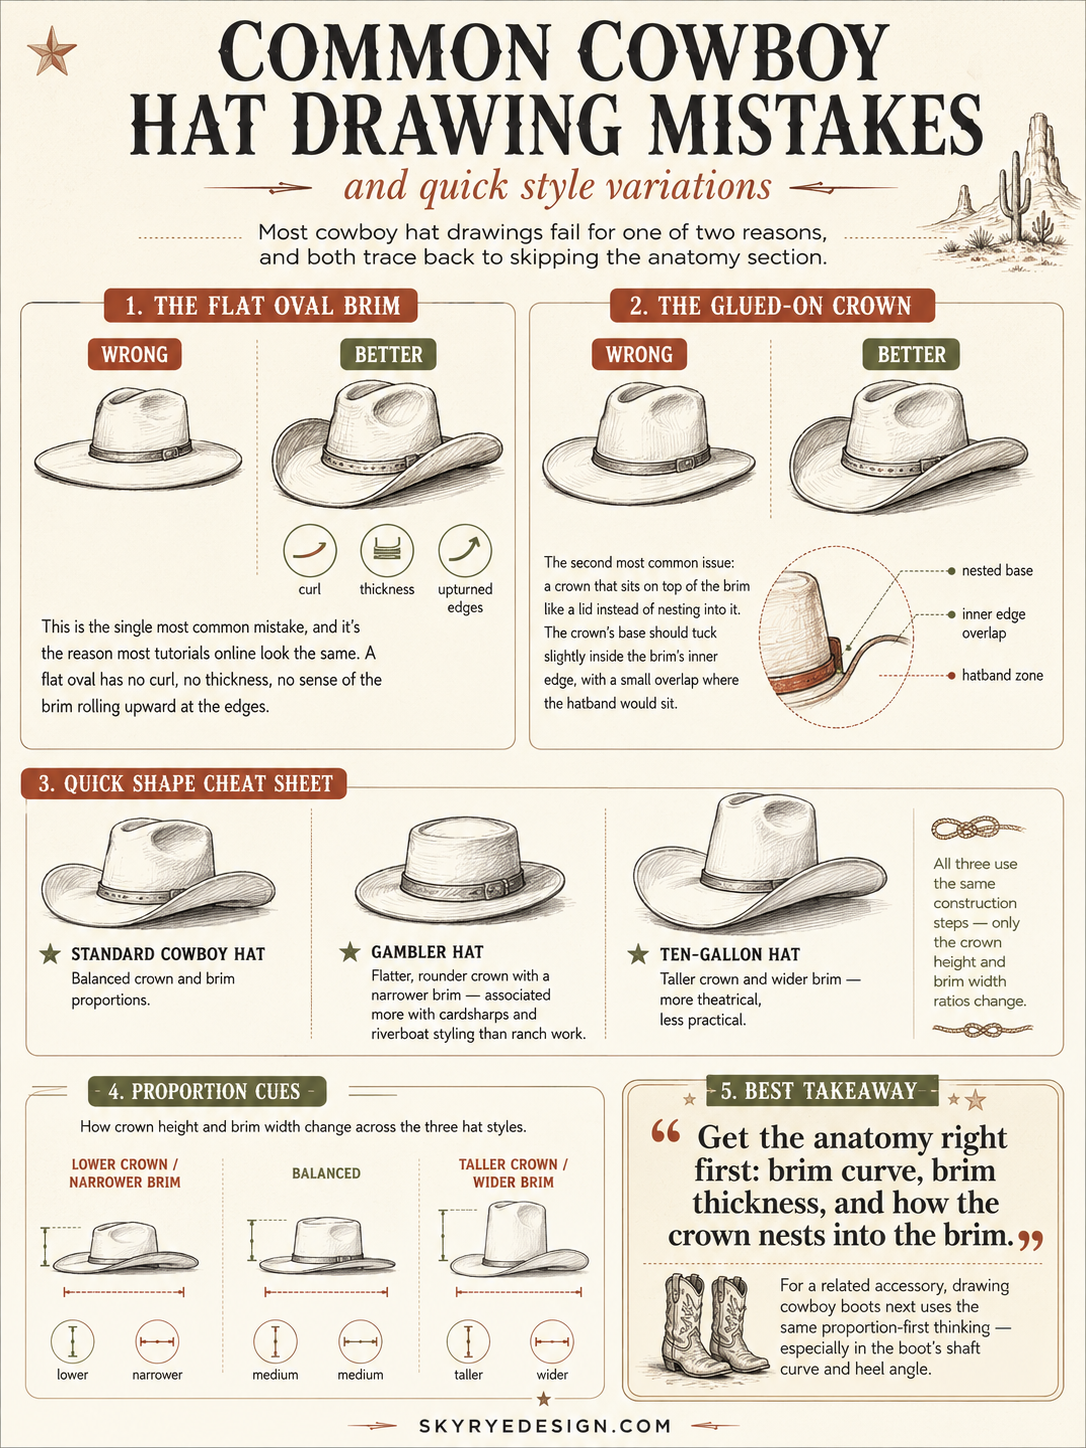
The flat oval brim
This is the single most common mistake, and it’s the reason most tutorials online look the same. A flat oval has no curl, no thickness, no sense of the brim rolling upward at the edges.
The glued-on crown
The second most common issue: a crown that sits on top of the brim like a lid instead of nesting into it. The crown’s base should tuck slightly inside the brim’s inner edge, with a small overlap where the hatband would sit.
Quick shape cheat sheet
If you want variety beyond the standard cattleman crown: a gambler hat has a flatter, rounder crown with a narrower brim — associated more with cardsharps and riverboat styling than ranch work. A ten-gallon hat pushes the crown taller and the brim wider, more theatrical, less practical. Both use the same construction steps — only the crown height and brim width ratios change.
For a related accessory, I’d point you toward drawing cowboy boots next — the same proportion-first thinking applies to the boot’s shaft curve and heel angle.
Conclusion
The gap between a cartoon cowboy hat and a real one comes down to two things: the brim is an ellipse, not an oval, and the crown has to sit into that ellipse instead of floating above it. Everything else — curl, texture, angle, placement on a head — builds on getting that one relationship right.
If you only take one thing from this guide, practice the brim ellipse alone, in a few different tilts, before you draw a full hat again. Once that shape stops fighting you, the crown, the curl, and the shading all fall into place a lot faster than they did the first time around.
Frequently asked questions
What shape is a cowboy hat brim really?
It’s a full ellipse, not a flat oval — even the part hidden behind the crown. The brim also curls upward at the sides (called the “roll”) and often dips slightly at the front and back. Drawing it as a flat, uncurled oval is the single most common reason cowboy hat drawings look like cartoons instead of real hats.
How do you draw a cowboy hat on a person’s head?
Start with the head’s centerline and match your brim ellipse to that exact tilt — if the head tilts down, the ellipse opens up; if it tilts up, the ellipse narrows. Position the crown higher than feels natural at first, covering most of the upper skull rather than sitting at the hairline like a baseball cap. A thin shadow line under the brim’s inner edge helps “seat” the hat instead of letting it float.
What’s the easiest way to draw a cowboy hat for beginners?
Block in a full brim ellipse first, even the hidden half, then build the crown so it nests into the brim’s inner edge rather than sitting on top of it. Add the upward curl at the brim’s outer edges before finishing the hatband and crease lines. Practicing the ellipse alone, in a few different tilts, makes everything after it easier.
How do you shade a cowboy hat to look realistic?
Map three value zones on the curved brim first: brightest on the top surface, darkest on the underside of the curl, and mid-value on the flat outer rim. For felt, blend those zones smoothly with no hard edges inside the form. For straw, use short parallel strokes following the brim’s curve to imply the woven texture instead of one flat gradient.
What’s the difference between a Stetson and a gambler hat shape?
A classic Stetson-style hat usually has a cattleman crown — two front-to-back creases with a center dent — and a moderate brim width. A gambler hat has a flatter, rounder crown with a narrower brim, associated more with riverboat and cardsharp styling than ranch work. Both use the same brim-and-crown construction steps; only the proportions change.
How do you draw a cowboy hat from the side?
From the side, you’re drawing two overlapping arcs instead of a full ellipse — the brim’s front dip and its back curl. This angle exposes crown height problems instantly, since there’s no front brim to distract from a crown that’s too short or too tall. Anchor the crown’s height first, then build the two brim arcs around it.
What’s the most common mistake when drawing cowboy hats?
Drawing the brim as a flat, uncurled oval with no thickness — it makes the whole hat look stiff and two-dimensional. The second most common mistake is a crown that sits on top of the brim like a lid instead of tucking into it, which makes the hat read as two separate pieces instead of one connected object.
- 1.3Kshares
- Facebook0
- Pinterest1.3K
- Twitter3
- Reddit0