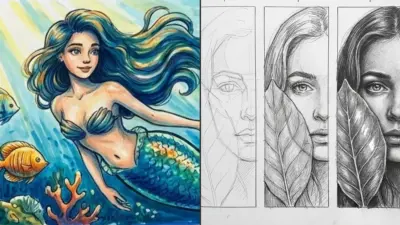
Learning how to draw female figure can be both rewarding and challenging. To create accurate and appealing representations, artists need to understand the unique proportions and forms that define the female body. By breaking down the drawing process into simple steps, anyone can improve their skills and gain confidence in their artistic abilities. One effective approach is to break the body into sections, such as using the eight-head rule, to make drawing proportions easier.
Starting with basic shapes to form the structure of the figure establishes a strong foundation. Artists can then add details, such as curves and features, to bring the drawing to life. As they refine their work and apply color, the figure becomes more dynamic and engaging.
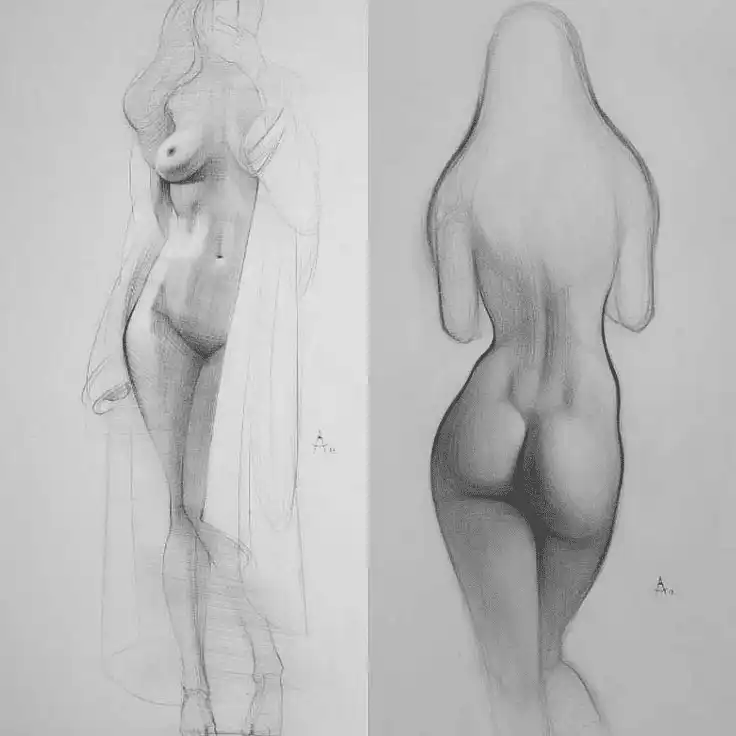
Hope is important for beginners—improvement is always possible with regular practice and a solid understanding of anatomy and perspective.
With practice and attention to detail, anyone can master the art of drawing the female form. Developing an understanding of proportions, structure, and color will enhance their ability to create beautiful artwork. This article will explain each step in detail to help you understand the process clearly.
Key Takeaways
- A strong foundation starts with basic shapes.
- Adding details brings the drawing to life.
- Practice and refinement lead to better results.
Understanding the Female Form
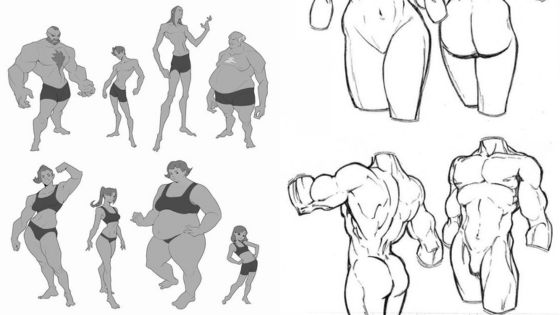
To effectively draw the female figure, one must grasp the core aspects of proportions, key anatomical landmarks, and the diversity of body shapes. Each element contributes to a more accurate and realistic representation. Understanding female anatomy is foundational for artists aiming to capture the nuances of the female form. It’s also important to recognize different body types, as variations in proportions such as hip, waist, and bust width can significantly affect the overall look.
This knowledge helps artists accurately depict the wide range of females they may encounter in their work.
Proportions and Measurements
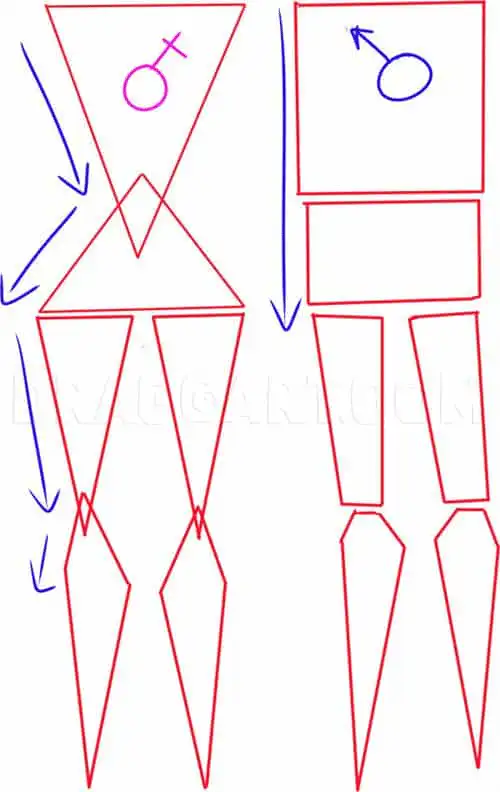
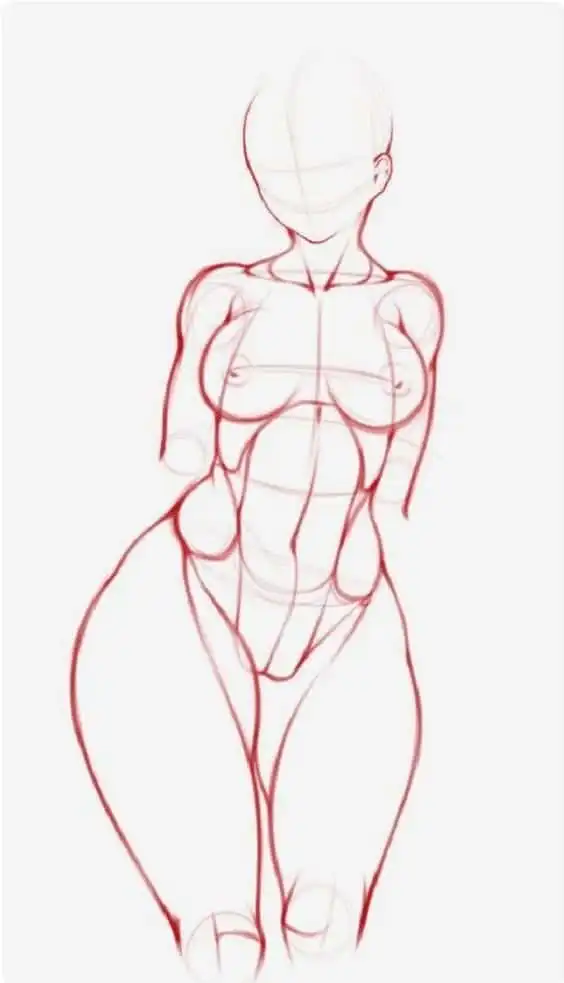
Understanding proportions is crucial when drawing female figures. Typically, an adult female is about 7 to 7.5 heads tall. The following measurements can help guide drawings:
- Head to Hip Ratio: The widest part of the hips is usually about 1.5 times the width of the shoulders.
- Waist to Hip Ratio: A common measurement is 0.7, which represents a curvy silhouette.
- Leg Length: Legs often make up roughly half of the total height.
- Key Points: Identifying anatomical points such as the navel, shoulders, and the point where the torso folds helps maintain accurate proportions and guides placement of body parts.
Using these measurements allows artists to create balanced and realistic body outlines.
Anatomical Landmarks


Recognizing anatomical landmarks aids in drawing a realistic female figure. Understanding the underlying bones, such as the rib cage and pelvis, is crucial for accurate proportions and structure in figure drawing. Essential points include:
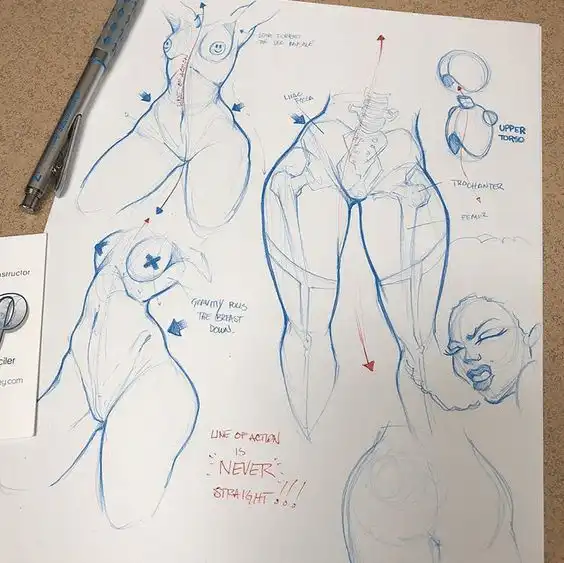
- Collarbone: This bone defines the width of the shoulders.
- Neck: The neck connects the head to the torso and is an important anatomical landmark for positioning the head and shoulders.
- Bust Line: The bust is positioned between the collarbone and the waist.
- Chest: The chest area includes the rib cage and the muscles attached to it, which help define the shape and volume of the upper torso.
- Waist: The narrowest part of the torso is the waist, critical for defining curves.
- Hips and Thighs: The hips are broader than the waist, leading into the thighs.
Studying these landmarks helps in capturing the figure’s essence and adding detail.
Body Shapes and Types
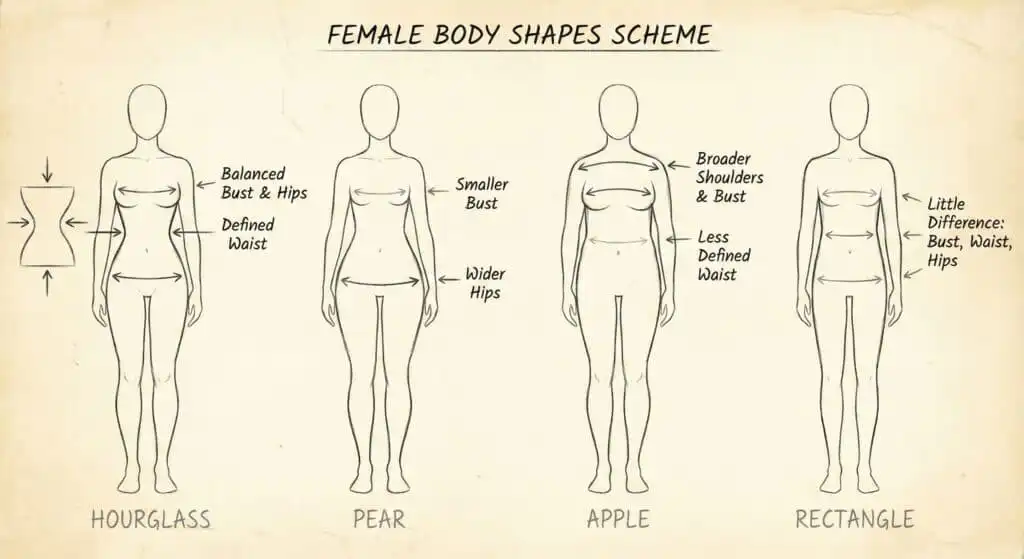
Female bodies come in various shapes, each with unique characteristics:
- Hourglass: Defined waist with balanced bust and hips.
- Pear: Wider hips with smaller bust.
- Apple: Broader shoulders and bust with a less defined waist.
- Rectangle: Little difference between bust, waist, and hips.
The stomach area can vary significantly between these body types, influencing the overall silhouette and how the torso connects the ribcage and pelvis. Paying attention to the shape and proportion of the stomach helps in accurately capturing the anatomical structure of each figure.
Understanding these shapes allows the artist to represent diverse female forms accurately. Each type brings its own appeal and style, enriching the artist’s portfolio.
Drawing Fundamentals


Understanding the basic elements of drawing is essential for creating female figures. Key aspects include using line and shape effectively, applying light and shadow for depth, and considering perspective and angle to enhance realism. These fundamentals build a strong foundation for any artist.
Note: Mastering these basics is crucial before moving on to details, as a solid understanding of proportions and structure will greatly improve your female figure drawings.
Line and Shape
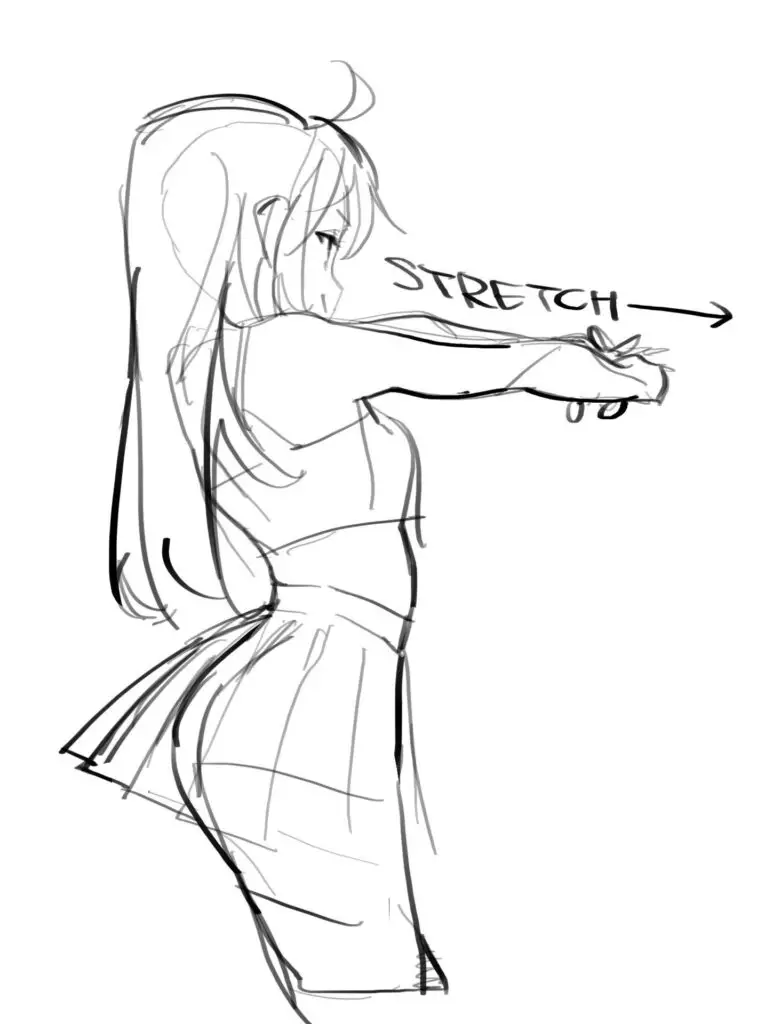

Lines and shapes are the building blocks of any drawing. Artists should start with simple forms like ovals and rectangles. These shapes create the structure of the figure.
- Head: Use an oval to map out the head.
- Torso: A rectangle can help define the torso’s width and length.
- Limbs: Cylindrical shapes work well for arms and legs.
Using these basic shapes simplifies the figure drawing process. Once the artist has established the basic forms, they can refine the outlines and add details, giving more character and form to the figure.
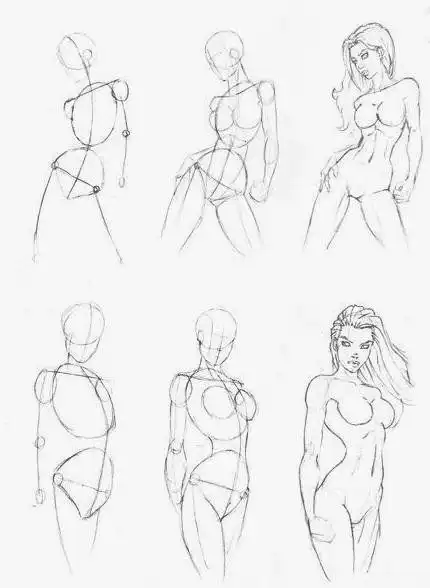
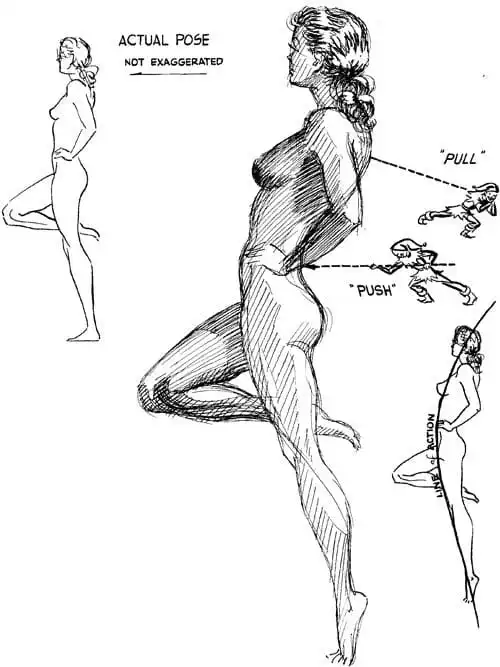
To better understand how these basic shapes translate into real-life poses and forms, study photo reference images and observe how anatomy is constructed from simple shapes.
Light and Shadow
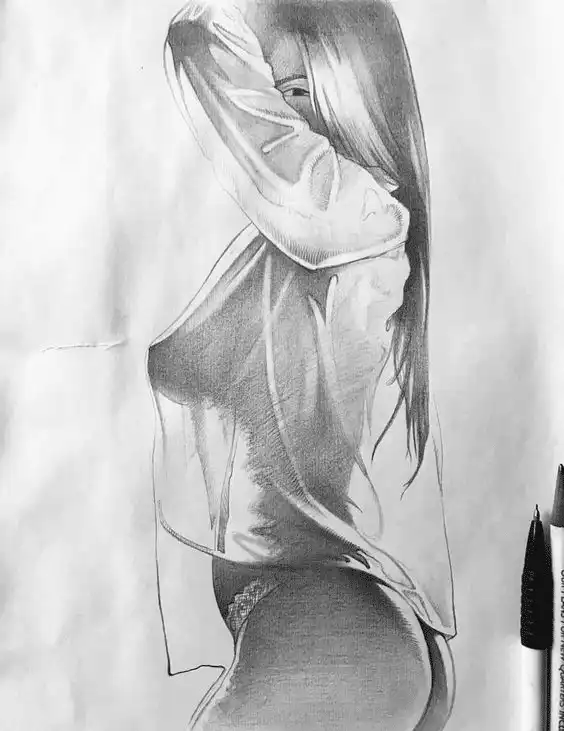
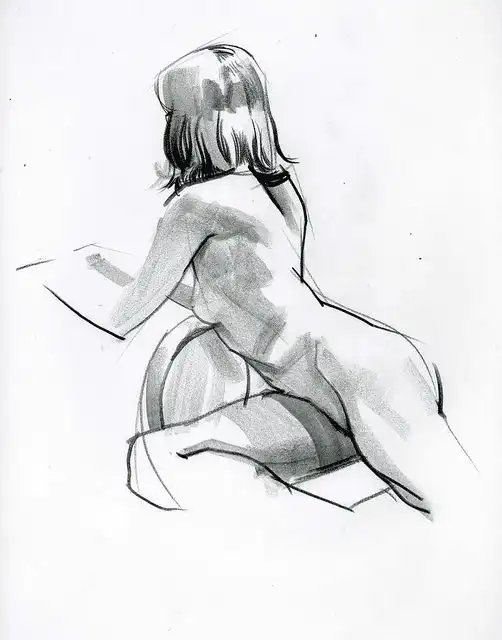
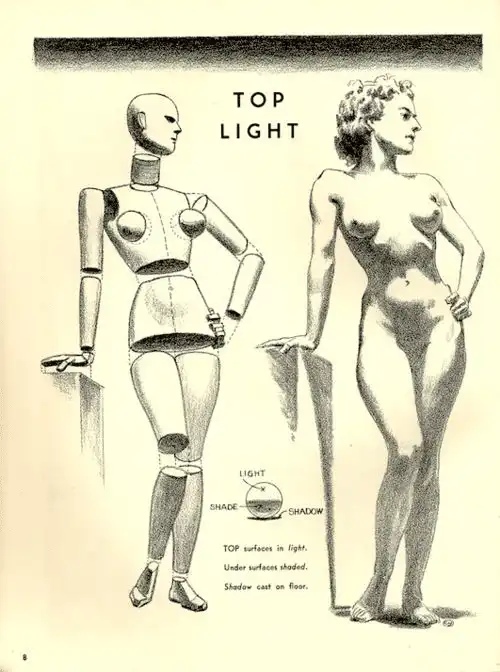
Light and shadow add depth and dimension to a drawing. Understanding how light interacts with the body helps create a realistic figure.
- Light Source: Identify where the light is coming from.
- Highlights: Areas closest to the light should be brighter.
- Shadows: Opposite the light source, shadows should be darker and softer.
Using shading techniques like hatching or cross-hatching can create the illusion of volume. Careful placement of shadows enhances the three-dimensionality of the figure.
Perspective and Angle
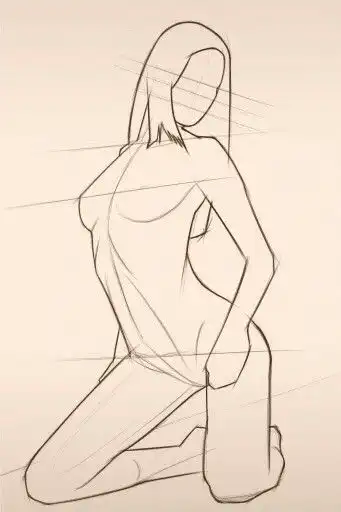
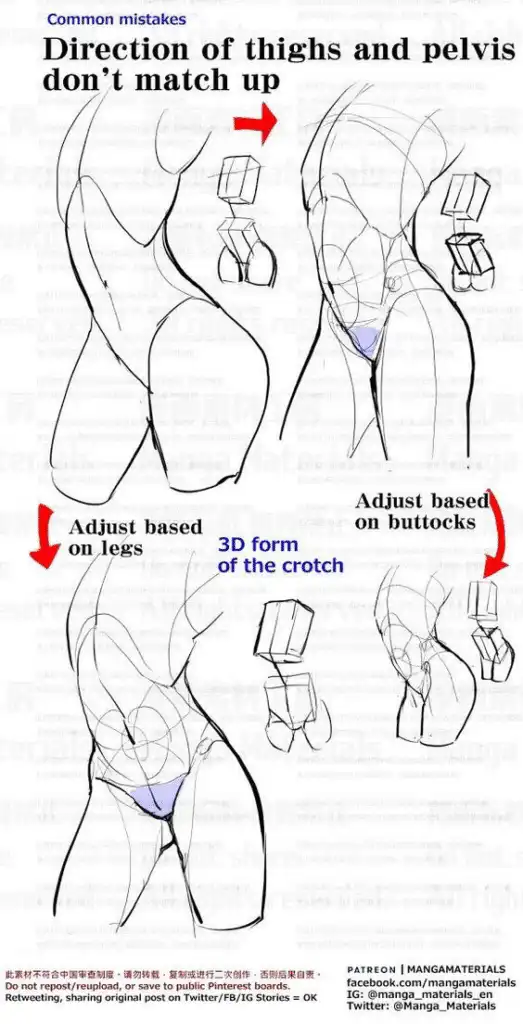
Perspective affects how a figure appears on the page. Understanding angles and proportions is crucial for capturing the human form accurately.
- Foreshortening: This technique shows limbs closer to the viewer appearing larger.
- Viewpoint: Different angles can change the proportions. For example, viewing from above or below alters how features are seen.
Practicing different perspectives helps artists create more dynamic poses. This allows for greater expression and action within their artwork, making the female figure more engaging.
Sketching the Basic Structure


To draw a female figure effectively, starting with a solid base is crucial. This section explores essential techniques, focusing on gesture drawings, establishing the torso, and laying out the limbs.
Creating a Gesture Drawing
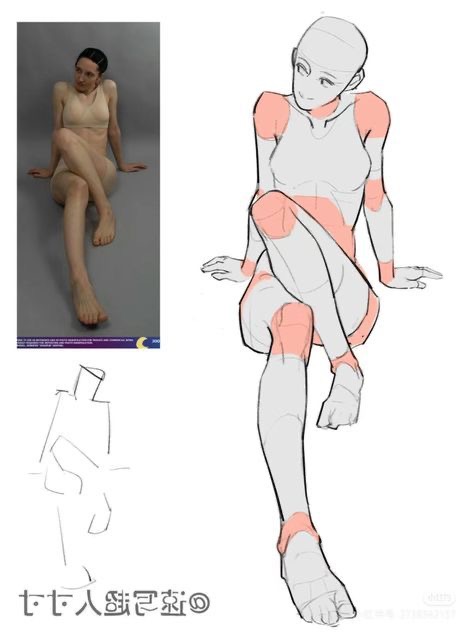
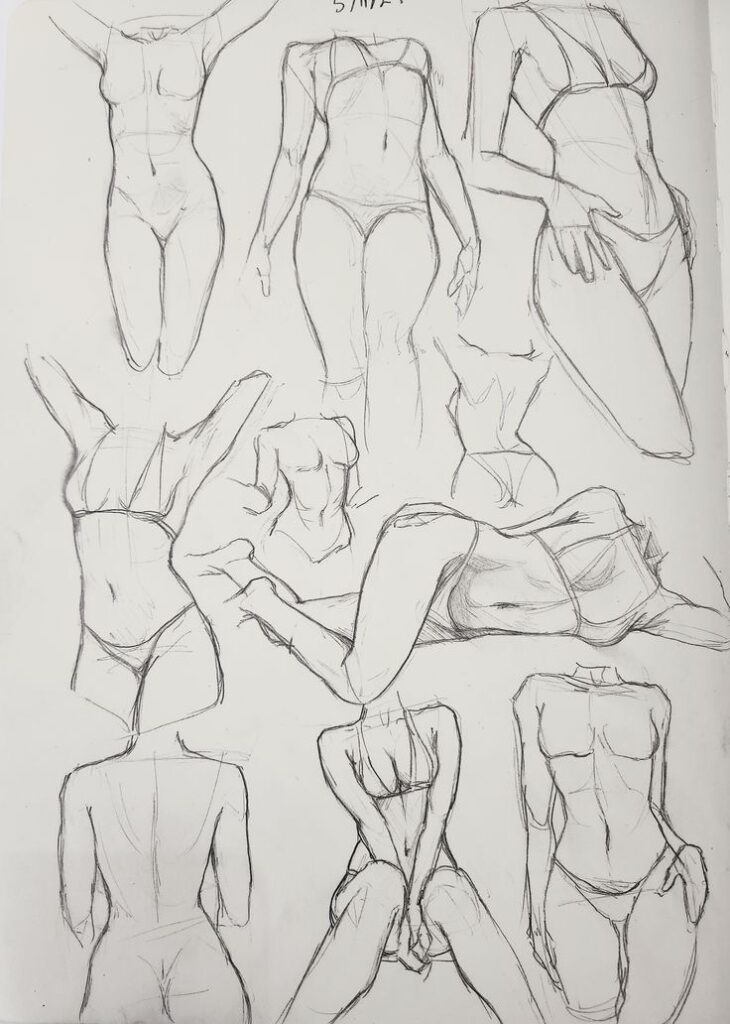
A gesture drawing captures the basic movement and flow of the figure. It is often the first step in figure drawing. Begin with light, loose lines to outline the posture and action.
- Use simple shapes like circles and lines.
- Focus on the overall movement, not details.
- Keep it quick, aiming for 30 seconds to 2 minutes per sketch.
This method helps artists understand proportions and balance. The outcome should convey energy and motion, serving as a foundation for further detailing.
Establishing the Torso
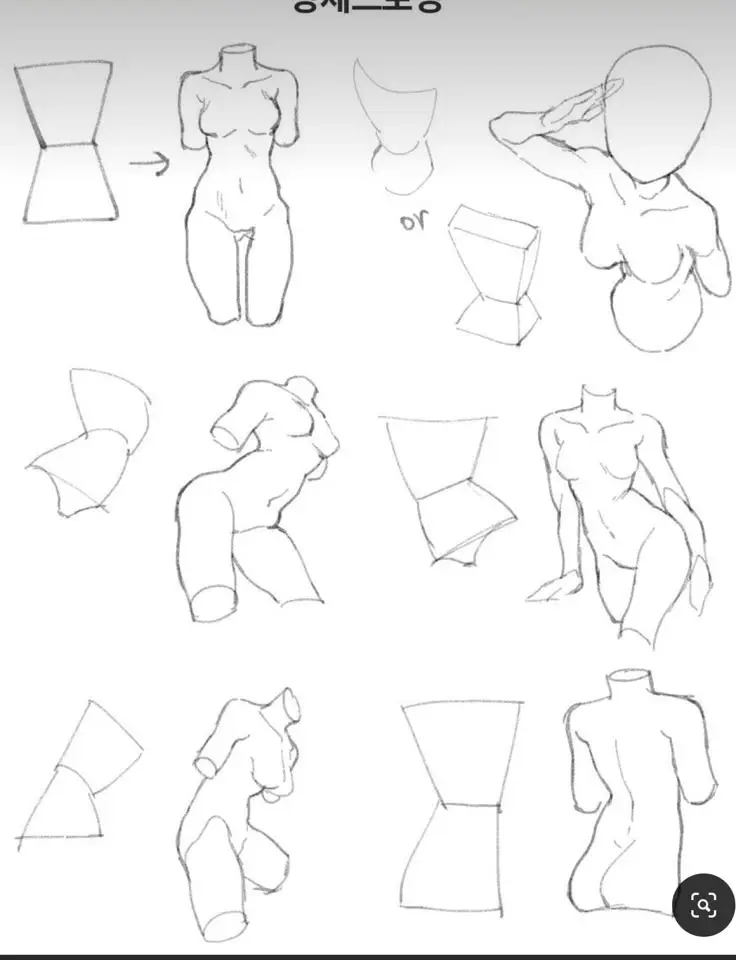
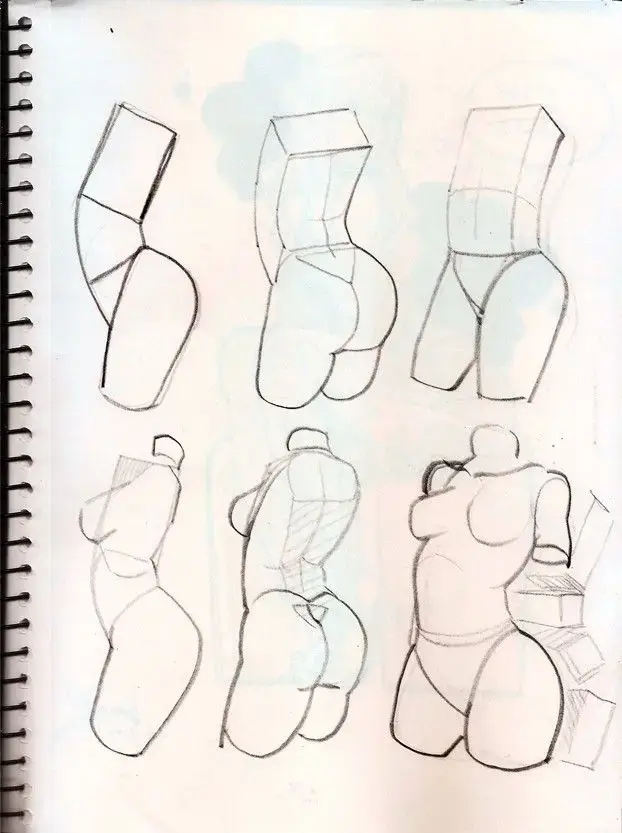
After the gesture drawing, focus on the torso. This part of the body is central to the figure’s structure.
- Shape: Start with an elongated oval or rectangle to represent the torso. Adjust its angle based on the pose.
- Proportions: The torso should be proportionate to the head and limbs.
- For a standard female figure, the torso is typically the same length as the head.
- Divide the torso into sections for added detail, like the rib cage and waist. Understanding the placement of muscles in the torso helps you capture realistic curves, movement, and anatomical accuracy.
Adding these shapes allows for more accurate rendering of curves and volume.
Laying Out the Limbs
Once the torso is in place, outline the limbs. This step adds essential details to the figure.
Use cylinders and boxes for upper arms, forearms, and legs.
- Arms: Start with circles at the shoulder and elbow, connecting them with straight or slightly curved lines.
- Legs: Begin with a wider shape at the hip, tapering down to the ankle.
Adjust the angles based on the figure’s pose to maintain balance.
Pay attention to the relationship between the limbs and the torso. This balance is vital in making the figure appear natural and dynamic. Keep proportions consistent to achieve a realistic look.
Adding Details and Features
Adding details and features enhances the realism of a female figure drawing. Focus on the face, hands, feet, hair, and clothing to create a complete and lively representation. This section will also cover important anatomical features such as breasts and how to represent them accurately.
Defining the Face
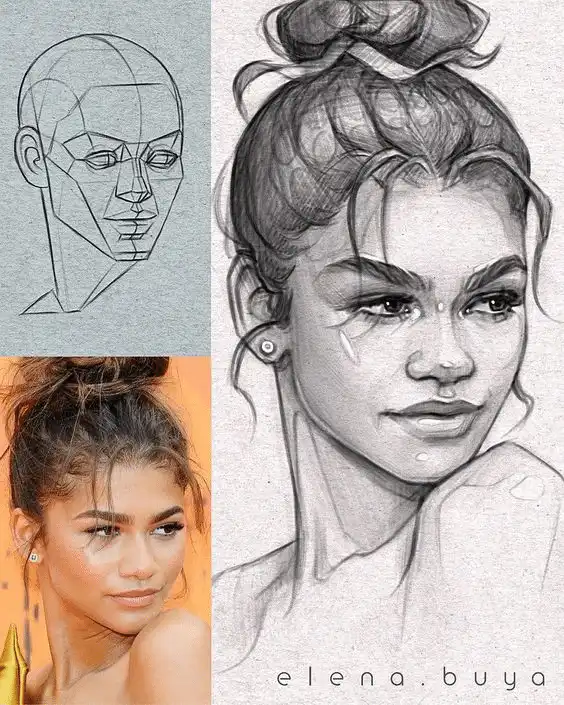
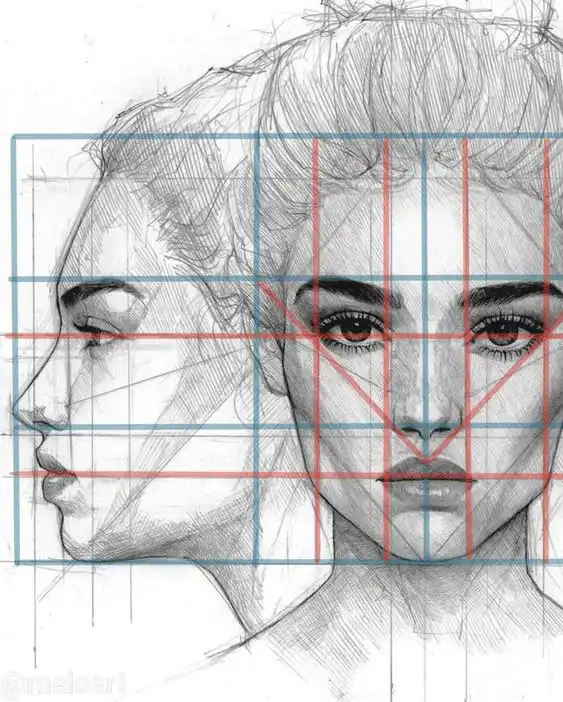
To define the face, start by sketching light guidelines to position the eyes, nose, and mouth. The eyes should be about one eye-width apart.
- Eyes: Shape varies; they can be almond or round. Add eyelashes and eyebrows for expression.
- Nose: Draw a simple geometric shape; adjust width and length based on style.
- Mouth: The lips can be fuller or thinner; give them shape by adding highlights.
Using shading can add depth, especially around the cheekbones and jawline.
Representing Hands and Feet
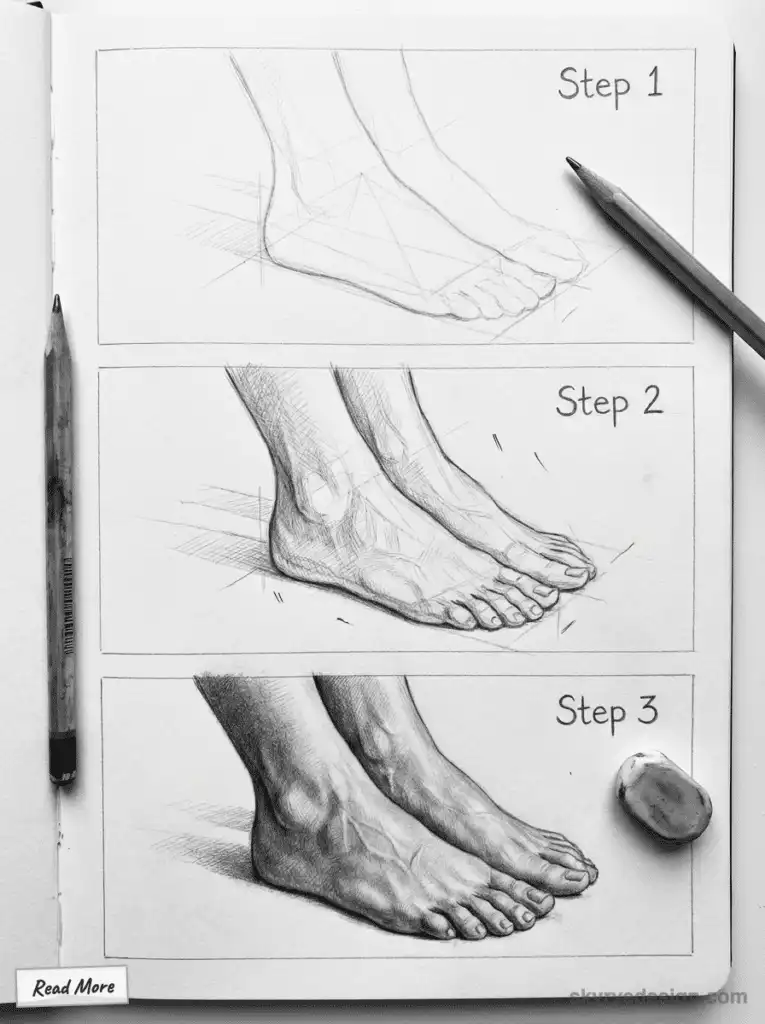
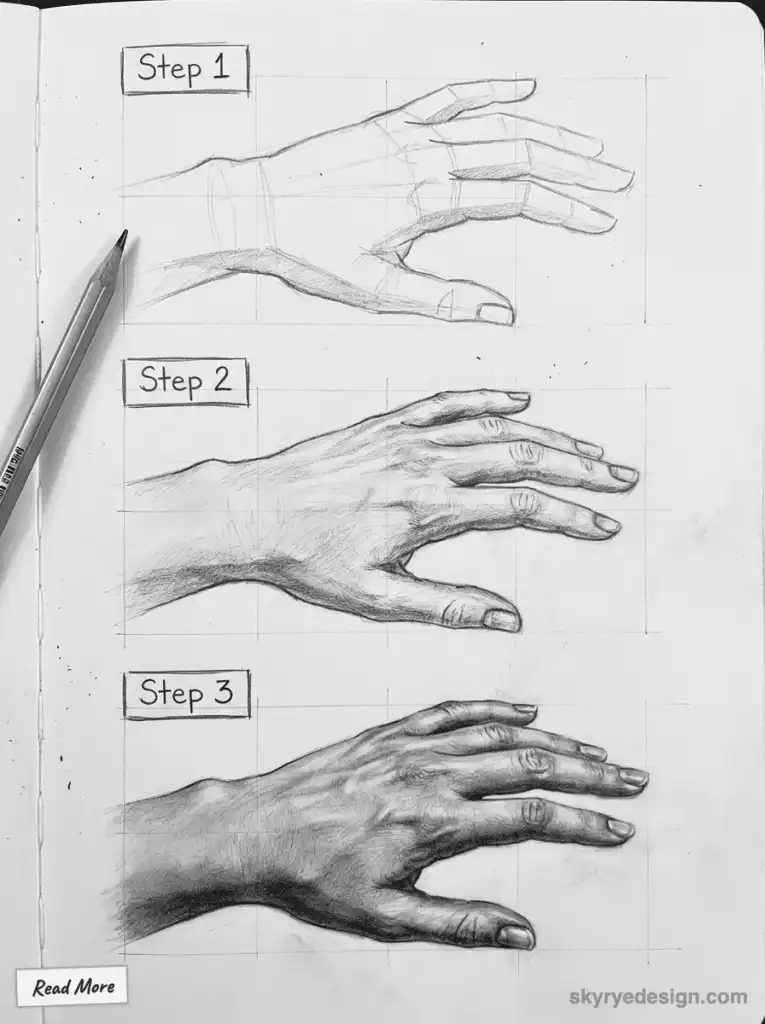
Hands and feet can be challenging but are crucial to realism. It is important to understand their proportions and basic shapes.
- Hands: Start with a basic outline. Use shapes like rectangles for the palm and ovals for fingers. There are different positions, so practice different poses.
- Fingers: They taper towards the tips, and knuckles create bends, so consider this when drawing.
For feet, use simple shapes to outline their structure. Once the outline is complete, detail the toes and arches.
Rendering Hair and Clothing
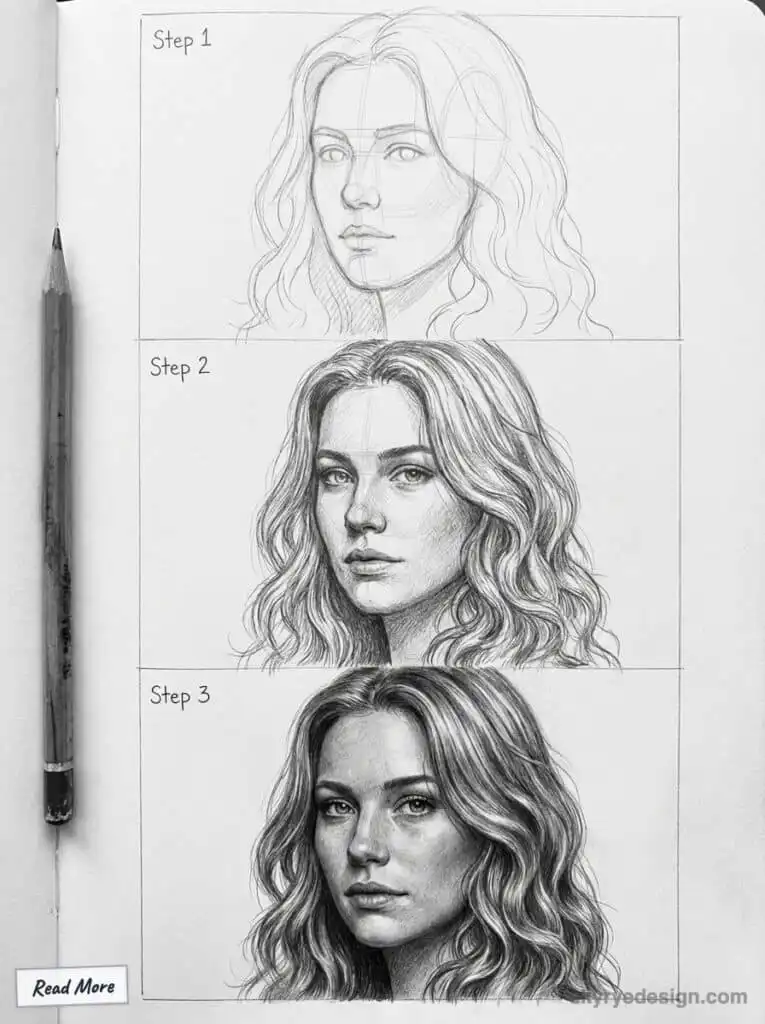
Hair and clothing add character and movement to a drawing. They should naturally follow the figure’s shape.
- Hair: Begin with a rough outline; then add bangs and layers. Use curves to imply flow and texture. Shading can indicate volume and shine.
- Clothing: Start with the body’s form as a base. Choose fabric types, as they each have their own flow and wrinkle patterns.
Be mindful of how clothing fits the figure. Use folds and creases to show movement and realistic wear.
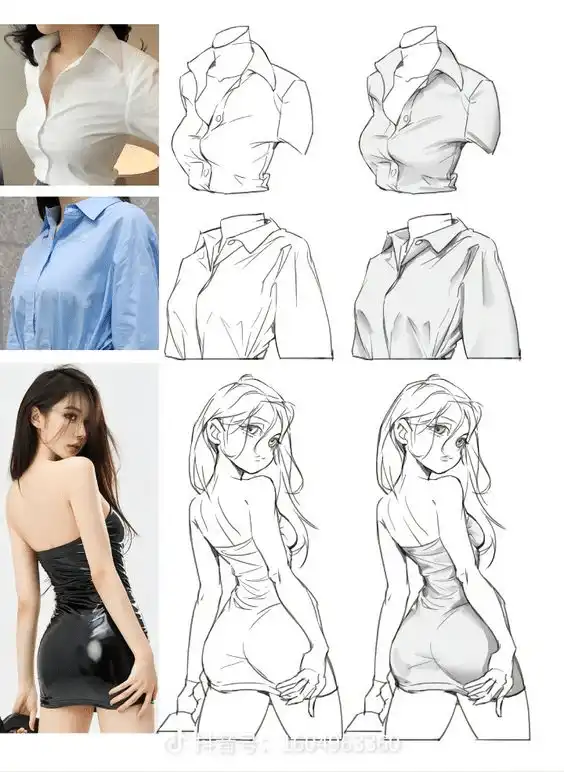
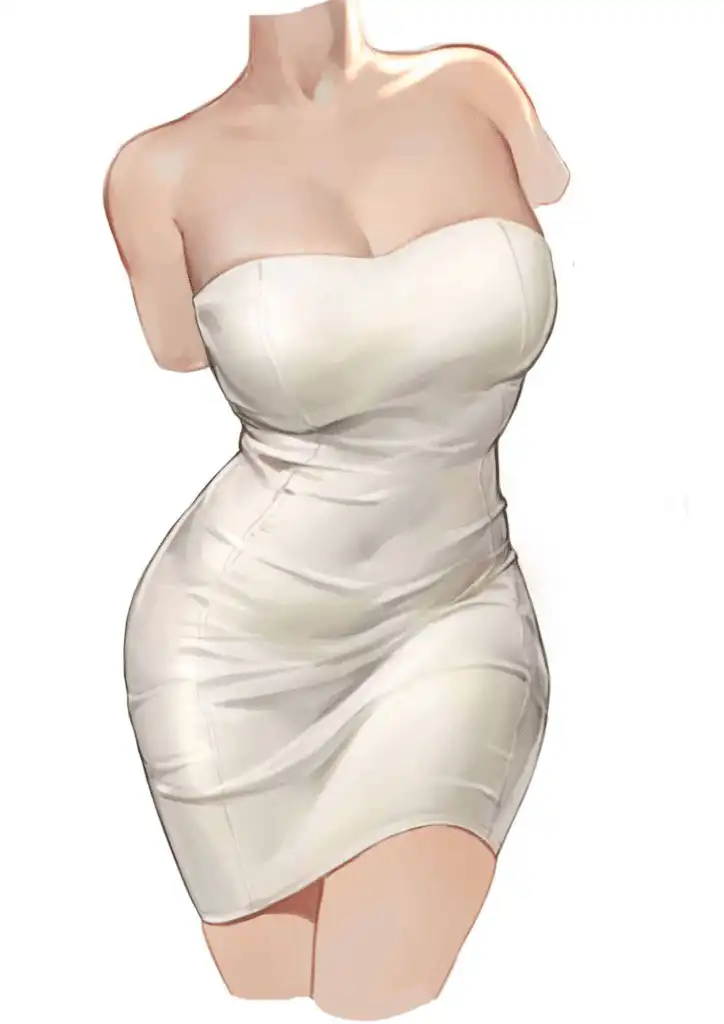
Incorporating these details will elevate the overall appearance of the figure, making it more dynamic and engaging.
Refining the Drawing

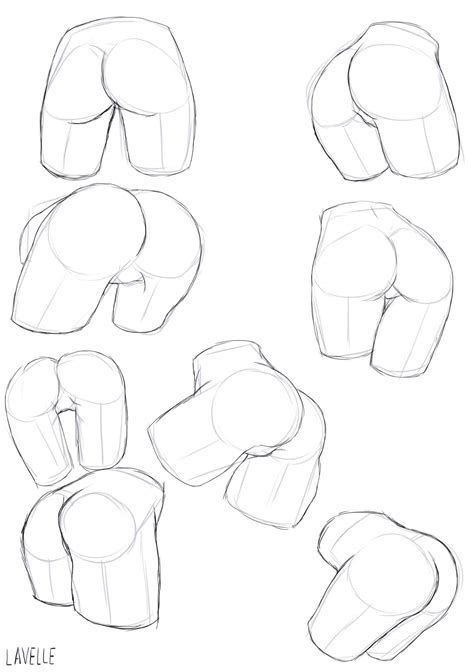
Refining a drawing involves enhancing details, correcting shapes, and finalizing contours. This process is crucial for bringing a female figure to life in an artwork.


Using your imagination during the refining stage can help you add unique touches and creative flair, allowing your drawing to stand out and reflect your personal style.
Enhancing with Texture and Tone
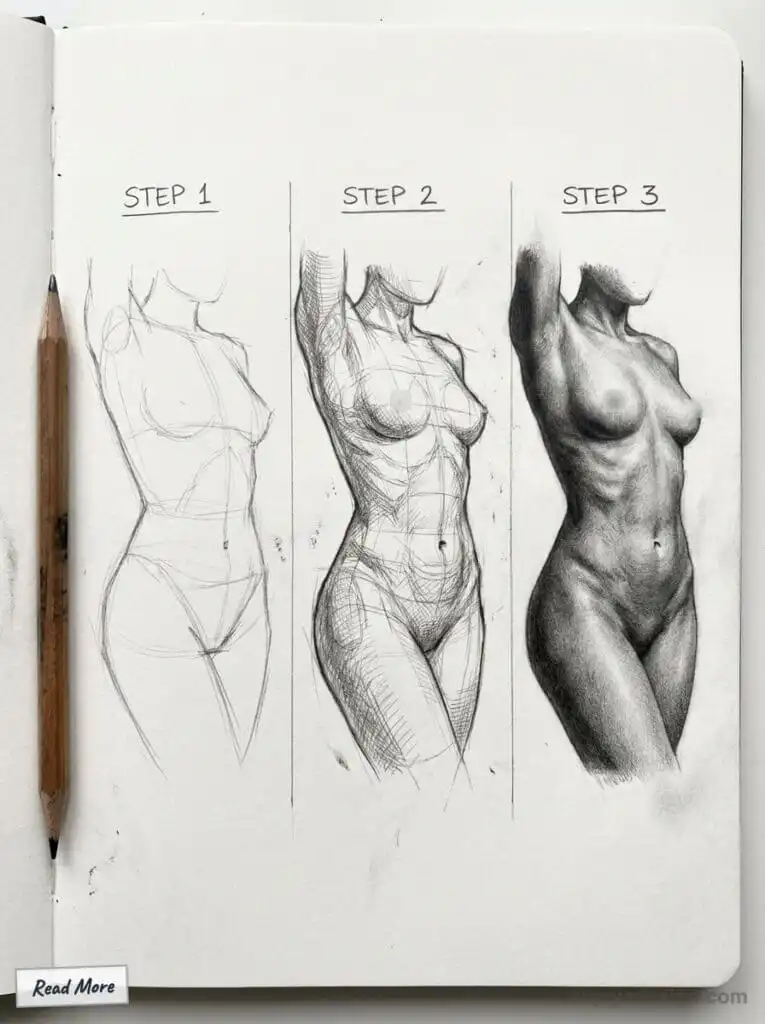
To enhance a drawing, adding texture and tone is vital. This can be achieved using varying pencil techniques, such as hatching, cross-hatching, and stippling. Each method creates different textures that can suggest skin, clothing, or hair.
- Use of Shading: Apply light and shadow to create depth. Identify the light source and add darker areas where shadows fall.
- Blending Techniques: Use blending stumps or fingers to smooth out harsh lines for realistic skin or fabric appearances.
- Contrasting Tones: Incorporate a range of tones from light to dark. This contrast will help the figure stand out and appear more three-dimensional.
These techniques together will enhance the visual appeal and realism of the drawing.
Correcting Shapes and Proportions
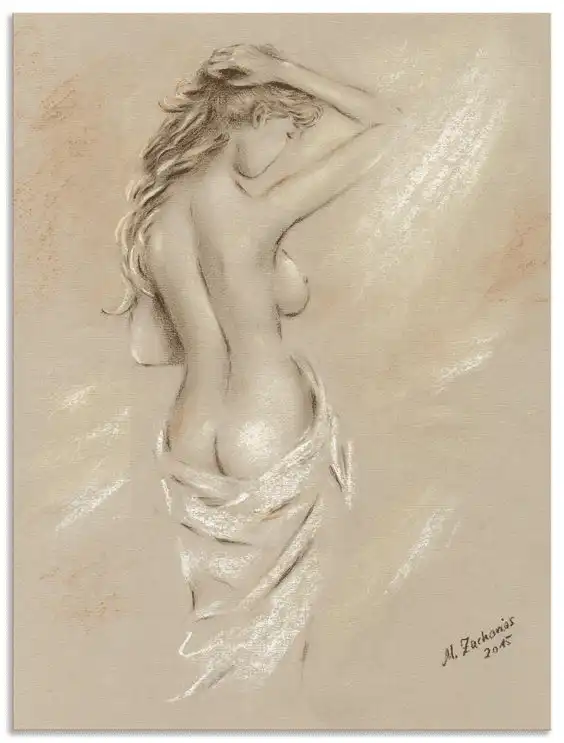
At this stage, checking and correcting shapes and proportions is crucial. Artists often mark key points on the drawing to help with alignment.
- Measurement: Using a ruler or a grid can assist in maintaining correct proportions. This is especially helpful for beginners.
- Comparative Techniques: Compare different sections of the drawing to ensure consistency in size and shape. For example, make sure the arms are proportionate to the torso.
- Adjustments: Don’t be afraid to erase and redraw parts that look off. This step can improve the overall accuracy of the figure.
Correcting these elements ensures the drawing looks balanced and lifelike.
Finalizing Contours


References from real-life photos are crucial for studying anatomy, proportions, and lighting.
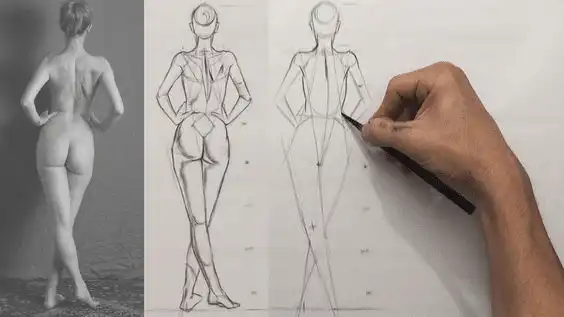
The last touch involves finalizing the contours of the figure. Clean lines add clarity and finish to the drawing.
- Defining Edges: Use a fine-tipped pencil or pen to go over important lines. This emphasizes the outline.
- Style Choices: Decide on the style of contour. Smooth lines can suggest a softer look, while jagged lines may convey motion or strength.
- Final Checks: Examine the entire drawing for any inconsistencies. Make small adjustments as needed, ensuring the foreground and background complement each other.
These final touches breathe life into the female figure, making it visually striking.
Applying Color


Applying color effectively can bring life to a drawing of a female figure. It is important to consider the color scheme, the techniques used, and how to add depth with shading and highlighting.
Choosing a Color Scheme

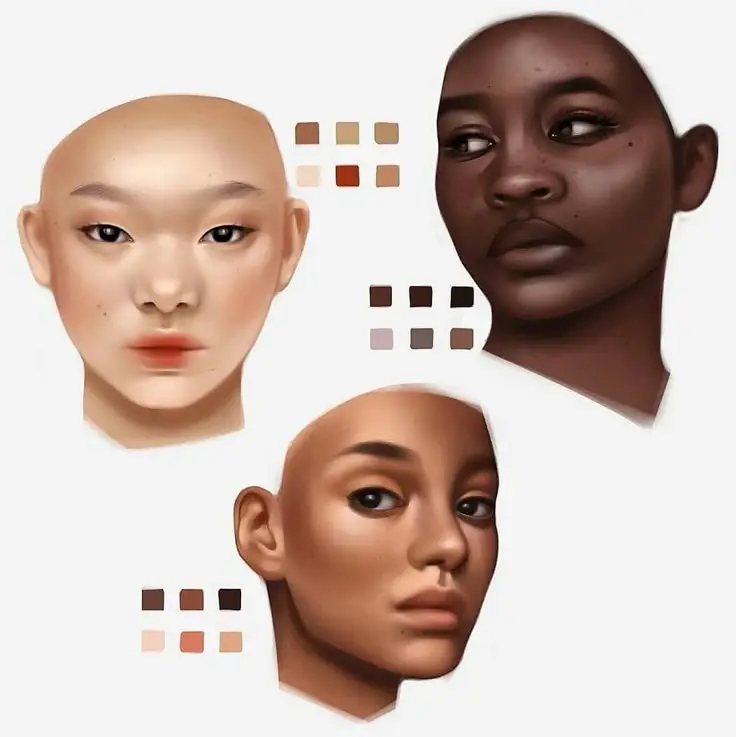
Selecting the right color scheme is essential for setting the mood of the artwork. Artists often use two main types of color schemes:
Analogous Colors: These are colors that sit next to each other on the color wheel, like blue, blue-green, and green. They create a harmonious look.
Complementary Colors: These are opposite colors on the wheel, such as red and green. They can make certain elements stand out.
Using a limited palette can also create a cohesive appearance. It is helpful to consider skin tones, hair colors, and clothing when choosing hues. For skin tones, using a base color mixed with different shades can add realism.
Coloring Techniques

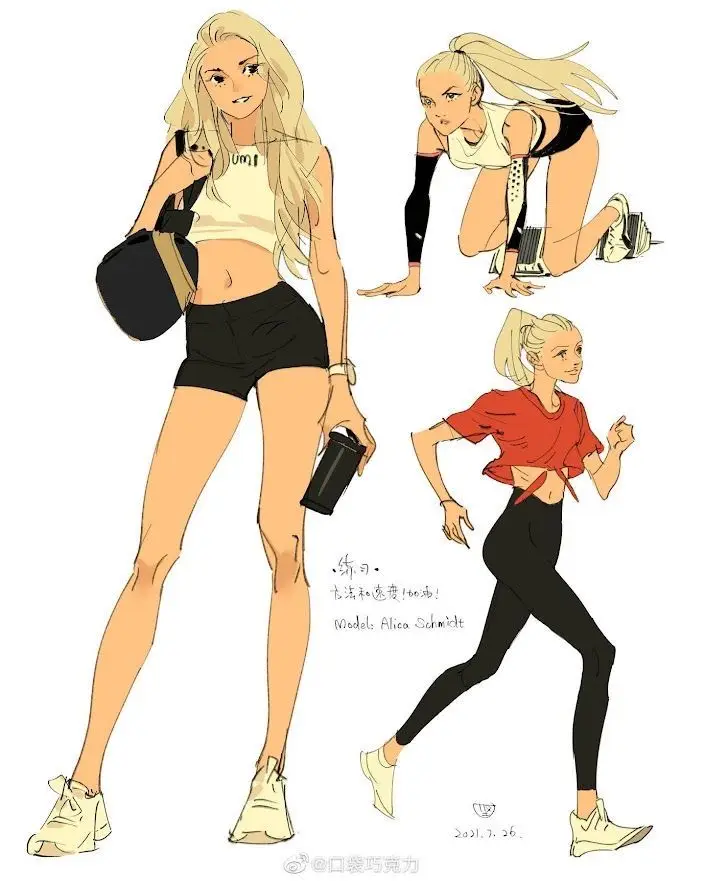

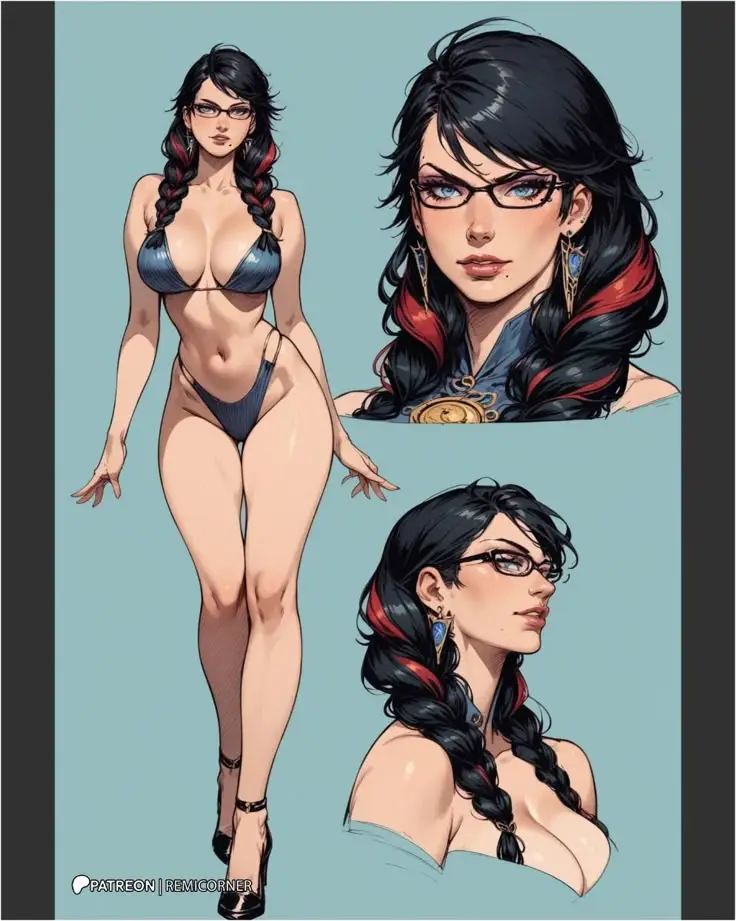
There are various techniques to apply color effectively. Some common methods include:
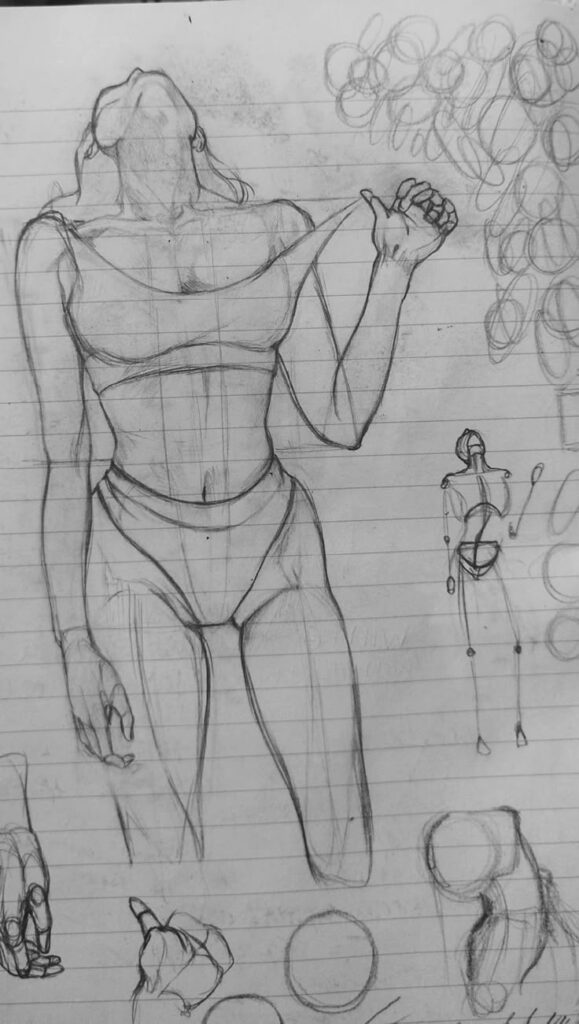
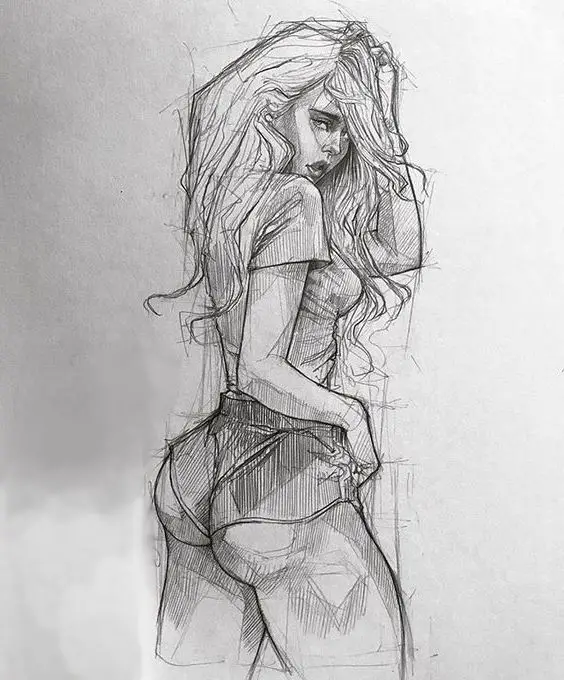
Flat Coloring: This involves filling areas with a single color, which is often the first step in coloring. It sets up the base.
Layering: By applying multiple layers of color, artists can build depth and richness. This technique is especially useful for hair and clothing.
Blending: Using tools like blending stumps or fingers can help smooth transitions between colors. For digital art, soft brushes achieve similar results.
Using reference images can guide choices and improve accuracy in color application.
Shading and Highlighting
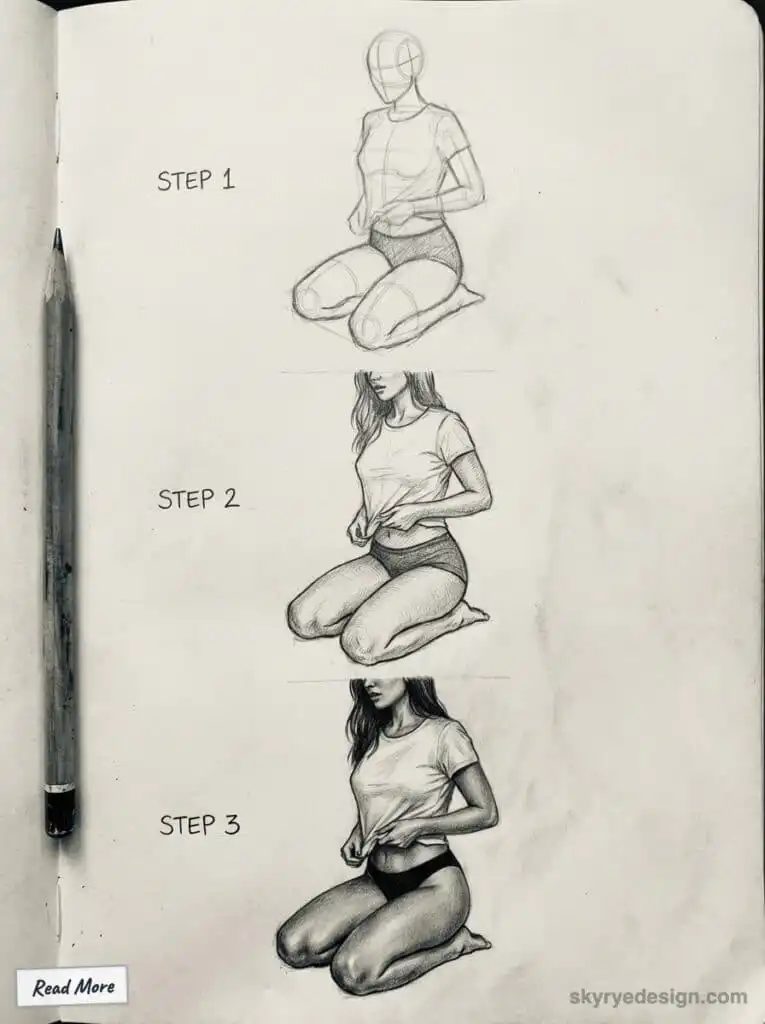
Light and shadow should be modeled using tonal shifts, starting with a light wash and gradually building darker tones for volume.
Shading and highlighting add dimension and realism to drawings. Understanding light sources is key. Here are some tips:
Determine the Light Source: Identify where the light is coming from. This will dictate where shadows and highlights fall.
Use Darker Shades for Shadows: Darker tones should be applied in areas away from the light source. This can include the underside of arms or the inner thigh.
Apply Highlights Sparingly: Brighter colors should be used on raised areas, like the tops of shoulders and cheekbones. Highlights can capture the light effectively.
Experimenting with different degrees of darkness and brightness will enhance the three-dimensional effect of the drawing.
Finishing Touches

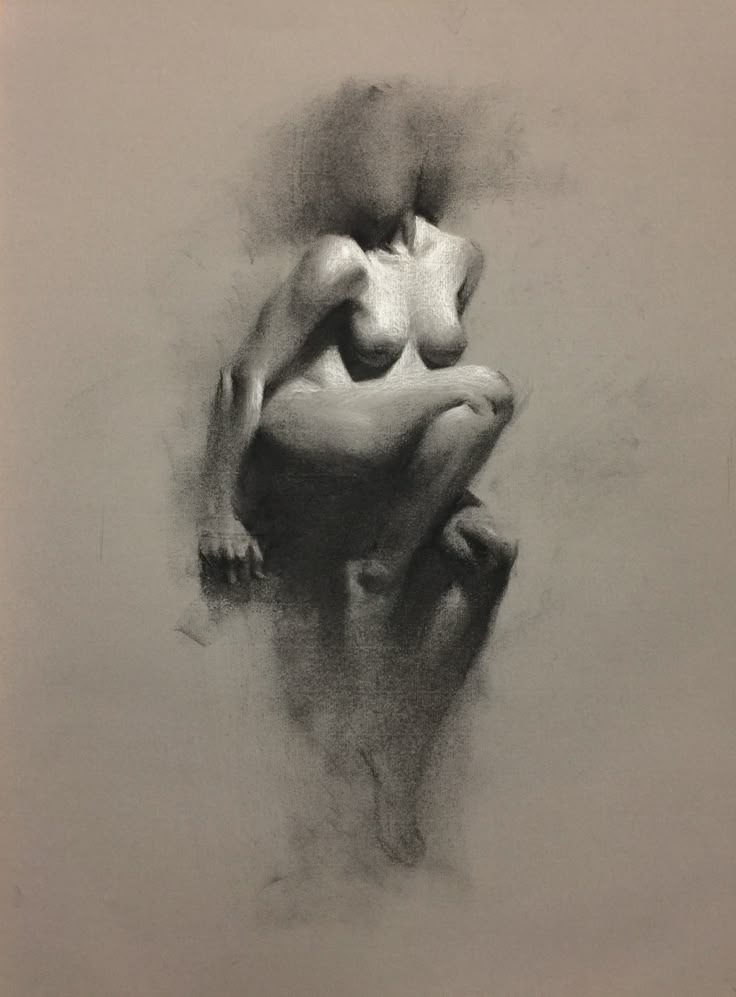
Adding the finishing touches to a female figure drawing enhances its overall impact. Key aspects include the background, narrative elements, and presentation.
Each of these factors plays a significant role in how the figure is perceived. Artists can also incorporate fantasy elements to create a more imaginative or otherworldly atmosphere in their finished drawings.
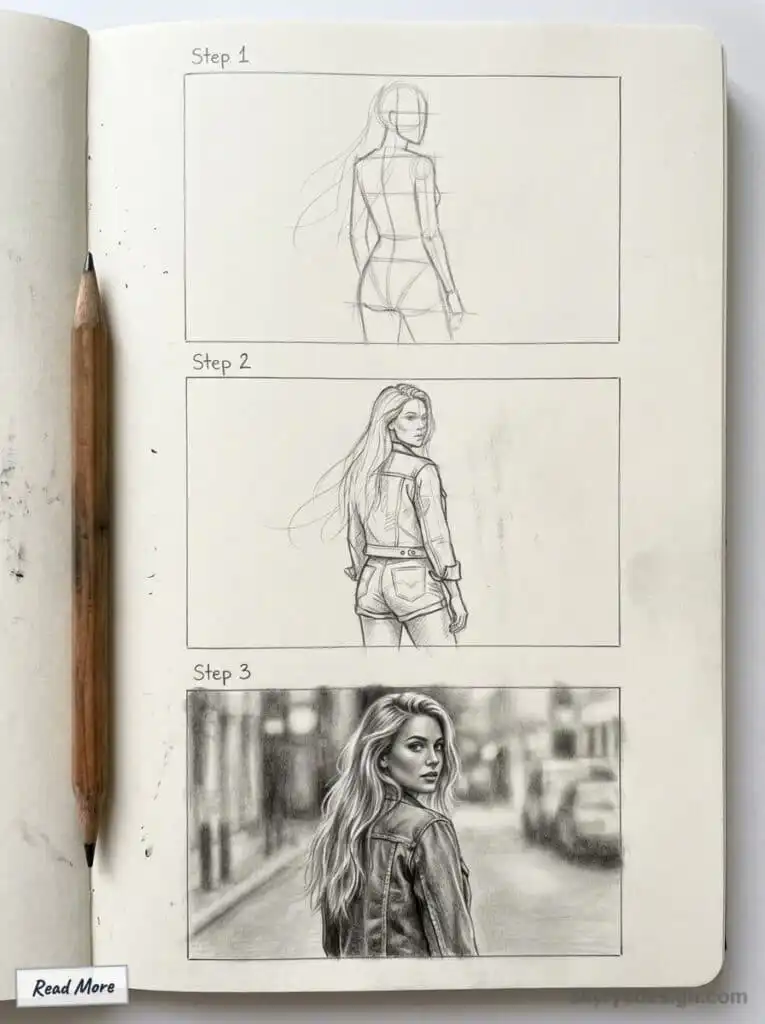
Backgrounds and Environments
A well-chosen background can add depth and context to a drawing. Simple environments, like a gradient or solid color, can keep the focus on the figure.
Here are some ideas for backgrounds:
- Nature scenes: Trees, mountains, or water can evoke mood.
- Urban settings: Buildings and streets can provide energy.
- Abstract shapes: Unique patterns can create a dynamic feel.
Choosing colors that complement the figure’s tones is essential. Soft pastel shades can create a gentle atmosphere. In contrast, bold colors can energize the composition.
Incorporating Narrative Elements
Adding narrative elements invites viewers to engage with the drawing. This can be done through objects or the figure’s pose.
Consider these narrative techniques:
- Props: Items can suggest a story. For example, a book may indicate knowledge or adventure.
- Pose and expression: A relaxed pose suggests calmness, while a dynamic one conveys action.
- Interactions: Including other figures can enhance storytelling.
Carefully selecting these elements can create a stronger connection between the figure and its environment. It encourages viewers to imagine the scene’s story.
Presentation and Framing
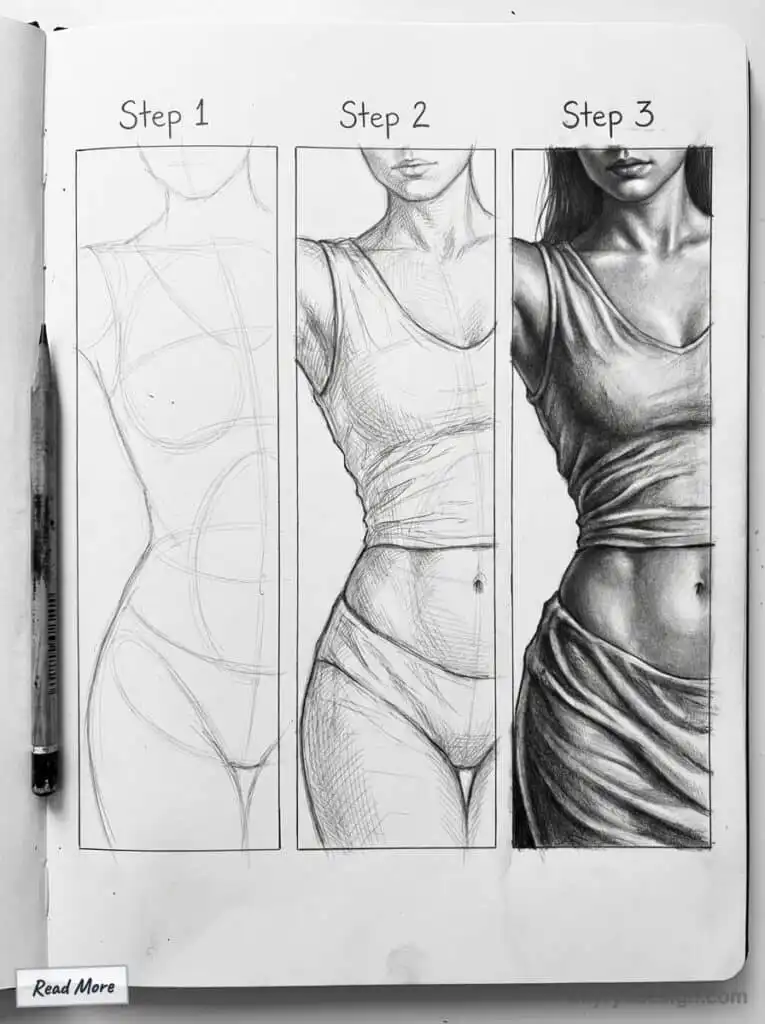
Presentation is key to making a strong impression. Good framing can enhance focus on the figure.
Effective presentation tips:
- Borders: Simple frames emphasize artwork without distraction.
- Matting: Adding a mat can separate the drawing from the background.
- Lighting: Proper lighting enhances details and colors in the artwork.
When presenting a drawing, the artist should consider the audience. Adjusting the style and framing can enhance the viewer’s experience.
Frequently Asked Questions


Many new artists have specific questions when learning to draw the female figure. These tips are helpful for students of all levels, from beginners to mature learners. This section covers essential steps, techniques for beginners, capturing feminine features, poses to practice, achieving accurate proportions, and guidance on full body portraits.
FAQ
How do you draw a girl figure easily?
Start by sketching simple shapes to build the basic structure—use ovals for the head and circles for joints. Connect these shapes with light lines to form the arms, legs, and torso. Focus on capturing the overall pose with quick gesture drawings before refining the details. Using basic shapes and practicing regularly helps simplify the drawing process.
What are common mistakes when drawing female figures?
Common mistakes include ignoring proper proportions, such as making the torso too long or the legs too short. Overlooking perspective and angles can result in unnatural poses. Another frequent error is neglecting anatomical landmarks like the rib cage and hips, which are essential for realistic structure. Additionally, drawing stiff or overly rigid lines instead of fluid curves can make the figure appear unnatural.
How to make a woman figure?
To create a woman figure, begin with basic shapes to outline the head, torso, and limbs. Emphasize feminine features by incorporating softer curves, narrower shoulders, and wider hips. Pay attention to anatomical landmarks such as the waistline and bust to create a balanced silhouette. Gradually add details like facial features, hair, and clothing to bring the figure to life.
What are some realistic female body drawing poses to practice?
Realistic poses can include standing, sitting, and movement poses. Artists may choose poses that showcase the body’s curves, such as a relaxed stance or a dynamic action pose. Practicing from reference images can provide insight into natural body movements.
How to draw a female body proportions?
To achieve accurate proportions, artists can use the “seven heads” method, where the height of the figure is approximately seven times the head’s height. Measure the distances between key points, like shoulders, waist, and hips, to maintain accuracy.
Can you provide guidance on drawing a full body portrait of a woman?
Use proportional guidelines like the “seven heads” rule, where the total height of the figure is about seven times the height of the head. Measure key points such as the shoulders, waist, and hips to maintain balance. The hips are typically wider than the shoulders in female figures, and the waist is narrower, creating an hourglass shape. Applying these measurements ensures accurate and realistic body proportions.
- 18.6Kshares
- Facebook0
- Pinterest18.6K
- Twitter1
- Reddit0

