Drawing faces from different angles can feel tricky at first, but understanding the basic shapes and structure of the head makes the process much easier. When someone learns to break down the face into simple forms, they gain the skill to draw it from almost any viewpoint. The key to drawing faces from different angles is focusing on the head’s basic shapes and using measurements to place features correctly.
This skill helps create more realistic and dynamic drawings because it gives artists the flexibility to show characters looking in many directions. Practicing with different angles builds confidence and improves accuracy. With consistent effort and simple techniques, anyone can improve at drawing faces that look natural and well-proportioned no matter the perspective.
Understanding Facial Structure
To draw faces from different angles, it’s important to know how the face is shaped and where key features sit. Understanding proportions, how the face is divided into flat surfaces, and important points like the nose and eyes makes drawing easier and more accurate.
Basic Face Proportions
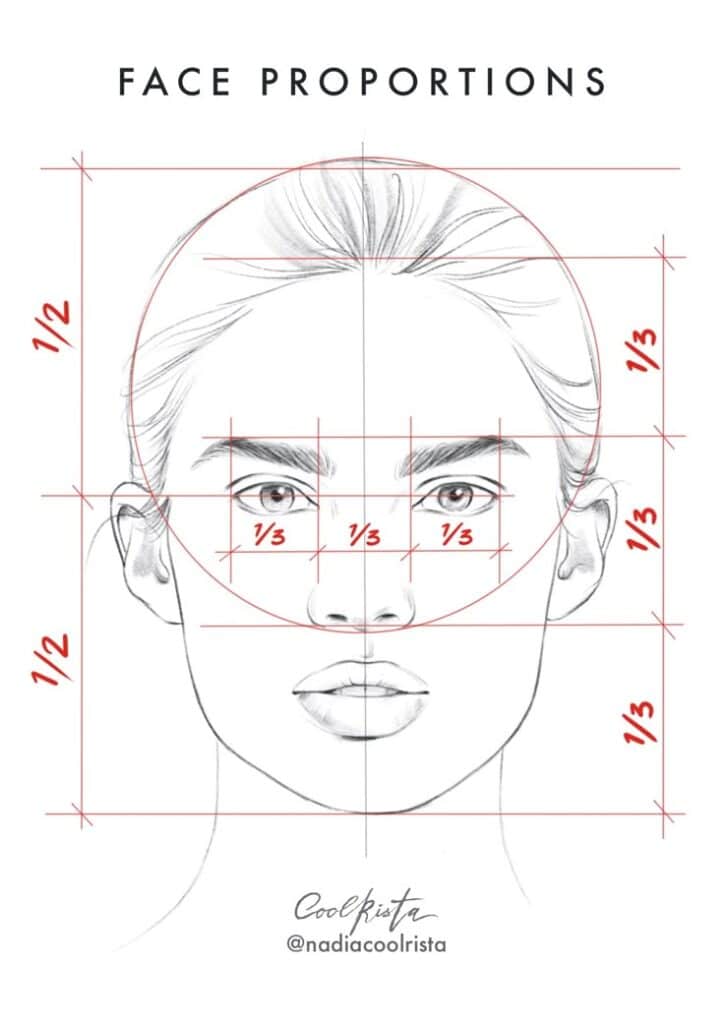
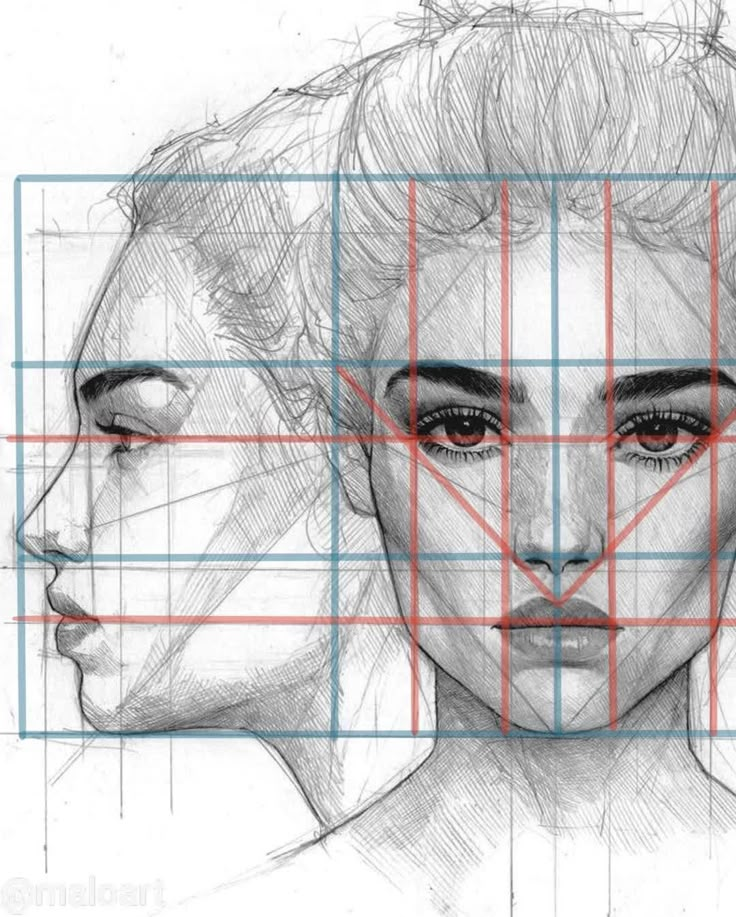
The face can be divided into simple parts to keep proportions right. The eyes usually sit halfway down the head. The space between the eyes is about the width of one eye.
The nose starts at the bottom of the brow line and ends roughly halfway between the eyes and chin. The mouth sits about one-third of the way down from the nose to the chin.
Using these rules, the face stays balanced. These proportions hold true even when the face is turned or tilted, helping to place features in the right spots.
Planes of the Face
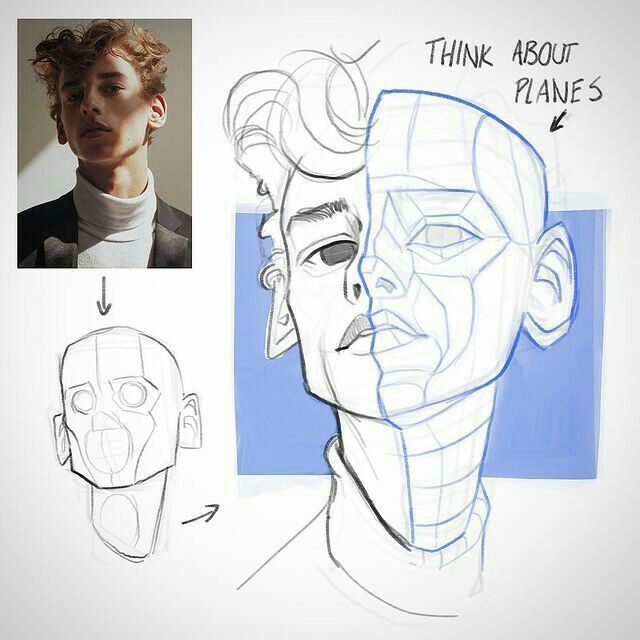
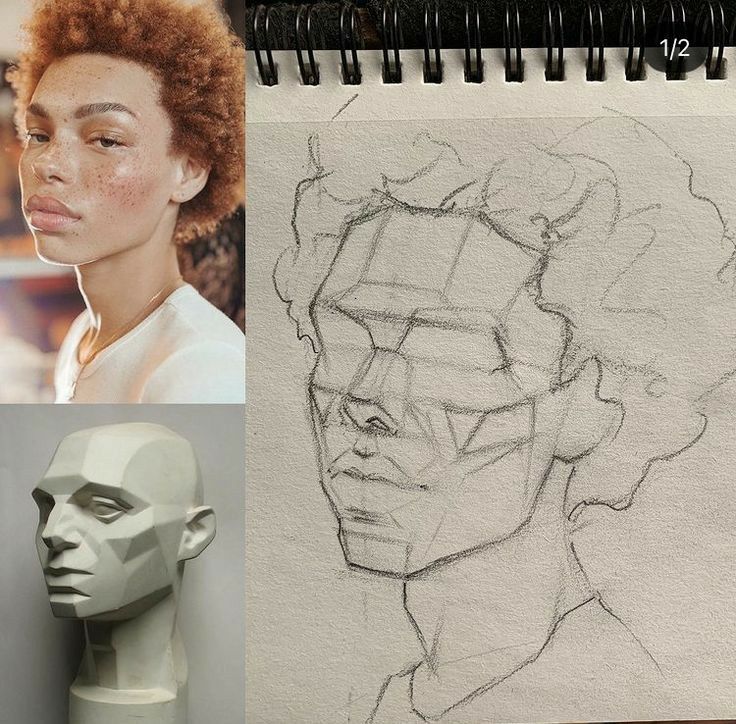
The face can be thought of as a series of flat surfaces or planes. These planes help show how light and shadow work on a face at different angles.
For example, the forehead, cheeks, and jaw all form separate planes. The nose is a protruding plane in the center. When drawing, breaking the face into these shapes helps keep the 3D form clear.
Seeing the face as planes makes it easier to rotate it in your mind and draw it from any angle.
Key Landmarks and Angles
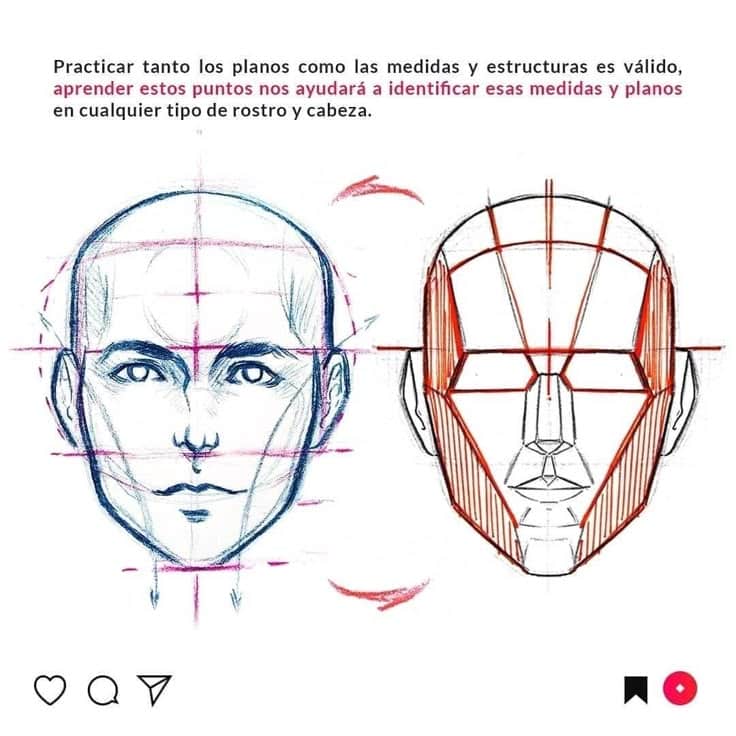
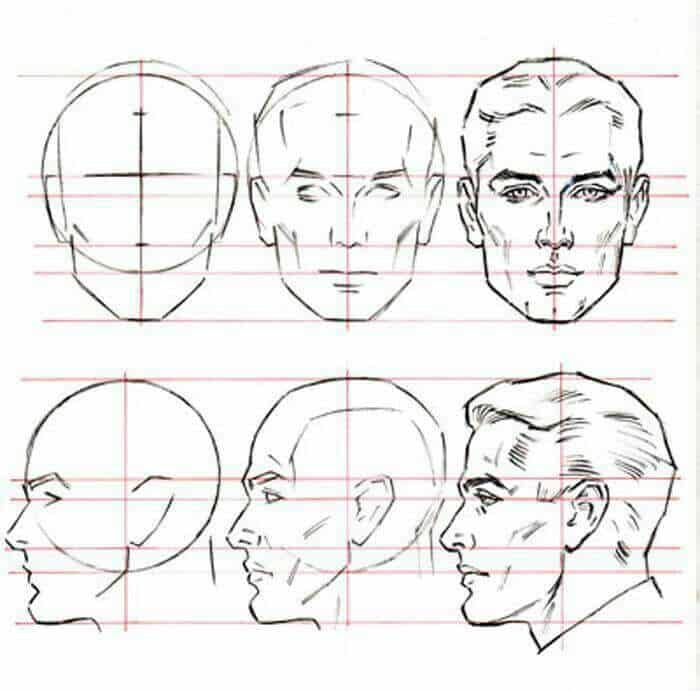
Certain points on the face guide where features go and how the face changes with movement. The central line runs down the middle of the face, even when it’s turned.
The brow ridge, the tip of the nose, and the chin are strong landmarks. The angle between the forehead and nose, and between the nose and lips, changes depending on perspective.
Paying attention to these landmarks and angles helps keep the face looking correct when turned or tilted.
Drawing Faces From the Front, Side, and Three-Quarter Views
Drawing faces from different angles requires paying attention to shapes, proportions, and how features shift with perspective. Each view has unique challenges, like balancing symmetry or capturing depth. Mastering these helps artists create more believable and dynamic portraits.
Frontal View Techniques
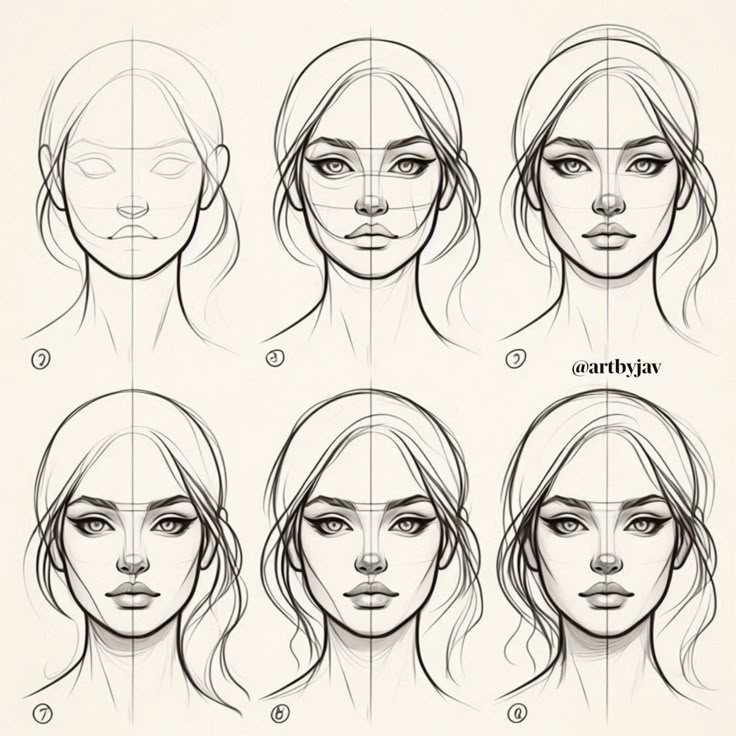
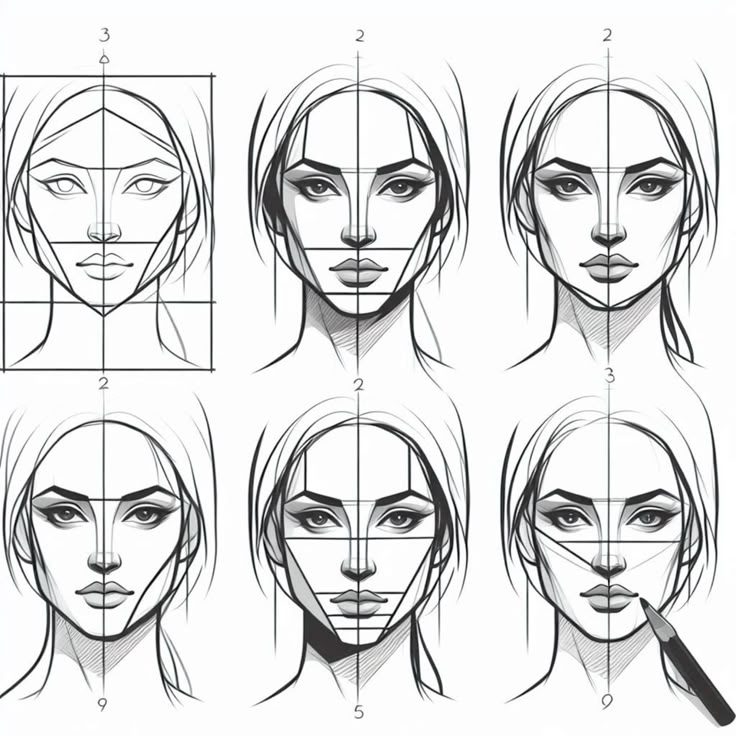
In the frontal view, both sides of the face are visible and need to be balanced. Artists start with a vertical centerline to keep features aligned. The eyes sit halfway down the head, with space about one eye-width between them.
The nose sits halfway between the eyes and chin. The mouth is placed a bit below the nose, centered on the line. Symmetry is important, so sketching lightly and checking evenly spaced features helps.
Details like the eyebrows, ears, and hairline follow guidelines based on the head shape. Drawing the face straight on allows easy practice of perfect proportions.
Profile Drawing Tips
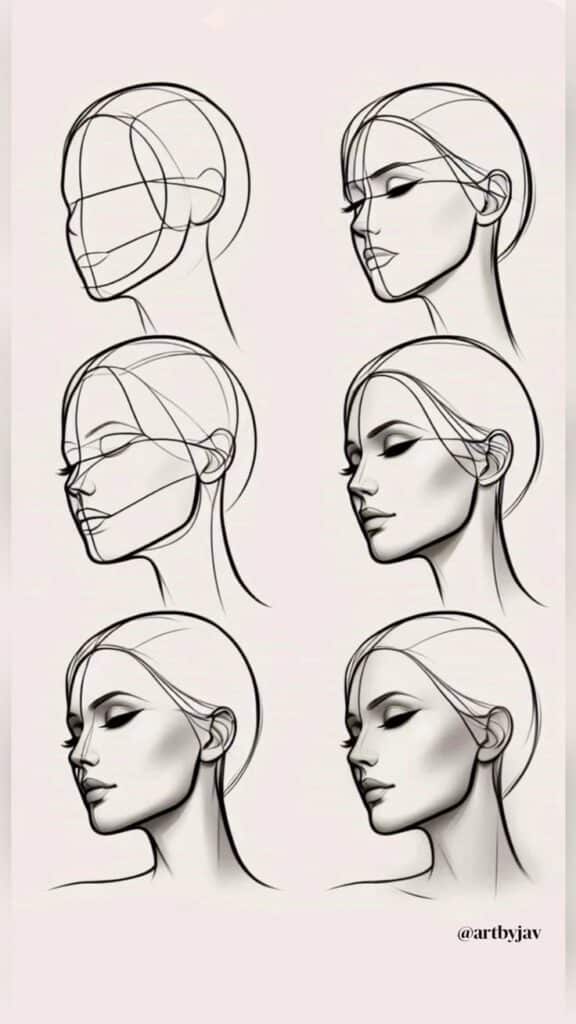
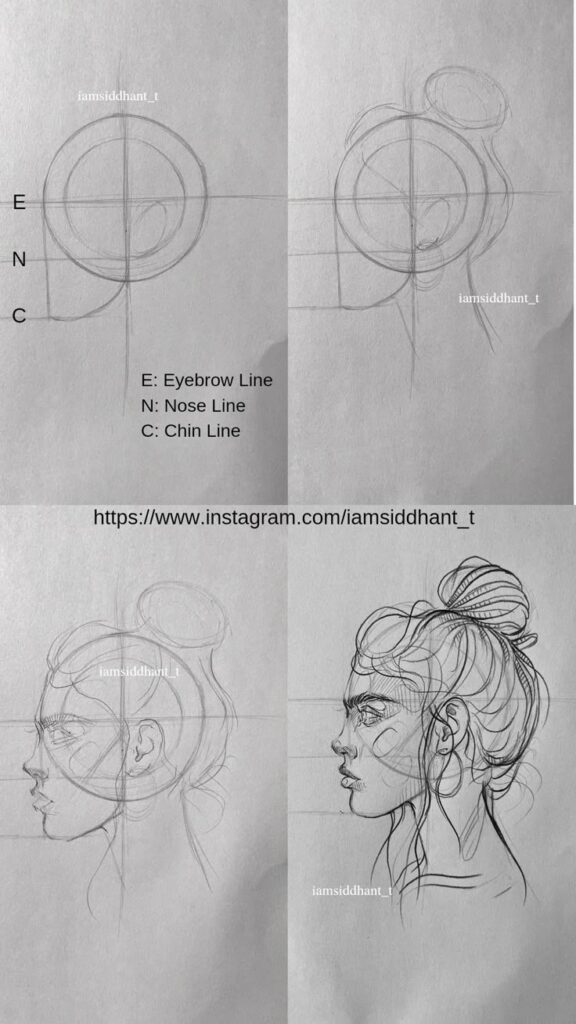
The profile shows only one side, so understanding the skull‘s shape is key. The head is often drawn as a simple oval with a strong jawline.
Important landmarks are the forehead, nose bridge, lips, and chin, all stepping out from the oval shape. The ear usually sits behind the midpoint between the eyes and nose.
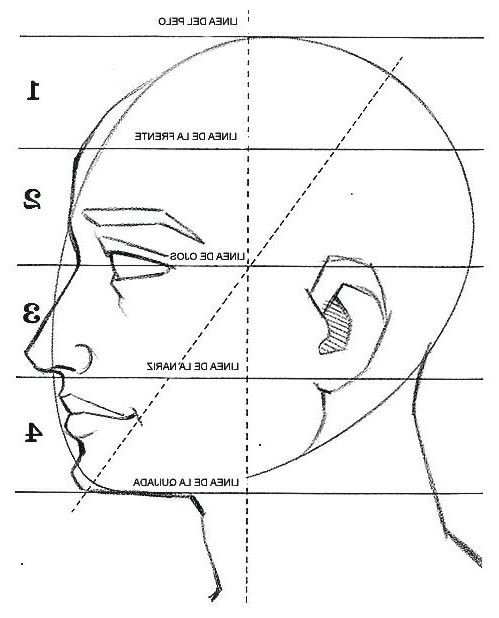
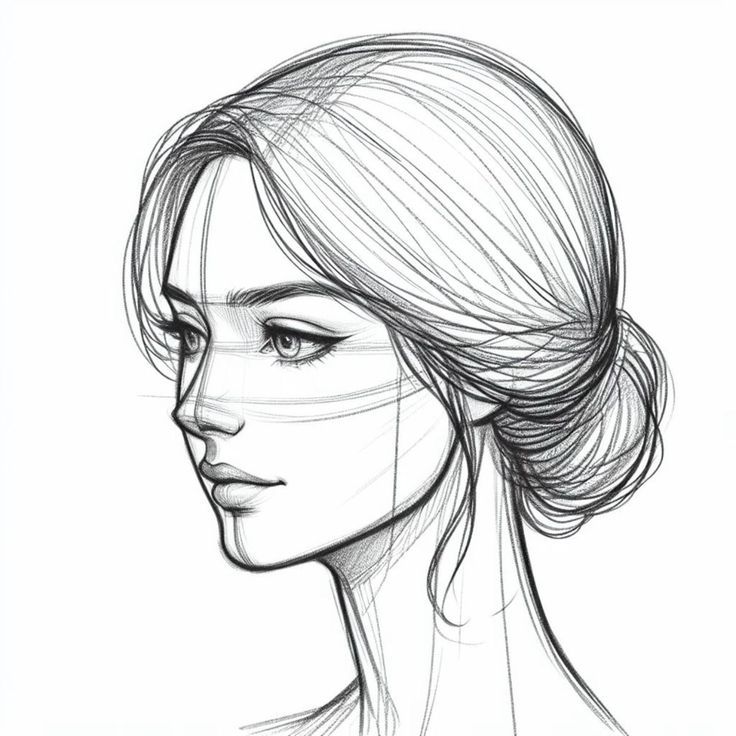
The eye is drawn as an almond shape, often smaller than from the front. Side view focuses on capturing the nose’s length and lips’ curve, since they project forward.
Three-Quarter Angle Essentials
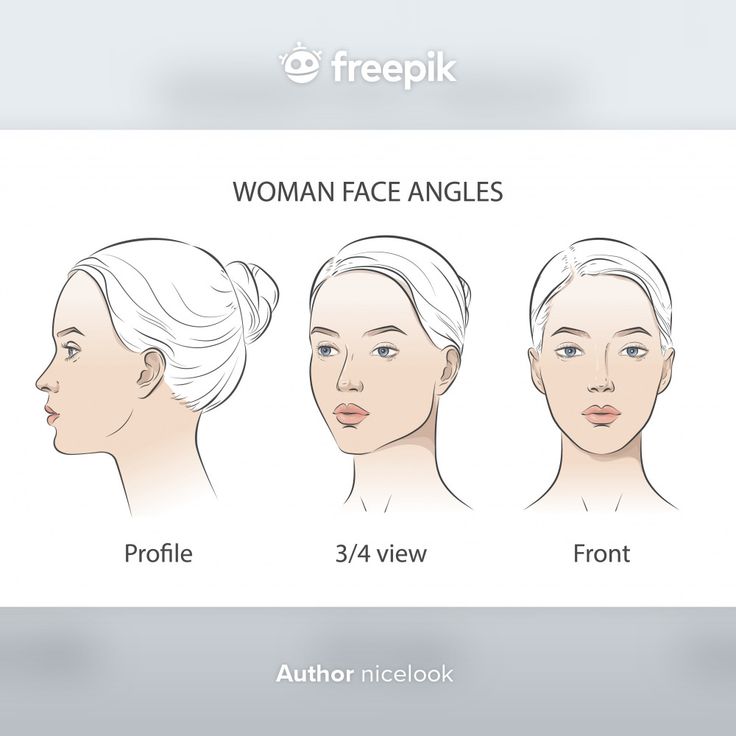
The three-quarter view blends front and side angles, making it the most common and tricky. The head turns, so one side appears larger and the other smaller.
Start with a circle for the cranium and draw a line down the face that curves slightly toward the side turned away. This helps place facial features correctly.
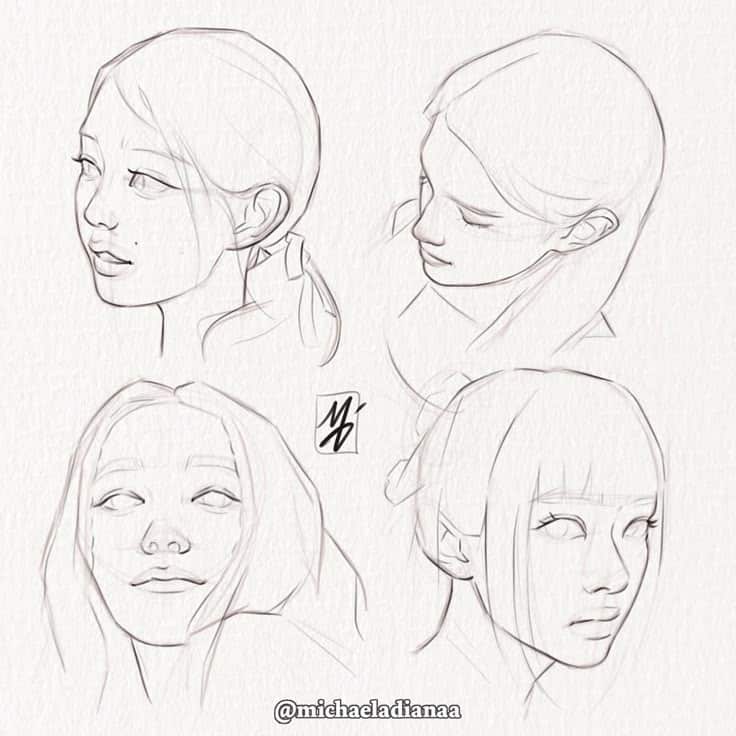
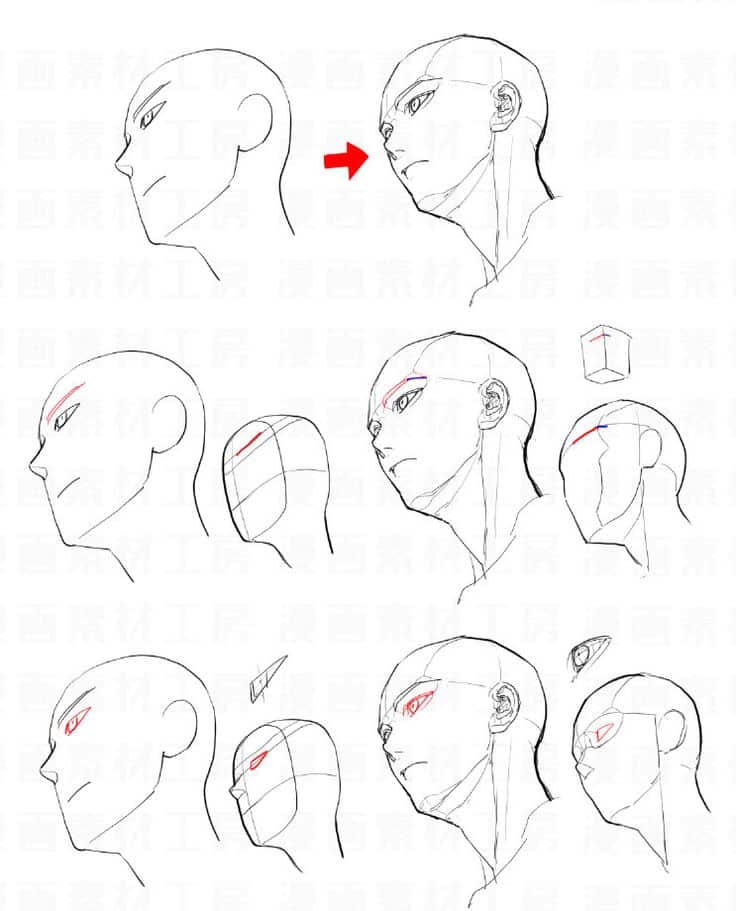
The far eye appears narrower, and the closer side of the nose blocks part of the face behind it. Lines for the mouth and jaw also curve to show depth. Checking angles with light sketches keeps proportions natural.
Using proportional guidelines works well here to make a believable face that feels three-dimensional.
Mastering Uncommon and Dynamic Angles
Drawing faces from unusual angles adds interest and energy to artwork. It requires paying close attention to how the head changes shape when viewed from different points. The artist needs to focus on the shifts in perspective and proportions to keep the drawing believable.
Drawing Extreme Upward and Downward Angles
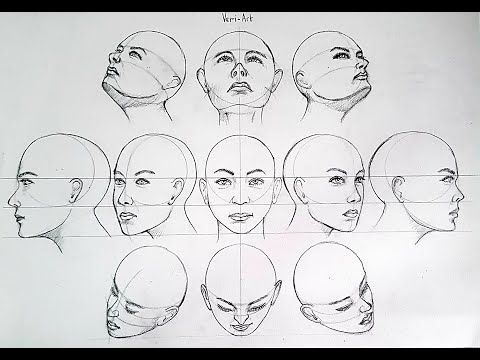
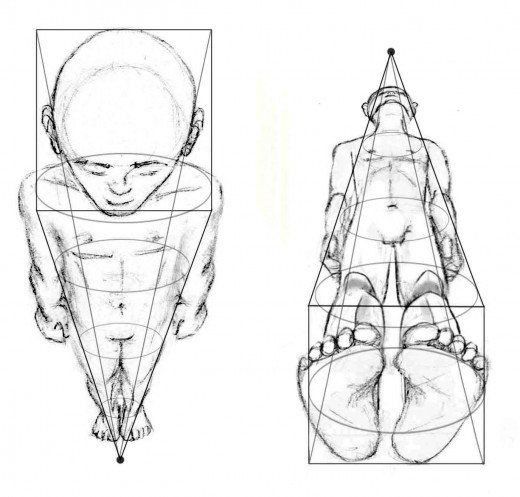
When drawing a face looking sharply up or down, the shape of the features changes a lot. For an upward angle, the chin and jawline become more visible, while the forehead and nose appear foreshortened. The eyes might look smaller or hidden behind the brow.
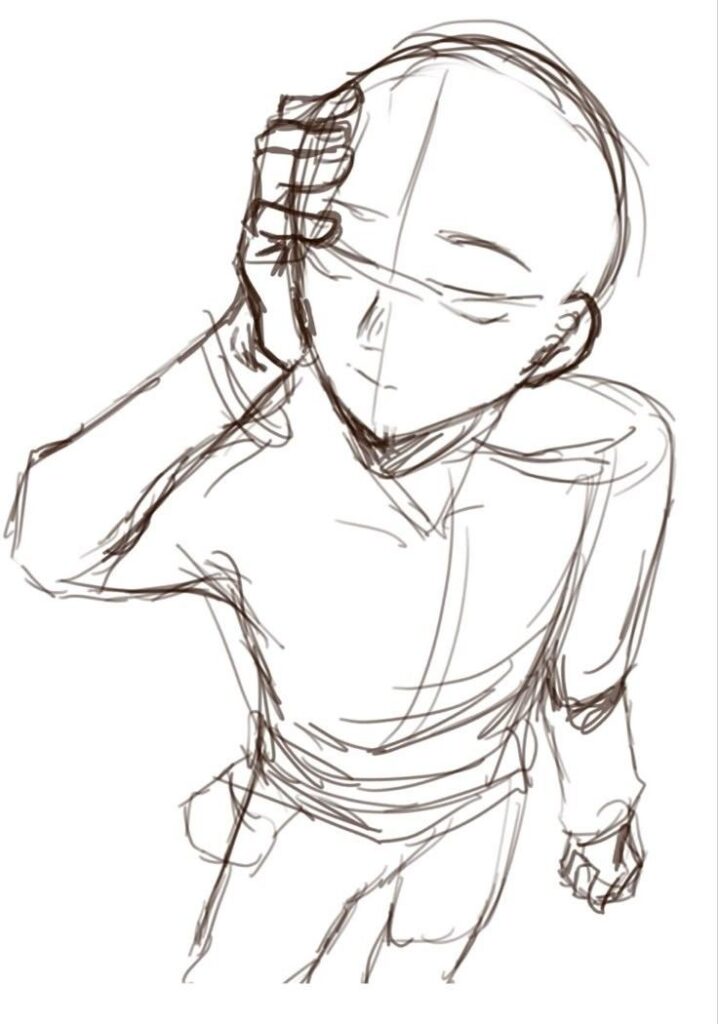
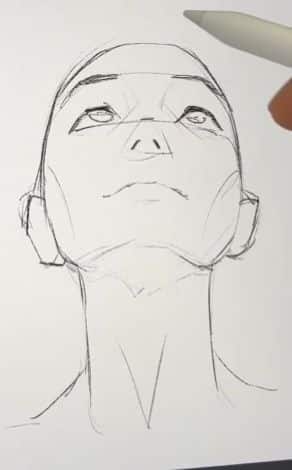
In a downward angle, the forehead and top of the head dominate the view. The nose and chin get shorter, and the jawline almost disappears under the chin. It helps to imagine the face as a 3D form and remember that parts closer to the viewer look bigger.
Using simple shapes like spheres and cubes can guide the placement of facial features. Marking key points lightly, such as the brow line and nose tip, makes it easier to keep the proportions right.
Difficult Perspectives and Foreshortening
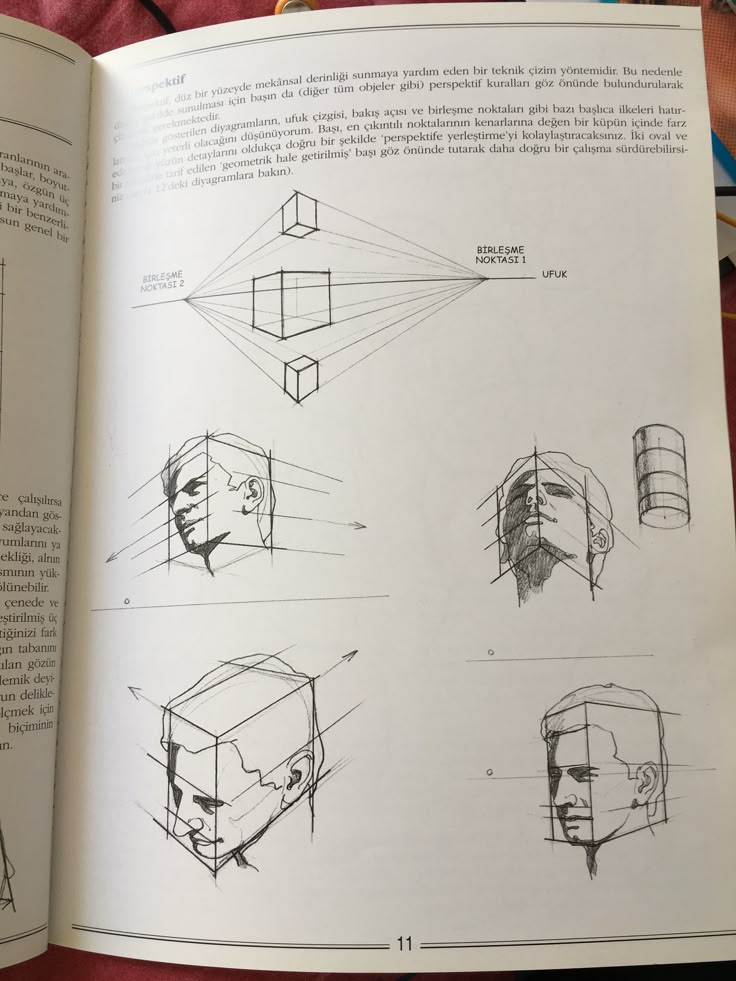
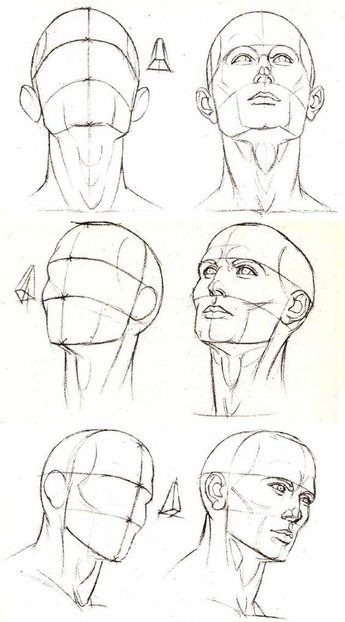
Foreshortening happens when parts of the face seem compressed because they point toward or away from the viewer. This can make drawing noses, chins, or foreheads tricky.
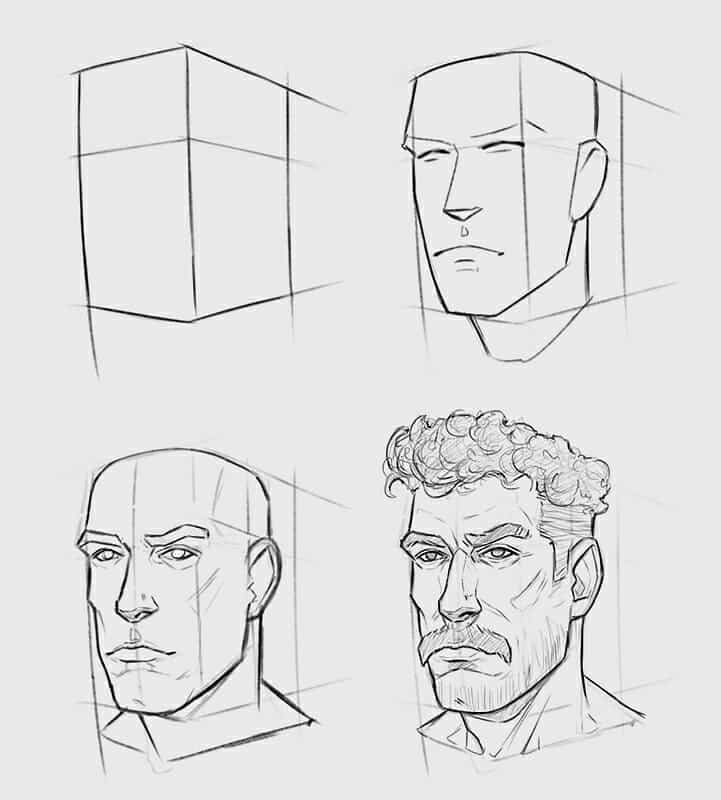
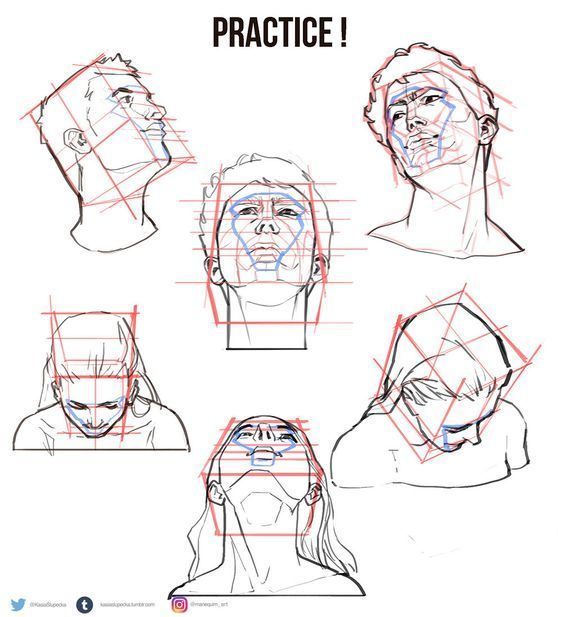
To handle foreshortening, the artist should break the face into basic geometric forms and look carefully at how angles change the shape. Lines will curve or shorten based on the view, so measuring relationships between features is key.
Artists benefit from practicing different views repeatedly. Using reference photos from unusual angles helps train the eye to notice subtle changes. Sketching simple faces from many perspectives builds confidence in capturing these tough views.
Lists to remember with foreshortening:
- Features closer to the camera look larger
- Lines curve around the form
- Parts farther away get smaller and compressed
This attention to detail makes dynamic angles more natural and easier to draw.
Features and Expressions Across Angles
Drawing a face from different angles changes how the features look and how expressions come across. The placement of the eyes, nose, and mouth shifts based on perspective. Expressions also change subtly depending on the angle of the head.
Eyes, Nose, and Mouth Placement Variations
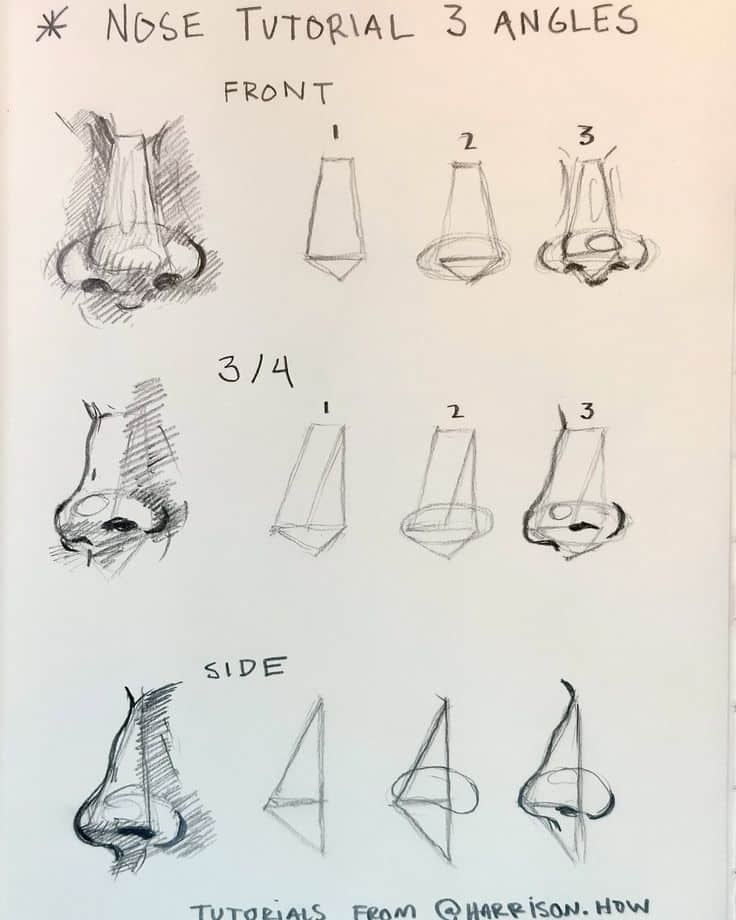
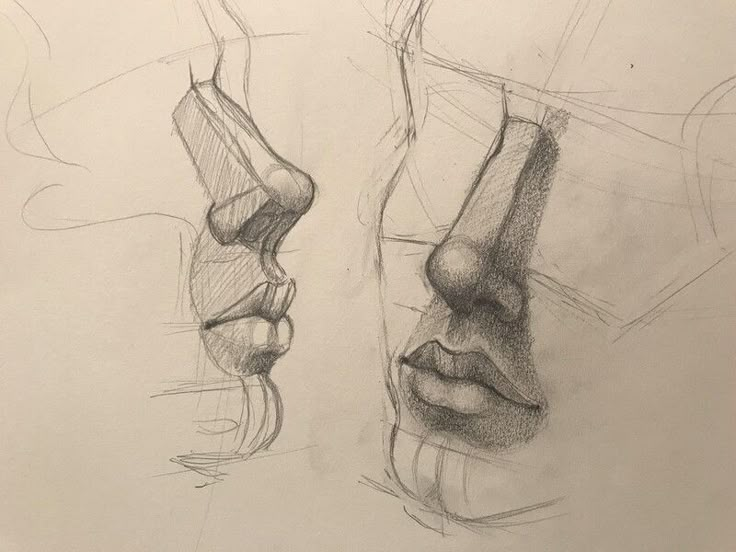
When drawing a face from the front, the eyes sit about halfway down the head. The nose and mouth align below in consistent vertical spacing.
From the side view, one eye is fully visible, while the other is hidden. The nose shape becomes clearer with its bridge and tip showing in profile.
In the three-quarter view, features overlap. One eye appears smaller because of distance, and the nose often covers part of the far eye.
The mouth also shifts: it curves slightly following the face’s angle. Drawing these parts with care helps keep proportional balance. Using guidelines can help place features correctly on any angle.
Adjusting Expressions With Perspective
Expressions change as the head moves. A smile might look wider or more compressed depending on the angle.
In a side or three-quarter view, shadows fall differently on the face. This affects how light or dark the expression seems.
The tilt of the head can emphasize emotions. A raised eyebrow stands out more in certain angles, while a frown might look stronger from below.
Artists pay attention to how muscles move in different directions to keep expressions natural when drawing from various viewpoints.
Practical Exercises and Study Tips
Drawing faces from different angles becomes easier with focused practice and useful tools. Working with real images helps artists understand proportions, while 3D models offer views from every side to build confidence.
Sketching From Photo References
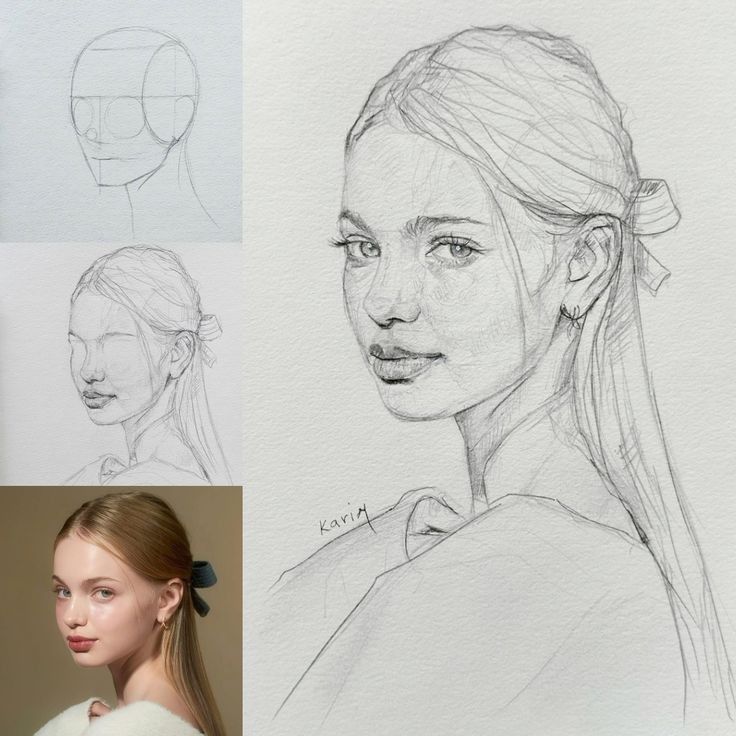
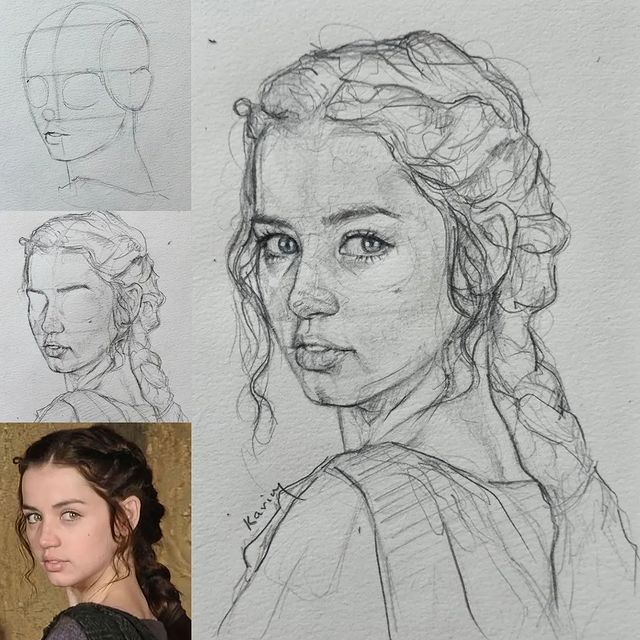
Using photo references is a great way to study real facial features and angles. Artists should pick images that show the face from front, side, and three-quarter views.
Start by lightly sketching the basic shapes of the head. Pay attention to the position of eyes, nose, and mouth in relation to one another. Comparing these parts across angles helps build accuracy.
Focus on small sections of the face at a time. For example, draw just the eyes or nose multiple times in different positions. This breaks down complex features into simple parts to learn better.
Photos with good lighting and clear details make it easier to see shadows and shapes. This can help artists practice shading and create more lifelike faces.
Using 3D Models for Practice
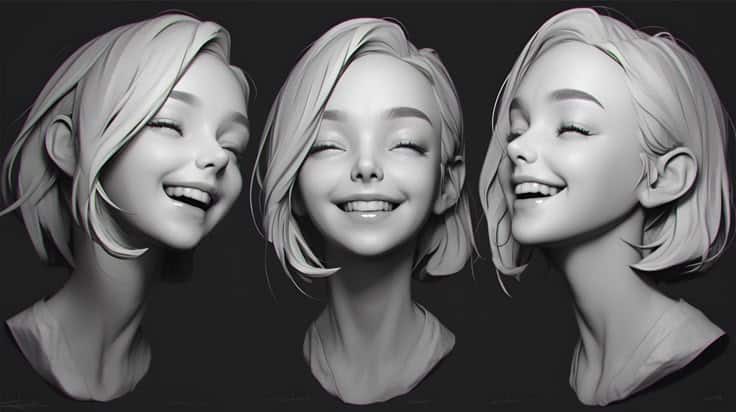
3D face models are useful because they can be rotated to any angle. This lets artists see how the face looks from up, down, or unusual perspectives.
Digital apps or physical sculptures are common tools for this kind of practice. Artists can study proportions and how facial features change with perspective.
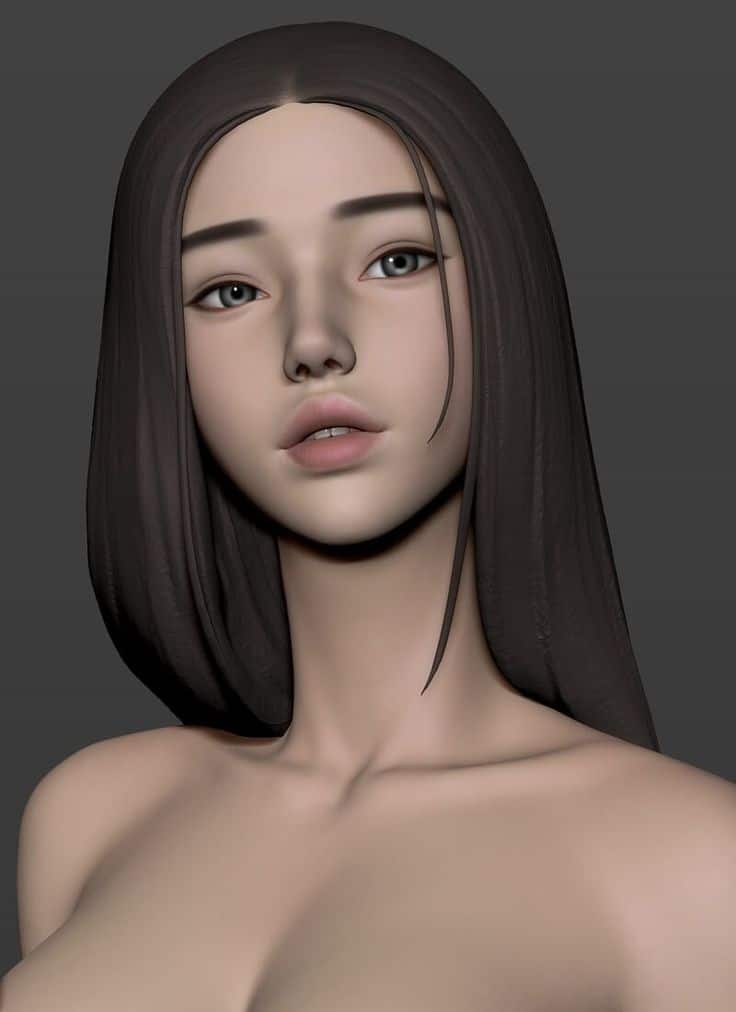
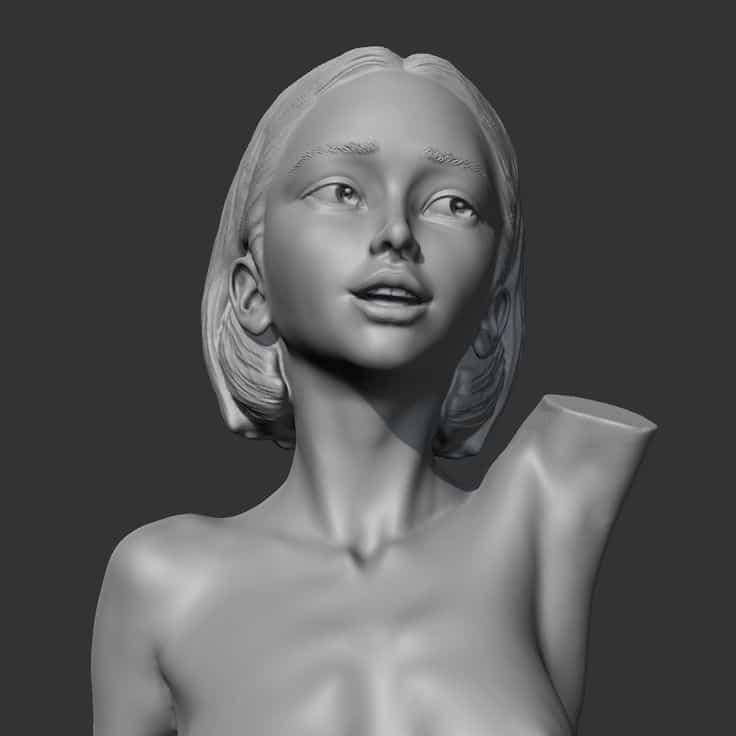
It’s helpful to trace over the model’s outline at different angles, focusing on the basic head shape and placements of eyes, nose, and mouth. Then, try recreating the face freehand.
Regular use of 3D models trains the brain to understand the 3D structure of faces. It also reduces the guesswork when drawing quickly or from imagination.
By combining models with other practice methods, artists can improve both their observation skills and drawing technique.
- 2.3Kshares
- Facebook0
- Pinterest2.3K
- Twitter0
- Reddit0
