Cloud drawing gets easier once you stop tracing a puffy outline and start drawing light, shadow, and soft edges. Start with the sky value, block the largest cloud masses, choose the light source, then layer mid-tones and lifted highlights until the cloud feels like air and volume instead of a sticker on blue paper.
My first clouds were scalloped shapes with a gray stripe underneath. The real shift came from treating each cloud like a loose form in space: bright planes, shadow planes, lost edges, and wispy transitions. That approach works whether you want an easy cloud drawing, a pencil cloud sketch, or a more realistic cloud drawing for a landscape.
- How to draw clouds step by step
- Cloud structure and types
- Essential tools and materials
- Cloud drawing fundamentals
- Step-by-step cloud drawing process
- Digital cloud drawing techniques
- Common cloud drawing mistakes
- Practice exercises
- FAQ
- Why do my clouds look like cotton balls?
- What's the most important skill for drawing clouds?
- Should I draw clouds from reference or imagination?
- How do I draw clouds in pencil without them looking smudgy?
- What colors are in cloud shadows?
- How do you draw realistic clouds step by step?
- What pencil should I use for cloud drawing?
- How do you shade clouds without outlining them?
- Final cloud drawing takeaway
How to draw clouds step by step
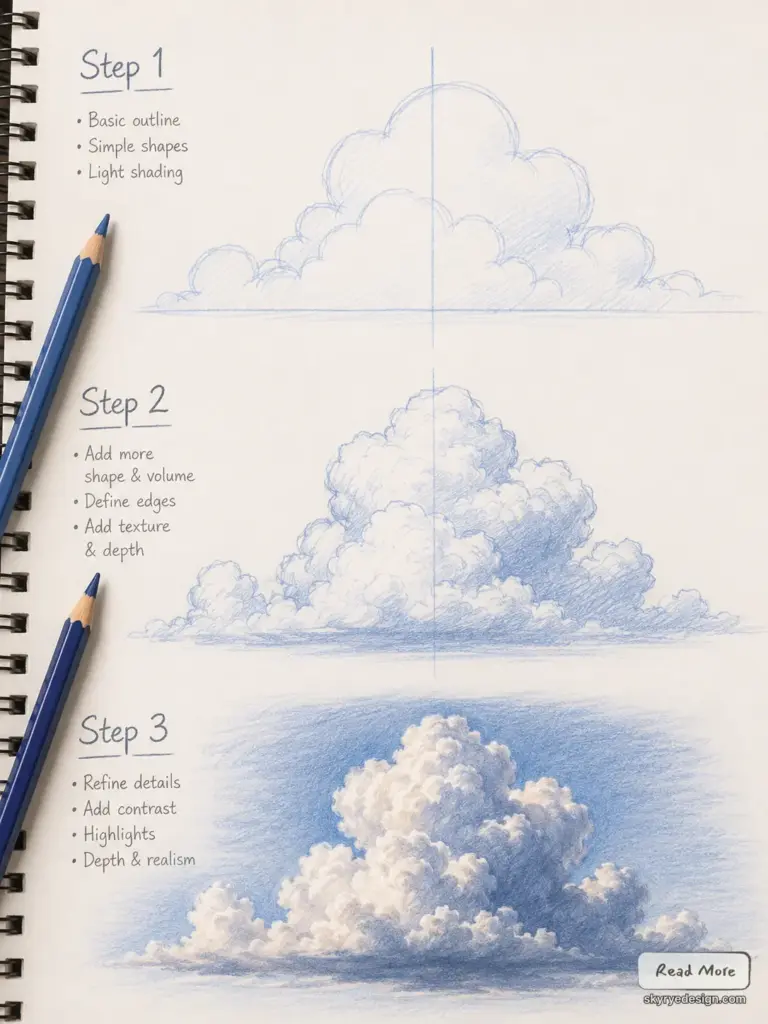
To draw realistic clouds, start with the whole sky, not the cloud outline. Lightly tone the sky around the cloud shape, leave the brightest highlights as untouched paper or a separate digital layer, then build the cloud with soft mid-tones. Add darker bases where the cloud turns away from the sun, lift small highlights with a kneaded eraser or soft brush, and soften the outer edges so parts of the cloud dissolve into the atmosphere.
- Mark the light source before drawing any cloud details.
- Tone the sky around the cloud so the highlight has something to contrast against.
- Block the largest shadow masses first, especially the flatter cloud base.
- Build mid-tones in layers, then lift highlights instead of scrubbing them in.
- Finish with a mix of hard, soft, and lost edges so the cloud sits in the atmosphere.
Keep sharper edges only where the cloud is dense and strongly lit. This value-first method works for pencil, charcoal, paint, and digital drawing because it follows how clouds actually read: as light, shadow, and edge variation, not as white objects with a gray bottom. If the cloud still feels flat, simplify the detail and check the big value pattern again.


| Cloud drawing problem | What to do | Why it works |
|---|---|---|
| Cotton ball shapes | Break the outline and vary the edge from hard to soft to lost. | Real cloud edges dissolve unevenly into the sky. |
| Flat white clouds | Map highlights, mid-tones, and shadow planes before adding detail. | Value structure creates volume. |
| Dirty pencil smudges | Build tone slowly, preserve clean highlights, and lift light areas with a kneaded eraser. | Clouds need controlled softness, not random blur. |
| Wrong cloud type | Match technique to the form: cumulus is puffy, stratus is layered, cirrus is wispy. | Each cloud type has a different visual rhythm. |
Here’s what separates convincing clouds from cotton ball doodles: understanding that clouds are forms in space, not shapes on a surface. They have volume, light sides, shadow sides, and edges that range from crisp to completely dissolved. The white isn’t uniform—it shifts from brilliant highlights to subtle mid-tones. The “gray shadow” isn’t just darker white—it’s influenced by the sky color, ground reflection, and atmospheric conditions.
Use this guide as a cloud drawing tutorial you can return to in pieces: cloud types first, then value structure, then edge control, then a full step-by-step cloud study. The same habits carry across pencil, charcoal, paint, and digital drawing.
These techniques come from years of landscape work and dedicated cloud studies. I’ve filled sketchbooks with nothing but clouds, painted them in oils, rendered them digitally, and studied how master landscape artists from Constable to contemporary concept artists handle atmospheric effects.
Cloud structure and types
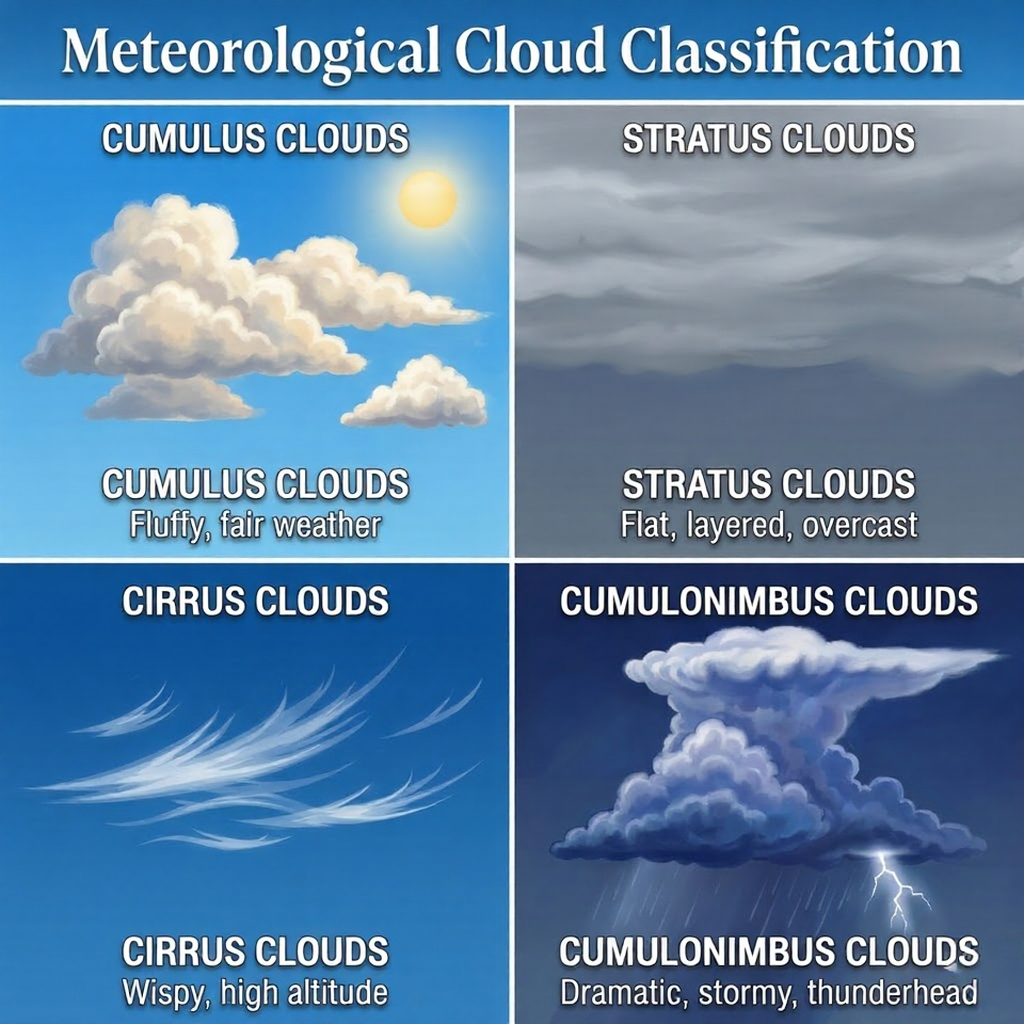
Before drawing clouds, understand what you’re looking at. Clouds aren’t random; they form in specific patterns based on atmospheric conditions. For reference, NOAA’s cloud guide groups common clouds by type and height, including cumulus, stratus, cirrus, and storm-forming cumulonimbus clouds.
Use a scientific cloud chart as a drawing reference, not as a rulebook. The NOAA guide to cloud types is useful when you need to check whether a reference cloud should be drawn as a puffy mass, a flat layer, or a thin high-altitude streak.
Cloud types and their drawing characteristics
Different cloud types have distinct visual properties:
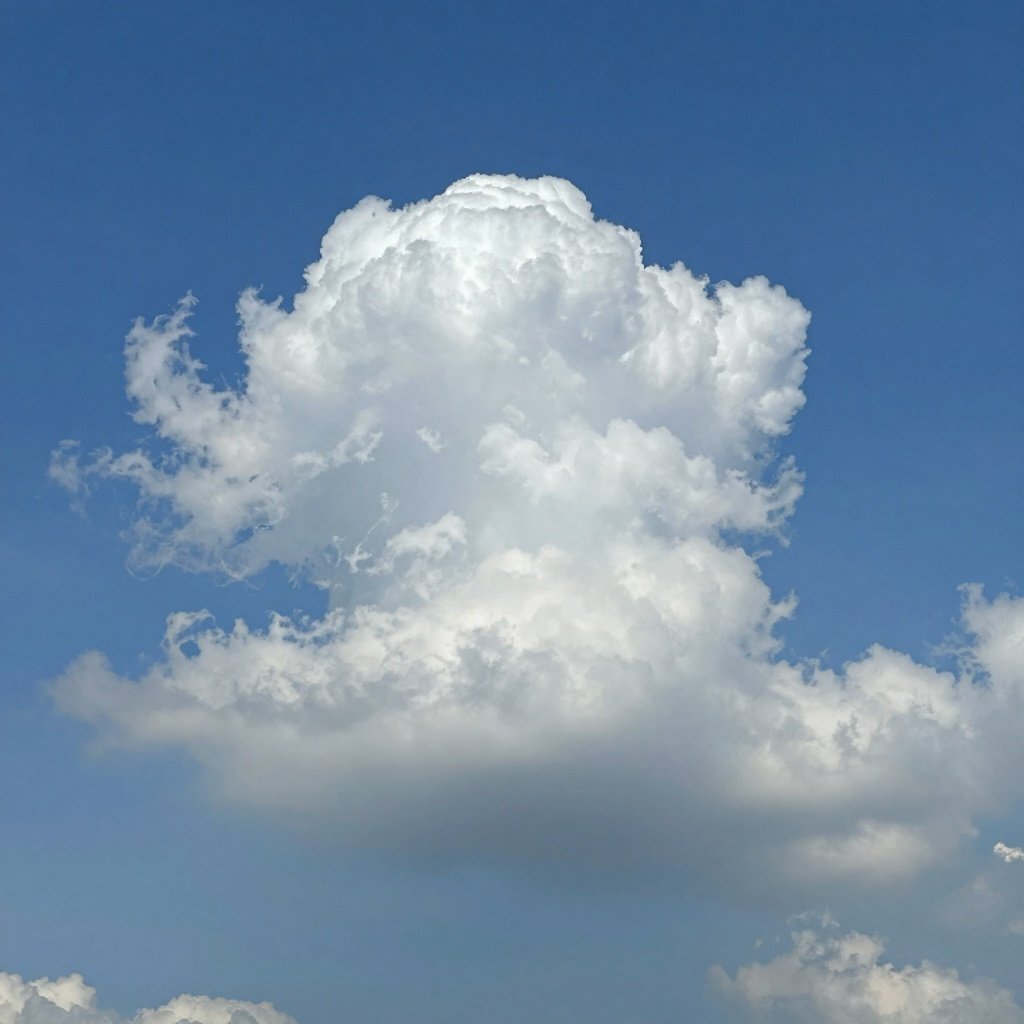
Cumulus clouds are the classic puffy clouds most people picture. They have flat bases (where rising air reaches the condensation level) and billowing tops. The key visual characteristic: strong contrast between bright, sunlit tops and darker, flatter bases.
Stratus clouds form in horizontal layers, often covering the entire sky. They’re characterized by subtle value gradations rather than dramatic light/shadow contrast. Drawing stratus means working with soft edges and gentle transitions.
Cirrus clouds are high, wispy formations made of ice crystals. They’re thin, stretched, and often appear as delicate streaks or curls. These require light touch and attention to directional flow.
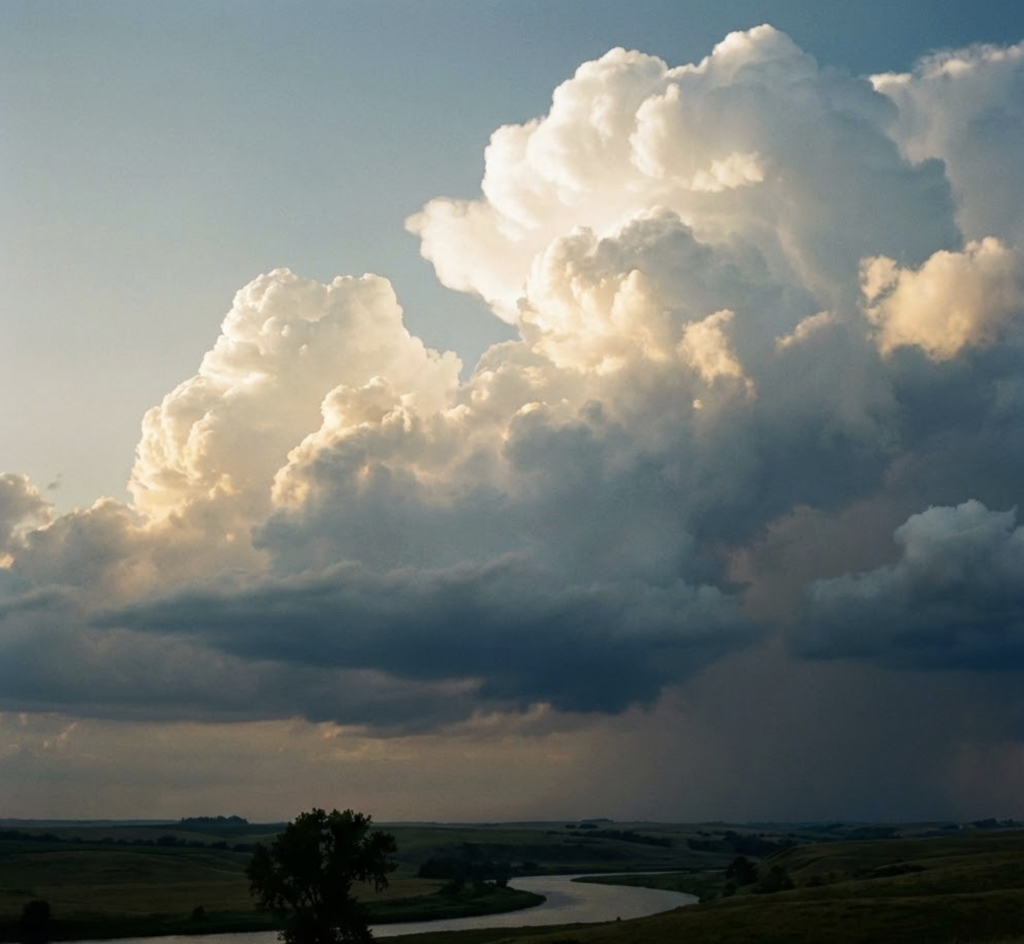
Cumulonimbus (storm clouds) combine massive vertical development with dramatic lighting. Dark bases, towering bright tops, and often visible precipitation make these the most dramatic to draw.
Why this matters: Each cloud type requires different drawing approaches. Cumulus clouds need strong value contrast; stratus need subtle gradation; cirrus need delicate linework. Knowing what you’re drawing determines how you draw it.
How light interacts with clouds
Clouds are semi-translucent masses lit by the sun. Understanding this light behavior is essential:

1000 Drawing Ideas for Artists
Get a free PDF packed with easy drawing ideas, anime prompts, character concepts, nature inspiration, and fantasy sketchbook challenges.
Download Free PDFTop-lit conditions (typical midday): Sun hits cloud tops directly, creating bright highlights. Bases are in shadow, receiving only reflected light from the ground. This creates the classic bright-top, dark-bottom cumulus look.
Side-lit conditions (morning/evening): Light rakes across cloud forms, emphasizing three-dimensional structure. One side bright, one side in shadow, with long cast shadows possible between cloud layers.
Backlit conditions: Sun behind clouds creates dark silhouettes with brilliant edges where light wraps around. Thin areas may glow with transmitted light.
Overcast conditions: Diffused light with no clear direction. Values compress toward middle tones with subtle gradation rather than strong contrast.
The critical insight: Clouds aren’t white with gray shadows. The “white” ranges from brilliant highlights to soft mid-tones. The “shadows” are influenced by sky color (often blue-gray), ground reflection (warm tones from below), and the cloud’s own thickness.
Essential tools and materials
The right tools support your technique without fighting you.
For pencil and graphite work
Pencils: Range from 2H (light, for subtle tones) through HB (medium) to 4B-6B (dark, for shadows and sky tones). Clouds require the full value range.
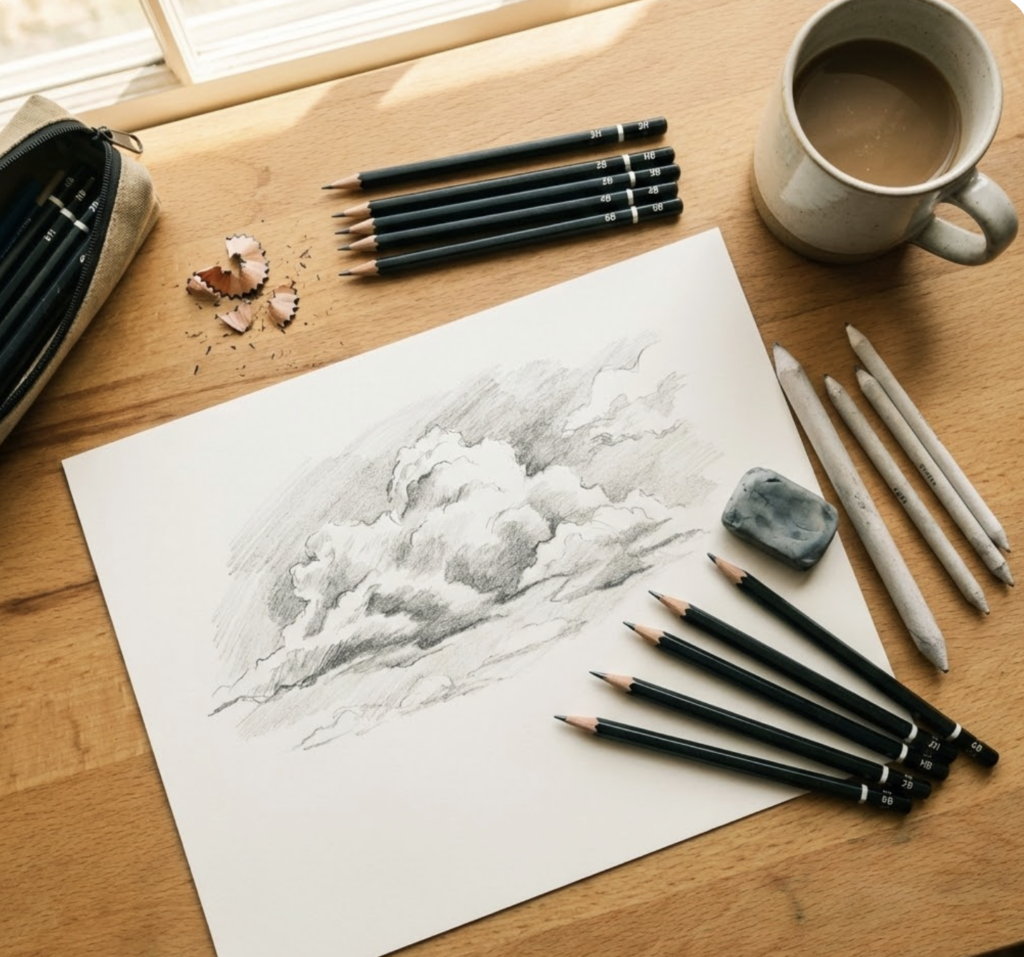
Paper: Smooth paper (Bristol, hot-press) allows fine gradations. Textured paper adds atmosphere but can fight detailed blending.
Kneaded eraser: Essential for cloud work. Shape it to lift highlights, create soft edges, and pull wispy formations out of toned areas.
Blending tools: Tortillons, blending stumps, or tissue for smooth transitions. Clouds need soft gradations that hatching alone can’t achieve.
White charcoal or pencil: For adding highlights when working on toned paper. Creates luminosity impossible to achieve with just graphite.
For digital work

Soft round brushes: Primary tool for cloud forms. Vary opacity and flow rather than using hard-edged brushes.
Smudge/blend tools: Essential for edge control and value transitions.
Layer controls: Build clouds in layers—sky base, distant clouds, mid-ground clouds, foreground elements. Opacity adjustments create atmospheric depth.
Reference readily available: Keep cloud photos accessible. Even experienced artists benefit from reference for complex formations.
Cloud drawing fundamentals
Master these core principles before attempting complete cloud scenes.
Seeing value structure
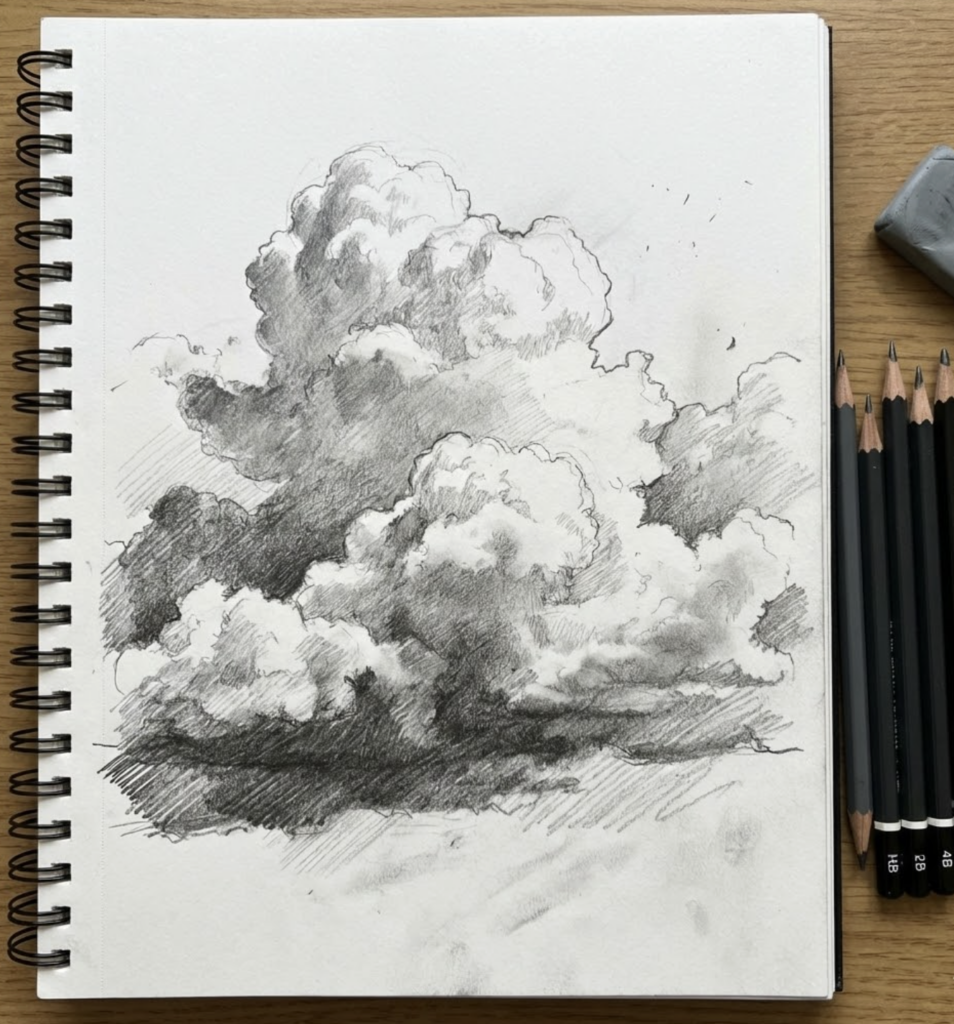
Clouds aren’t about shape—they’re about value (light and dark relationships):
Identify the light source. Where is the sun? This determines which cloud surfaces are bright and which are in shadow.
Map the value range. Before drawing details, identify: Where are the brightest highlights? Where are the deepest shadows? Where are the mid-tones?
Squint to simplify. Squinting reduces detail and reveals the fundamental value pattern. Draw this simplified structure first.
The common mistake: Drawing clouds as white shapes, then adding shadow underneath. This creates flat, pasted-on results. Instead, think of the entire cloud as a range of values from light to dark.
Edge control
Cloud edges determine whether your clouds look solid or atmospheric:
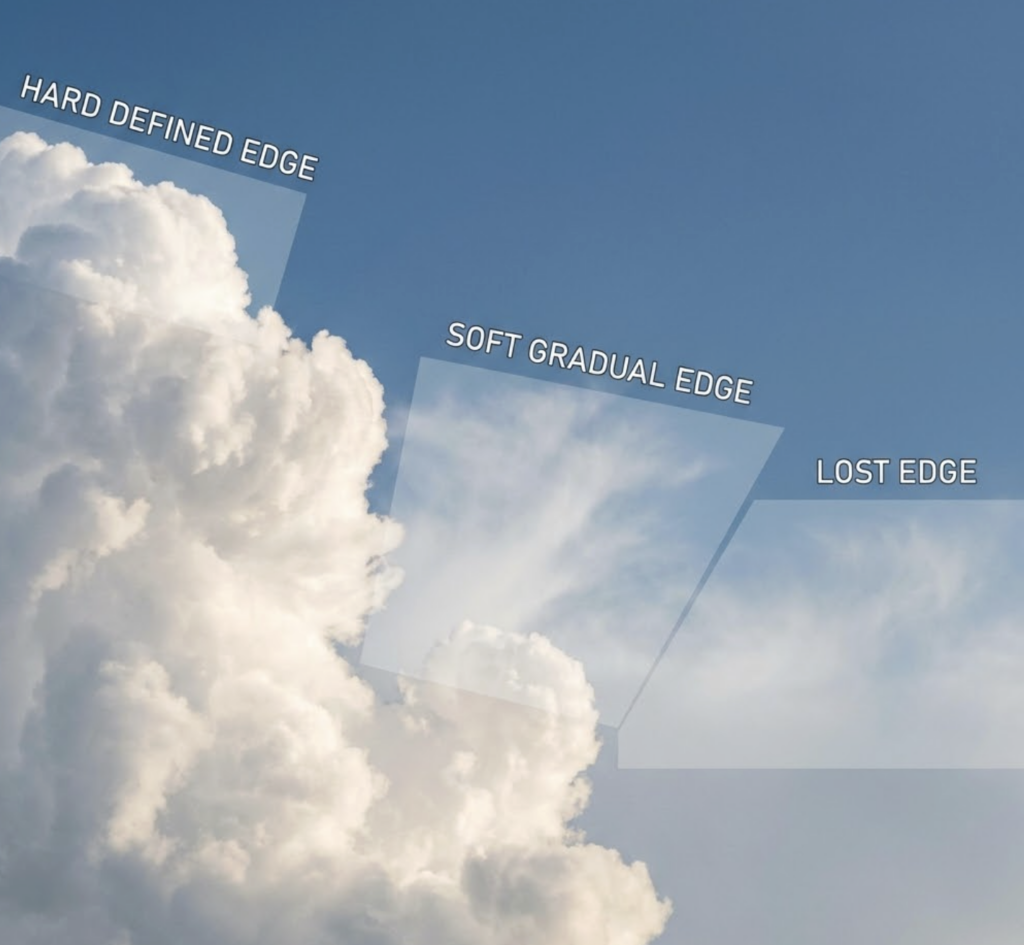
Hard edges appear where clouds are dense and clearly defined against sky—typically the sunlit tops of cumulus formations.
Soft edges appear where clouds thin out and dissolve into atmosphere—typically at the outer reaches and where wisps trail off.
Lost edges occur where cloud values match sky values, causing the form to disappear into background. This creates atmosphere and prevents clouds from looking cut out.
The rule: Vary your edges. All hard edges look like cut paper. All soft edges look unfocused. Mixing hard, soft, and lost edges creates dimensional, atmospheric clouds.
Building form through values
Clouds have three-dimensional form. Show this through value progression:
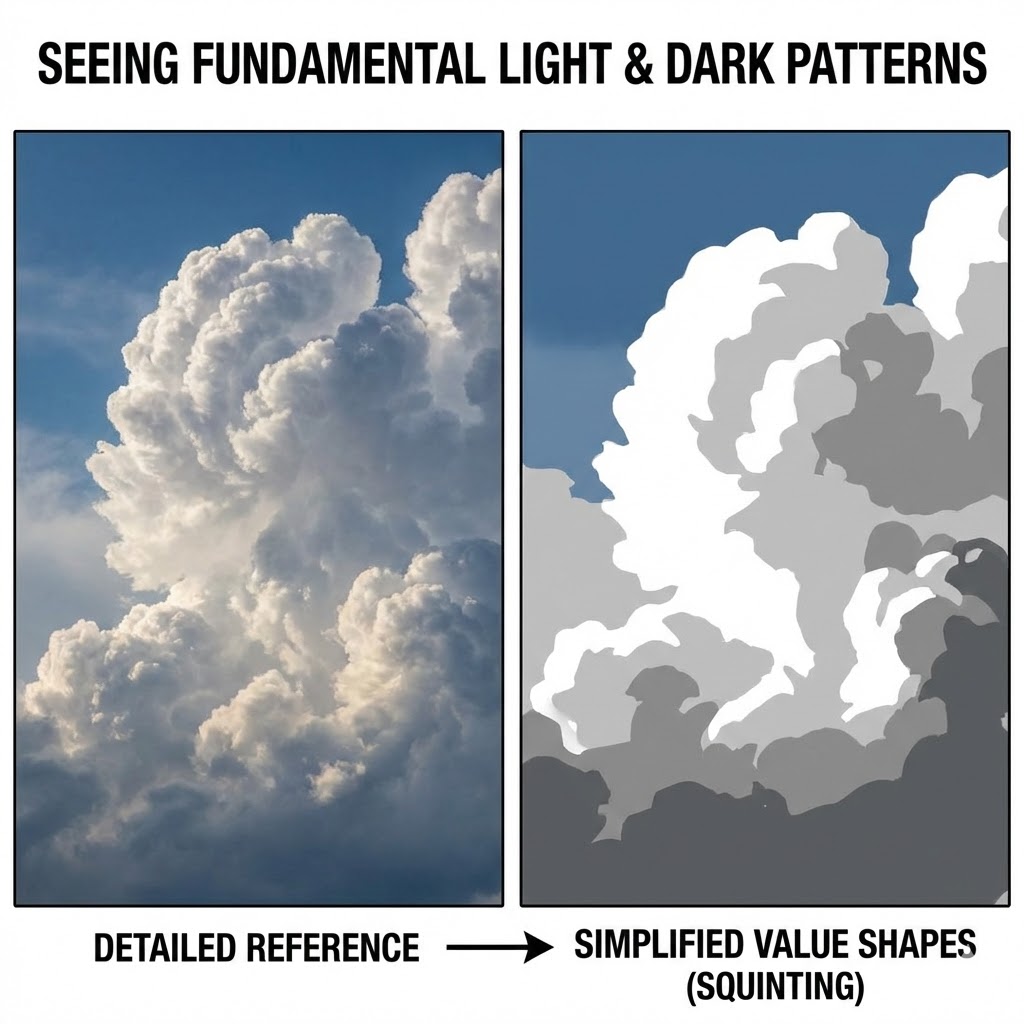
Light side: Directly facing the sun. Brightest values, often pure white or near-white.
Mid-tones: Angled surfaces receiving partial light. The bulk of most cloud forms live in this range.
Shadow side: Facing away from light. Darker values, but rarely very dark except in storm clouds.
Core shadow: The darkest area on the form, where the surface turns most directly away from light.
Reflected light: Light bouncing into shadow areas from ground or adjacent clouds. Warms and lightens shadows slightly.
Step-by-step cloud drawing process
Planning your composition
Before drawing any cloud:
Establish the sky gradient. Sky isn’t uniform—it’s typically darker at the top (directly through atmosphere) and lighter toward the horizon (light scattered through more atmosphere). Lay this gradient first.
Block major cloud masses. Lightly indicate where clouds will sit. Consider composition—clouds clustered in one area? Scattered? Leading the eye through the scene?
Identify your focal cloud. One cloud (or cloud group) typically gets the most attention and detail. Others support but don’t compete.
Rendering cumulus clouds
The most commonly drawn cloud type:
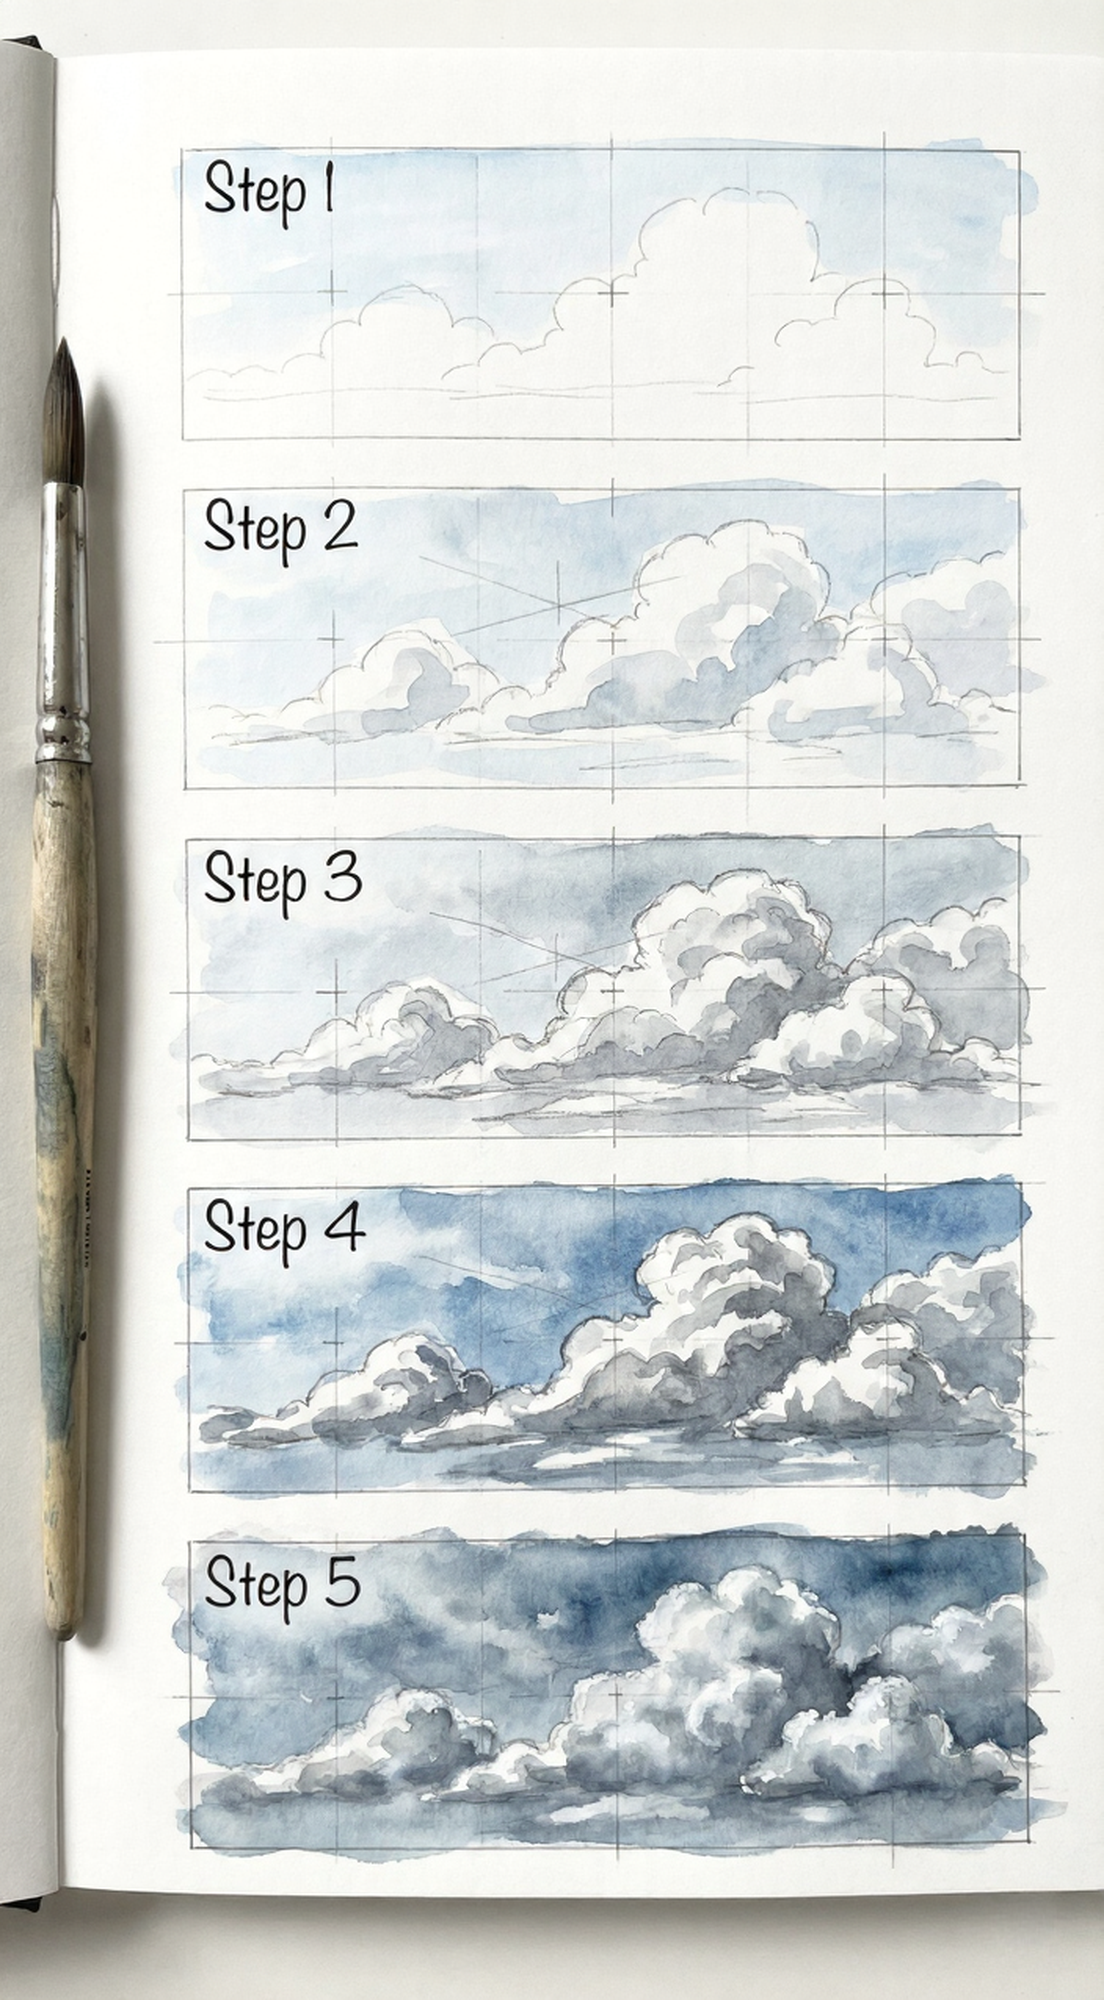
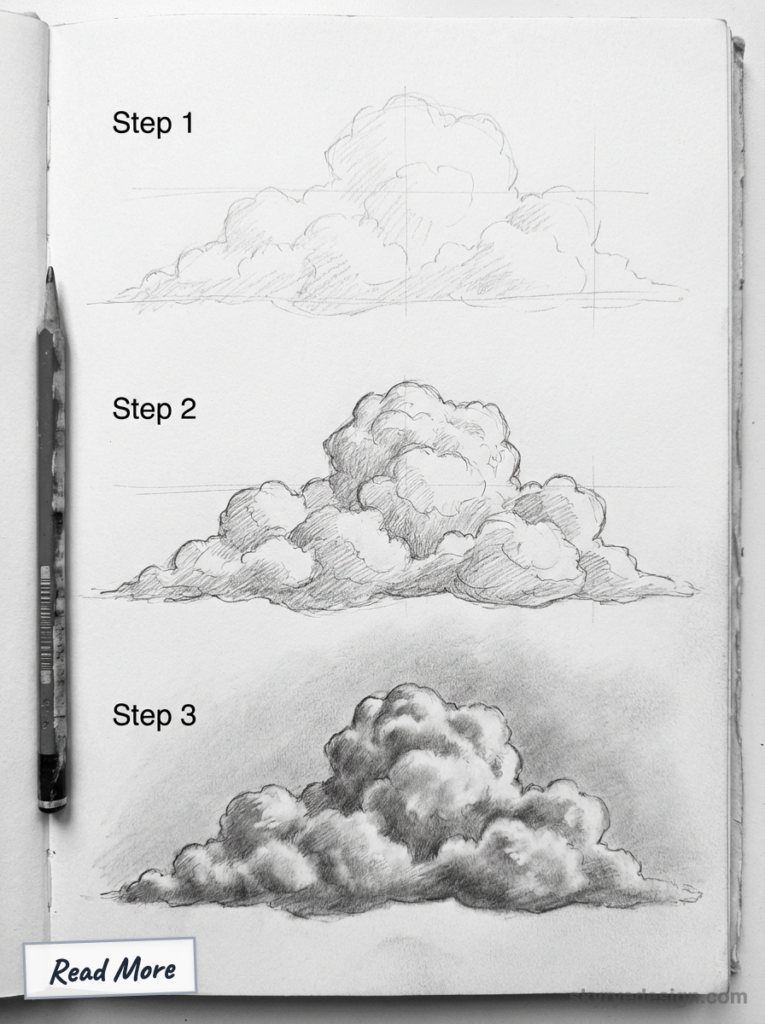
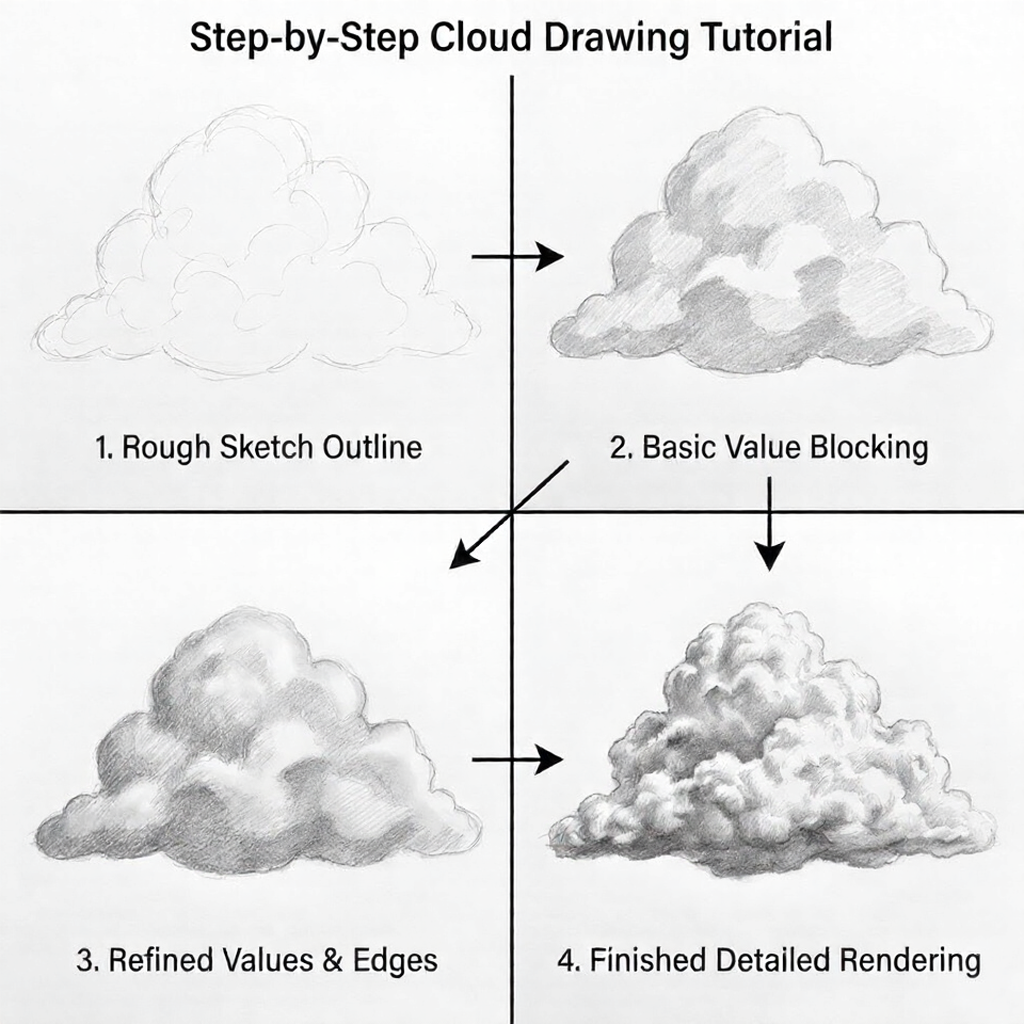
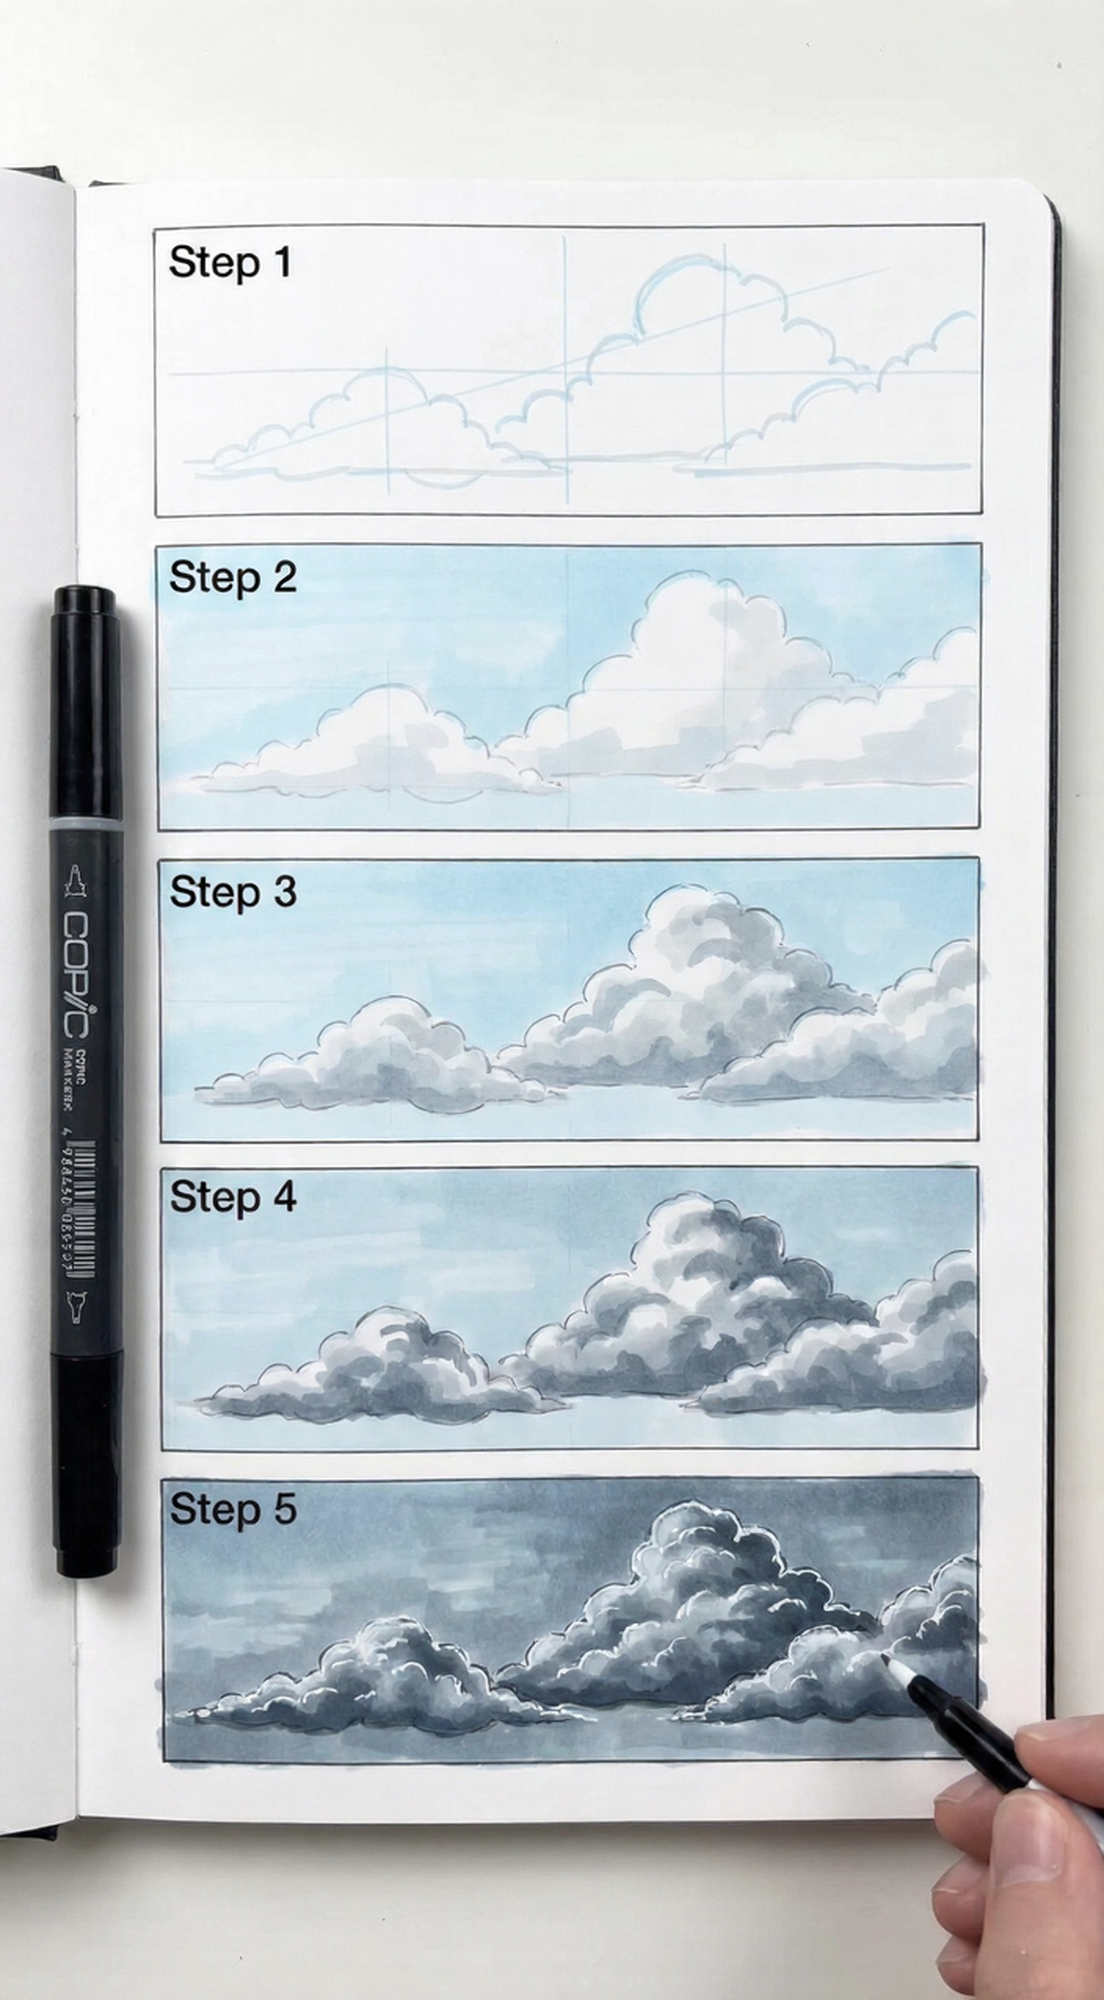
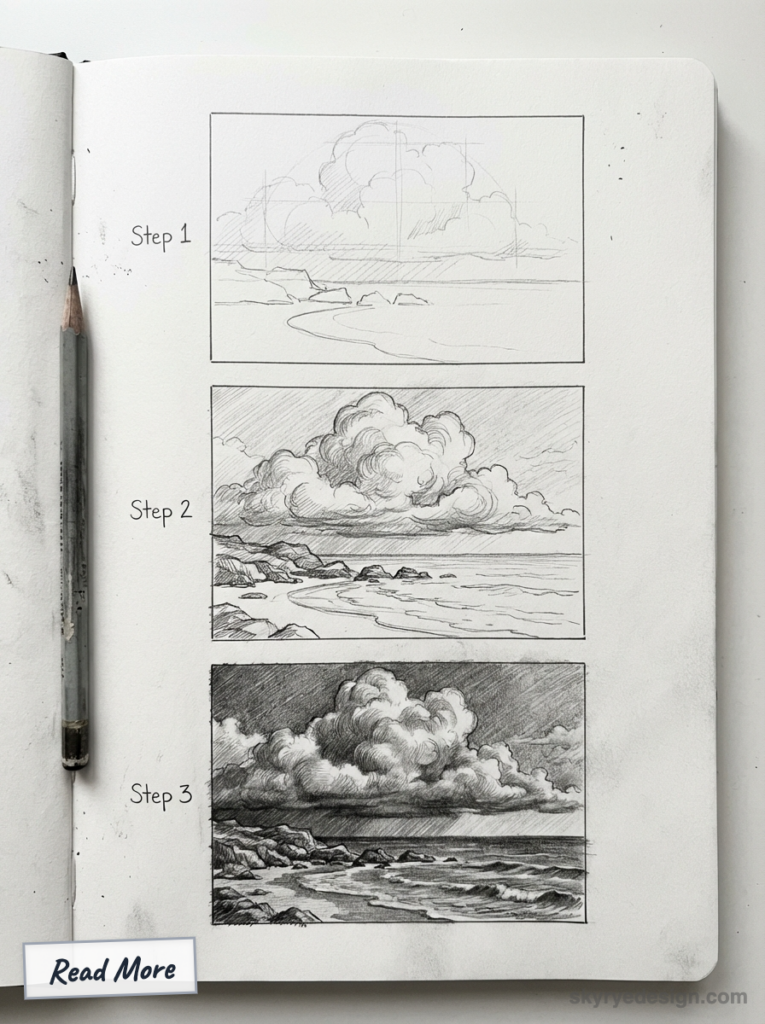
Step 1: Establish the sky tone. Work around where clouds will be, laying in the blue-gray sky tones. Leave cloud areas as white paper (or light base in digital).
Step 2: Block shadow masses. Identify the underside shadow pattern of your cloud. Block this in with medium-gray tones. Don’t detail yet—capture the overall shadow shape.
Step 3: Build mid-tones. Work the transition between bright tops and shadowed bases. These mid-tones give clouds their dimensional quality.
Step 4: Develop edges. Sharpen some edges where clouds are defined; soften others where they fade to wisps. Use eraser (traditional) or soft brushes (digital) to create variety.
Step 5: Add highlights. In pencil, preserve your white paper for the brightest spots. In digital or with white media, add final bright touches to sunlit surfaces.
Step 6: Refine and atmospheric effects. Add subtle internal variation, wispy elements, and any atmospheric effects like light rays or color shifts.
Rendering other cloud types
Stratus/overcast: Work in compressed value ranges. Subtle gradations matter more than defined shapes. Build thin layers of tone across the sky, varying slightly for interest.
Cirrus: Light, delicate strokes following the wind direction. These clouds are thin—show sky through them. Use eraser to pull out bright areas rather than adding white.
Storm clouds: High contrast, dramatic value range. Dark bases can approach very dark values. Bright areas may be brilliantly lit by slanting sun. Edge variety becomes extreme—hard edges on defined masses, completely lost edges in rain areas.
Digital cloud drawing techniques
Digital tools offer specific advantages for cloud work.
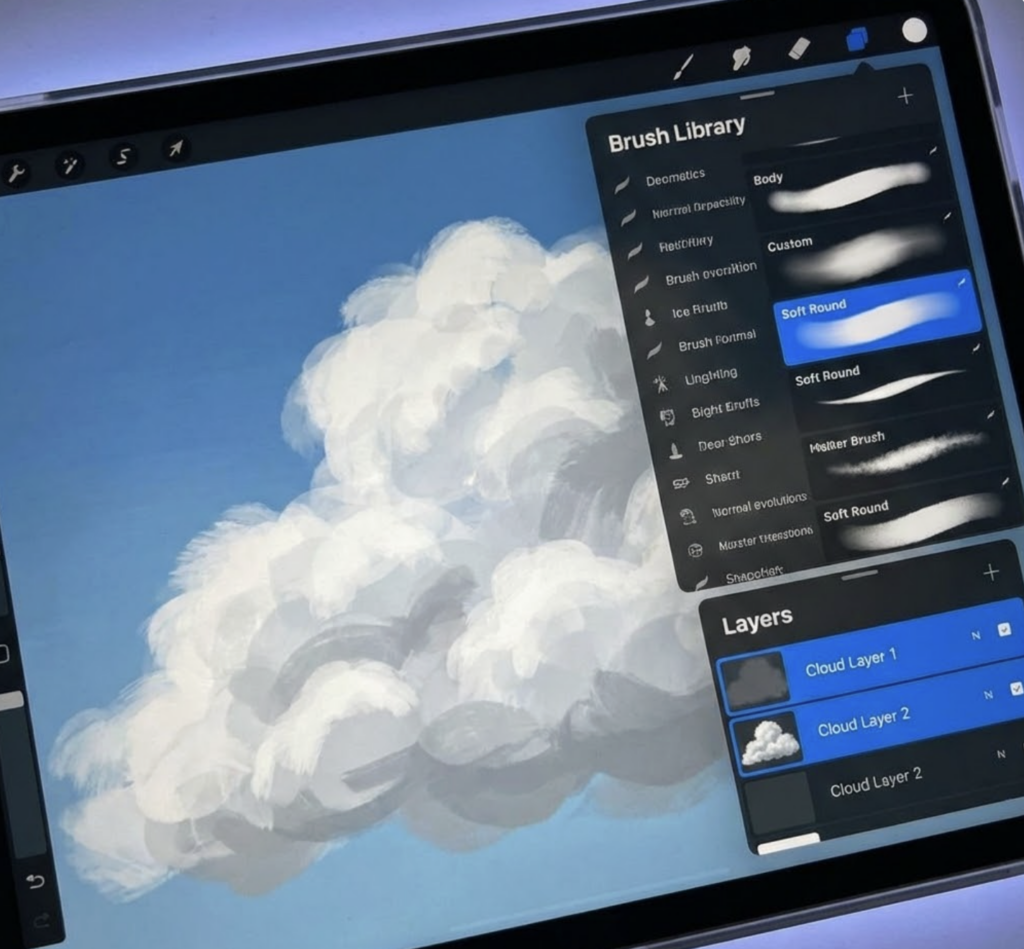
Brush settings for clouds
Soft round with pressure opacity: Your primary cloud brush. Light pressure = transparent; heavy pressure = opaque. Build clouds through layered strokes.
Textured cloud brushes: Many artists create custom brushes that lay down cloud-like patterns. These speed up initial blocking but need refinement to avoid looking mechanical.
Smudge tool settings: Lower strength (10-30%) for subtle blending; higher strength for dramatic blurring. Use directionally to suggest wind movement.
Layering strategy
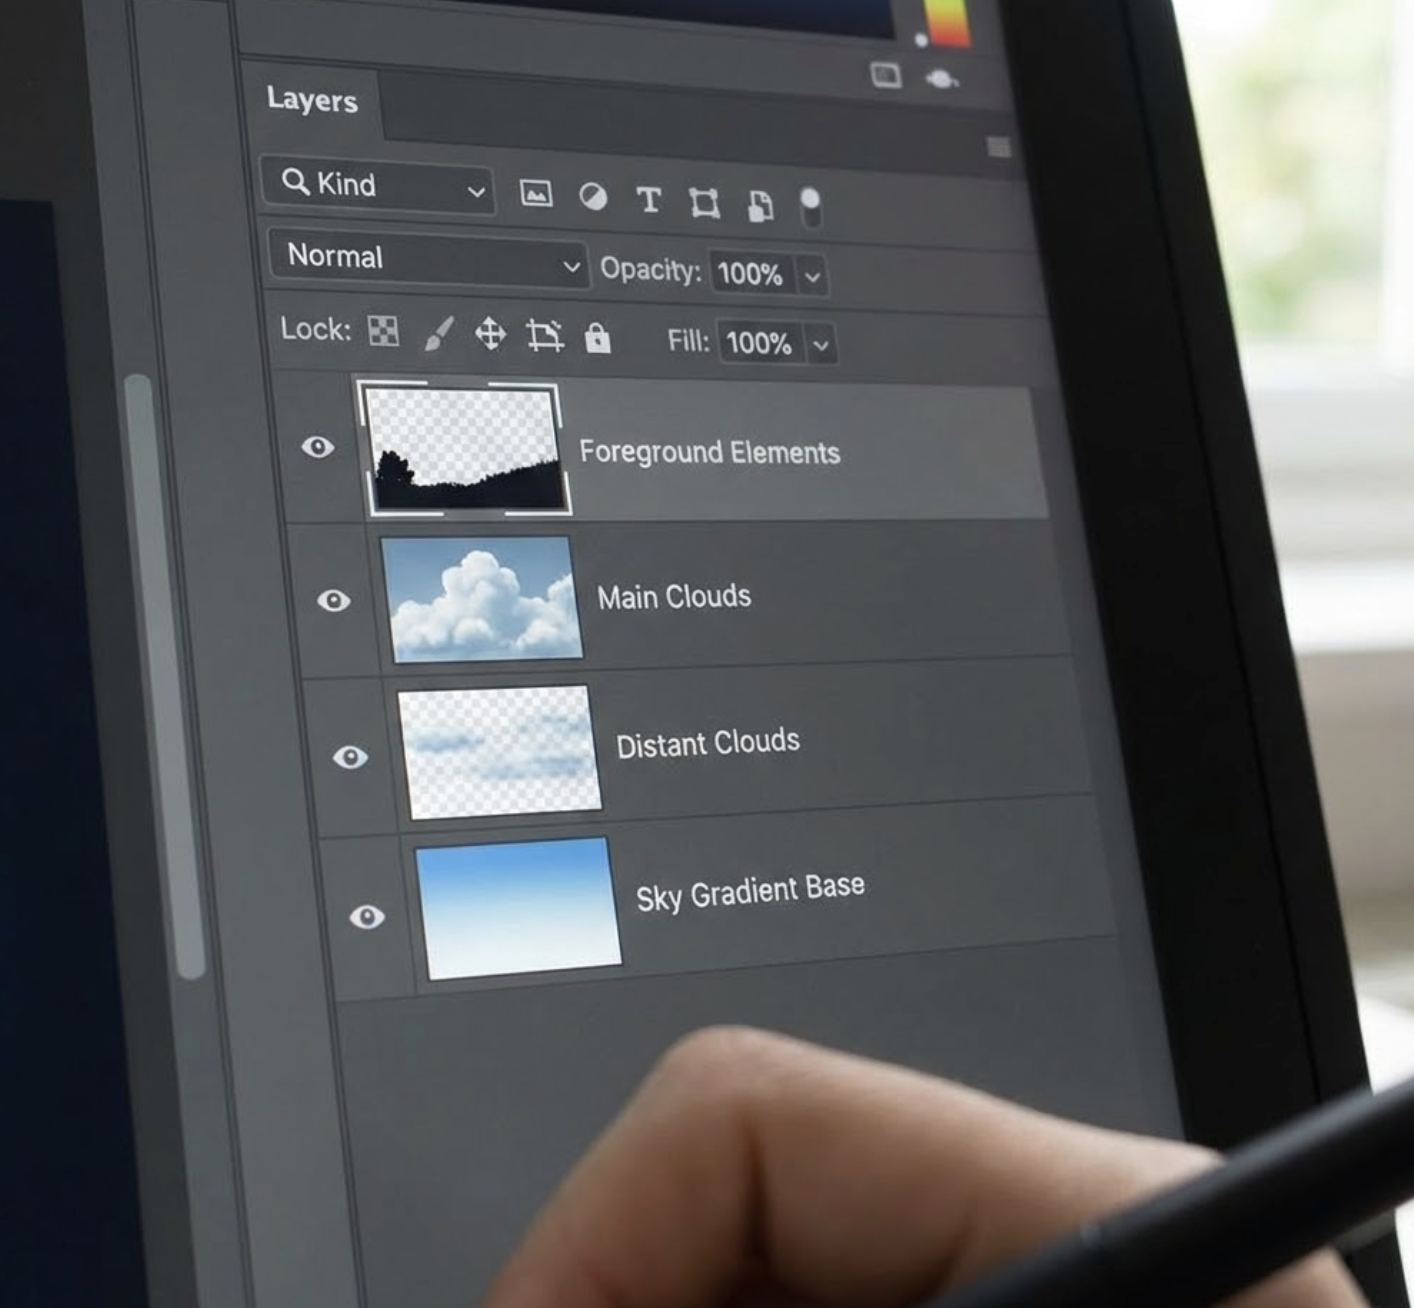
Layer 1: Sky gradient. Establish atmospheric base.
Layer 2: Distant clouds. Lower contrast, cooler colors, softer edges. These sit near the horizon.
Layer 3: Mid-ground clouds. Main cloud masses with full value range.
Layer 4: Foreground elements. If any clouds appear very close (looking up at underside), highest contrast and sharpest edges.
Adjustment layers: Use curves/levels to tweak overall atmosphere. Subtle color adjustments unify the image.
Using reference effectively
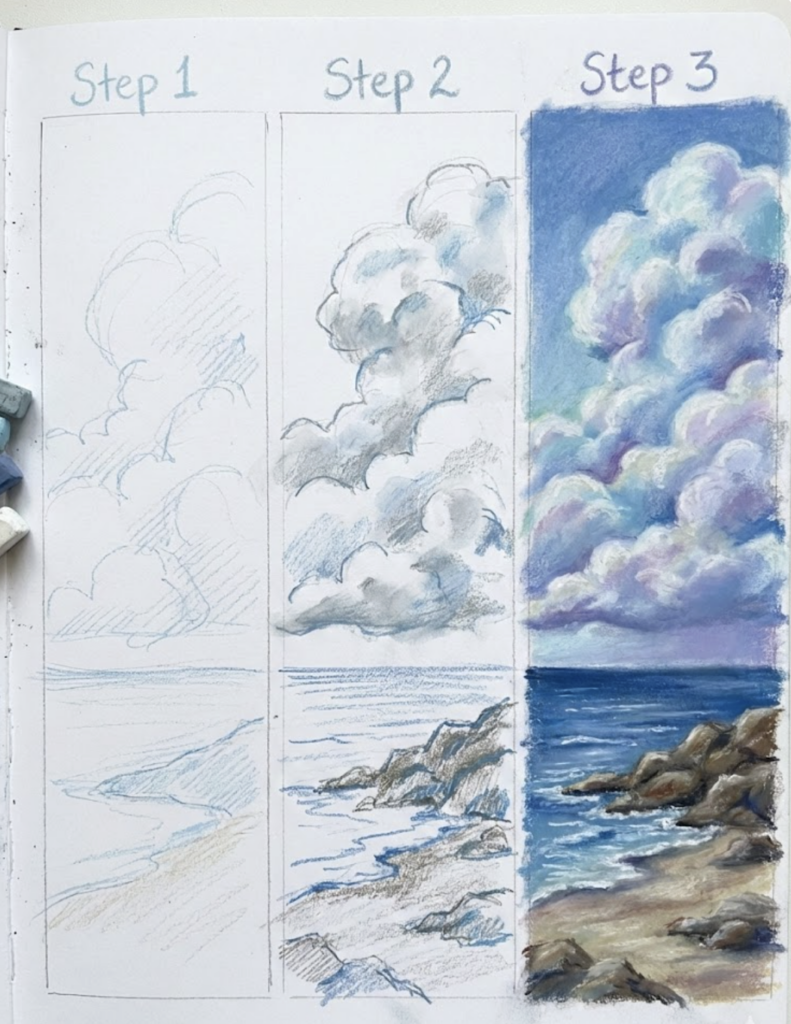
Don’t copy—analyze. When using photo reference, identify what the photo teaches you: Where are the values? What’s happening at the edges? How does light move through the form?
Combine references. The composition from one photo, the lighting from another, the cloud type from a third. You’re not illustrating a specific photo—you’re understanding clouds.
Build a reference library. Collect cloud photos across different conditions: times of day, weather types, seasons. Observing variety builds understanding that improves all your cloud work.
Common cloud drawing mistakes
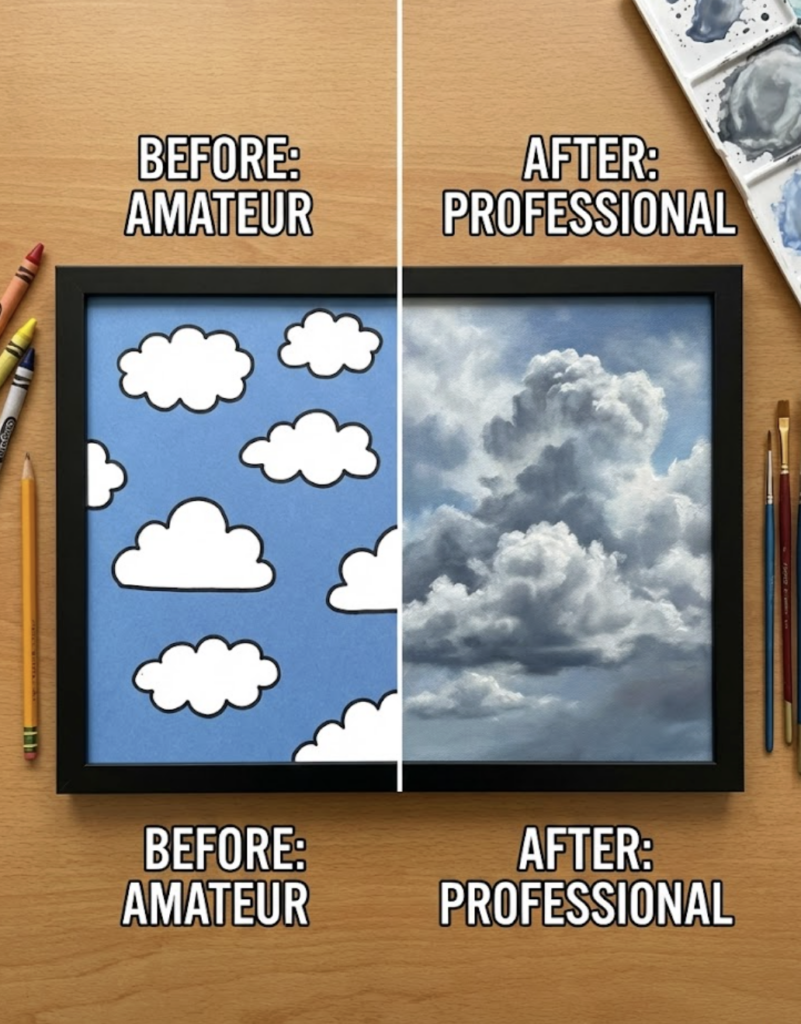
Mistake: uniform white clouds
Problem: Clouds appear flat because they’re all one value.
Solution: Even the brightest cumulus cloud has value variation. The sunlit top might be near-white, but sides and edges are softer. Map at least 3-4 values within your “white” cloud areas.
Mistake: hard edges everywhere
Problem: Clouds look cut out and pasted on the sky.
Solution: Vary your edges deliberately. Keep hard edges for specific areas (dense, defined formations). Use soft edges for most transitions. Let some edges disappear completely (lost edges) where cloud and sky values approach each other.
Mistake: symmetric cloud shapes
Problem: Clouds look artificial because they’re too regular.
Solution: Real clouds are asymmetric, irregular, and varied. The brain naturally creates patterns—actively break them. Make one side more developed than the other. Vary the intervals between cloud masses. Add unexpected wisps and gaps.
Mistake: forgetting atmospheric perspective
Problem: Distant clouds look the same as near clouds.
Solution: Distance affects clouds like everything else. Far clouds: lower contrast, cooler colors (more blue-gray), softer edges, less detail. Near clouds: higher contrast, warmer colors possible, sharper edges, more detail.
Mistake: isolated cloud drawing
Problem: Clouds don’t integrate with the rest of the scene.
Solution: Clouds affect everything below them—casting shadows on landscapes, reflecting in water, influencing the color of everything. And the landscape affects clouds—warm ground reflects into cloud shadows. Draw clouds as part of the complete scene, not as separate elements.
Practice exercises
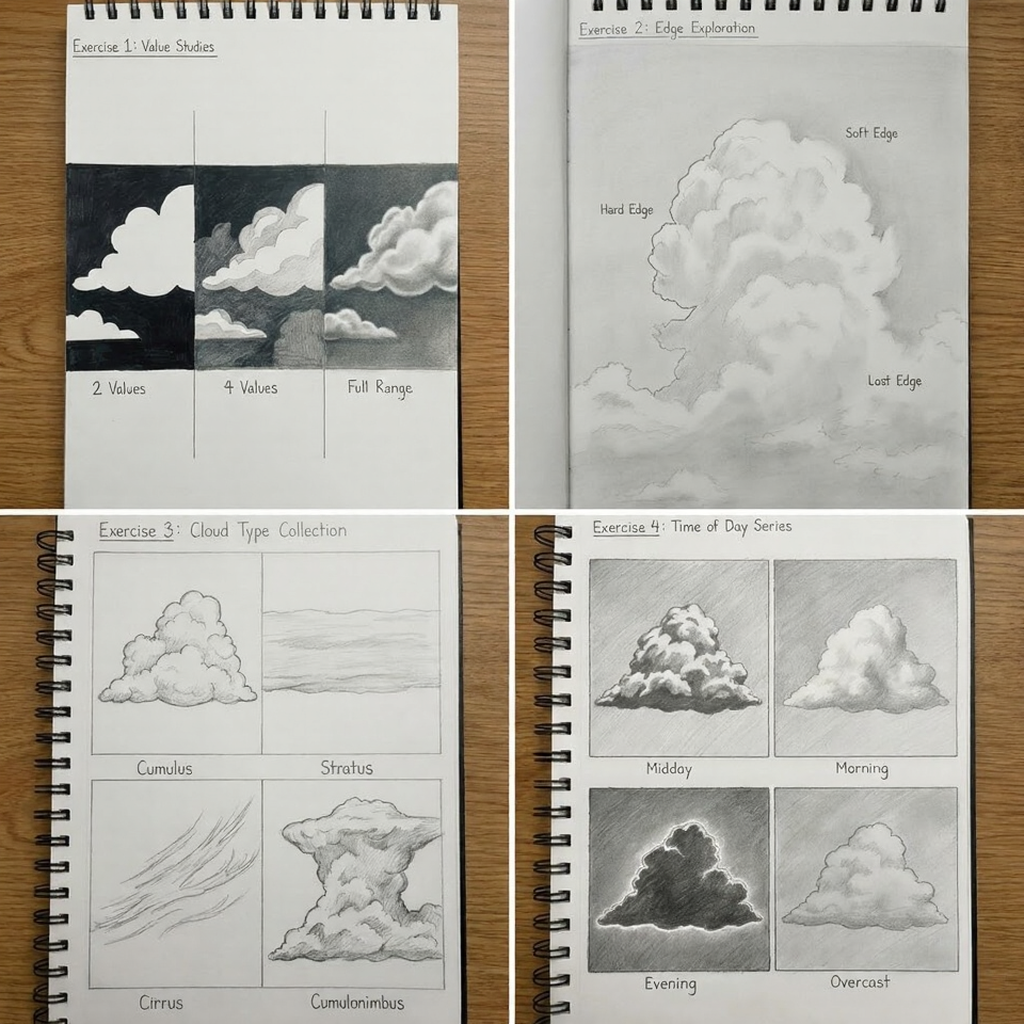
Exercise 1: value studies
Draw the same cloud scene three times, limiting yourself to: 2 values only, 4 values only, then full range. See how much form you can create with limited values.
Exercise 2: edge exploration
Draw a single cloud focusing only on edges. Create sections with hard edges, soft edges, and lost edges. Notice how edge treatment alone creates the sense of atmosphere.
Exercise 3: cloud type collection
Over one week, draw each major cloud type: cumulus, stratus, cirrus, and cumulonimbus. Focus on what makes each type visually distinct.
Exercise 4: time of day series
Draw the same cloud mass under different lighting: midday top-lit, morning side-lit, evening backlit, overcast diffuse. Notice how lighting transforms the same form.
FAQ

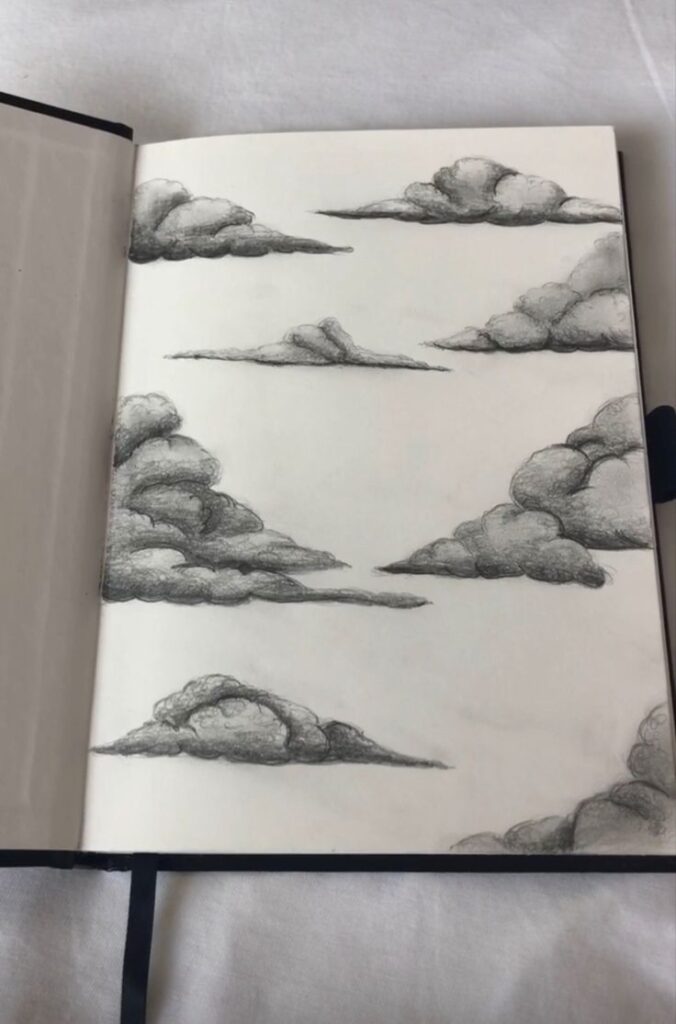
Why do my clouds look like cotton balls?
Clouds usually look like cotton balls when you draw the outside symbol first. For a better cloud drawing, build the form from values: bright top planes, softer mid-tones, darker bases, and broken edges that fade into the sky.
What’s the most important skill for drawing clouds?
Edge control matters most. Keep a few crisp edges where the cloud is dense and lit, then use soft and lost edges everywhere else. That mix is what makes a cloud sketch feel atmospheric instead of pasted onto the sky.
Should I draw clouds from reference or imagination?
Start with reference. Cloud structure, light, and movement follow patterns that are easier to learn by observation. After enough studies, you can invent clouds that still feel believable.
How do I draw clouds in pencil without them looking smudgy?
Use a clean value plan before blending. Preserve white paper for the brightest highlights, build pencil tone in light layers, and lift soft highlights with a kneaded eraser instead of rubbing the whole cloud into one gray patch.
What colors are in cloud shadows?
Cloud shadows are rarely plain gray. They often include blue-gray from the sky, warmer reflected light from the ground, and muted purple in low light. The exact mix depends on the time of day and the surface below the clouds.
How do you draw realistic clouds step by step?
Tone the sky first, reserve the brightest cloud highlights, block the large shadow masses, build mid-tones through the body, then finish with varied edges. The step that makes clouds look realistic is usually the edge work, not extra detail.
What pencil should I use for cloud drawing?
Use a small range: 2H or HB for pale sky tones and light planning, then 2B to 6B for deeper cloud bases and storm shadows. A kneaded eraser is just as important because it lifts soft highlights cleanly.
How do you shade clouds without outlining them?
Shade the sky around the cloud first and let the cloud appear through contrast. Build the form with soft value shifts, erase back into highlights, and keep only a few sharp accents where the cloud is dense.
Cloud drawing practice links
After the cloud study starts working, move into nearby sky and landscape practice: sunset drawing, landscape sketch practice, mountains drawing, ocean drawing, waves drawing.
For more value and scene-building support, continue with beach drawing ideas, how to draw water, nature drawing ideas, shading drawing guide, perspective drawing for beginners.
Final cloud drawing takeaway
Cloud drawing improves fastest when you think in values first: light source, big masses, shadow bases, lifted highlights, and edges that fade in and out. A good cloud sketch does not need every puff rendered; it needs a clear light pattern and enough soft transitions to feel like atmosphere.
For more fundamentals that support sky and landscape studies, browse the drawing basics hub for shading, value, and composition practice.


The fundamentals are straightforward: identify your light source, map your values from light to shadow, vary your edges from hard to lost, and remember atmospheric perspective affects clouds like everything else. Master these principles and you can draw any cloud type in any medium.
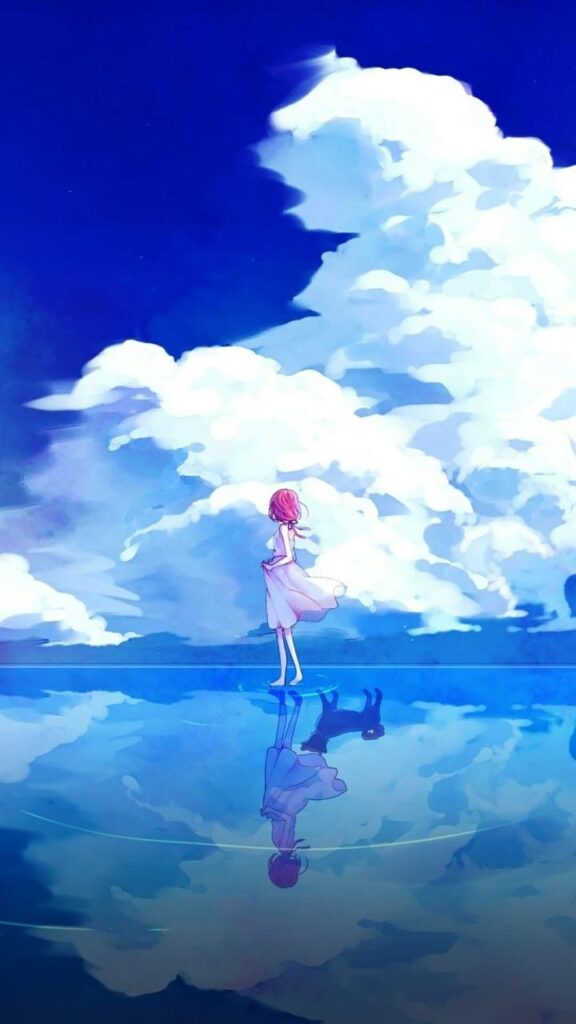
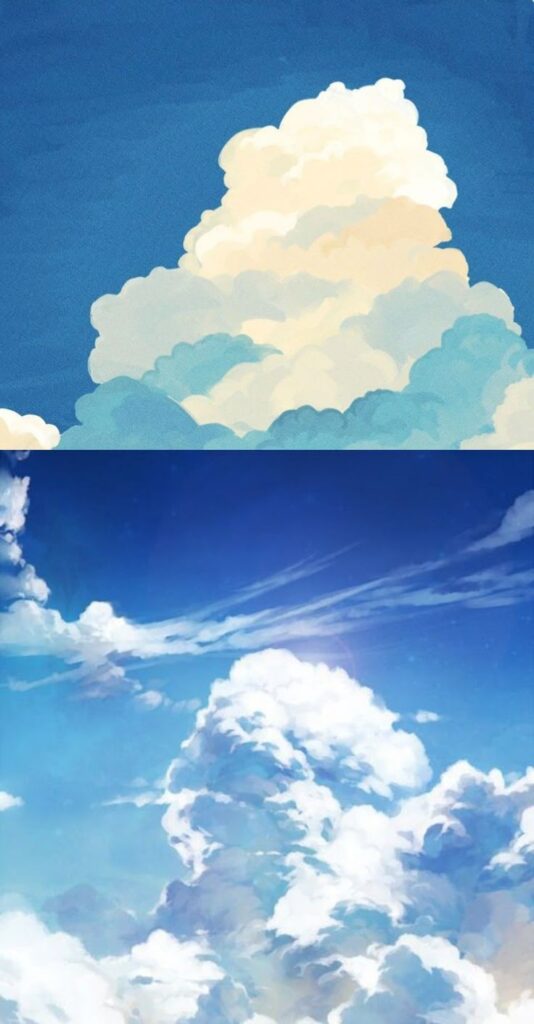
This week: Spend 15 minutes looking at actual clouds without drawing. Identify the light source. Find the brightest highlights and darkest shadows. Notice which edges are sharp and which dissolve. Observation before drawing.
This month: Fill 10 sketchbook pages with cloud studies from photos or life. Focus on value structure only—no finished scenes, just understanding how light moves through cloud forms.
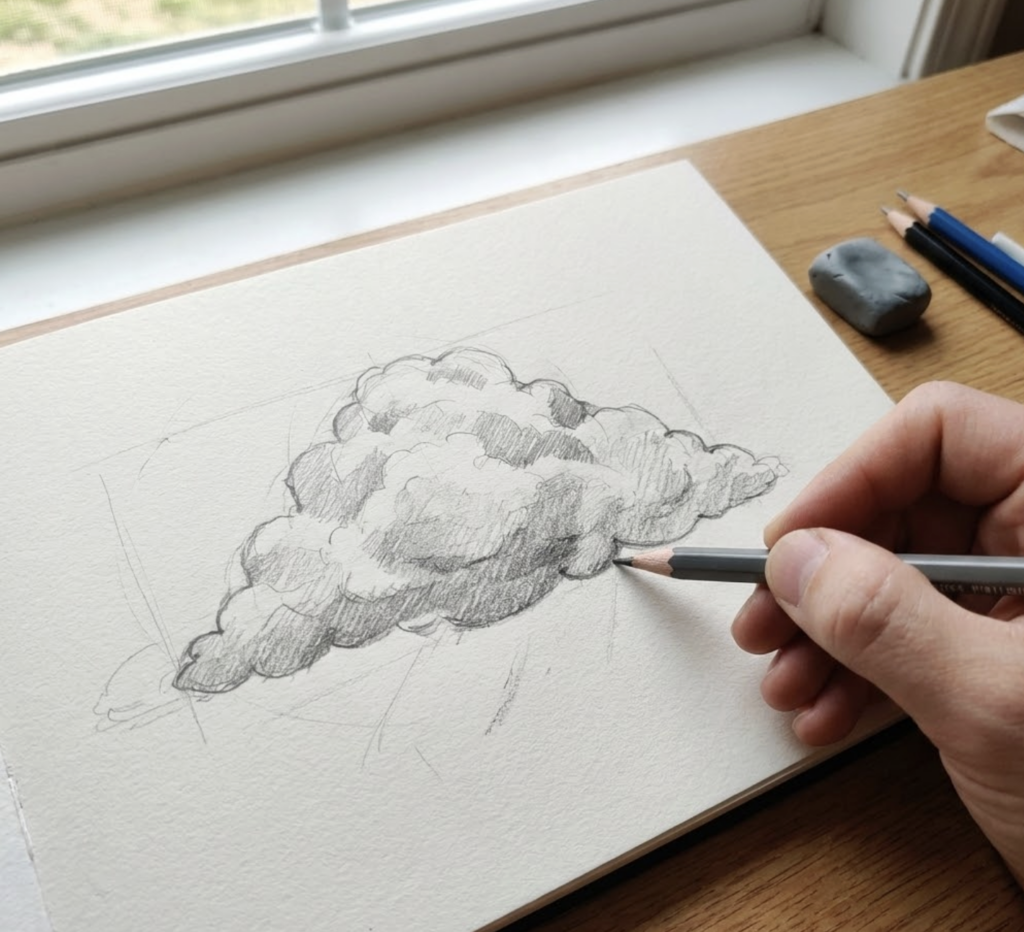
Ongoing: Build a cloud reference library. Photograph interesting clouds when you see them. Study master painters known for atmospheric work—Constable, Turner, Bierstadt, and contemporary landscape artists. The more clouds you observe and draw, the more your understanding deepens.
Your landscapes deserve skies that breathe, clouds that have form and atmosphere, not stickers pasted on blue. Start seeing clouds as the complex, beautiful phenomena they are, and your drawings will follow.
Clouds are a natural bridge into drawing in an impressionist style, since the form changes quickly and the soft edge is usually more important than the contour.
For seascapes, an ocean drawing background uses many of the same soft-edge decisions as clouds: lighter distance, simpler shapes, and stronger contrast near the viewer.
The same edge control works on a planet scene. This Earth drawing guide shows how to wrap cloud bands around a sphere instead of placing flat white shapes over the continents.
Cloud studies are a natural place to practice drawing with pastels, because soft edges, lifted highlights, and layered sky color matter more than hard outlines.
- 12.3Kshares
- Facebook0
- Pinterest12.3K
- Twitter0
- Reddit0