Portrait drawing can be a rewarding and expressive form of art. It allows artists to capture the unique features and emotions of their subjects, creating a lasting impression. These tips aim to guide both beginners and experienced artists in improving their skills.
Learning and mastering these tips can make a noticeable difference in the quality of your portraits. Whether you’re drawing from life or using a photo reference, these insights will help you to achieve more realistic and captivating results.
1. Start with basic shapes
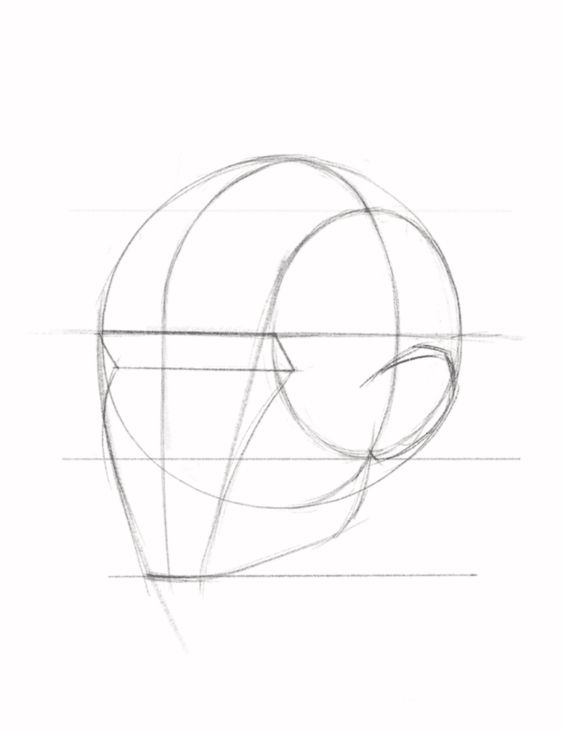
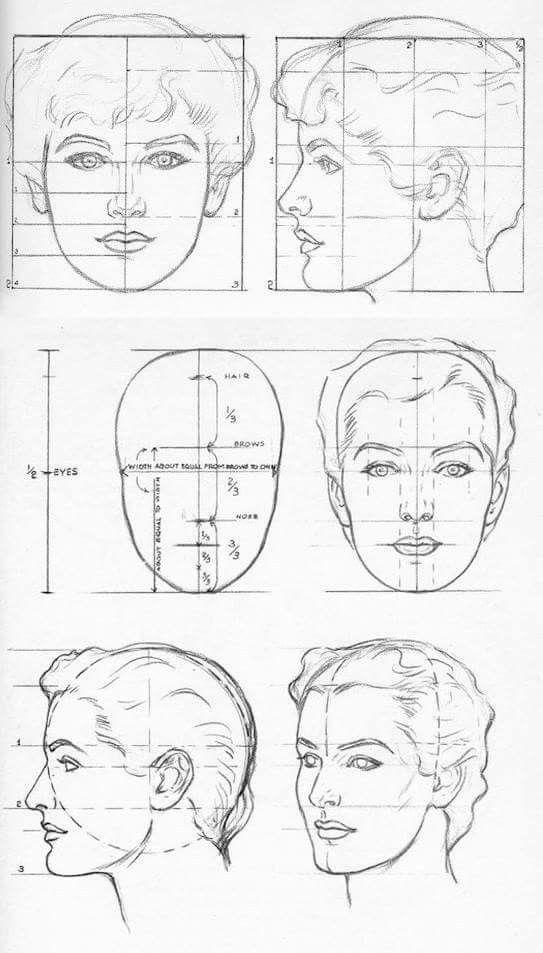
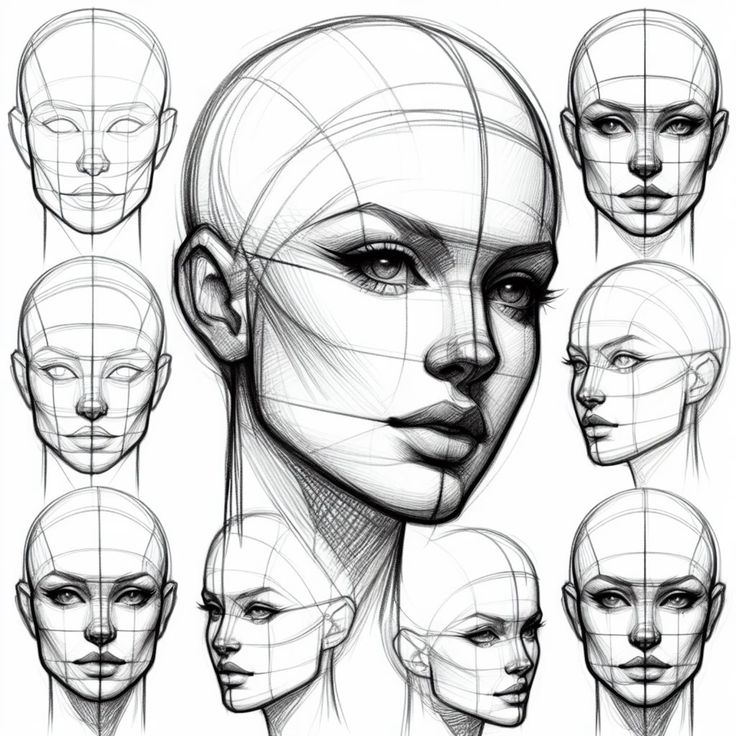
When drawing a portrait, beginning with basic shapes makes the process simpler. Circles, ovals, and rectangles help map out the head, features, and proportions.
The head can start as an oval or an egg shape. This provides a foundation to refine later.
Place the eyes, nose, and mouth using horizontal and vertical guidelines. Use smaller shapes for each feature.
The eyes can begin as almond shapes. The nose can start as a triangle or an oval.
Using these shapes helps keep everything in the right place. Adjusting and refining the drawing becomes easier this way.
2. Use a grid system
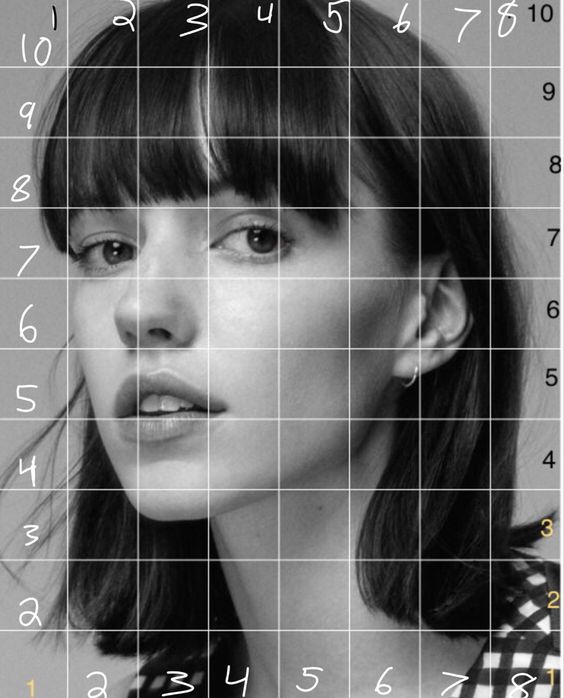
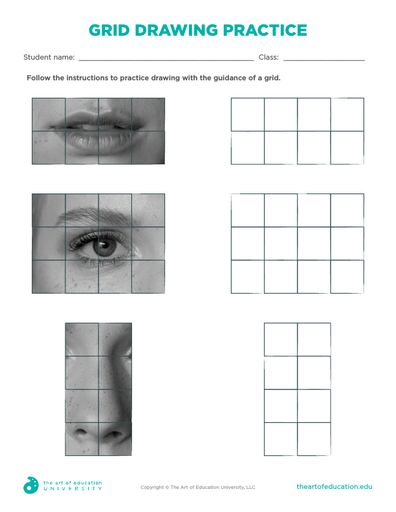
A grid system helps artists place features accurately. By dividing the reference photo and the drawing surface into equal squares, it becomes easier to see where each part of the face should go.
First, draw a grid over the reference photo. Make sure the lines are straight and the squares are even. Then, draw the same grid lightly on the drawing paper.
Each square in the grid represents a part of the portrait. Focus on one square at a time. This method keeps proportions correct and features well-aligned. It’s especially helpful for beginners who find it hard to judge distances by eye.
A grid system reduces mistakes. When the artist finishes, they can erase the grid lines. The drawing will be more accurate, and the overall likeness of the subject will improve.
3. Focus on proportions
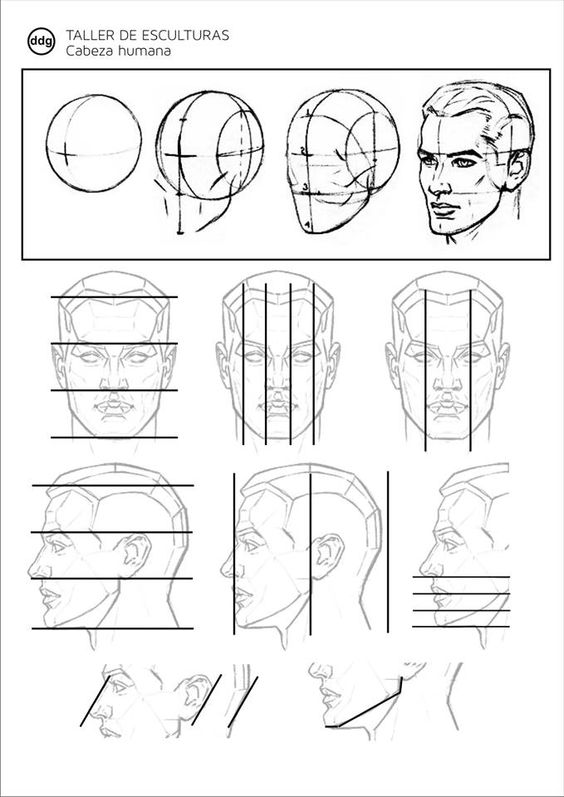
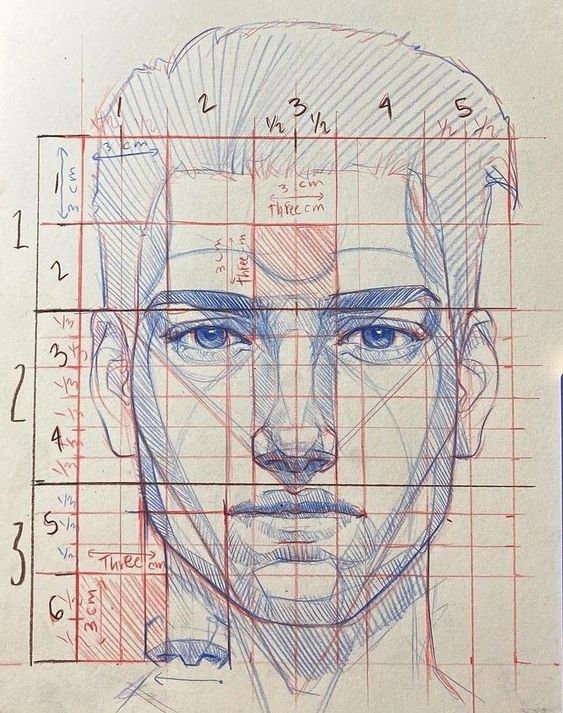
To draw a realistic portrait, getting the proportions right is essential.
Start by studying the face. Notice the relationships between different features like the eyes, nose, mouth, and ears.
The eyes are typically located halfway down the head. The distance between the eyes is usually about the width of one eye.
The bottom of the nose is generally halfway between the eyes and the chin. The mouth typically sits one-third of the way down between the nose and chin.
Use light, quick lines to map out these points before adding details. Having these reference points helps keep features balanced and well-placed.
Check the angles and distances as you draw. Compare different parts of the face constantly to ensure accuracy.
Remember, every face has unique proportions. Regular practice will help you spot and capture these differences better.
4. Study anatomy
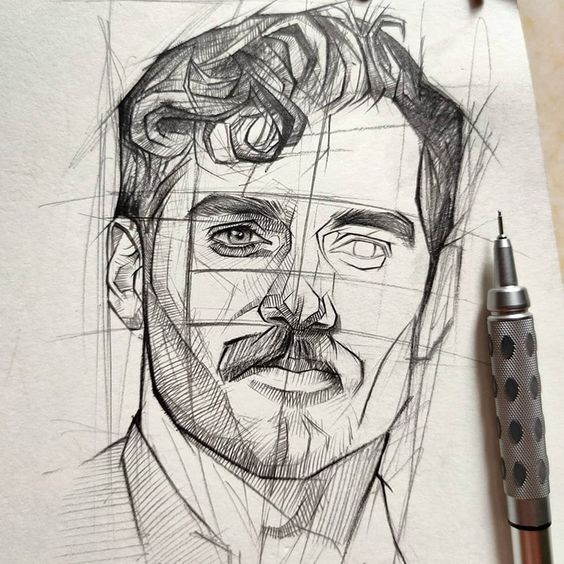
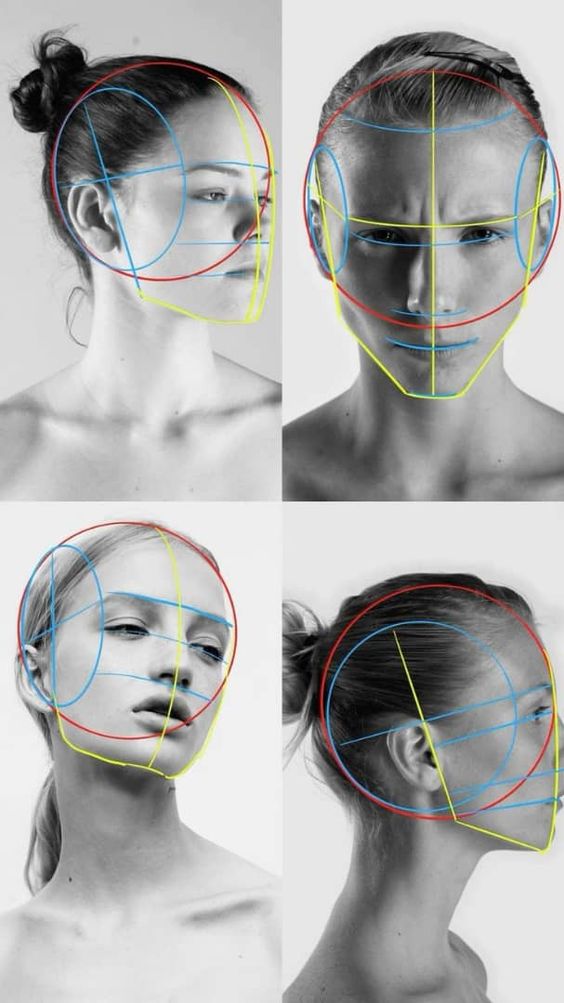
Knowing human anatomy helps artists draw portraits more accurately. Understanding the structure of the skull and muscles can improve the way you shade and detail the face.
Focus on learning the bones of the skull. The shape of the skull affects the overall proportions of the face. Recognizing these shapes makes it easier to draw realistic heads.
Muscles also play a key role. They show how the skin stretches and folds. Learning about facial muscles helps depict different expressions and emotions more convincingly.
Practice drawing basic anatomical parts first. Start with the skull, then move on to muscles. This practice will make your portraits look more lifelike.
Use reference materials to study anatomy. Anatomy books, online resources, and live models can provide valuable insights. Observing real-life examples strengthens your grasp of human proportions.
Try not to stress over every small detail. Focus on understanding the main structures. Over time, your knowledge will grow, making your drawings more natural and realistic.
5. Practice facial expressions
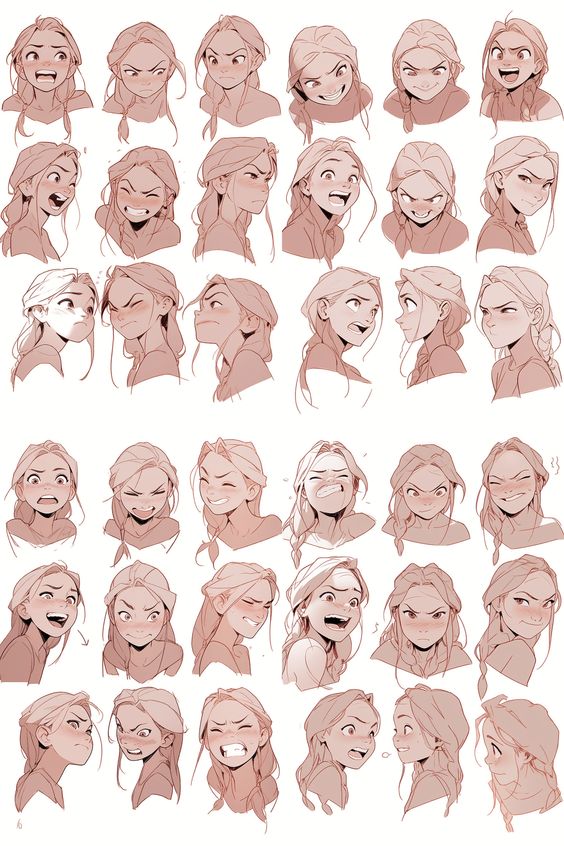
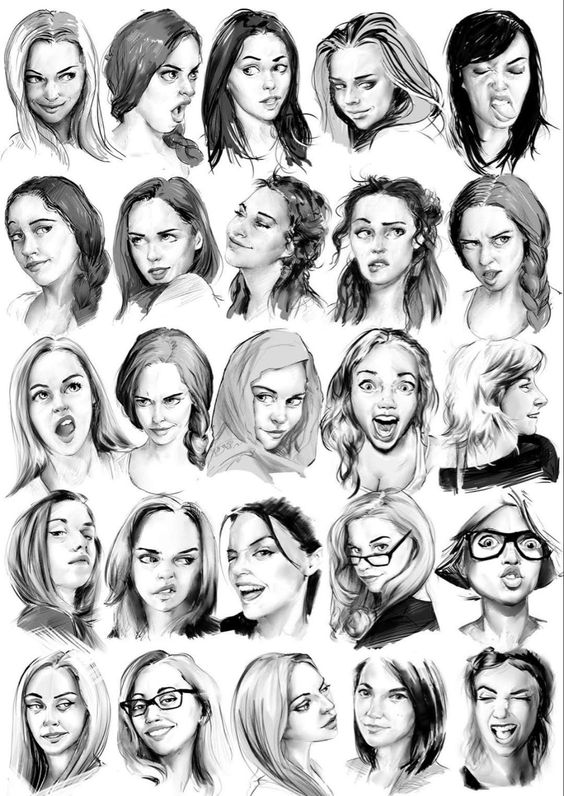
Drawing facial expressions adds life to portraits. They reflect mood and emotions clearly. Focus on the eyes and mouth first. These areas show the most expression.
Spend time sketching different expressions. Try happy, sad, angry, and surprised faces. Look at yourself in a mirror or use photo references. Notice the small changes in the features.
Practice drawing quick sketches. These help capture the essence of an expression. Don’t worry about details at this stage. Focus on the overall feel.
Study different faces and how they express emotions. Each person has unique ways of showing feelings. Pay attention to these differences.
Lastly, keep practicing. The more you draw different expressions, the better you’ll get. Keep observing real people and use their expressions in your drawings. This will make your portraits more lively and realistic.
6. Utilize reference photos
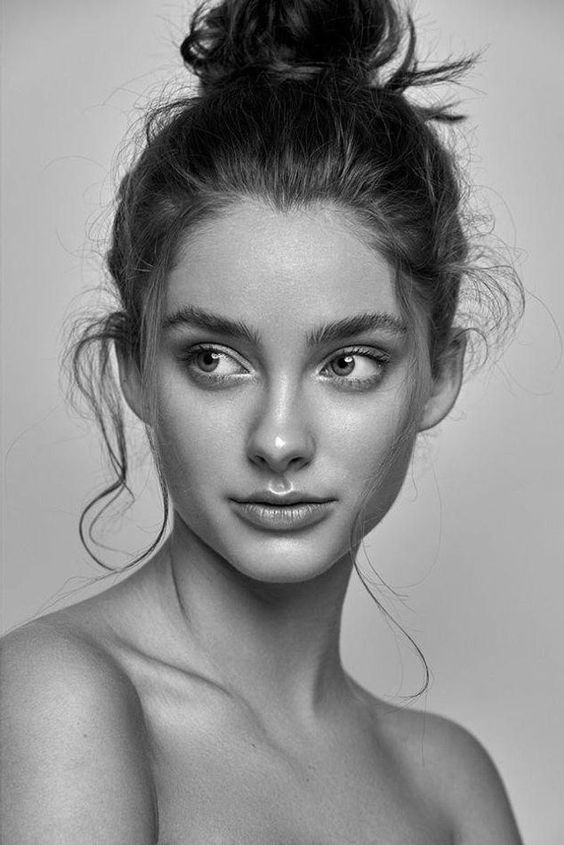
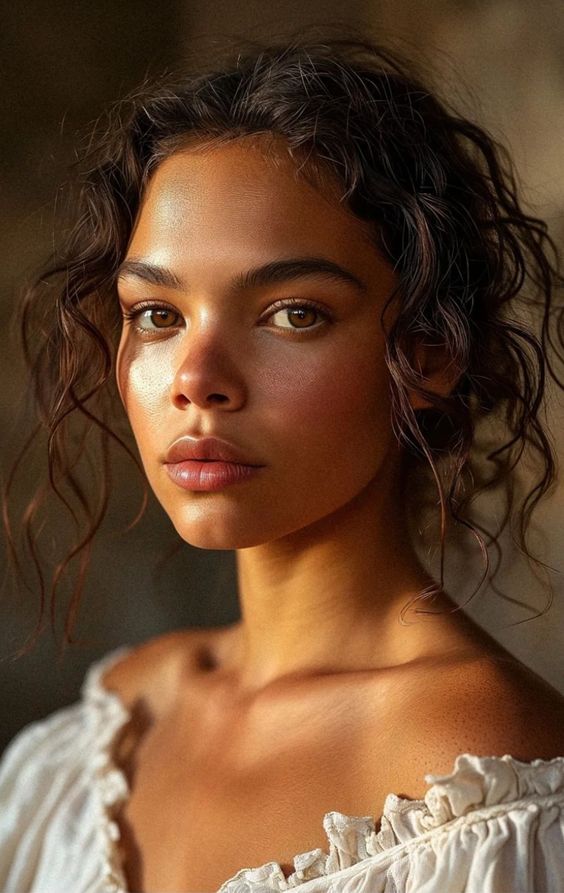
Reference photos are essential tools for portrait artists. They help capture accurate proportions and details. Artists can study different facial expressions, lighting, and angles.
Using reference photos also allows for better understanding of textures. By analyzing real images, artists can improve their techniques for drawing hair, skin, and clothing.
It’s important to choose high-quality photos. Clear images with good lighting make it easier to see fine details. Zoom in to observe specific features closely.
Artists should not rely solely on memory. Even experienced artists use references to ensure accuracy. Reference photos provide a steady guide throughout the drawing process.
Experiment with different sources. Photographs from magazines, online galleries, or personal collections can offer a variety of subjects. This variety aids in practice and skill development.
Taking your own photos is another valuable approach. Personal photos allow control over lighting and angles, tailoring the reference to specific drawing needs.
7. Understand lighting and shadows
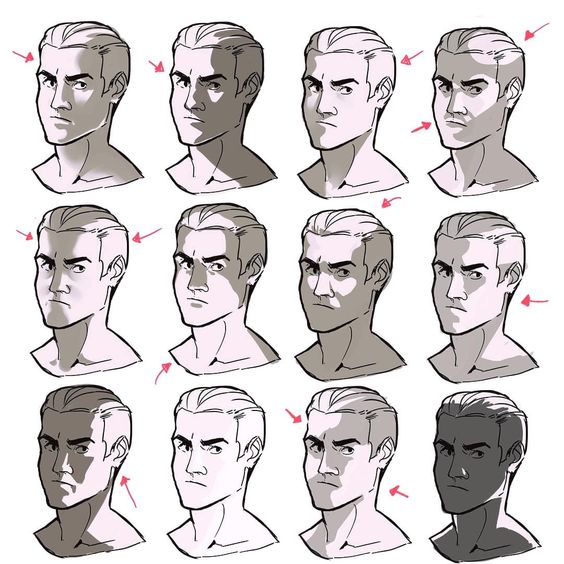
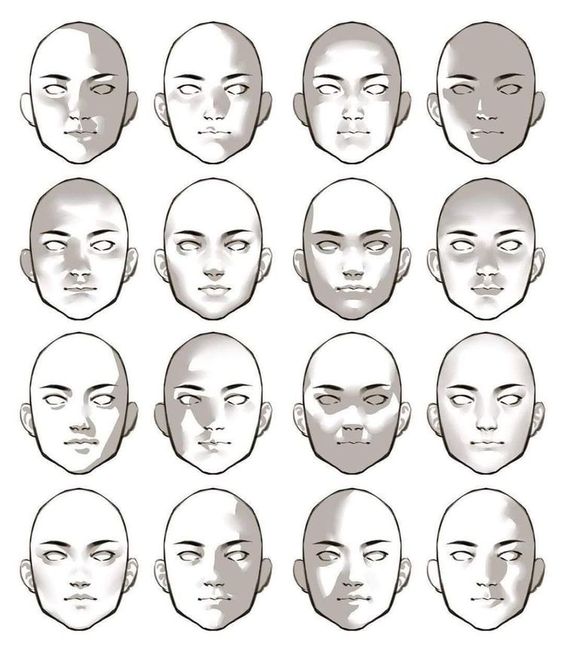
Lighting is crucial in portrait drawing. It affects how features look and how shadows fall. Artists should study how light hits the face from different directions.
Different light sources create different shadows. Natural light might make soft shadows. Artificial light might make sharp ones. Knowing how to draw these can make a huge difference.
Shadows show depth. Deep shadows can make parts of the face look like they are farther back. Small shadows can make features stand out. This adds realism to drawings.
Pay attention to highlights too. Highlights are the bright spots where light hits directly. They balance shadows and help make the face look three-dimensional.
Practice drawing with different lighting setups. Try side lighting, top lighting, and back lighting. Observing how shadows change with each setup can improve an artist’s skill.
Studying photographs can help. Look at photos with strong shadows and highlights. Note where the light source is and how it affects the face.
Using shading techniques can add to this. Cross-hatching or blending can mimic shadows and highlights. This builds the illusion of depth and form.
8. Experiment with different mediums
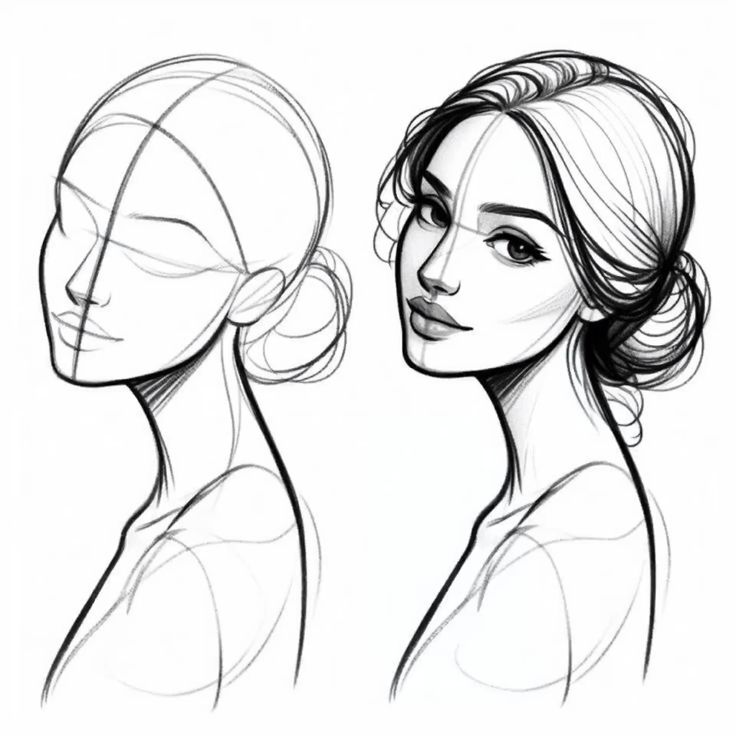
Using different mediums can enhance portrait drawing skills. Graphite pencils are popular for detail and control. They allow for fine lines and shading variations.
Colored pencils add vibrancy and depth. They can create more dynamic and engaging portraits. Blending different colors can make skin tones look more realistic.
Charcoal is another great option. It creates deep, rich blacks and soft grays. It’s ideal for expressive and bold portraits, giving a different texture and depth.
Watercolors offer a unique look. They can give portraits a soft, dreamy effect. Watercolors require a different technique but can be very rewarding.
Ink pens bring sharpness and precision. They work well for bold outlines and detailed features. Ink also offers a permanent, striking finish.
Pastels can be used for a softer look. They blend well and create smooth transitions of color. Pastels are great for adding texture and a painterly effect.
Mixing mediums can also be effective. Combining pencils with watercolors or ink can create unique results. Experimenting helps artists discover their preferences and strengths.
9. Master line work
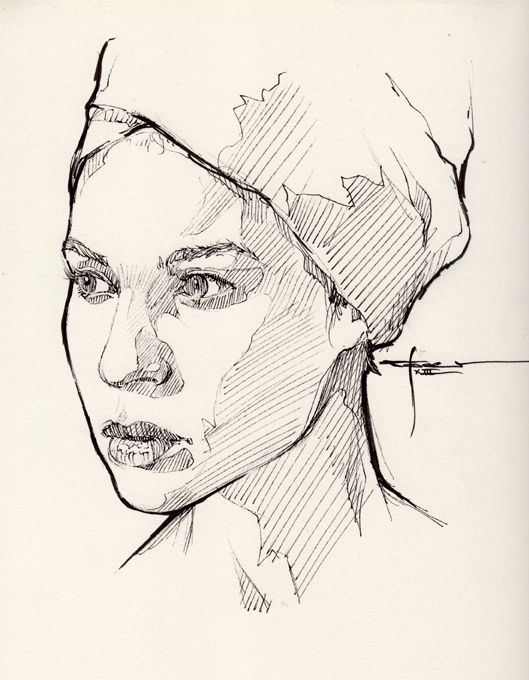
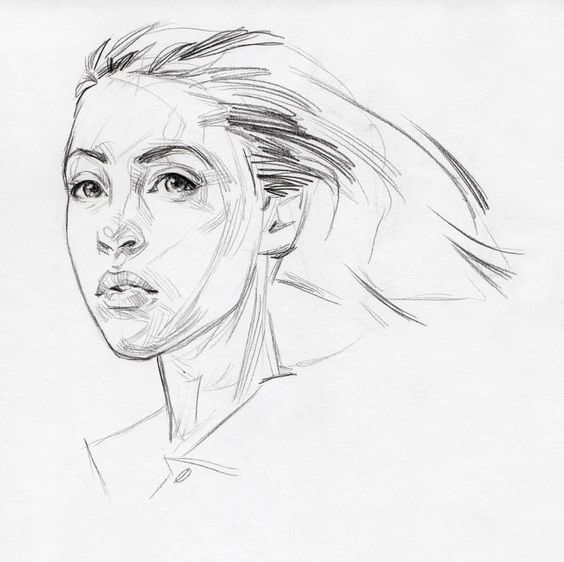
Mastering line work is crucial in portrait drawing. It adds depth and detail to your sketches. Start by practicing clean, confident lines. Avoid chicken scratching or overly sketchy lines.
Experiment with line thickness. Thicker lines can emphasize shadows and contours, while thinner lines can highlight delicate features. Use varying pressure on your pencil to achieve this.
Pay attention to line direction. Follow the natural curves of the face and features. This helps to create a more realistic appearance and improves the overall flow of your drawing.
Practice hatching and cross-hatching techniques. These can be used to create shading and texture. Proper use of hatching can add depth and dimension to your portraits.
Maintain a steady hand. A shaky hand can lead to uneven lines. Practice drawing straight lines and smooth curves to improve your control.
Use references to study different styles of line work. Analyze how other artists use lines to convey expressions, textures, and lighting. This can provide inspiration and improve your skills.
Experiment with different tools. Try pens, markers, and digital brushes to see how they affect your line work. Each tool offers unique possibilities for your drawings.
Consistency is key. Regular practice will help you develop a steady and confident line style. Aim to sketch a variety of faces and features to build your skillset.
10. Pay attention to details
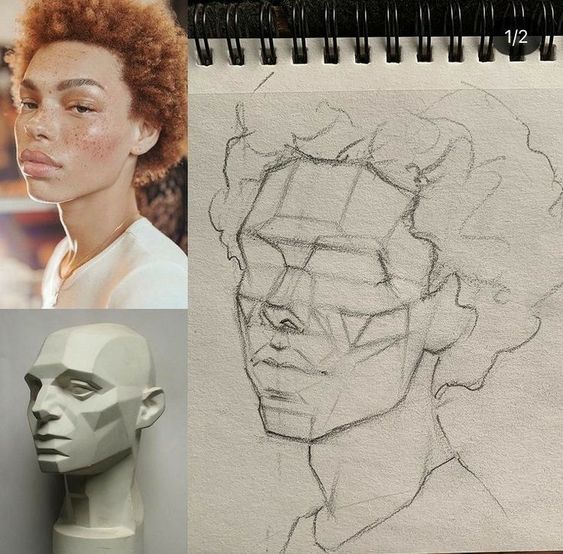
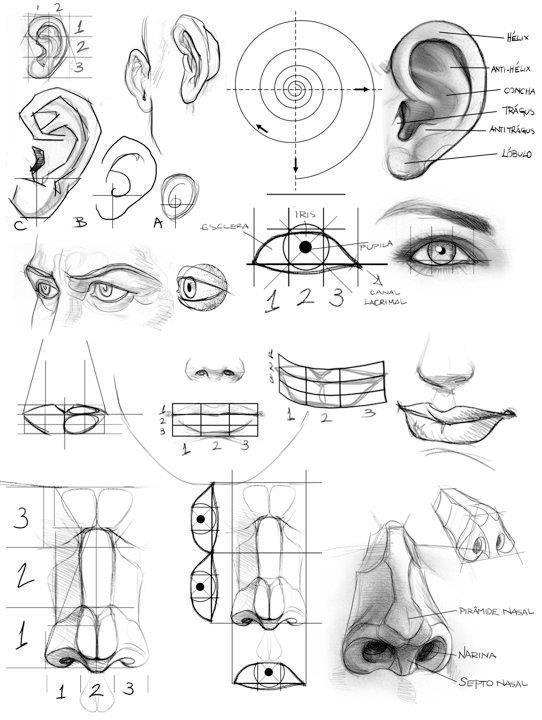
Details make a portrait come alive. Small features like freckles, wrinkles, and scars can add character. They help to capture the essence of the person you’re drawing.
Study the subject closely. Notice the way light hits their face. Shadows bring depth and dimension. Look at the texture of the skin and the unique lines.
Don’t overlook the eyes. They are often called the windows to the soul. Spending extra time on them can make your portrait more realistic. Eyebrows and eyelashes also need careful attention.
Hair can be challenging, but breaking it into sections helps. Look at the direction of the strands. Different textures require different techniques. Curls, waves, and straight hair each need different strokes.
Clothing and accessories add context. Pay attention to folds and how fabrics drape. Jewelry and glasses should be drawn precisely. These small elements can enhance your portrait.
11. Learn to Draw Hair Realistically
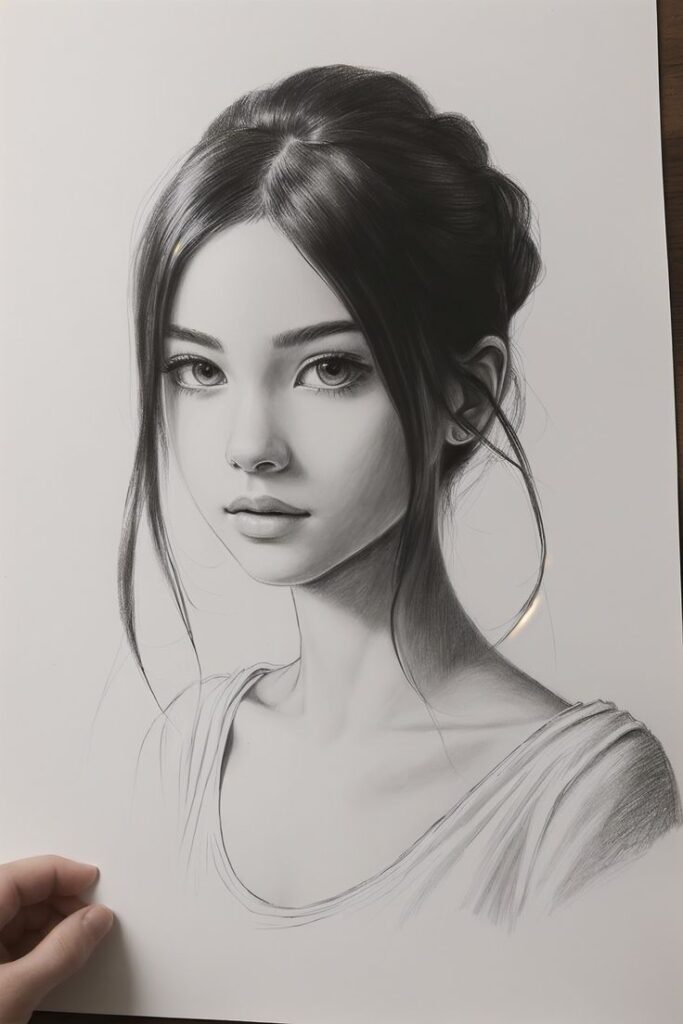
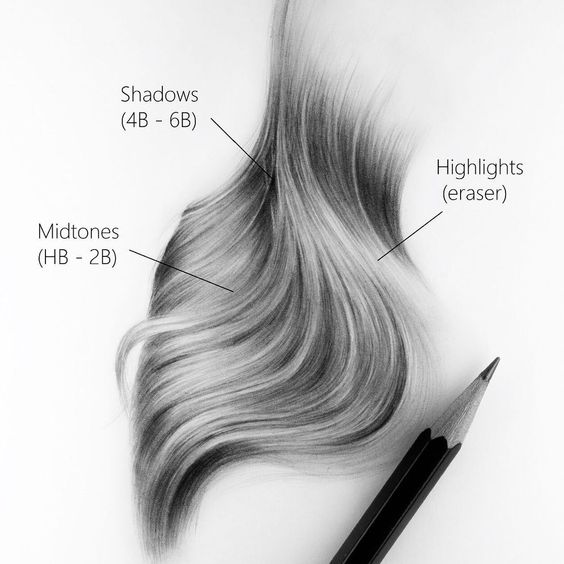
Learning to draw hair realistically can greatly improve a portrait. Start by observing how hair flows naturally. Notice the way it curves and falls.
Instead of drawing individual hairs, focus on the larger shapes. Use light strokes to outline these shapes. This helps to create volume and depth.
Pay attention to the direction of hair growth. Make the strokes follow this direction. Use a variety of line weights to add texture. Light lines work for highlights, while darker lines build shadows.
Highlight areas where light hits the hair. Use an eraser to create these highlights. This adds a shiny, realistic look.
Practice drawing different hair types. Straight, curly, and wavy hair all have unique patterns. Study reference images closely for accuracy.
Avoid over-detailing every strand. Too many lines can look messy. Simplify the hair into sections.
Use layering techniques. Start with a base layer to block in the main shapes. Gradually add detail with more layers.
Experiment with different tools. Pencils of varying hardness can create different effects. Soft pencils make dark, bold lines; hard pencils produce lighter, delicate lines.
By practicing these techniques, anyone can learn to draw hair that looks real and natural.
12. Study different portrait styles
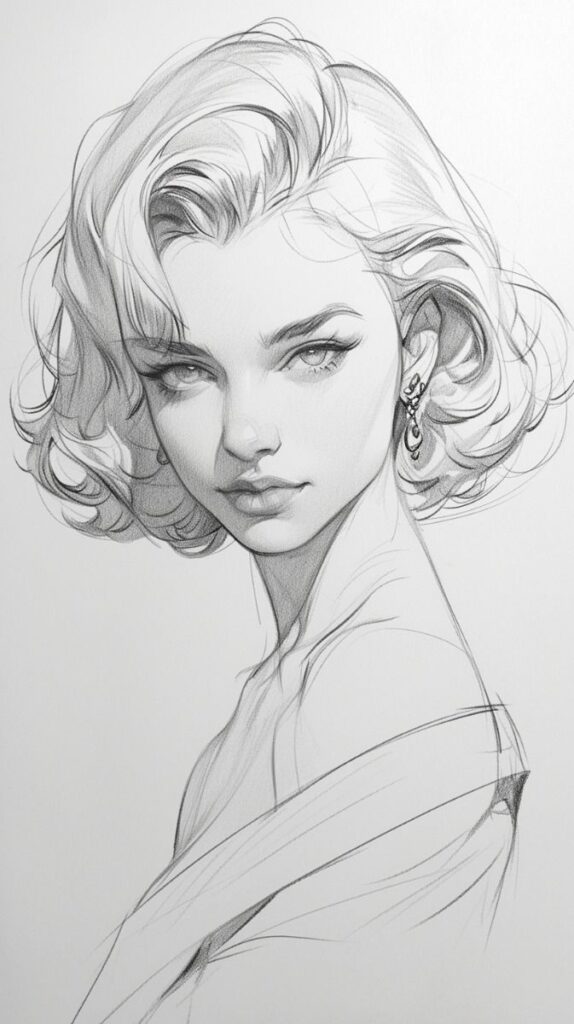
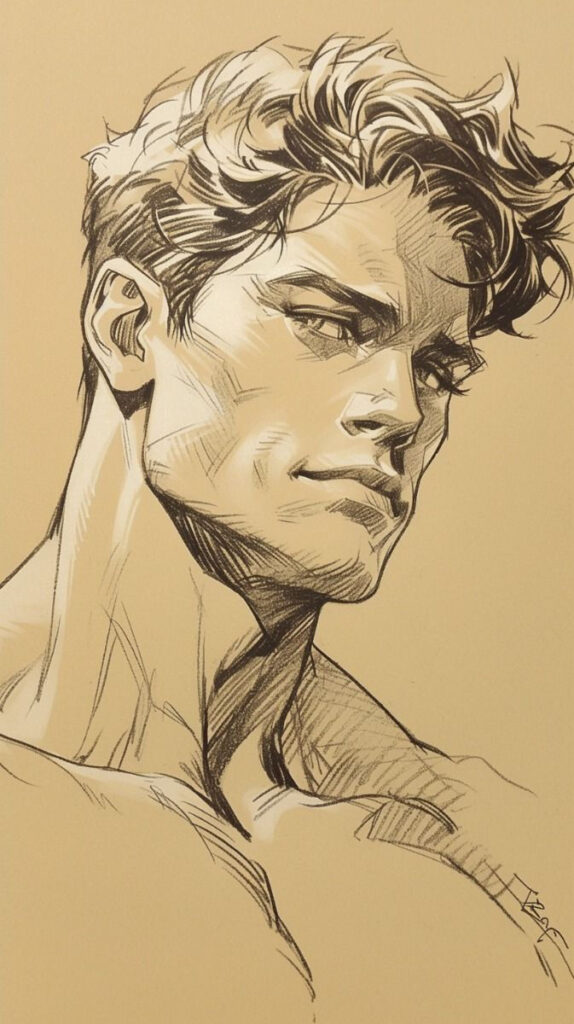
Artists should explore different portrait styles to expand their skills. Realism focuses on capturing life-like details. This includes accurate proportions and shading. Artists like Leonardo da Vinci are known for this style.
Impressionism, on the other hand, uses loose brushwork and vibrant colors. This style captures the essence of a subject rather than fine details. Edgar Degas is a notable artist in this genre.
Cubism breaks portraits into shapes. It presents multiple angles within a single view. Pablo Picasso is famous for using this approach. This style helps artists think about form differently.
Abstract portraits use colors and shapes to express emotions. They do not aim to look like a real person. Wassily Kandinsky’s works are good examples of this style. Studying these can inspire creativity.
Caricature artists exaggerate features for comic effect. They often emphasize eyes, noses, or mouths. This style is common in political cartoons. Learning caricature can improve observational skills.
Each style offers something valuable. Trying different styles helps artists grow. They learn new techniques and ways to express their ideas. This makes their own portraits more interesting.
13. Practice consistently
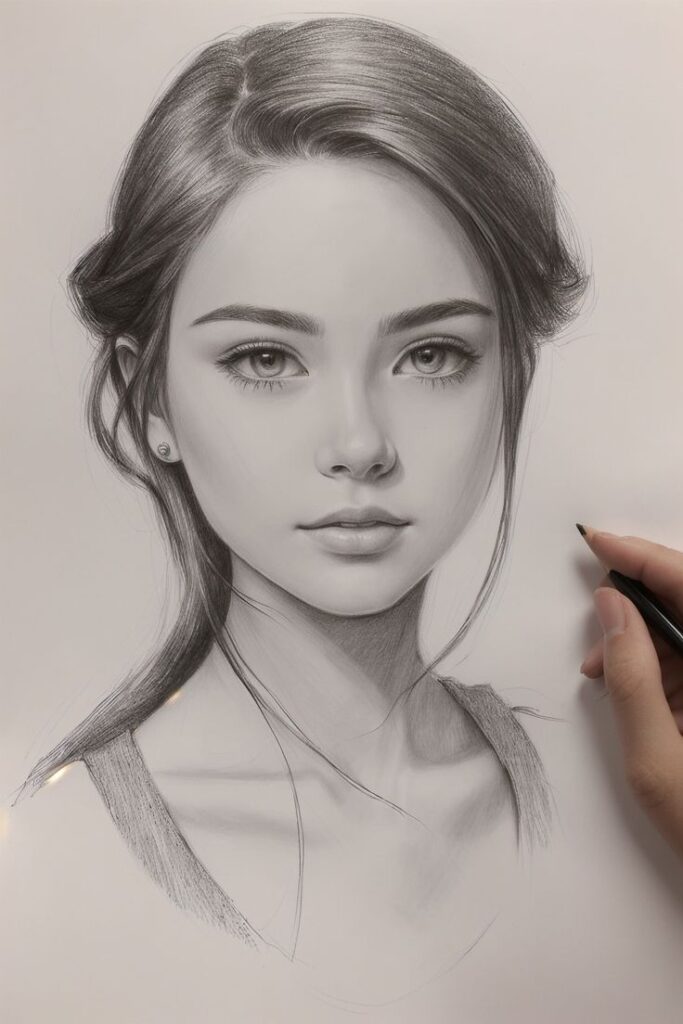
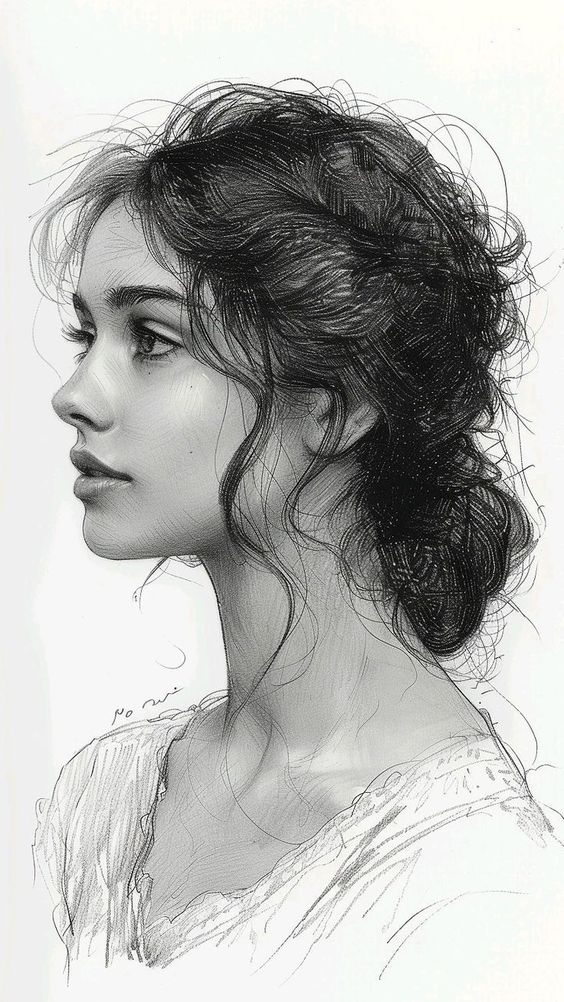
To improve at portrait drawing, practice regularly. He should set aside time every day to draw, even if it’s just for a few minutes. Regular practice helps to build skills and maintain them.
Practicing consistently helps her eye and hand coordination. Over time, this habit makes details easier to capture. It reduces the struggle with proportions and features.
They can use various references to keep it engaging. Drawing from real people, photos, or even statues can provide different challenges and learning opportunities.
Consistency in practice helps in recognizing mistakes and correcting them. It builds confidence and skill, making the artist better with each session.
It’s important for him not to get discouraged by errors. Each mistake is a learning opportunity and part of the improvement process. Consistent practice turns mistakes into progress.
Setting small goals can be motivating. She might focus on achieving accurate proportions one week, then shading techniques the next. Small, achievable goals can help in breaking down the practice into manageable tasks.
They should also review their previous works to see progress. Tracking improvement over time can boost motivation and show how much consistent practice pays off.
14. Use soft shading techniques
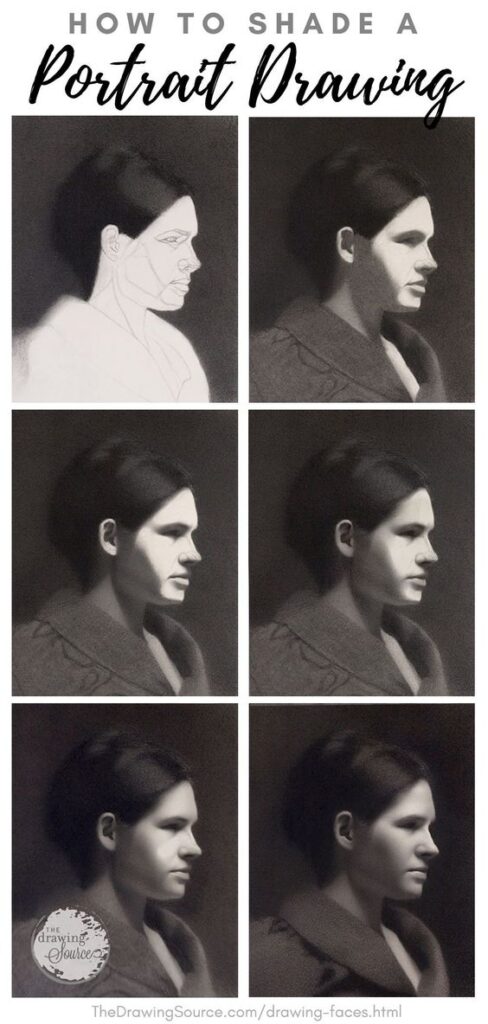
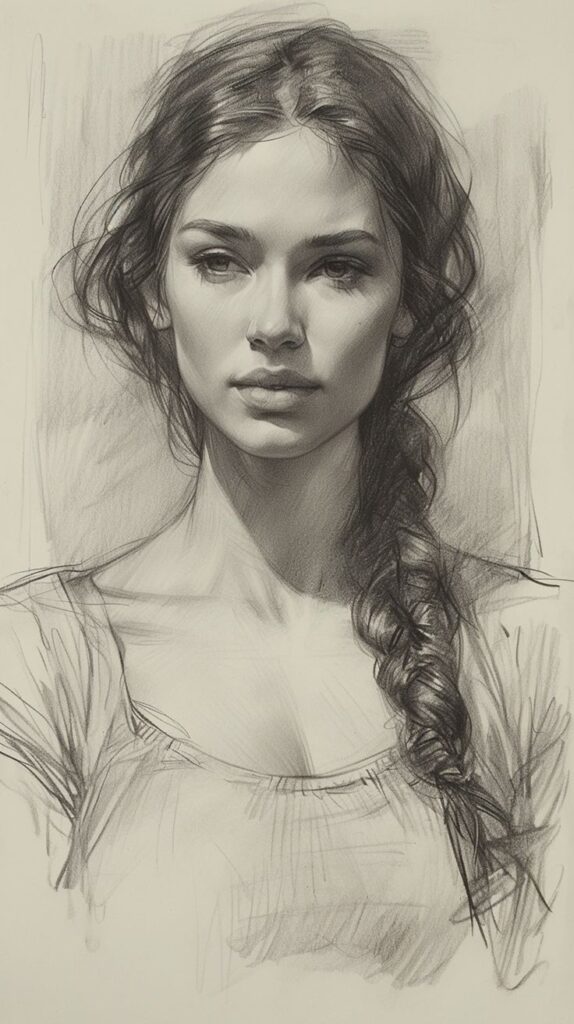
Soft shading can make a portrait look more realistic. It helps to create smooth transitions between light and dark areas. This technique can be done using tools like blending stumps, tissue paper, or your fingers.
Start by applying gentle, light strokes with your pencil. Gradually build up the layers of shading. Blend the graphite to soften any hard lines.
Focus on areas like cheeks, forehead, and neck where shadows are subtle. Soft shading can add depth to the eyes and lips, making them look more lifelike.
Experiment with different blending tools to see which one works best for you. Practice makes perfect, so keep trying to improve your technique.
Soft shading can also help to create a sense of volume. It can give your portrait a three-dimensional feel.
15. Develop a Steady Hand
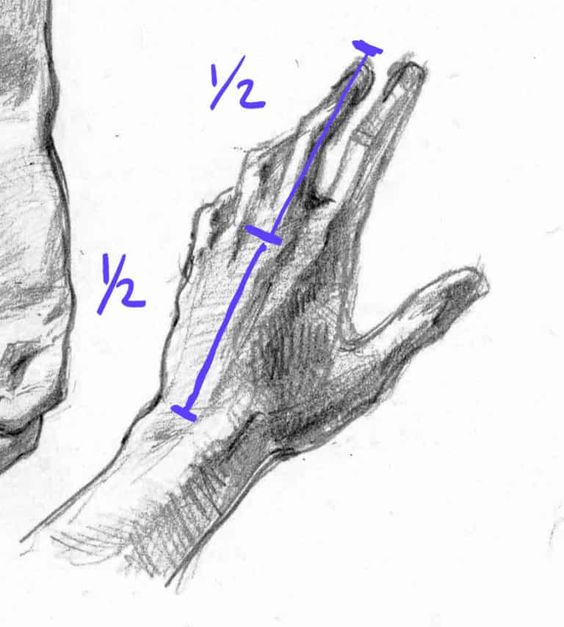
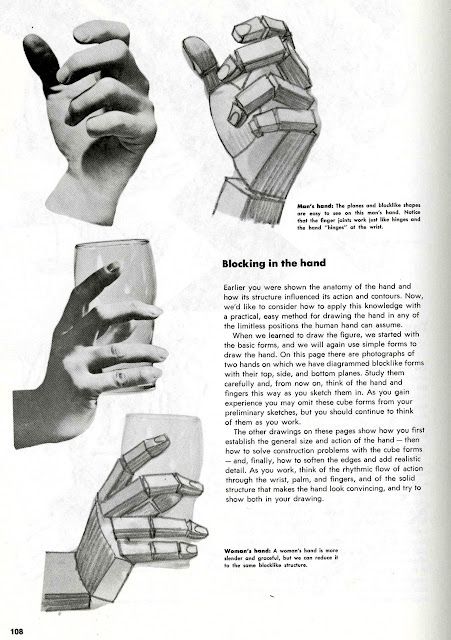
A steady hand is crucial for precise lines and details in portrait drawing. To improve, practice drawing basic shapes and lines regularly.
Incorporate exercises like tracing over templates or using a ruler to keep lines straight. These small practices build muscle memory.
Holding the pencil lightly helps control and steadiness. Pressing too hard can lead to shaky lines.
Take breaks to avoid fatigue. A tired hand is more likely to shake. Stretch your fingers and wrists regularly.
Using your whole arm, not just your wrist, provides smoother motion. This technique is especially useful for long strokes.
Practice drawing from your shoulder. This helps in maintaining steady lines and curves. It also reduces strain on the wrist.
Work on your grip. A relaxed grip reduces tension and helps in drawing more steady lines.
Experiment with different pencil weights and textures. Some artists find that certain tools provide better control.
Focus on consistency. Regular practice and attention to technique will gradually develop a steadier hand.
16. Focus on the eyes first
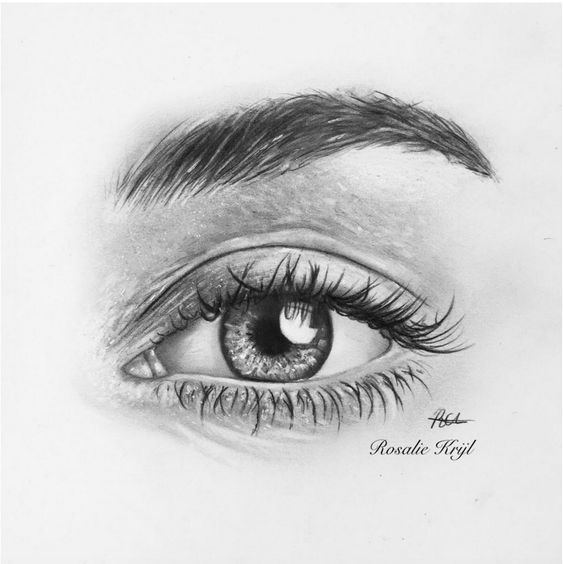
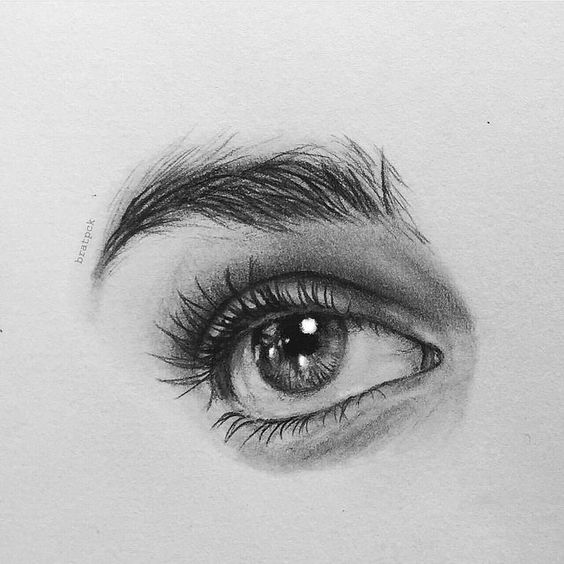
When starting a portrait, focusing on the eyes can make a big difference. The eyes are often the first thing people notice. They express emotions and bring the portrait to life.
Drawing the eyes first also helps set the proportions for the rest of the face. Once the eyes are in place, it’s easier to align the nose, mouth, and other features.
It’s important to capture details like the iris, pupil, and eyelids. These small elements add depth and realism. Paying attention to light reflections in the eyes can also make them look more lifelike and vibrant.
Using light strokes and building up gradually can prevent mistakes. Erasing and redrawing details becomes simpler when starting with the eyes. This approach allows the artist to adjust and perfect the eyes before moving on.
Focusing on the eyes can build confidence. It’s rewarding to see expressive, accurate eyes early in the process. This motivates the artist to continue with the rest of the portrait.
17. Create depth with layering
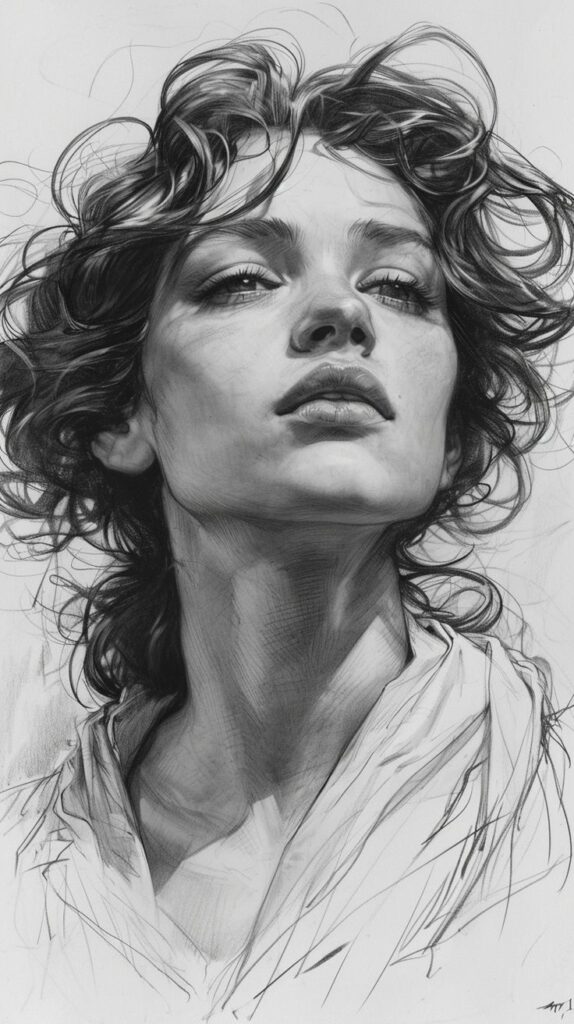
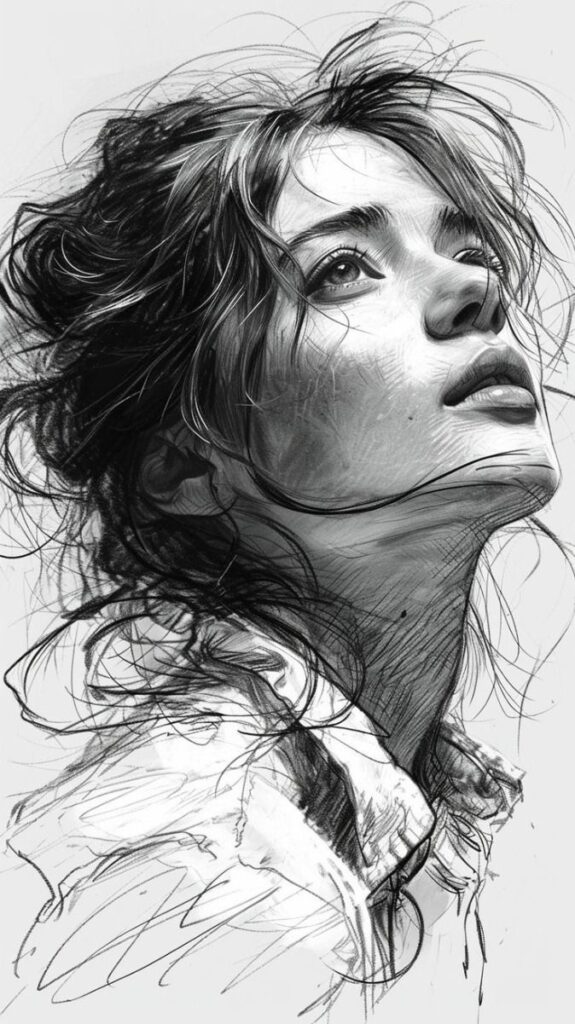
Layering shades and tones is key to adding depth to your portrait drawings. Start with the lightest shades and gradually build up to the darker values. This technique helps to create a more realistic and three-dimensional look.
Use different pencil pressures to achieve varied tones. Light pressure will give you softer shades, while harder pressure will create darker lines. This contrast is important for bringing out the depth.
Blending tools can also help to smooth transitions between layers. Items like blending stumps or tissues can push graphite into the paper, making the texture even more lifelike. Be careful not to overblend, as you may lose some of the details.
Look closely at your subject and notice where the shadows and highlights are. These observations will guide your layering decisions. Shadows around the eyes, nose, and mouth add dimension and make the portrait come to life.
18. Use Guidelines for Accuracy
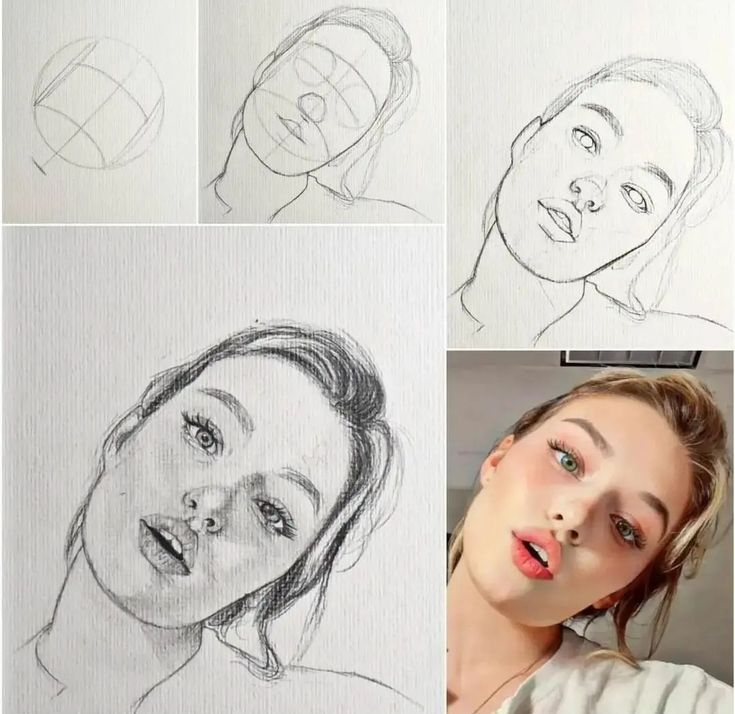
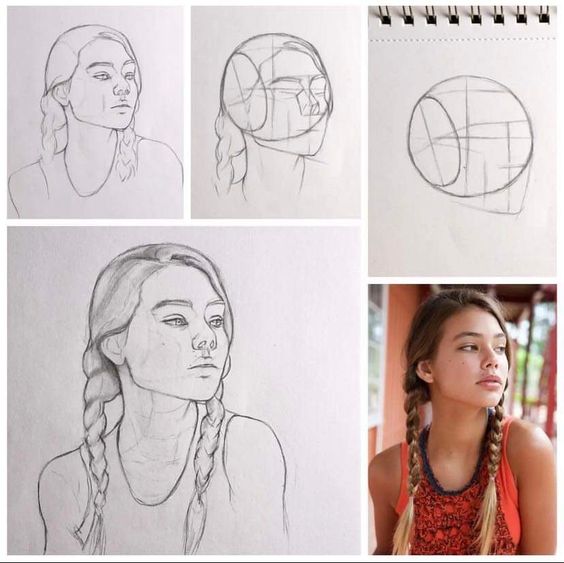
Guidelines are essential for keeping your portrait drawing accurate. They help you plan the placement of the eyes, nose, mouth, and other features. By sketching light lines, you ensure that everything is in the right spot before you add details.
Start with a vertical line down the center of the face. This will divide the face into two equal halves. Then draw a horizontal line halfway down the face to mark where the eyes will go.
Next, add another horizontal line halfway between the eye line and the chin. This line helps place the bottom of the nose. Finally, a third horizontal line between the nose and chin guides the placement of the mouth.
Using these basic guidelines, you can avoid common mistakes like misaligned features. It’s a simple yet powerful technique that supports both beginners and experienced artists.
For more complex details, you can add extra lines. For example, you might draw guidelines for the eyebrows, hairline, or ears. These additional lines make it even easier to achieve a precise and realistic portrait.
Erase the guidelines gently once you are satisfied with the placement of the facial features. This leaves you with a clean base to work from.
Guidelines make a noticeable difference in the accuracy and symmetry of your portraits. They are a valuable tool for any portrait artist aiming for lifelike results.
19. Draw from life whenever possible
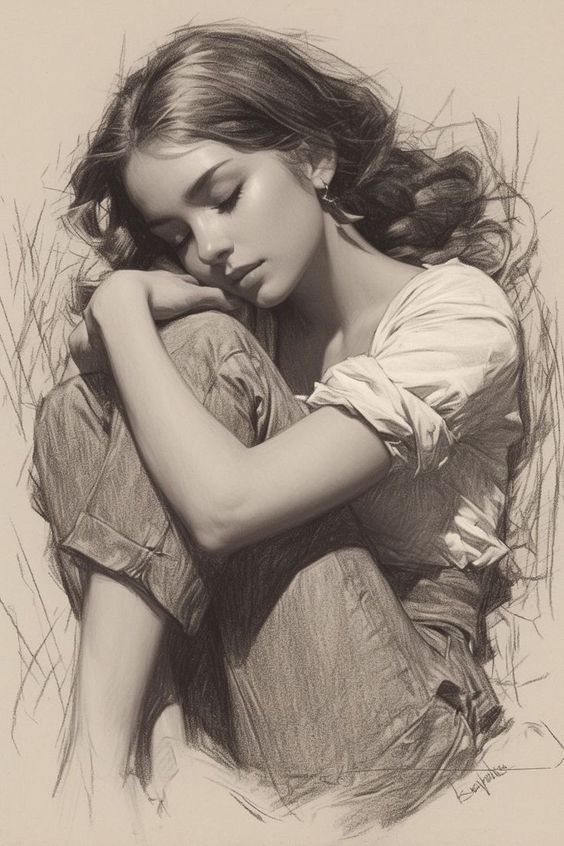
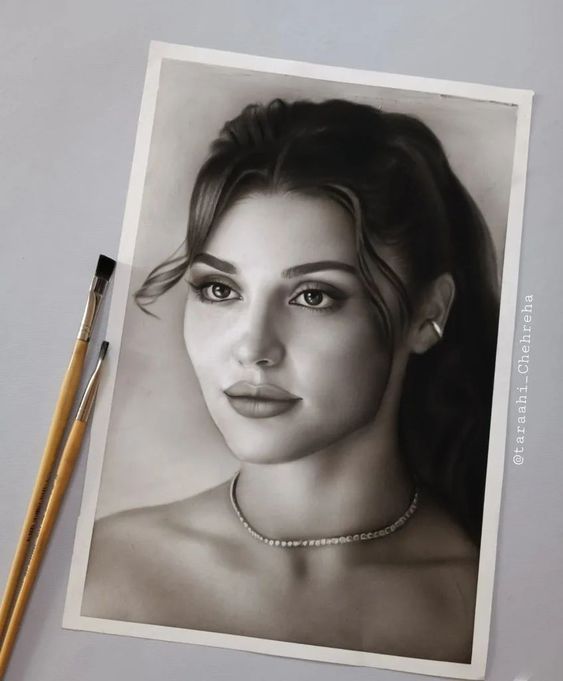
Drawing from life helps artists see different angles and details. It trains the eye to spot shadows, light, and shapes.
People, pets, and outdoor scenes make excellent subjects. Each session builds skills in observing and translating the 3D world onto the 2D page.
Live subjects also help capture movement and emotion. Unlike photos, they offer a unique, ever-changing canvas.
20. Experiment with textures
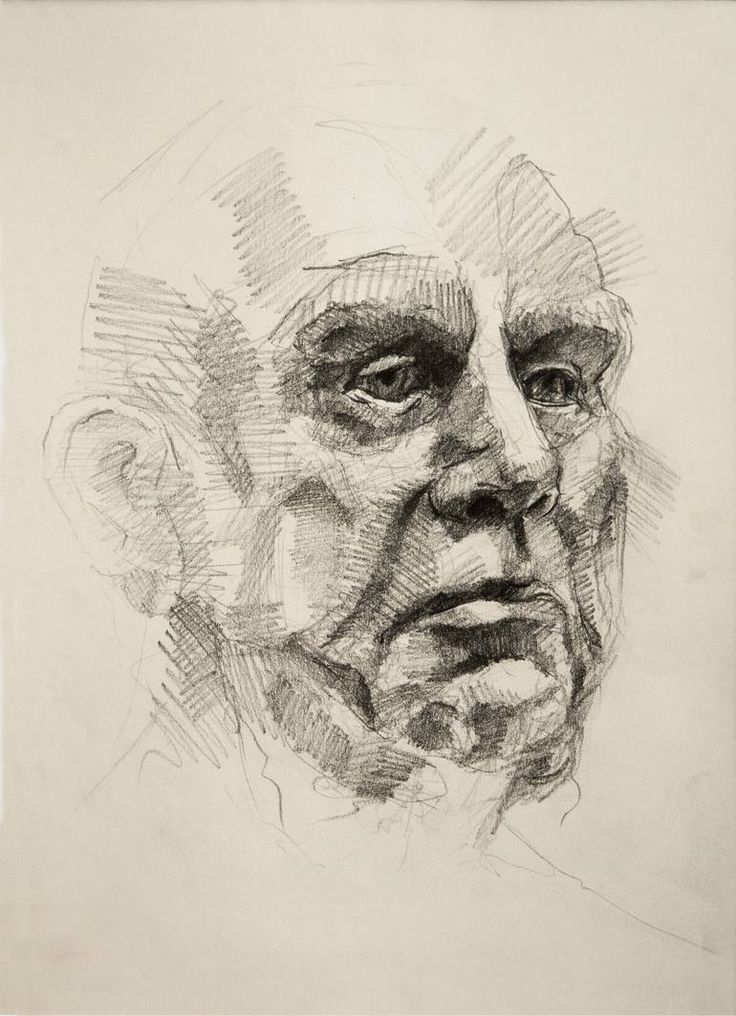
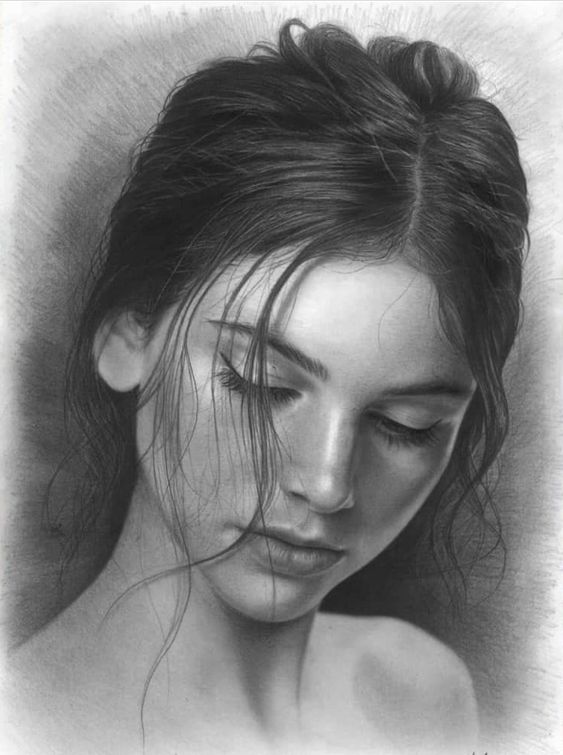
Textures add depth to a portrait. Different tools can create unique effects. Try using pencils, charcoal, or ink for varied textures.
Cross-hatching and stippling are techniques that can make your drawing stand out. Practice them to see which works best for you.
Use different paper types, too. Rough paper gives a grainy texture, while smooth paper provides a clean look.
Blending is another way to experiment. Use blending stumps or your fingers to soften edges and create gradients.
Don’t be afraid to mix media. Combine graphite with pastel or watercolor to achieve interesting results.
Adding texture can turn a simple portrait into a fascinating piece of art. It encourages viewers to look closer and appreciate the details.
Basic Principles of Portrait Drawing
Portrait drawing requires a strong grasp of proportion and scale, an understanding of facial anatomy, and attention to light and shadow.
Understanding Proportion and Scale
Proportion and scale are critical in portrait drawing. The human face has specific measurements that guide the artist. For example, the eyes are typically halfway down the head. The space between the eyes is usually about the width of one eye. The bottom of the nose often aligns with the bottom of the ears.
Using a grid can help maintain accurate proportions. Sketch lightly at first to map out the face, checking distances between features. Correcting proportions early prevents major revisions later. Consistent practice with these measurements is essential for improving accuracy.
Mastering Facial Anatomy
Knowledge of facial anatomy is crucial. Key features include the eyes, nose, mouth, and ears. The eyes have an almond shape and sit ~1 eye-width apart. The nose varies but often matches the space from the eye’s inner corners.
The mouth’s corners align with the centers of the eyes. Understanding muscle and bone structure underneath the skin enhances realism. For instance, knowing how cheekbones influence shadows around the face can add depth.
Realistic hair representation involves understanding hairlines, texture, and flow. Practice drawing individual features before combining them into a full portrait.
Importance of Light and Shadow
Light and shadow give portraits dimension. Recognizing the light source is essential. Shadows fall opposite the light and add contrast, highlighting facial contours.
Common types of shadows include core, cast, and form shadows. Core shadows are the darkest and appear on the side away from the light. Cast shadows are those that “fall” from one feature onto another, like the nose shadow on the cheek. Form shadows show gradual changes on curved surfaces.
Using a range of values from light to dark creates a more lifelike image. Soft shading adds subtleties, showing gentle slopes and curves of the face. Paying attention to light and shadow transforms a flat drawing into a three-dimensional portrait.
Advanced Techniques for Realistic Portraits
Mastering advanced techniques can bring a new level of realism to portraits. Key areas include creating textures and details, layering and blending techniques, and using reference photos effectively.
Creating Textures and Details
Textures add depth to portraits. To get realistic skin, use a variety of pencil strokes. Light, short strokes for smooth areas and cross-hatching for rougher textures. It’s important to notice how light interacts with the skin and create small details like pores and wrinkles.
Hair and clothing need different strokes. For hair, use long, flowing lines and vary the pressure to show highlights and shadows. For clothing, study the fabric and use different textures to show folds and patterns. Experiment with different pencils and techniques to achieve varied textures.
Layering and Blending Techniques
Layering colors and shades builds depth and realism. Start with light layers and gradually build up. This allows greater control over the shading. Use blending tools like a blending stump or tissue to smooth transitions between shades.
Different tools give different effects. A soft brush can blend large areas smoothly, while a tortillon can blend small, detailed parts. Experiment with mixing colors by layering different pigments for richer tones. Patience is key; adding layers slowly will help prevent muddying colors.
Using Reference Photos Effectively
Reference photos guide you in capturing accurate proportions and details. Choose clear, high-resolution photos with good lighting. Study the photo to understand the subject’s features, shadows, and light sources.
Compare frequently while drawing. Measure distances between features regularly to ensure correct proportions. Use grid techniques if necessary to transfer the photo accurately. References are useful for capturing complex elements like expressions and textures. Keep the photo handy to keep the drawing accurate and lifelike.
Common Challenges and Solutions
Artists often face trouble with maintaining proper proportions, striking a balance between creativity and accuracy, and dealing with artist’s block. These challenges can be frustrating, but they are manageable with the right techniques and persistence.
Fixing Proportional Errors
Proportional errors can make a portrait look unrealistic or awkward. A great way to fix this is by using grid methods. Draw a grid over your reference photo and a corresponding grid on your drawing paper. This helps in aligning features correctly.
Another technique is to measure with your pencil. Hold the pencil at arm’s length, lining it up with features on your reference. Compare these measurements to your drawing. This ensures consistency and accuracy.
Pay attention to angles as well. If an eye or nose looks off, check the angle. Sometimes, just rotating the drawing slightly can reveal mistakes.
Balancing Creativity and Accuracy
Balancing creativity and accuracy can be tricky. Sometimes, sticking too closely to the reference can stifle your artistic expression, while being too creative can lead to unrealistic portraits.
One practical tip is to start with accuracy. Draw a convincing likeness of your subject first. This lays a strong foundation. Once you are satisfied with the proportion and features, you can slowly introduce creative elements.
For instance, play with shading and textures after you have established the basic form. This adds your unique style without compromising the likeness. Remember, accuracy doesn’t mean perfection—it means representation that can be enhanced creatively.
Dealing with Artist’s Block
Artist’s block affects everyone at some point. It can halt your progress and dampen motivation. One strategy to combat this is taking breaks. Step away from your drawing for a short period and return with fresh eyes.
Another approach is trying different styles or mediums. If you usually draw realistic portraits, try an abstract or caricature portrait. This shifts your focus and sparks creativity.
Additionally, engaging with other artists or joining art communities can provide inspiration and new ideas. Seeing others’ work and getting feedback can energize and motivate you to continue.
Frequently Asked Questions
Understanding the basics, improving techniques, and knowing the right materials are crucial in drawing realistic portraits. Here are some answers to commonly asked questions about portrait drawing.
What are the fundamental steps for drawing a portrait for beginners?
Beginners should start with basic shapes to outline the head and facial features. Using a grid system can help maintain proper proportions. It’s important to focus on anatomy to understand the structure beneath the skin.
What techniques can improve my skills in drawing realistic portraits?
Practicing facial expressions and studying light and shadow can greatly enhance realism. Consistently sketching from life or photographs will also help in gaining accuracy and confidence.
Why do many artists find portrait drawing challenging?
Portrait drawing is complex due to the detailed anatomy of the human face. Capturing expressions and emotions accurately adds to the difficulty. Precision in proportions is essential and even small mistakes can be noticeable.
How much time is typically required to create a detailed realistic portrait?
The time required can vary depending on the artist’s skill level and the portrait’s complexity. Generally, a detailed realistic portrait can take anywhere from several hours to a few days to complete.
What materials are essential when starting to draw portraits?
Essential materials include quality pencils, erasers, and sketching paper. Charcoal and graphite can also be useful for adding depth and shading. A good sharpener and blending tools like stumps or tissues will enhance your work.
Can you suggest some effective practices for beginners learning portrait drawing?
Regular practice is key. Using reference photos can help in understanding different features. Breaking down the face into simpler shapes and gradually adding details will make the process less overwhelming. Joining art classes or online tutorials can provide structured learning and feedback.
- 9.9Kshares
- Facebook0
- Pinterest9.9K
- Twitter1
- Reddit0
