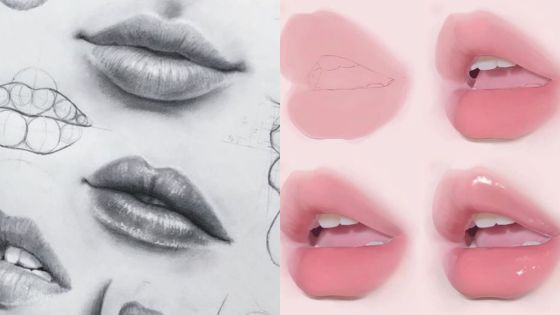
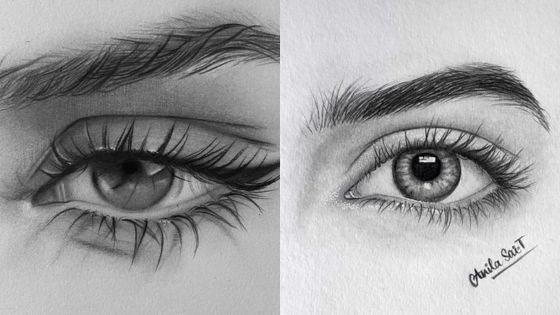
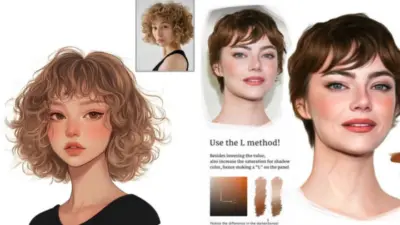
Side Profile Drawing can reveal the natural beauty and unique features of a person’s face. As artists, capturing the elegance of a profile view offers a different perspective compared to front-facing portraits. It challenges us to consider subtle details, from the curve of the nose to the angle of the jawline. Mastering these elements adds depth to our artwork and enriches our storytelling through drawing.
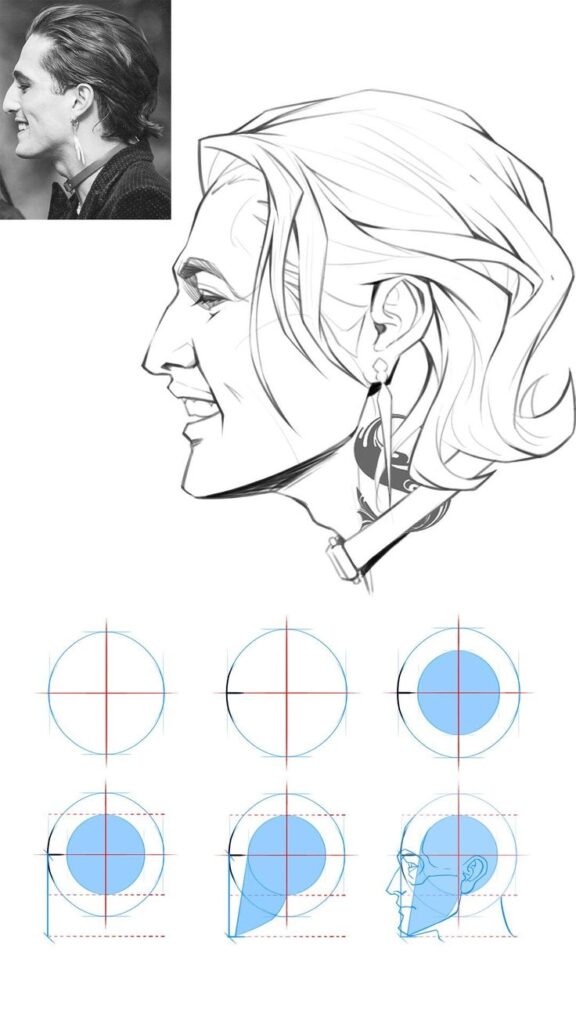
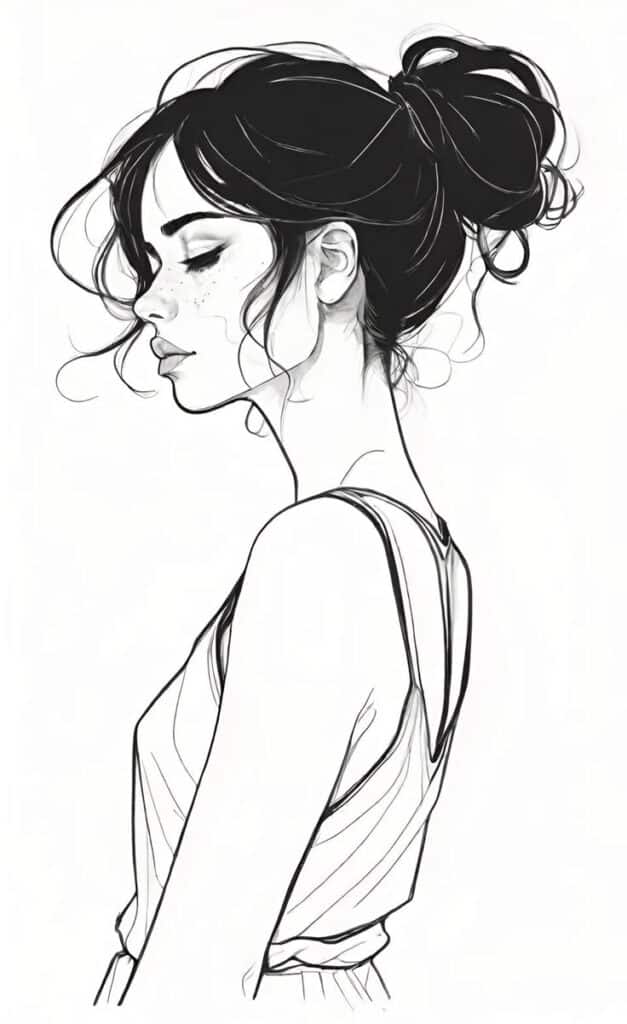
Understanding the basics is crucial, whether we’re just starting or looking to refine our skills. Side profile drawing requires an eye for detail and an appreciation for form. Using the right tools and materials helps bring our vision to life. Exploring various techniques, like shading and line weight, can enhance the realism and expression in our drawings.
Our journey in side profile illustration doesn’t stop at the basics. Incorporating stylization and character design allows us to infuse personality and narrative into each piece. By consistently practicing and experimenting, we improve our craft and expand our artistic horizons.
Key Takeaways
- Basics and details are crucial for drawing an accurate side profile.
- Choose suitable tools to enhance your side profile illustrations.
- Practice and experimentation lead to better drawing skills.
Understanding the Basics of Side Profile Drawing
To draw a side profile effectively, we need to focus on the anatomy of the face, the importance of proportion, and the different perspectives in a profile view. Mastering these elements will improve our ability to create realistic and engaging profile portraits.
Anatomy of a Side Profile
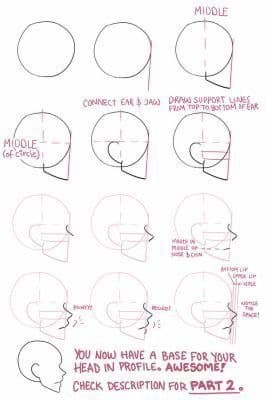

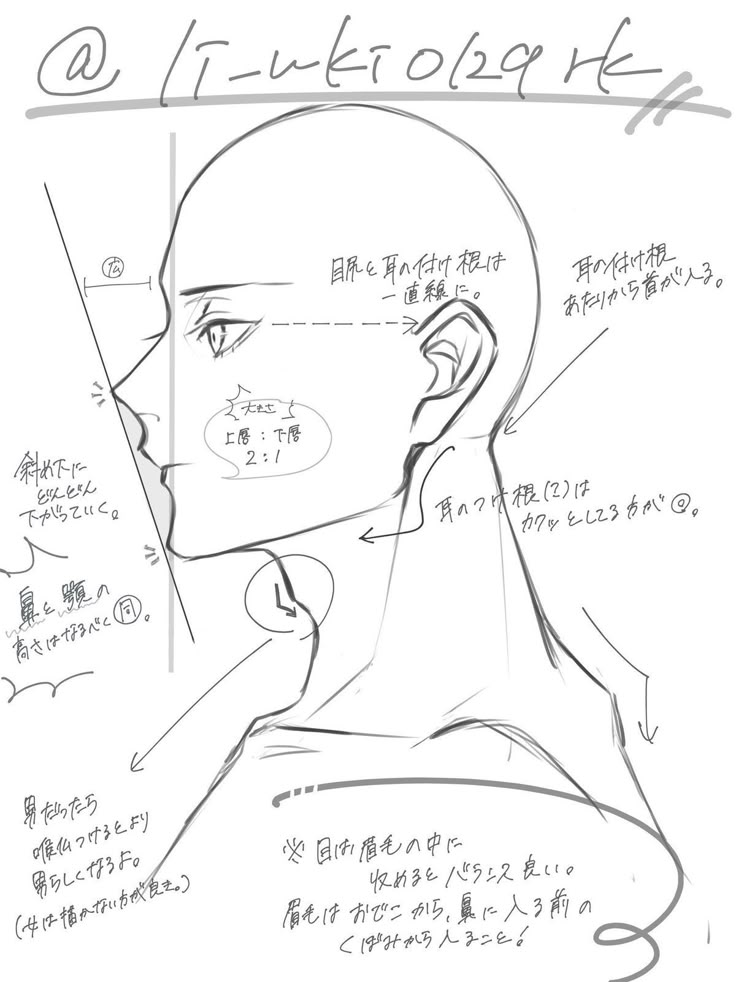
In a side profile, it’s crucial to understand the silhouette of the face. This includes the forehead, nose, lips, chin, and jawline. Each feature has its own unique proportions and shape.
The jawline curves smoothly from the chin to the ear, which may peek out slightly. Our focus should be on creating a smooth line that captures the natural flow of these features.
The nose is a central element in profiles. We must pay attention to the bridge and nostril, making sure they’re proportionate to the rest of the face. Let’s remember to capture the ear just behind the jawline, as its placement is essential for balance.
Importance of Facial Features Proportions
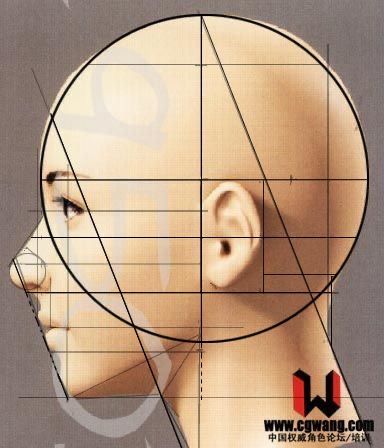
Getting the proportions right is key to a believable side view. We use guides to help us place facial features correctly.
Start by dividing the head into thirds: from the top of the head to the brow line, brow line to the base of the nose, and base of the nose to the chin. These lines help position the eyes, nose, and mouth.
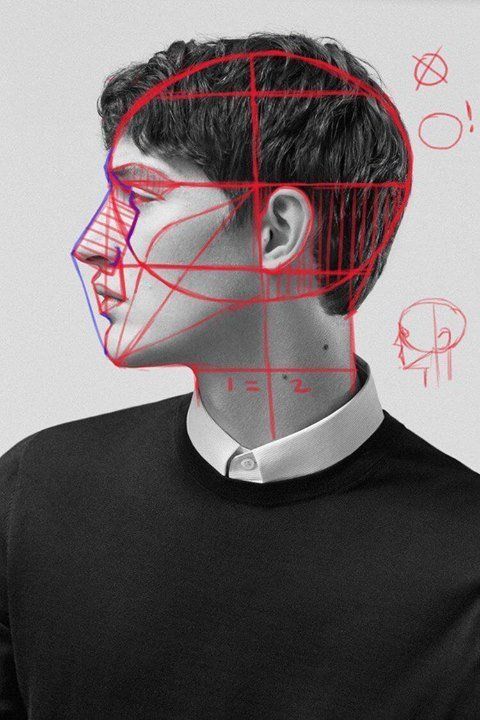
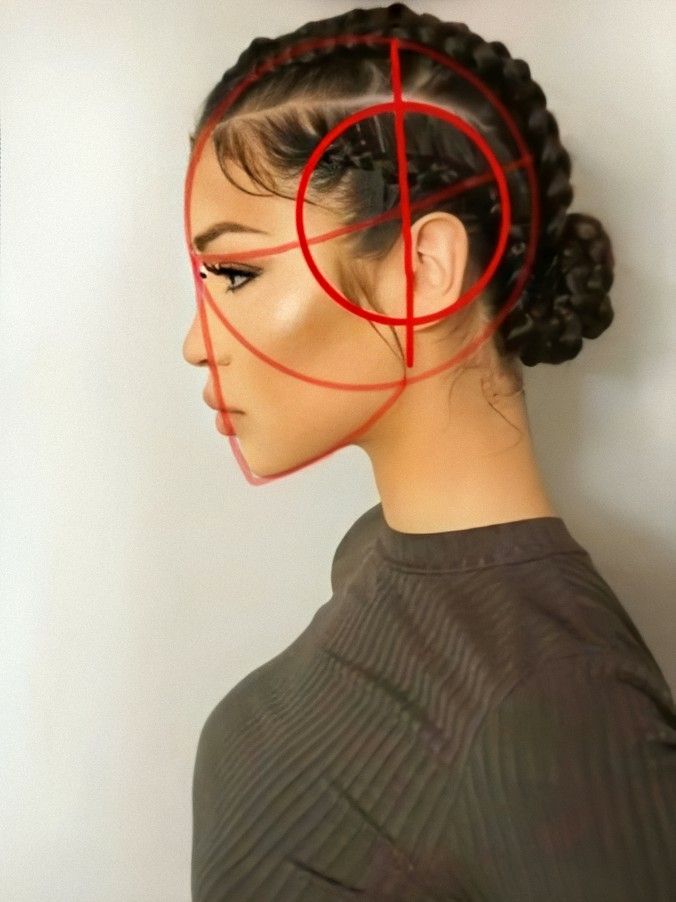
Pay attention to the brain case, which includes the cranium. It contributes to the overall shape and size of the head. Correctly aligning these proportions makes our drawings more realistic and true to life.
Different Perspectives in Profile View
Though often overlooked, different perspectives in profiles can add depth and interest to our drawings. Profiles can be subtle variations from a strict side view to a more angled view.
A three-quarter view adds dimension, revealing part of the other side of the face. This perspective highlights the facial features more clearly than a strict side profile.
The silhouette is a critical aspect in these views, as it defines the profile’s unique characteristics. Understanding these different perspectives allows us to capture varied and expressive profiles.
Tools and Materials for Side Profile Illustration
When creating side profile illustrations, using the right tools and materials can make the process smoother and enhance the final artwork. This includes choosing appropriate drawing utensils, selecting suitable paper, and considering software for vector illustrations.
Choosing the Right Drawing Utensils
Selecting the right drawing utensils is crucial for creating detailed side profiles. We recommend pencils for initial sketches due to their versatility. Good options include Staedtler graphite pencils, which come in different hardness levels for varied line work. For inked outlines, black Sharpie markers or fine-liner pens work well. These tools allow us to create clean and distinct lines that are essential in line art.
Colored pencils or crayons can add life to the drawing. They are useful for shading skin tones or adding small details. An eraser, especially a kneaded one, helps in correcting errors without damaging the paper.
Drawing Surfaces and Paper Types
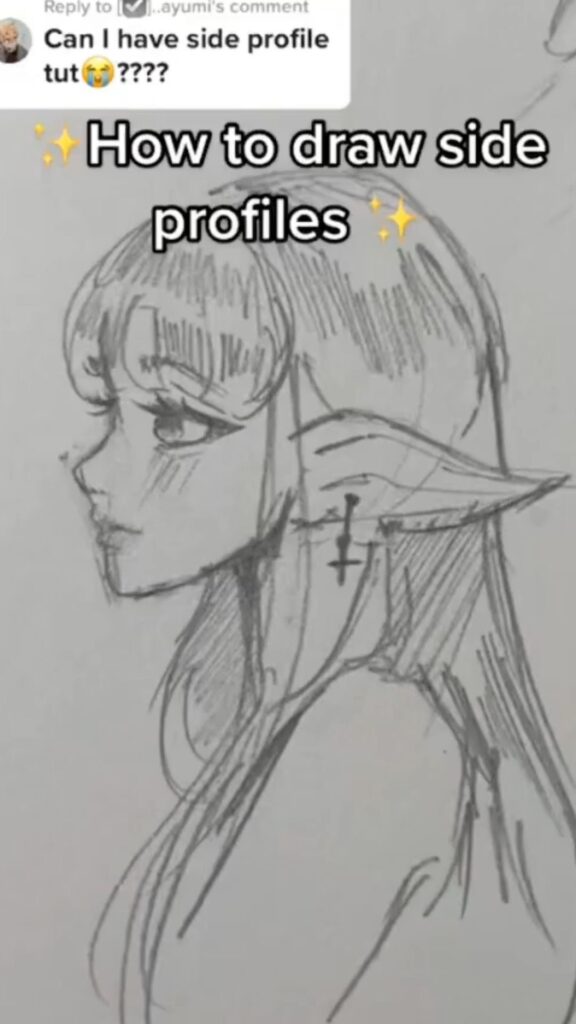
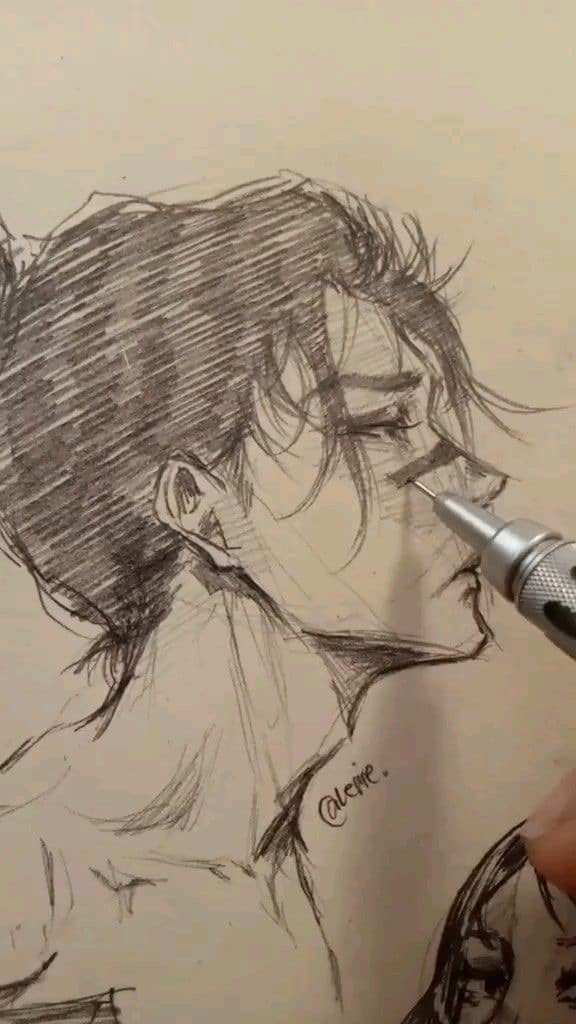
The choice of paper affects the quality of our side profile drawings. It’s important to use a drawing surface that accommodates various techniques without smudging. Smooth, heavyweight paper is ideal as it can handle pencils, ink, and blending tools well. This type of paper provides a solid base for creating consistent strokes in black and white line sketches.
Consider using sketchbooks or loose sheets depending on our workflow. Loose sheets can be advantageous if scanning or sharing artwork is required. The right kind of paper enhances our ability to produce clear and precise illustrations.
Use of Software for Vector Illustrations


For those who prefer digital methods, vector illustration software offers a range of tools to create polished side profiles. Programs like Adobe Illustrator provide capabilities for creating scalable vectors. This is beneficial for making precise, adjustable shapes and lines that are important in vector drawing.
Such software allows us to experiment with colors and layers efficiently. Using digital tools, we can quickly adjust designs without starting from scratch. This is particularly useful for professional work or when developing designs for multiple uses or sizes.
Preparing to Draw a Side Profile
Before we start drawing side profiles, it’s crucial to set up a suitable workspace, use references like stock photos and panoramic images, and understand the importance of licensing. This preparation will ensure that our artwork is both unique and legally compliant.
Setting Up Your Workspace
Creating the right environment for drawing can greatly impact our productivity. First, ensure that our workspace is well-lit and free of distractions. A clean desk with only the necessary supplies, such as sketch pads, pencils, and erasers, helps us focus better.
Investing in a comfortable chair and an adjustable desk can make a big difference. Not only will our posture improve, leading to less fatigue, but we can also spend more time on our art. Organizing our materials efficiently allows us to access our tools quickly when inspiration strikes.
Drawing from Stock Photos and Panoramic Images


Stock photos are excellent resources for practicing side profile drawings. They offer high-quality images with clear details, which are useful for honing our skills. We should choose photos with different angles and expressions to broaden our understanding.
For a more immersive experience, 360° panoramic images offer a unique perspective. This type of imagery allows us to view profiles from various angles, adding depth to our practice. By incorporating these resources, we expand our artistic vision and become more versatile in our creations.
Understanding Licensing: Extended License
When using images from the web for our projects, it’s vital to understand licensing terms. Many stock photos come with basic licenses, but an extended license might be needed if our artwork is for commercial use. This license allows us to reproduce or sell our work without legal complications.
We should check whether the images require an extended license for web design purposes. Knowing these details can save us from potential legal issues and ensures respect for the original creators. By being mindful of licensing, we maintain ethical standards while pursuing our art.
Drawing the Side Profile
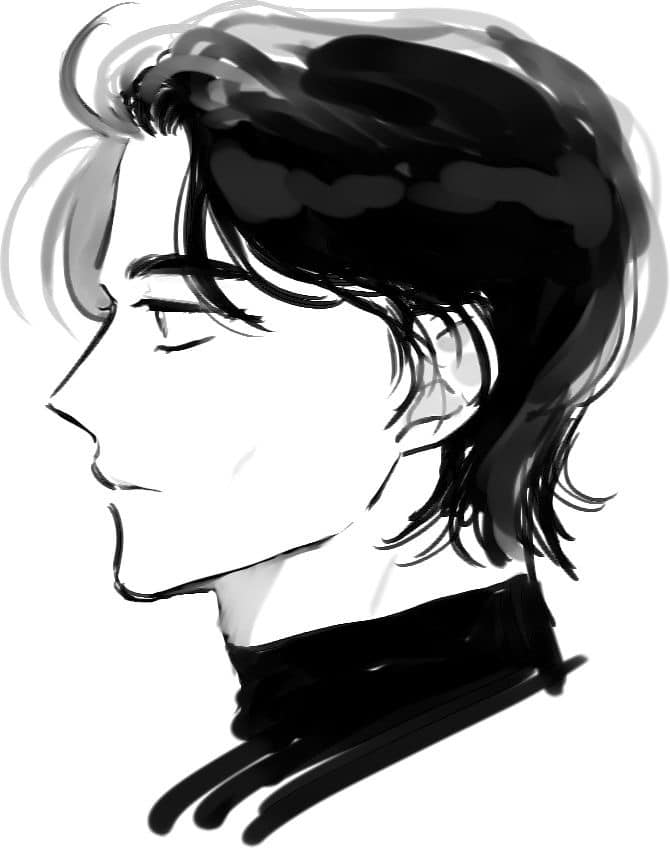

When drawing a side profile, it’s vital to focus on individual facial elements like the nose and hairline while also considering the overall shape and shading. We can create a striking side profile by breaking it down into understandable steps.
Step-by-Step Guide to Draw the Nose
Our first focus is on drawing the nose in the side profile view, which can greatly define the face’s likeness. Begin by sketching a simple curve to outline the bridge of the nose. The tip should slightly extend, as this part often curves downward or upward depending on the person.
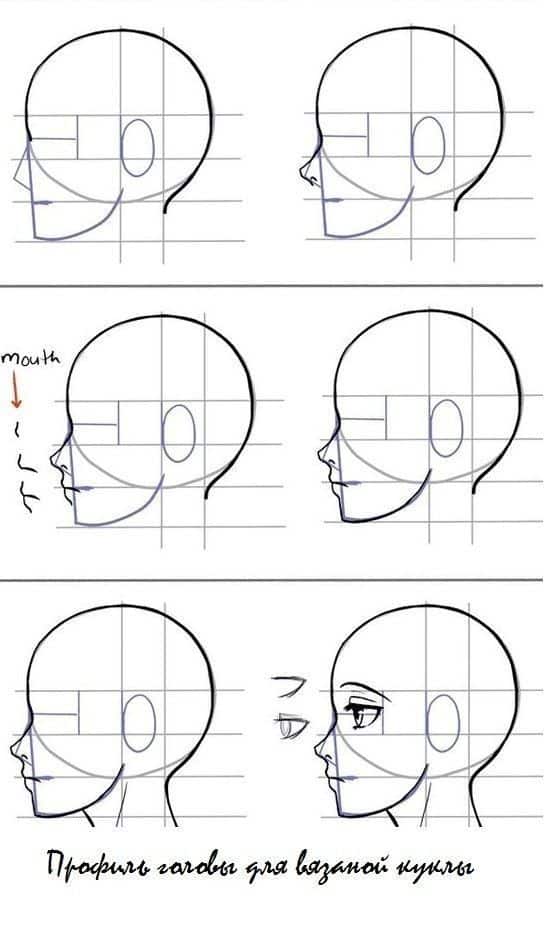
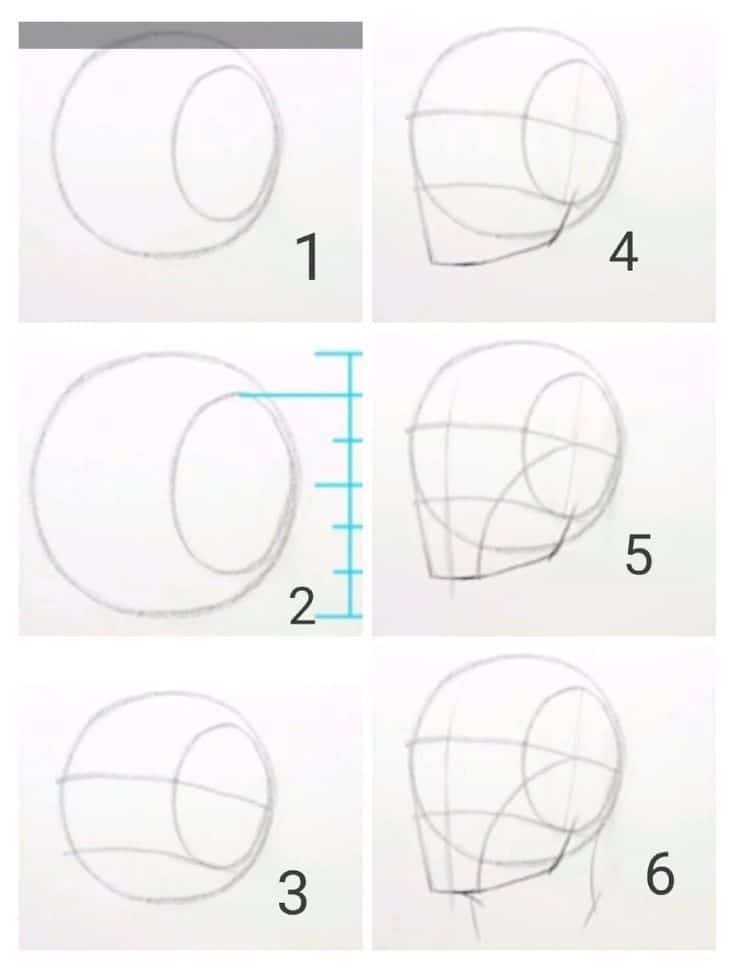
The nostril can be drawn as a small triangle or circular shape depending on the woman face profile. For an African American woman, consider the subtle adjustments for nose width and nostril flare. Observe and adjust shadows around the nose to add depth, making sure to maintain a natural contour. Focus on the light source direction to accurately depict the nose’s highlights and shadows. This will help us in capturing the true essence of the nose.
Crafting the Perfect Hairline and Hairstyles
Next, let’s explore hairlines and hairstyles. Begin by marking the starting point of the hairline, which generally begins around the upper forehead. The shape can vary, appearing straight, curved, or even slightly zig-zagged for a natural effect.
Hairstyles add personality to our drawing. Sketch different styles like sleek back, flowing waves, or short curls. Pay special attention to how hair falls in a side profile. For an African American woman, textured hair might require detailed attention to curls and volume. Lightly draw the outer boundary of the hair before filling in the details. Adjust the hair thickness and texture by varying line pressure and spacing.
Adding Details and Shading to the Drawing
Once we’ve established the foundational elements, it’s time to add details and shading. Start with the eye, which should be placed midway between the top head and chin. In a side profile, we see more of the eyelash and less of the eye itself.
For shading, identify the light source and apply shadows on the opposite side. Use softer shading for a smooth skin texture and bolder strokes for features like the hairline and jawline. To highlight the black outline, darken areas like the pupil, nostril, and hair border. This contrasts effectively against highlighted areas such as the forehead and cheekbones, enhancing dimension and realism.
Creating a Side Profile Vector
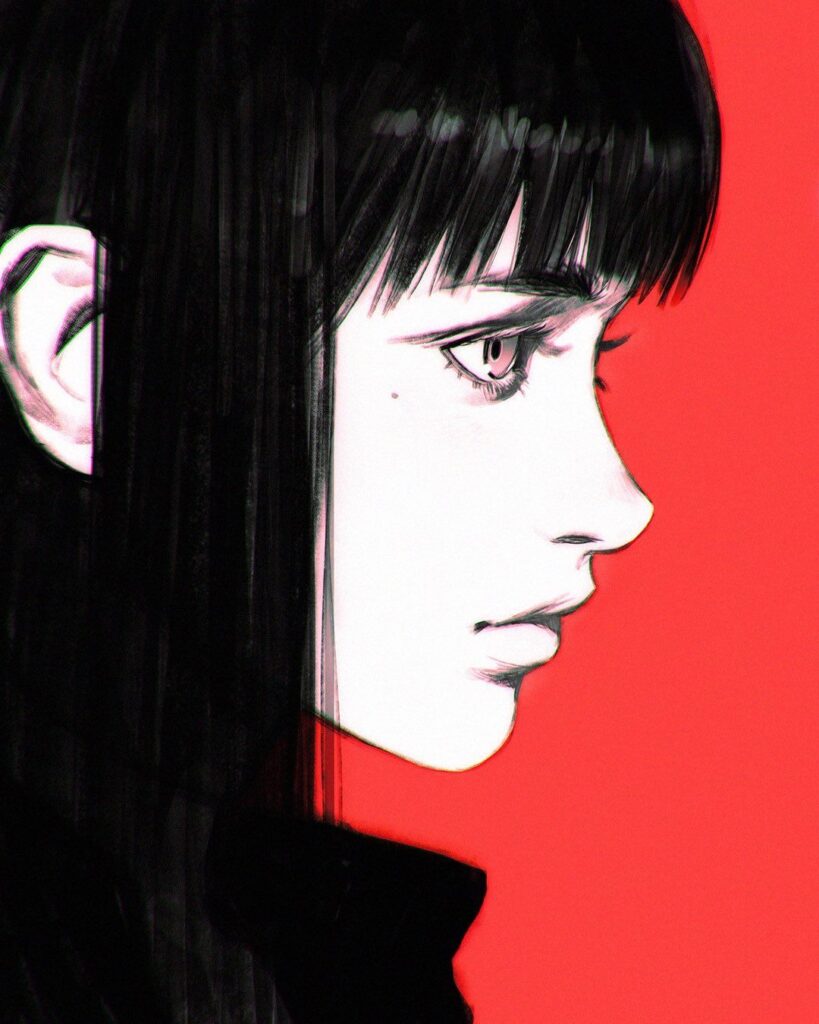
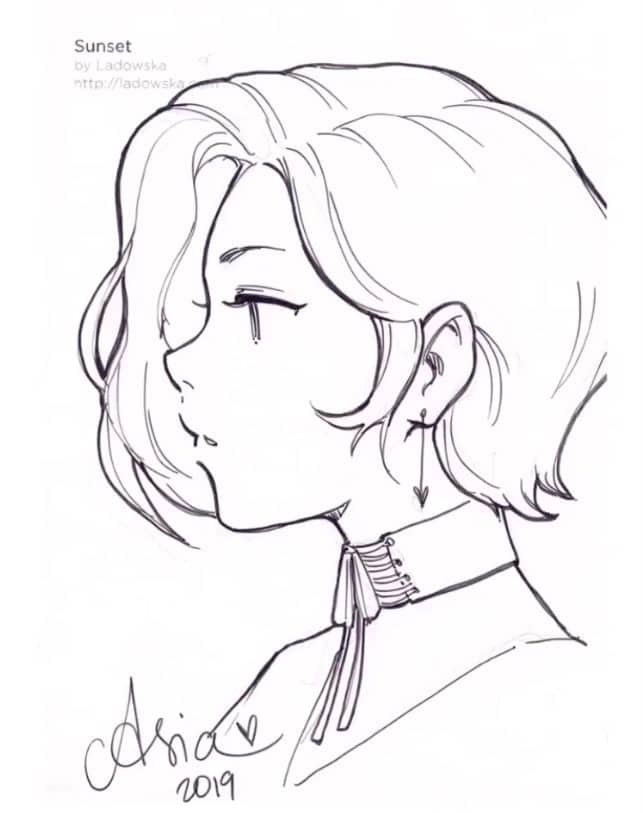
Finally, for digital artists, creating a side profile vector offers flexibility in design. Begin by converting your sketch into digital format using vector software. Clean lines are crucial to maintain a sharp look, so use vector paths to define each facial feature accurately.
Ensure the paths follow the natural curvature of the face. For a professional touch, choose colors that match skin tones and hair, applying gradients to mimic natural lighting. This is effective when illustrating a vector woman’s face, providing a polished and scalable artwork suitable for various applications.
Stylizing and Character Design
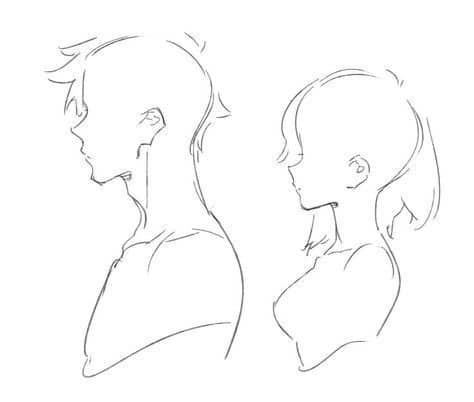

When embarking on the journey of side profile drawing, we focus on unique styles and techniques. Each method, like cartooning or using bold outlines, adds distinct flair and personality to our work.
Illustrating a Cartoon Style Profile
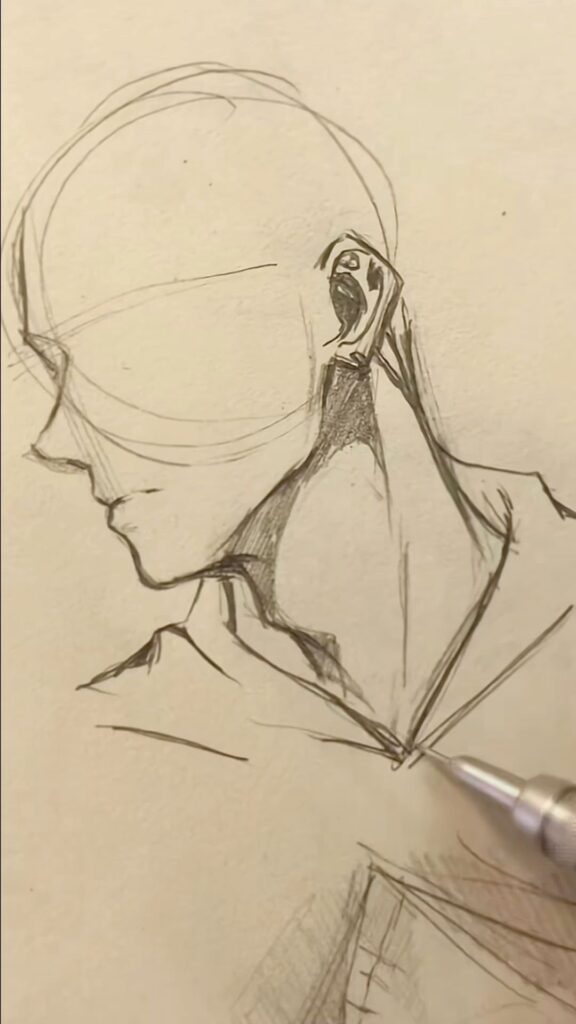
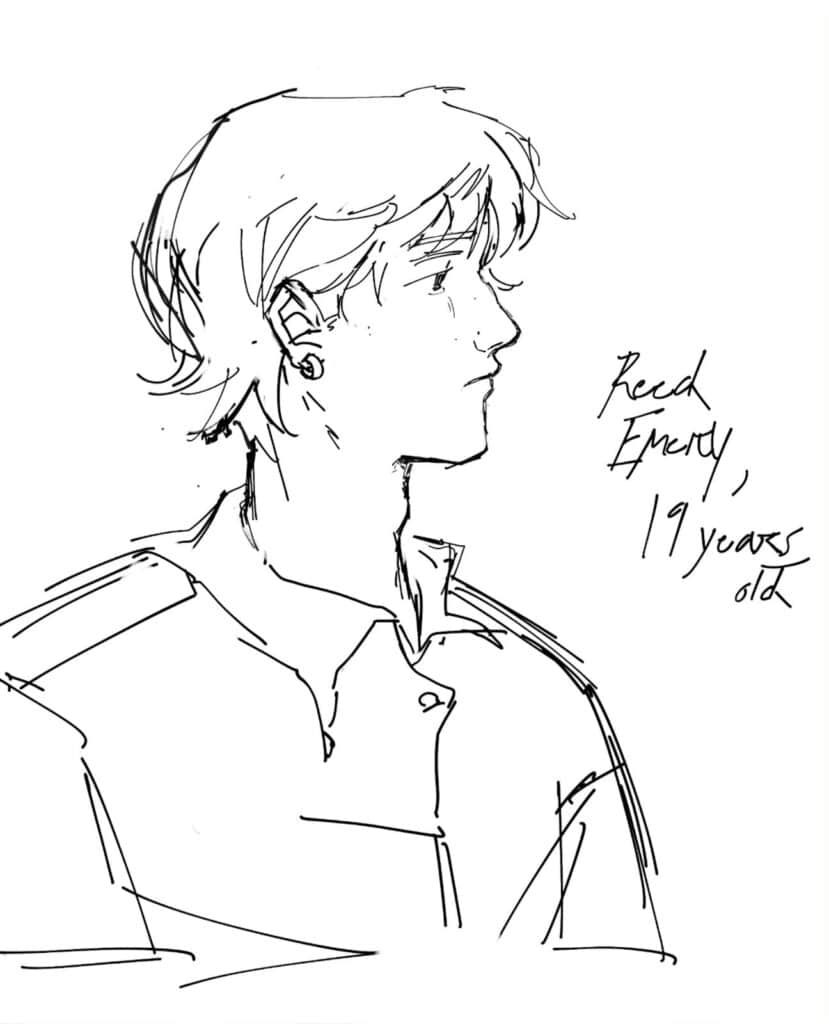
In our experience, cartoon styles rely on exaggeration and simplified shapes. These elements help convey personality and emotion efficiently. Bold and vivid colors make characters pop, while oversized features like eyes or heads amplify expressiveness.
Using references can help us mimic different cartoon styles. For example, by analyzing anime and Disney styles, we notice how exaggerated proportions and simplified lines create a playful look. Simplification is key; less is often more in communicating character traits.
Designing a Gradient Silhouette
A gradient silhouette provides depth and dimension to our side profiles. This involves blending colors or shades smoothly to suggest light and shadow. By experimenting with gradients, we can create a dramatic effect, making our art stand out.
Selecting the right color palette is crucial. Using tools like digital brushes, we can achieve a seamless transition from light to dark. Practicing with basic shapes, like circles and triangles, helps us master this technique. Remember, subtle transitions often yield the most natural results.
Line Art and Black Outline Techniques
Incorporating line art with black outlines adds crispness and definition. When we use strong outlines, they frame our characters distinctly against any background, emphasizing shape and form.
Drawing clear and consistent lines requires steady hands, good quality tools, and sometimes digital software aids. Understanding when to use thicker or thinner lines enhances the character’s features. For instance, thick lines can signify shadows, while thin lines highlight delicate details. This method is essential for styles focusing on visual impact and precision.
By mastering these techniques, we enrich our stylized side profile drawings, capturing the essence of character design effectively.
Enhancing Your Drawing Skills
Improving our drawing skills requires dedication and practice through various methods. Drawing challenges, online guides, and creating diverse portfolios are effective strategies.
Engaging in Drawing Challenges
Participating in drawing challenges can be an exciting way to enhance our skills. Challenges like Inktober or Draw This in Your Style push us to draw consistently and creatively. These activities encourage us to try new techniques and step out of our comfort zones.
By engaging regularly in such challenges, we gradually build confidence. They help us develop a routine that improves our line work, composition, and imagination. This continuous practice is vital for progress in our journey to become better artists.
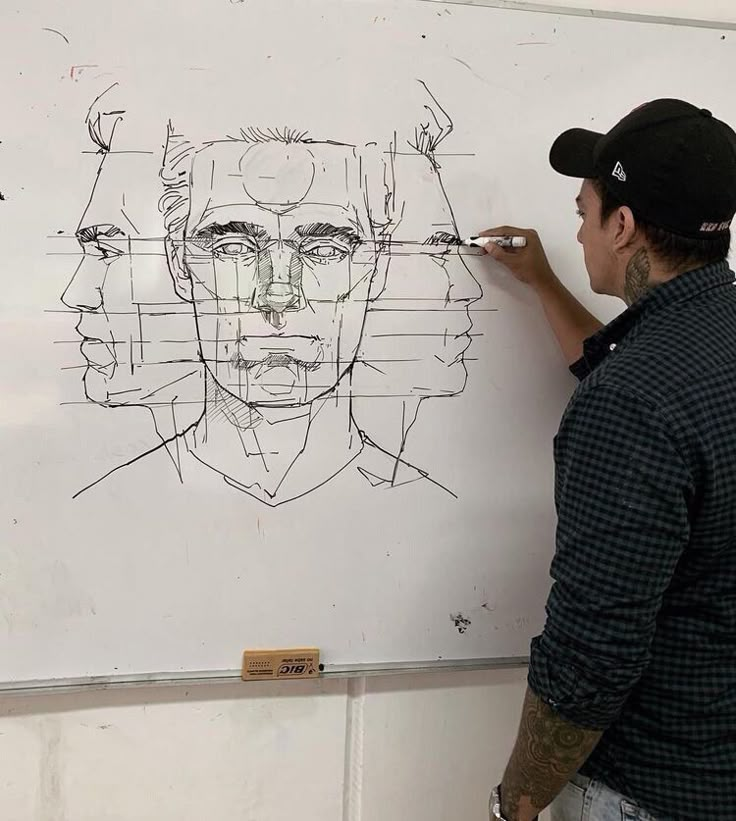
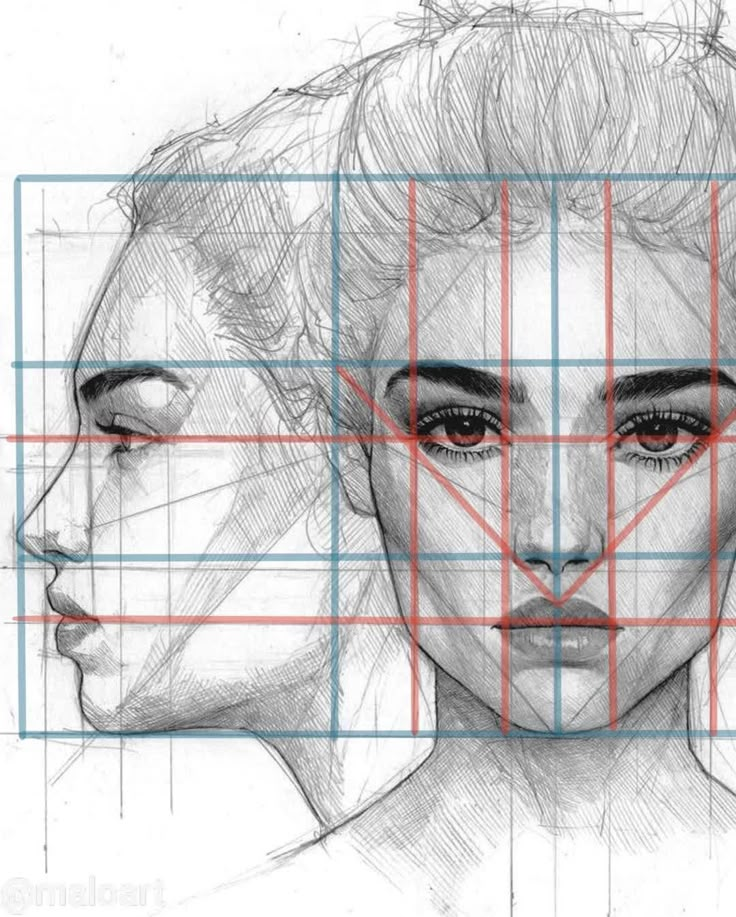
Following Online Drawing Guides and Videos
Using online resources like drawing guides and videos can significantly help us improve. Platforms like YouTube offer step-by-step guides on various topics, from beginner techniques to advanced skills. These resources often provide clear, visual instructions that make learning easier.
For instance, learning to draw facial features can be simplified by following a portrait drawing guide. By studying these guides, we can focus on specific aspects of drawing where we feel less confident. This targeted learning allows us to progress faster in our art journey.
Creating a Diverse Portfolio


Building a diverse portfolio showcases our range as artists and helps track our progress. By including different styles, subjects, and mediums, we demonstrate versatility and skill.
A varied portfolio encourages us to experiment with new techniques and ideas. This experimentation is crucial in developing a well-rounded skill set. It also allows us to receive feedback from others, which can be invaluable for improvement. By focusing on areas like anatomy, perspective, and shading, and keeping our portfolios updated, we ensure continuous growth in our drawing abilities.
- 4.4Kshares
- Facebook0
- Pinterest4.4K
- Twitter0
- Reddit0

