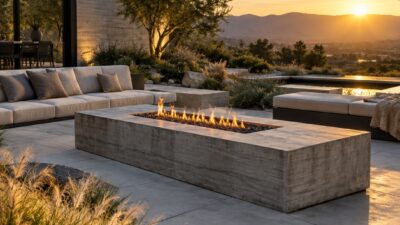
Scroll through any outdoor kitchen feed and you’ll see the same dream setup: a stone counter, a built-in grill, string lights overhead, a sink for rinsing vegetables before they hit the pan. It looks effortless. Almost nobody talks about what’s sitting six inches below that countertop, and that gap is exactly why so many outdoor kitchens end up half-finished, or quietly falling apart within a few summers of looking perfect in photos.
Good outdoor kitchen plans don’t start with tile or lighting. They start with water, drainage, gas, power, and a maintenance plan for the day something under the counter needs attention.
- Why outdoor kitchen plans should start underground
- Map water, drainage, gas and power before choosing the layout
- Outdoor kitchen layout: design around maintenance access
- Drainage and grading: the detail that protects the patio
- Materials that look good and survive real outdoor use
- Design sequence: the right order for an outdoor kitchen project
- What to keep from the original article
- FAQ
- Start with what you can't see
Get that sequence backwards, which is how most people approach it, and you end up retrofitting pipes through finished stonework later, which costs far more than doing it right the first time. It’s the same lesson I’ve relearned in every design discipline I’ve worked in, whether it’s a car interior or a kitchen counter: the parts nobody sees decide how well the parts everyone sees actually hold up.
Why outdoor kitchen plans should start underground
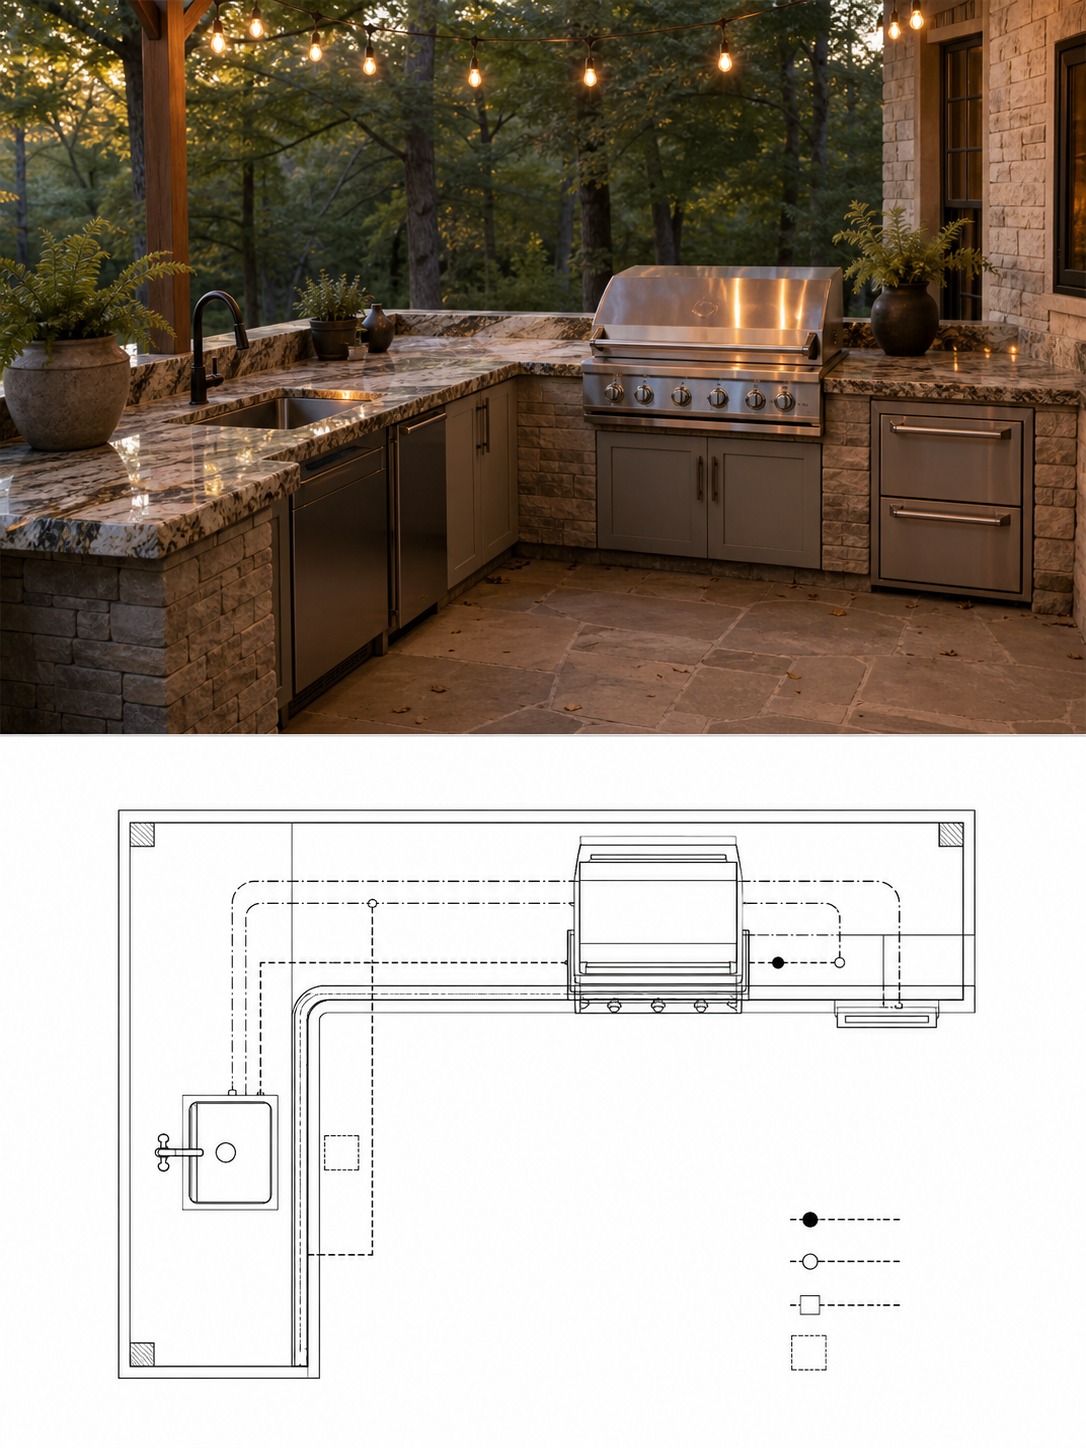
What photos hide: supply lines, drains, slope, access and winterizing
Most homeowners plan an outdoor kitchen the way they’d plan a living room: pick the tile first, then the appliances, then the seating, and squeeze water and drainage in wherever there’s room left over. That order feels natural because it’s how indoor rooms usually get designed, where the plumbing already exists inside the walls. Outdoors, none of that infrastructure exists yet, which means the order that works indoors actively works against you outside.
A sink needs a supply line, a drain line, and in colder climates a way to keep those pipes from freezing over winter. None of that shows up in a finished photo. What does show up, eventually, is a countertop with a crack from frozen plumbing underneath it, or a beautiful paver patio that has to get torn up because nobody left an access point near the pipes. The utility map has to exist before the design does, not as an afterthought squeezed in once the layout looks good on paper.
Why the pretty finishes should come after the utility map
There’s a real design argument for this sequence too, not just a durability one. Once the water, gas, and power routes are settled, the layout decisions above ground actually get easier, not harder. Knowing exactly where a supply line and drain line run tells you precisely where a sink, a fridge, and a grill can go, so the layout stops being guesswork and starts being a direct response to what’s already in the ground.
This also changes how a designer talks to a client during the early meetings. Instead of starting with a mood board, the first real conversation becomes a site walk: where the water meter sits, which side of the yard drains toward the house, whether there’s an existing gas line close enough to extend. Clients tend to find this reassuring once they understand why, since it means the pretty decisions later aren’t guesses, they’re choices made against a plan that’s already been tested against the site.
Map water, drainage, gas and power before choosing the layout
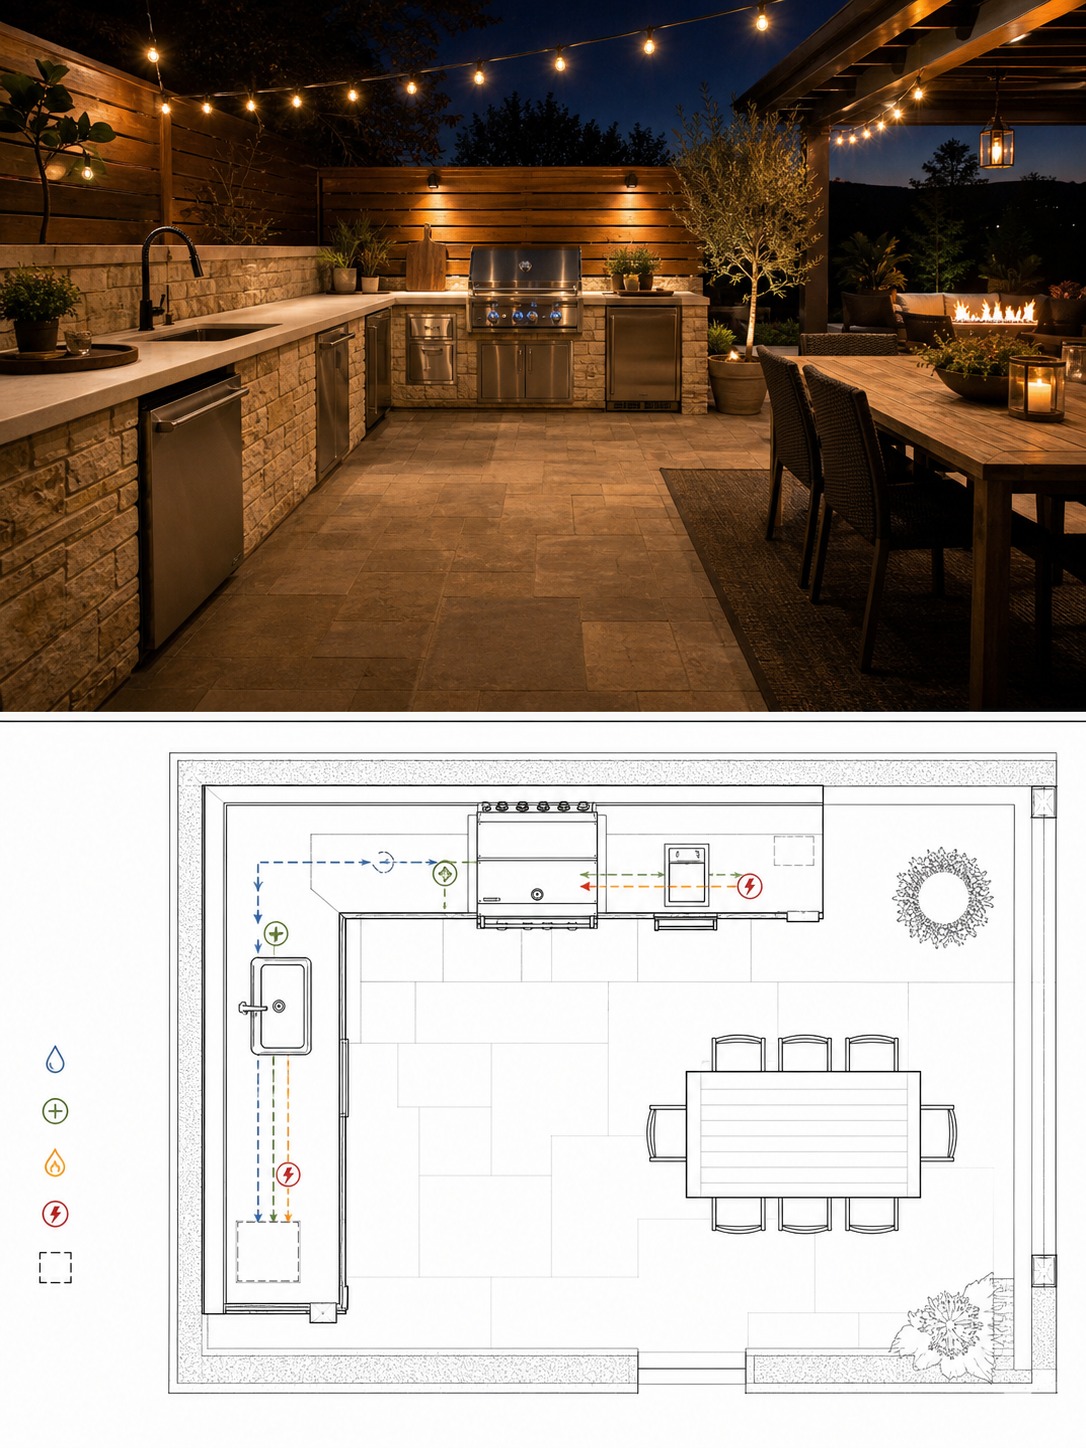
Before any layout gets drawn, four utilities need a rough map: water supply, drainage, gas (if a built-in grill or pizza oven is planned), and power for lighting, outlets, and any refrigeration. Skipping this step is the single most common reason outdoor kitchens get expensive to fix later.
Where a sink can realistically go
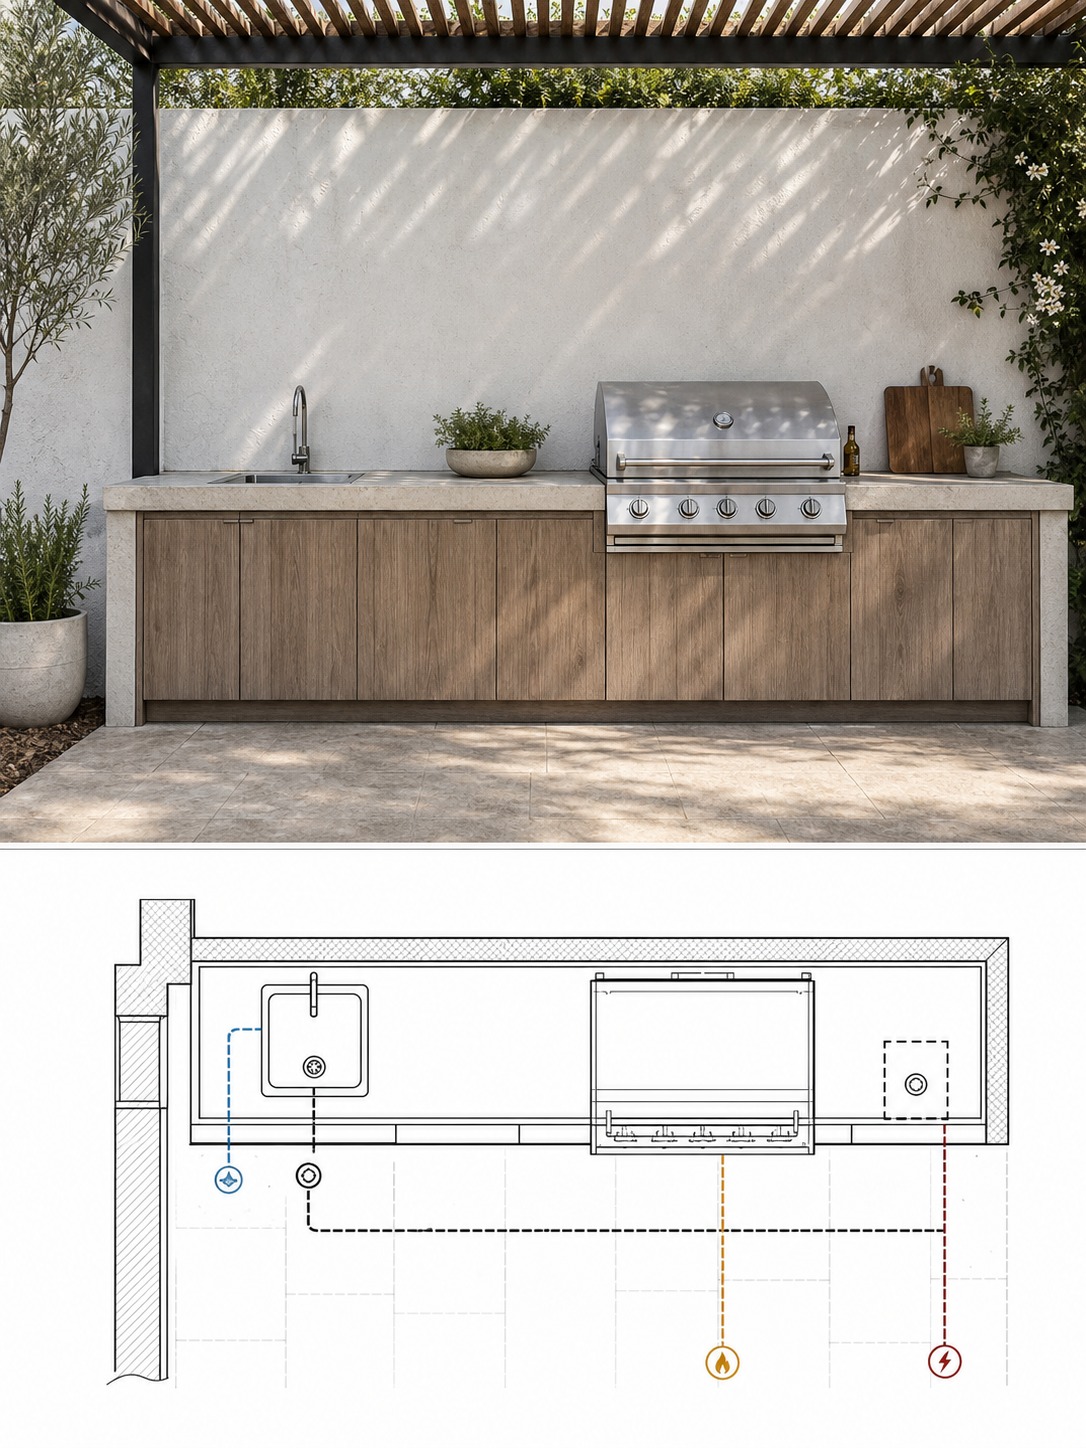
A sink’s location isn’t really a design choice, it’s a plumbing answer wearing a design hat. The realistic range of where a sink can go is set by how far a drain line can run before it needs a lift pump, and by how close the run is to an existing water supply point. A sink positioned twenty feet from the nearest supply line costs meaningfully more to plumb than one positioned six feet away, and that cost difference is worth knowing before a layout gets emotionally attached to a specific spot.
How water pressure, well systems and existing supply lines affect design
Homes on well water need an extra step most city-supplied homes can skip: checking whether the well pump can actually handle an added fixture without dropping pressure indoors. A well system that comfortably supplies a house at normal indoor demand can struggle when an outdoor sink and an irrigation zone both draw at once during a summer cookout. Testing this before the design locks in avoids a scenario where a beautiful new sink comes with a side effect of weak water pressure inside the house.
Why utility routes shape counter runs and appliance placement
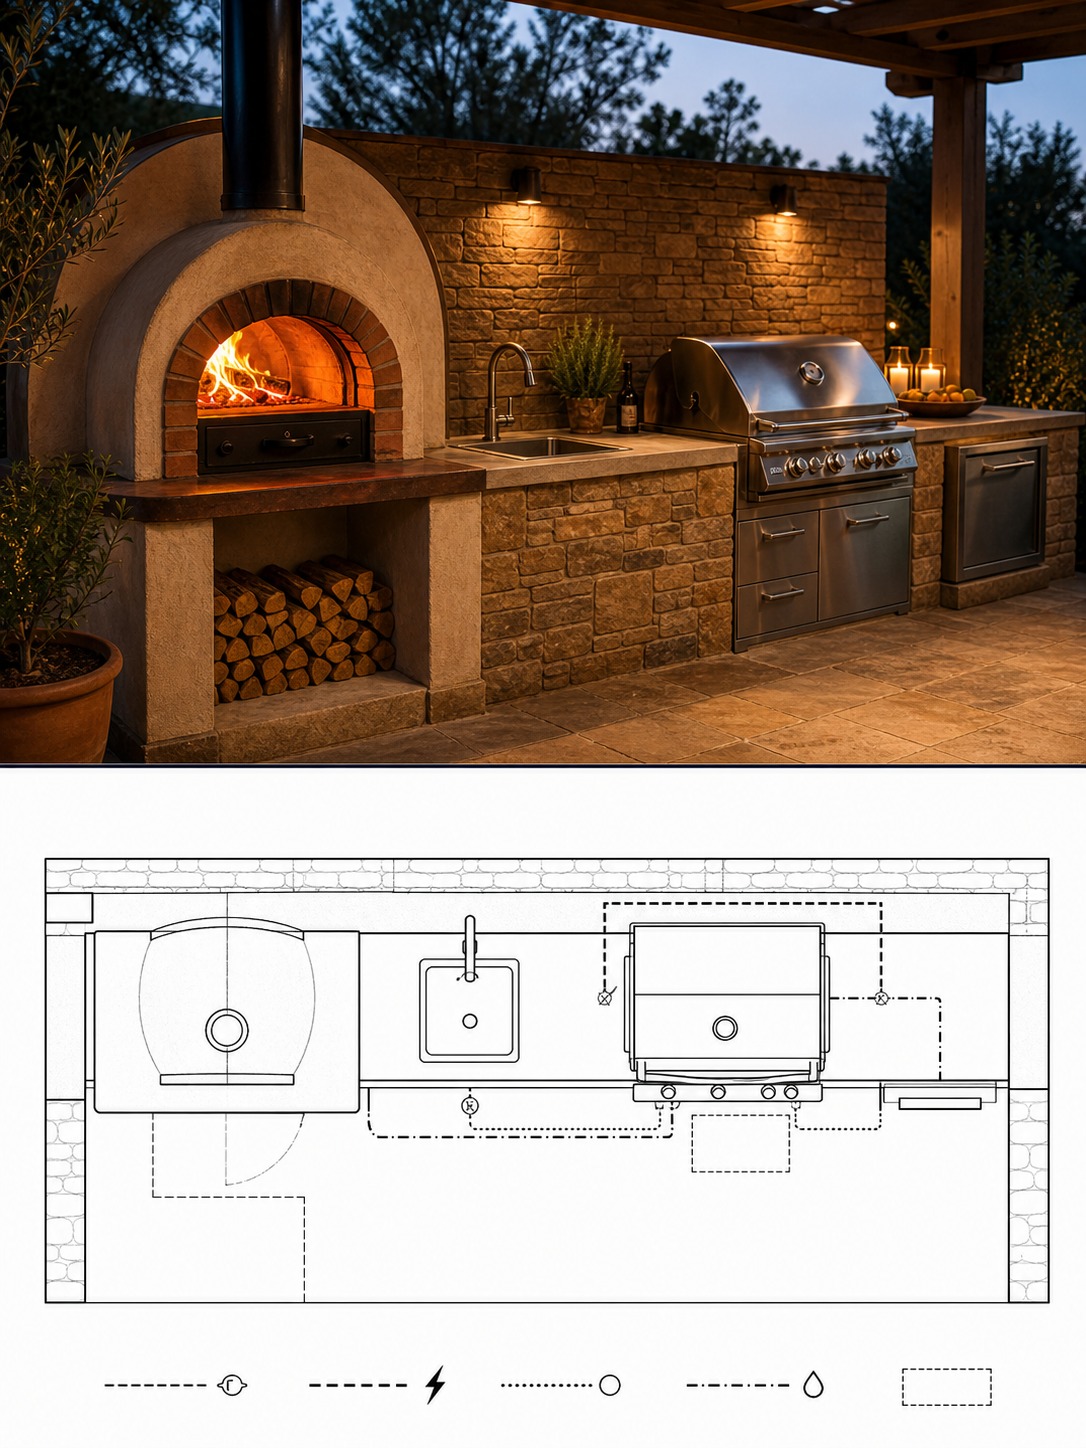
Once water, gas, and power routes are marked, they effectively draw the layout’s skeleton. A grill needs to sit near its gas line and have enough clearance for safe venting. A sink needs to sit near both its supply and its drain. A fridge needs power nearby and, ideally, shade so the compressor isn’t fighting direct sun all day. Counter runs end up following these fixed points rather than the other way around, which is a more efficient design process than picking finishes first and hoping the utilities cooperate.
Outdoor kitchen layout: design around maintenance access
Removable pavers, access panels and service-friendly cabinet bases
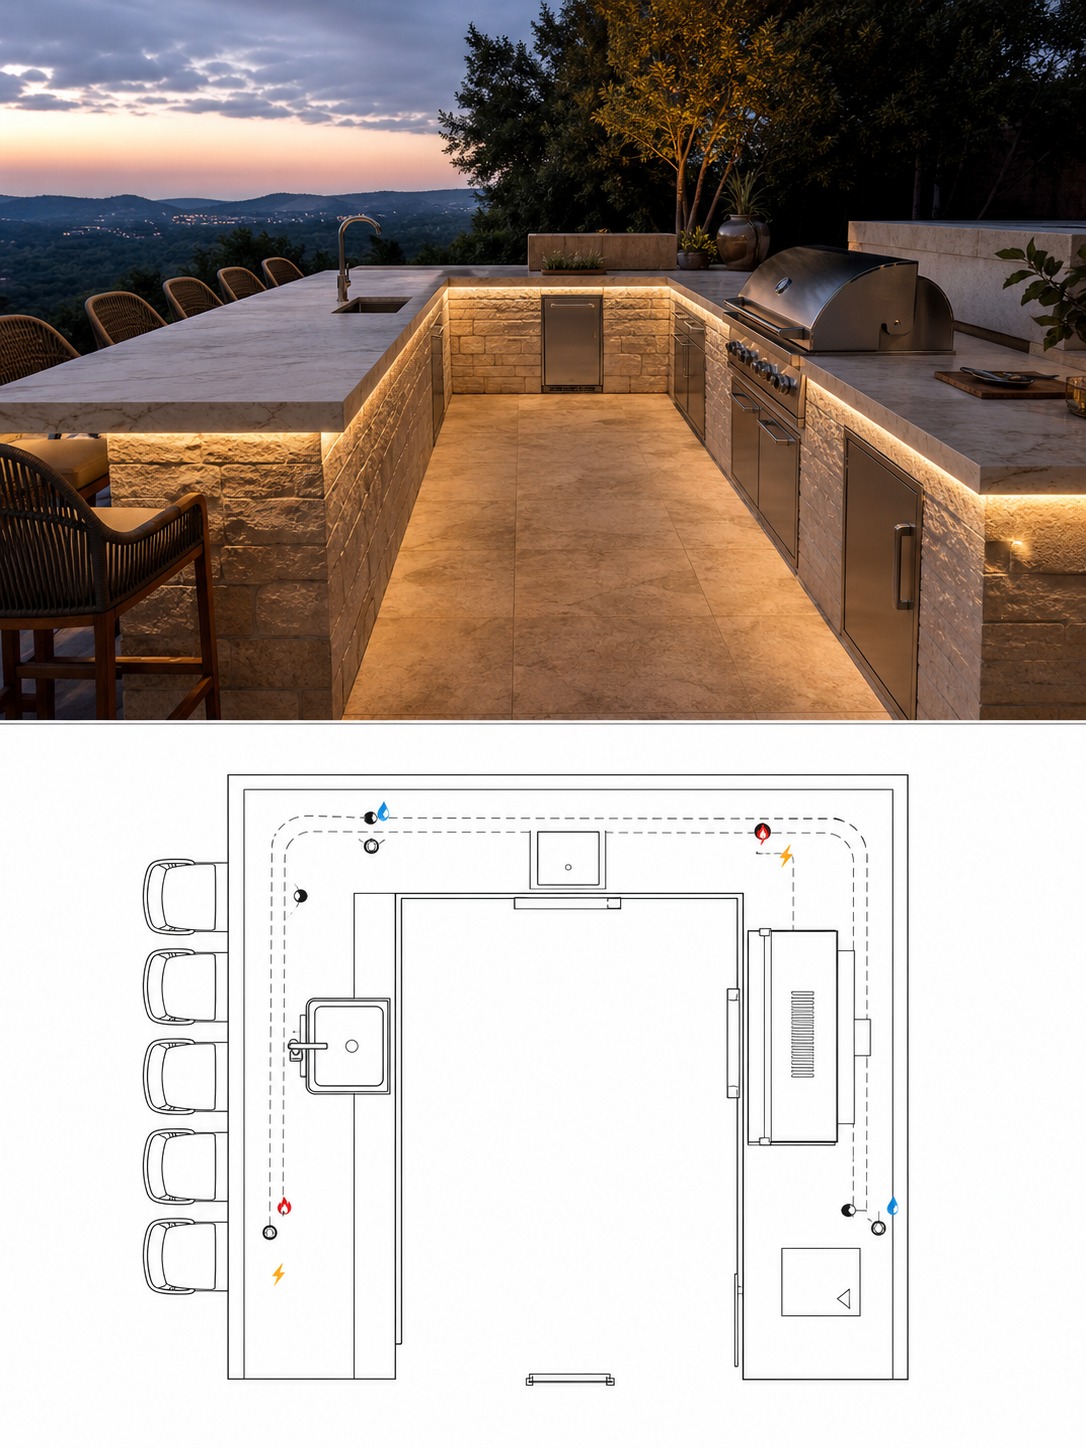
Layout decisions should account for the fact that something under an outdoor kitchen will eventually need attention: a valve, a drain trap, a gas fitting. Planning for that day during design, rather than discovering the problem during a repair, is what separates a kitchen that stays functional for decades from one that needs a full teardown for a small fix. For tighter footprints where every inch of layout counts, compact outdoor kitchen designs show how to keep full function without sacrificing access.
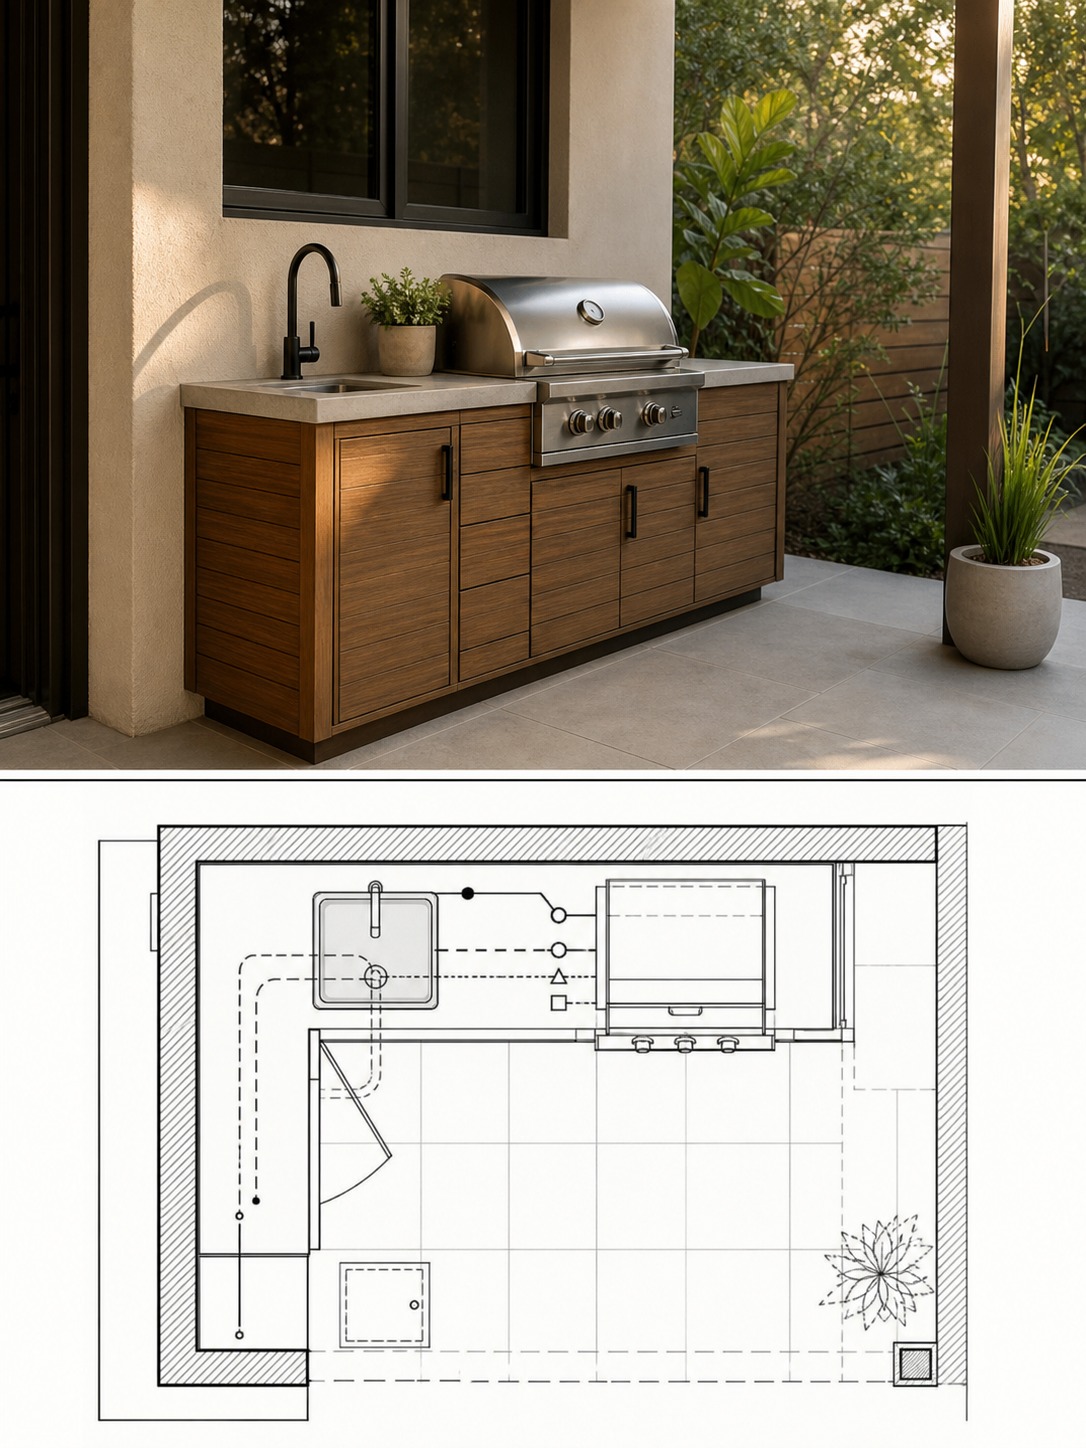
Removable pavers over a utility run, a hinged access panel built into a cabinet base, or a stretch of gravel instead of mortared stone directly above a drain line all do the same job: they turn a future repair into an afternoon instead of a demolition project. This costs very little to plan for at the design stage and a great deal to add after the stonework is finished and grouted.
How to avoid tearing out finished stonework for a small repair
Skipping this step doesn’t cause a problem immediately, which is exactly why it gets skipped. The problem shows up years later, when a drain clogs or a valve fails and the only way to reach it is to break apart finished countertop or pull up mortared pavers that were never meant to come up again. A kitchen designed with access in mind turns that same repair into removing a panel, fixing the issue, and putting the panel back.
Drainage and grading: the detail that protects the patio
Slope away from the house
Hard surfaces like stone counters and paver patios don’t absorb water the way grass does, so every outdoor kitchen needs a plan for where water goes, both the water used at the sink and the rain that lands on the hardscaping. Getting the slope right is one of the most overlooked steps in any outdoor build, and it’s the difference between a patio that sheds water cleanly and one that pools exactly where someone stands to cook.
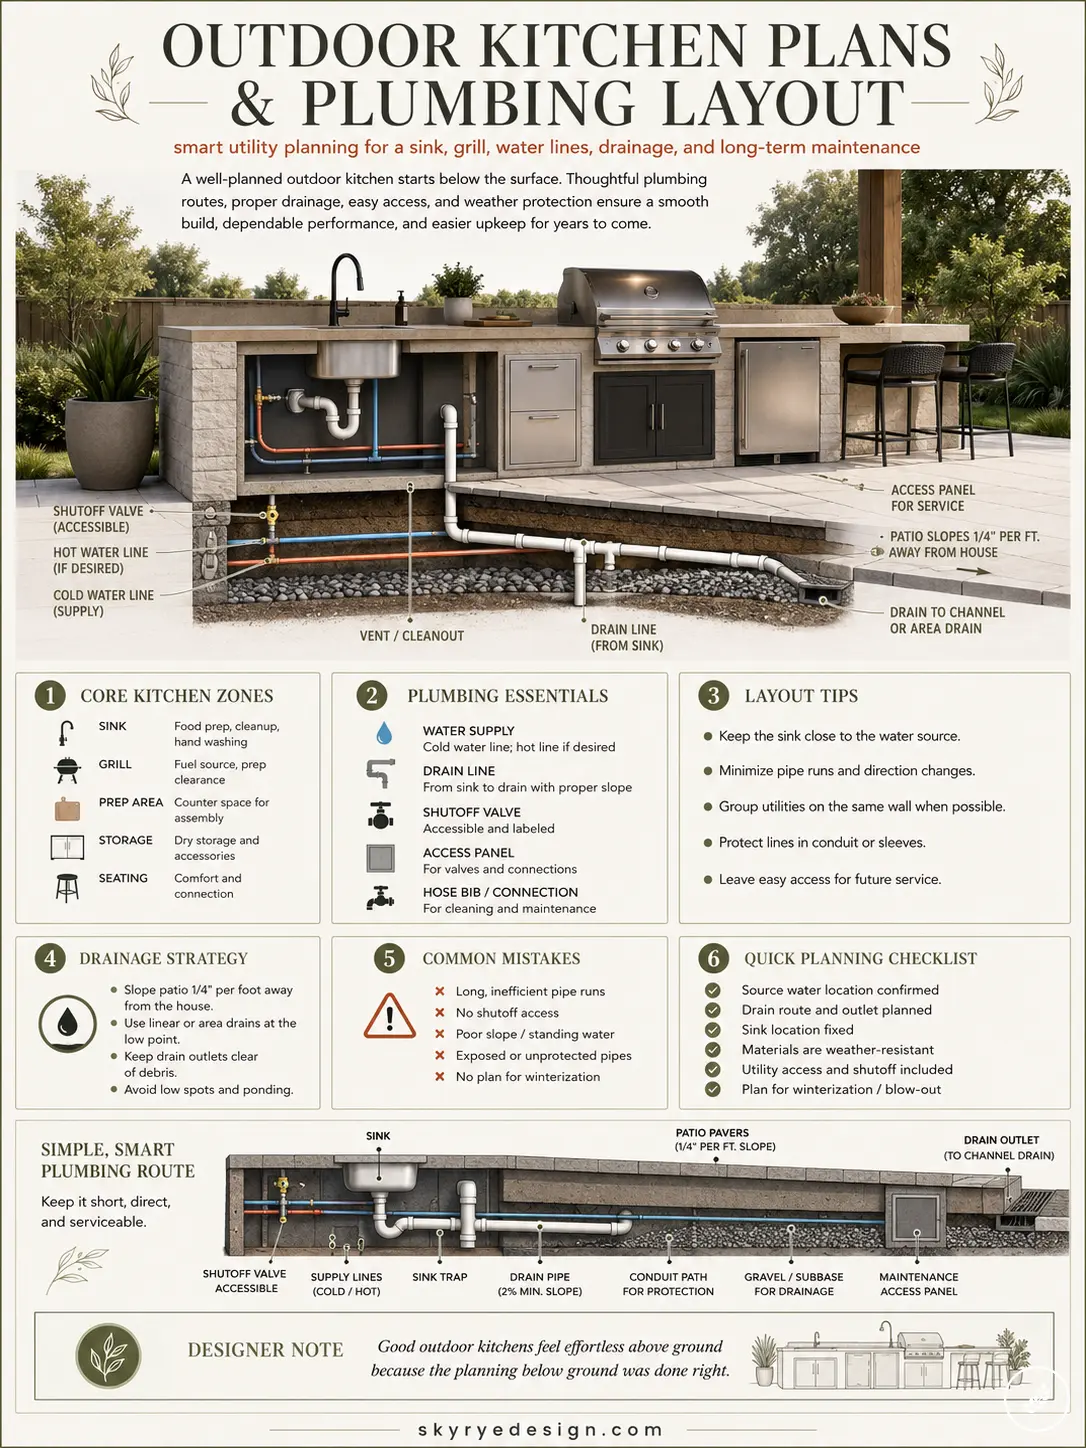
The general rule is a gentle, consistent slope away from the house, typically a couple of percent, enough to move water without making the surface feel tilted underfoot. Getting this wrong sends runoff back toward the foundation instead of away from it, which turns a kitchen project into a foundation problem a few rainy seasons later.
Where runoff goes after rain and sink use
Sink water and rain runoff both need somewhere to go once they leave the patio surface. That destination should be planned, not assumed: a drain line tied into the existing storm system, a dry well that lets water percolate into the soil away from the house, or a permeable paving section that absorbs water rather than shedding it. For the fuller picture of how drainage protects a structure and not just a patio, the science behind roof drainage covers the same underlying principles applied to a house’s largest water-shedding surface.
When French drains, dry wells or permeable paving belong in the plan
For yards with genuinely poor drainage, standard grading sometimes isn’t enough on its own. A French drain intercepts and redirects groundwater or surface water before it reaches the patio. A dry well gives water somewhere to go when the surrounding soil doesn’t absorb it fast enough. Permeable paving lets water pass through the surface itself rather than running off it entirely. Which of these belongs in a given plan depends on soil type, yard slope, and how much hardscape is being added, which is exactly the kind of site-specific question worth answering before, not after, the layout is finalized.
Materials that look good and survive real outdoor use
Material choice for an outdoor kitchen has to survive a harder test than an indoor one: direct sun, rain, freeze-thaw cycles, and constant temperature swings that indoor materials never have to handle. A countertop or cabinet base that looks identical to an indoor version in a showroom can behave completely differently after a year outside. This is worth testing skepticism against, not just trusting a finish because it photographs well under showroom lighting; ask specifically how a material performs after a full freeze-thaw season, not just how it looks on day one.
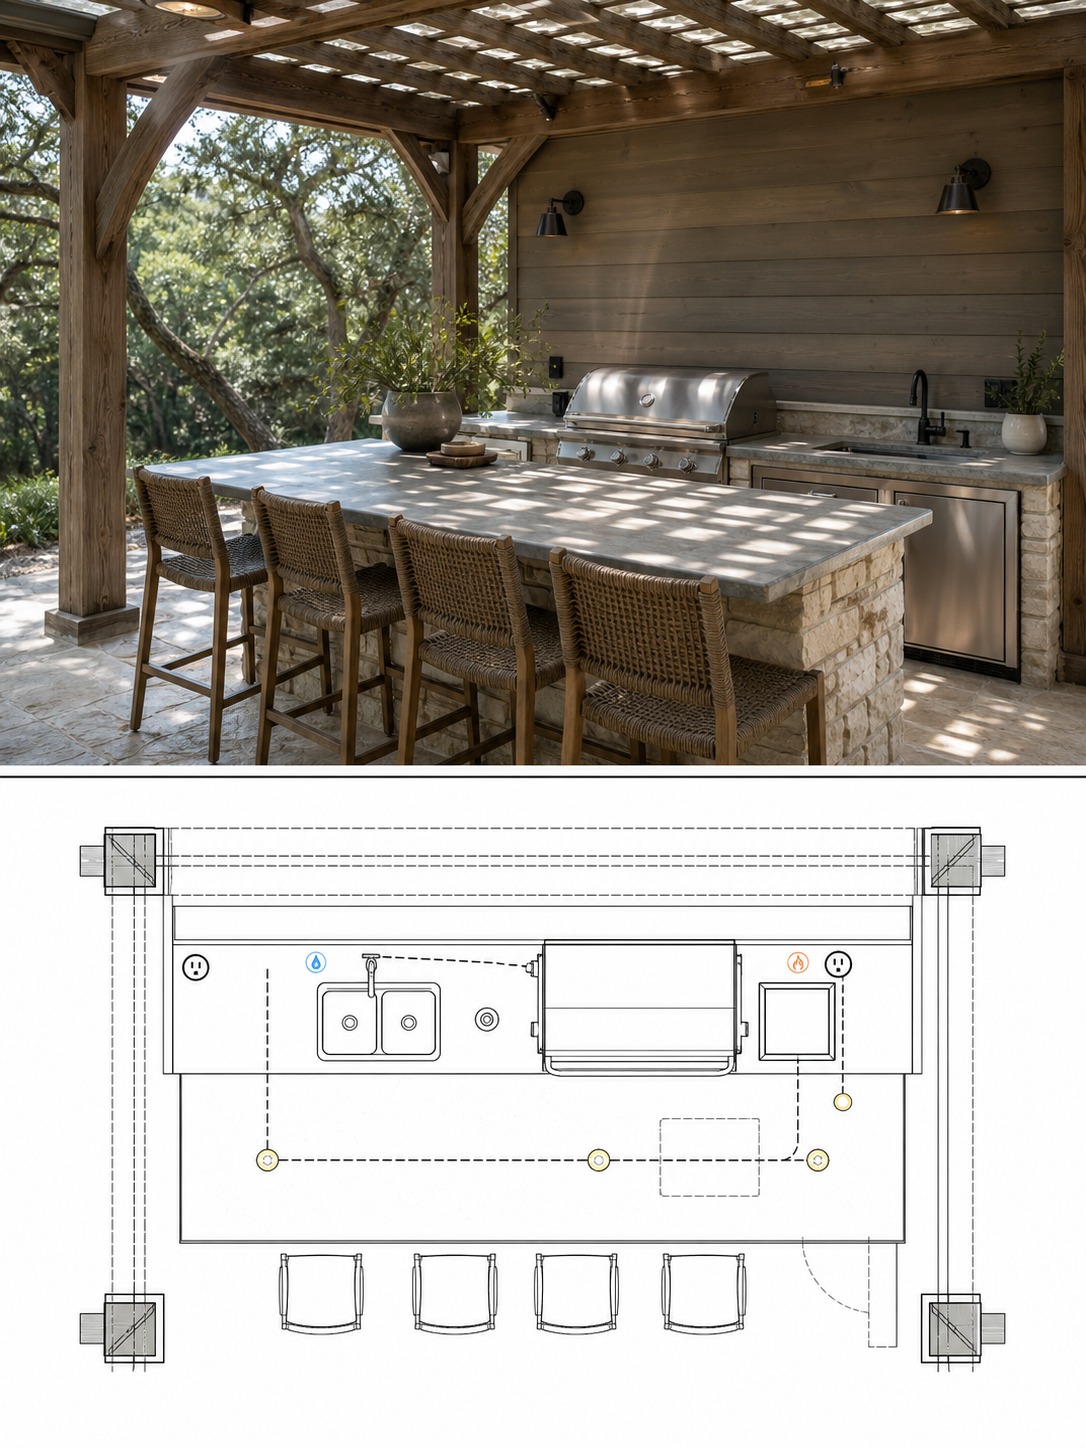
Countertops, pavers and cabinet bases
Dense natural Caesarstone, certain concrete blends, and specific porcelain products hold up well to UV exposure and moisture without cracking or fading. Pavers chosen for outdoor kitchen zones should match that same standard, and ideally allow for the removable-access approach mentioned earlier. Cabinet bases built for outdoor use need weather-rated materials rather than indoor cabinetry adapted for outside, since humidity and temperature swings work differently in an uncovered patio than in a kitchen. Where budget is a real constraint, affordable outdoor kitchen upgrades show which finishes give the most visual return without compromising on the materials that actually take weather damage.
Sink choices, corrosion-resistant fixtures and weather exposure
An outdoor sink needs fixtures rated for exterior use, not indoor hardware installed outside and hoped for the best. Corrosion-resistant metals matter here more than they do indoors, since an outdoor faucet deals with humidity and temperature swings an indoor one never sees. Sink material matters too. A compact stainless sink handles exposure better than options that look better in a showroom but weren’t designed to live outside year-round.
Freeze/thaw planning for colder climates
In climates with real winters, every water line serving the outdoor kitchen needs a winterizing plan: shutoffs, drain-downs, or insulation sized for how cold the site actually gets. Skipping this step is one of the fastest ways to turn a single frozen pipe into a full replumbing job the following spring. This is worth deciding during design, since retrofitting a winterizing shutoff into a finished system is far more disruptive than building it in from the start.
Design sequence: the right order for an outdoor kitchen project
A reliable order for planning an outdoor kitchen looks less like picking finishes and more like a short sequence, each stage depending on the one before it. Skipping a stage doesn’t save time, it just moves the cost of skipping it to a later, more expensive point in the project, usually right around the point the stonework is already finished.
Site check
Start with what the site can actually support: existing water supply, well capacity if relevant, drainage patterns after rain, and how the space sits relative to the house.
Utility plan
Map the water, gas, and power routes based on what the site check revealed, including where a drain line can realistically run and where an access point makes sense.
Layout
Let the layout follow the utility map rather than the other way around, placing the sink, grill, and fridge where the routes actually support them. For the broader planning logic behind laying out a functional kitchen, kitchen floor plans covers the same core principles indoors, where many of the same access and workflow rules still apply.
Materials
Choose materials rated for outdoor exposure and freeze-thaw conditions, once the layout is locked in and the true dimensions of each surface are known.
Lighting, seating and styling
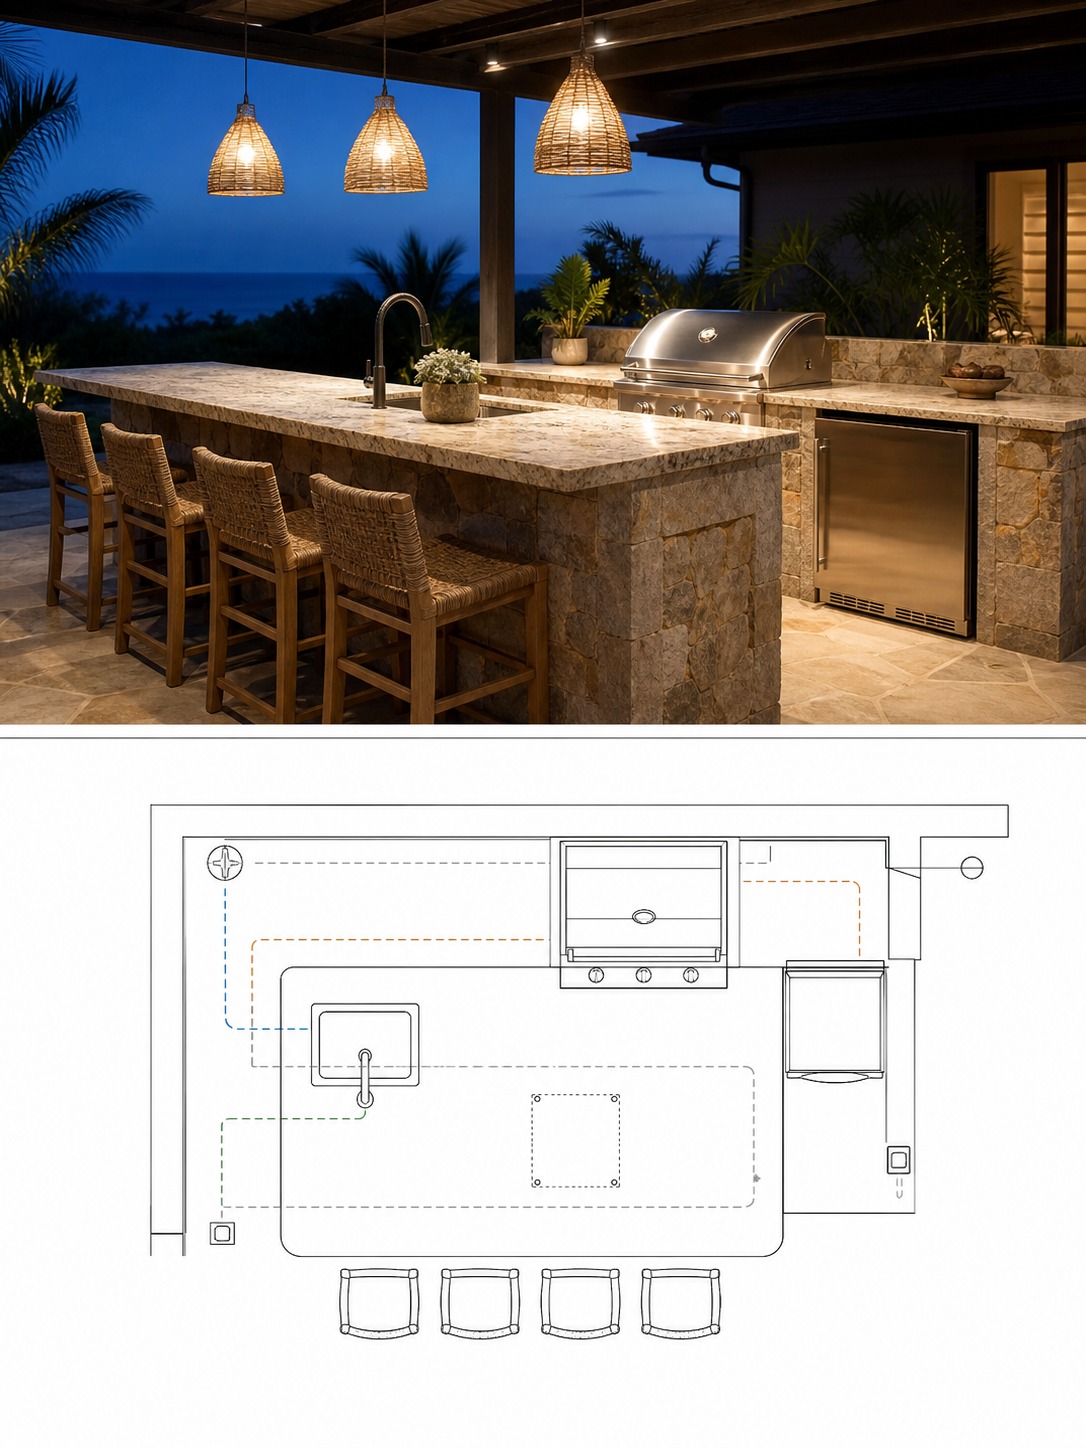
Only once the first four stages are settled does it make sense to think about lighting fixtures, seating, and finish styling, the parts that show up first in photos and last in a plan that actually works.
What to keep from the original article
Keep the plumber/well-service angle as one expert-check section
The plumbing and well-service angle from the source material behind this piece is worth keeping, not because it’s the whole story, but because it’s the one step most design content skips entirely. A local specialist such as LandP Plumbing and Well Service can test an existing water system, check a well pump’s real capacity, and confirm honestly whether it can support an added outdoor sink without dropping pressure inside the house. That single visit, done early, prevents a summer of weak indoor water pressure competing with a new outdoor sink for the same supply.
Remove local-service repetition and make it useful for any design-led homeowner
What doesn’t need to carry over is the local-service framing itself. The planning sequence (utilities first, layout second, materials third, styling last) holds regardless of location, water source, or which company ends up doing the plumbing work. For anyone thinking about how an outdoor kitchen fits into a larger backyard plan, outdoor living design covers how these same sequencing principles extend to the rest of the space.
FAQ
Q: What should be included in outdoor kitchen plans?
A: A complete plan maps water supply, drainage, gas (if a grill or pizza oven is included), and power before any layout gets drawn. It also accounts for maintenance access, drainage and grading around the hardscape, and materials rated for outdoor exposure, not just the visible layout and finishes.
Q: Do outdoor kitchens need plumbing?
A: Any outdoor kitchen with a sink needs a water supply line and a drain line, and in colder climates, a winterizing plan to protect those pipes. A grill alone doesn’t require plumbing, but most full outdoor kitchen plans include at least a sink, which brings plumbing into the project from day one.
Q: How do you drain an outdoor kitchen sink?
A: A sink drain typically ties into the existing sewer or septic system through a dedicated drain line, sized and sloped correctly by a plumber. Separately, the patio itself needs its own drainage plan for rain runoff, which is a different system from the sink’s plumbing but needs to be planned alongside it.
Q: What is the best layout for an outdoor kitchen?
A: There isn’t one universal best layout. The right layout follows the utility map: where the water, gas, and power lines can realistically run determines where the sink, grill, and fridge can go, and the counter runs follow from there rather than being decided first.
Q: What materials last longest in an outdoor kitchen?
A: Dense natural stone, certain concrete blends, and outdoor-rated porcelain hold up well to sun, moisture, and temperature swings. Corrosion-resistant fixtures for the sink and weather-rated cabinet bases matter just as much as the visible countertop material, especially in climates with real freeze-thaw cycles.
Start with what you can’t see
The countertop will look just as good whether the planning happened in the right order or not. The difference shows up years later, in whether the kitchen still works. An outdoor kitchen planned from the utilities up (water, drainage, gas, power, and access) before a single tile gets chosen, is the version that’s still functioning a decade in, while the one planned backward is the one quietly waiting for its first expensive repair.
None of this has to slow a project down. A site check and a utility map add days to the front of a timeline, not months, and they’re the cheapest insurance the project will ever buy against a five-figure repair later. Spend the first weekend on the parts nobody photographs, and the parts everyone photographs tend to take care of themselves.
An outdoor kitchen needs a social zone that does not block the cooking route. This pergola furniture layout guide shows how benches, tables, and circulation can sit together more comfortably.
- 732shares
- Facebook0
- Pinterest732
- Twitter0
- Reddit0