Learning to draw the human figure is key for anyone interested in fashion illustration. It helps artists create clothes that fit well and look natural on a body. Understanding proportions means knowing how different parts of the body relate in size to each other, so drawings look balanced and realistic. Drawing the human figure can be challenging, but it is a skill that can be learned with patience and practice.
The process can be broken down into simple steps, making it less intimidating for beginners. Fashion illustrations often use stylized proportions, but they still follow basic rules to keep the figure believable. Getting the hang of these rules helps artists design better and clearer fashion sketches.
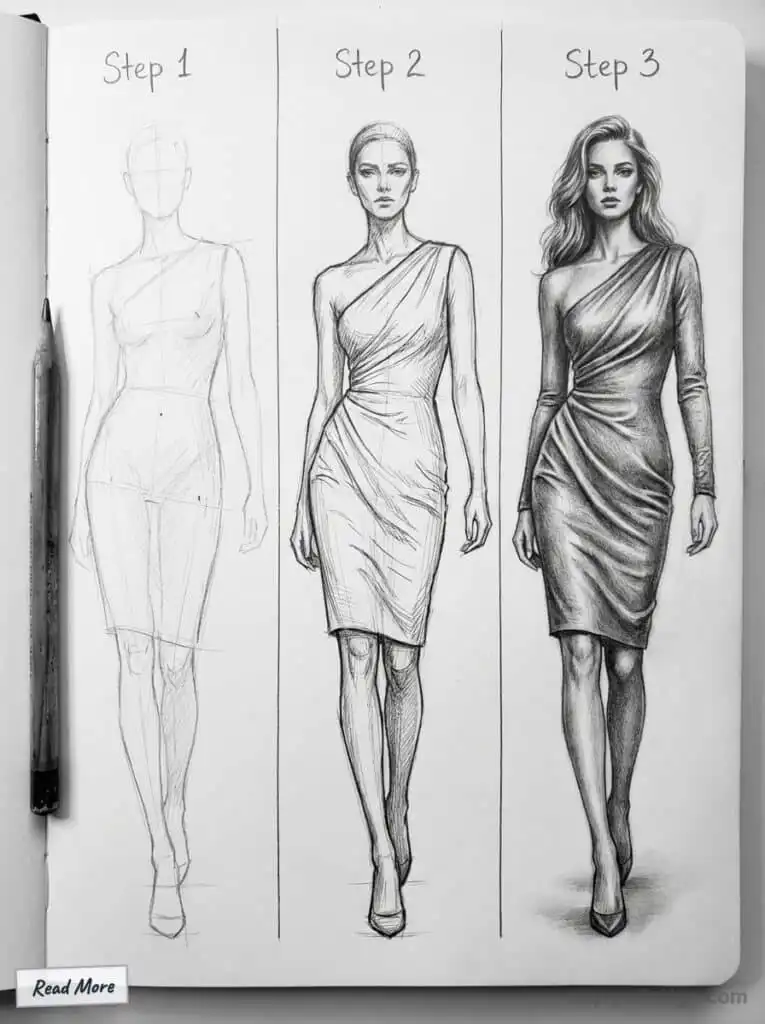
By focusing on proportions, anyone can improve their ability to draw poses and outfits that show how clothes move and fit. This makes the whole process of designing more fun and effective. Start with a clear idea or concept for your drawing to help guide your creative process.
Understanding Proportions in Fashion Illustration
Learning to draw the human figure for fashion means knowing the right size and length of body parts. This helps create designs that look balanced and stylish. It also means understanding how fashion figures differ from real-life bodies in size and shape.
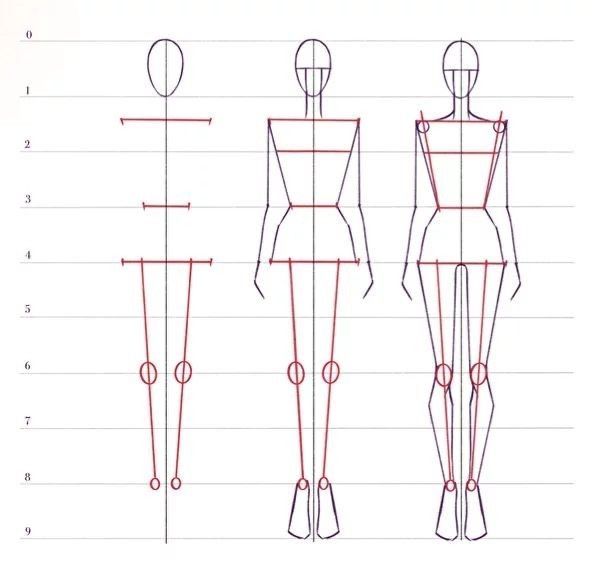
Fashion figures often exaggerate proportions to enhance the visual appeal of clothing designs. The ‘9 heads‘ proportion is a foundational guideline used to draw a fashion figure, allowing for a more dramatic and stylized representation that showcases garments effectively. When constructing the figure, using circles and other geometric shapes can help capture joints, movement, and organic body shapes. By following these guidelines, you can avoid common errors in proportion and improve your fashion illustration skills.
The Importance of Correct Proportions
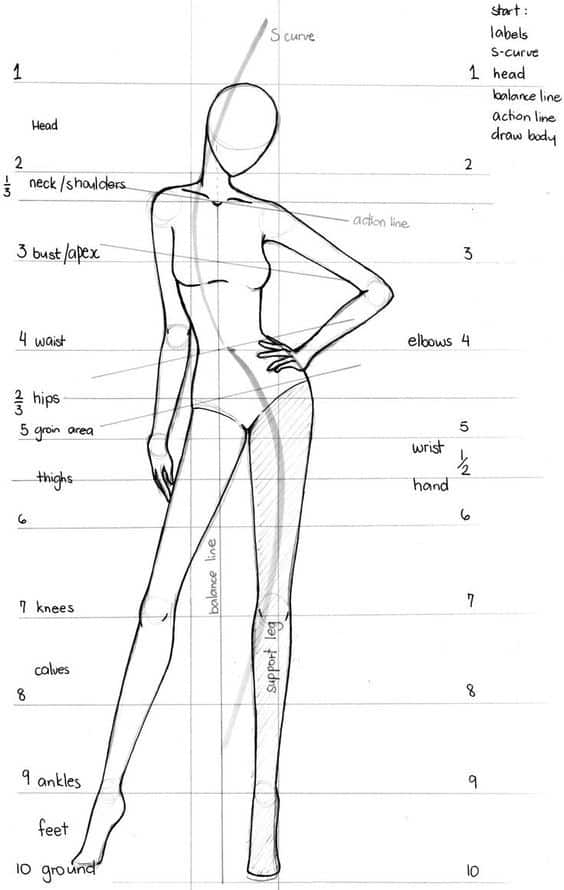
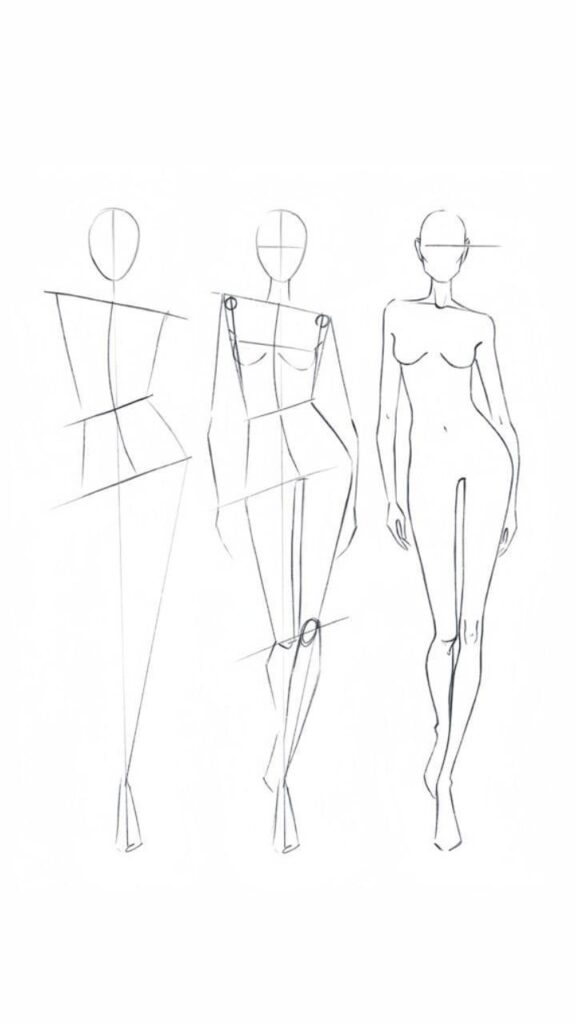
Correct proportions are key to making fashion drawings believable. They help show how clothes fit and move on the body. Without good proportions, designs may look awkward or unrealistic.
Accurate proportions also guide where details like seams and buttons should go. Fashion figures help communicate the technical elements of a design, such as length and fit, to a patternmaker. Including the right level of detail makes the design easier to understand for anyone creating the clothes. It also helps designers avoid mistakes when turning sketches into real garments.
Common Fashion Figure Ratios
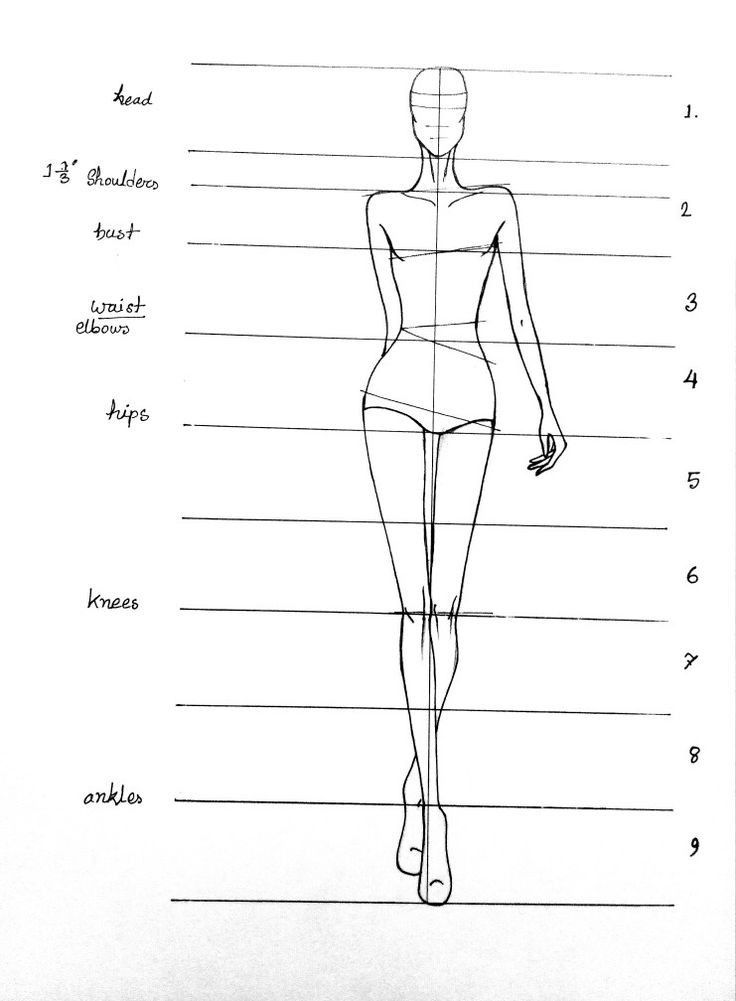
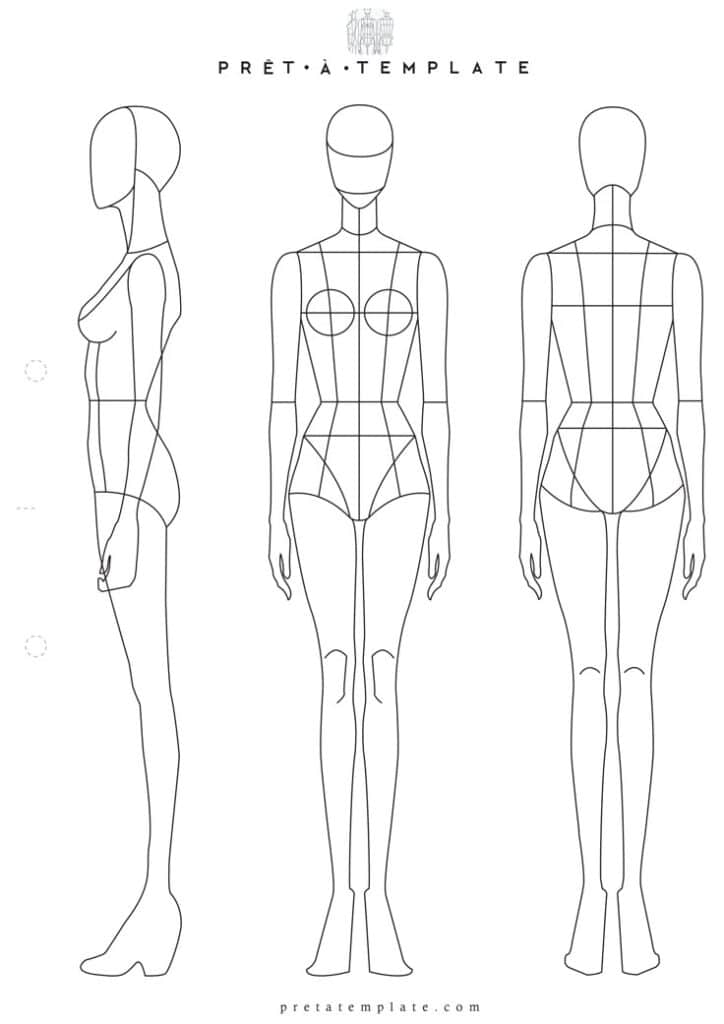
Fashion figures often follow a ratio of 9 heads tall. This means the height of the figure equals the length of nine head units stacked vertically. The average person is about 7.5 heads tall, so this ratio makes figures look longer and leaner.
Here is a simple breakdown:
| Body Part | Number of Heads Tall |
|---|---|
| Head | 1 |
| Torso to waist | 2-3 |
| Waist to knees | 3-5 |
| Knees to feet | 6-9 |
Using these proportions helps create a stylish, elongated look that highlights the clothing.
Differences Between Fashion and Realistic Proportions
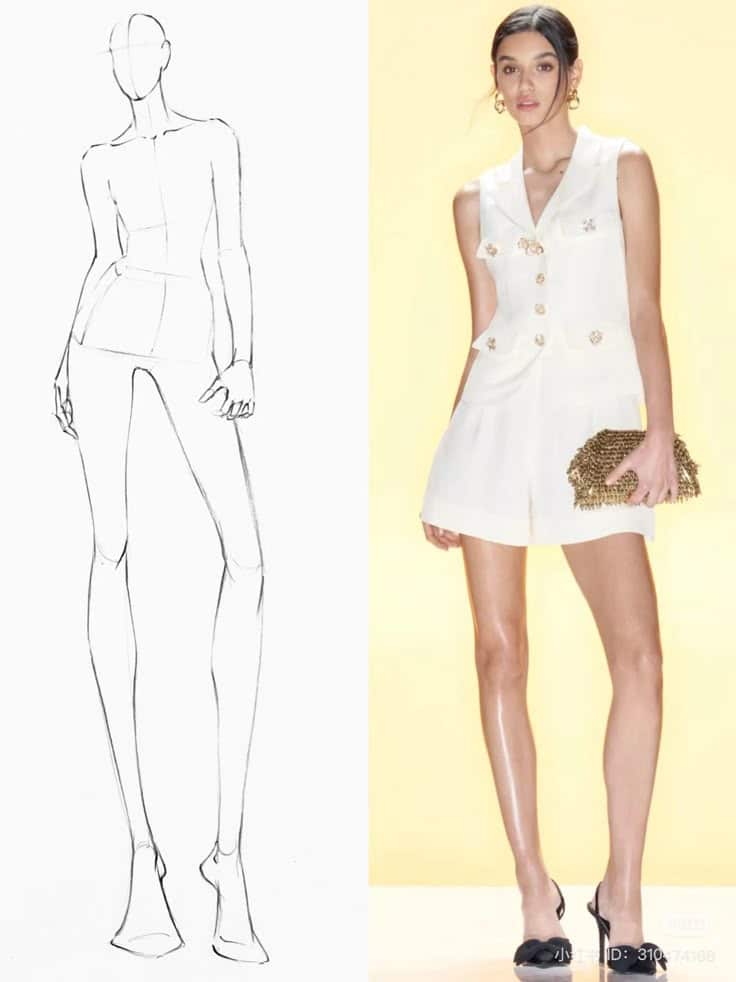
Fashion illustrations exaggerate body parts to emphasize style. Figures are taller, slimmer, and have longer legs than normal people. This creates a dramatic effect but is not a true reflection of everyday bodies.
Realistic proportions stick closer to how most people look, usually around 7 to 7.5 heads tall. Fashion drawings stretch bodies to draw attention to garments and create a more dynamic pose.
The choice depends on the illustrator’s goal. For fashion, exaggerated proportions work best to show off the clothes clearly and beautifully. Fashion figures can be stylized in various ways, but the ‘9 heads’ rule provides a foundational guideline for proportion in fashion drawing.
Creating a Fashion Croquis
A fashion croquis is the essential foundation for any fashion figure drawing, acting as a blank canvas for your creative ideas. Fashion designers use croquis as templates to sketch out new clothing designs, ensuring that each garment fits and flows naturally on the human body. Creating your own croquis is a great way to develop your own style and streamline your fashion illustration process.
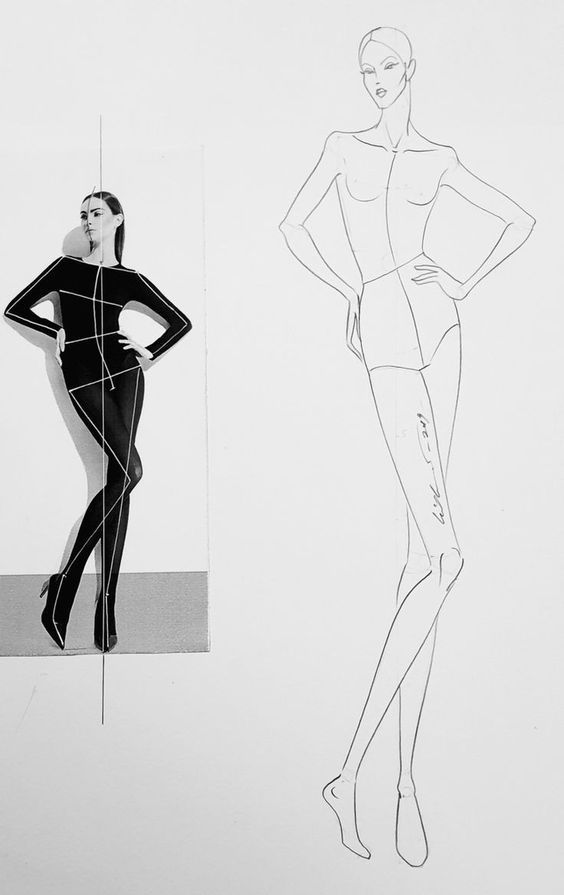
To begin, draw a vertical line down your paper—this is your balance line, which helps keep your fashion figure upright and proportionate. The balance line can be straight or gently curved, depending on the pose you want your figure to have. This line sets the stage for the rest of your drawing, so take a moment to imagine the movement and attitude you want to capture.
Next, draw horizontal lines across the vertical line to mark the key points of the body: the shoulders, waist, and hips. These horizontal lines help you keep the proportions of your fashion figure correct and make it easier to place clothing details later. The shoulder line should be the widest, the hip line a bit narrower, and the waist line the narrowest. Adjust these lines to match the pose and movement of your figure—if your model is leaning or twisting, let the lines reflect that dynamic.
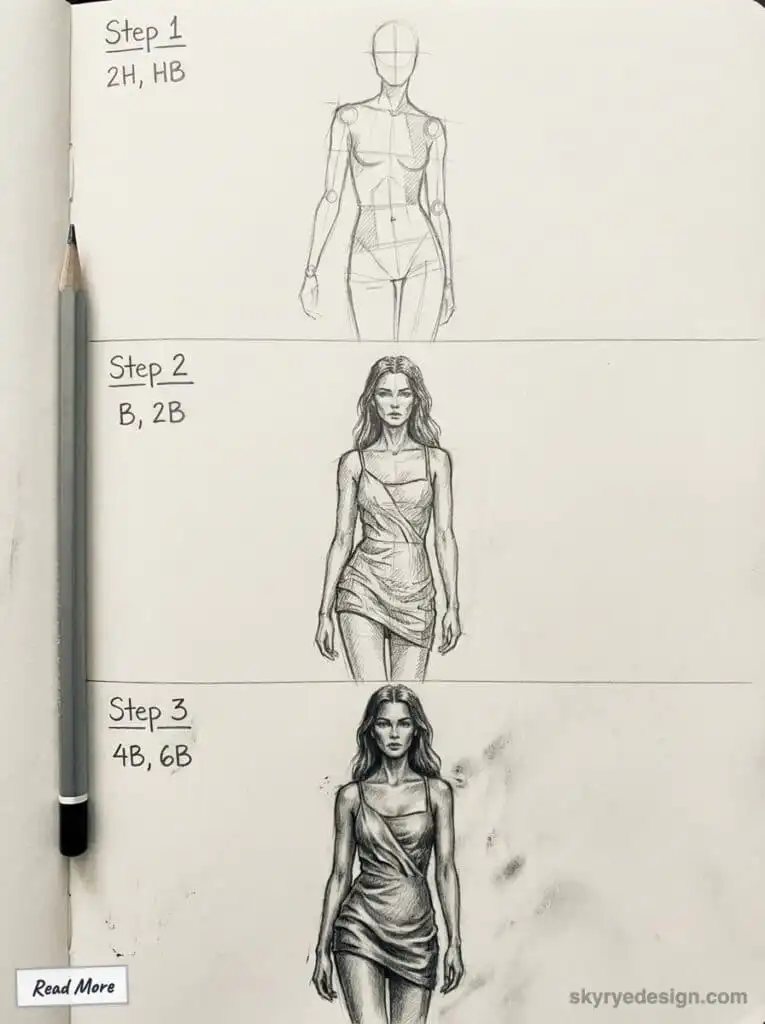
Add another horizontal line to indicate the underwear line, which sits just below the hips. This guideline is especially helpful for fashion designers, as it shows where pants, skirts, and other garments will sit on the body. Make sure this line curves slightly to follow the natural shape of the human form.
Now it’s time to block out the rest of the body using basic shapes. Draw a small oval for the head, then use circles, rectangles, and triangles to sketch out the shoulders, chest, hips, and limbs. Fashion croquis are usually drawn with elongated proportions—think long legs, a small head, and a slim waist—to give your fashion figure that signature runway-ready look. Don’t worry about making everything perfect; the goal is to create a flexible outline that you can refine as you go.
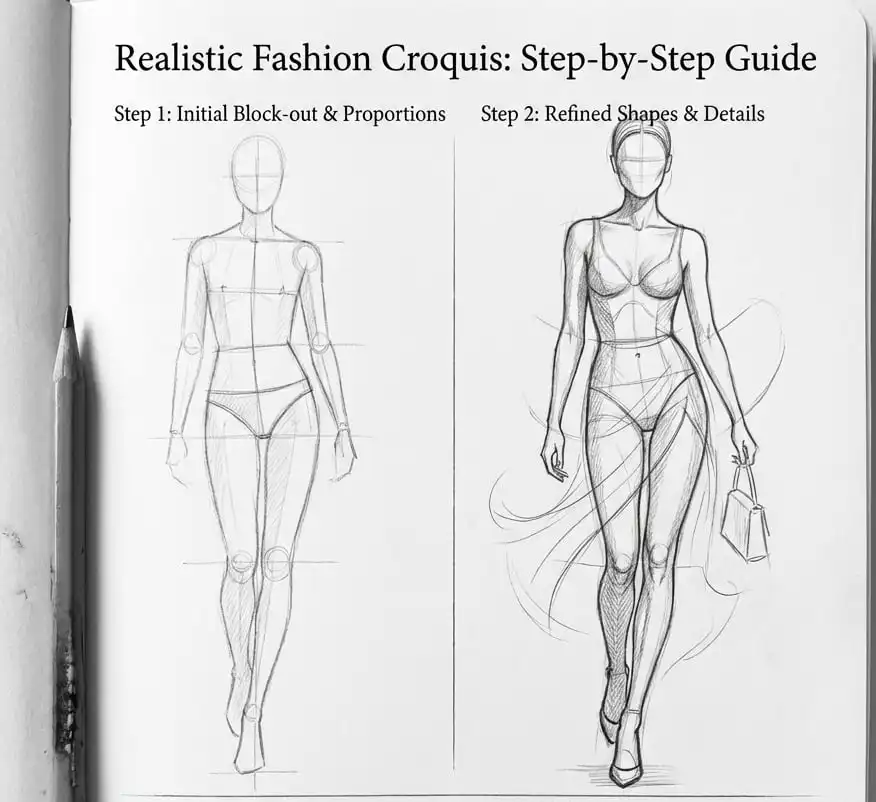
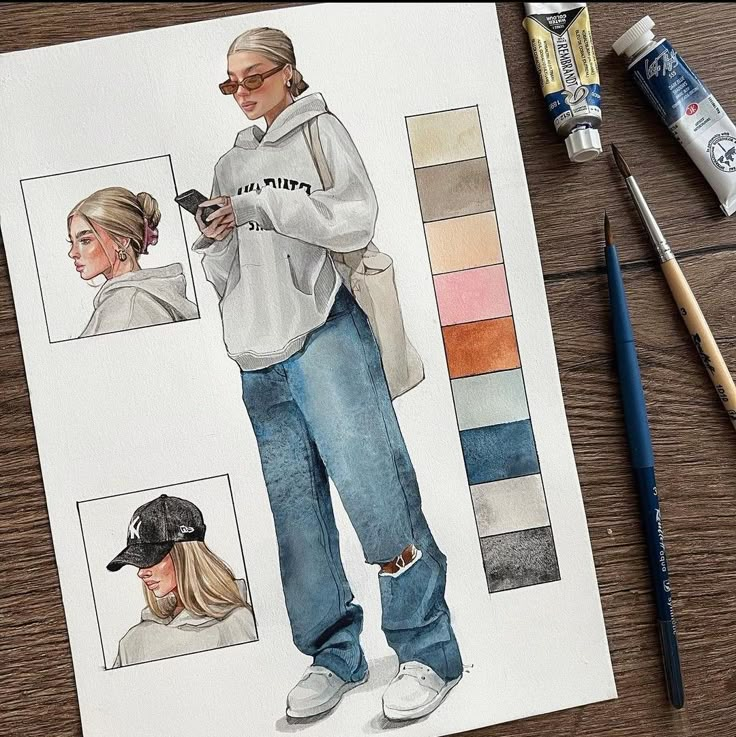
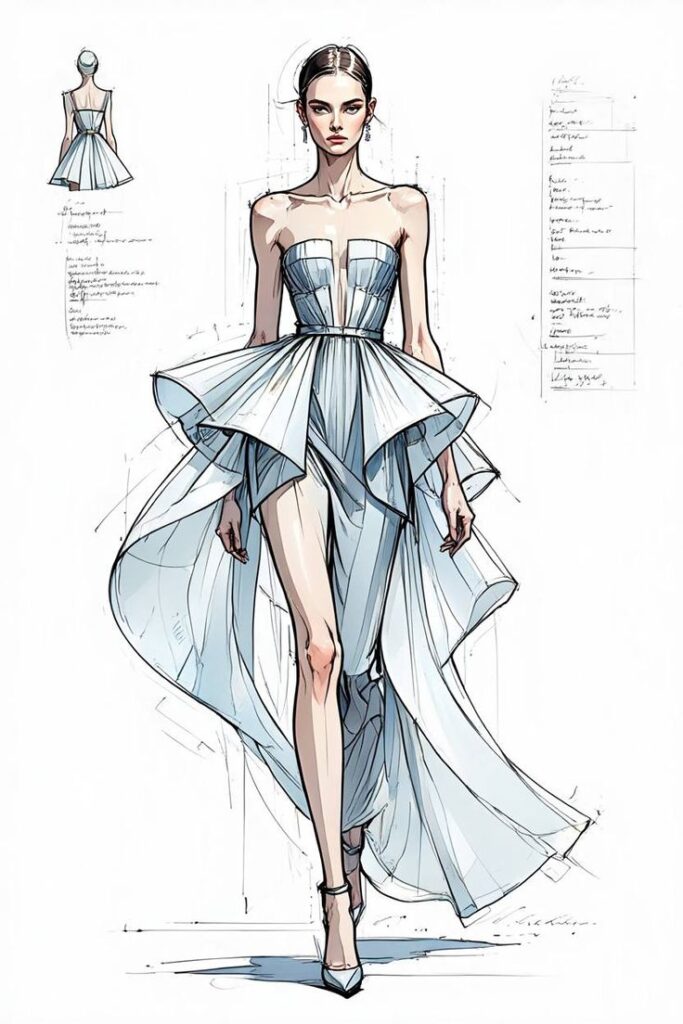
To bring your croquis to life, add movement lines that show how the figure moves and how the clothes will drape. These lines help you imagine the flow of fabric and the attitude of your model. You can also start sketching in details like hair, shoes, and accessories to complete the look and give your fashion figure personality.
Here’s a simple step-by-step guide to creating your own fashion croquis:
- Draw a vertical line as the balance line for your figure.
- Draw horizontal lines to mark the shoulders, waist, and hips.
- Add a curved horizontal line for the underwear line, just below the hips.
- Use basic shapes—ovals, circles, rectangles—to block out the head, torso, hips, and limbs, keeping fashion proportions in mind.
- Add movement lines to suggest the pose and flow of the garments.
- Sketch in details like hair, shoes, and accessories to complete your fashion figure.
With regular practice, you’ll develop your own style and technique for fashion croquis. Don’t be afraid to experiment with different poses, body shapes, and clothing ideas. The more you draw, the more confident you’ll become in capturing the energy and elegance of the human form in your fashion sketches. Whether you’re designing for fun or working toward a career in fashion designing, mastering the croquis is a key step in bringing your creative vision to life.
Drawing the Human Figure for Fashion
Fashion figures need to be stylish and balanced. The process involves building the figure step by step, setting a clear pose, and using guidelines to keep proportions correct.
Using the right tools, such as pencils, is essential for sketching light outlines and practicing different poses. Starting with a stick figure as a base can also simplify the process of drawing the human figure.
Step-by-Step Construction of the Fashion Figure
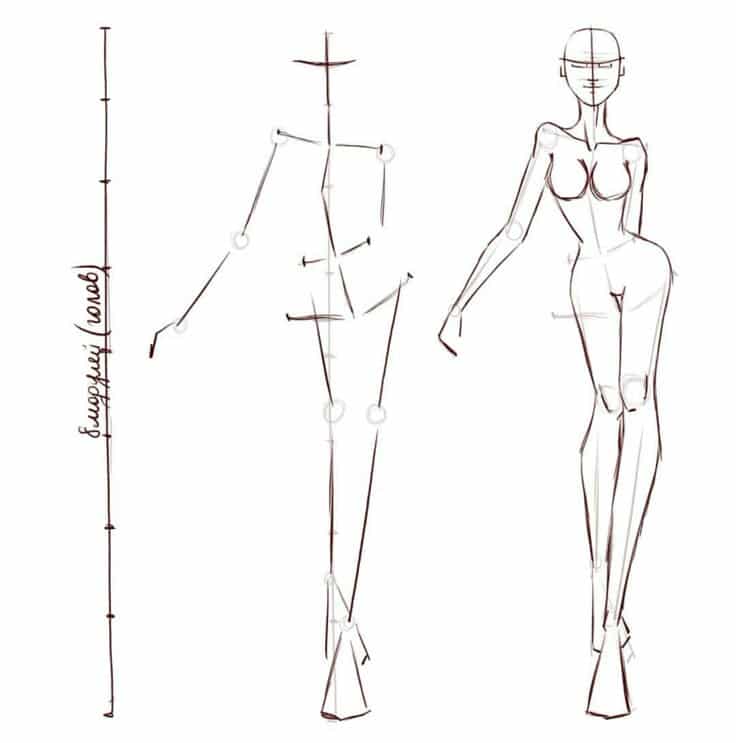
First, the artist starts with a basic skeleton called a “gesture line” to capture movement. To make the process easier, break it down into simple, manageable steps. Then, simple shapes like ovals and rectangles form the torso, hips, and limbs, and geometric shapes such as ovals and triangles are often used to build the figure’s structure.
The figure usually is drawn taller than a real person—about 9 heads tall instead of 7.5. This elongation creates a sleek look that suits fashion sketches.
Next, the artist refines shapes and adds curves to show femininity or strength. Pay special attention to the placement and movement of the arms, as their position relative to the shoulders, waist, and hips enhances the dynamic of the figure. The hands, feet, and neck are smaller but must be drawn carefully as they impact the figure’s balance.
Establishing the Figure’s Pose and Silhouette
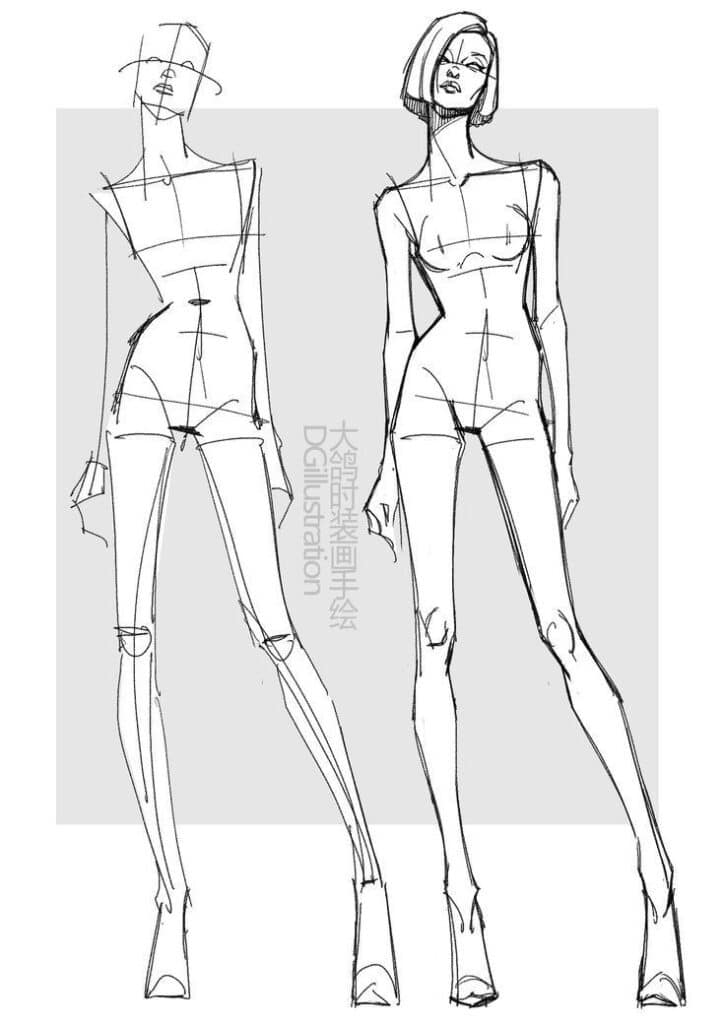
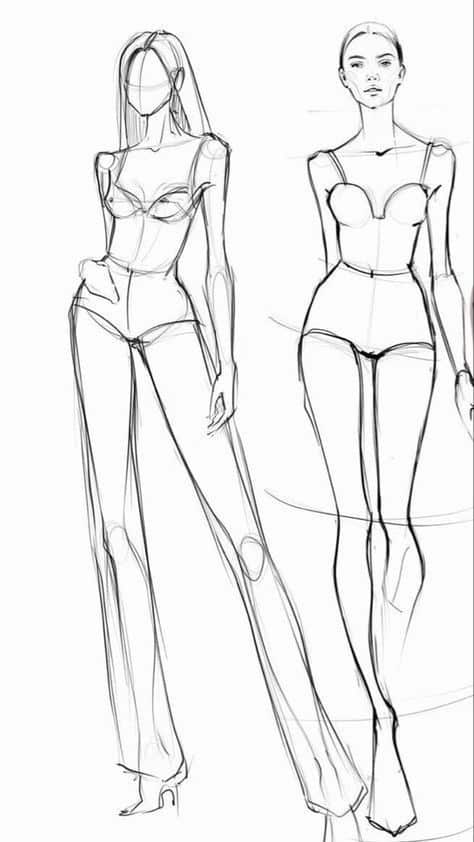
The pose shows the model’s attitude and clothing flow. It can be dynamic, with a twist or a bend, or calm and straight. Contrapposto is a classic pose where the shoulders and hips tilt in opposite directions, creating a natural curve in the body and adding a sense of movement.
The silhouette is the overall outline of the figure. It should be smooth and clear. Drawing shoulder lines as slanted horizontal lines, often opposite to the hip line, is important for conveying movement and posture in the figure. A good silhouette makes the clothing stand out and the figure easy to read.
Using light lines helps adjust the pose before firming up the drawing. The figure’s weight is balanced by positioning feet and hips correctly.
Mapping Proportions With Guidelines
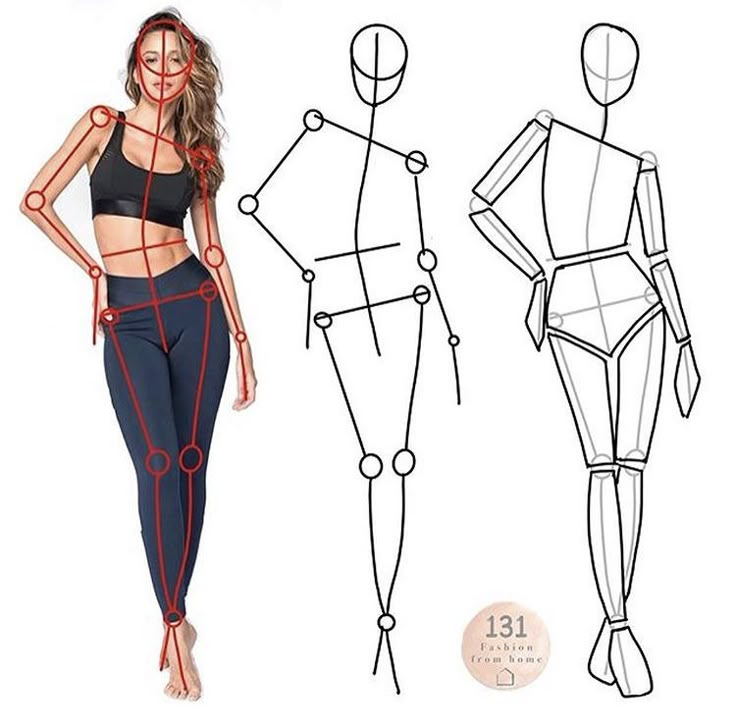
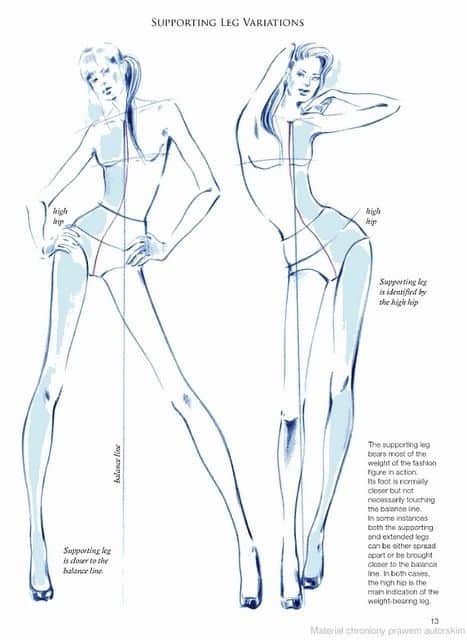
Guidelines divide the figure into parts to keep everything in order. A common way is to split the height into nine equal parts, or “heads.”
These lines mark key points like the chin, chest, waist, hips, knees, and ankles. They guide where each body part goes.
Artists draw horizontal lines across the figure to keep shoulders and hips level. Vertical center lines help for symmetry and posture.
Using guidelines helps maintain consistency, especially when drawing multiple figures or different poses.
Refining Your Fashion Illustration Techniques
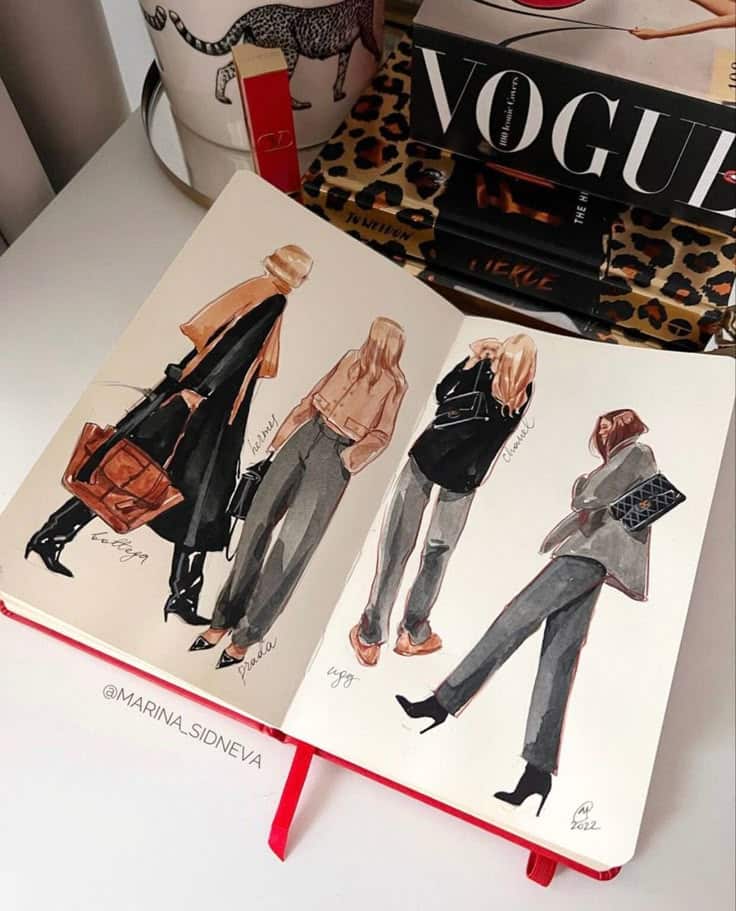
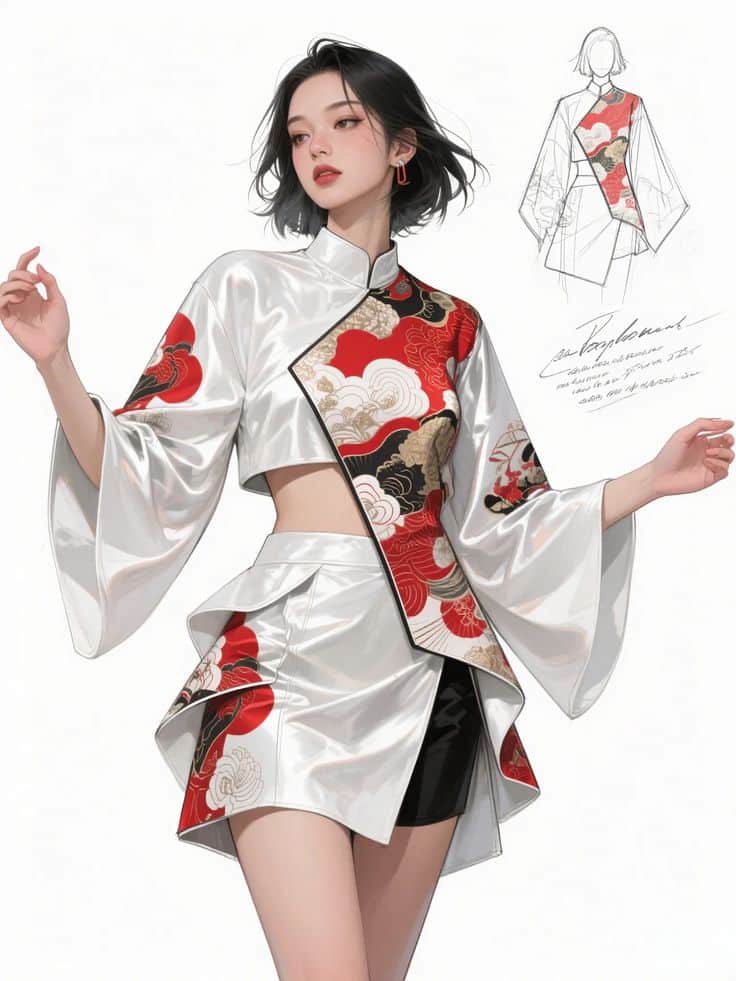
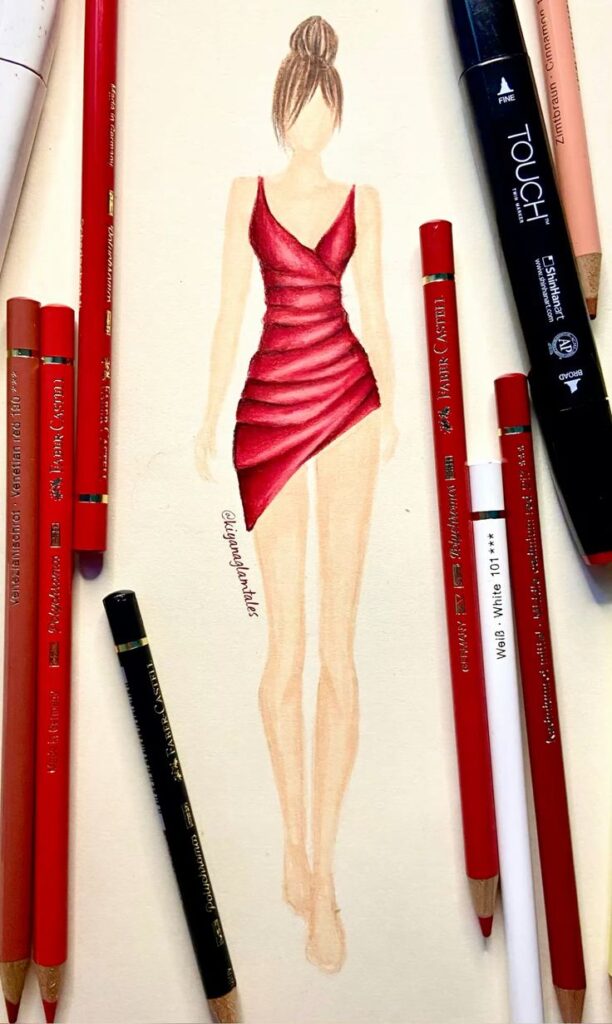
Improving fashion drawings means focusing on small but important details and trying out new ways to show the figure’s movement. Play with different techniques and approaches, such as drawing stick figures in various poses and scenarios, to experiment and develop your own style.
These steps help make the drawings more interesting and lively. Regular practice and experimentation are essential for developing a unique illustration style.
Adding Stylized Details to the Figure
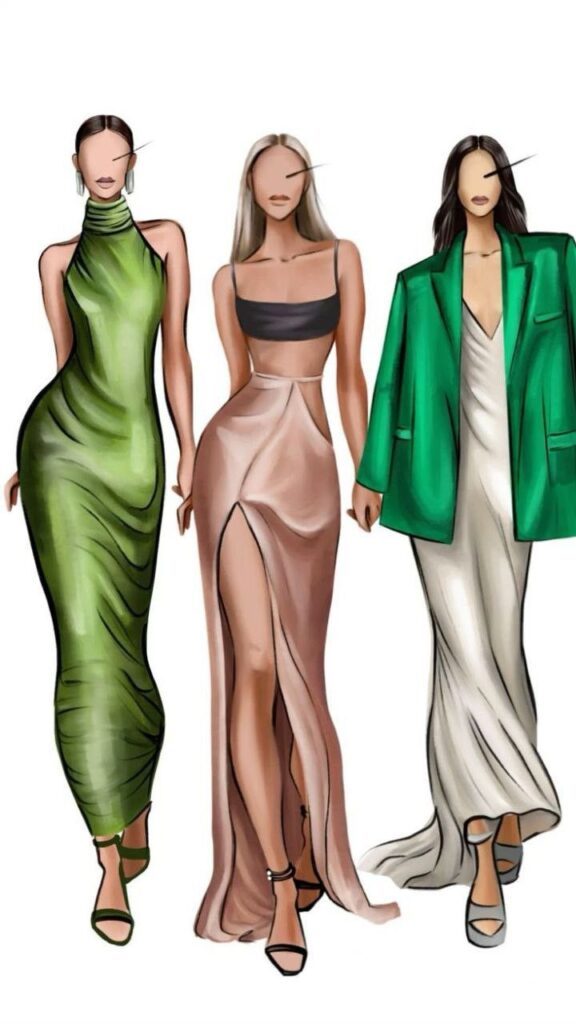
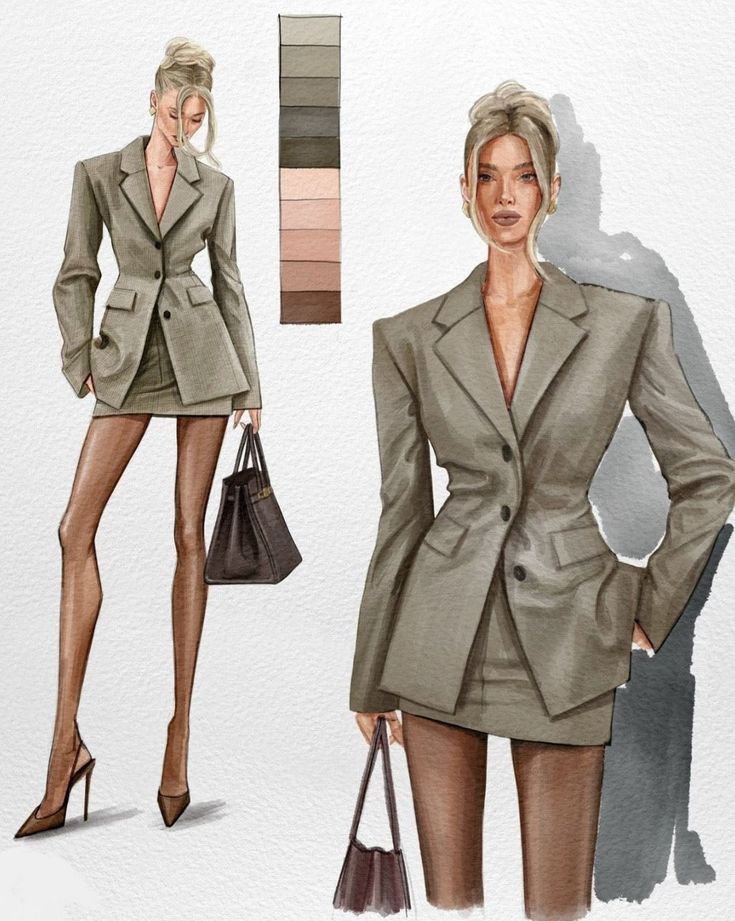
Stylized details highlight the unique look of a fashion illustration. Instead of drawing everything exactly as it is, the artist can change features to make the figure look taller or more elegant.
For example, elongating the legs or neck creates a sleek, graceful feel. Clothing folds and textures should also be added carefully. Small touches like sharp collars, flowing fabric, or exaggerated ruffles catch the eye.
Using clean lines for hair and facial features keeps focus on the outfit. Accessories like belts, hats, or jewelry should support the outfit without overwhelming the sketch. Balance is key to maintain style without clutter.
Experimenting With Dynamic Poses
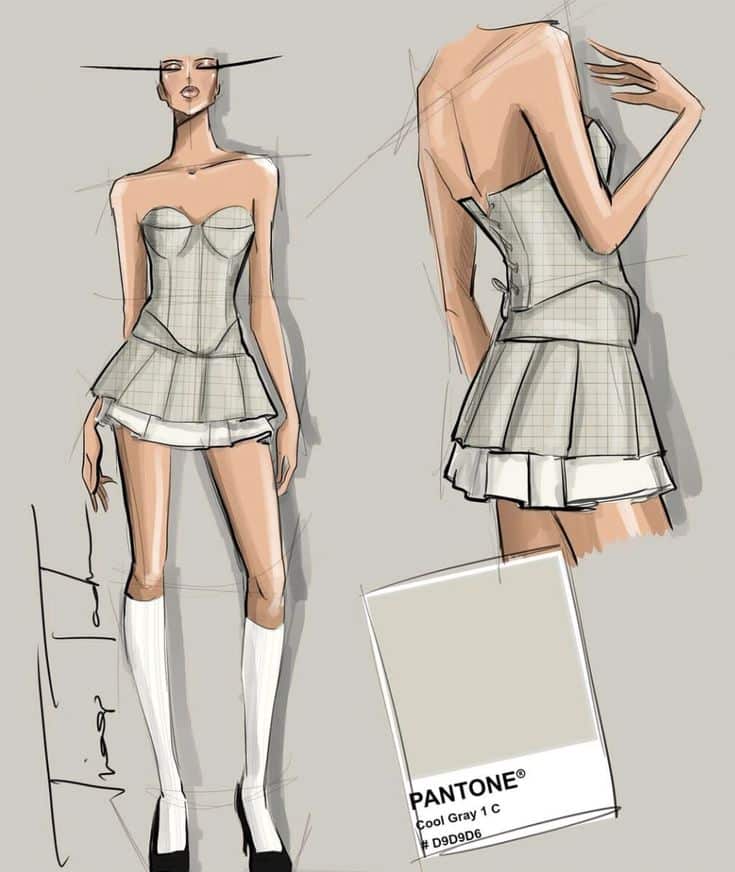
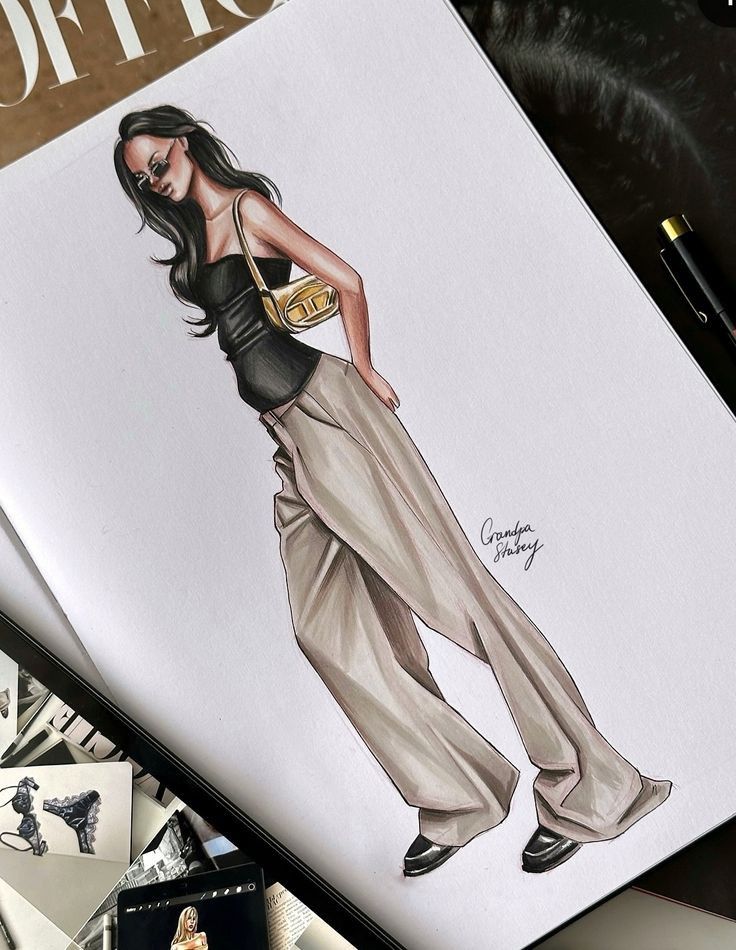
Dynamic poses bring energy to fashion sketches. Instead of standing straight, the figure can lean, twist, or walk. This shows how the clothes move and fit in real life. Diagonal lines and asymmetrical shapes can be used to convey movement in dynamic poses.
Artists start by drawing simple lines called gesture lines to capture motion quickly. Then they add body shapes, keeping proportions right. Poses like a hand on the hip or a step forward add life and personality.
Trying different angles, like side views or a three-quarter turn, can help show the clothes from many perspectives. This makes the designs clearer for others to understand. Watching a video tutorial can help artists learn how to draw dynamic poses step by step.
Frequently Asked Questions (FAQ)
How to draw a body for fashion illustration?
To draw a body for fashion illustration, start by establishing the overall proportions using the ‘9 heads’ or ’10 heads’ rule to create an elongated figure typical for fashion sketches. Begin with a vertical balance line and add horizontal lines to mark key points like shoulders, waist, hips, and underwear line. Use basic shapes such as ovals and rectangles to block out the head, torso, and limbs. Incorporate movement lines to capture the pose and fabric flow, then refine the figure with details like arms, legs, hair, and clothing. Practice helps develop your own style and accuracy.
What is the 10 head rule in fashion figures?
The 10 head rule is a proportional guideline used in fashion illustration where the height of the figure is divided into ten equal parts, each the size of the head. This creates an elongated and stylized figure that is taller than the average human, which is typically about 7.5 heads tall. Using this rule helps fashion designers emphasize elegance and showcase garments with dramatic proportions.
What is the simplest method of drawing a human figure?
The simplest method of drawing a human figure is to start with a stick figure or gesture line to capture the basic pose and movement. Then, build up the figure by adding basic geometric shapes like circles, ovals, and rectangles to represent joints and body parts. This approach breaks down the complex human form into manageable parts, making it easier to maintain correct proportions and create dynamic poses.
What is the 4 8 8 method of drawing?
The 4 8 8 method of drawing is a proportion technique where the body is divided into sections based on head lengths, often used to simplify figure drawing. While not as common as the 9 or 10 heads rule in fashion illustration, it helps artists measure and map out the human figure by breaking the height into parts that correspond to key anatomical landmarks, aiding in achieving balanced and realistic proportions.
- 1.2Kshares
- Facebook0
- Pinterest1.2K
- Twitter0
- Reddit0
