An Earth drawing starts with one clean circle, a chosen view of the continents, and a single light source. Keep the landmasses simple at first, curve cloud bands around the sphere, and save the darkest blue for the shadow side. The guide below shows an easy step-by-step method, then expands it into realistic, cartoon, and space-view variations.
Earth Drawing: Quick Answer
Draw a large circle and lightly mark a vertical axis so the globe does not feel flat. Choose one hemisphere—the Americas or Africa and Europe—and place only the largest land shapes. Colour the oceans first, leave small gaps for clouds, then shade one edge of the circle to create volume. A narrow pale rim on the lit side suggests atmosphere. For a beginner version, stop at simple green land and blue water; add texture only after the silhouette reads clearly.
How to Draw Earth Step by Step
Materials You Need


You only need a few basic drawing materials: smooth paper, an HB pencil, a clean eraser, and blue, green, brown, and white colouring tools. A compass or a cup gives you a reliable circle; a white pencil or gel pen is useful for cloud edges and the thin atmospheric highlight. Use medium-weight paper if you plan to layer coloured pencil or a light watercolour wash.
Step-by-Step Drawing Guide


- Build the globe. Draw a circle lightly. Add a faint vertical axis and a curved equator; these guides help every later shape follow the sphere.
- Choose the view. Decide which hemisphere faces the viewer. Do not try to show every continent at once.
- Block the land. Place two or three large continent silhouettes before tracing coastlines. Keep the pencil pressure light so you can correct their size.
- Add clouds. Break white bands into uneven groups and curve them along the globe. Let some cross land and ocean.
- Colour from large to small. Fill the oceans first, then land, ice, clouds, and small surface accents.
- Set the light. Darken one edge, soften the transition across the middle, and keep a thin light rim on the bright side.
Adding Colors and Textures


Lay in the ocean with an even middle blue, then deepen the shadow-side edge with navy or indigo. Keep the centre slightly lighter; this value change does more for the spherical form than drawing waves across the surface. Use muted green and ochre for land so the clouds remain visible.
Cloud bands should overlap the continents and follow the same curvature as the equator. Press lightly with white pencil, pastel, or gouache, then sharpen only a few sunlit edges. A narrow pale-blue rim outside the bright edge suggests atmosphere without turning it into a thick outline.
Earth Drawing Ideas and Inspiration
Use the examples below as Earth picture references rather than templates to copy exactly. Try a satellite-inspired study, playful cartoon, or a small globe in a space scene. For related practice, compare the curved water shapes in an ocean drawing, then browse more drawing ideas when you want a different subject.
Realistic Earth Illustrations


For a realistic Earth drawing, choose one reference and match its viewing angle before adding detail. The NASA Earth galleries are useful for checking continent scale, cloud coverage, ocean colour, and the thin atmospheric rim. Simplify the coastlines, but keep the large land-to-water balance recognisable.
Using shading and color blending helps to show depth and texture. For example, light areas can represent sunlight hitting the surface, while darker zones show shadows or deep water.
People often add natural features like mountains, forests, and ice caps to make the Earth feel more alive. This style is good for showing the planet’s real beauty and geography clearly.
Cartoon and Creative Styles

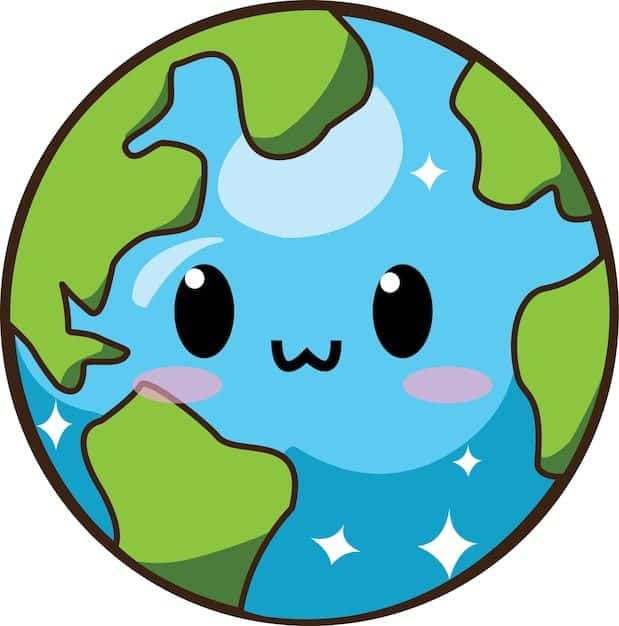
This style uses simple shapes, bright colors, and fun designs to represent Earth. The artist might draw big eyes or a smiling face on the planet.
Creative drawings can include Earth holding hands with other planets or surrounded by stars and plants. These ideas make the artwork feel friendly and playful.
Using bold lines and exaggerated features helps to catch attention. Cartoon styles are great for kids or projects that want to show Earth’s importance in a fun way.
Drawing the Earth From Space
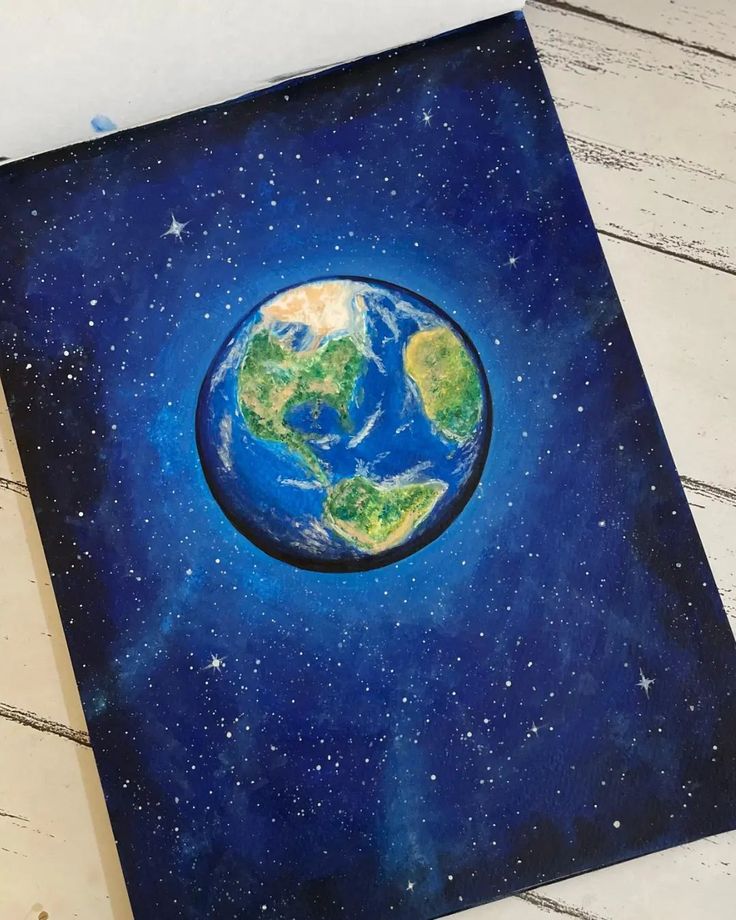

This approach shows Earth as it looks from far away in space. The planet is usually a sphere with visible land and ocean shapes.
Keep the space background darker than the planet’s shadow side, but avoid filling every gap with stars. One small cluster is enough to hold the composition together. If you add a second body, this moon drawing guide covers the same sphere-and-light logic on a simpler surface.
This style helps to show Earth as a whole unit, emphasizing its place in the universe. It often inspires thoughts about protecting the planet and feeling connected to it.
Tips for Improving Your Earth Artwork
Check the globe at thumbnail size before polishing it. The circle, continent placement, and light direction should still read when the page is small. Use this quick table to diagnose the drawing before adding texture.
| Check | What to look for | Quick fix |
|---|---|---|
| Sphere | One side is clearly lighter | Darken the opposite edge with a soft gradient |
| Continents | Large shapes fit the chosen hemisphere | Erase small coast details and correct the silhouette |
| Clouds | Bands curve around the globe | Break straight strips into uneven arcs |
| Composition | The planet has breathing room | Move stars or the Moon away from the tangent edge |
Shading and Lighting Techniques
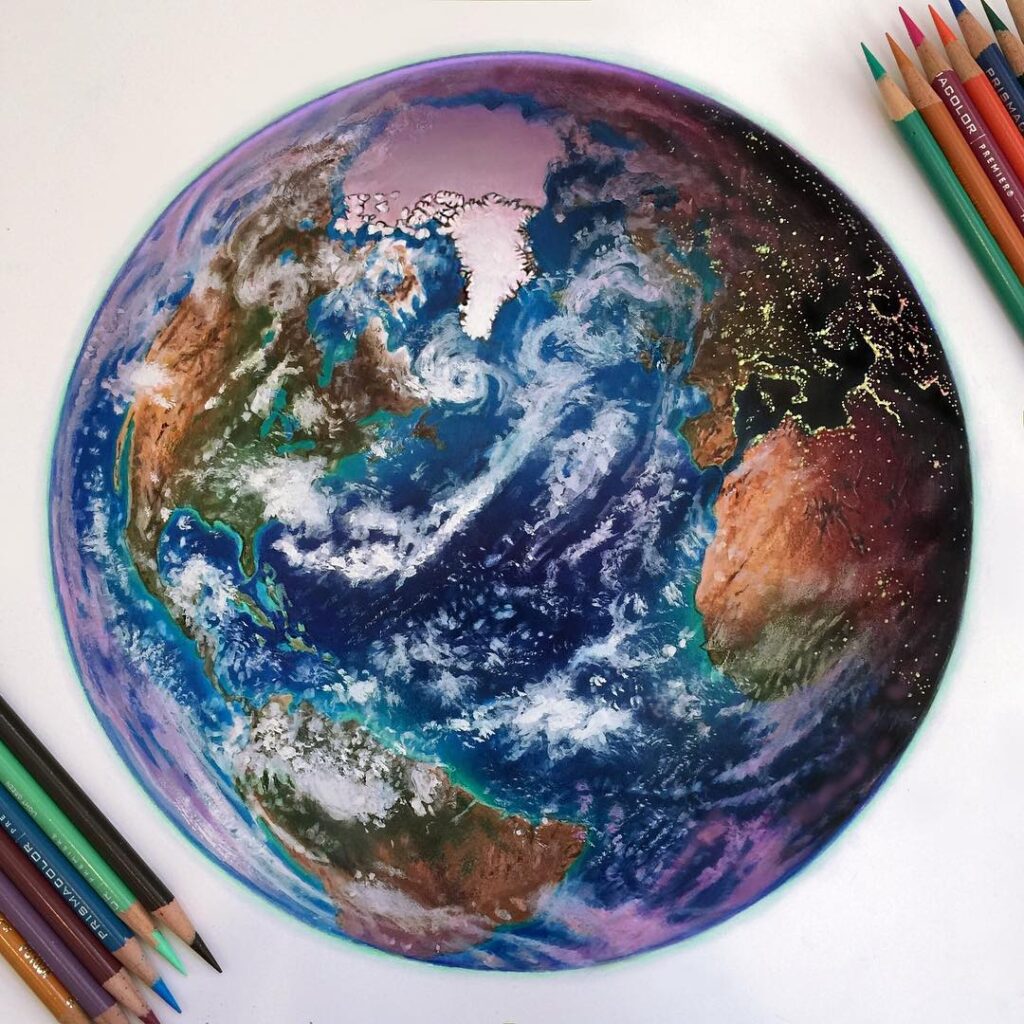

Using shading can create a round, 3D look for the Earth. Light usually hits one side of the planet, so the artist should make that side brighter. The opposite side should be darker to show shadow.
A smooth gradient between light and dark helps the Earth look like a sphere. Blending colors softly is key.
Adding a small bright spot, called a highlight, shows where the light source hits strongest. This makes the Earth look shiny and more real.
Using different pencil pressures or brush strokes can give texture to the surface. Shadows near the edges can show the planet’s curve.
Incorporating Details Like Clouds and Continents


Including continents helps the viewer recognize Earth quickly. The artist should focus on the major shapes of land, like Africa, Asia, and the Americas. Drawing these shapes clearly but simply is important.
Place clouds across land and ocean so they feel suspended above the surface. Avoid equal-sized cotton-ball shapes; combine soft bands, broken wisps, and one or two brighter masses. The full cloud drawing guide explains how values and lost edges create volume without a hard outline.
Using white or light gray creates a soft, airy look for clouds. It’s good to scatter clouds randomly to make them look natural.
Use short directional marks for mountain ranges and reserve solid white for ice or the brightest clouds. Surface details should support the globe’s curve, not compete with it.
Common Earth Drawing Mistakes
- Drawing every continent at once: choose one view and let the far side disappear around the sphere.
- Making coastlines too detailed too early: correct the large land silhouettes before adding bays or islands.
- Using a dark outline around the whole globe: let the shadow edge soften and keep the lit rim narrow.
- Placing clouds like stickers: overlap land and water, vary their edges, and curve the bands around the planet.
- Changing the light direction: use one source for the globe, clouds, Moon, and any nearby objects.
- 503shares
- Facebook0
- Pinterest500
- Twitter3
- Reddit0