For about six months, I kept a sketchbook that I filled with drawings I was proud of and drawings I was not proud of in roughly equal proportion. Then someone who was better at drawing than me looked through it and said something that changed everything: she pointed at the drawings I was most proud of — a series of carefully finished portraits from photo reference — and said those were the ones teaching me the least.
The crumpled paper studies, the five-minute hand gestures, the kitchen corner drawn in ten minutes before the light changed: that was where the growth was. The comfortable drawings were good. The uncomfortable ones were useful.
- The Subject You Choose Determines the Skill You Build
- Observational Drawing Ideas: Looking Harder at What Is Already There
- Gesture and Figure Drawing Ideas
- Urban Sketching and Architectural Drawing Ideas
- Nature and Botanical Drawing Ideas
- Imagination-Based Drawing Ideas
- Master Study Ideas: Learning from Artists Who Solved the Problems You Face
- FAQ: Art Drawing Ideas
That reframe changed how I choose drawing subjects. The question is not just what do I want to draw — or what should I draw when I’m bored — but what does drawing this subject actually teach me? A portrait from a photograph trains you to copy shapes carefully. A portrait from a live sitter at two-minute intervals trains you to see, prioritise, and commit under pressure. Same subject, different conditions, completely different skill development.

The art drawing ideas in this guide are organised by what they teach rather than what they look like. That distinction is the difference between filling a sketchbook and building a practice.
At university, we had a term for it: “getting your act together,” “getting your groove on,” when you get into a system and start coming up with new ideas every day, you start throwing away your laziness, and you notice that your work is improving and you’re getting a lot of insight. The main thing is to get your groove on.
This guide covers: observational drawing from life, gesture and figure work, architectural and urban subjects, nature and botanical drawing, imagination-based prompts, and master study exercises — over forty subjects in total, each with a note on why it works and how to start.
The Subject You Choose Determines the Skill You Build
Most drawing guides treat subject choice as an aesthetic or motivational question — draw what you love, draw what inspires you. Sound advice for maintaining a practice, but incomplete advice for developing one. Different subjects train different perceptual and technical skills, and an artist who only draws what they love tends to develop persistent weaknesses everywhere else.

The classic example: artists who draw primarily from photo reference get very good at copying shapes and values as they appear in a flat image. They often struggle with foreshortening, spatial relationships between objects in real space, and subjects that move or change.
Artists who draw primarily from life get better at observing three-dimensional form but sometimes produce work that lacks compositional refinement. Neither approach is wrong — but understanding what each subject teaches lets you make strategic choices rather than defaulting to whatever feels comfortable.
 with pencil, pen, eraser | Sky Rye Design")
The other dimension is the one my colleague was pointing at: difficulty level within your current skill range determines your growth rate. Drawing subjects you already handle competently produces drawings you feel satisfied with. Drawing subjects that challenge your current level produces frustrating sessions and visible skill gains over weeks. Both have a place in a healthy sketchbook practice, but the ratio matters. If every page is comfortable, you are consolidating rather than growing.
| ✏ Sketchbook method: Keep a simple log at the back of your sketchbook. After each session, note the subject and one thing it specifically challenged. After a month, look at the log and identify which skills you challenged most and which you avoided entirely. The gaps are your development priorities for the following month. Five minutes of reflection turns a sketchbook into a directed learning tool. |
Observational Drawing Ideas: Looking Harder at What Is Already There
Observational drawing — working directly from a real subject in front of you — is the foundation of almost every other drawing skill. It develops the perceptual ability to see accurately, the hand-eye coordination to translate what you see onto paper, and the judgment to decide what to include and what to leave out.

Betty Edwards, in Drawing on the Right Side of the Brain (1979), identified that the core challenge in observational drawing is not technical but perceptual: the brain must switch from symbolic shorthand (the idea of an eye, a hand, a tree) to pure shape-and-value reading. Every subject below is chosen because it disrupts that symbolic shorthand and forces a genuine looking.

Observational drawing — working directly from a real subject in front of you — is the foundation of almost every other drawing skill. It develops the perceptual ability to see accurately, the hand-eye coordination to translate what you see onto paper, and the judgment to decide what to include and what to leave out.
Objects and Still Life
A Crumpled Piece of Paper

The single best tonal exercise available. The complex folds create a value range from near-white to deep shadow in an object with no colour to distract you. Work in 2B graphite on cartridge paper. Every fold is a lesson in how curved surfaces catch and block light.
Negative Space of a Chair or Stool

Instead of drawing the chair, draw only the shapes of air between its legs and rungs. Negative space drawing breaks the brain’s object-recognition habit more effectively than any other exercise and significantly improves compositional accuracy.
A Worn Leather Shoe

Complex organic form, surface texture, laces as linear elements, the relationship between a rigid and a flexible material. Illustrators from Heinrich Kley to Norman Rockwell used shoes as practice objects specifically because of this material complexity.
A Pair of Glasses

Reflective surfaces, thin linear elements, the challenge of drawing transparent material that is visible primarily through what it distorts. Teaches you to draw what you see rather than what you know is there.
A Ceramic Mug Under Directional Light

The cylindrical form teaches the core shadow/highlight/reflected light relationship on a rounded surface. Position a desk lamp at 45 degrees to one side. The handle introduces a secondary form attached to the primary. The interior is a foreshortening exercise in ellipses.
A Brown Paper Bag, Crumpled and Standing

More complex than the crumpled paper study because the form is three-dimensional and structural. The fold patterns are unpredictable and force genuine observation rather than assumed knowledge.
Your Own Hand in Five Positions

The most available figure drawing subject. Each position teaches foreshortening, the relationship between knuckle joints, and how skin compresses and stretches. Andrew Loomis dedicated an entire chapter of Figure Drawing for All It’s Worth (1943) to hands for exactly this reason.
Blind Contour Drawing of Any Object

Draw without looking at the paper and without lifting your pen. The result will look wrong, but the exercise builds the neural connection between eye movement and hand movement more directly than any other warm-up. Five minutes of blind contour before a longer session measurably improves observational accuracy.
Fabric and Drapery
A piece of fabric thrown over a chair or box is one of the most technically informative subjects in academic drawing tradition. Drapery reveals the three-dimensional form beneath it through how folds gather and fall — it was the primary training subject in Renaissance workshops for this exact reason, and every serious academic drawing programme still includes drapery studies.

Throw a simple white cloth over an object with an interesting form. Use a 2B or 4B pencil on smooth cartridge paper. Draw the cloth, not the object. The object’s shape will emerge through the drapery’s behaviour, and you will understand both forms better than if you drew either directly.
| ✏ Sketchbook method: Work in natural light from a single window rather than overhead artificial light. Single-source light creates the clearest shadow structure and the most readable value range. Even a desk lamp at 45 degrees is better than uniform overhead fluorescent light for training your eye to see three-dimensional form. |
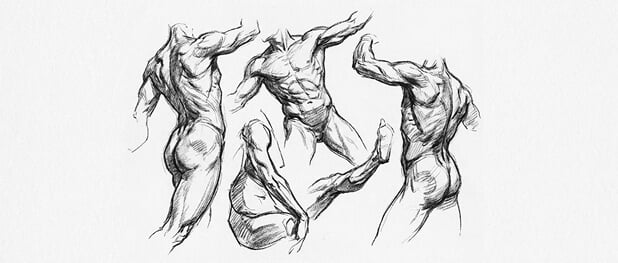
Gesture and Figure Drawing Ideas
Figure drawing separates artists who have done sustained practice from those who have not — not because the figure is inherently harder than other subjects, but because drawing it well requires a specific observational speed and decisiveness that only develops through repeated, timed exercises. The gesture drawing tradition is built on exactly this: short timed poses, many of them, force you to prioritise the essential and discard the peripheral.
30-Second Gesture Studies
The idea: Draw the human figure in 30 seconds per pose using timed references from Line of Action (line-of-action.com) or Quickposes. Do 20–30 poses per session. Use a 2B pencil on newsprint, or charcoal if you want to build the habit of large, committed marks.
Why it works: Develops the observational speed and decisiveness that long-pose study alone never produces. Forces prioritisation of what matters most in a pose. Repetition across many poses builds a visual vocabulary of body mechanics that transfers directly to imaginative figure work.

How to start: Draw the line of action first — the single flowing curve from head through spine to the weight-bearing foot. Add the head oval, the torso box, and the hip box. Add limbs as simple cylinders. Stop when the timer goes. The incompleteness is the point.
Skill level: All levels. The constraint equalises skill differences. The technically accomplished artist benefits as much as the beginner because the challenge is observational speed, not technical refinement.

The Five-Minute Portrait from Life
The idea: Ask a friend or family member to sit for a five-minute portrait. Set a timer. Draw their face with a single pen or single pencil grade — no erasing.
Why it works: Drawing from a live sitter develops a completely different skill set from drawing from photo reference: you manage the subject’s movement, changing light, and your own decision-making simultaneously. The no-erasing constraint forces commitment and breaks the habit of overworking.

How to start: Establish the head oval and eye line (at the midpoint of head height) in the first 30 seconds. Place the major features in correct proportion before committing to any detail. Use the remaining four and a half minutes for detail, not proportion adjustment.
Self-Portrait Every 30 Days
The idea: Draw a self-portrait from direct observation — not from a phone photo — on the same day each month for a year. Same format, same medium, same three-quarter view each time.


Why it works: Creates a visual record of your developing skills applied to a constant subject. After six months, the improvement is often dramatically visible. James McMullan, the illustrator known for his Lincoln Center theatre posters, maintained this practice as a professional discipline throughout his career.
How to start: Set up a mirror at arm’s length and slightly to one side. Do not look at your previous self-portraits before beginning each new one. Draw freshly from observation every time.
| ✏ Sketchbook method: Carry a small pocket sketchbook — A6 size works well — specifically for drawing people in cafes, on public transport, and in waiting rooms. These moving, unpredictable subjects are more challenging than timed online references and produce faster gains in observational speed. The awareness that you have twenty seconds before the person shifts position forces exactly the decisiveness that gesture sessions train. |
Urban Sketching and Architectural Drawing Ideas
Urban sketching is one of the most sustained drawing movements of the past fifteen years, built around drawing architecture, street life, and environment on location rather than from photograph or memory.


The organisation Urban Sketchers, founded by journalist Gabriel Campanario in 2007, now has chapters in over 400 cities and has significantly influenced how architectural and environmental subjects are approached in contemporary illustration.
A Single Building Facade from Across the Street

Start with the overall mass and major horizontal and vertical divisions before adding any detail. The common error is starting with the interesting detail (an ornate doorway, an unusual window) and building outward from it. Start with the large shapes and work toward the detail. A 0.3mm fineliner for structure, then loose watercolour wash on top, is the classic urban sketching combination.
The Interior of a Cafe or Restaurant

Interior perspective drawing teaches the convergence of horizontal lines to vanishing points in a context where the geometry is clear and the subject is comfortable. Figures inside the space add scale and human presence without requiring figure-drawing confidence.
A Street Corner with Two Converging Facades

Two-point perspective in a real environment. Establish the horizon line and locate the two vanishing points before drawing a single building edge. This exercise makes two-point perspective intuitive faster than any textbook exercise because the evidence is directly in front of you.
A Doorway or Entrance in Detail

A single architectural element at large scale. The rectangle of the doorway, the mouldings, the steps, the hardware, and the recession of the door within its frame are all separate drawing problems within a manageable, unified subject.
The View from a Window

The window frame creates a natural composition aid. The distance from the closest plane (the sill) to the farthest (the horizon) teaches atmospheric perspective: edges soften, detail reduces, value contrast decreases with distance.
Nature and Botanical Drawing Ideas
Botanical drawing has experienced a measurable revival in 2025–2026 across both fine art and illustration communities. The appeal is partly reactionary — precise observational drawing of natural forms is one of the clearest demonstrations of human artistic skill — and partly practical: natural subjects are always available, infinitely variable, and reward careful observation more consistently than almost any other subject category.
A Single Leaf at Twice Life Size

Enlarging forces you to observe and draw details you would overlook at actual size. The vein structure, surface texture, and edge character of a single leaf provide enough visual information for a substantial drawing session. Use a 2B pencil on smooth cartridge paper.
A Flower in Four Views

Front, side, three-quarter, and from below. The same subject from four angles teaches form comprehension rather than surface observation. You understand a flower three-dimensionally after drawing it from four angles in a way that no single view ever produces.
A Pine Cone

One of the most consistently recommended subjects in art education because its scale pattern, each segment slightly different from the others, develops both observational precision and pattern understanding. Draw it from the side, then from above.
Bark at Close Range


Texture study at its most demanding. The surface irregularity of bark cannot be guessed or systematised — you must look at every mark. This develops the habit of looking rather than assuming, which transfers directly to every other drawing subject.
A Bird from Life

Moving subjects force the same observational speed as gesture figure studies. A bird that returns repeatedly to a garden feeder gives you multiple short observation windows to build a composite drawing — the wildlife equivalent of timed gesture sessions.
| ✏ Sketchbook method: Draw botanical subjects from life rather than photographs whenever possible. Photographs flatten the three-dimensional form of leaves and flowers and eliminate the subtle translucency that many plant forms carry. A backlit leaf held up to natural light reveals a completely different structure than the same leaf viewed flat. Working from the actual object consistently produces richer, more accurate botanical drawings. |
Imagination-Based Drawing Ideas
Imagination-based drawing draws on everything you have learned from observation and reveals the gaps in that learning. Artists who attempt to draw from imagination quickly discover which anatomical structures, perspective relationships, and material qualities they understand three-dimensionally — and which they only know as flat patterns.
An Invented Creature with Believable Anatomy

Design a fictional animal, then sketch its skeleton. What structure would support the body’s weight? How do the limbs attach? Where is the centre of gravity? James Gurney developed his creature design process for Dinotopia around exactly this structural logic, building imaginative creatures from anatomical reasoning outward.
A Familiar Object Made from a Different Material

Draw a glass chair, a stone umbrella, a fabric clock. The exercise forces you to think about how a material’s surface qualities — reflectivity, texture, opacity, weight — determine how it is drawn.
A Scene from a Specific Book or Song

No photograph exists to reference. You must build the scene from textual description combined with observational knowledge accumulated from life drawing. The constraint of the source text prevents arbitrary invention and demands considered visual interpretation.
An Impossible Building in a Real Landscape

Architecture that could not exist within physical constraints, placed in an environmental context drawn from observation. This combination forms the structural basis of much compelling architectural illustration, from Piranesi’s Carceri (c. 1745) to contemporary speculative illustration.
A Map of an Imaginary Place
 with mountains, forests, castle and compass rose | Sky Rye Design")
A considered cartographic representation of terrain designed to be inhabitable and internally consistent. Rivers flow downhill. Mountain ranges shape weather. Roads follow the path of least resistance. Tolkien and Ursula K. Le Guin both drew maps of their fictional worlds before writing the books set in them.
Toned Paper Studies from Imagination
Work on mid-grey or warm tan toned paper with graphite or charcoal for darks and white chalk or a white Posca pen for lights. Toned paper removes the intimidation of the white page and forces you to think simultaneously about light and shadow rather than building from outline alone.
Master Study Ideas: Learning from Artists Who Solved the Problems You Face
Copying the work of artists you admire is one of the oldest and most consistently effective learning methods in visual art. Every significant European painting tradition before the 20th century included copying as a central pedagogical practice. The act of copying forces you to solve the specific problems the original artist solved — using your own hand — which is a more demanding learning process than studying the work analytically.

A Rembrandt Chalk or Ink Figure Study
Copy a small figure study or portrait. Focus on how Rembrandt builds form through directional mark-making rather than outline, and how he creates deep shadow with crossed marks rather than blended gradients.
A Dürer Engraving Detail

Select a 5×5cm section and copy it at twice the original size. Albrecht Dürer’s (1471–1528) cross-hatching system is the most instructive example of using directional marks to simultaneously describe form and value, and it is the basis of all subsequent engraving and technical pen drawing.
A Hokusai Figure from the Manga

Katsushika Hokusai (1760–1849) produced the Manga books as a systematic visual encyclopaedia of how to draw everything from figures to landscapes to animals across fifteen volumes. Copy individual figures or objects for their economical line and compositional intelligence.
A Sargent Watercolour Wash

John Singer Sargent’s watercolours demonstrate the most sophisticated wet-on-wet technique in the medium. Even copying one in graphite — translating the wash values into pencil tones — teaches how he used large, confident value shapes rather than detailed marks to produce complex, luminous effects.
An Ingres Portrait Drawing

Jean-Auguste-Dominique Ingres (1780–1867) produced portrait drawings of extraordinary refinement using minimal but precisely placed line. Copy one at close to the original scale and study how he describes the transition from lit plane to shadow plane using a single change in line weight rather than graduated shading.
| ✏ Sketchbook method: Avoid copying an entire large work. Select a 10–15cm section that contains the specific problem you want to solve — a hand, a passage of drapery, a shadow transition — and copy it at double or triple the original scale. This forces you to make every decision the master made in that section, at a size where those decisions are visible and learnable. Copying an entire large work risks producing a superficially similar result without understanding the specific choices that created it. |
FAQ: Art Drawing Ideas
What are good art drawing ideas for beginners?
The five most skill-building subjects for beginners: a crumpled piece of paper (tonal observation), your own hand in different positions (foreshortening and organic form), a ceramic mug under directional light (rounded form and shadow structure), a plant or leaf from life (organic shape with rich texture), and a five-minute self-portrait from a mirror (proportion under time pressure). All five teach fundamental observation without requiring advanced technical knowledge or specialist materials.
How do I find drawing ideas when I have artist’s block?
Artist’s block is almost always the expectation of producing something good becoming larger than the willingness to produce something bad. Three fixes: set a five-minute timer and draw anything (constraint removes paralysis); draw a neutral object you have no personal investment in (bypasses the inner critic); or do a master study — copy a passage from an artist you admire. Copying removes the generative pressure and replaces it with observational practice. The Urban Sketchers community has built an entire methodology around drawing on location specifically because the immediacy of a real scene overwhelms the tendency toward overthinking.
What is the 30-second gesture drawing exercise?
Draw the human figure in 30 seconds per pose using timed references from Line of Action (line-of-action.com). Draw only the line of action and the major mass shapes — head, torso, hips, limbs as simple forms. Do 20–30 poses per session in a single sitting, using a 2B pencil or charcoal on newsprint. Develops observational speed and decisive mark-making faster than any long-pose study. Most serious figure drawing practice begins with 30-second gesture rounds before moving to longer poses.
What drawing ideas are trending in 2026?
Gen Z artists are leading a return to foundational skills — anatomy, gesture, and plein air observation — as a direct response to AI-generated imagery. Urban sketching continues to grow through the Urban Sketchers community (400+ cities globally). Botanical illustration is experiencing a strong revival. Toned paper drawing with graphite and white chalk is trending particularly among portrait artists. And architectural sketching that combines technical perspective with expressive mark-making has strong traction on Instagram and Behance.
- 3.7Kshares
- Facebook0
- Pinterest3.7K
- Twitter0
- Reddit0


