The first time I tried sketching a Corvette from memory, I got it wrong in almost every way that matters. Wheelbase too short. Roofline too high. It looked like a generic sports car wearing a Corvette costume. What actually fixed it wasn’t more detail — it was going back to reference photos and rebuilding the whole thing from gesture lines up, which felt like a step backward at the time and turned out to be the only thing that worked.
- A quick history of the Corvette's design language
- Step-by-step: sketching a Corvette in 5 steps
- Corvette generations worth drawing (C1–C8)
- Materials that actually matter
- Chrome, rims, glass, and perspective
- Common mistakes when drawing a Corvette
- Frequently asked questions
- How long does it take to draw a Corvette?
- What's the easiest angle to draw a Corvette from?
- Do I need to draw a specific Corvette model, like a C5 or C8?
- What paper and pencils work best for car sketching?
- How do I make wheels look round instead of oval?
- Can I draw a Corvette without a reference photo?
- How do I draw the Corvette logo?
- Final thoughts
“Looks like a car” and “looks like a Corvette” are two different problems, and the gap between them is proportion and stance, not rendering. Most tutorials online skip straight to outlining panels and coloring them in. Fine for a weekend craft project. Useless if you want to understand why the silhouette reads the way it does.
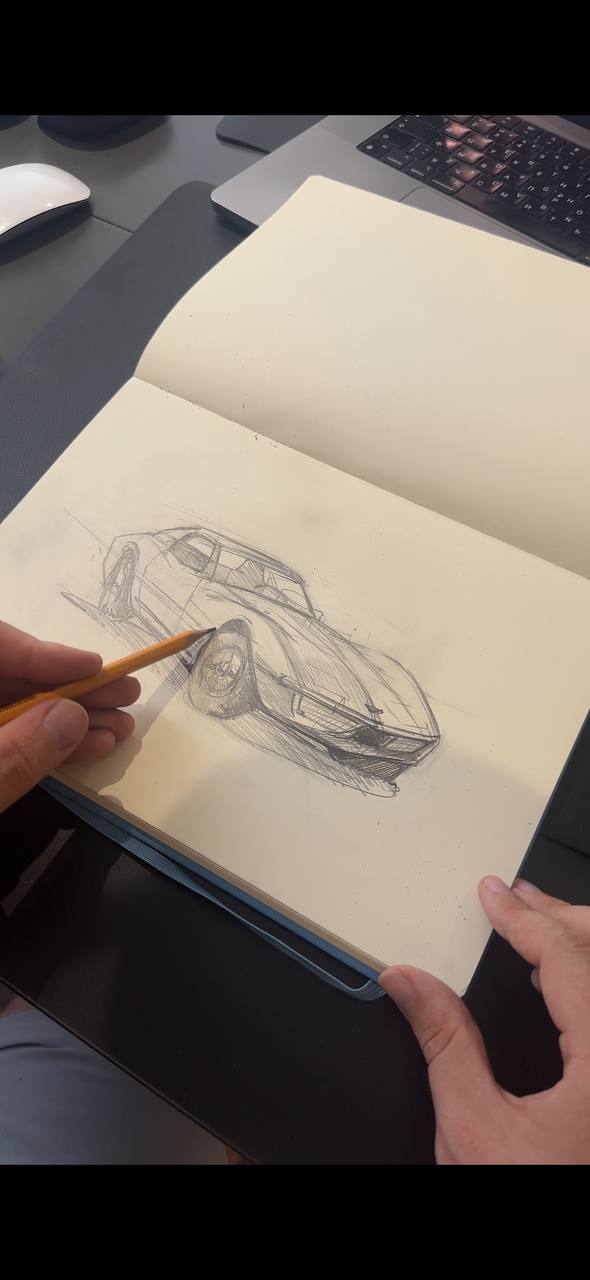
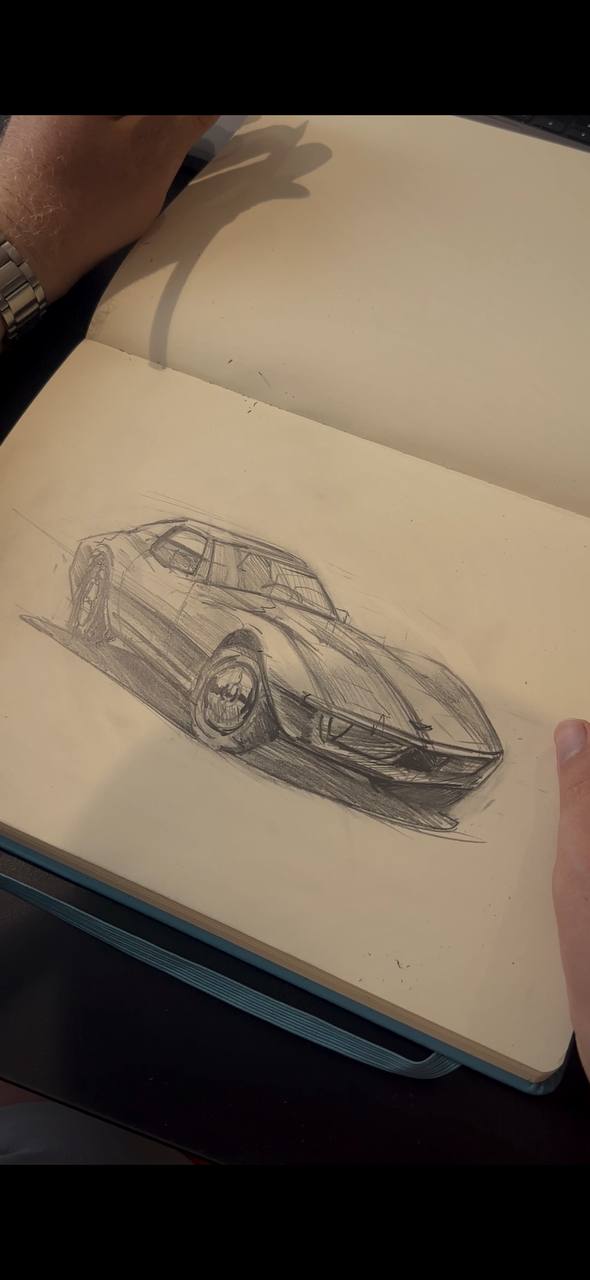
So here’s a different route: a short history of the design language, a five-step sketching process, the generations worth drawing, materials, chrome and perspective, and — because I couldn’t find anyone else covering this — the mistakes that trip up almost everyone.
A quick history of the Corvette’s design language
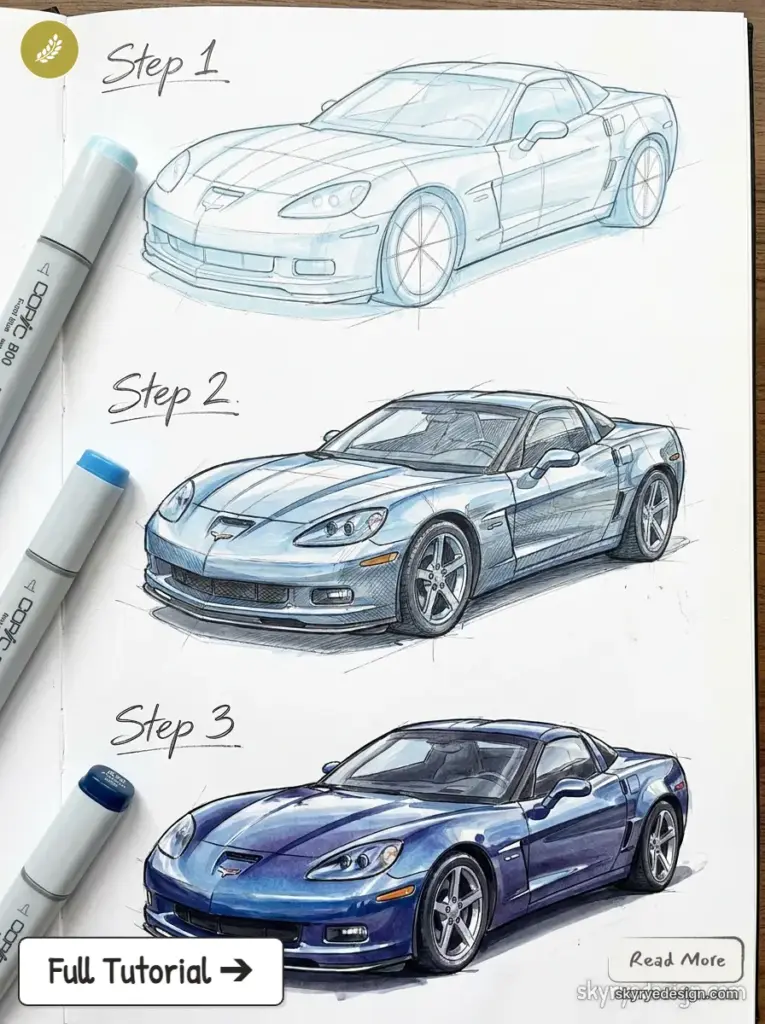
From C1’s chrome curves to C8’s mid-engine shift
The Corvette’s been through seven generations, starting with a convertible concept Harley Earl designed for the 1953 GM Motorama. That first C1 had the soft, chrome-heavy curves you’d expect from ’50s American design — nothing sharp about it anywhere. Every generation since pulled the shape somewhere new. The C2 and C3 got muscular through the fenders. The C6 and C7 sharpened into creases and vents. Then the C8 broke the pattern completely by moving the engine behind the driver.
That mid-engine shift changes everything about the silhouette. Classic Corvettes have a long hood and a cab set back near the rear axle. The C8 flips that — short front end, cab pushed forward over the front wheels. If you learned to draw Corvettes on a C5 or C7, this is the adjustment that’ll trip you up first, and it did trip me up the first time I sat down to sketch one.
From sketch to clay to CAD
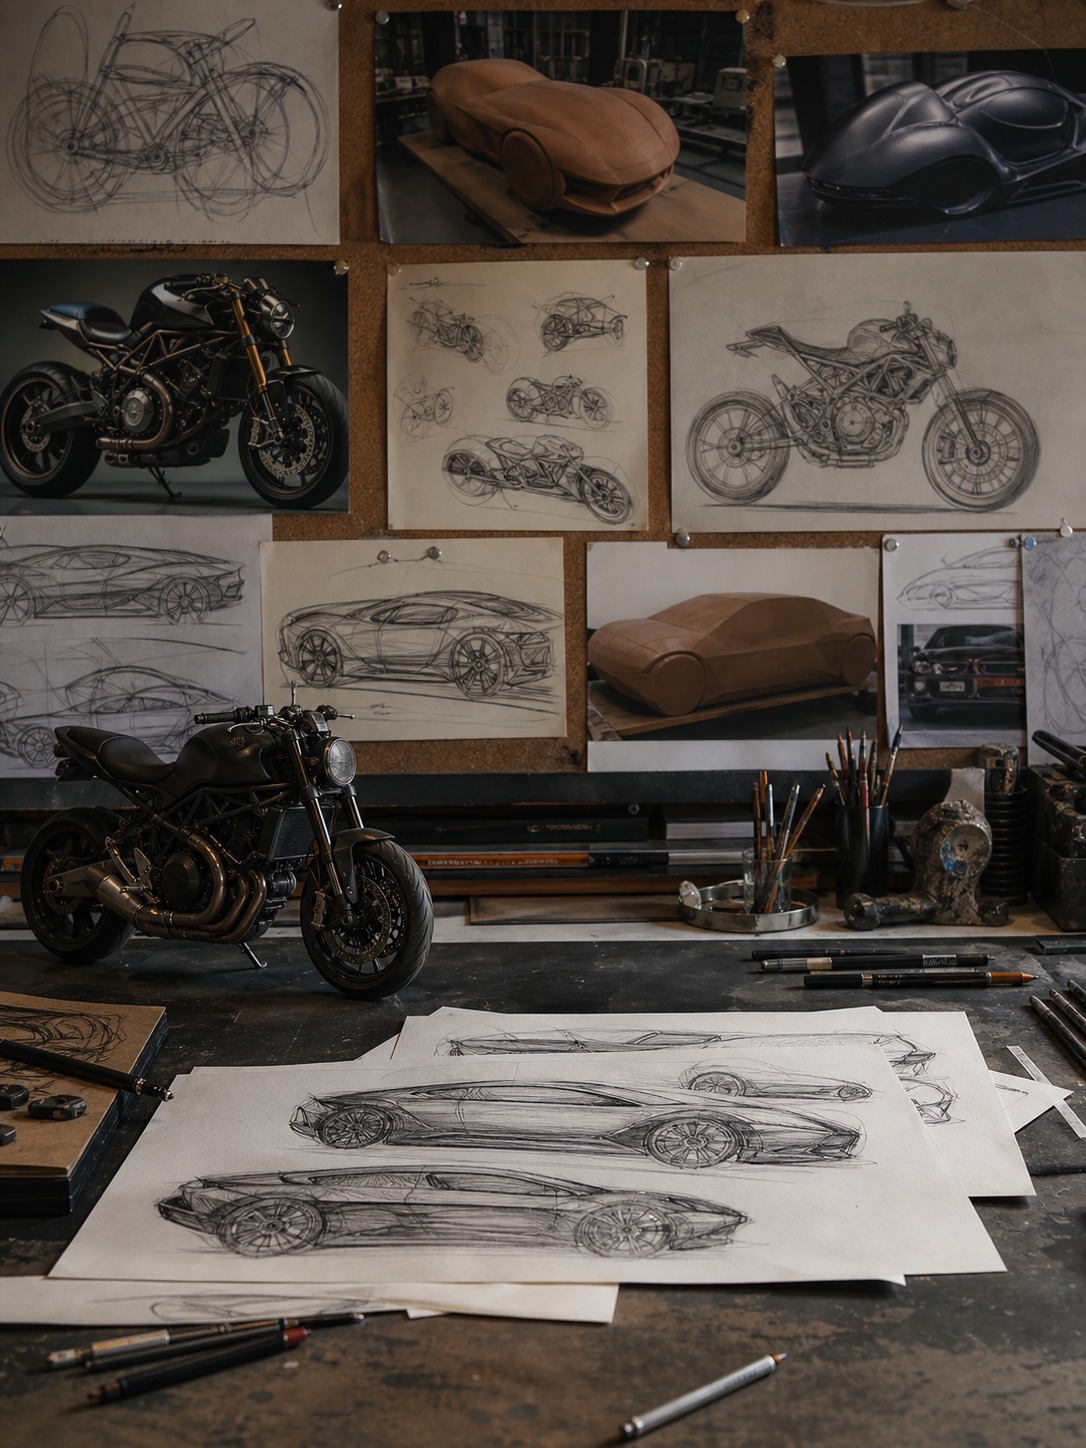
Here’s something I stumbled on while digging into C8 reference material: development sketches were already underway before the C7 had even been shown to the public in 2013, working through clay models and eventually CAD. And apparently GM’s design team used a Ducati Panigale as a reference point for fastener and detail design.
A motorcycle. For bolt placement on a car.
That’s the instinct worth stealing. Stop looking only at cars for reference on how vents, seams, and hardware should read.
Why the silhouette kept changing
Every redesign responded to engineering shifts and shifting taste, sure — but trace the whole line from C1 to C8 and there’s really one thing happening over and over: lower, wider, meaner. Once you see that pattern, picking a generation to draw gets a lot easier.
Step-by-step: sketching a Corvette in 5 steps
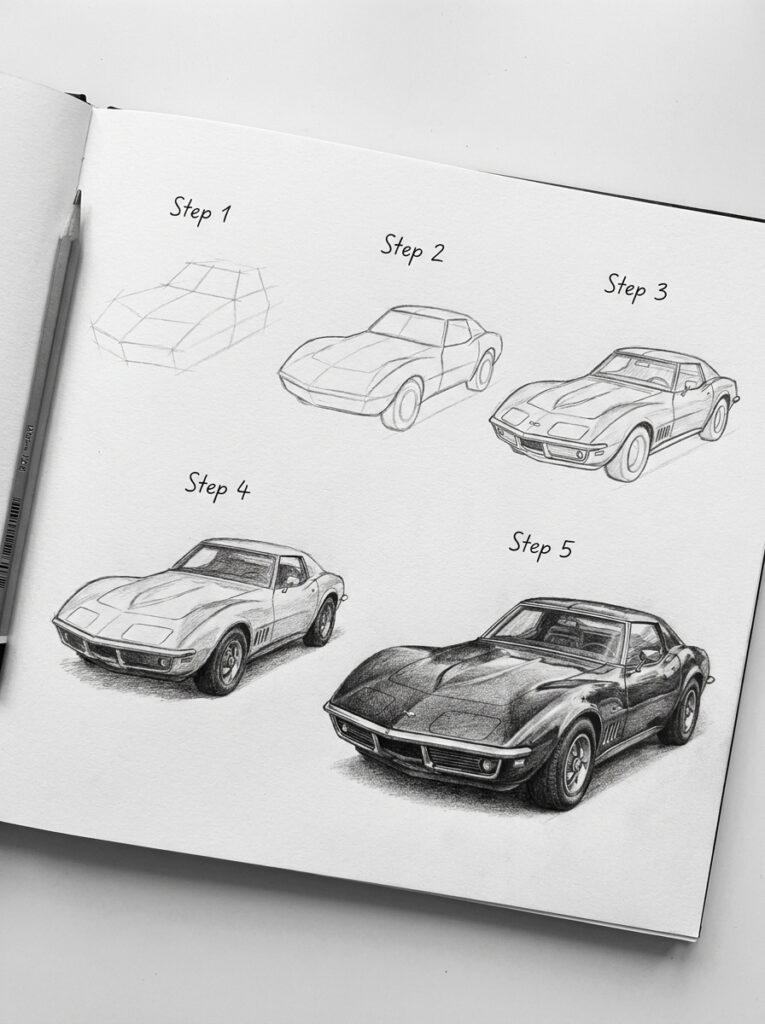
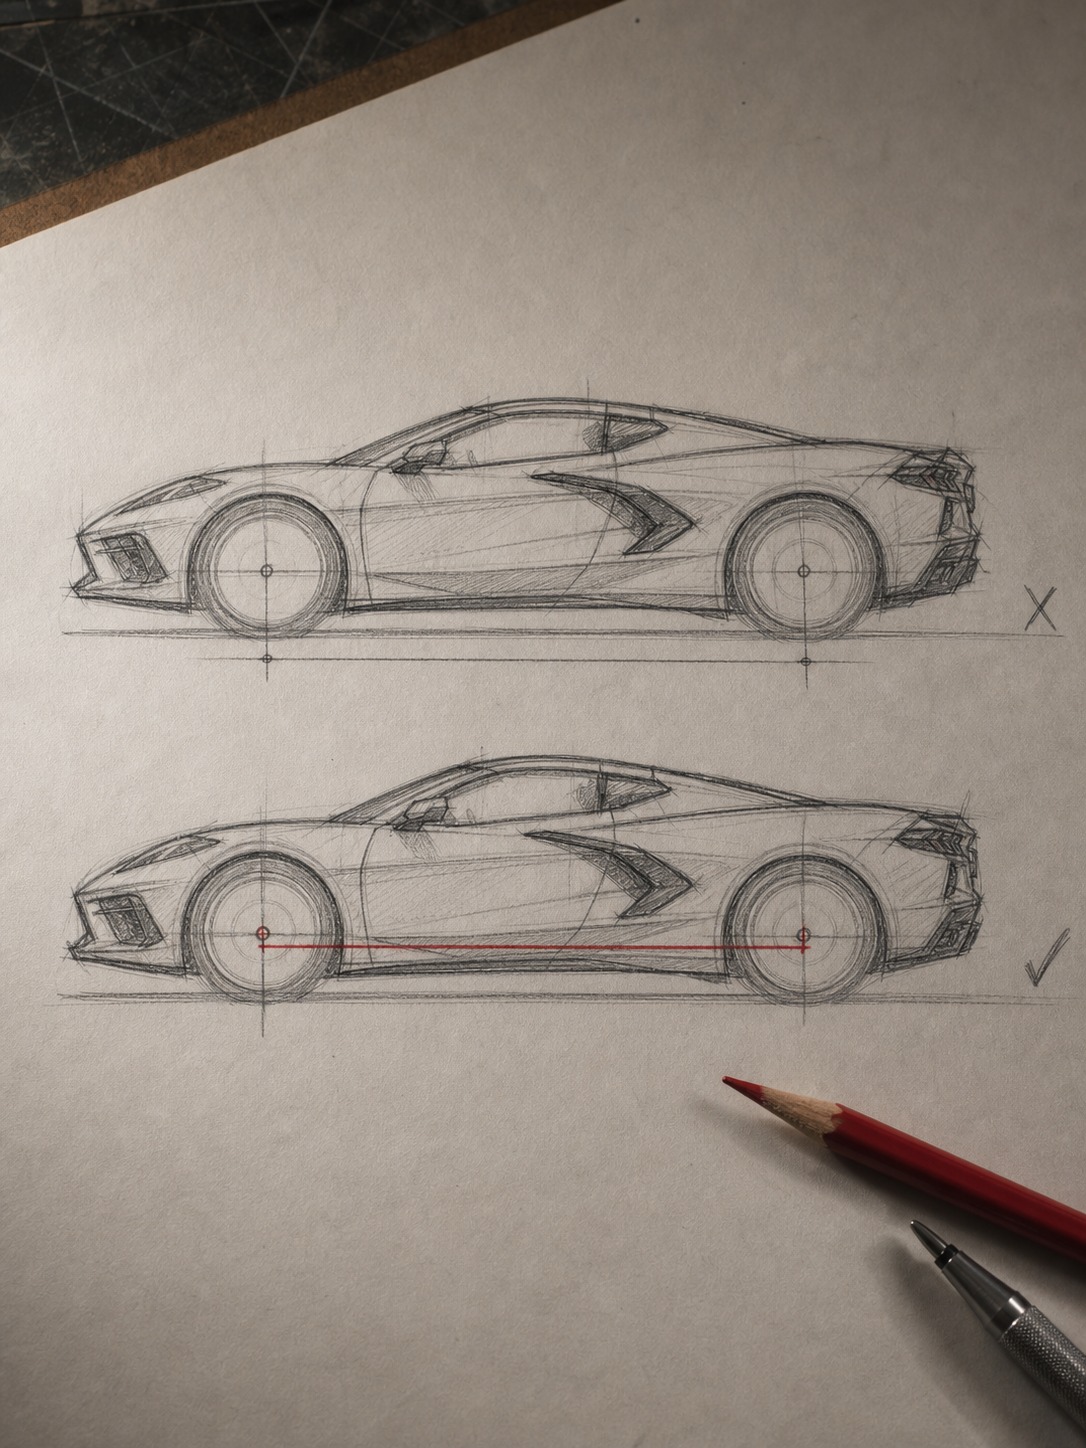
Step 1: gesture and wheelbase
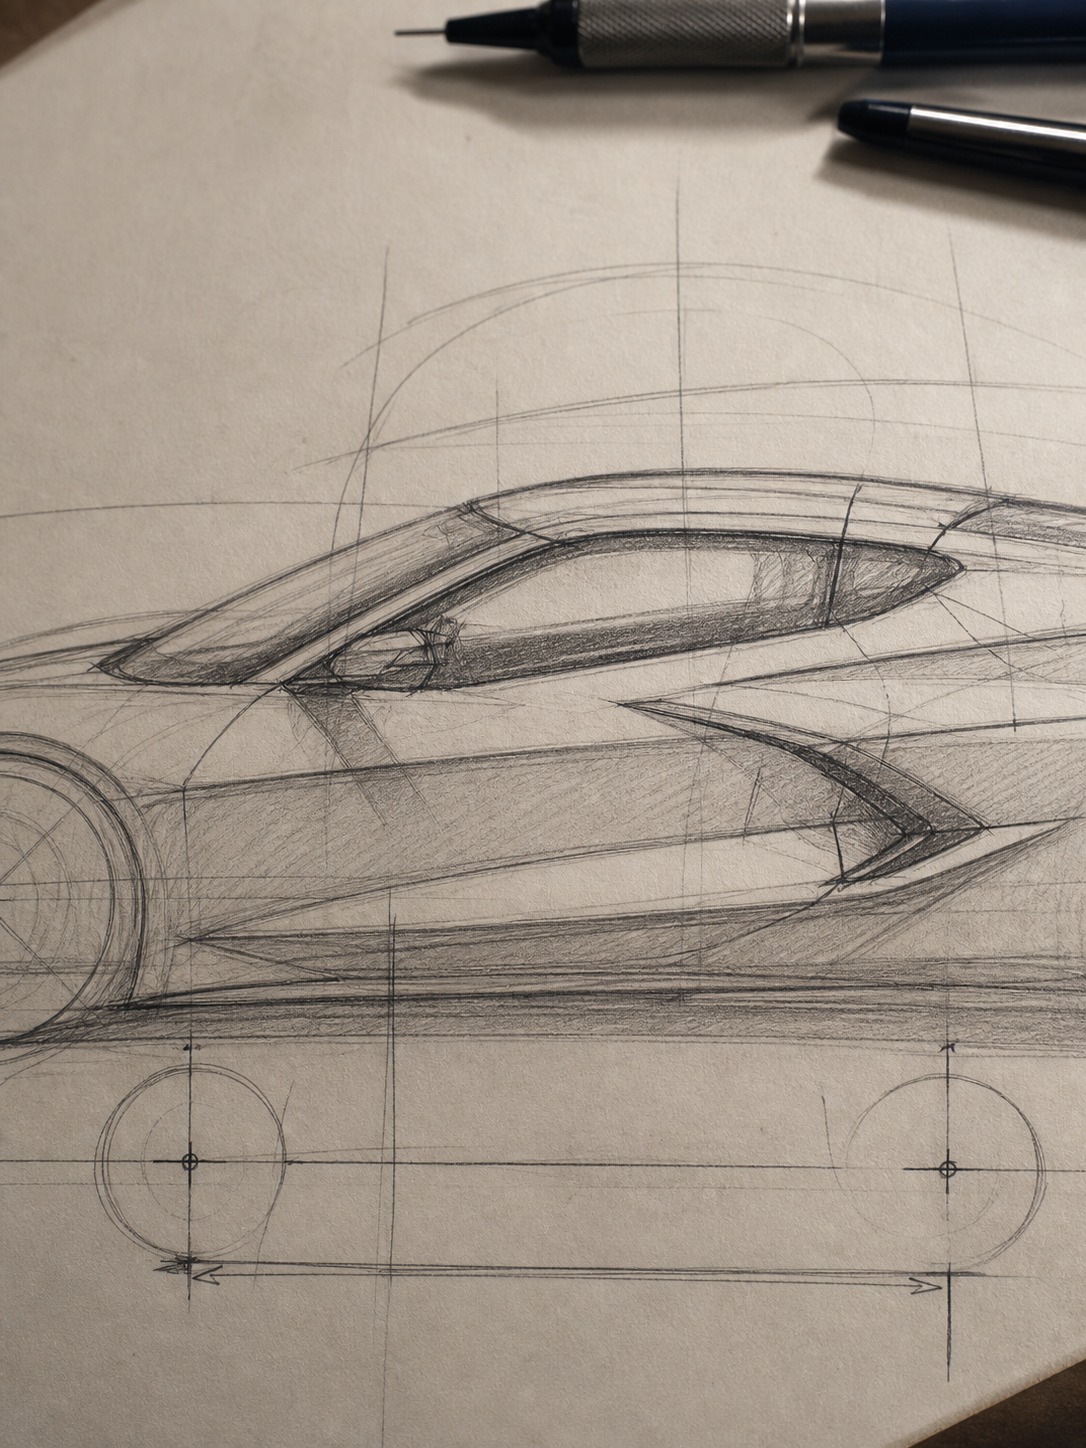
Before any panel goes down, block in the wheelbase with a horizontal gesture line and two circles for the wheels. This one step decides whether the finished drawing reads as a sports car or as “car, generic.” Get the wheel spacing and ride height wrong here and no amount of detail later saves it — I’ve tried.
Step 2: greenhouse and roofline
Sketch the cabin — windshield, roof, rear glass — as one connected shape sitting on your gesture line. On a Corvette this “greenhouse” is compact next to the overall body length. On a C8 especially, since the cab sits so far forward it almost looks wrong until you get used to it.
Step 3: fenders and character lines
Build the fenders around your wheel circles, then run the character lines along the door and rear quarter panel. These lines are basically what gives a Corvette its visual tension. Keep them confident. Sketchy, broken lines here kill the whole drawing — this is not the place to be tentative.
Step 4: wheels in perspective
Turn those wheel circles into proper ellipses based on your angle, then start adding rim detail. This is where drawings usually go flat. Slow down.
Step 5: line cleanup and detailing
Go over the gesture lines with cleaner, more deliberate weight. Add mirrors, vents, badging. Erase the construction lines underneath and you’re basically done.
Tip: Block in the wheelbase before you touch a single body panel. Everything else forgives mistakes — this step doesn’t.
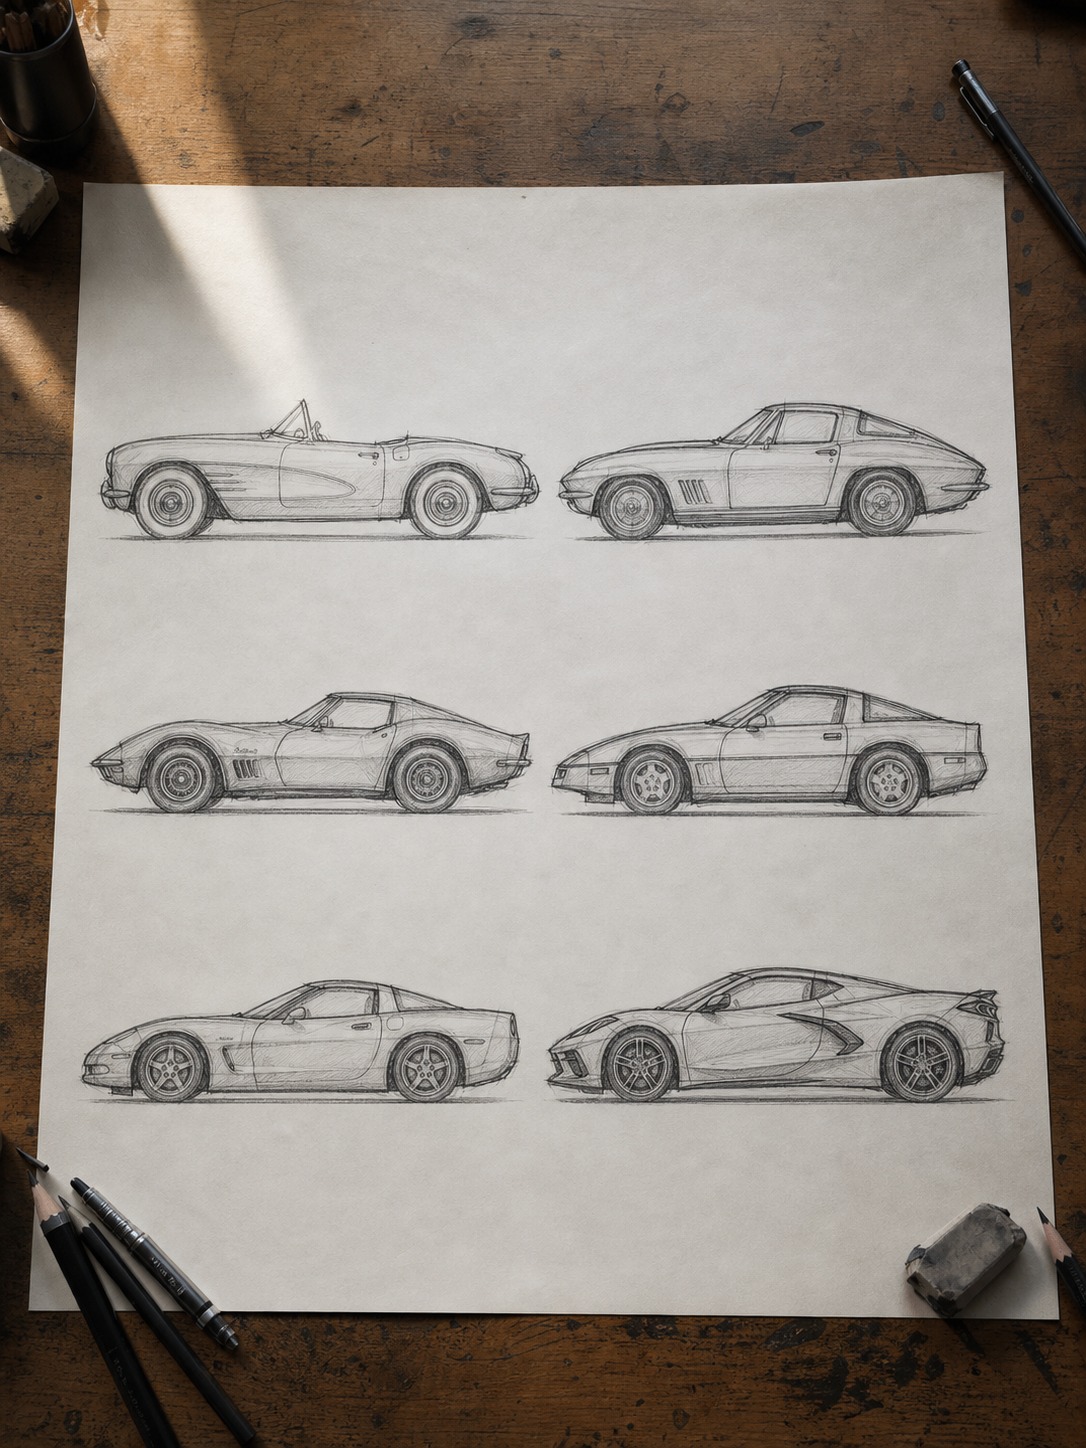
Corvette generations worth drawing (C1–C8)
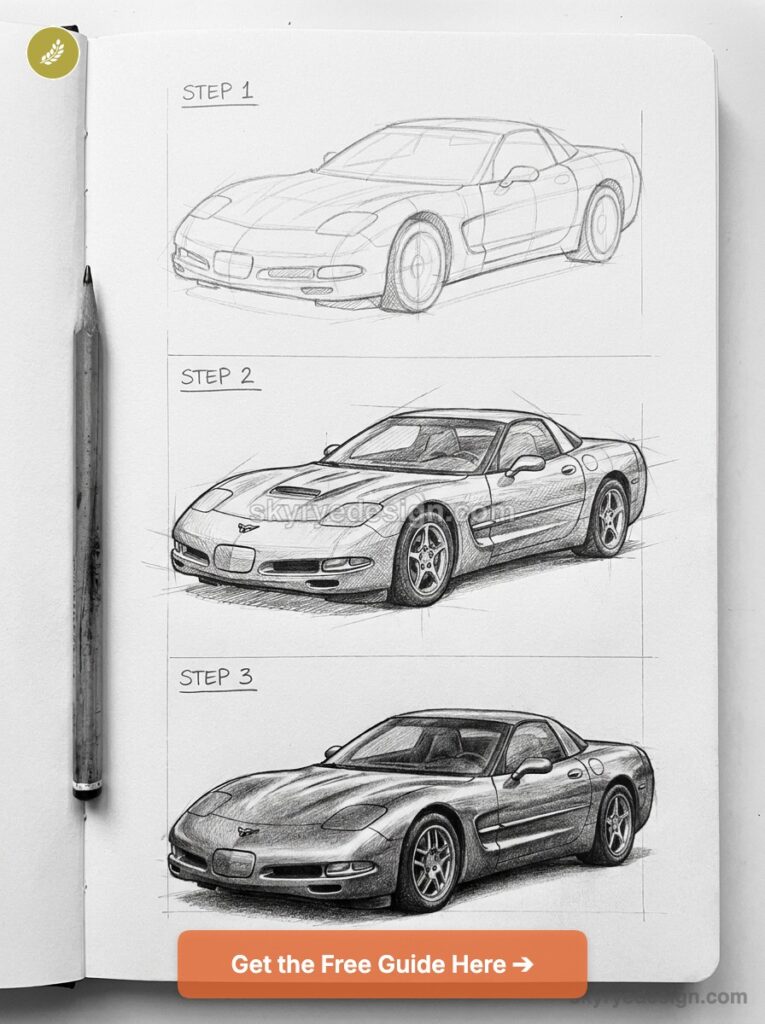
Classic curves (C1–C5): easier for beginners
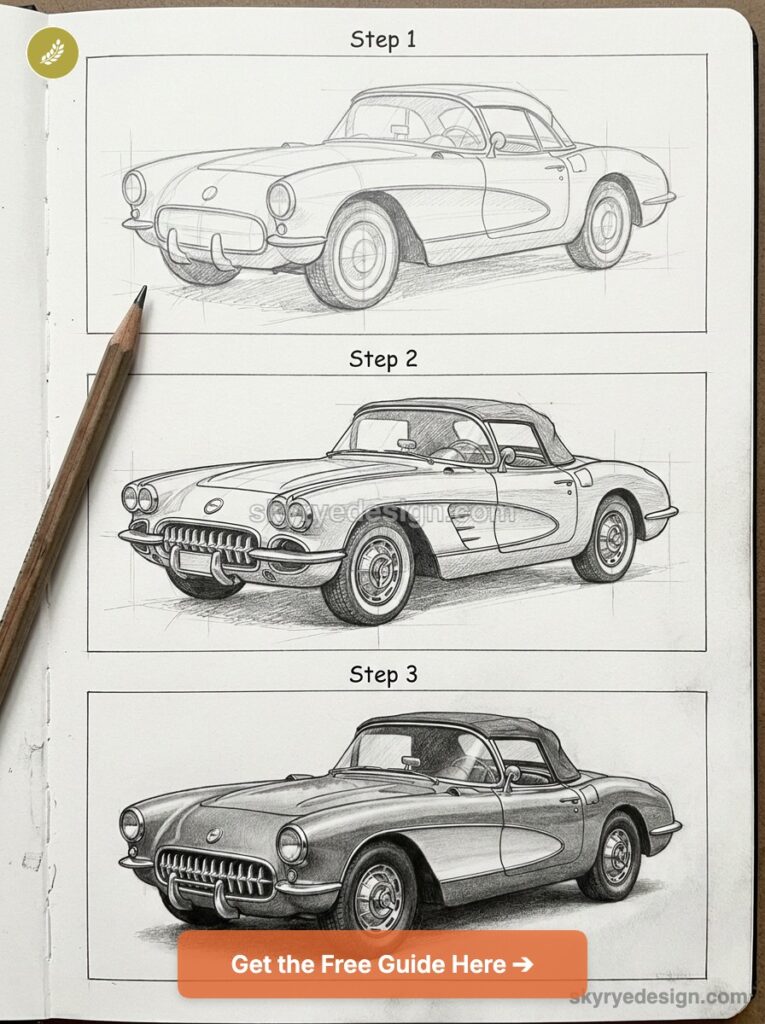
C1 through C5 share soft, rounded surfaces without a lot of hard creases, which makes them forgiving to sketch freehand.
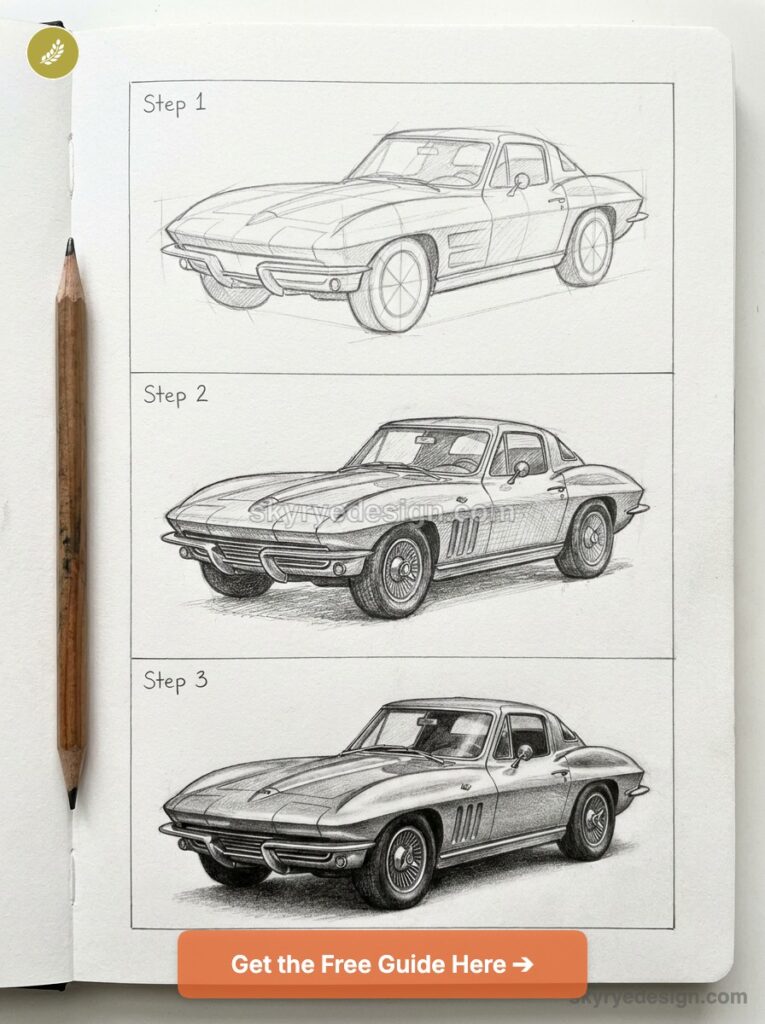
Newer to car drawing? A C3 or C5 gives you room to be a little loose without the whole thing falling apart.
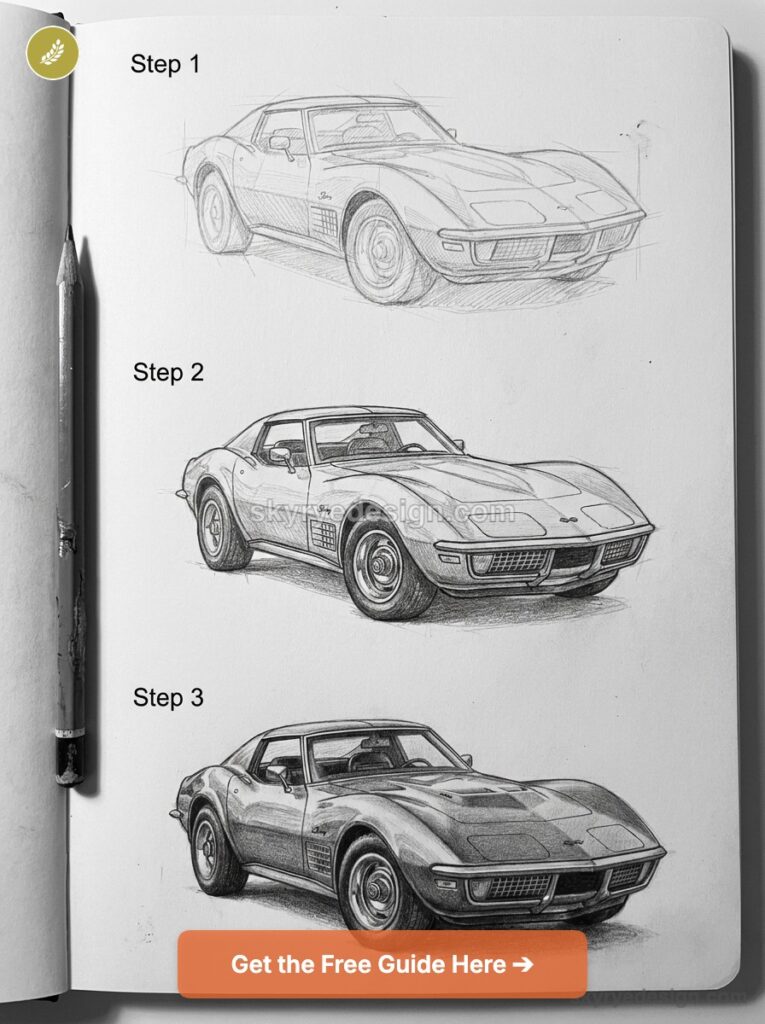
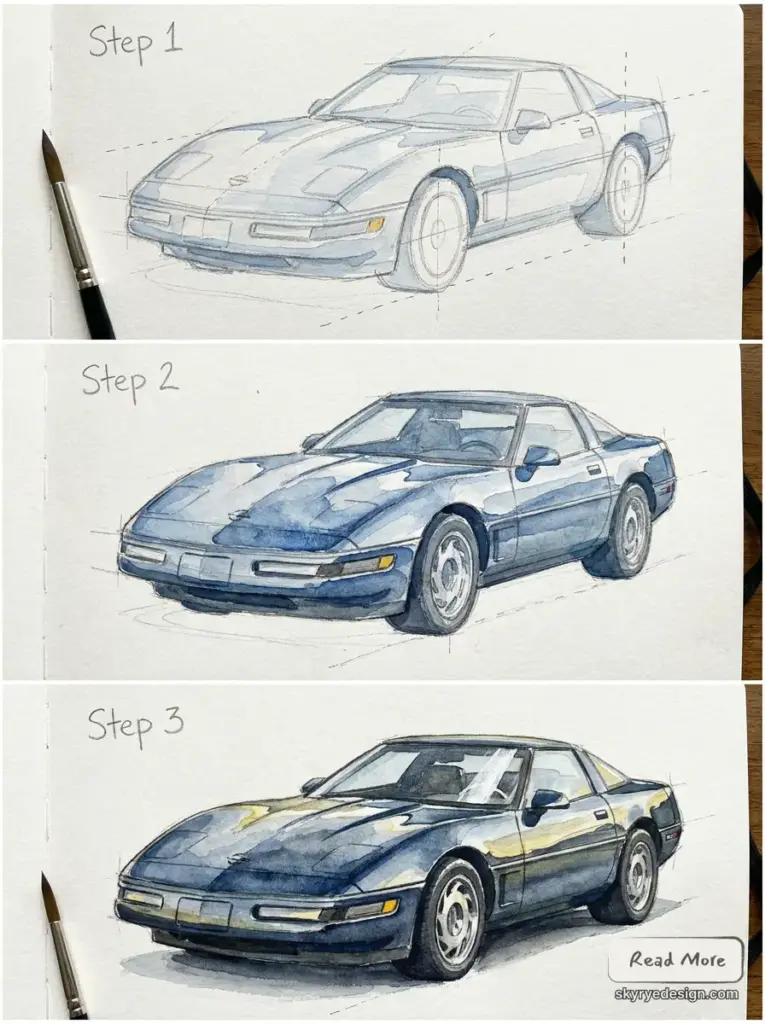
Modern aggression (C6–C8): harder angles, sharper lines
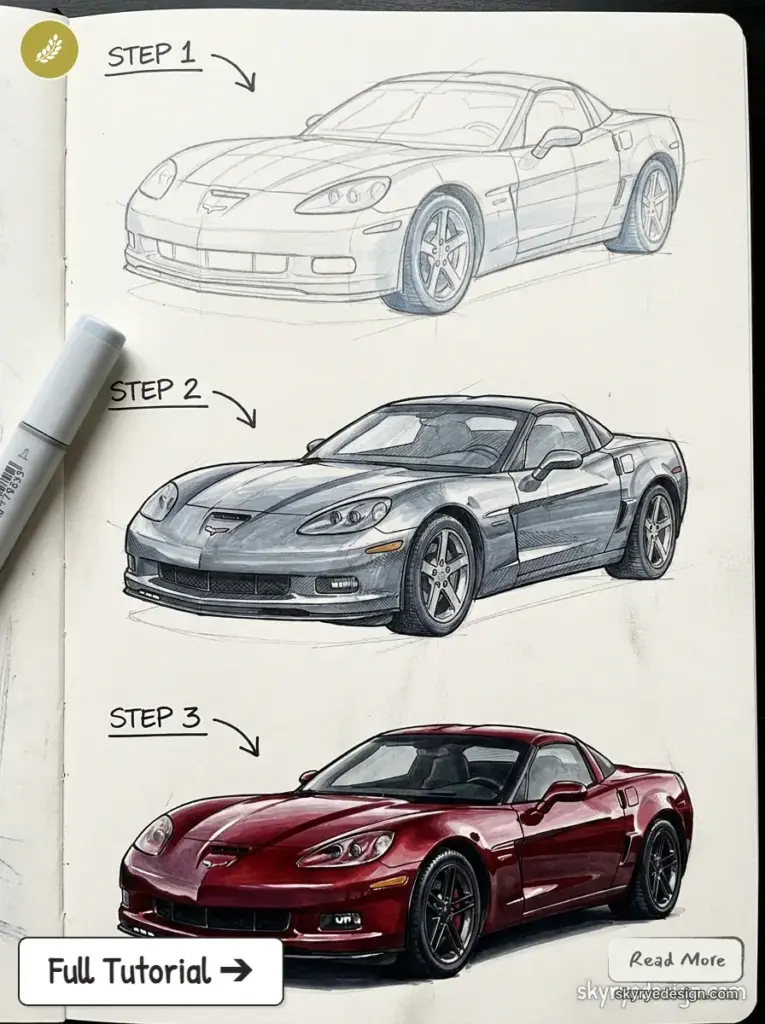
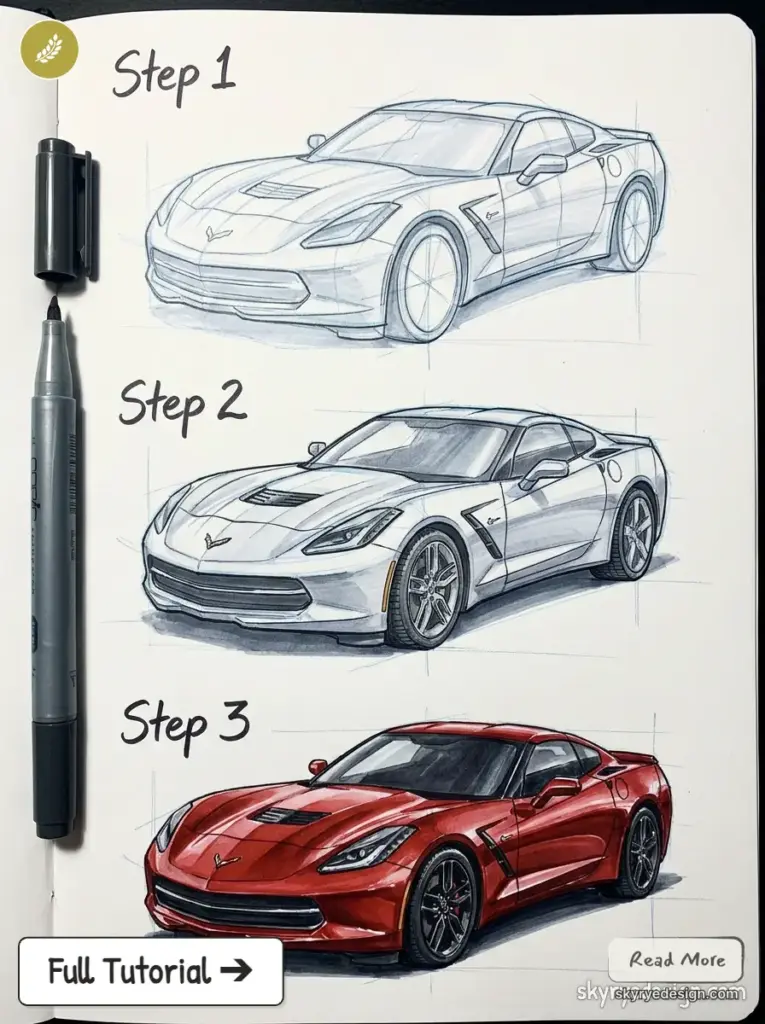
C6 onward gets tighter — creases, vents, proportions with less margin for error. The C8 punishes wheelbase mistakes worse than any earlier generation.
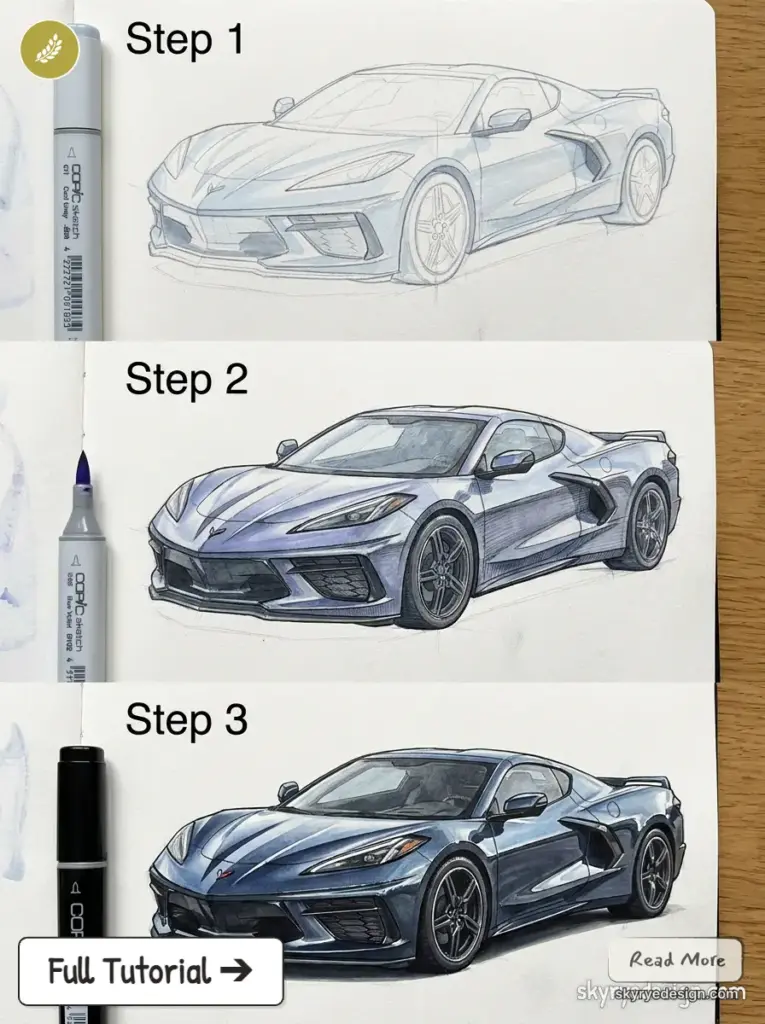
Great one to draw once the fundamentals are solid. Rough one to start on.
Materials that actually matter
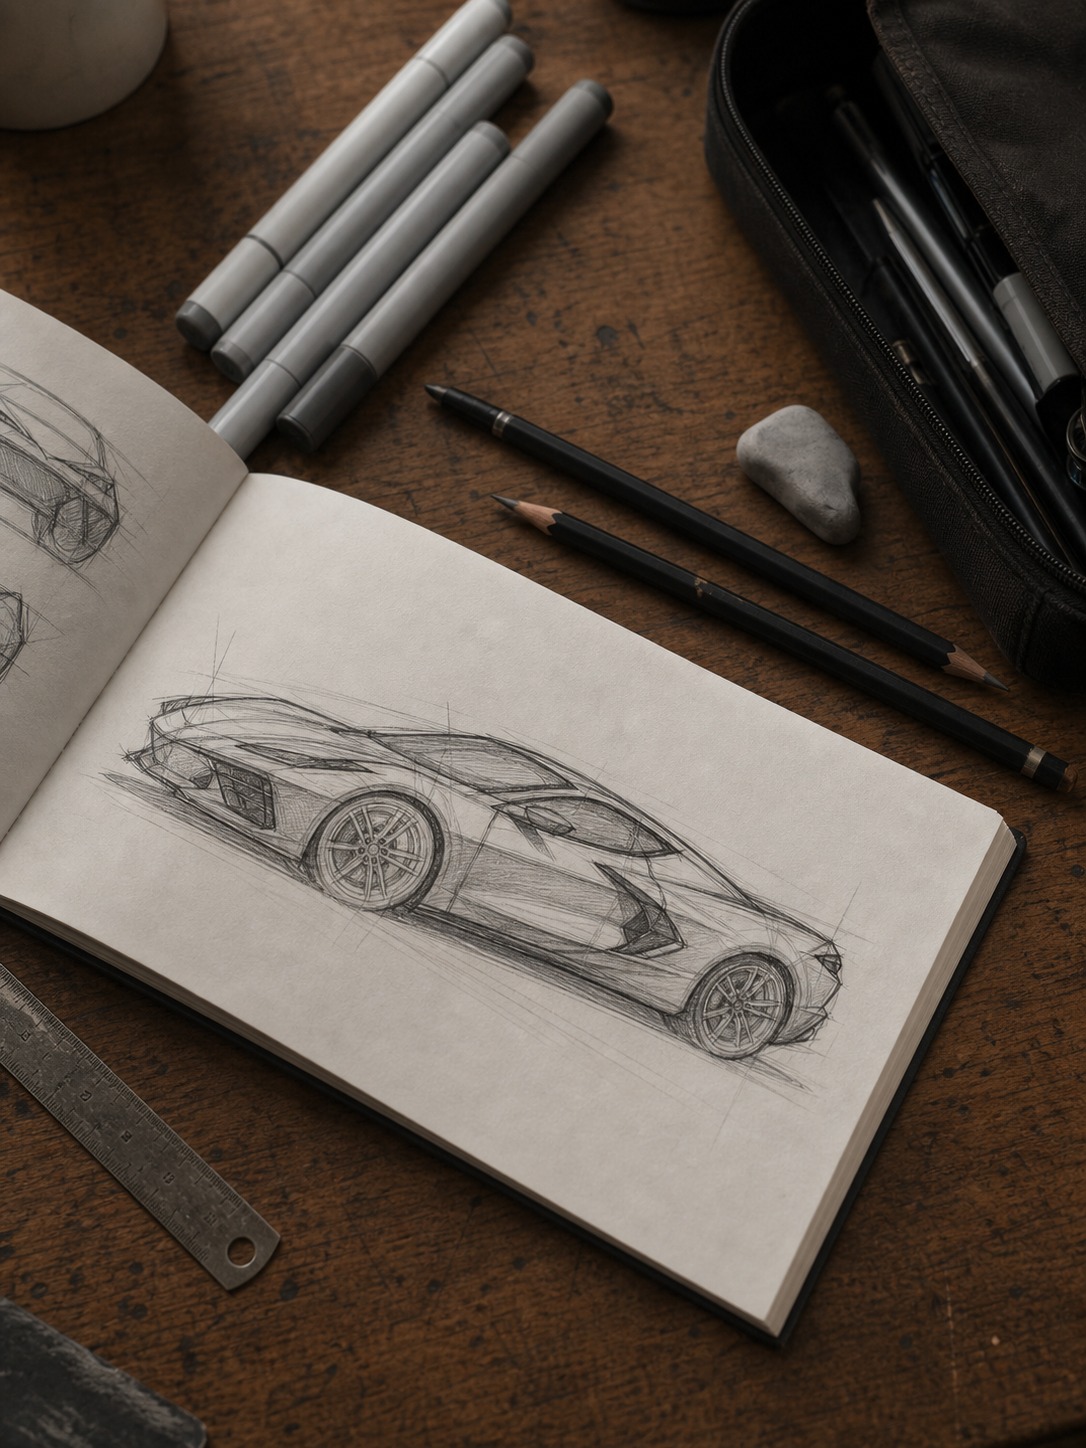
Nothing fancy needed. A mechanical pencil for construction lines, a softer 2B or 4B for final linework, paper that can take erasing without falling apart. Want to push further? Gray alcohol markers block in basic shading on glass and tires fast, and colored pencils handle highlights on top. Digital works too — the proportion and perspective rules don’t change either way, so don’t stress over the tool.
Chrome, rims, glass, and perspective
Drawing chrome without overdoing it
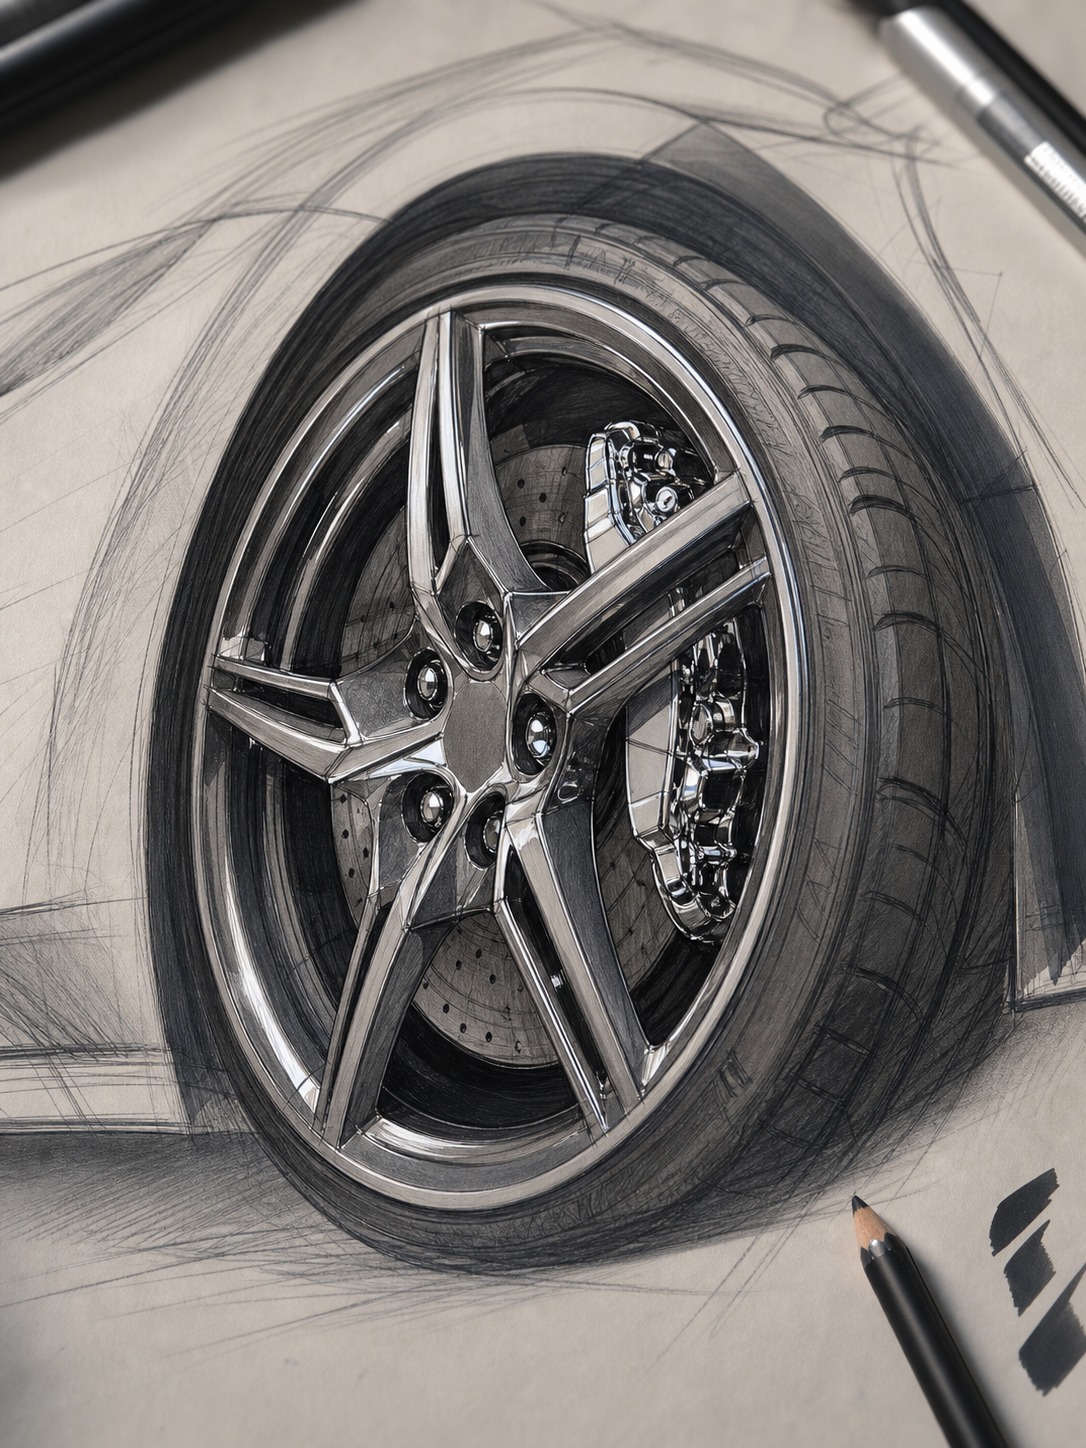
Chrome reads best with a few sharp, high-contrast highlights against darker surrounding tone. Not a dozen soft gradients chasing every reflection in the photo. Two or three well-placed highlights beat an overworked surface every time — I learned this the slow way, by overworking a lot of chrome.
Rims and tires — ellipses, not circles
Wheels are ellipses in nearly every angle except a dead-on side view. Get the ellipse angle wrong and it doesn’t matter how good the rest of the drawing is. It’ll look off. Check the wheel shapes against your reference before touching spoke detail.
Glass and windshield treatment
Keep it simple here. A light gray-blue base with one or two sharp highlights reads as glass far better than trying to paint a full reflection of the environment.
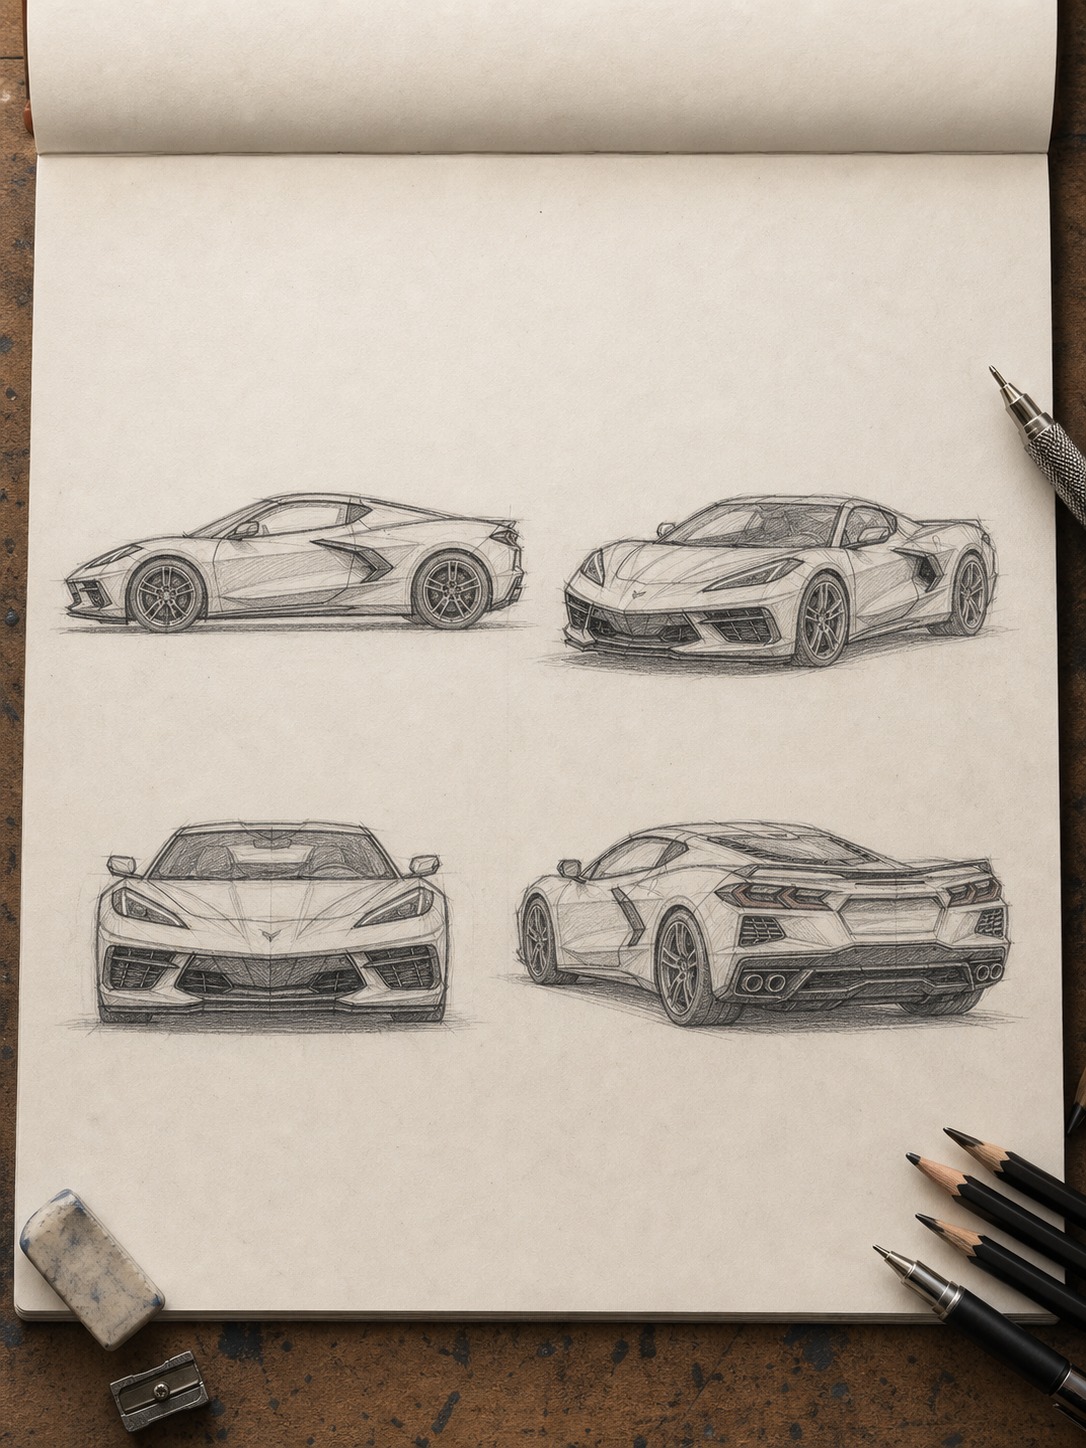
Choosing your angle — side, 3/4, front, rear
Most tutorials only ever show you one angle, and it’s almost always a flat side view.
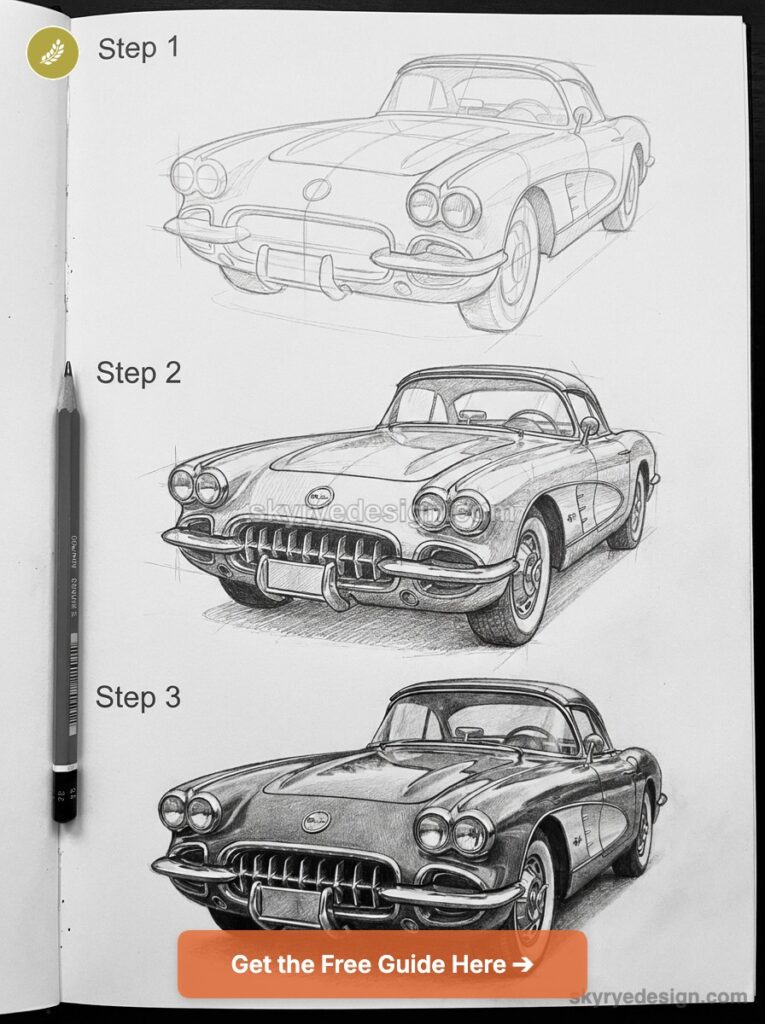
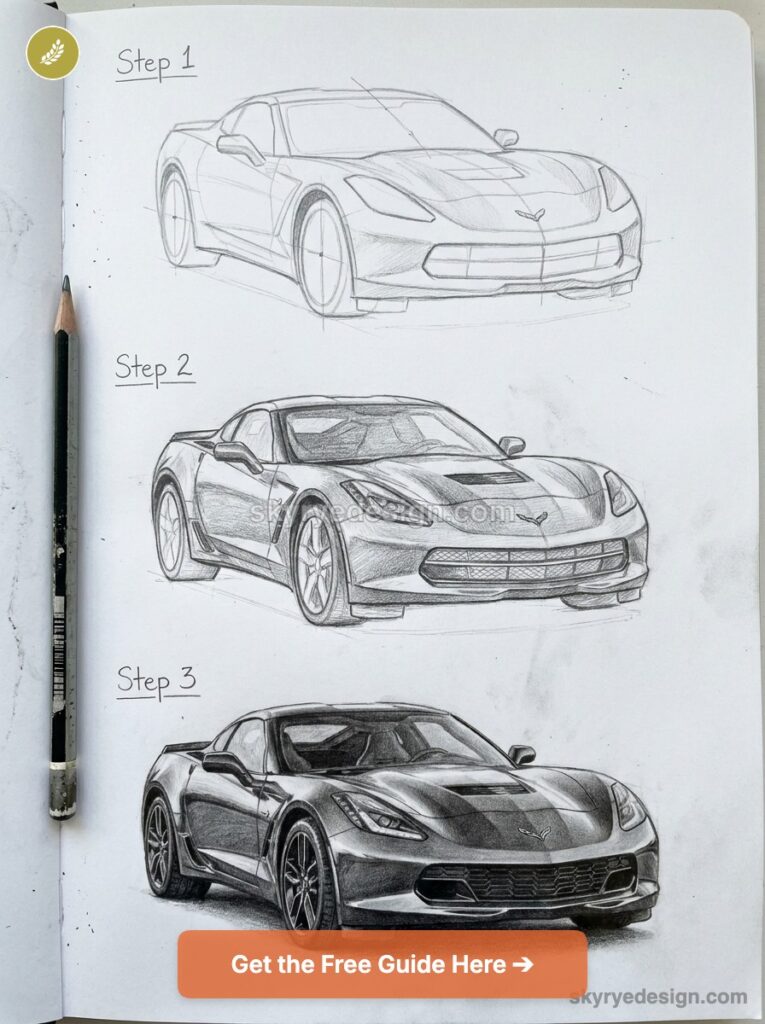
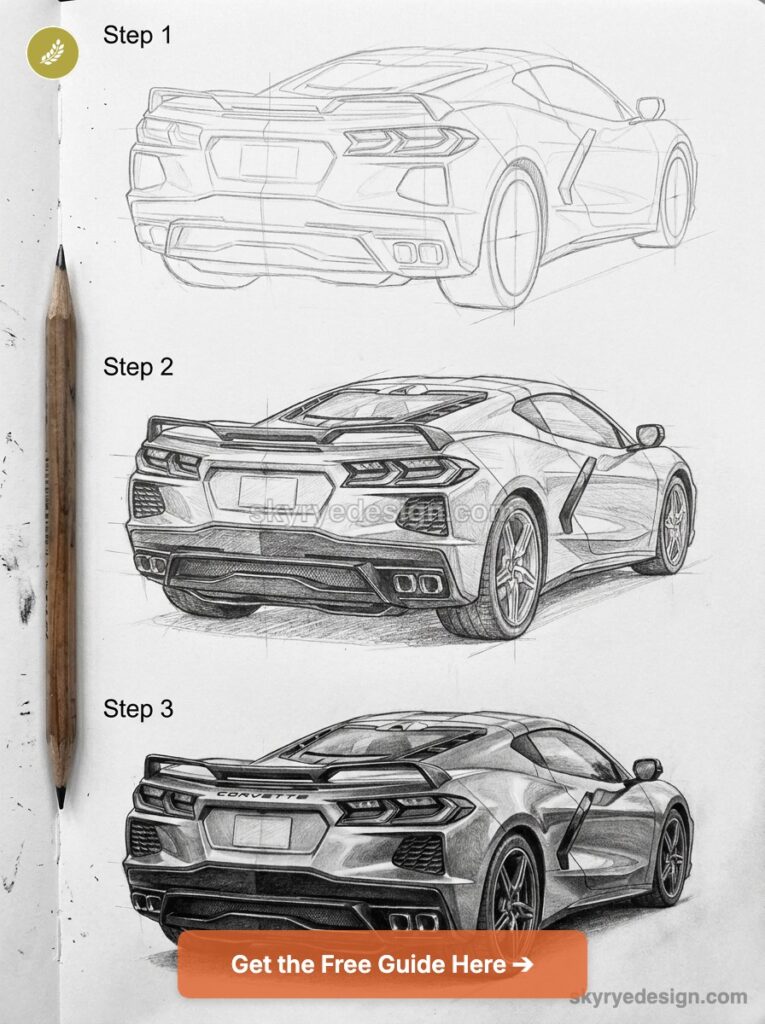
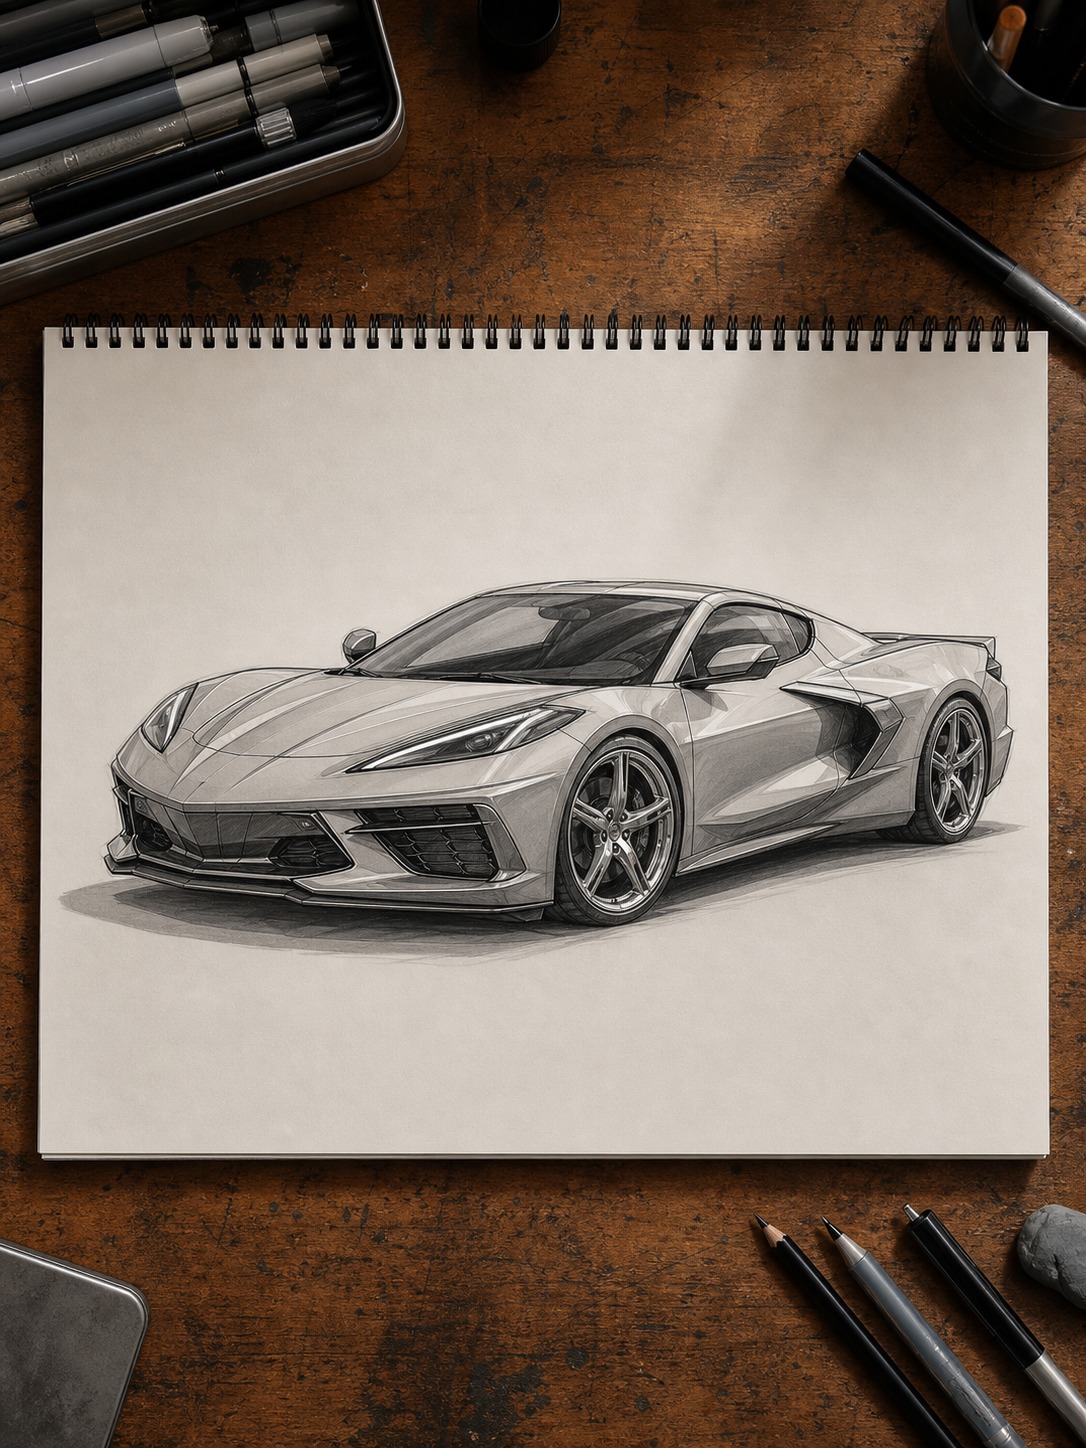
Easiest to draw. Least interesting to look at. A 3/4 front view captures more of the car’s character and stance. Rear 3/4 works well if you want to show off a spoiler or diffuser on the later generations.
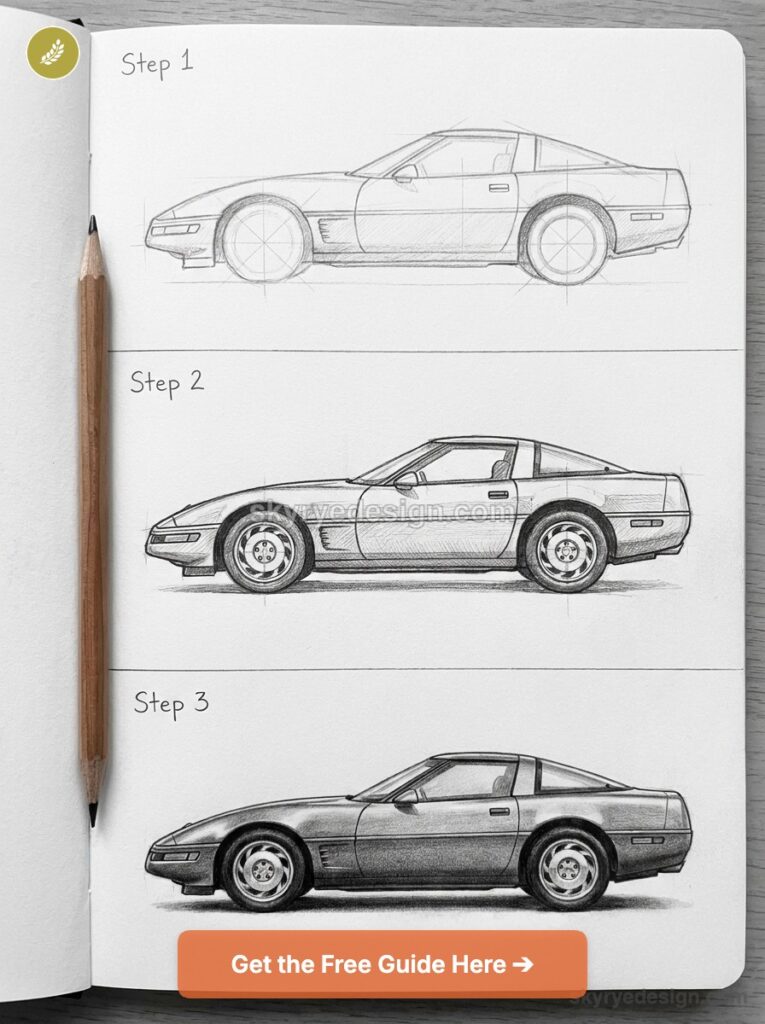
Once proportions feel natural, practice all four — you’ll notice which one you gravitate toward.
Common mistakes when drawing a Corvette
Wrong wheelbase-to-body ratio. By far the most common issue. Wheels too close together, or a body drawn too long for the wheelbase — it reads as “off” even to someone who couldn’t tell you why.
Flat-looking wheels. Circles instead of perspective-correct ellipses. Fastest way to flatten an otherwise decent sketch.
Overworking chrome too early. Detailed highlights before proportions and linework are locked in usually just means redoing that work later. Ask me how I know.
Ignoring the C8’s mid-engine proportions. Copying a classic Corvette’s long-hood stance onto a C8 sketch is an easy trap. Check your reference carefully if you’re drawing this generation.
For contrast, practice the opposite silhouette with this Volkswagen Beetle drawing guide. The rounded roof and shorter wheelbase make a useful counterpoint to the Corvette’s low wedge profile.
Frequently asked questions
How long does it take to draw a Corvette?
A rough gesture sketch takes 20-30 minutes. A fully detailed, shaded drawing can run several hours depending on how far you push the rendering.
What’s the easiest angle to draw a Corvette from?
Flat side profile — it removes most of the perspective challenges. A 3/4 view captures more personality once proportions feel comfortable.
Do I need to draw a specific Corvette model, like a C5 or C8?
Not required, but picking a generation upfront makes reference-gathering easier and keeps proportions consistent.
What paper and pencils work best for car sketching?
Mechanical pencil for construction lines, a 2B or 4B for final linework, paper that holds up to erasing.
How do I make wheels look round instead of oval?
They shouldn’t look perfectly round in most angles — only a dead-on side view shows true circles. Check your angle against the reference before finalizing.
Can I draw a Corvette without a reference photo?
Once the proportions are internalized through practice, sure. Until then, work from a reference — especially for something as proportion-sensitive as a C8.
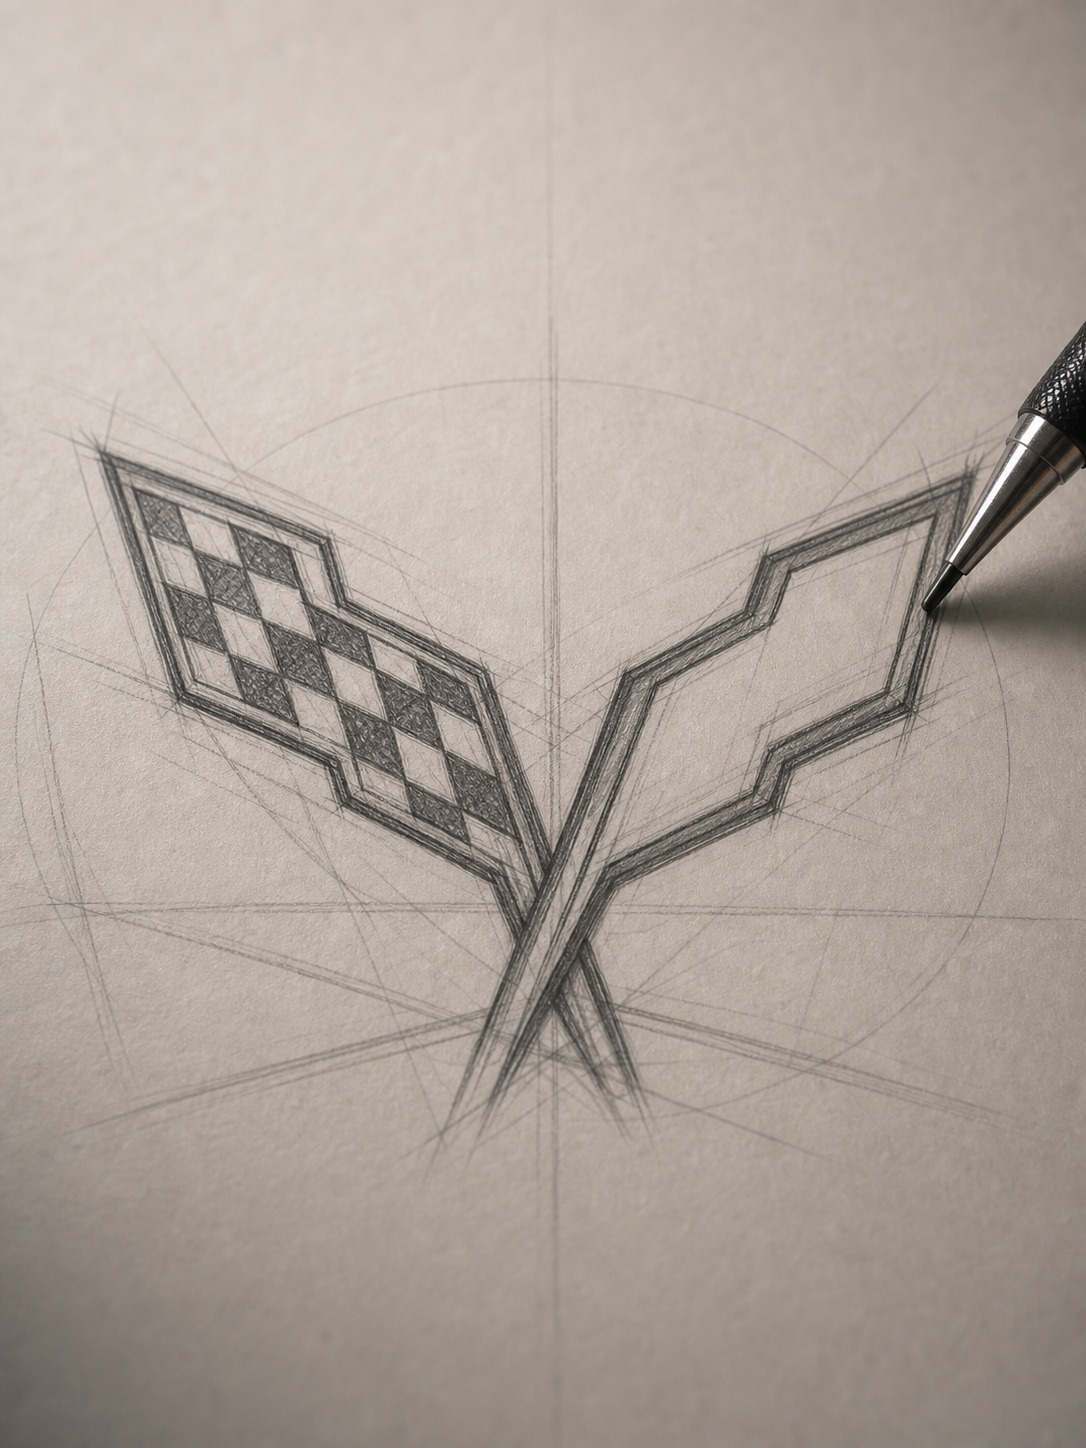
How do I draw the Corvette logo?
Worth practicing separately from the car. Start with the flag shapes and checkered pattern, then add the script lettering and center stars.
Final thoughts
A Corvette drawing lives or dies on proportion, not detail. Nail the wheelbase, stance, and greenhouse shape, and even a rough, unfinished sketch reads clearly as a Corvette. Detail and shading make it polished. Proportion is what makes it correct.
Next up, I’m covering how I sketch a Ferrari F40, if you want to keep building on this.
- 448shares
- Facebook0
- Pinterest448
- Twitter0
- Reddit0