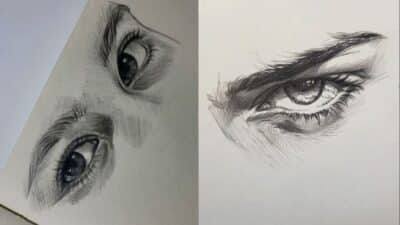
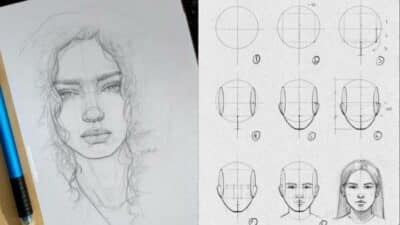
People often wonder why drawing people feels so difficult. Capturing the shapes, expressions, and movements can seem overwhelming at first. Yet, drawing people becomes easier when an artist understands basic shapes and how bodies move, rather than just focusing on details.

When someone practices the simple forms that make up the human figure, they start to see how features and clothing fit together naturally. This approach helps bring drawings to life, making them look both believable and full of character.


Learning to draw people is about more than copying what is seen. It involves observing, breaking down complex forms, and practicing techniques that connect the parts into a whole figure. With time, even beginners build confidence and skill through simple, focused steps.
Key Takeways
- Start with basic shapes to understand human figures better.
- Observe how features and clothes fit naturally on the body.
- Practice small steps to make drawings more lively and realistic.
Fundamentals of Drawing People

Drawing people well depends on understanding how the body fits together, breaking down complex forms into simple shapes, and capturing the flow of movement. Each of these helps create a figure that looks natural and alive rather than stiff or awkward.
Understanding Proportions

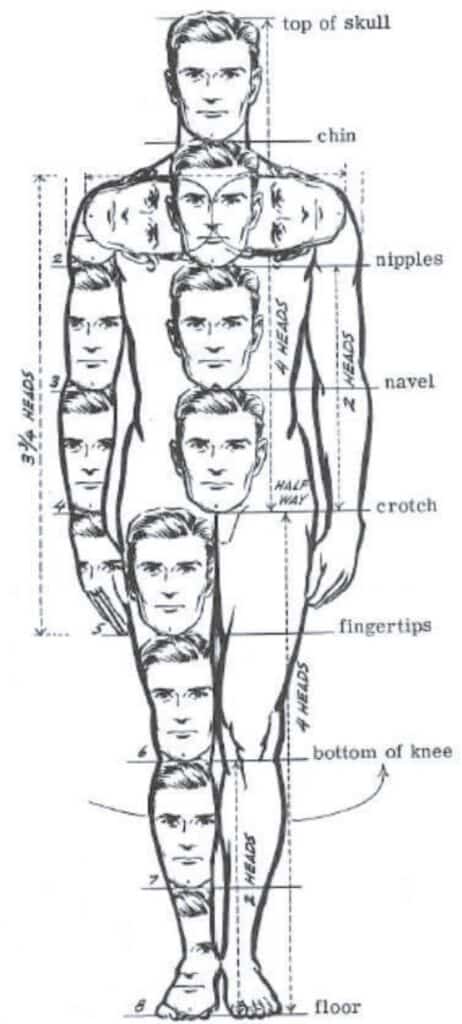
Proportions are the basic rules that define the size relationships between different parts of the body. For example, the human figure is often measured in “heads.” A typical adult figure is about 7 to 8 heads tall. This helps artists keep the body balanced and realistic.
Key points to remember:
- The torso usually equals about 3 heads tall.
- The arms reach midway down the thighs when relaxed.
- Legs are about half the total height.
Using landmarks like the shoulders, waist, and knees makes it easier to keep proportions accurate while drawing. He or she should check these often during figure drawing to avoid mistakes. Proportion guides can change based on age, gender, and style but sticking to standard measurements helps with consistent results.
Sketching Basic Shapes


Breaking the body into basic shapes helps simplify the drawing process. Instead of drawing every detail at once, the artist starts with circles, ovals, rectangles, and lines to form the head, chest, hips, and limbs.
For example:
- The ribcage can be drawn as an oval or egg shape.
- Pelvis as a flattened box or oval.
- Limbs as cylinders or tubes.
These shapes act like a skeleton for the sketch. They help position parts correctly and establish size relationships before adding detail. Starting with simple shapes also helps when the model moves. Keeping the sketch loose but accurate saves time and enhances the overall flow.
Capturing Gesture
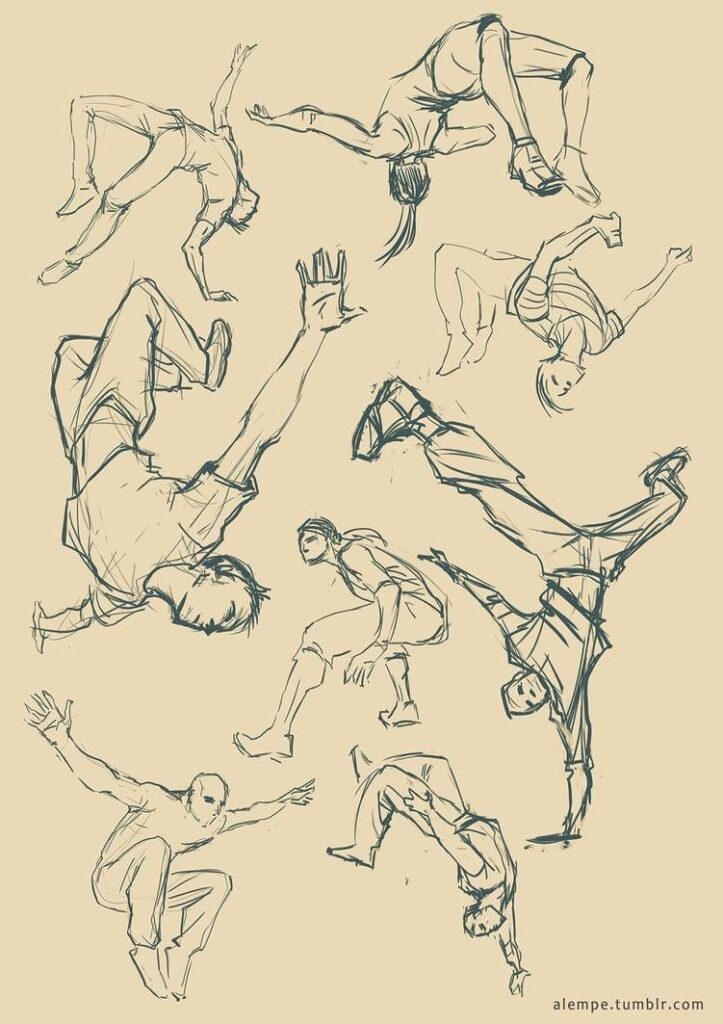

Gesture captures the basic movement and energy of the figure. It focuses on the line of action, which is the main curve or direction that guides the body’s pose. Gesture drawing is quick, usually done in a few seconds to minutes.
The artist’s goal is not detailed anatomy but to record the rhythm and flow. This helps make the figure dynamic and alive rather than stiff.
Tips for gesture drawing:
- Use long, sweeping lines.
- Avoid detailing early on.
- Focus on balance and weight distribution.
Gesture drawing trains the eye to notice key parts of movement and posture. It is a valuable skill for any figure drawing because it improves the natural feel and expression of people drawing.
Drawing Facial Features and Expressions


Drawing a face requires attention to structure, the main facial parts, and how expressions change those parts. Accurate shapes and proportions create natural looks. Adding emotion helps bring characters to life by showing feelings through their faces.
Mastering the Face Structure
The face has a basic shape that helps place features correctly. It usually looks like an oval or egg shape. The eyes sit about halfway down the head. The nose is below the eyes, and the mouth is below the nose.


Using simple lines to divide the face can guide where to put each part. For example, draw a vertical line down the middle and a horizontal line where the eyes go. This helps keep features balanced and even. The jawline and cheekbones give the face its unique shape.
Understanding these rules makes it easier to draw faces that look real and not flat.
Drawing Eyes and Nose


The eyes are one of the most important facial features. They usually follow a pattern: the space between the eyes is about the width of one eye. Eyes have a round shape with details like the pupil, iris, and eyelids.
The nose sits in the center below the eyes. It can be drawn with simple shapes like triangles or curves. Pay attention to the nostrils and the bridge of the nose to give it depth. Shadows help show the nose’s form.
Both eyes and nose vary by person, so small differences make each face unique but following basic shapes keeps drawings clear.
Expressing Emotions with Facial Expressions


Facial expressions change how the features appear. For example, when someone smiles, the mouth curves upward, and the cheeks lift. Eyebrows move up or down to show surprise or anger.
Expressions affect the eyes too—widened eyes can show fear, while squinting can indicate suspicion or concentration. The nose often wrinkles with disgust or confusion.
Drawing these subtle changes allows the artist to show feelings clearly. Using simple changes in line and shape can make a big difference in how emotions are shown in a drawing.
Depicting the Human Body

Drawing the human body requires attention to muscle shape, accurate hand and feet details, and understanding how the back looks from behind. These elements create lifelike figures and help show movement and structure clearly.
Rendering Muscles and Anatomy
Muscle shapes give the body form and strength. Artists focus on major muscles like the biceps, triceps, and chest muscles to show how they wrap around bones.


It helps to break muscles into simple shapes, such as cylinders for arms and legs. This method makes drawing muscles easier and more accurate.
Muscle tension changes with different poses. For example, a flexed arm will have tighter, more defined muscles. Artists must observe these changes to keep the body believable.
Knowing muscle placement also improves shading. Light and shadow on muscles create volume that brings drawings to life.
Drawing Hands and Feet


Hands and feet are often difficult due to their complex shapes. Fingers and toes have multiple joints, so understanding their bending points is key.
Artists should study the basic bone and muscle layout. For hands, knuckles create main angles, while feet have arches that affect their shape.
Keeping proportions correct is important. For example, the middle finger is usually the longest, and feet vary in arch height.
Simple lines can guide finger spacing before adding details. Also, paying attention to nails, wrinkles, and creases brings realism to the drawing.
Understanding Back View Drawing
The back view shows muscles and bones that differ from the front. The shoulder blades and spine are main features artists must highlight.
The back muscles, like the trapezius and latissimus dorsi, create a broad shape. Observing how these muscles stretch or relax helps show motion and posture.
The spine can be drawn as a gentle curve to suggest body position. The skin often folds near the lower back when bending.
Clarity in muscle groups helps separate the back into sections. This approach supports realistic and clear figure poses from behind.
Illustrating Clothing on Figures


Clothing on drawn figures should show shape, texture, and how fabric moves. Capturing details like folds and seams makes clothes look real. Color adds life and mood to the design, helping viewers understand material and style quickly.
Drawing Clothing Details
Clothing details highlight the fabric’s behavior on the body. Artists focus on folds, creases, and seams to show if material is soft, stiff, or stretchy. For example, tight clothes have small, sharp creases near joints, while loose fabric shows large, smooth folds.


Buttons, zippers, and stitching add realism. These elements guide the eye and clarify the garment’s construction. Lines should be clean and carefully placed to avoid confusion.
Showing how clothes fit the figure gives a sense of movement. Wrinkles near elbows or knees show bending. Overlapping fabric can hint at layers or texture differences.
Use light and shadow to stress volume. A fold’s shadow makes the fabric look three-dimensional. This detail helps clothing appear less flat and more alive.
Using Color in Clothing


Color choice affects the look and feel of the clothing. Bright colors can make designs stand out, while muted tones suit classic or serious styles. Artists often choose colors based on mood or season.
Color also shows fabric type. Shiny materials like silk have highlights, while rough fabrics like wool absorb light, showing duller shades. Using a mix of light and dark shades adds depth and richness.
When coloring, artists should consider how light hits the figure. Shadows and highlights must be consistent with the light source to keep the clothing believable.
Combining colors can create contrast or harmony. Opposite colors on the color wheel make a piece pop, while colors close to each other blend softly. Balancing this helps focus attention on key parts of the outfit.
Bringing Drawn People to Life


Creating drawn people that feel real involves capturing both their unique traits and the sense of movement they carry. It means shaping their personality through careful detail and showing their actions clearly to tell a convincing story.
Conveying Personality and Story
To show personality, an artist focuses on key characteristics like facial expressions, posture, and clothing. These details tell viewers about the person’s mood, background, or feelings. For example, a confident character might stand tall with a steady gaze, while a shy one could look down with closed body language.


Artists can also add small items or settings around the figure to hint at their story. A drawn character holding a book may suggest curiosity or knowledge. Every line and shape contributes to expressing who the person is beyond just their physical form.
Depicting Movement and Action
Showing movement makes drawings appear lively and dynamic. Artists achieve this by capturing the natural flow of muscles and the direction the body leans or turns. Quick, confident strokes can suggest fast motion, while softer lines might show gentle actions.


The way limbs bend and the body’s balance help tell what the character is doing. For example, a runner’s forward lean and bent legs suggest speed. Paying attention to these small movement cues can make the drawing feel active rather than static.
Techniques and Tools for Artists

Drawing people needs the right materials and careful attention to detail. Using good tools helps artists capture the form, expression, and movement of the human body. Clear techniques help illustrators create lifelike or stylized figures.
Choosing Materials for People Drawing
Artists pick materials based on the style and detail level they want. Graphite pencils are common for sketching because they erase easily and allow light shading. Charcoal offers deeper contrast but can smudge, so artists use fixatives to protect finished work.
Paper texture affects the overall drawing. Smooth paper works well for detailed lines, while rough paper helps create texture in hair or clothing. Colored pencils or ink pens add vivid details after the initial sketch.
Some illustrators prefer digital tablets because they allow quick changes and layering. Digital tools also include brushes and effects that mimic traditional media but give more control and flexibility.
Tips for Illustrators
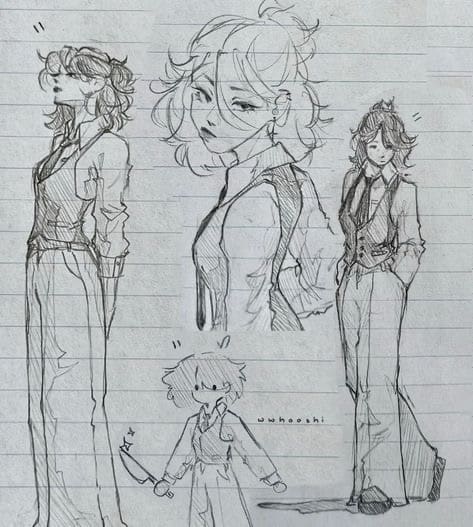

Start with basic shapes like circles and ovals to block in the head and body. This helps keep proportions accurate. Artists should observe real people or photos to understand anatomy and posture.
Keep lines light at first to adjust poses easily. Once happy with the shape, darken and refine the outlines. Adding shading shows light and shadow, giving drawings volume.
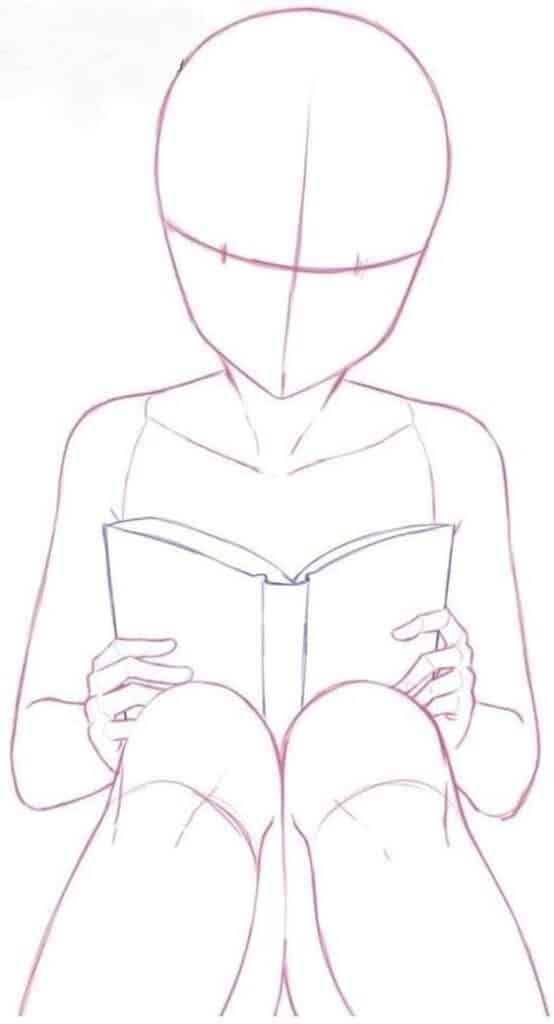

Focus on key details such as eyes, hands, and facial expressions. These parts bring life to the drawing. Illustrators also practice gesture drawing—a quick sketch technique to capture movement and emotion fast.
Using layering helps. Start with broad shapes, then build details gradually. This method keeps the drawing balanced and less overwhelming for the artist.
Drawing People from Life and Travel

Drawing people takes on new meaning when combined with travel. It requires attention to surroundings, local customs, and quick observation skills. Artists must adapt to different places and capture moments that reflect life and culture.
Capturing People While Traveling
When traveling, capturing people on the move helps create authentic drawings. Artists often study gestures, clothing, and expressions unique to the location. This adds depth and cultural context to the artwork.


Travel settings can be busy or quiet. Sketching in crowded markets or calm villages offers different challenges and opportunities. Timing is key because people rarely stay still long. Quick sketches or memory drawing after observation work best.


Photographs and notes can support drawing later, but initial sketches done on-site tend to capture energy more accurately. Observing how people interact with their environment provides clues that enrich the final drawing.
Drawing People On Location
Drawing people directly on location requires skill and confidence. The artist must quickly decide where to focus among many details. Light, posture, and surroundings influence the scene strongly.
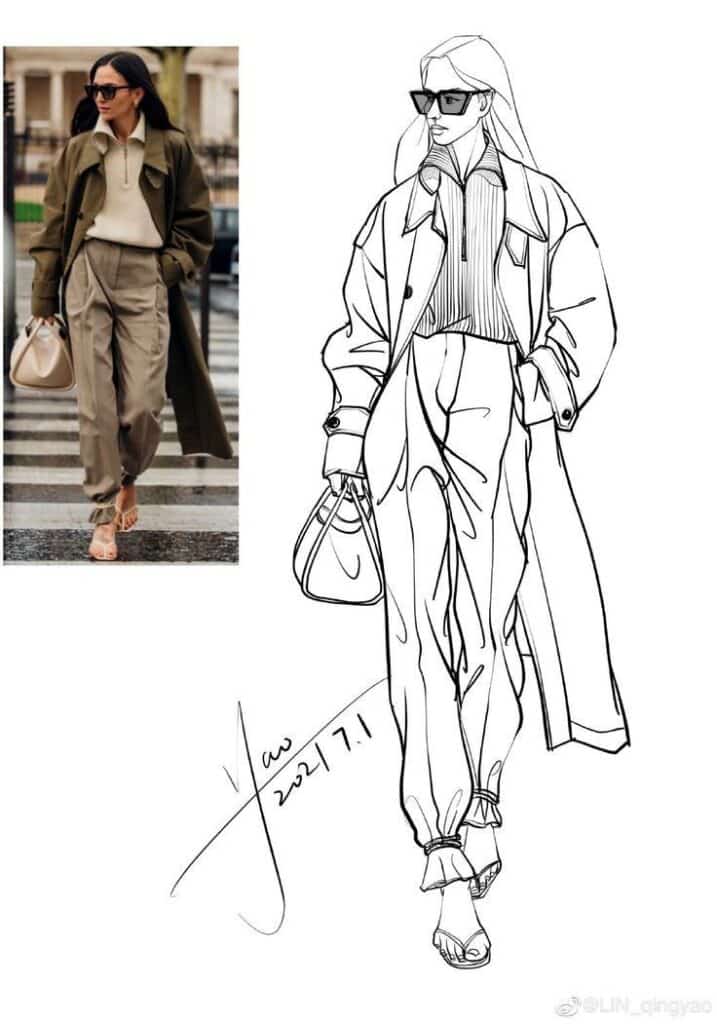

Portable materials like pencils, charcoal, or small sketchbooks suit location work well. Using simple supplies allows fast setup and adaptability. Often, artists blend rough outlines with sharper details in real time.
Respect for subjects matters greatly on location. Some people welcome being drawn, while others prefer privacy. Artists should stay discreet and considerate. Observing without disturbing helps maintain natural poses and expressions.
- 2.9Kshares
- Facebook0
- Pinterest2.9K
- Twitter0


