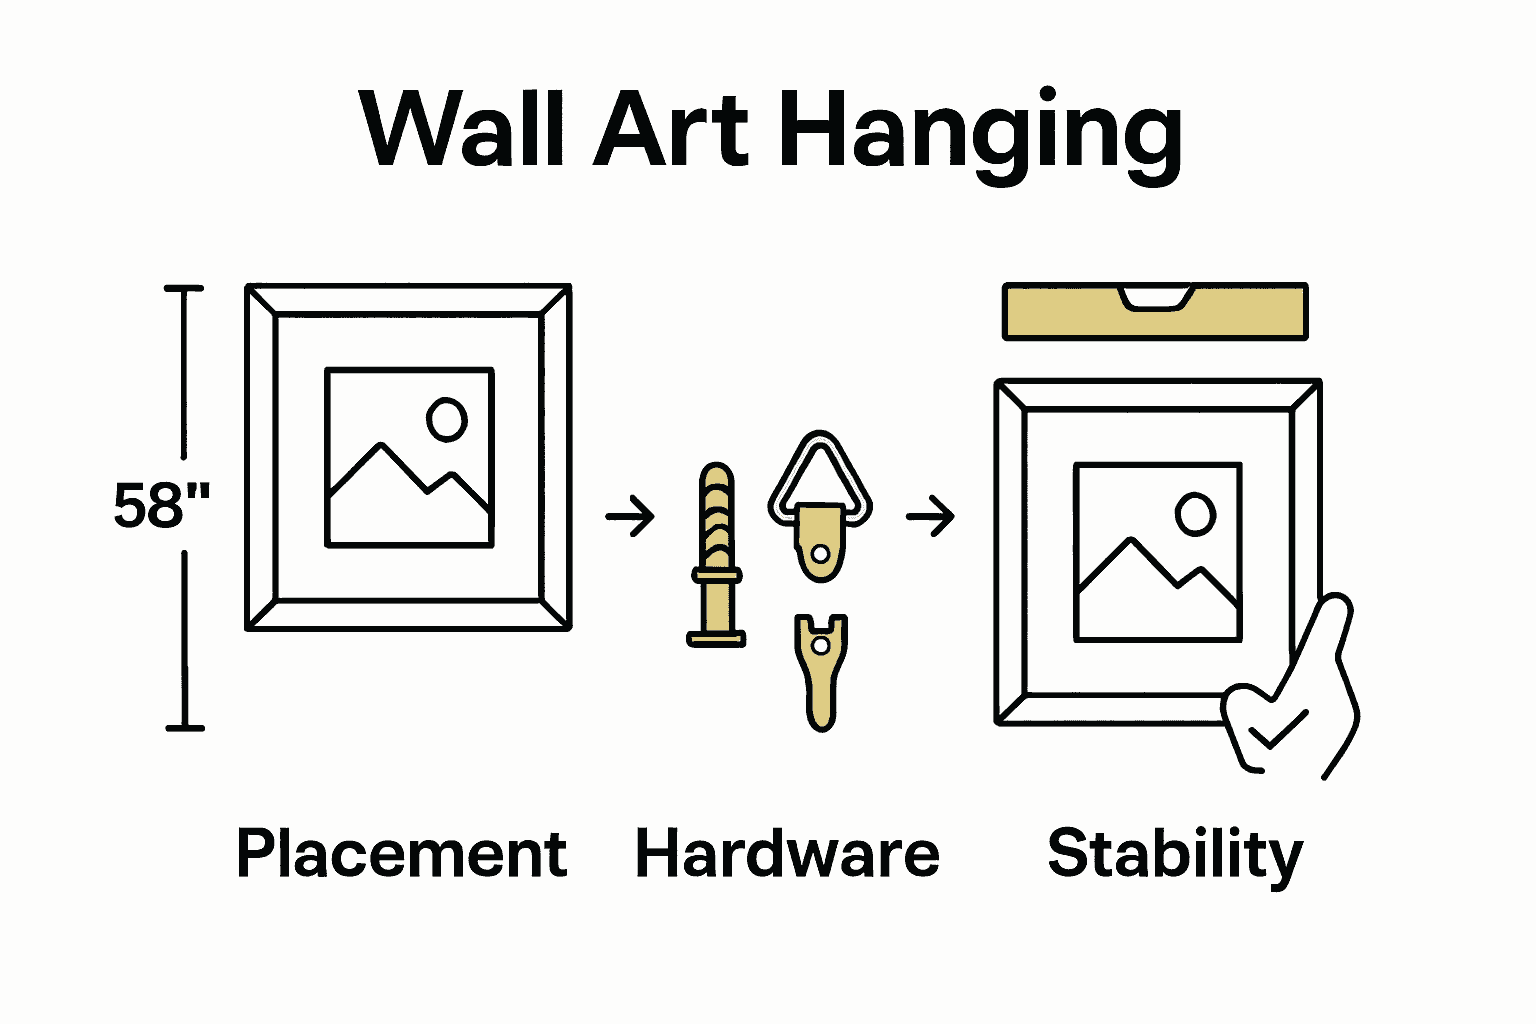
Here is how to hang wall art without guessing: set the viewing height first, check the artwork weight and wall type, then calculate the hook position from the frame’s actual hanging hardware. For many rooms, a centre point between 57 and 60 inches from the finished floor is a sensible starting range. It is not a law. A sofa, console, staircase, low ceiling, or seated viewing position can move that centre line.
The expensive mistakes usually happen before the drill comes out: the frame is centred on the wall instead of the furniture, the wire slack is ignored, or an anchor is chosen without checking its load rating. This wall art hanging guide handles those decisions in the right order.
Wall art hanging quick reference
| Decision | Useful starting point | What changes it |
|---|---|---|
| Viewing height | Centre at 57–60 inches from the floor | Seated viewing, stairs, ceilings, nearby furniture |
| Gap above furniture | About 6–10 inches | Frame scale, back cushions, lamps, objects on a console |
| Artwork width | Roughly ⅔–¾ of the furniture width | Asymmetry, architectural edges, intentionally oversized art |
| Gallery wall spacing | About 2–3 inches between frame edges | Very large frames or an intentionally loose salon layout |
| Hardware | Match wall, load, and frame attachment | Drywall, stud, plaster, masonry, tile, frame construction |
Tools for hanging wall art
For a straightforward installation, gather a tape measure, pencil, painter’s tape, spirit level or laser level, stud finder, drill and bits, screwdriver, and the fixing hardware. Add a second person for a large frame; trying to mark, lift, and level a heavy piece alone is where careful measurements turn into rushed decisions.
The California College of the Arts exhibition resources are useful for thinking about an installation as a planned layout rather than a sequence of isolated nails. If you are also matting or hinging art on paper, use conservation-safe materials; the Library of Congress materials guide explains why ordinary tapes and boards are not automatically suitable for long-term contact with artwork.
1. Choose the placement before drilling
Stand where the artwork will normally be seen. Check the frame against the sofa, console, bed, doorway, window, and any strong vertical line in the room. Centreing on the bare wall can look wrong when the furniture sits off-centre; in most rooms, the artwork needs to belong to the furniture grouping first.
When I plan a wall, I look at the outside edges before the subject inside the frame. Those edges create the composition. Mark the proposed frame boundary with painter’s tape, then step back to the main doorway and the usual seating position. If the taped rectangle already feels too high or too small, the artwork will not rescue it.
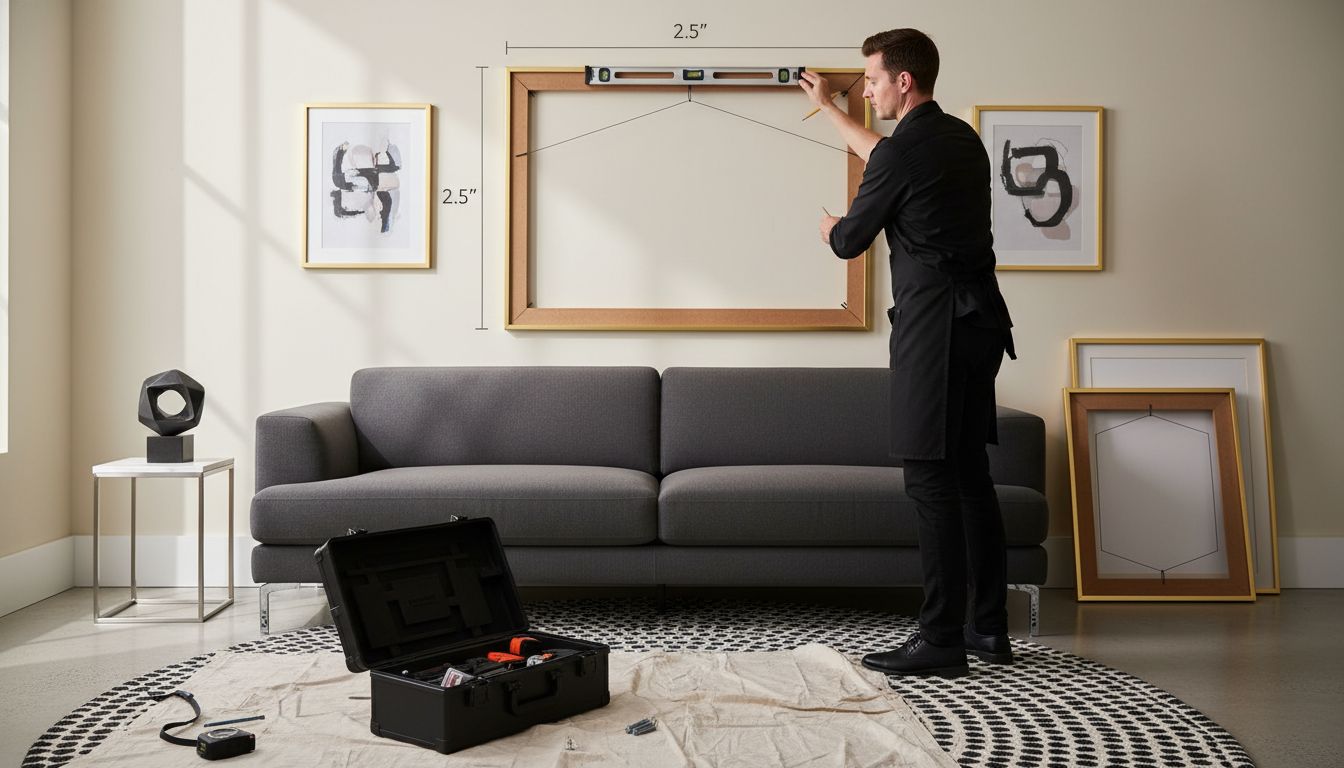
For several frames, plan the full boundary with the gallery wall layout method. If you are still deciding on scale or colour above a sofa, compare the examples in the living-room canvas art guide before committing to holes.
2. Calculate the picture-hook position
Do not place the hook at the intended top edge of the frame. The hook location depends on the frame height and the distance from the top edge to the tensioned wire, D-ring, cleat, or other hanging point.
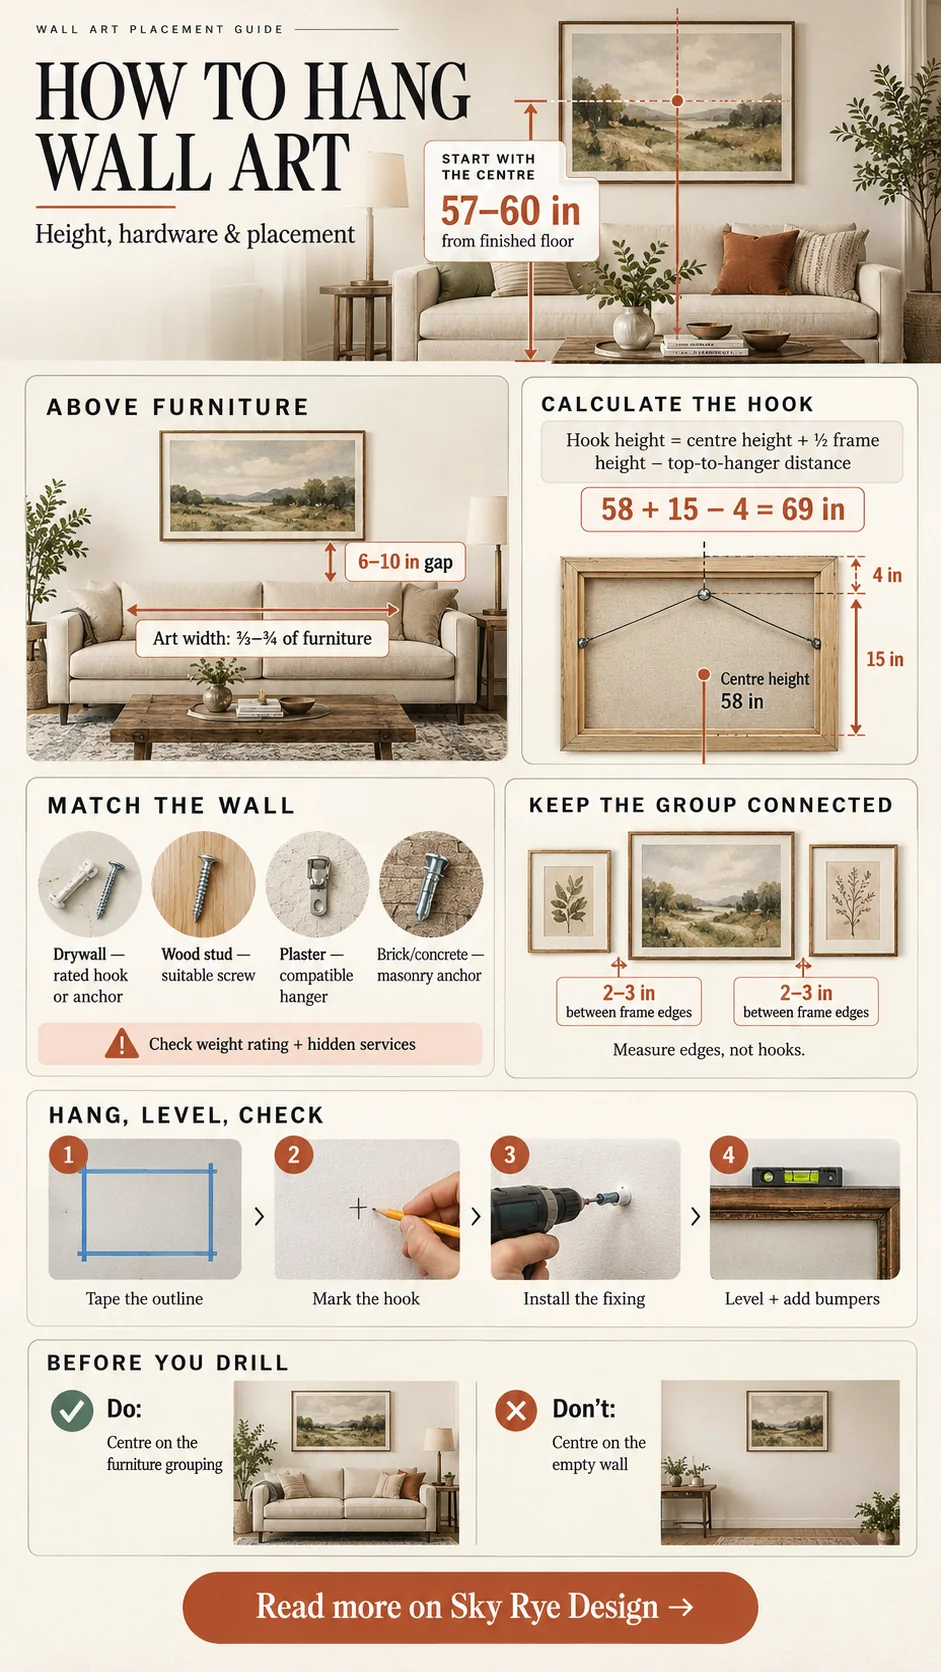
Hook height = intended centre height + half the frame height − distance from the frame top to the hanging point.
| Worked example | Measurement |
|---|---|
| Intended artwork centre | 58 inches |
| Frame height | 30 inches; half is 15 |
| Top edge to tensioned wire | 4 inches |
| Hook mark | 58 + 15 − 4 = 69 inches from the floor |
Pull the wire upward gently before measuring; loose wire rises once the frame is hanging. With two D-rings and no wire, measure both attachment points from the top and side edges of the frame, transfer both marks to the wall, and check them with a level. A paper template is useful because it keeps the calculation visible while you position the frame.
The East Carolina University gallery handbook includes professional guidance on artwork height, multiple hooks, hardware calculations, groupings, and work above furniture.
3. Match the hardware to the wall and frame
The safest fixing is not the biggest anchor in the toolbox. It is a complete system in which the frame attachment, wall fixing, and wall material can all carry the load. Read the manufacturer’s rating and installation instructions for the exact product; ratings are not interchangeable between brands or wall types.
| Wall or situation | Typical approach | Check before installation |
|---|---|---|
| Drywall | Rated picture hook or drywall anchor; stud fixing for heavier work | Anchor rating, stud position, wiring and pipes |
| Wood stud or solid timber | Appropriate screw into sound timber | Screw length, frame hardware, concealed services |
| Plaster and lath | Plaster-compatible hanger, picture rail, or fixing into structure | Brittleness, hidden lath, cracks, wall condition |
| Brick or concrete | Masonry bit, plug or anchor designed for the substrate | Mortar versus brick, anchor depth, dust control |
| Tile or stone | Purpose-made drill bit and anchor, or professional installation | Crack risk, waterproofing, pipes, replacement difficulty |
| Rental or very light frame | Rated removable adhesive system on a compatible smooth surface | Surface finish, curing time, weight and removal instructions |
D-rings and French cleats give a frame more stable support than a small central sawtooth hanger when the artwork is large enough to justify them. The University of North Georgia gallery-ready guidelines specifically require D-rings with wire or French cleats for wall-mounted student work and do not accept sawtooth hangers.
4. Install, hang, and level the artwork
- Confirm the final frame outline and hook marks with painter’s tape.
- Check for a stud, wiring, pipes, and the correct drill bit before making a hole.
- Install the fixing exactly as its instructions specify. Do not enlarge the hole by rocking the drill.
- Lift the artwork with two people if its size, glass, or weight makes one-person handling awkward.
- Lower the frame onto the fixing and confirm that the wire, D-rings, or cleat has fully engaged.
- Level the frame and add small felt or rubber bumpers to the lower corners to reduce movement and protect the wall.
For a DIY piece, confirm the backing and frame are dry and rigid before hanging it. The DIY textured wall art tutorial includes the making process; installation hardware still needs to suit the finished weight, not the estimated weight before texture, paste, or framing was added.
5. Keep a gallery wall visually connected
Treat several frames as one composition. Lay them on the floor or tape paper templates to the wall, establish the outside boundary, and position the anchor piece first. Two to three inches between frame edges is a useful starting gap because it keeps different pieces connected without making the arrangement feel cramped.
Keep the gaps consistent even when the frames are different sizes. Visual balance does not require symmetry: one large dark frame can be balanced by two or three lighter pieces on the opposite side. If the collection still feels scattered, repeat one element such as frame finish, mount colour, or medium instead of buying matching frames for everything.
Use the broader wall art ideas to choose a display direction, then apply the balance principles for interiors to check how the art relates to the rest of the room.
Artwork can conceal a harmless patch or visually balance an awkward wall, but it should not cover an active crack or damp area. The companion guide to hiding home imperfections with design explains when art works and when the underlying defect needs attention first.
Common wall art hanging mistakes
| Mistake | Why it causes trouble | Better check |
|---|---|---|
| Centreing on the empty wall | The art can look disconnected from off-centre furniture | Compose the art with the furniture and sightline |
| Ignoring wire tension | The frame finishes lower than the calculation | Measure to the wire while gently pulling it upward |
| Using one fixing for every wall | Load ratings depend on the substrate and installation | Match the fixing to the wall and manufacturer instructions |
| Spacing from nail to nail | Visible frame gaps become inconsistent | Measure between the actual frame edges |
| Hanging first, styling later | Lamps, cushions, doors, or cabinet lines can conflict | Preview the complete room with tape or paper templates |
| Using adhesive strips for unsuitable loads | Paint, texture, humidity, and excess weight can cause failure | Check surface compatibility, curing time, and published rating |
When to use a professional installer
Bring in experienced help for valuable or irreplaceable artwork, oversized glazing, tile or stone, brittle historic plaster, uncertain wall cavities, very heavy pieces, high stairwells, and layouts that need several fixing points to align precisely. A professional is also the sensible choice when you cannot lift the piece without twisting the frame.
After installation, apply a controlled downward load rather than a sudden tug, confirm that the hardware does not move, and inspect the frame from the side. Recheck heavy work after a day and occasionally thereafter, especially if the room experiences vibration, humidity changes, or frequent contact.
Finish with the room, not the frame
A level frame can still be badly placed. Step back to the doorway, sit in the main chair, and look at the artwork with the lamps and curtains in their normal positions. Check whether the centre feels comfortable, whether glare hides the image, and whether the frame has enough breathing room. Adjusting one inch now is easier than living with a piece that always feels slightly wrong.
If the piece uses leaves, butterflies, flowers, or other organic forms, judge the outline and shadow as part of the composition. The nature-inspired wall art placement guide shows how sculptural metalwork, botanical motifs, and room lighting change the visual weight of a display.

Wall art hanging FAQ
What is the best height for hanging wall art?
A centre height of 57 to 60 inches from the finished floor is a practical starting range for art viewed while standing. I usually begin at 58 inches, then adjust for the furniture, ceiling height, and normal sightline in the room. Treat a gallery wall as one large shape and place the centre of the whole arrangement in that range rather than centring every frame separately.
How high should wall art hang above a sofa or console?
Start with the bottom of the frame about 6 to 10 inches above the furniture, then test the relationship with painter's tape. The artwork should feel connected to the furniture, not stranded halfway up the wall. A single piece or complete grouping often looks balanced when it spans roughly two-thirds to three-quarters of the furniture width, but use that as a visual check rather than a rigid rule.
How do I calculate where to put the picture hook?
Choose the intended centre height, add half the frame height, then subtract the distance from the top of the frame to the tensioned wire or hanging point. For a 30-inch frame centred at 58 inches with the hanging point 4 inches below the top, the hook mark is 69 inches from the floor: 58 + 15 – 4. Measure wire under gentle upward tension so the finished position matches the calculation.
Which picture hanger should I use for drywall?
Match the hanger to the artwork weight and the hardware manufacturer's published load rating. A light frame may use a rated picture hook or suitable drywall anchor; a heavier piece is safer on a stud or on a mounting system designed for that load. Do not assume every plastic anchor, adhesive strip, or sawtooth hanger works on every wall. Check for wiring and pipes before drilling.
How far apart should frames be in a gallery wall?
Two to three inches between frame edges is a useful starting point for many residential gallery walls. The exact gap can be wider for very large pieces, but consistency matters more than one perfect number. Measure from frame edge to frame edge, not from the hooks, and check the outer boundary of the whole grouping before drilling.
Can I hang heavy artwork without a professional?
Only if you can identify the wall construction, choose hardware rated for the full load, and lift the piece safely. Large glass frames, valuable work, tile, brittle plaster, masonry, uncertain wall cavities, and multi-point installations are sensible reasons to use an experienced installer. Stop if the wall crumbles, the anchor spins, or the frame hardware flexes during a controlled test.
Related wall art guides
Continue with the guide to artwork at home, explore wall art design ideas, or plan a first display with the first-apartment decorating guide. If you want to make the work yourself, try the fabric wall art tutorial or another project from the Sky Rye Design art archive.
- 5shares
- Facebook0
- Pinterest5
- Twitter0
- Reddit0