An outdoor kitchen with pizza oven starts with one fixed element: the masonry dome and its chimney. Once built, it is difficult to move, so its scale, position and relationship to the counter need to be settled early.
I think about it the way I’d think about any fixed architectural anchor: place it wrong and every other decision in the space fights against it for years. Get the scale, the sightline, and the relationship to the counter right from the start, and the rest of the outdoor kitchen practically organizes itself around that one commitment.
This guide looks at how the oven’s shape, size and placement influence the layout, materials and finishes around it, whether you’re building from scratch or adding a separate oven station.
- Start with the oven: scale, shape and the garden view
- Three ways to arrange an outdoor kitchen around a pizza oven
- Match the brick oven to your outdoor kitchen style
- Separate the oven's technical build from its decorative finish
- Plan prep space, tool storage and a clear serving route
- Connect the oven area to seating and lighting
- FAQ
- Where should a pizza oven go in an outdoor kitchen?
- Can a brick pizza oven fit into a small outdoor kitchen?
- How do you make a brick pizza oven look modern?
- What's the difference between a built-in oven and a freestanding oven station?
- How much space does an oven-centered outdoor kitchen actually need?
- Should the pizza oven match the rest of the outdoor kitchen's finish?
- Final thoughts
Most outdoor kitchen projects I’ve seen go wrong the same way indoor renovations do: someone falls in love with a finish material or a specific appliance and works backward from there, instead of starting with how the space actually needs to function. An oven is a bigger commitment than a finish choice. It deserves to be the starting point, not an afterthought squeezed into a layout that was already decided.
Start with the oven: scale, shape and the garden view
Before you draw a single counter line, settle three things about the oven itself: dome size, arch style, and base height. These aren’t just technical specs. They set the visual scale for everything nearby.
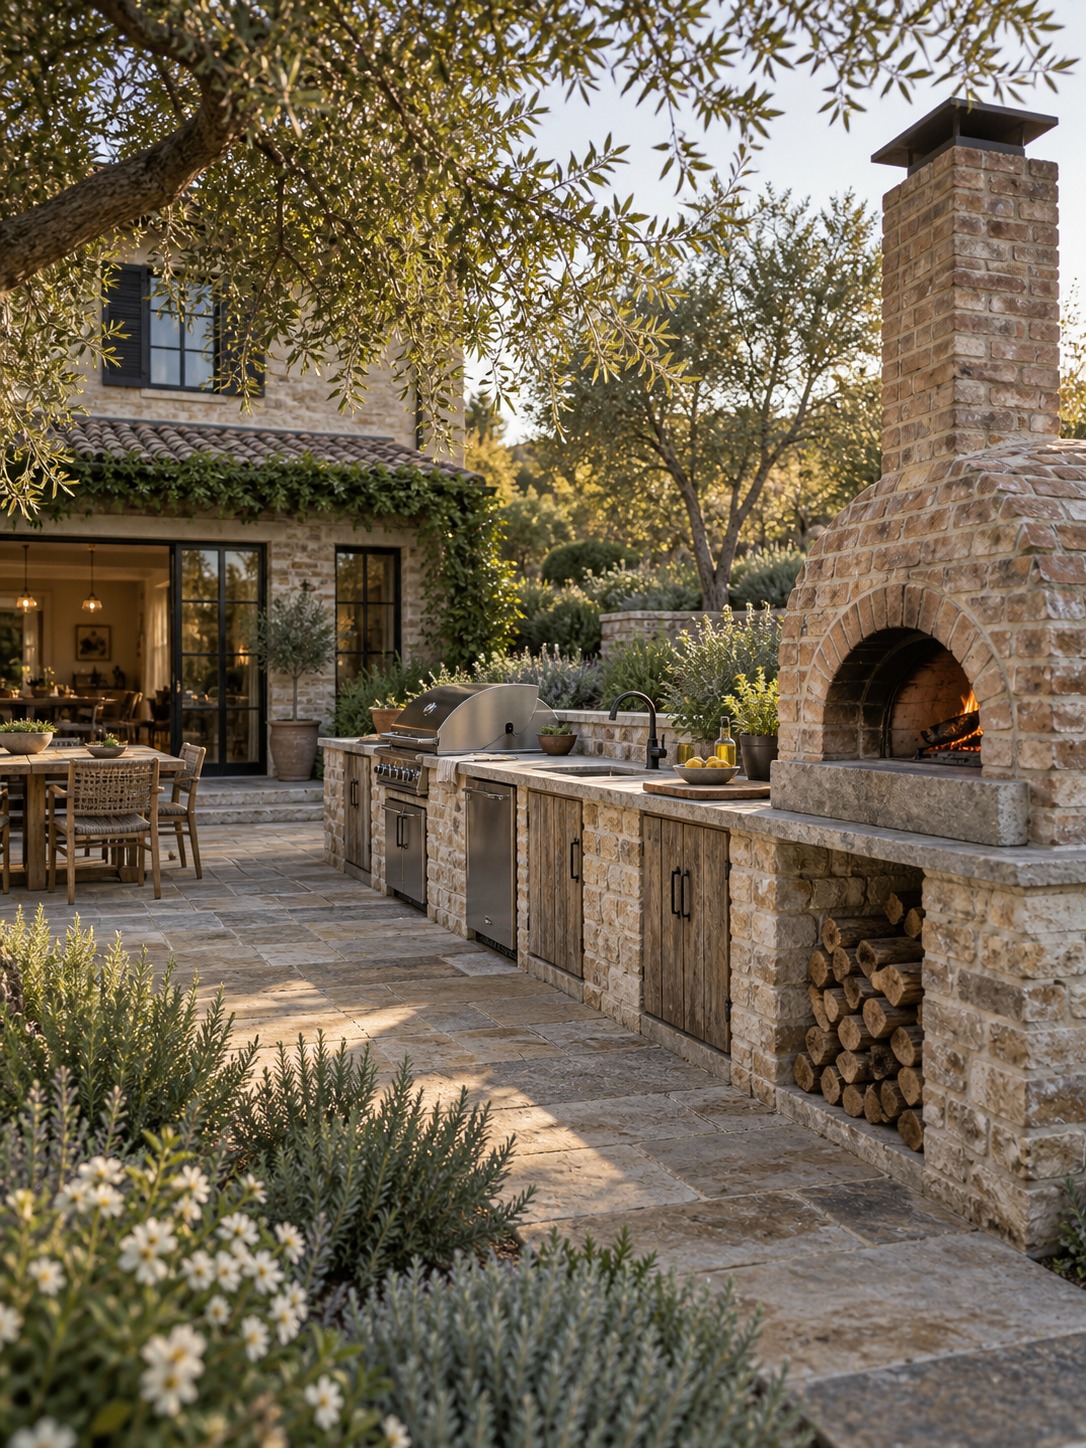
A larger dome, anything past roughly 40 inches across, reads as a genuine architectural feature and can anchor a whole outdoor room on its own. A smaller dome, closer to 28 to 32 inches, works better as one element among several rather than the single focal point, which matters if you’re also fitting a grill, a sink, and a full counter run into the same footprint.
The arch shape (rounded barrel versus a squared, more modern opening) sets the tone before anyone even sees the finish material. A rounded arch reads as traditional almost regardless of what you clad it in, while a squared opening can push even a rustic brick toward something more contemporary.
Sightline matters as much as scale. Stand at your kitchen window, or wherever the main view of the yard happens, and think about where the oven sits in that frame. I’ve noticed a lot of outdoor kitchens get built with the oven tucked to one side, out of the main view, when it’s actually the most interesting object in the whole yard and deserves to be seen from the house, not just from the patio itself.
Height off the ground is worth checking early too, since it’s easy to overlook until the oven’s already built. A base that puts the cooking floor around waist height suits most adults working standing up, but if the oven will regularly be operated by someone shorter, or from a seated position for accessibility reasons, that base height should shift accordingly before the masonry goes in, not after.
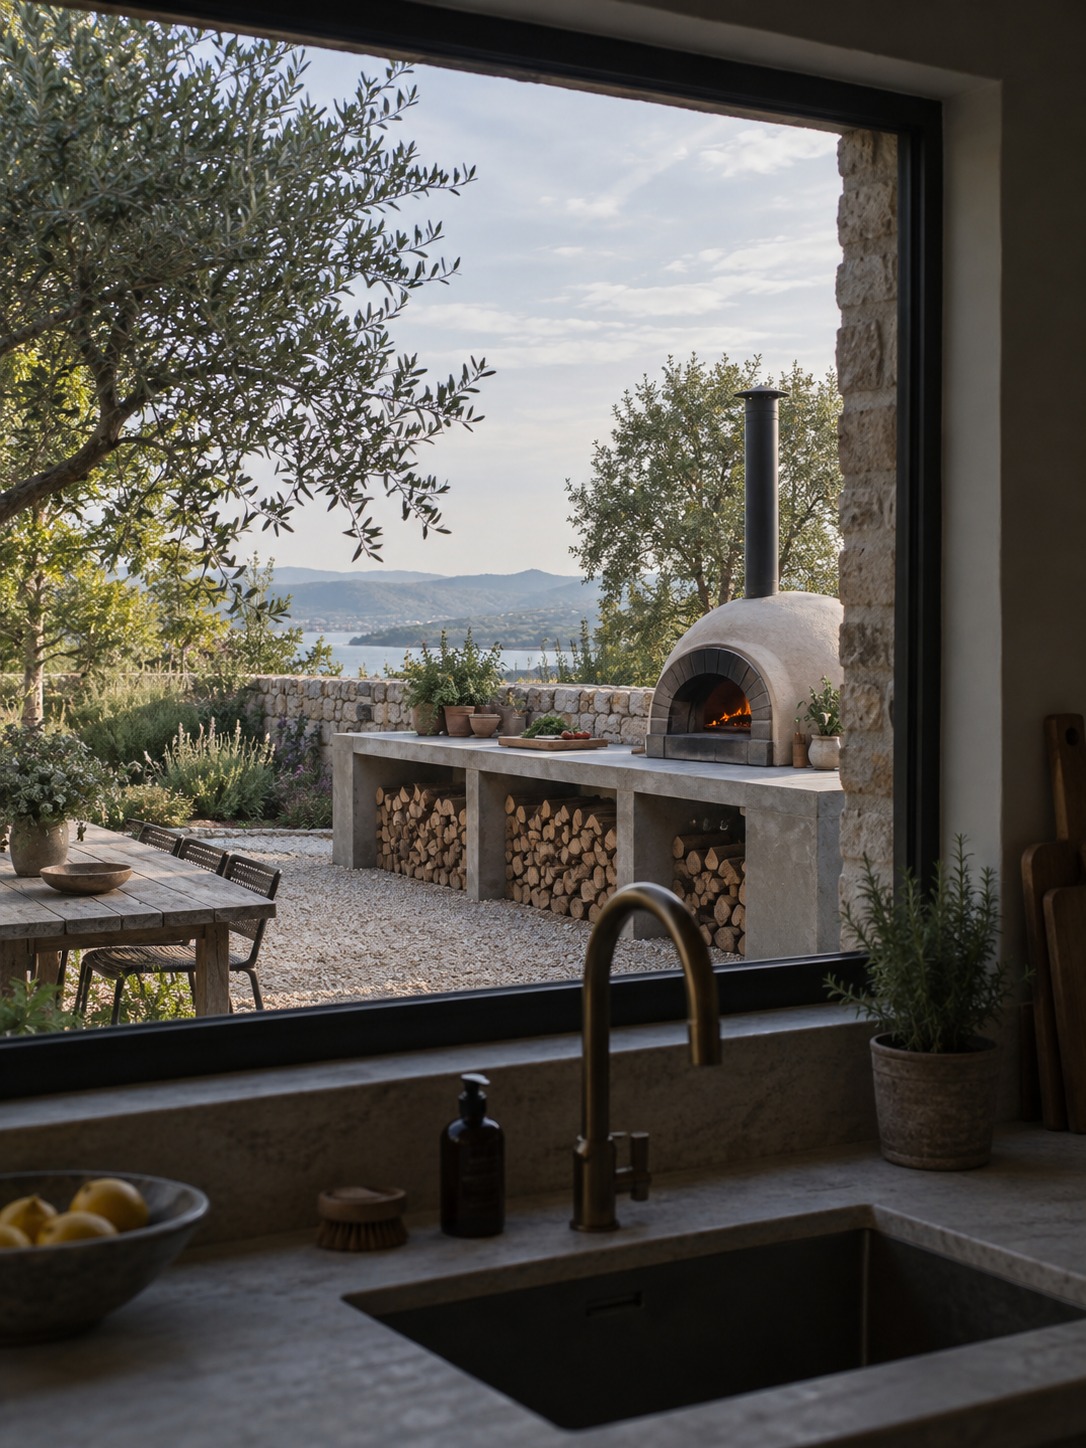
Three ways to arrange an outdoor kitchen around a pizza oven
Once the oven’s scale is set, the layout question becomes where it sits relative to prep space, seating, and how people actually move through the area. Three configurations cover most real yards.
A linear counter with the oven at one end
This is the simplest layout to build and the easiest to read visually: one continuous counter run, with the oven anchoring one end and prep, sink, and grill space extending along the rest. It suits narrower yards or a kitchen built against an existing wall or fence line, since it doesn’t need depth in more than one direction.
The tradeoff is traffic flow. Whoever’s cooking at the oven end has to move the full length of the counter to reach anything stored at the other end, so tool storage (peels, brushes, a small table for dough) works best kept close to the oven itself rather than centralized elsewhere. Guests naturally cluster at whichever end has the most activity, which in practice means the oven end gets crowded while the far end sits empty.
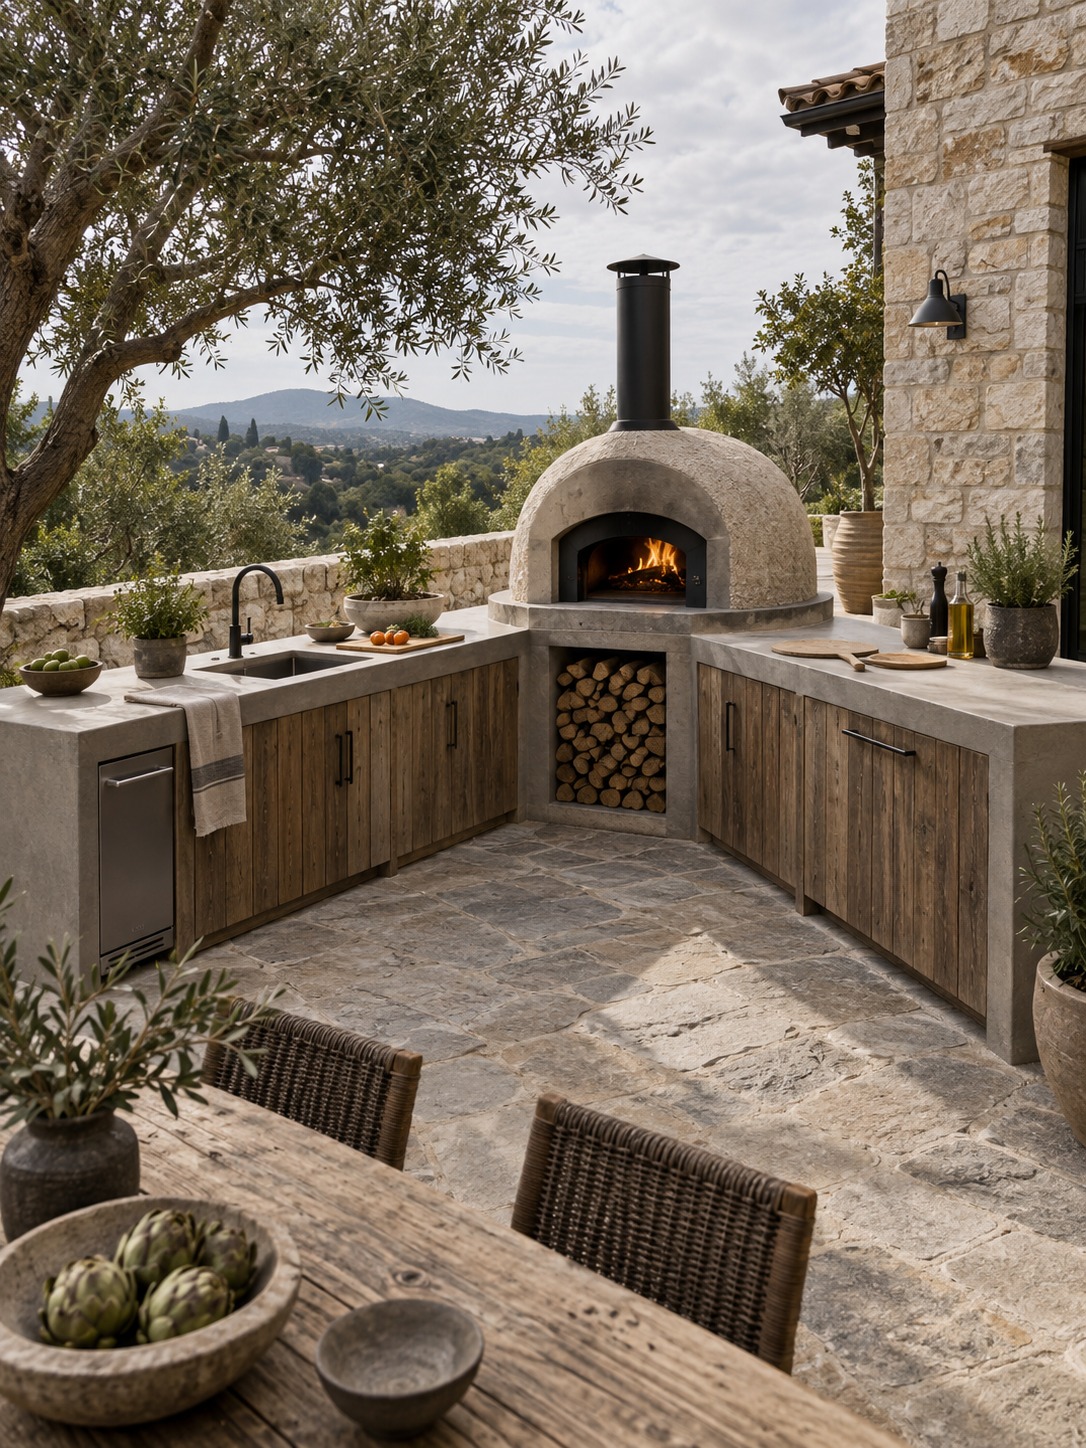
An L-shaped kitchen with a dedicated oven zone
An L-shape gives the oven its own leg of the counter, physically separated from general prep and serving, which solves the crowding problem a straight line creates. One arm handles the oven and its immediate tools; the other handles everything else, sink, storage, serving surface, with the corner acting as a natural buffer between the two.
This layout needs more total space, generally a minimum of roughly 8 by 10 feet of usable patio to avoid feeling cramped at the corner, but it pays that space back in how much calmer the workflow feels. It’s a strong choice if the outdoor kitchen also works as a dining area, since the L can wrap partway around a table without the oven ever being directly behind someone’s chair.
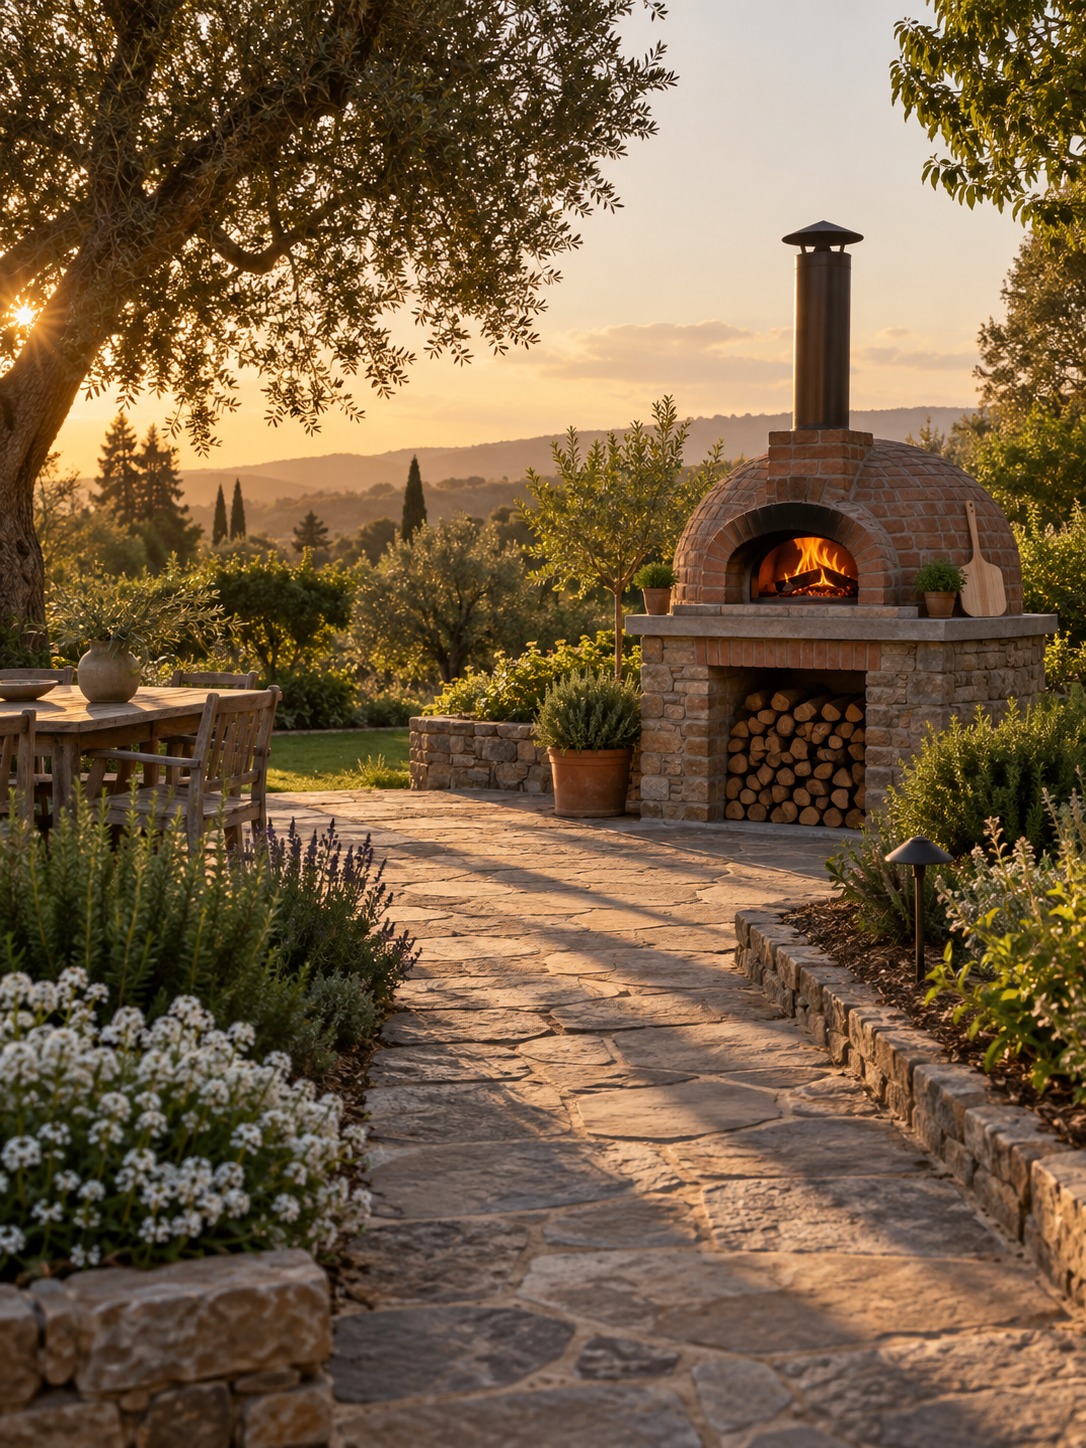
A freestanding brick oven beside a prep counter
Here the oven sits as its own structure, physically separate from the main counter run, connected only by proximity and a shared paving material. This suits larger yards where the oven can become a genuine second destination, a spot people gather around while it’s firing, distinct from the main cooking and serving counter.
It’s also the most forgiving layout for retrofitting an oven into an outdoor kitchen that already exists, since you’re not tying its footprint or plumbing into an existing counter run at all. The main design task becomes visual: matching or deliberately contrasting the oven’s base material with the counter’s, and making sure the paving between them reads as one connected space rather than two separate zones that happen to share a yard.
Match the brick oven to your outdoor kitchen style
The oven’s finish does more to set the tone of the whole outdoor kitchen than almost any other single material choice, simply because of how much visual mass a dome and chimney occupy.
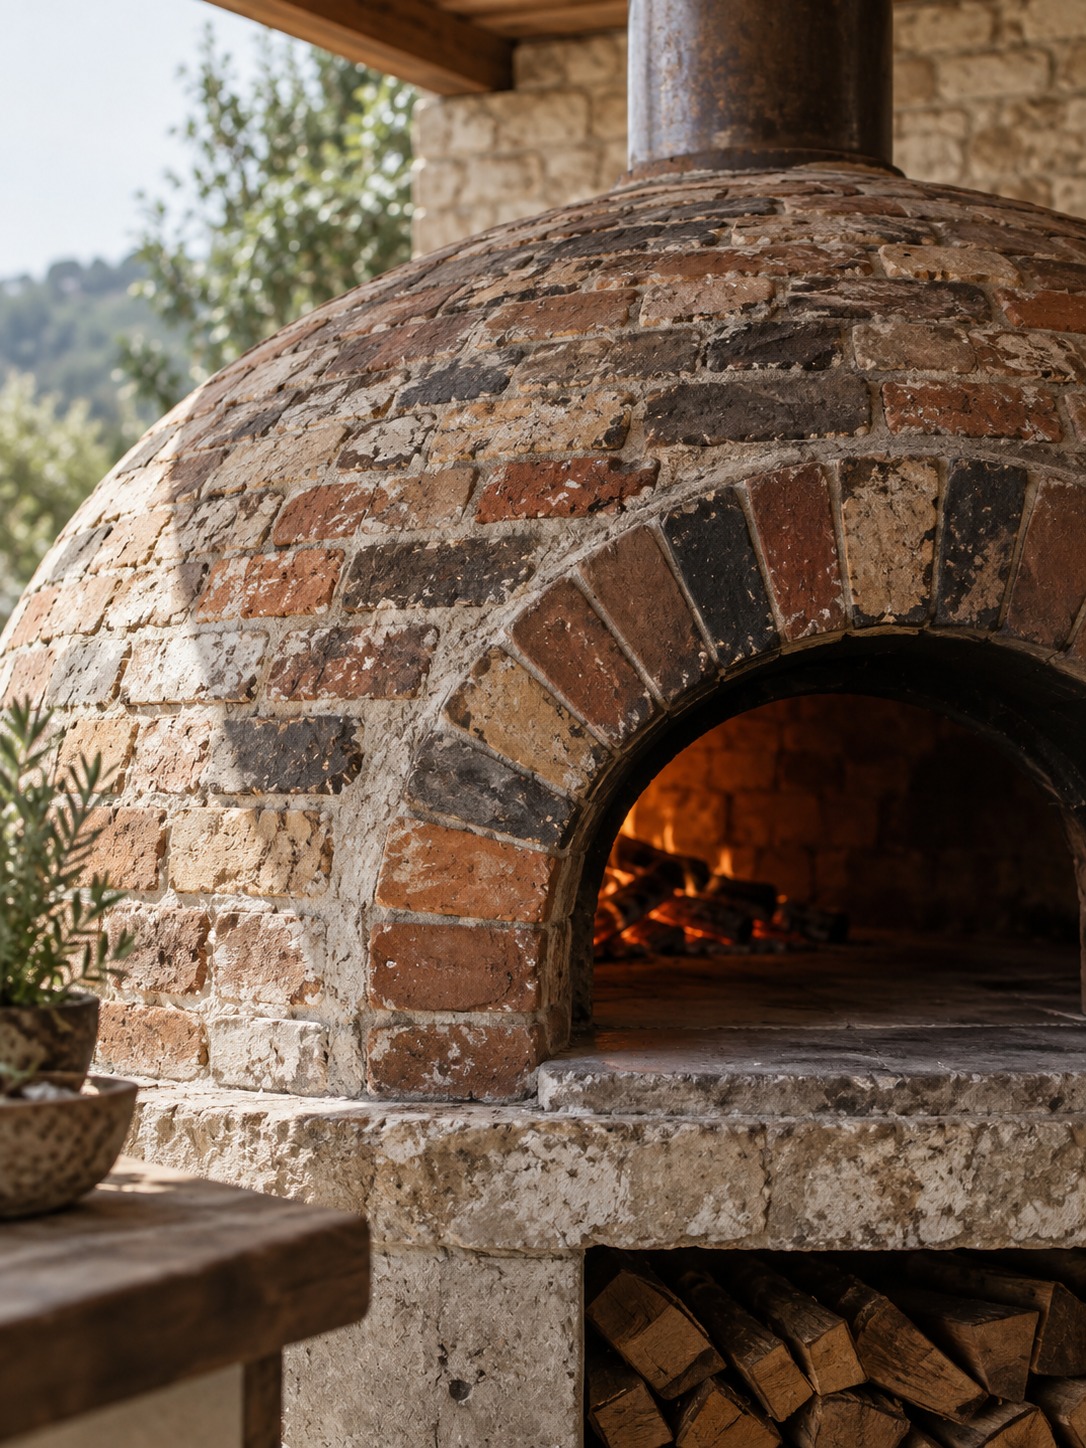
Rustic brick and warm stone
Exposed red or reclaimed brick, paired with a rough-cut stone base or hearth, is the look most people picture when they hear “pizza oven,” and it earns that reputation because it pairs well with almost any planting scheme and ages visibly without looking neglected. Mortar joints left slightly uneven rather than perfectly struck add to the handmade read.
This finish works best when the rest of the kitchen doesn’t compete with it. A stainless counter and simple poured concrete paving let the oven stay the visual star, while a busy patterned tile floor underneath tends to fight the brick for attention.
Reclaimed brick specifically photographs and ages better than new brick manufactured to look distressed, since the wear pattern on genuinely old material is irregular in a way that’s hard to fake convincingly. If reclaimed brick isn’t available or affordable, a mixed-tone new brick with some color variation between units reads more honestly than a single uniform shade laid across the whole dome.
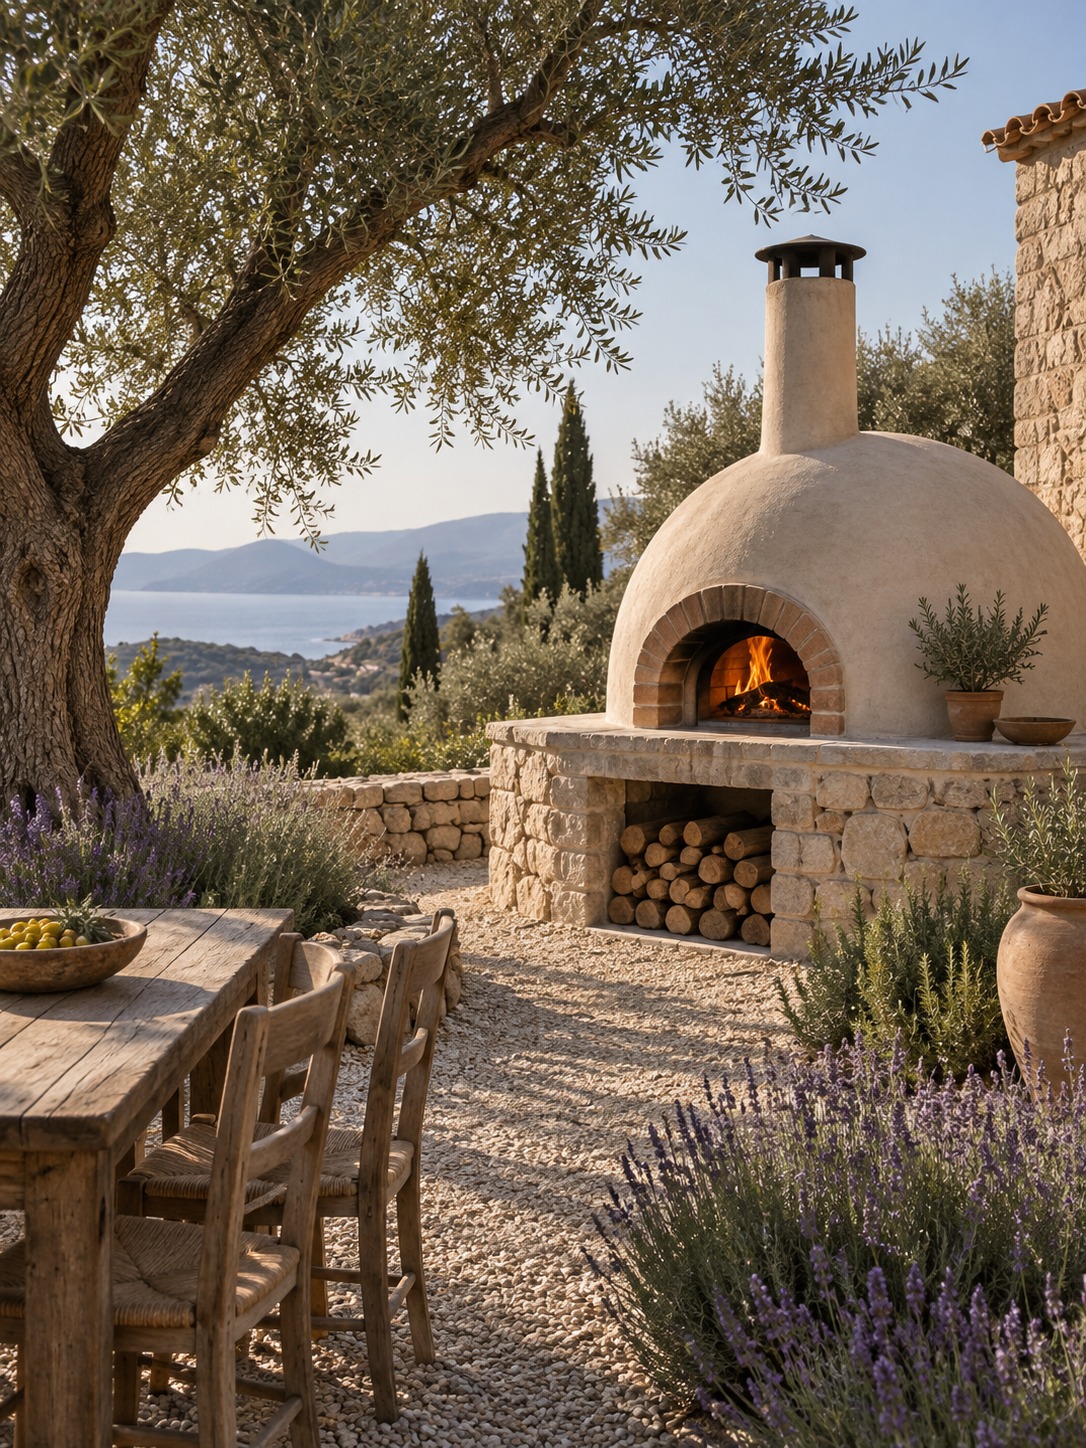
A Mediterranean dome with a simple rendered finish
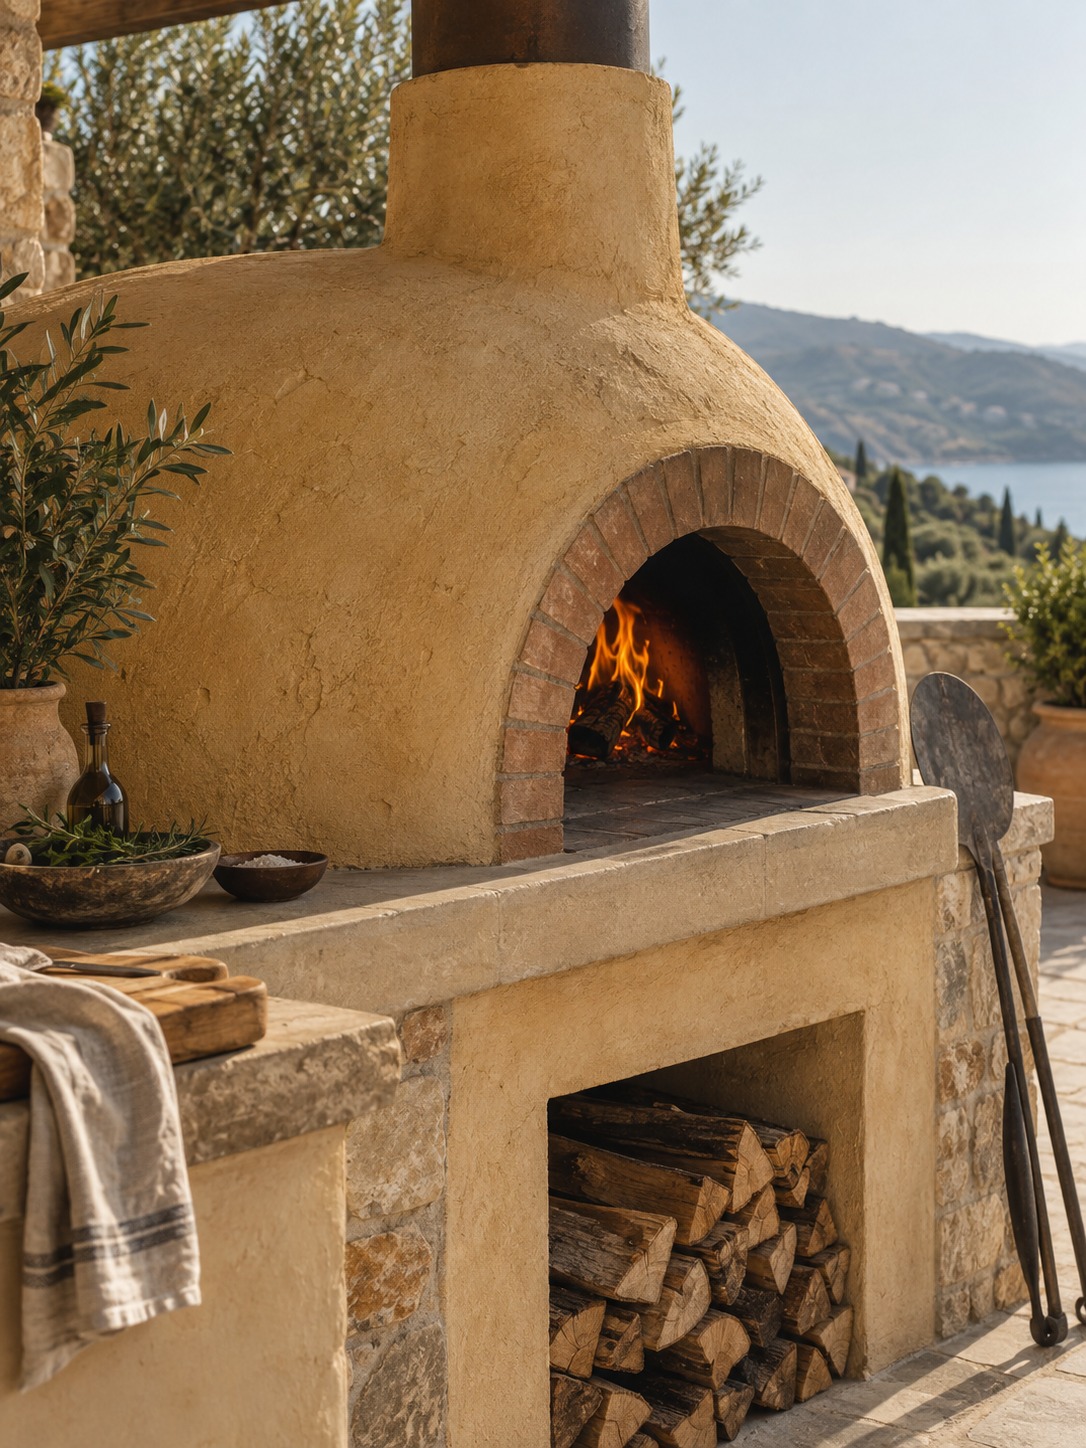
A smooth stucco or lime-render finish over the dome, usually in warm white, ochre, or terracotta tones, shifts the whole feel toward a Mediterranean courtyard rather than a rustic backyard. The render hides the underlying brick structure entirely, which means the oven’s silhouette, that rounded dome and arch, has to do all the visual work.
Pair this finish with simpler, cleaner paving and planting (olive trees, lavender, gravel rather than lawn) to keep the reference consistent. A rendered dome next to heavily rustic wood furniture tends to read as mismatched rather than eclectic.
A modern enclosure with clean lines
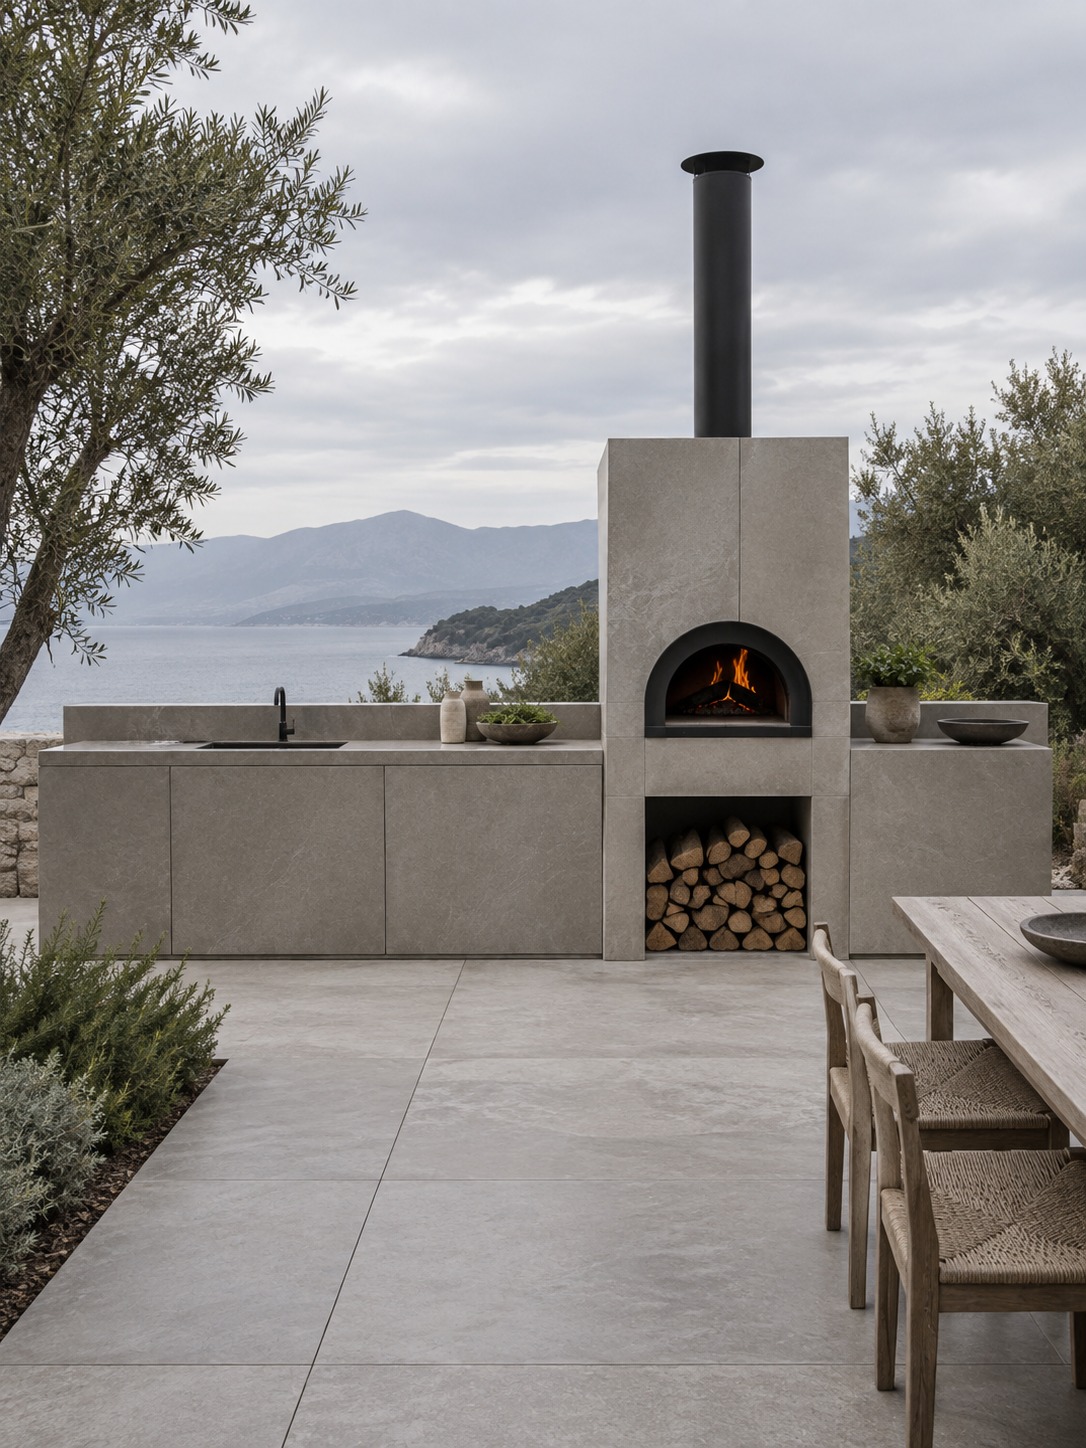
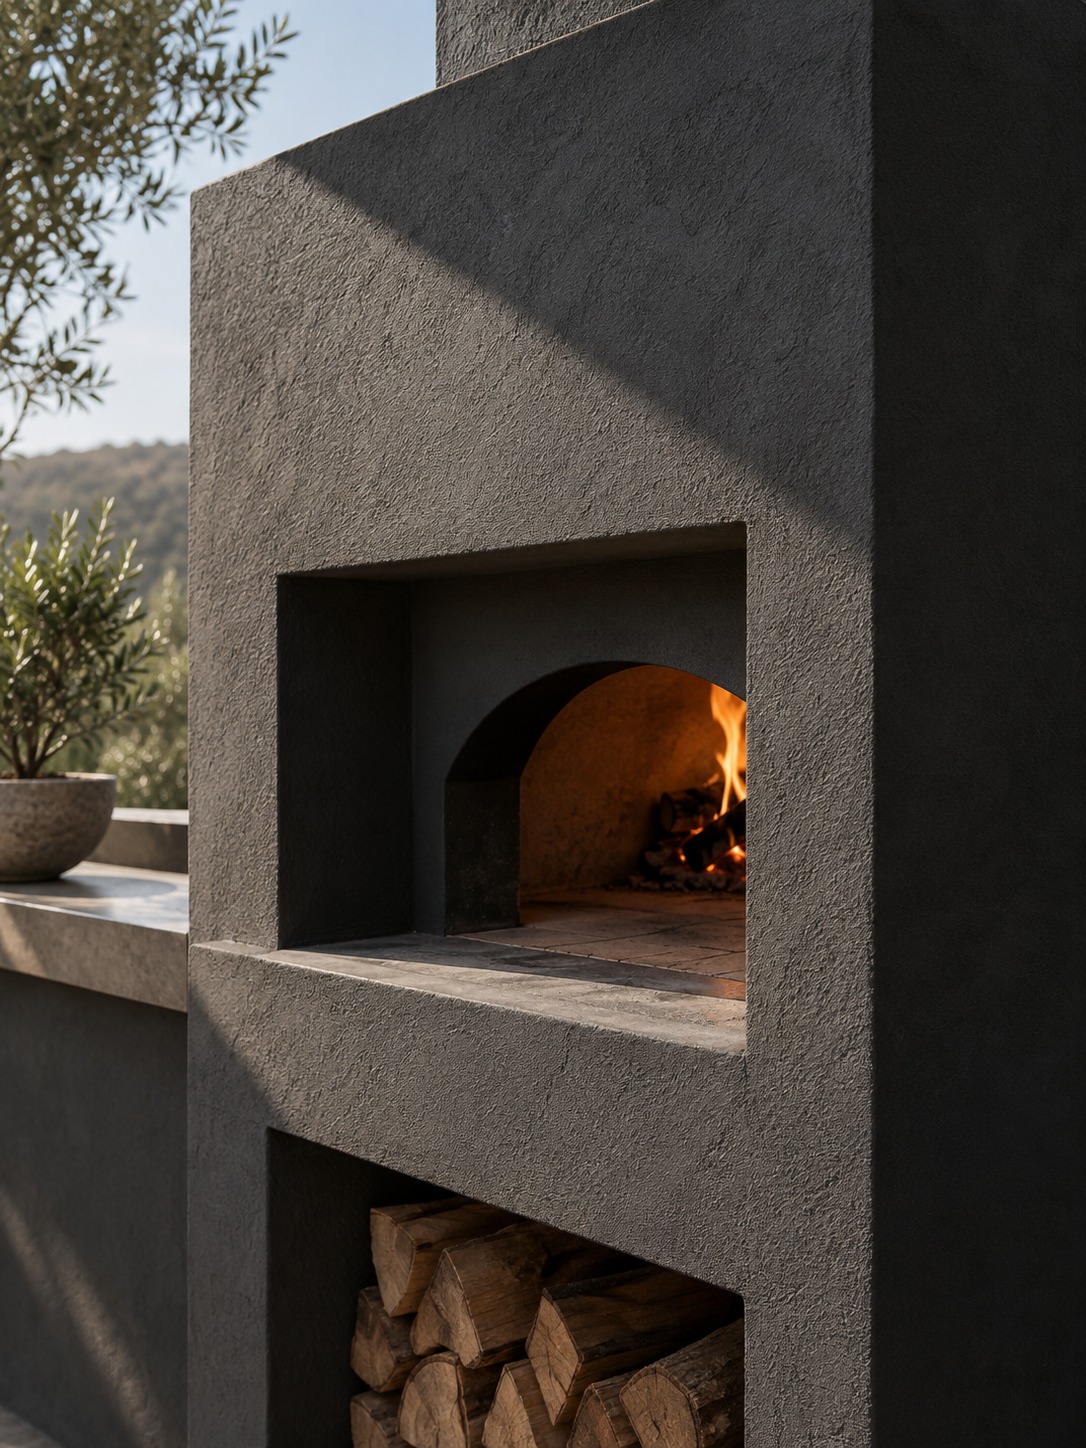
A squared, minimal enclosure around the oven, often finished in dark stucco, board-formed concrete, or large-format porcelain panels, treats the dome as a piece of equipment housed inside an architectural volume rather than a decorative feature in its own right. The chimney becomes a simple vertical element rather than a rustic focal point.
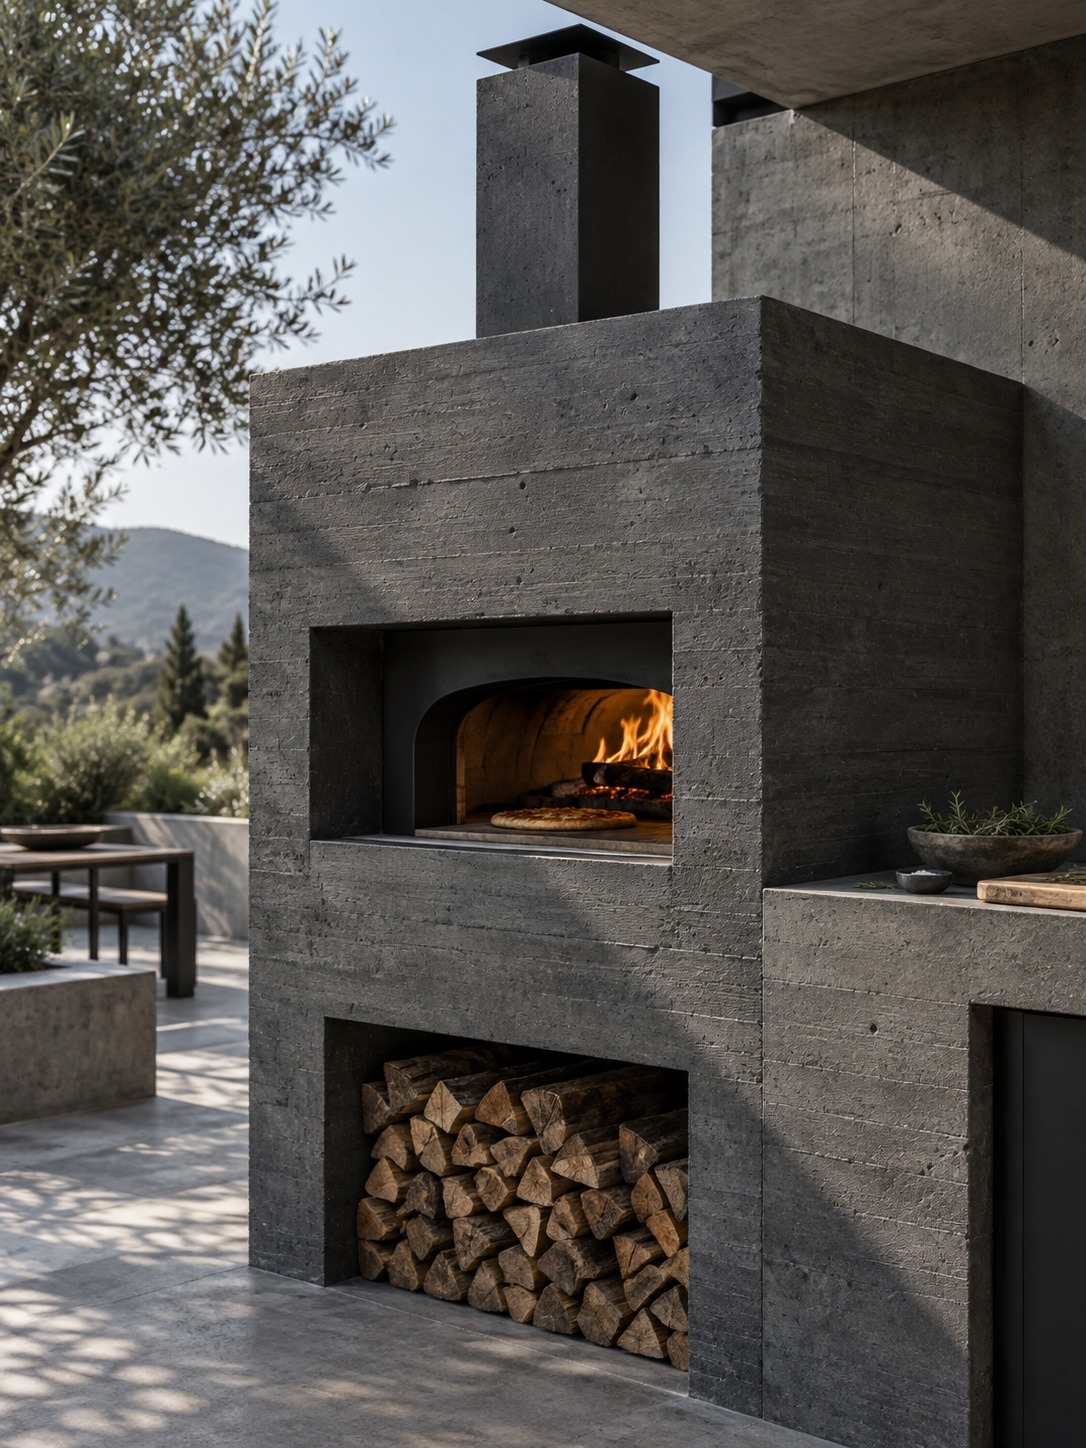
This finish suits outdoor kitchens attached to a contemporary house, where matching material language between indoor and outdoor spaces matters more than the oven reading as traditional. Keep the arch opening simple and squared here rather than rounded; a barrel arch inside a hard-edged modern box usually looks like an afterthought instead of a deliberate choice.
Separate the oven’s technical build from its decorative finish
A pizza oven has two separate systems: the firebrick core that handles heat, and the decorative material around it. These materials have different jobs, and confusing them can undermine the build.
The core, insulation, and any refractory materials need to match the specifications of whatever oven system you’re using; manufacturers of wood-fired components, including outdoor pizza oven systems from firms like Vitcas, publish exact compatibility and clearance requirements for their firebrick, mortar, and insulation products, and those specifications should always take priority over a general design idea. The decorative layer, brick veneer, stucco, stone cladding, sits outside that thermal envelope and is where the design choices from the previous section actually apply.
Treat this as a two-decision process rather than one. Decide on the technical build first, based on the manufacturer’s documentation for your specific oven and insulation system, then design the visible finish around it. Trying to force a finish material that isn’t rated for the clearance the core requires is a common and avoidable mistake.
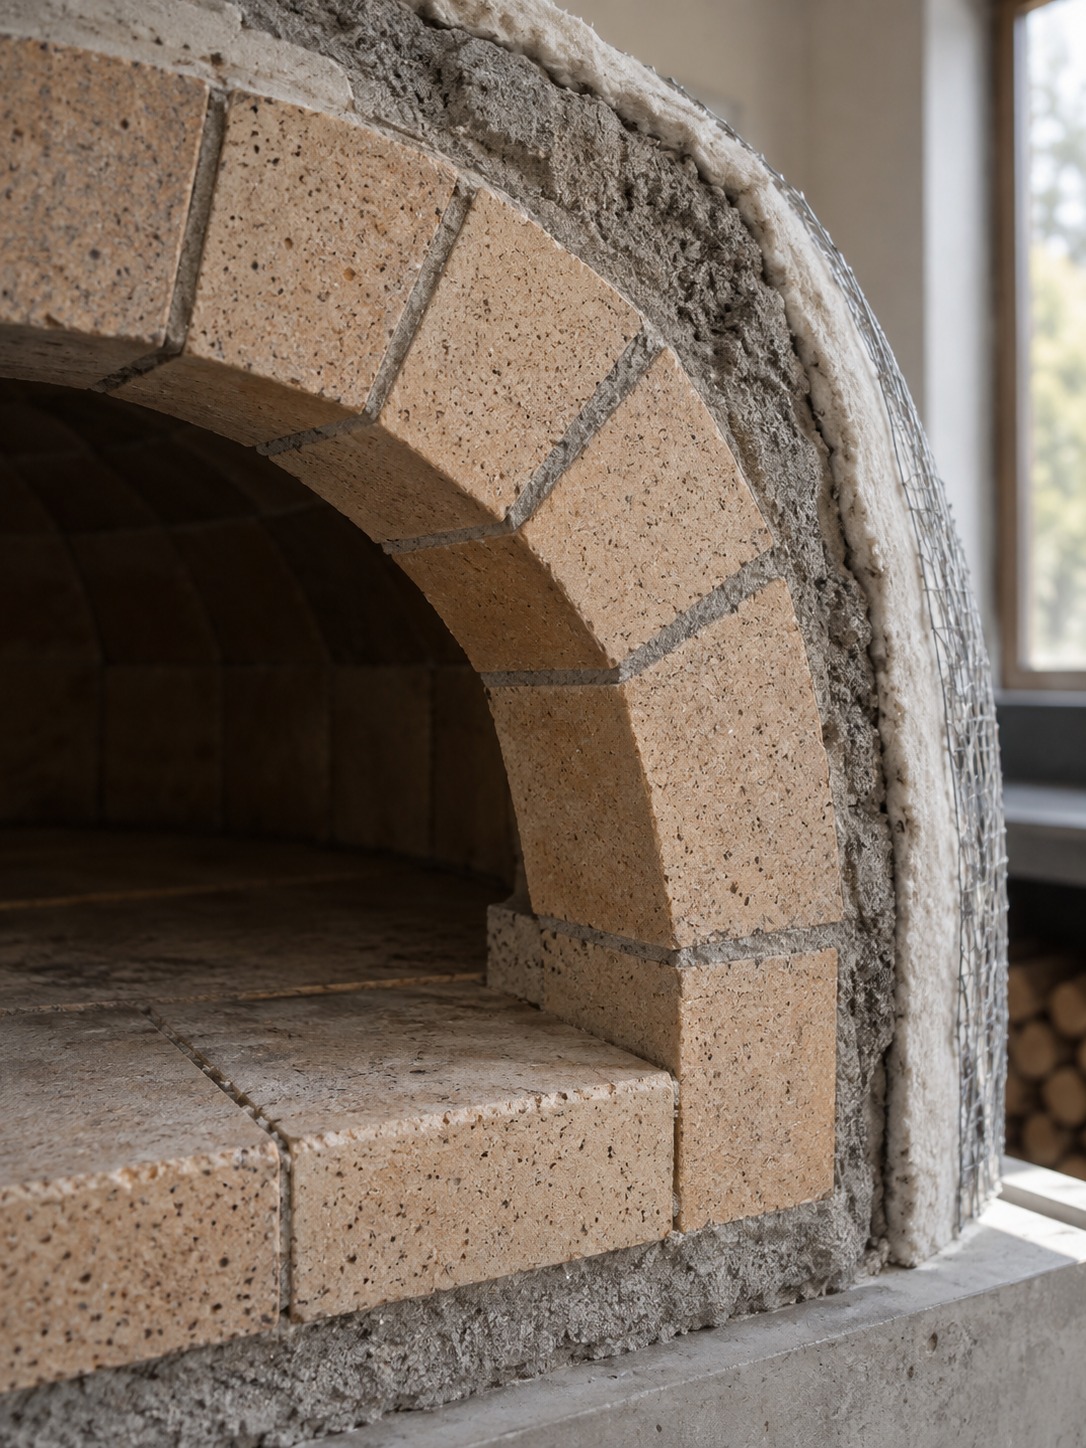
This split also matters for anyone planning to build the oven in stages, core one season, decorative finish the next, which is a reasonable way to spread out both cost and effort. Just make sure the core is fully weatherproofed on its own before pausing, since an exposed firebrick structure left through a wet season can absorb moisture that causes problems once it’s finally fired.
Plan prep space, tool storage and a clear serving route
The area immediately around the oven needs to support a specific, repeated set of movements: sliding something in, checking it, pulling it out, and setting it somewhere safe to rest before serving. Design for that sequence specifically, not just for “counter space” in the abstract.
A small dedicated landing zone right beside the oven’s mouth, even just 18 to 24 inches of heat-resistant surface, gives you somewhere to set a hot pizza peel down without needing to carry it across the whole kitchen. Store the peel, a small brush, and any oven tools on a hook or shallow shelf within arm’s reach of that same spot, rather than in general kitchen storage further away.
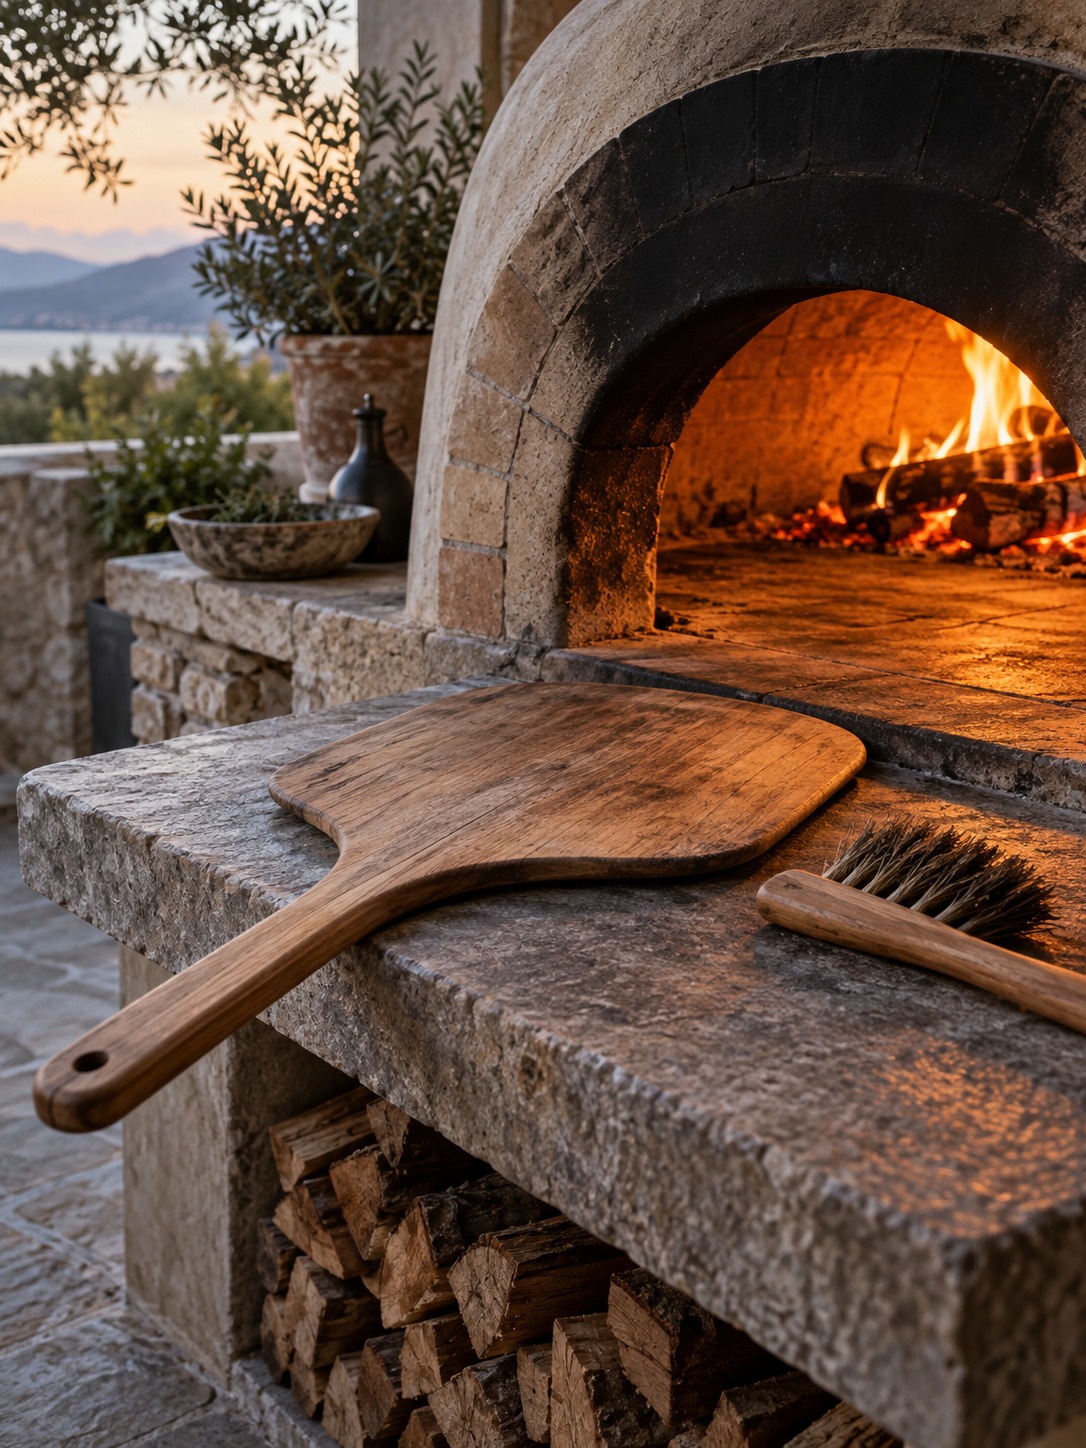
One compact scenario worth walking through: a small urban patio with room for only a narrow counter and a compact-dome oven tucked at one end. Here, the landing zone and the serving surface become the same piece of countertop, just used sequentially, first for the peel, then wiped and used for plating. A single well-placed shelf above handles tool storage without adding footprint. It’s a tight sequence, but it works precisely because every surface has one clear job at each stage of cooking, rather than trying to do everything at once in an ambiguous open counter.
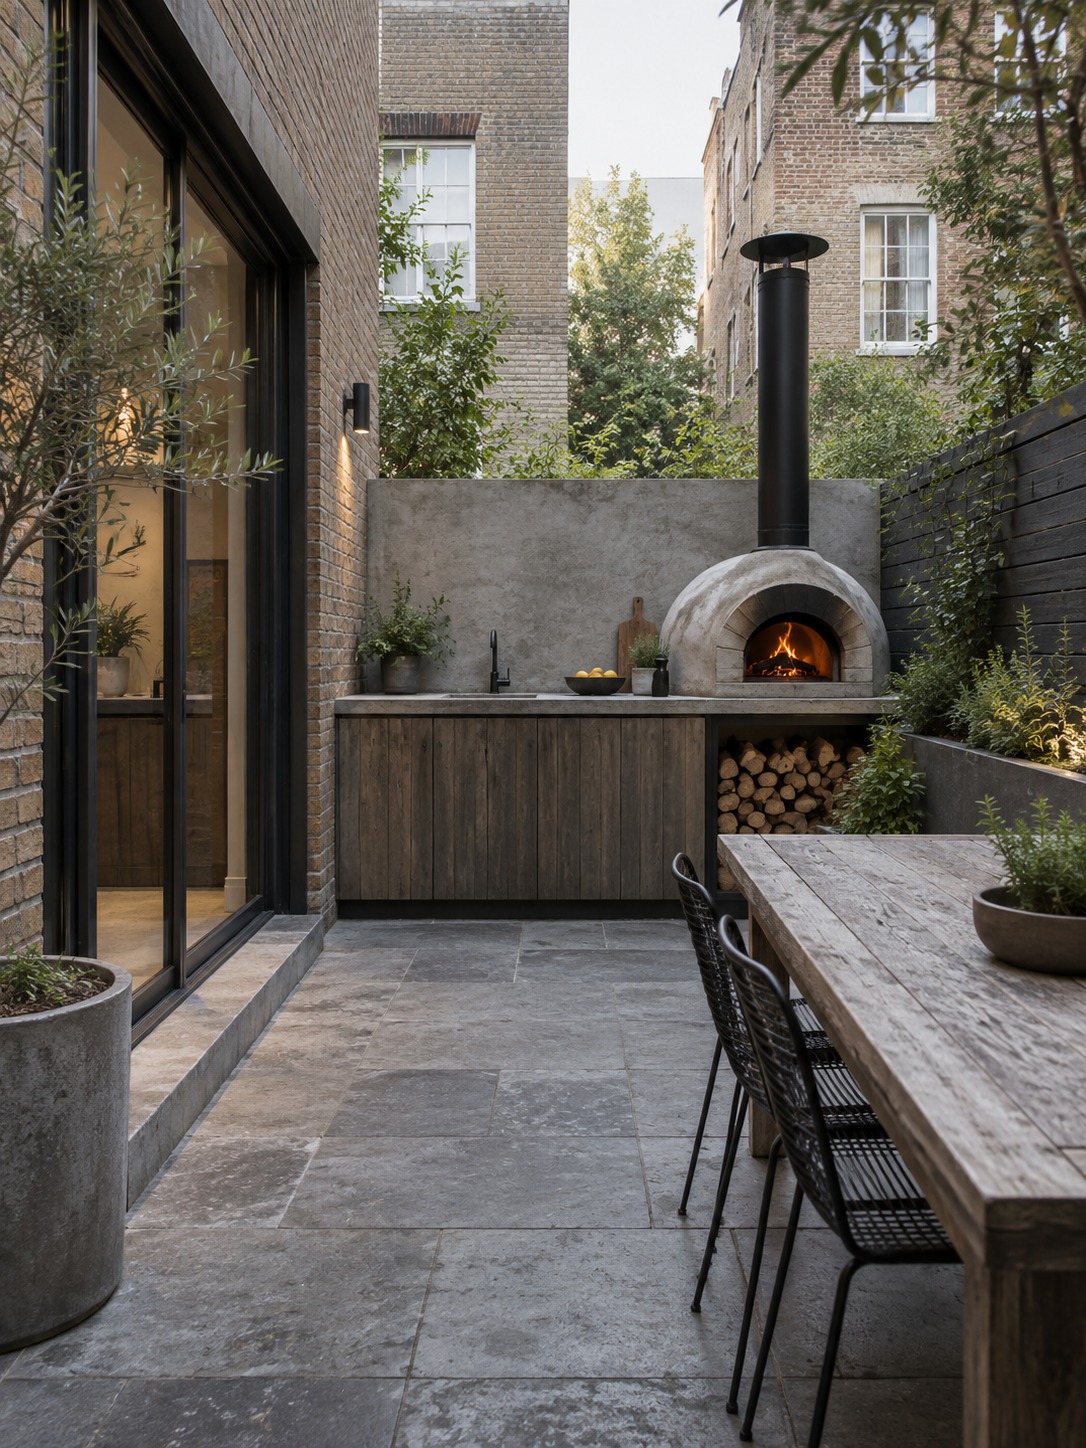
The serving route matters just as much as the prep zone. Whoever’s cooking shouldn’t have to cross through the main guest gathering area to get finished food to a table. If your layout puts the oven’s mouth facing directly into where people naturally stand and talk, either the layout or the seating placement needs to shift, since a collision between hot food traffic and casual standing guests is one of the more common friction points in outdoor kitchens that otherwise look great on paper.
Design tip: Design the oven’s scale and position first, then let the counter, seating, and lighting respond to it. A beautifully finished oven in the wrong spot still creates traffic problems.
Connect the oven area to seating and lighting
Lighting an outdoor kitchen well means treating the oven zone and the general counter zone as two different lighting problems, not one. Task lighting over the main prep counter should be bright and even, similar to what you’d want over any indoor countertop. The oven area benefits from something dimmer and warmer, since the fire itself provides plenty of ambient light and glare from an overhead fixture competes with that rather than adding to it.
A single warm-toned downlight or two, positioned to light the landing zone beside the oven without shining directly into anyone’s eyes while they’re checking on food, is usually enough. Save brighter, more even lighting for wherever plates actually get assembled and served.
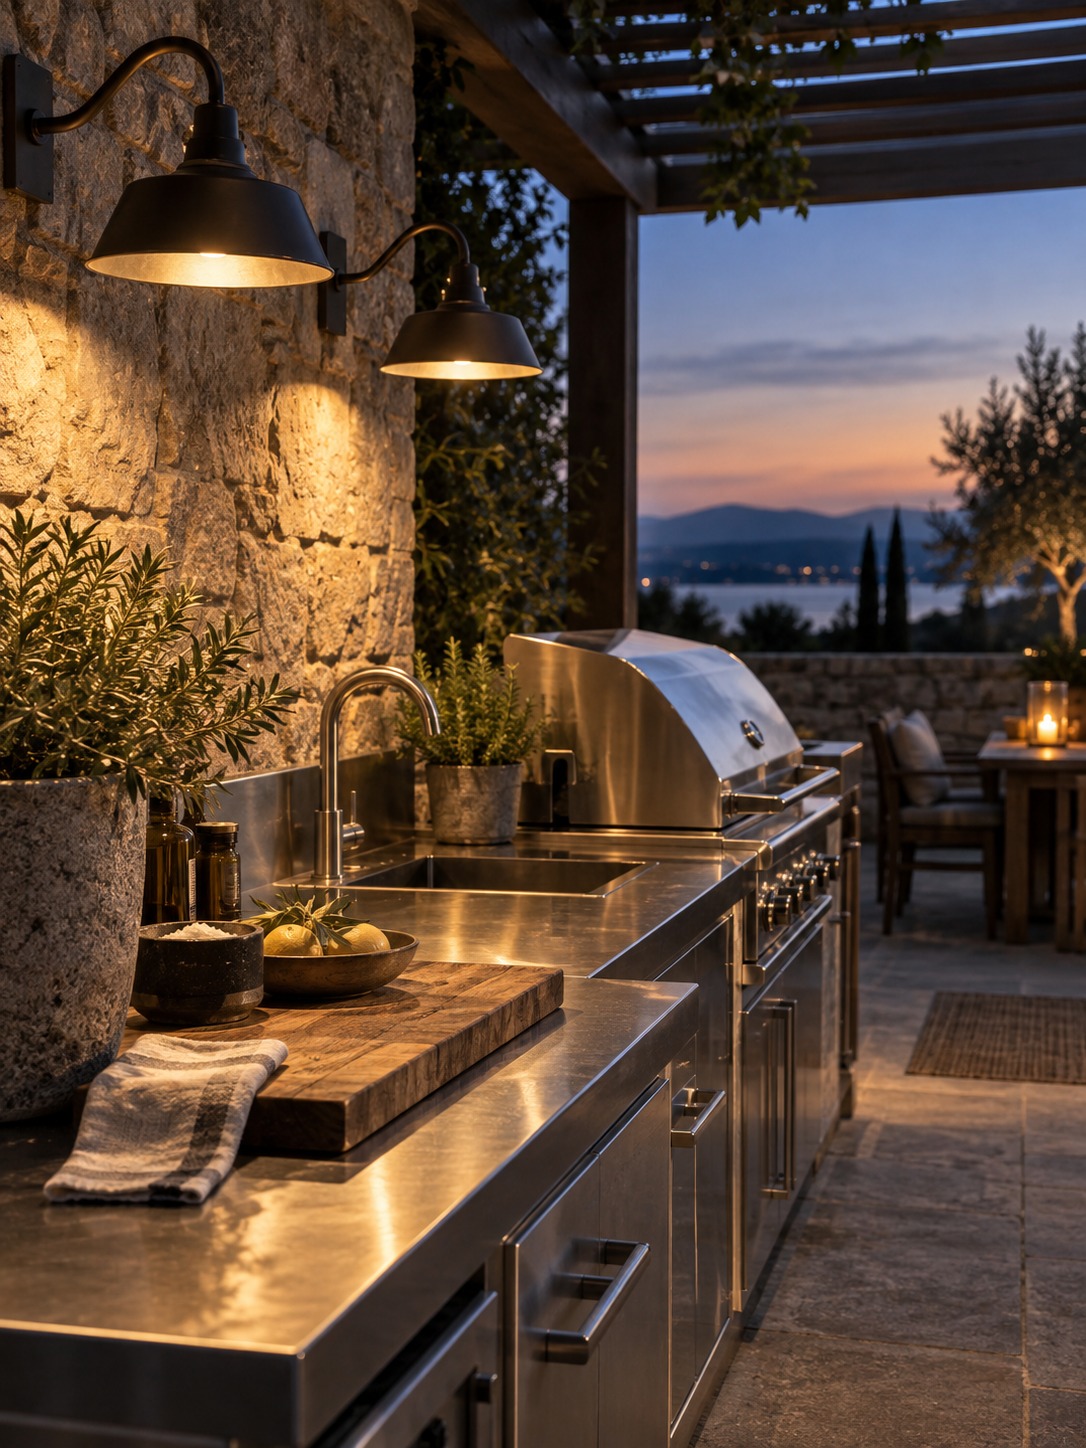
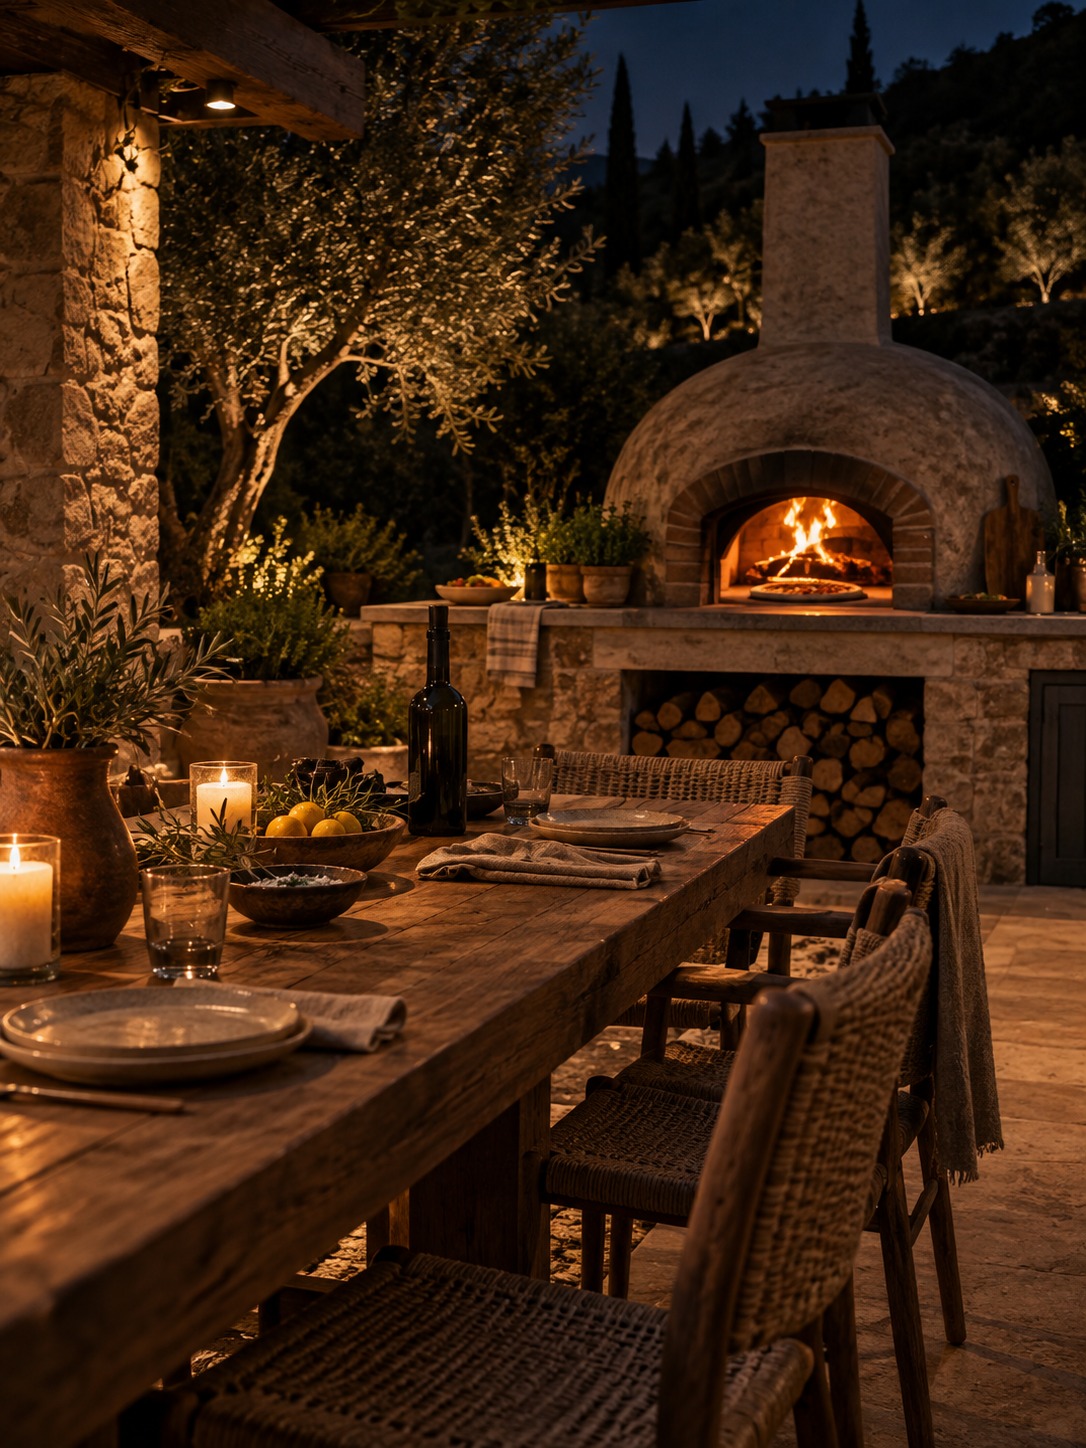
The visual connection between the oven and the seating area matters too. If the dining table sits close enough to see the fire through the arch while it’s cooking, that sightline is worth protecting rather than blocking with a storage unit or an unnecessary partition. For a broader look at layering task, ambient, and accent light across a full backyard, not just the cooking zone, I covered that ground in backyard lighting ideas.
FAQ
Where should a pizza oven go in an outdoor kitchen?
Position it where it’s visible from the main gathering area and, ideally, from inside the house, since it’s usually the most visually interesting element in the space. Keep it close enough to the prep counter for a short, direct serving route, but give it its own landing zone so hot food and general traffic don’t compete for the same surface.
Can a brick pizza oven fit into a small outdoor kitchen?
Yes, with a smaller dome (around 28 to 32 inches) and a layout that combines the landing zone and serving surface into one sequential space rather than separate dedicated areas. Compact freestanding models also make retrofitting into an existing small patio easier than building a full masonry structure from scratch.
How do you make a brick pizza oven look modern?
Use a squared arch opening instead of a rounded barrel arch, and finish the enclosure in dark stucco, board-formed concrete, or large-format panels rather than exposed brick. Keeping the surrounding paving and furniture simple and uncluttered reinforces the modern read more than the oven material alone.
What’s the difference between a built-in oven and a freestanding oven station?
A built-in oven is physically integrated into the main counter run, sharing its base and often its finish material with the rest of the kitchen. A freestanding oven station is a separate structure connected only by proximity and paving, which offers more layout flexibility and is generally easier to add to an existing outdoor kitchen after the fact.
How much space does an oven-centered outdoor kitchen actually need?
A linear layout can work in a fairly narrow footprint since it only needs depth in one direction. An L-shaped layout with a dedicated oven zone generally needs a minimum of around 8 by 10 feet of usable patio to avoid feeling cramped at the corner where the two counter runs meet.
Should the pizza oven match the rest of the outdoor kitchen’s finish?
Not necessarily. A freestanding oven can deliberately contrast with the main counter’s material as long as the paving between them visually ties the two together. A built-in oven sharing a counter run usually looks more cohesive when its base material matches or closely complements the surrounding cabinetry.
Final thoughts
Design the oven’s scale and placement first, then let the counter, seating, and lighting respond to it, not the other way around. That order matters more than any single finish choice, since a beautifully clad oven in the wrong spot still creates the same crowding and traffic problems a plain one would.
Walk the space before committing to a layout, ideally at the time of day you’d actually use it most. Stand where the cook would stand, look toward where guests would gather, and check the sightline back to the house. Most layout problems are obvious once you’re physically standing in the footprint; they’re much harder to catch on a drawing alone.
If you’re planning the full footprint before committing to any structure, my guide to outdoor kitchen plans and plumbing layout covers the utility and drainage side of this same planning process. For smaller lots specifically, compact outdoor kitchens has more on making a tight footprint work without feeling cramped, and if budget is shaping your material choices as much as layout is, affordable outdoor kitchen ideas covers that ground in more depth.
- 2shares
- Facebook0
- Pinterest2
- Twitter0
- Reddit0