Drawing a butterfly can be simple and fun, even for beginners. With basic shapes and a few easy steps, anyone can create a beautiful butterfly drawing. The key is to start with simple lines and build up details slowly to make the process easy to follow.
Many people find butterflies a great subject because of their symmetrical wings and clear shapes. They can use simple guides or printable templates to help with the drawing. This approach makes it easier to understand the butterfly’s structure without feeling overwhelmed.
As they practice, they can add colors and personal touches to bring their butterflies to life. This makes drawing butterflies a relaxing and rewarding activity that anyone can enjoy.
Simple Steps for Easy Butterfly Drawing
Drawing a butterfly can be fun and straightforward. By picking the right tools, starting with a clear outline, and filling in details carefully, anyone can create a lovely butterfly sketch.
Choosing Art Supplies


The best supplies for an easy butterfly drawing are simple and easy to use. A pencil is perfect for sketching because it allows for light lines that can be erased if needed. Using a soft pencil, like a 2B, makes shading easier without pressing too hard.
For coloring, crayons, colored pencils, or markers work well. Colored pencils offer more control for adding fine details, while markers give bright, bold colors. A good eraser is helpful to fix mistakes and clean the drawing.
Having a sharpened pencil and a smooth, white drawing paper will improve the drawing experience. Avoid thick paper if using markers, as ink can bleed through.
Sketching the Butterfly Outline

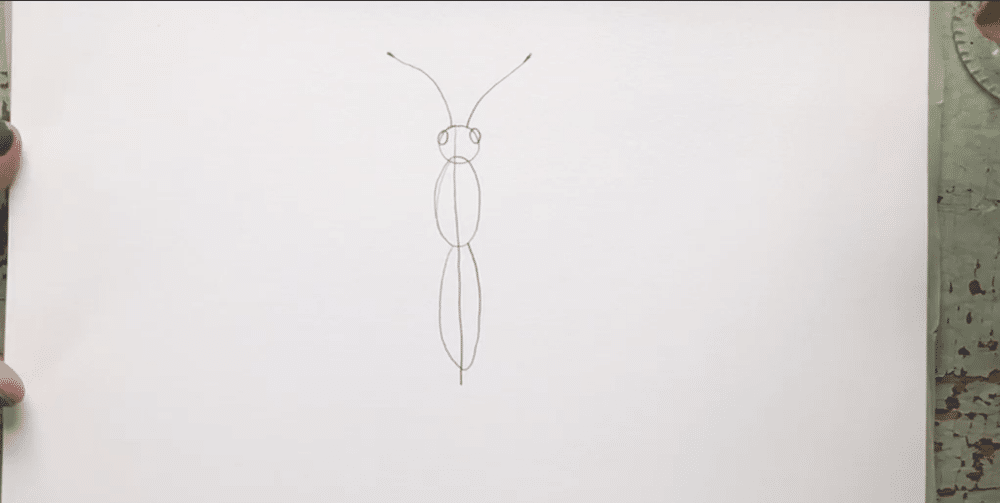
Start by drawing a small oval or circle for the butterfly’s body in the center of the paper. Next, add two curved lines extending from the top of the body to form the antennae.
To create the wings, draw four simple shapes around the body. The top wings are larger and rounded, while the bottom wings are smaller and slightly pointed. Keep the shapes simple; they can be like wide leaves or soft triangles.
Lightly sketch these parts first. This way, adjustments can be made easily before adding details. The main goal is to get the correct size and position of the wings and body.
Adding Wing Details

Once the outline is ready, add patterns to the wings. Most butterflies have symmetrical markings on each side, so repeating shapes on both wings is important.

Start with simple details like veins. Draw thin lines that fan out from the body toward the edges of the wings. These lines give texture and natural look.
Next, fill in spots or shapes inside the wings. Circles, ovals, or small dots work well. Using colored pencils or markers, color these areas carefully, staying inside the lines.

Adding layers of color can make the wings look bright and lively. Light shades first, then darker colors on top to show depth. This step adds character without making the drawing too complicated.


Enhancing Your Butterfly Illustration
Adding color and details can bring a simple butterfly drawing to life. Using varied techniques for coloring and paying attention to the wing patterns will make the butterfly look more interesting and natural.
Coloring Techniques

Using colored pencils or markers works well for butterflies. They allow for smooth shading and blending. Start with a light base color, then layer darker shades to create depth.

Watercolors can give a soft, natural look. Apply light washes and build color gradually. Make sure to wait for each layer to dry to avoid mixing colors too much.
Layering colors helps add vibrancy. For example, start with yellow, then add orange and red to show warmth. Using a white pencil or gel pen on top can add highlights and make wings shine.
Creating Realistic Patterns


Butterfly wings have unique spots, stripes, and shapes. Look closely at real butterfly photos to notice how patterns repeat and mirror on both wings.
Use small dots or lines carefully. Patterns often follow the wing’s shape, so drawing them along the curves helps them look natural.
Try using a fine-tip pen or a sharpened pencil for detail. You can sketch patterns lightly first, then darken them once the shapes feel right.
Keeping symmetry is important. Check both sides often and adjust to make the butterfly balanced. This will make the drawing look more polished and real.
Creative Butterfly Drawing Ideas
There are many ways to make butterfly drawings interesting. Some focus on fun, simple shapes and bright colors. Others show butterflies in detailed natural settings like flowers or leaves. Both styles let artists practice different skills while creating unique art.
Cartoon-Style Butterfly Art


Cartoon-style butterflies use simple lines and big shapes. The wings often have bold patterns like circles or stripes. This style lets artists play with colors and shapes without worrying about realism.
Faces with big eyes or smiling mouths give the butterfly a friendly look. Adding antennas that curl or wave makes the drawing more lively. Cartoon butterflies are great for kids or beginners because they are easy to draw and can look playful.
Using colored pencils or markers helps make the colors stand out. Sometimes, artists add sparkles or dots to the wings for extra fun. The key is to keep details clear but simple.
Butterfly in Nature Scenes


Drawing a butterfly in nature means including parts like flowers, leaves, and branches. This style often requires more careful observation of shapes and colors. The butterfly might rest on a flower or fly above a garden.


Artists focus on wing patterns and textures to make the butterfly look real. Light and shadow help show the butterfly’s shape and where it sits. Background elements are usually soft and less detailed to keep attention on the butterfly.
Using watercolor or soft pastels can create a gentle, natural look. Adding small details like dew drops or petals makes the scene feel alive. This approach helps artists practice combining different textures in one picture.
- 234shares
- Facebook0
- Pinterest234
- Twitter0
- Reddit0


