Body drawing is a creative way to explore human anatomy and artistic expression. It allows artists to capture the beauty and complexity of the human form through various styles and techniques. From simple sketches to detailed illustrations, body drawing offers endless possibilities for artistic growth and self-expression. Body drawing ideas can also include sketching animals, which helps artists understand anatomy and movement across different species.
These 15+ body drawing ideas can help artists of all skill levels improve their craft, learn to draw bodies—both human and animal—and find new inspiration. Whether you’re a beginner looking to practice basic shapes or an experienced artist seeking fresh challenges, these ideas provide a starting point for creating compelling body art. By trying different approaches and experimenting with various poses and perspectives, artists can develop their skills and create unique, engaging works of art.
1) Line of Action Poses
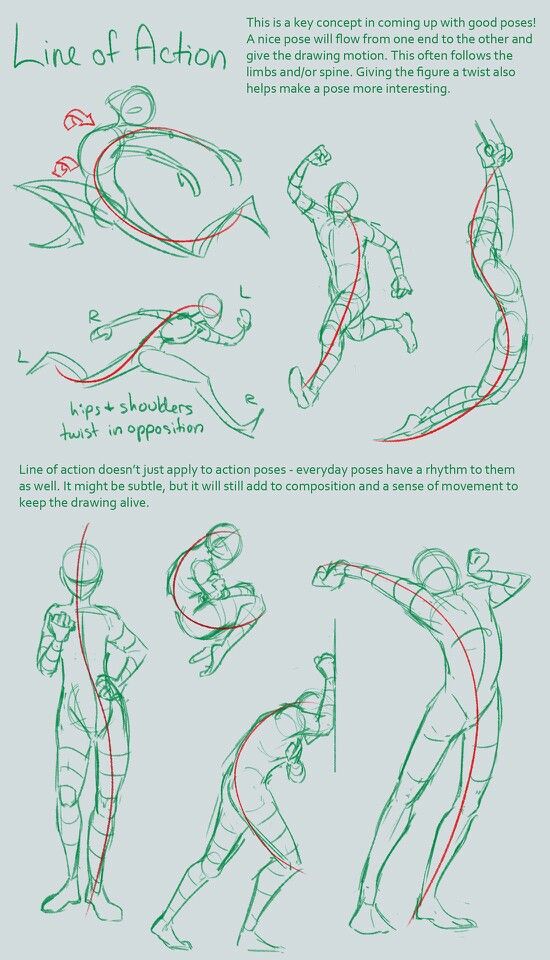
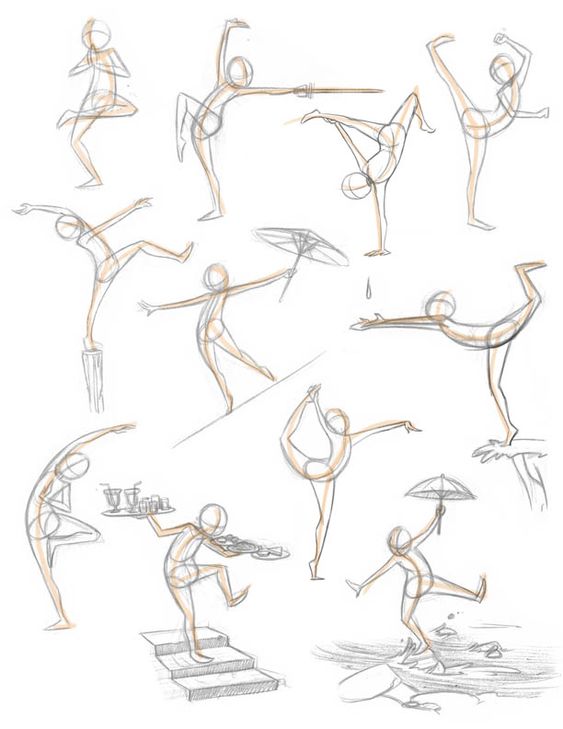
Line of action poses are a key technique in body drawing. They help artists create dynamic and expressive figures. The line of action is a curved line that runs through the main parts of the body.
Artists often start by drawing the line of action before adding other details. This line guides the overall flow and energy of the pose. It can be straight, curved, S-shaped, or take the form of a c curve, which is commonly used to capture dynamic poses and the gestural flow, especially in animal figure drawing.
Strong line of action poses can make characters look more lively and interesting. They work well for action scenes or to show a character’s personality. Artists can use them to create a sense of movement or tension.
When drawing line of action poses, it’s important to keep the body balanced. Even in extreme poses, the figure should look stable. Artists can practice by sketching quick gesture drawings. There are a lot of different line types to try, including c curves, to explore various poses and movements.
Stick figures can be useful for practicing line of action poses. They let artists focus on the basic shape and flow without getting caught up in details. As skills improve, more complex figures can be added to the initial line.
2) Proko Anatomy for Artists
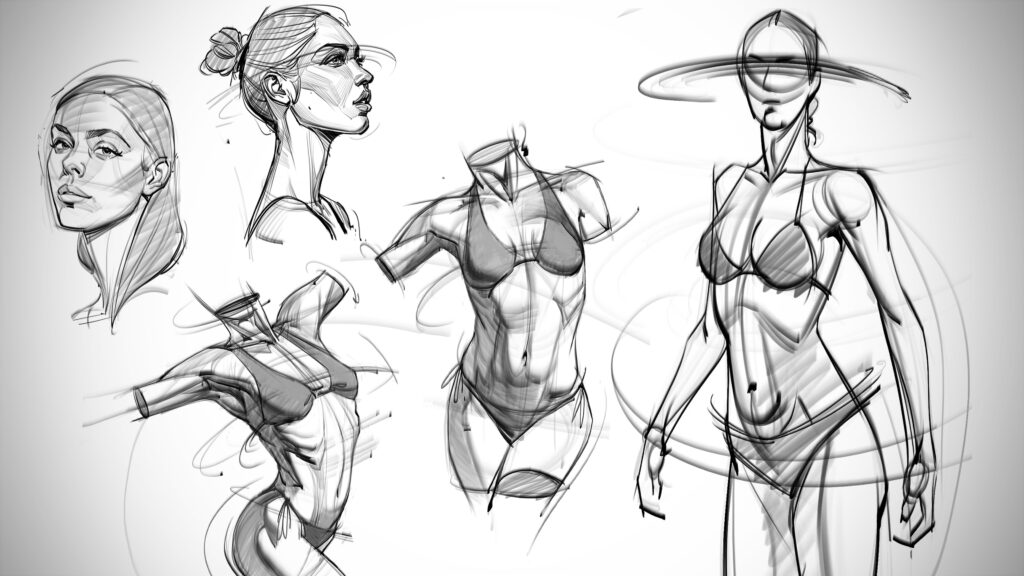
Proko is a popular online resource for artists looking to improve their figure drawing skills. The platform offers comprehensive anatomy courses designed to help artists create more realistic human figures.
Stan Prokopenko, the founder of Proko, is an experienced artist and teacher. He has developed a series of video lessons that break down complex anatomical concepts into easy-to-understand segments. Proko often teaches anatomy bit by bit, making it easier for students to grasp each part before moving on.
The Proko anatomy courses cover various aspects of the human body, including muscles, bones, and proportions. These lessons are suitable for artists of all skill levels, from beginners to advanced.
One of Proko’s strengths is its focus on practical application. Students learn how to apply anatomical knowledge to their drawings, rather than simply memorizing facts. For example, a lesson might focus on drawing the torso first, allowing students to master that bit before progressing to the limbs.
Proko also provides supplementary materials like reference images and 3D models. These tools help artists practice and reinforce the concepts they learn in the video lessons.
Many artists have found success using Proko’s methods to enhance their figure drawing skills. The courses offer a structured approach to learning anatomy, which can be challenging to study independently.
3) Draw This!
Draw This! is a fun and creative body drawing idea that can help artists improve their skills. This exercise involves drawing specific body parts or poses based on prompts or challenges.
Artists can find Draw This! prompts online or create their own. These prompts often focus on different aspects of the human form, such as hands, feet, or facial expressions.
One popular version of Draw This! involves drawing life-size human figures. This technique allows artists to explore the entire body in detail and practice proportions.
Another approach is to focus on specific body parts, like drawing only eyes or mouths. This helps artists hone their skills in rendering intricate details.
Draw This! can also include timed challenges. Artists might have to complete a drawing within a set time limit, encouraging quick thinking and spontaneity. These prompts are a great way to test new drawing techniques or styles, helping artists discover what works best for them.
Some Draw This! exercises involve drawing from memory rather than reference. This helps artists develop their understanding of anatomy and improve their ability to visualize the human form. While some prompts may be a struggle at first, they challenge artists to push their limits and improve over time.
4) Quick Poses
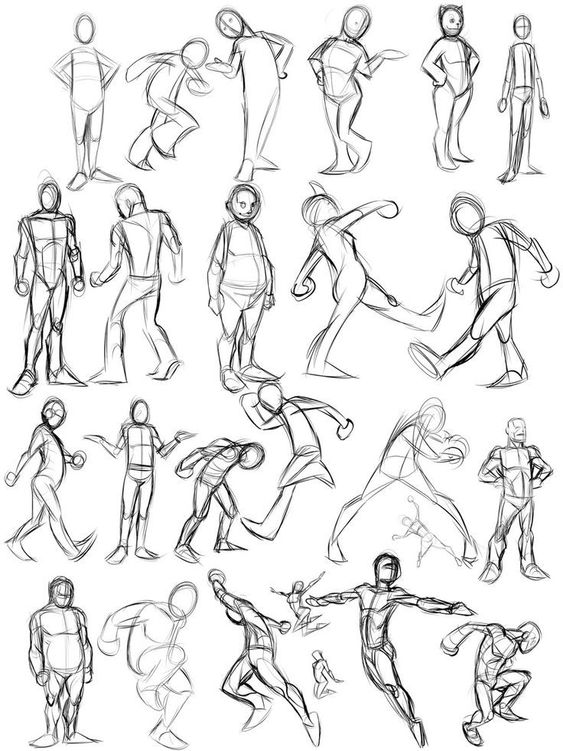
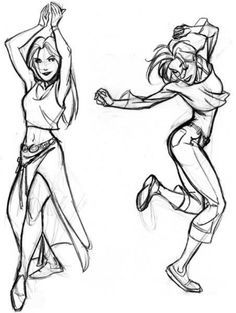
Quick poses are a great way to improve body drawing skills. Artists use them to capture the essence of a figure in a short time. These exercises help develop speed and accuracy.
Gesture drawing is a key part of quick poses. It focuses on the main lines and shapes of the body. Artists often do these drawings in 30 seconds to 2 minutes.
Quick poses force artists to see the big picture. They learn to ignore small details and focus on the overall form. Breaking the body into basic shapes makes it easier to capture the pose quickly.
Life drawing classes often start with quick poses. Models change positions every few minutes. This keeps artists on their toes and helps them stay focused.
Digital artists can find quick pose resources online. Many websites offer timed figure drawing practice. These tools let artists work on their skills from home.
Quick poses help artists loosen up and be more creative. They encourage a free, expressive style of drawing. Artists can start with a sort of silhouette or basic outline before adding details. This can lead to more dynamic and lively artwork.
5) Figure & Gesture Drawing Tool
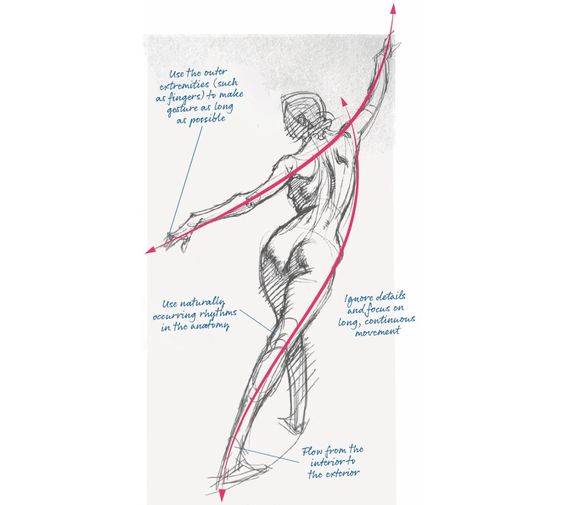
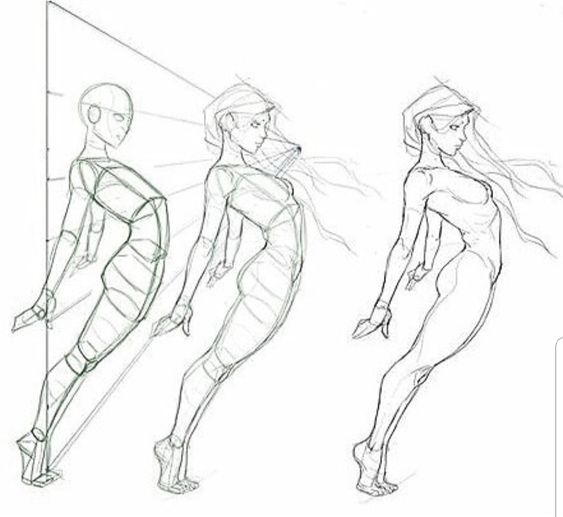
Figure and gesture drawing tools help artists capture the essence of human forms quickly. These tools range from simple pencils to digital apps designed for speedy sketching.
Traditional tools like charcoal and conte crayons allow for bold, expressive lines. They’re great for capturing the flow and energy of a pose in just a few strokes.
Digital tools offer unique advantages. Many gesture drawing apps have timers to keep artists focused on quick sketches. They also let users easily erase and adjust their work.
Some artists prefer blending sticks or stumps for shading and creating smooth transitions between light and dark areas. These tools help add depth to quick sketches.
Regardless of the tool, the goal is to capture the basic form and movement of the figure. Artists often use loose, flowing lines to convey the subject’s energy and pose. To better capture the flow of the pose, artists can think of the body as a chain of connected parts, which helps in understanding posture and movement.
Practice with different tools has helped many artists find what works best for their style. The right tool can make gesture drawing more enjoyable and effective.
6) Caldwell Tanner Tutorials
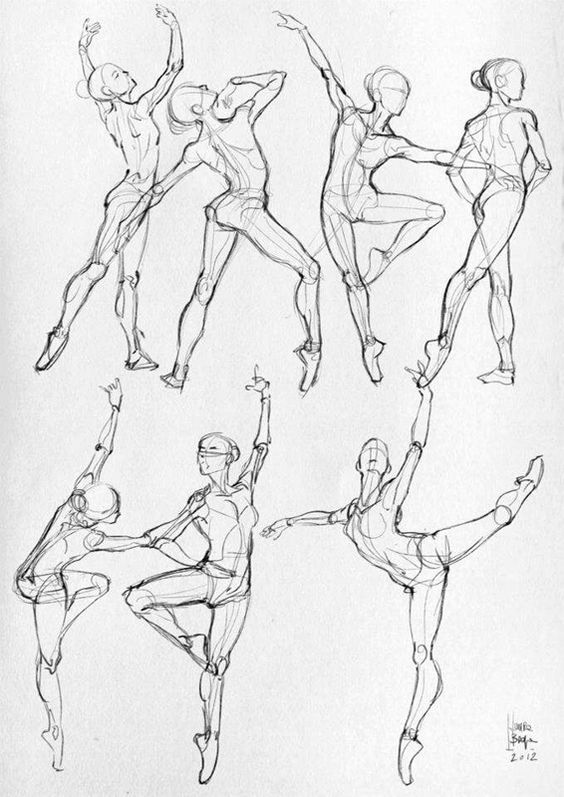
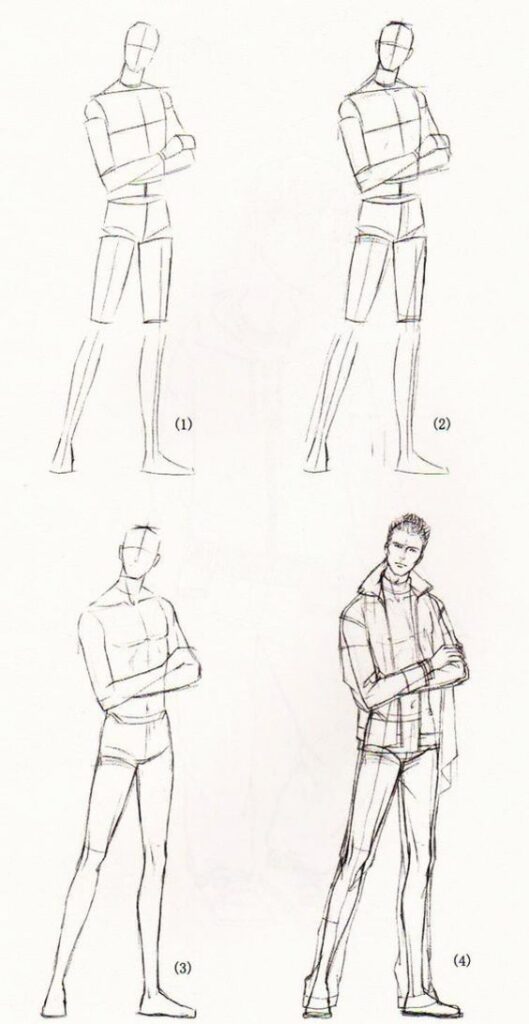
Caldwell Tanner is a renowned artist known for his unique style and effective teaching methods. He wanted to share his approach to body drawing to help other artists improve, making his tutorials valuable for anyone seeking new body drawing ideas.
Tanner’s lessons focus on capturing the essence of human anatomy through simplified shapes and forms. He emphasizes the importance of gesture drawing to convey movement and emotion.
In his tutorials, Tanner demonstrates how to break down complex body structures into basic geometric shapes. While understanding anatomy and gesture can be hard at first, Tanner’s methods make it more approachable for beginners and experienced artists alike. This approach helps artists of all skill levels improve their understanding of proportion and form.
Tanner’s lessons often include tips on shading and adding depth to drawings. He shows how light and shadow can enhance the three-dimensional quality of body sketches.
Many artists find Tanner’s tutorials helpful for developing their own style. His methods encourage experimentation while providing a solid foundation in body drawing fundamentals.
Caldwell Tanner’s tutorials are accessible online through various platforms. They offer a valuable resource for artists looking to improve their body drawing skills.
7) Croquis Cafe

Croquis Cafe is a popular online resource for artists looking to improve their figure drawing skills. The site is regularly updated with new drawing sessions and resources, ensuring artists always have fresh material to work with. It offers a wide range of video sessions featuring live models in various poses.
The website provides both timed and untimed drawing sessions. This allows artists to practice quick sketches or spend more time on detailed studies.
Models in Croquis Cafe videos come from diverse backgrounds. The site features updated content to reflect a wide range of body types and poses, representing different ages and ethnicities, giving artists a chance to draw a variety of figures.
The platform is especially useful for those who can’t attend in-person figure drawing classes. It brings the live model experience right to artists’ homes or studios.
Croquis Cafe sessions often include both nude and clothed models. This helps artists practice drawing different textures and fabric folds as well as anatomy.
Many artists use Croquis Cafe to create quick sketches or gesture drawings. These exercises help improve their ability to capture the essence of a pose quickly.
8) ArtStation Body Studies
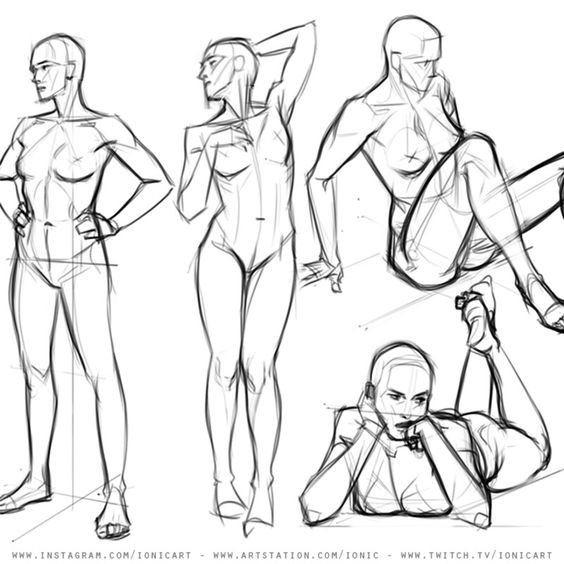
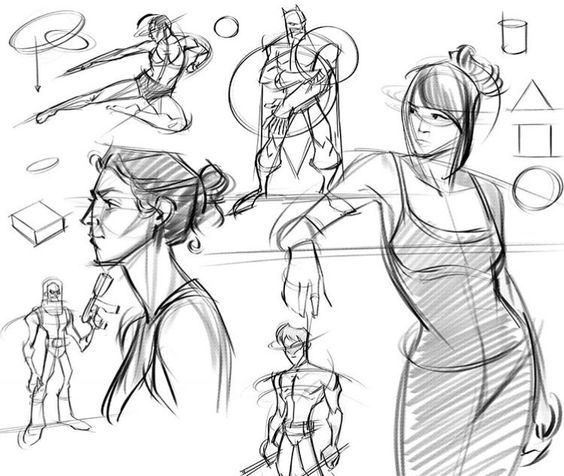
ArtStation is a popular platform for artists to showcase their work. It’s a great place to find body drawing ideas and studies.
Many artists on ArtStation focus on creating detailed body studies. These studies often show different poses, muscle structures, and body types.
Artists use various techniques to create these studies. Some use digital tools, while others prefer traditional media like pencil or charcoal.
ArtStation body studies often explore anatomy in depth. They might focus on specific body parts like hands, feet, or facial features.
Some artists create studies of dynamic poses. These can include action shots, dance movements, or sports-related poses.
Others focus on more subtle aspects of the body. This might include studies of skin textures, wrinkles, or how light interacts with the human form.
ArtStation also features studies of diverse body types. This includes different ages, genders, and body shapes, providing a wide range of reference material.
Many artists on the platform share their process. ArtStation regularly highlights new things, such as innovative body studies and drawing techniques, making it easy to discover the latest trends and methods. This can be helpful for learning new techniques or approaches to body drawing.
9) Love Life Drawing
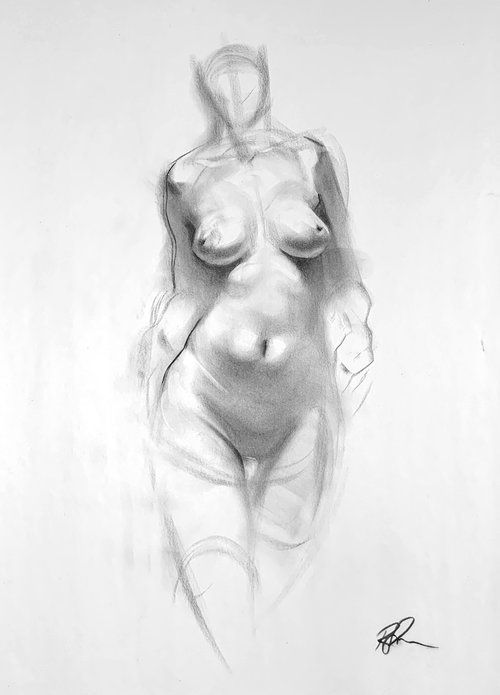
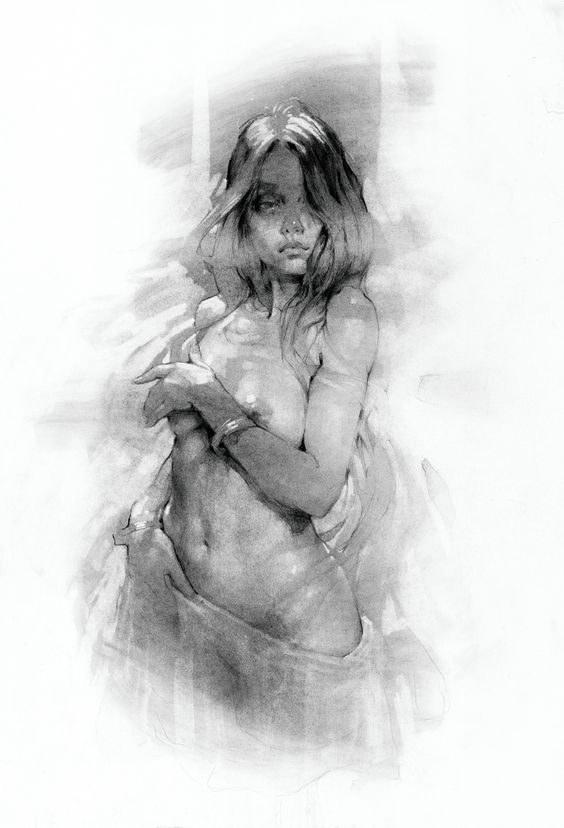
Life drawing is a great way to improve artistic skills. It involves sketching or painting the human form from a live model. Many artists find this practice both challenging and rewarding. Don’t worry about making mistakes—practice is key, and every drawing helps you improve.
Life drawing sessions can boost body image. They help artists see the beauty in all body types. This can lead to more body acceptance and appreciation.
Some artists focus on quick gesture drawings. These capture the essence of a pose in just a few lines. Others prefer longer poses for more detailed studies.
Life drawing teaches observation skills. Artists learn to really look at proportions, shapes, and shadows. This trains the eye and improves overall drawing ability.
Regular practice can spark creativity. Artists often experiment with different materials and techniques during life drawing sessions. This can lead to new artistic ideas and styles.
Many art schools and studios offer life drawing classes. These provide a supportive environment for learning and growth. Artists of all levels can benefit from these sessions.
10) Anatomy 360
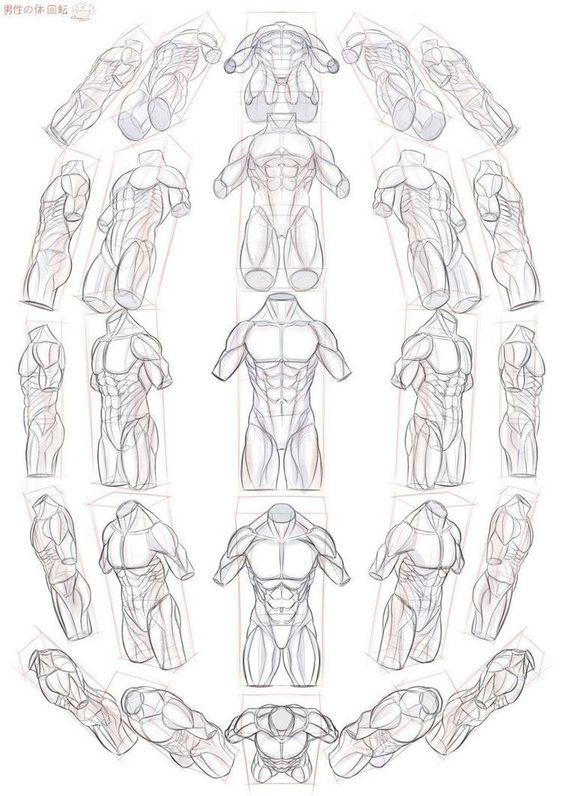
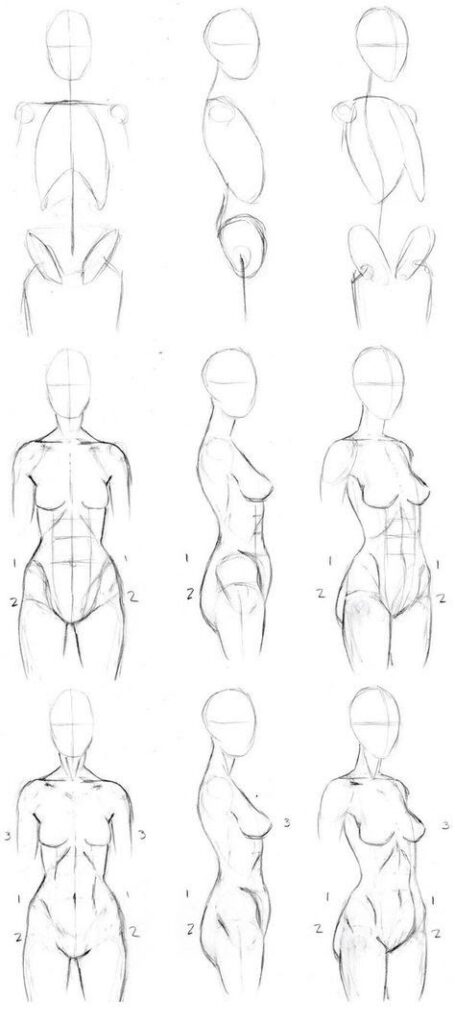
Anatomy 360 is a drawing technique that helps artists capture the human form from all angles. It involves studying and sketching the body as it rotates, providing a complete view of its structure.
This method enhances understanding of how muscles and bones work together during movement. Accurately placing the pelvis is especially important when drawing the body from different angles, as it serves as a key anatomical marker for posture and proportion. Artists can create more dynamic and realistic figure drawings by mastering this approach.
To practice Anatomy 360, artists often use reference materials or live models. They may sketch quick poses as the model turns, capturing key details of the body’s form.
Digital tools can also aid in Anatomy 360 studies. 3D modeling software allows artists to rotate and examine virtual human figures from any angle, enhancing their understanding of anatomy.
Regular practice of Anatomy 360 can greatly improve an artist’s ability to draw figures in various poses and perspectives. It builds a mental library of anatomical knowledge that can be applied to future artwork.
11) SenshiStock Reference Packs
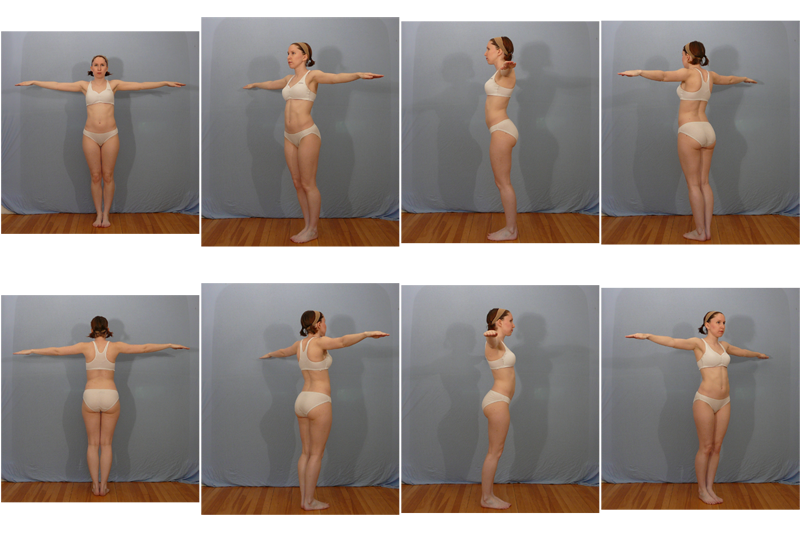
SenshiStock Reference Packs are valuable resources for artists looking to improve their body drawing skills. These packs contain high-quality reference photos of models in various poses and positions.
Created by artist and photographer Sailor Senshi, SenshiStock offers a wide range of reference images. The packs cover different themes and body types, and some are organized by class, such as action poses or everyday activities, making them useful for various drawing projects.
Artists can find packs focusing on specific areas like hands, feet, or facial expressions. Others feature full-body poses for action scenes, everyday activities, or character design.
SenshiStock Reference Packs are known for their clarity and diversity. They include multiple angles of each pose, helping artists understand the body’s form and movement.
These packs are available for purchase or download on various platforms. Many artists use them as practice material or reference for their own artwork.
By studying SenshiStock Reference Packs, artists can enhance their understanding of anatomy, proportion, and dynamic poses. This resource proves helpful for beginners and experienced artists alike.
12) SketchDaily
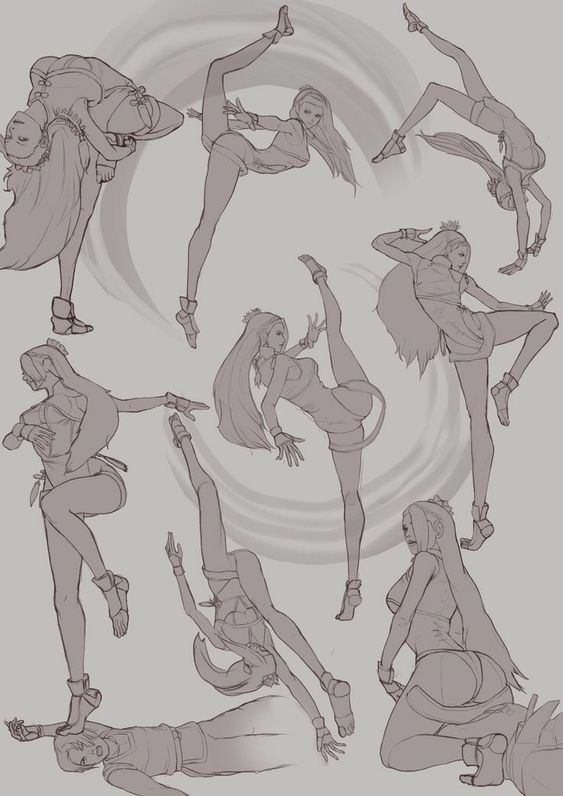
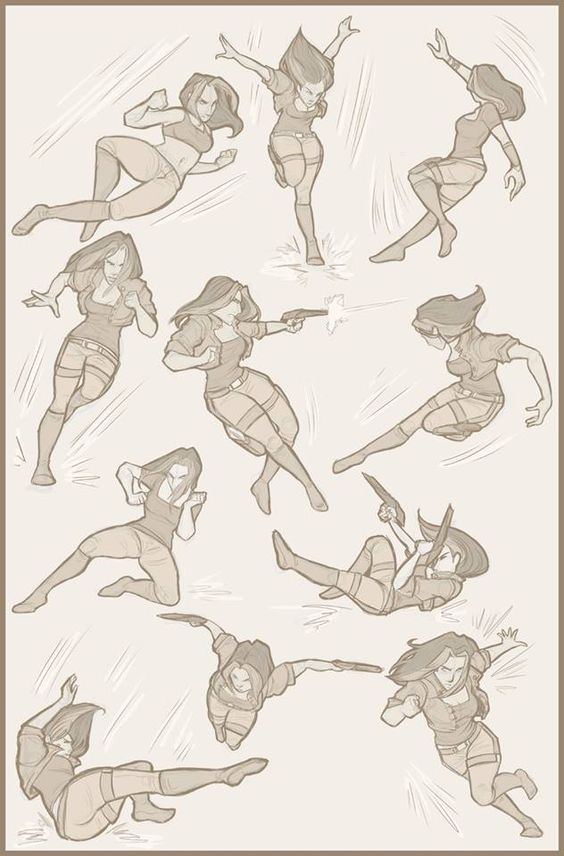
SketchDaily is an online community that encourages artists to practice drawing every day. It provides a platform for artists to share their work and get feedback from others.
The community posts daily drawing prompts to inspire artists. These prompts often focus on different body parts or poses, making it a great resource for body drawing practice. The community often introduces a couple of new prompts each week to keep things fresh.
Artists can find a wide range of body drawing ideas on SketchDaily. The prompts might include hands, feet, facial expressions, or full-body poses.
Participating in SketchDaily can help artists improve their skills quickly. Regular practice leads to better understanding of anatomy and proportions.
The community aspect of SketchDaily adds motivation. Artists can see how others interpret the same prompt, sparking new ideas. Artists can learn a lot from seeing the different things others create in response to the same prompt.
SketchDaily generates new ideas for artists. It pushes them to draw subjects they might not typically choose.
For those looking to enhance their body drawing skills, SketchDaily offers a consistent source of inspiration and practice opportunities.
13) Figure Drawing LAB
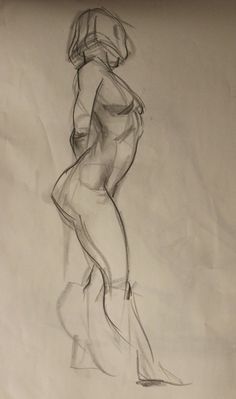
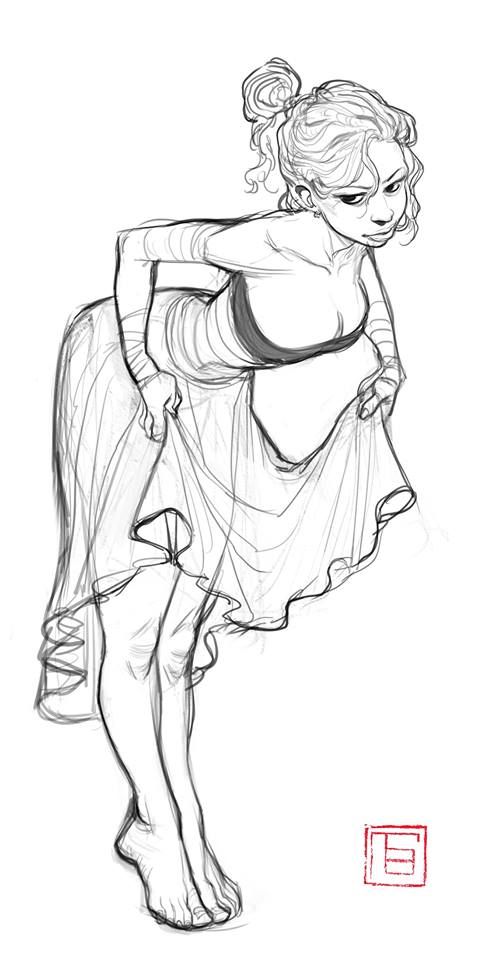
Figure Drawing LAB is a hands-on approach to learning the art of drawing the human body. It provides a space for artists to practice and improve their skills in capturing the human form.
In a typical Figure Drawing LAB, models pose in various positions for set periods of time. These poses can range from quick 1-minute sketches to longer 20-minute studies.
Artists use different tools and techniques during these sessions. They might start with gesture drawings to capture the essence of movement and form.
The LAB setting allows artists to experiment with various drawing methods. During the initial stages of a LAB session, artists tend to focus on gesture and proportion, observing how the body’s overall direction or flow is influenced by the spine’s curvature and major body parts. They can focus on different aspects of the body, such as proportion, anatomy, or light and shadow.
Regular practice in a Figure Drawing LAB helps artists develop their observational skills. It trains the eye to see and accurately represent the human form on paper.
Figure Drawing LABs often encourage artists to step out of their comfort zones. They might try new materials or styles, pushing the boundaries of their artistic expression.
14) AdorkaStock Figures

AdorkaStock Figures offer artists a unique resource for body drawing practice. These digital figure references provide a wide range of poses and body types to study and draw from.
The figures are designed with a cartoony style, making them appealing for artists working in animation, comics, or stylized art. They feature exaggerated proportions and simplified shapes, which can help beginners learn basic anatomy.
AdorkaStock Figures come in various sets, including male and female characters in different poses. Some sets focus on specific themes like action poses, everyday activities, or emotional expressions.
Artists can use these figures as a starting point for their own character designs. The simplified forms allow for easy customization and adaptation to different styles.
One benefit of AdorkaStock Figures is their accessibility. Artists can download and use them digitally, making them a convenient option for digital art or remote learning situations.
While not a substitute for life drawing, these figures can supplement an artist’s practice. They’re especially useful for quick sketches, gesture drawing, and exploring dynamic poses that might be difficult to capture with live models.
Finally, AdorkaStock Figures can be a valuable addition to any artist’s practice routine, helping to build confidence and skill in body drawing ideas.
15) 2 Minute Pose
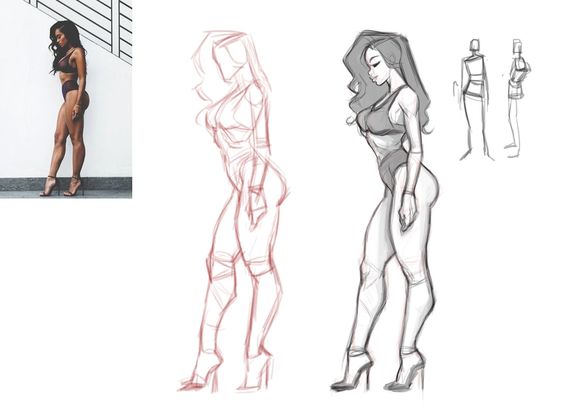
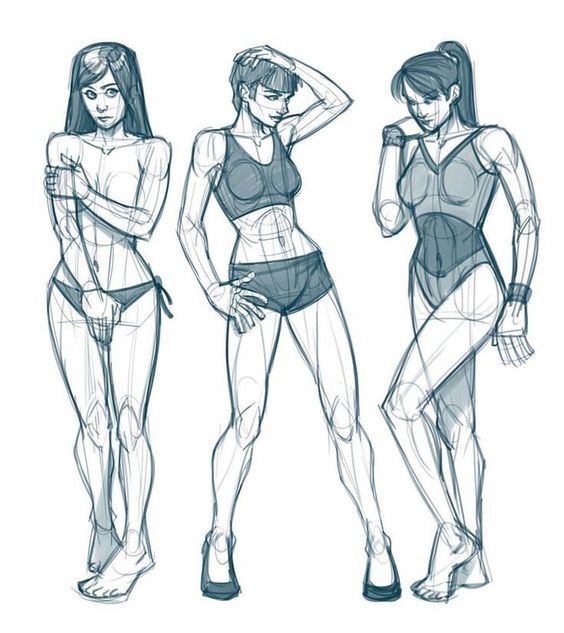
Two minute poses are a popular exercise for artists to improve their figure drawing skills. These quick sketches help artists capture the essence of a pose without getting bogged down in details.
In a typical 2 minute pose session, a model holds a series of brief poses. Artists must work quickly to capture the basic shapes and lines of the body
This exercise trains the eye to see and the hand to draw rapidly. It forces artists to focus on the most important elements of the figure’s form and gesture.
Artists often use loose, gestural lines for 2 minute poses. They aim to convey the overall movement and energy of the pose rather than precise anatomy.
Regular practice with 2 minute poses can greatly improve an artist’s ability to draw the human figure. This exercise can also be used to draw animals, helping artists quickly capture their movement and dynamic poses. It helps develop speed, accuracy, and confidence in capturing the human form.
Understanding Human Anatomy
Grasping human anatomy is key for creating lifelike body drawings. Artists need to know body proportions and major muscle groups to make their figures look real and believable.
Basic Proportions
The human body follows certain rules of proportion. An average adult is about 7.5 head lengths tall. The face divides into thirds, with the eyes at the midpoint. Arms reach to mid-thigh when hanging straight.
The body’s midpoint falls at the pubic bone. Legs make up about half of total height. Hands extend to mid-thigh when arms are at sides.
Shoulders are about 2 head widths across in men, slightly less in women. Hips are wider in women, about equal to shoulders. The waist is typically narrower than hips and chest.
Muscle Groups
Understanding major muscle groups helps create realistic figure drawings. The torso has several key muscle areas:
- Pectorals (chest)
- Abdominals
- Latissimus dorsi (back)
- Trapezius (upper back/neck)
Arms feature biceps, triceps, and forearm muscles. Legs have quadriceps, hamstrings, and calf muscles.
Bony landmarks like the collarbone, hip bones, and kneecaps help define the body’s structure. Muscles attach to these points, creating the body’s shape and allowing movement.
Artists should study how muscles change shape during different poses and actions. This knowledge brings life and realism to figure drawings.
Techniques for Realistic Body Drawing
Drawing realistic bodies requires practice and skill. Artists use specific methods to capture the human form accurately. These techniques help create lifelike figures with proper proportions and details.
Gesture Drawing
Gesture drawing is a quick sketching method that captures the basic pose and movement of a figure. Artists typically spend 30 seconds to 2 minutes on each sketch. This technique helps develop a feel for human anatomy and motion.
Contour drawing is another useful approach. It involves drawing the outline of the body without lifting the pencil. This method improves hand-eye coordination and observation skills.
To practice gesture drawing, artists often use live models or photo references. They focus on the overall shape and energy of the pose rather than small details.
Shading and Highlights
Shading brings depth and volume to body drawings. Artists use various techniques to create the illusion of three-dimensional form on a flat surface.
Hatching and cross-hatching are common shading methods. They involve drawing parallel lines or crossing lines to create shadows and textures.
Blending is another important technique. Artists use tools like blending stumps or their fingers to smooth out shading for a more realistic look.
Highlights are crucial for creating the illusion of light on the body. Artists leave areas of the paper white or use light colors to show where light hits the figure.
Stylistic Approaches and Tips
Artists can use different techniques to create expressive body drawings. These methods help capture the human form in unique and interesting ways.
Line Art vs. Detailed Sketching
Line art uses simple lines to show the body’s shape and form. It’s great for quick sketches or stylized drawings. Artists often use fluid, continuous lines to create flowing figures.
Detailed sketching adds depth and texture. It uses shading and fine lines to show muscles and skin. This style works well for realistic portraits or anatomical studies.
Artists can mix these styles too. They might use bold lines for outlines and soft shading for details. This creates a balance between simple and complex.
Incorporating Dynamics and Movement
Dynamic poses make drawings more lively. Artists can show action by drawing figures mid-motion. This might be a dancer leaping or an athlete running.
Gesture drawings are quick sketches that capture movement. They focus on the flow and energy of a pose rather than details.
Artists can use curved lines to suggest motion. Straight lines often show stillness, while curves imply action. Adding motion lines around a figure can also create a sense of movement.
Exaggerating poses can make drawings more dynamic. This means bending limbs or twisting bodies more than in real life.
Frequently Asked Questions
Drawing the human body takes practice and technique. These questions cover key aspects of figure drawing, from basic methods to more advanced skills. Let’s explore some helpful approaches for artists of all levels.
What are effective techniques for drawing the human figure?
Start with basic shapes to outline the body’s structure. Use cylinders for limbs and ovals for the torso and head. Pay attention to proportions and how body parts relate to each other. Practice gesture drawing to capture the essence of poses quickly.
How can I improve my skills in drawing female forms?
Study real anatomy to understand muscle and bone structure. Observe how light and shadow define curves. Practice drawing a variety of body types and poses. Use reference photos or life models to improve accuracy.
What are some beginner-friendly ways to draw the full human body?
Begin with stick figures to get proportions right. Add basic shapes to flesh out the form. Use mannequin-style drawings to understand joints and movement. Try contour drawing to focus on outlines and shapes.
Which body part is recommended to begin with when drawing figures?
Many artists start with the torso as it’s the body’s center of mass. It helps establish proportions for other parts. Some prefer beginning with the head to set the figure’s scale. Experiment to find what works best.
Can you suggest life drawing poses that are suitable for practice?
Simple standing poses are good for beginners. Seated poses help practice foreshortening. Dynamic poses with twists or reaching motions improve understanding of muscle groups. Timed poses from 1 to 15 minutes build different skills.
What are the best practices for drawing life models accurately?
Observe carefully before starting to draw. Use measuring techniques to check proportions. Focus on the whole figure rather than details at first. Take breaks to step back and assess your work. Practice regularly with tools like Figure & Gesture Drawing Tool to improve over time.
- 12.1Kshares
- Facebook0
- Pinterest12.1K
- Twitter0
- Reddit0


