Butterfly drawing captures the delicate beauty of these winged insects, allowing artists to explore intricate details and vibrant colors. Creating a butterfly sketch can be a rewarding artistic endeavor for beginners and experienced artists alike. Learning to draw butterflies enhances observation skills and provides a deeper appreciation for nature’s artistry.
The process of drawing butterflies involves understanding their anatomy, from the symmetrical wings to the slender body and antennae. Artists can choose from various styles, ranging from realistic representations to stylized interpretations. As skills develop, incorporating textures and shading techniques can bring butterfly drawings to life.
Butterfly art offers endless creative possibilities, from simple line drawings to elaborate watercolor paintings. Whether used as a standalone subject or as part of a larger composition, butterfly drawings add a touch of grace and whimsy to any artwork.
Key Takeaways
- Butterfly drawing combines artistic expression with natural observation
- Mastering butterfly anatomy is crucial for creating accurate representations
- Various techniques and mediums can be used to create stunning butterfly artwork
Getting Started with Butterfly Drawing
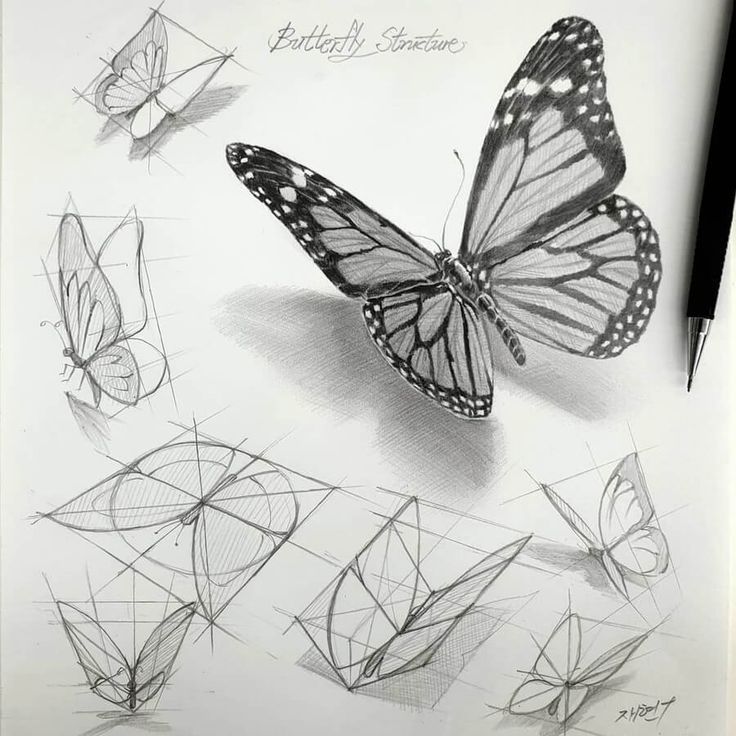
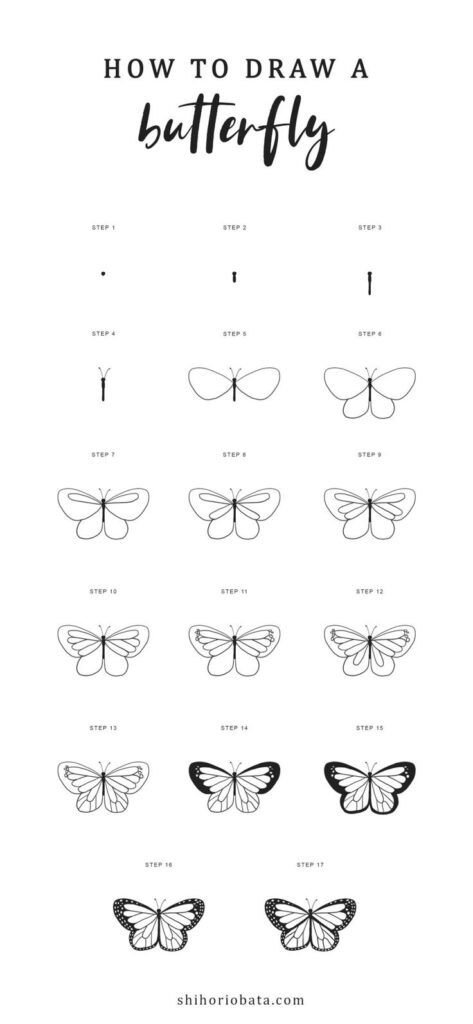
Butterfly drawing combines artistic skill with an appreciation for nature’s beauty. It requires basic materials and an understanding of fundamental shapes to create captivating lepidopteran art.
Materials Needed
To begin drawing butterflies, gather essential supplies. A sketchbook or drawing paper provides the foundation for your artwork. Choose smooth, high-quality paper that can withstand erasing and shading. Pencils are crucial – opt for a set with varying hardness levels (2H to 6B) for different line weights and shading techniques.
A good eraser is indispensable. Kneaded erasers work well for lifting graphite and creating highlights. Include a pencil sharpener to maintain crisp lines. Consider colored pencils or watercolors for adding vibrant hues to your butterfly drawings.
Basic Butterfly Shapes
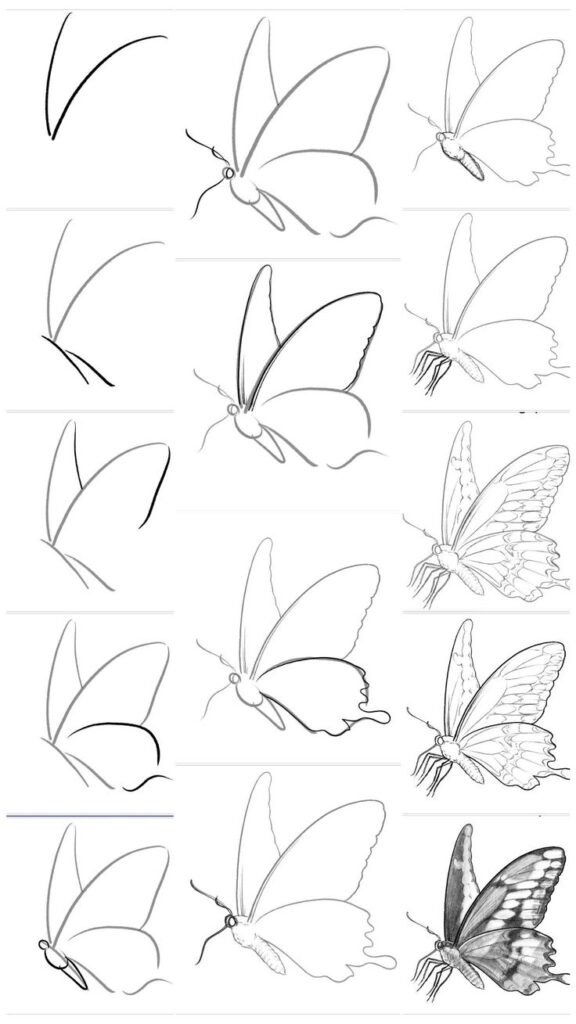
Start with simple shapes to form the butterfly’s structure. Begin by drawing an oval for the body. Add two circles on top for the head and thorax. Sketch wing outlines using curved lines extending from the body.
Focus on symmetry when drawing wings. Use light, loose strokes to create initial shapes. Refine the wing edges with gentle curves and points. Add antennae as thin, curved lines from the head.
Practice these basic shapes repeatedly. Gradually incorporate more details like wing patterns and body segments as you become comfortable with the foundational forms.
Understanding Butterfly Anatomy
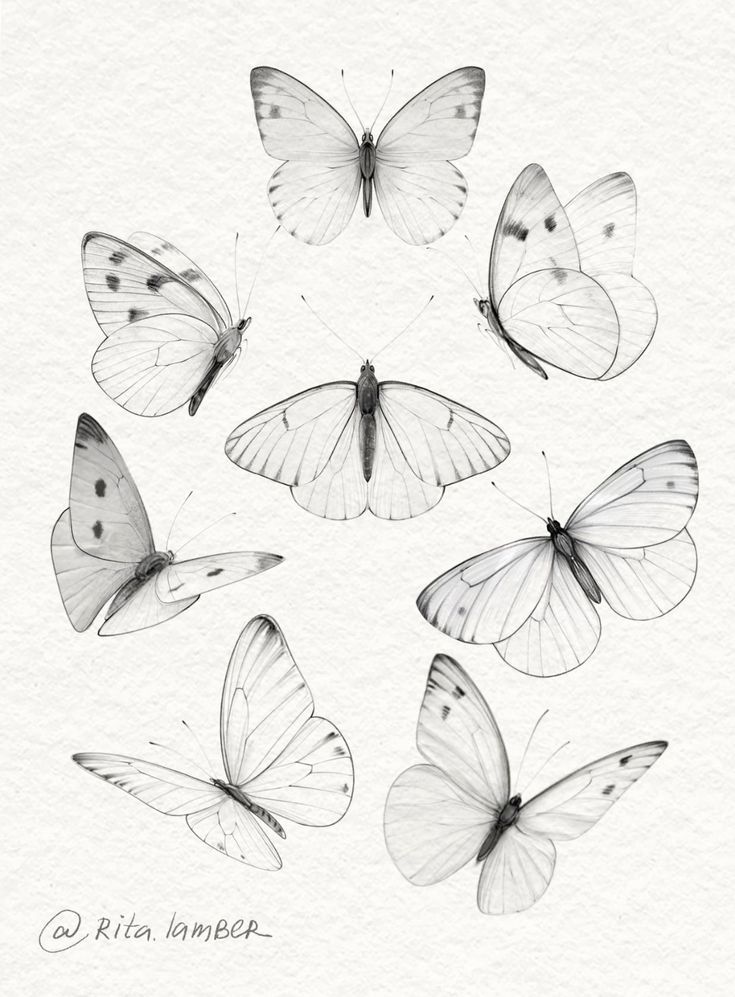
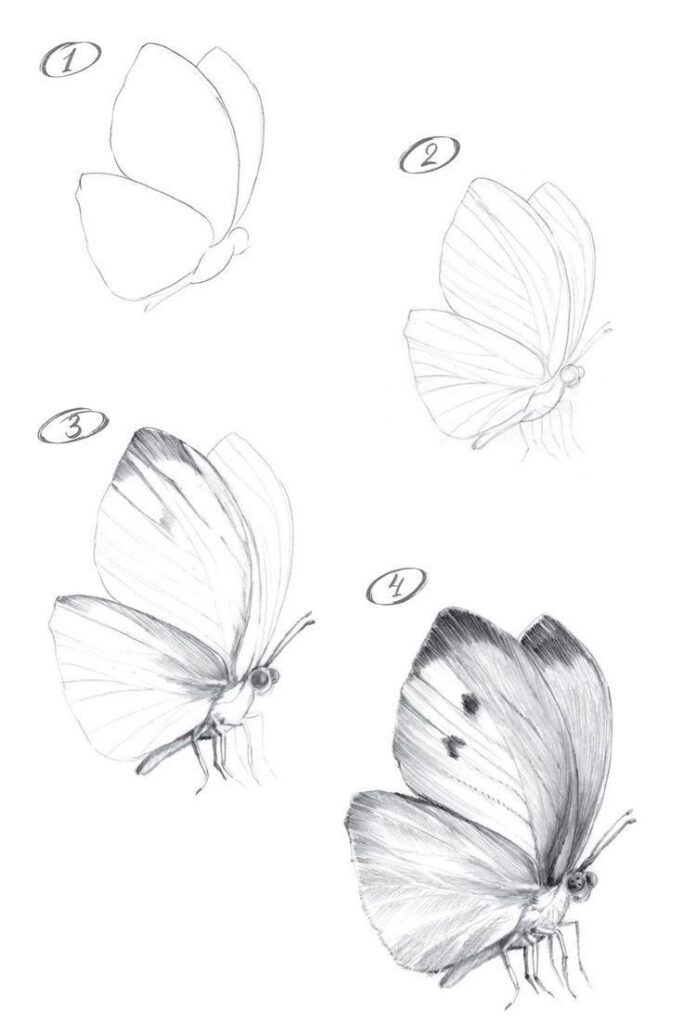
Butterflies possess unique anatomical features that enable their distinctive appearance and behaviors. Their intricate structures play crucial roles in flight, feeding, and survival.
Anatomy of Butterfly Wings
Butterfly wings consist of thin membranes supported by a network of veins. These veins provide strength and carry nutrients throughout the wing. The wings are covered in tiny scales that give butterflies their vibrant colors and patterns.
Scales overlap like shingles on a roof, creating complex designs. Some butterflies, like the monarch, display bright orange and black patterns as a warning to predators. Others use camouflage to blend into their surroundings.
Wing shapes vary among species. Some have large, rounded wings for gliding, while others possess narrow wings for quick, darting flight. The forewing and hindwing work together during flight, connected by a small hook called a frenulum.
Different Butterfly Species
Butterfly species exhibit remarkable diversity in size, color, and wing patterns. The largest butterfly, the Queen Alexandra’s Birdwing, has a wingspan of up to 12 inches. In contrast, the Western Pygmy Blue measures less than an inch across.
Swallowtail butterflies are known for their distinctive tail-like projections on their hindwings. Morpho butterflies display iridescent blue wings that seem to change color as they move.
Some species, like the glasswing butterfly, have transparent wings. This unique adaptation helps them avoid predators. The painted lady butterfly is found on every continent except Antarctica, showcasing remarkable adaptability.
Butterfly wing patterns serve various purposes. They can attract mates, warn predators, or provide camouflage. Understanding these differences is crucial for accurate butterfly drawing and identification.
Step-by-Step Drawing Guide
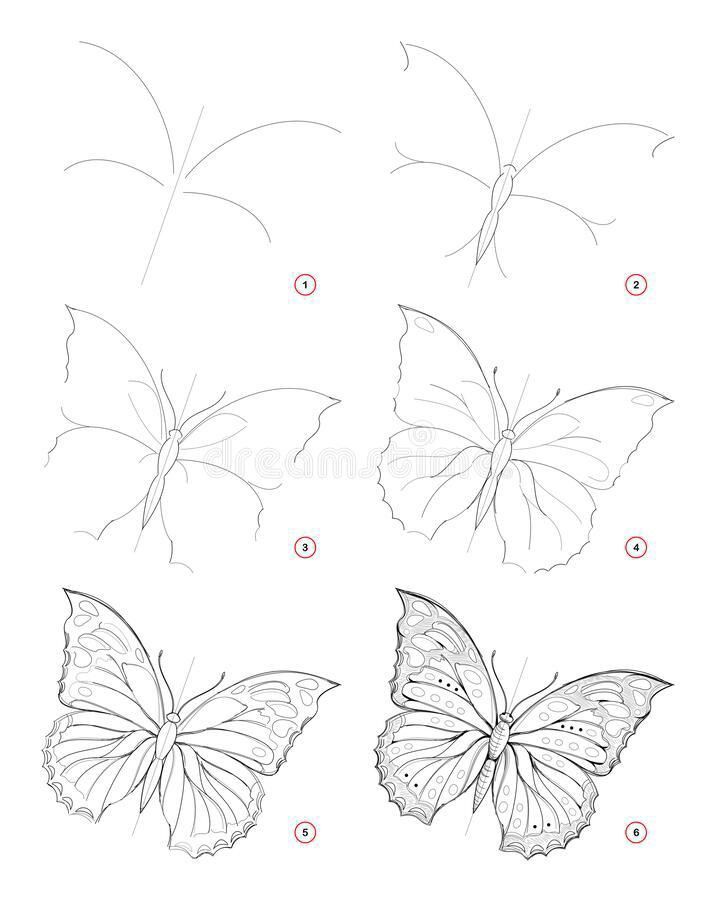
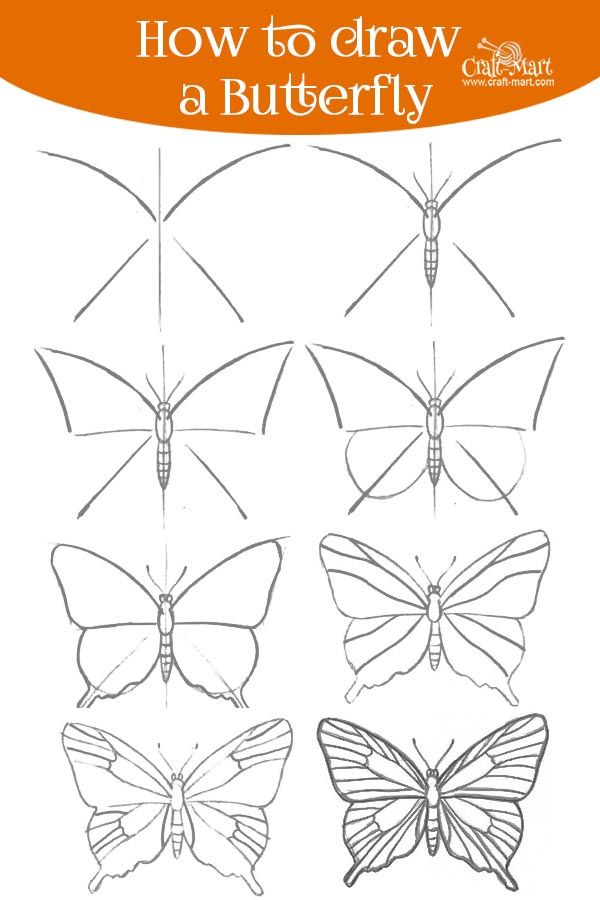
Drawing a butterfly requires attention to detail and a systematic approach. The following guide breaks down the process into manageable steps for artists of all skill levels.
Sketching the Outline
Begin with light pencil strokes to create the basic butterfly shape. Draw an oval for the body and add two circles for the head and thorax. Sketch four wing shapes, making the top pair larger than the bottom. Ensure symmetry by folding the paper in half and tracing the outline on both sides.
Add antennae with gentle curves. Draw thin legs extending from the thorax. Keep lines loose and light at this stage, as they will serve as guidelines for the final drawing.
Adding Details and Patterns
Focus on wing patterns next. Butterflies have unique markings, so research different species for inspiration. Start with larger shapes like spots or stripes. Add smaller details like scales or veins radiating from the body.
Enhance the body by defining segments. Draw compound eyes and refine the antennae. Add texture to the thorax and abdomen with short, light strokes. Remember to keep the patterns symmetrical on both sides of the butterfly.
Finalizing the Drawing
Darken the outlines of your butterfly, erasing unnecessary sketch lines. Add shading to create depth and dimension. Use light, medium, and dark tones to bring your butterfly to life. Pay attention to where light would naturally hit the wings and body.
Color your butterfly if desired. Choose a realistic palette or get creative with vibrant hues. Layer colors to achieve a rich, natural look. Add highlights to wings for a shimmering effect. Sign your artwork and admire your completed butterfly drawing.
Styles and Techniques
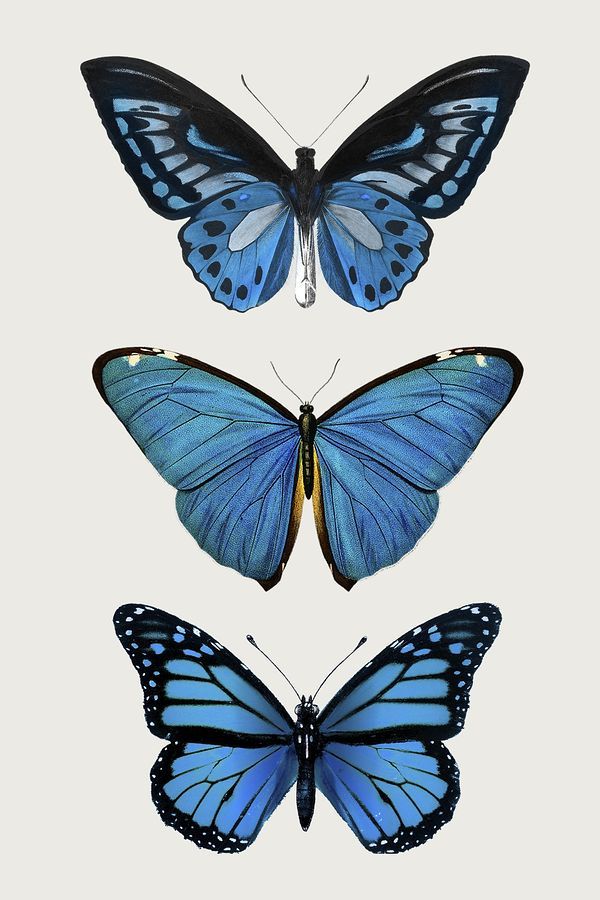
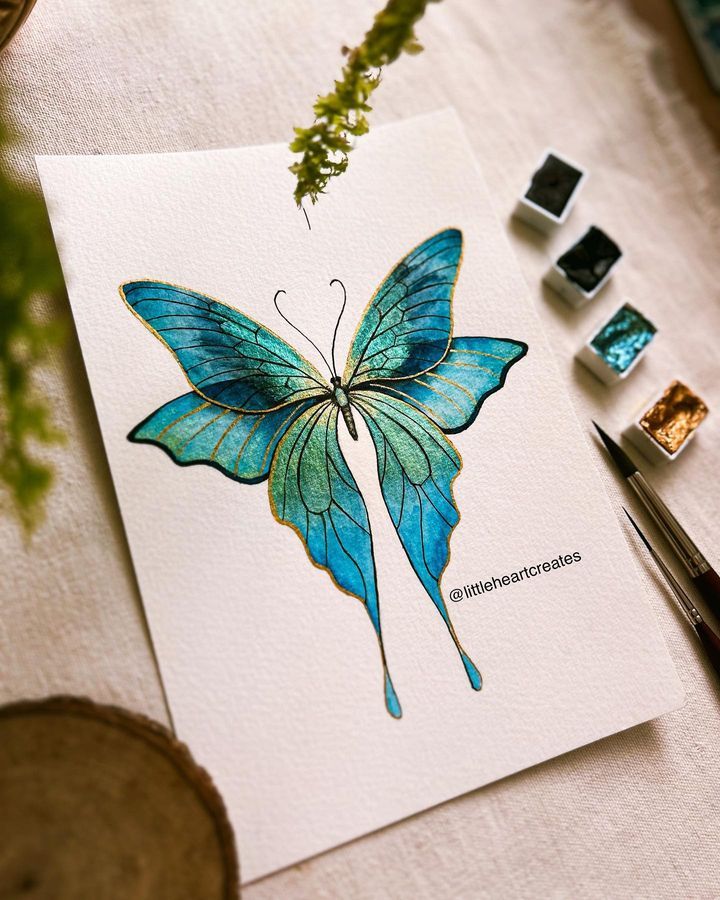
Butterfly drawings offer artists a range of creative possibilities. From lifelike representations to whimsical interpretations, various approaches can bring these delicate creatures to life on paper.
Realistic Butterfly Drawings
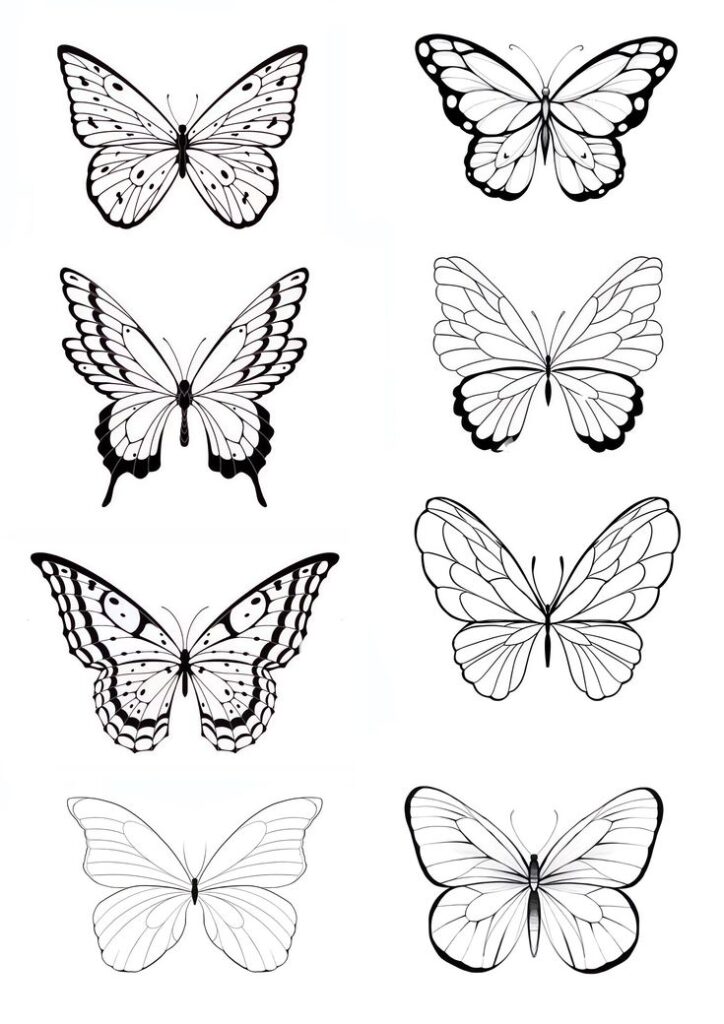
Realistic butterfly drawings aim to capture the intricate details of these insects with precision. Artists focus on accurate wing patterns, body proportions, and anatomical features. They often use fine-tipped pens or sharp pencils for detailed linework.
Shading techniques play a crucial role in creating depth and texture. Crosshatching and stippling help render the subtle gradations of color on butterfly wings.
Watercolors or colored pencils can add vibrancy to the artwork. Many artists study real butterfly specimens or high-quality photographs to ensure accuracy in their depictions.
Abstract Butterfly Creations
Abstract butterfly art takes a more experimental approach. Artists may distort shapes, exaggerate colors, or simplify forms to create unique interpretations.
Geometric patterns often replace naturalistic wing designs. Bold color contrasts and unconventional color choices can make these pieces visually striking.
Mixed media techniques are common in abstract butterfly art. Collage, paint splatters, or digital manipulation can add layers of complexity to the artwork.
Cartoon Butterfly Illustrations
Cartoon butterfly illustrations emphasize charm and simplicity. Artists typically use bold outlines and simplified shapes to create cute, appealing characters.
Exaggerated features like large eyes or expressive antennae are common. Bright, solid colors often replace intricate wing patterns for a more playful look.
These illustrations may incorporate anthropomorphic elements, giving butterflies human-like expressions or poses. Cartoon butterflies are popular in children’s books, animations, and graphic design projects.
Adding Colors and Textures
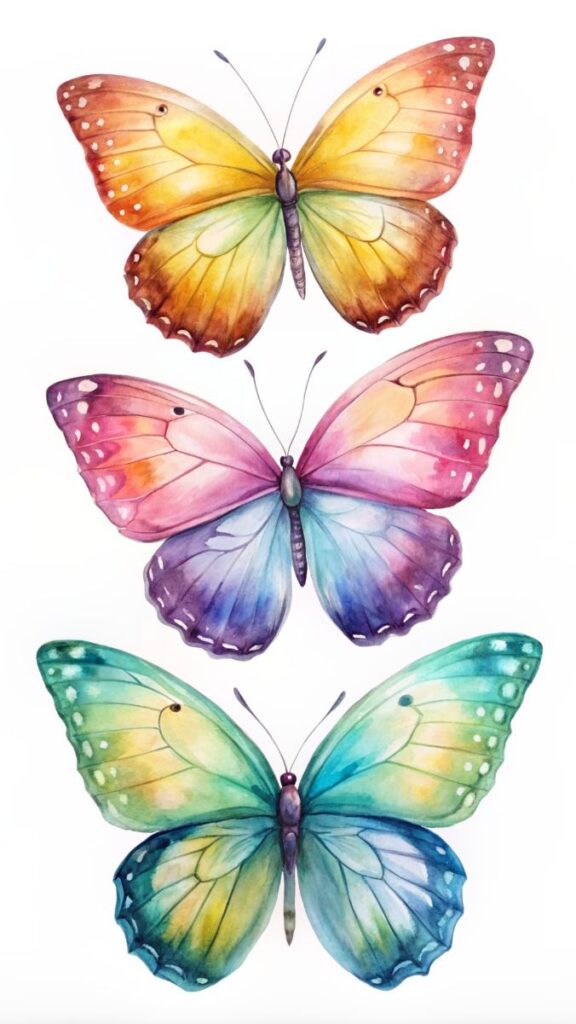
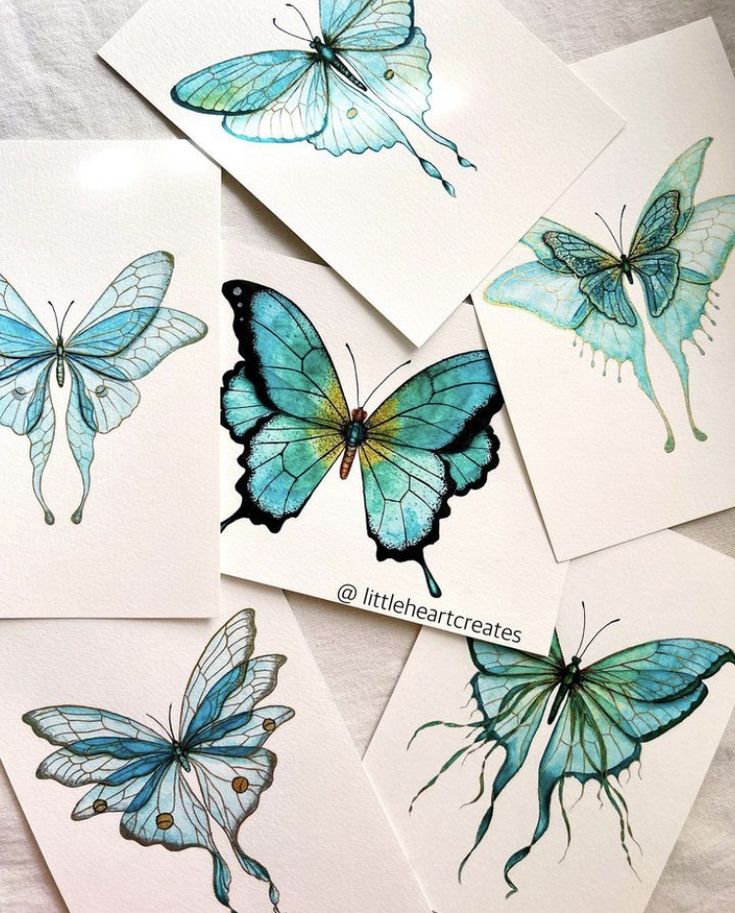
Coloring and texturing bring butterfly drawings to life, showcasing their intricate patterns and natural beauty. The right techniques can transform a simple sketch into a vibrant, realistic representation.
Choosing Colors for Butterfly Wings
Butterfly wings display an incredible variety of hues. Study reference photos to select accurate colors for your chosen species. Start with a base layer of light, neutral tones. Build up color gradually, using thin layers to achieve depth and richness.
Consider using colored pencils for precise control. Watercolors work well for creating soft, blended effects. Experiment with both cool and warm shades to capture the subtle color variations found in nature.
Pay attention to color placement. Many butterflies have darker edges and lighter central areas on their wings. Some species feature bold spots or stripes that require careful positioning.
Creating Textures and Patterns
Butterfly wings exhibit complex textures and intricate patterns. Use fine lines and dots to replicate scales. Start with larger shapes, then add finer details.
Employ cross-hatching techniques to create depth and shadow. Vary the pressure and direction of your strokes to mimic the layered texture of wing scales.
For spotted patterns, use small circular motions. Create striped designs with parallel lines of varying thickness. Replicate eyespots with concentric circles and subtle shading.
Incorporate white highlights to suggest the shimmering quality of butterfly wings. This adds dimension and brings your drawing to life.
Display and Preservation
Properly displaying and preserving butterfly drawings ensures their longevity and visual appeal. Careful framing and storage techniques protect the artwork from damage and deterioration over time.
Framing Your Butterfly Drawing
Select an acid-free mat board to prevent discoloration of the artwork. Choose a frame that complements the drawing’s style and colors. Use UV-protective glass to shield the piece from harmful sunlight. Ensure the drawing is securely mounted using archival-quality materials.
Avoid hanging the framed artwork in direct sunlight or areas with high humidity. Position it away from heat sources and air vents to maintain a stable environment. Clean the frame and glass regularly with a soft, dry cloth to remove dust and debris.
Long-Term Preservation Tips
Store unframed butterfly drawings in acid-free portfolios or flat files. Use tissue paper between sheets to prevent smudging or transfer of pigments. Keep the storage area cool, dry, and dark to minimize exposure to damaging elements.
Regularly inspect the artwork for signs of damage or pest infestation. Handle drawings with clean, dry hands or wear cotton gloves to avoid transferring oils. Consider creating high-quality digital scans as backups of your butterfly drawings.
For valuable or irreplaceable pieces, consult a professional conservator for specialized preservation advice. They can recommend tailored storage solutions and restoration techniques if needed.
- 121shares
- Facebook0
- Pinterest121
- Twitter0
- Reddit0
