Drawing a realistic eye might seem challenging at first, but with the right approach, anyone can master this fundamental skill. Understanding the basic geometry and structure of the eye is the foundation for creating lifelike drawings that capture depth and emotion. You don’t need to be an experienced artist to achieve impressive results—just patience and attention to detail.
The process becomes much more manageable when broken down into simple steps that build upon each other. Starting with the basic shapes and proportions allows you to establish a solid framework before moving on to shading and fine details. Many beginners focus too much on perfecting small details without first getting the structure right, which often leads to frustration.
Key Takeaways
- Focus on mastering the basic structure and geometry of the eye before adding detailed shading.
- Use reference images to understand how light interacts with different parts of the eye for realistic depth.
- Practice the pupil, iris, and eyelid shapes consistently to develop muscle memory for drawing eyes.
Essential Tools and Materials
Having the right supplies can make a significant difference in creating realistic eye drawings. Quality materials will allow you to achieve precise details, proper shading, and lifelike textures that make eyes appear three-dimensional.
Graphite Pencil Selection
The foundation of any realistic eye drawing begins with proper pencils. A set of graphite pencils ranging from hard (H) to soft (B) grades is essential. The 2B pencil is particularly versatile for eye drawings, offering a good balance between dark values and control.
For detailed work like eyelashes and pupil definition, sharper pencils like HB or H work best. When creating shadows and depth in the iris, softer pencils like 4B or 6B help achieve rich, dark values.
Recommended graphite pencil set:
- 2H: Light outlines and highlights
- HB: Initial sketching and fine details
- 2B: Main shading and midtones
- 4B-6B: Deep shadows and dark accents
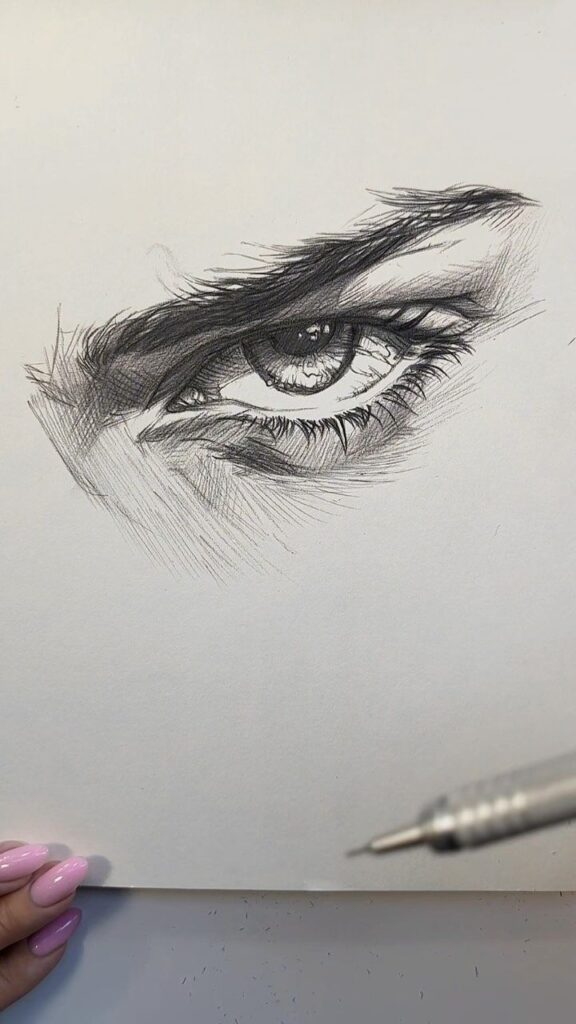
Consider investing in mechanical pencils with 0.5mm leads for consistent line work on smaller eye details.
Choosing the Right Paper
Your choice of paper dramatically affects the outcome of your eye drawing. Smooth, heavyweight paper (100lb/150gsm or higher) allows for precise detail work and clean erasing.
Bristol board or hot-pressed watercolor paper provides an ideal surface for realistic eye renderings. The smooth texture enables fine detail work necessary for capturing minute iris patterns and delicate eyelashes.
Paper with some tooth (slight texture) can add interesting effects to your shading. Medium-textured drawing paper works well for practice and can give a softer look to your eye drawings.
Avoid thin copy paper or sketch paper for finished work, as they can’t handle multiple layers of graphite and may buckle with heavy erasing.
Additional Drawing Supplies
Beyond pencils and paper, several auxiliary tools will elevate your eye drawings. A kneaded eraser is invaluable for creating highlights in the iris and pupil reflections. It can be shaped to lift graphite precisely without damaging the paper.
Blending tools are essential for smooth transitions in value. Paper stumps (tortillons) and blending pencils help create the subtle gradients needed in the sclera (white of the eye) and iris.
Must-have additional supplies:
- Kneaded eraser for lifting highlights
- White gel pen for intense highlights
- Paper stumps for blending
- Precision eraser pen for fine details
- Drawing board for a stable surface
A quality pencil sharpener maintains your tools in optimal condition. Consider a battery-powered version that creates perfectly sharp points for detailed work on eyelashes and iris structures.
Understanding Eye Anatomy for Artists
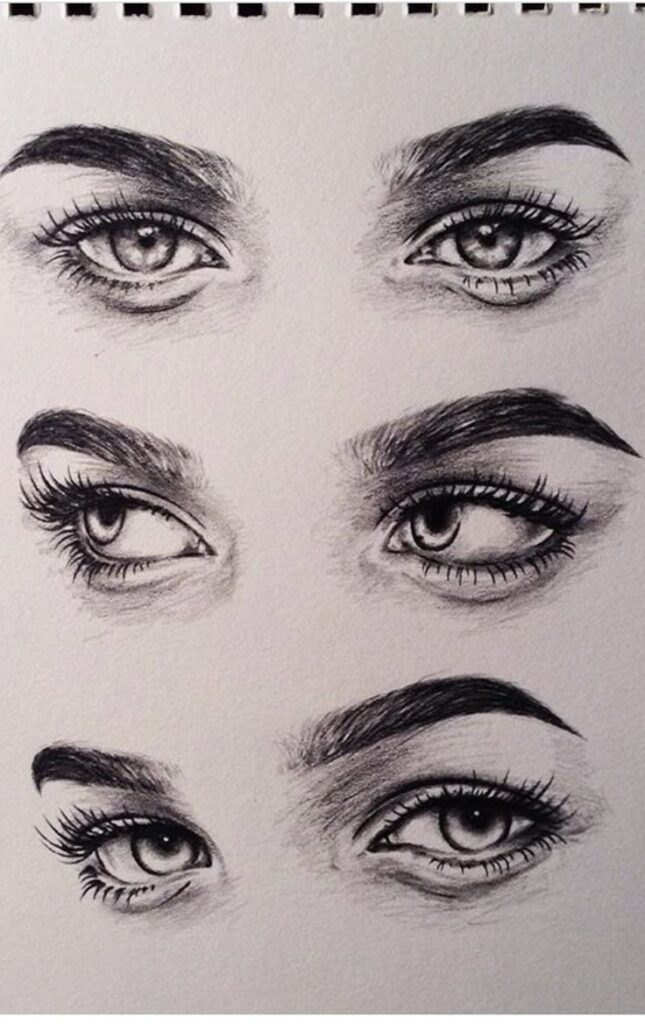
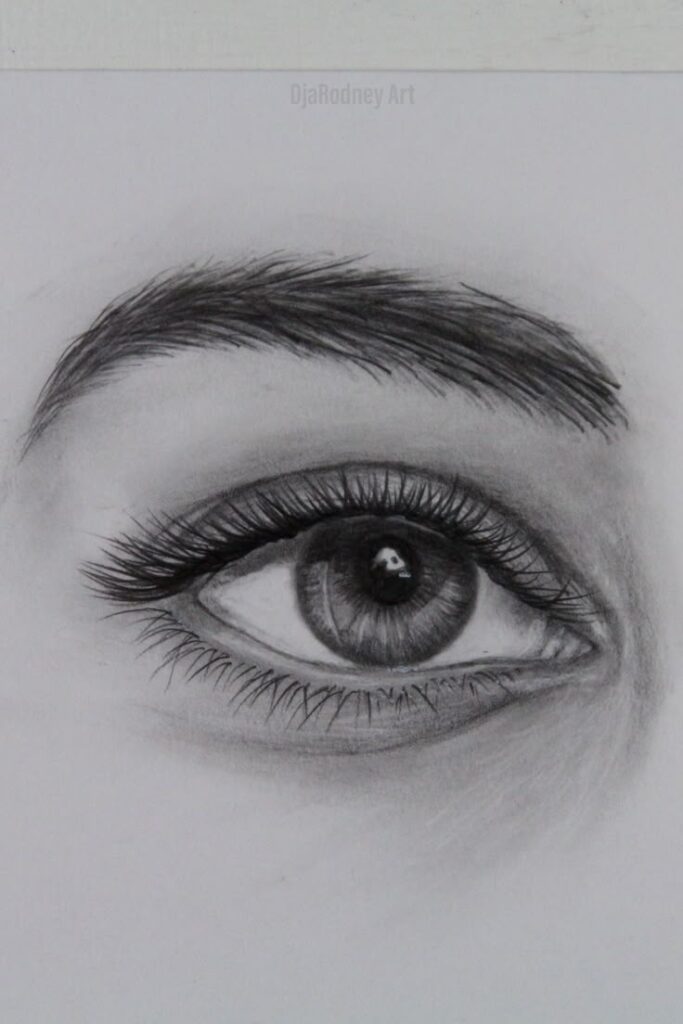
Mastering eye drawing requires understanding the key anatomical components that create expression and realism. Knowledge of these structures will help you create more convincing and expressive eyes in your artwork.
Iris and Pupil Structure
The iris is the colored portion of the eye that surrounds the pupil. Its appearance varies greatly between individuals, with colors ranging from brown to blue, green, or hazel. The iris contains intricate patterns of lines radiating from the pupil, similar to spokes on a wheel.
The pupil is the central black opening that allows light to enter the eye. It’s important to understand that the pupil isn’t simply a flat black circle. It has depth and is actually an opening within the iris.
When drawing the iris and pupil, pay attention to:
- Light reflection on the cornea (usually a small white dot)
- Variation in iris color (darker at the outer edge)
- The limbal ring (a darker circle surrounding the iris)
Remember that pupils dilate (enlarge) in low light and contract in bright conditions, which can dramatically change the eye’s expression.
Eyelids and Eye Shape
Eyelids are not simple lines but three-dimensional structures with thickness. The upper eyelid folds over the eyeball, creating a crease that varies in visibility depending on ethnicity and individual characteristics.
The lower eyelid is typically less pronounced but equally important for conveying expression. Both lids wrap around the spherical eyeball, not sitting flat against it.
Key points to remember:
- The visible eyeball is only part of the entire eyeball structure
- Eyelids have thickness and cast shadows
- The tear duct is located at the inner corner of the eye
- The outer corner (lateral canthus) typically angles slightly upward
Eye shapes vary significantly between individuals and ethnicities, affecting how much of the iris is visible and how pronounced the eyelid crease appears.
Eyebrows and Their Role
Eyebrows frame the eyes and are crucial for conveying expression. They sit on the brow ridge, which is a bony structure protecting the eye socket.
Eyebrows grow in a directional pattern: hairs near the nose grow upward, middle hairs grow outward, and outer hairs angle downward. This natural growth pattern creates the characteristic arch in most eyebrows.
When drawing eyebrows, note these features:
- They’re not solid shapes but collections of individual hairs
- They have varying thickness and density
- Their position changes dramatically with expressions
The distance between eyebrows and their thickness can significantly alter a face’s character. Raised eyebrows indicate surprise, while lowered, furrowed eyebrows suggest anger or concentration. Understanding this mobility is essential for creating expressive portraits.
Step-By-Step Guide to Drawing an Eye
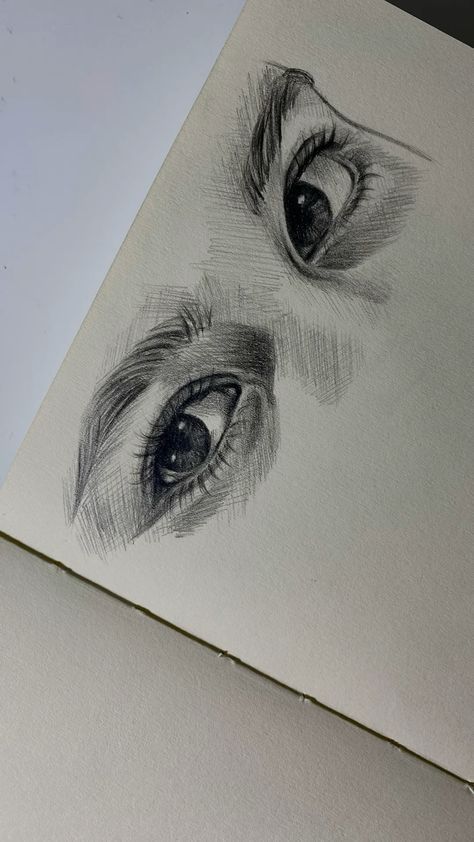
Drawing a realistic eye requires attention to detail and understanding of its key components. The following guide breaks down the process into manageable steps that will help you create a lifelike eye drawing, even if you’re a beginner.
Sketching the Eye Outline
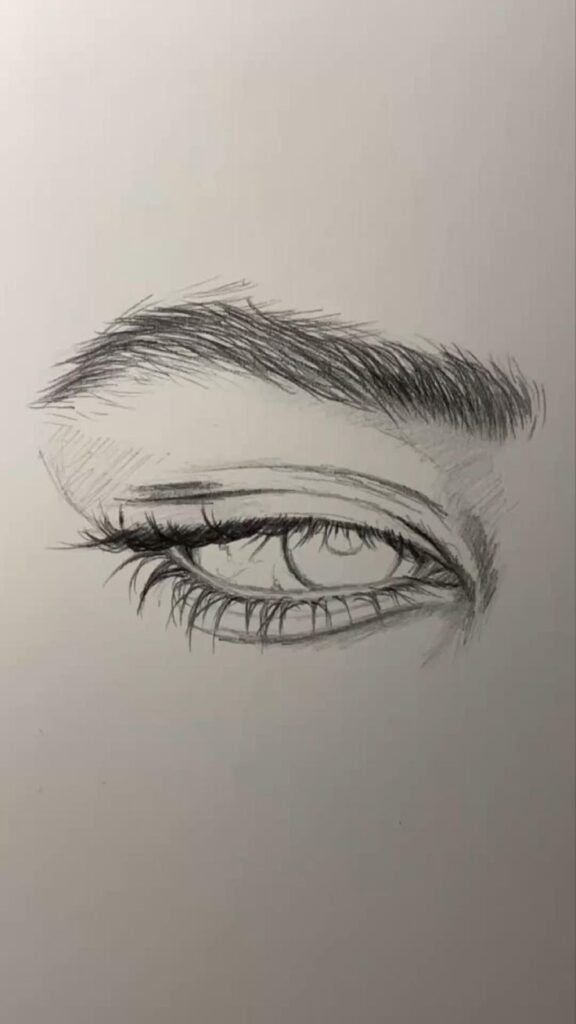
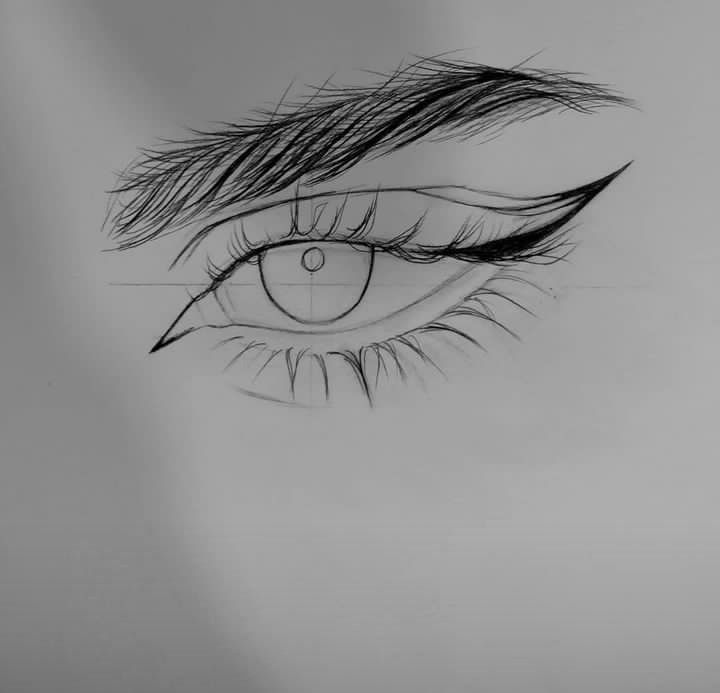
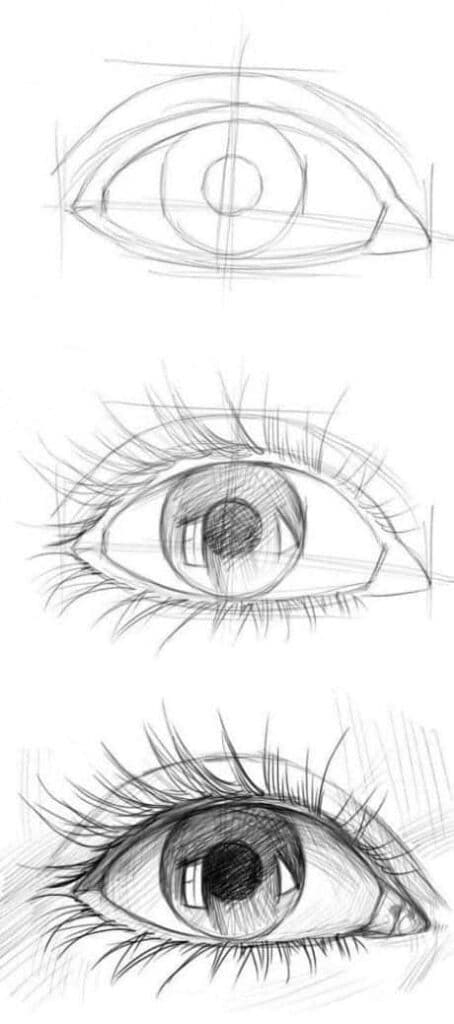
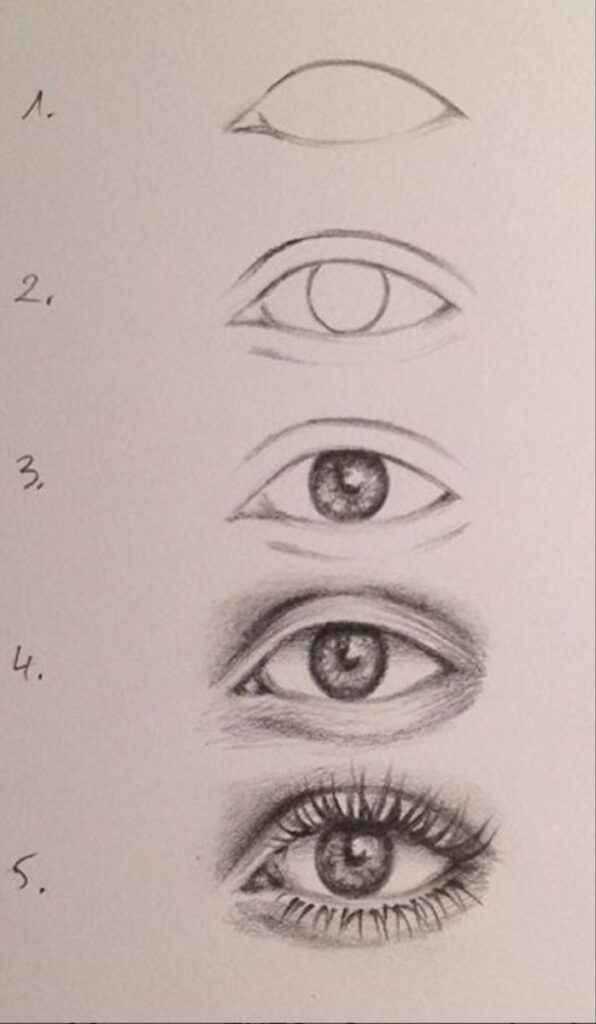
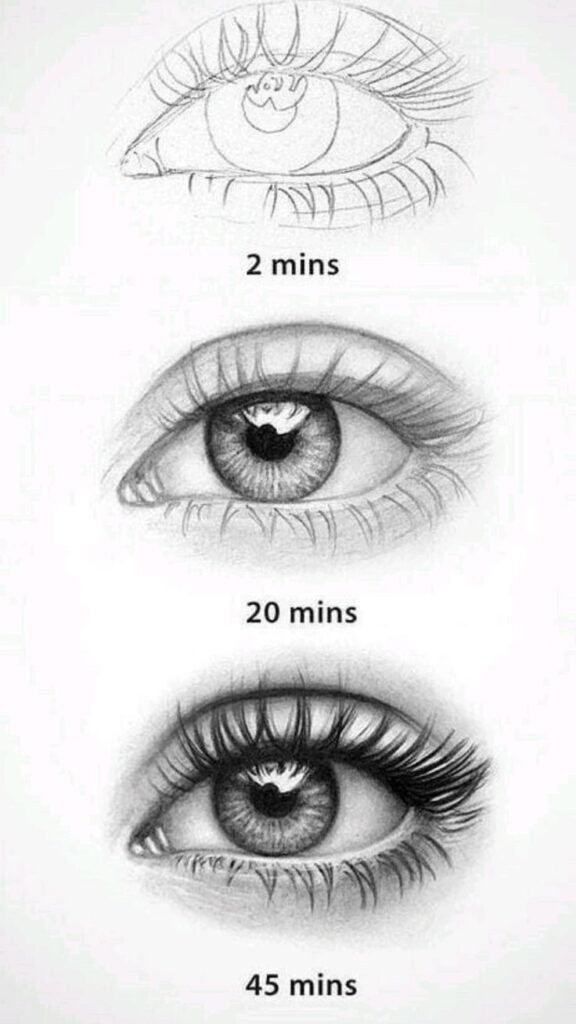
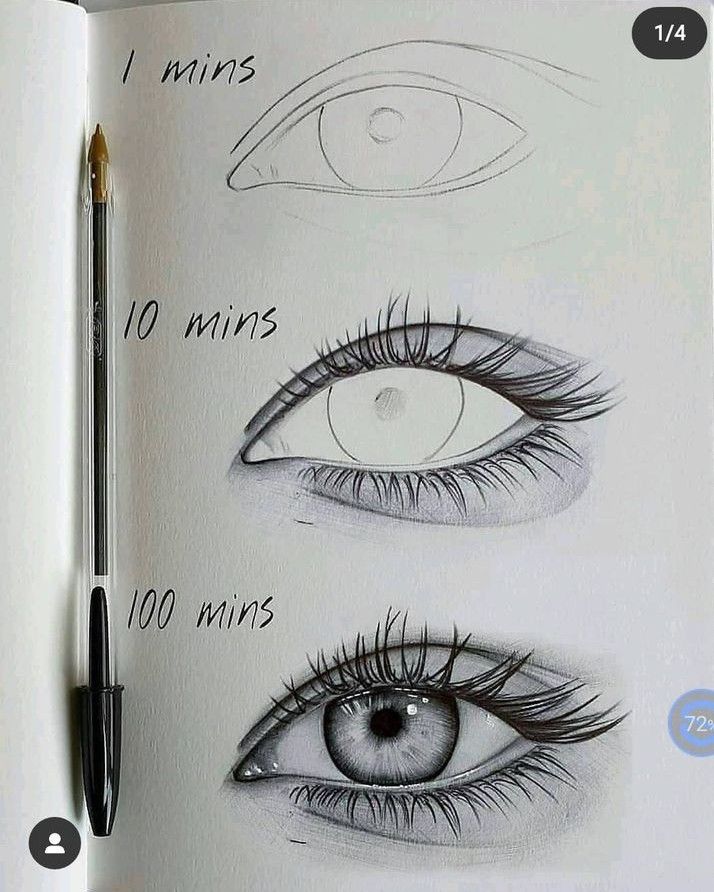
Begin with a simple horizontal oval or almond shape, which forms the basic outline of the eye. Draw lightly so you can easily erase and adjust as needed.
For proper proportions, remember that an average eye is approximately the width of five eyes across the face. Sketch a small circle in the center that will become your iris and pupil area later.
Add a faint horizontal line through the middle of your oval to help guide the placement of the iris and pupil. This reference line ensures your eye looks natural rather than surprised or droopy.
Remember that eyes aren’t perfectly symmetrical, so add slight variations to make your drawing more realistic.
Defining the Iris and Pupil
The iris is the colored part of the eye, while the pupil is the dark center. Draw the iris as a perfect circle within your eye outline, making sure it touches both the upper and lower lids.
Draw the pupil as a smaller black circle in the center of the iris. The pupil size varies depending on lighting conditions – larger in dim light and smaller in bright light.
Add radiating lines from the pupil outward through the iris, like spokes on a wheel. These represent the muscle structures in the iris. Vary the thickness and spacing of these lines for a natural look.
Apply shading to the iris, leaving a small reflection point (white spot) untouched to create the illusion of light reflecting off the eye.
Drawing Eyelids and Tear Duct
The eyelids frame the eye and give it expression. The upper lid has a slight curve that overlaps the iris, while the lower lid is generally flatter.
Add thickness to the eyelids by drawing a second line parallel to your original outline. This represents the edge where eyelashes will grow.
Draw the tear duct in the inner corner of the eye as a small, slightly curved triangle. This area is typically more pink and moist-looking than the rest of the eye.
Sketch eyelashes extending from the eyelids. Upper lashes are longer and curve upward, while lower lashes are shorter and point downward. Draw them in groups rather than individually for a more natural appearance.
Placing the Eyebrow
Position the eyebrow about one iris-width above the eye. The eyebrow typically starts above the tear duct and extends beyond the outer corner of the eye.
Draw the general shape first, usually thicker on the inner end and tapering toward the outer edge. Most eyebrows have a slight arch near the outer third of the eye.
Add individual hair strokes in the direction of growth – typically upward at the start, then outward toward the temple. Vary the length and direction slightly for realism.
Use light, feathery strokes rather than solid lines to capture the texture of eyebrow hairs. Remember that eyebrows frame the eyes and contribute significantly to facial expressions, so their shape should complement your eye drawing.
Techniques for Realistic Details
Mastering realistic eye drawings requires attention to specific details that bring your artwork to life. The right techniques for shading, blending, and creating eyelashes will transform a basic eye sketch into a captivating, lifelike representation.
Building Depth With Shading
Shading creates the dimensional quality that makes an eye appear three-dimensional. Start with identifying your light source, as this determines where highlights and shadows fall. The pupil should be the darkest part of your drawing, while the white of the eye (sclera) requires subtle shading.
Apply gradual pressure with your pencil for varied tones. The upper portion of the iris typically appears darker due to the shadow cast by the upper eyelid. This contrast helps create depth.
For realistic texture within the iris, add fine lines radiating from the pupil toward the outer edge. These “spokes” add authentic detail and dimension to your eye drawing.
Remember to include the shadow cast by eyelashes on the eye itself and the subtle shadow beneath the bottom lid.
Blending for Smooth Transitions
Blending transforms harsh pencil lines into smooth, realistic transitions. Use tools like blending stumps, tortillons, or even tissue paper to gently smudge your pencil work.
For the iris, blend in circular motions following the natural radial pattern. This technique preserves the directional strokes while softening them appropriately.
When blending the sclera (white of the eye), use an extremely light touch. Even the whitest part of the eye has subtle shading and isn’t pure white on paper.
Blend from dark to light areas, not the reverse. This prevents dragging too much graphite into your highlights.
Clean your blending tools frequently or rotate to a clean section. This prevents unwanted dark smudges in lighter areas of your drawing.
Creating Lifelike Eyelashes
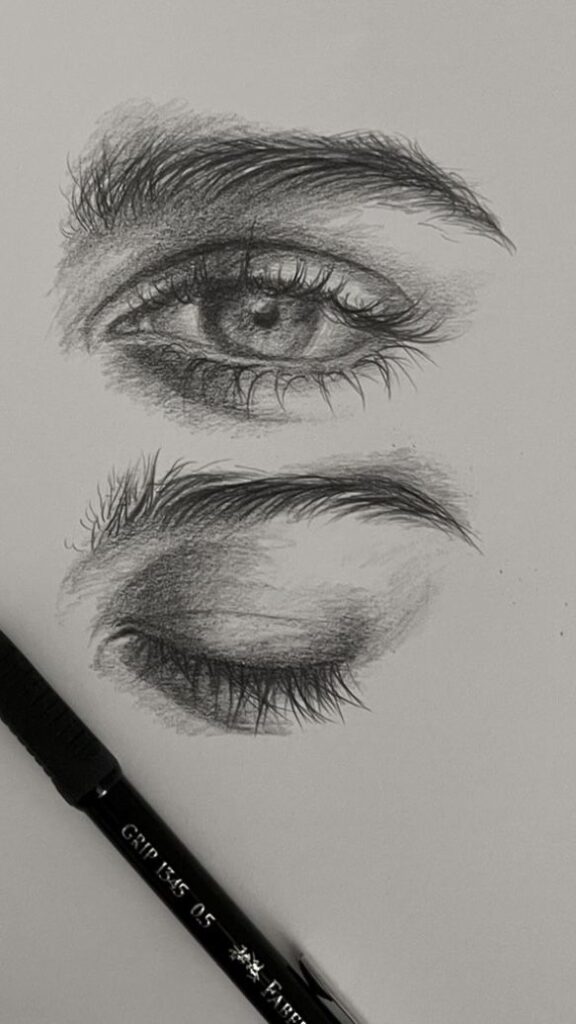
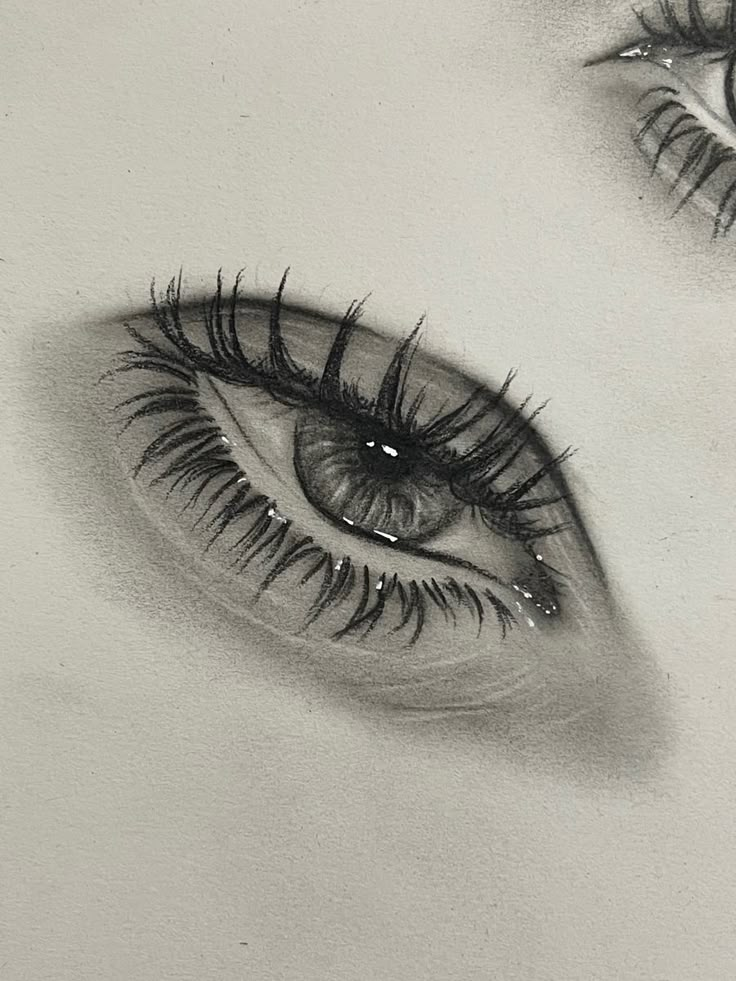
Eyelashes should never be drawn as uniform lines. Instead, draw them with varying thickness, length, and curvature. The base of each lash is thicker than its tip.
Draw lashes in small groupings rather than individually. Observe that upper lashes curve upward and outward, while lower lashes curve downward and are typically shorter and more sparse.
Eyelashes follow a directional pattern: lashes on the inner third of the eye curve inward, middle lashes point straight out, and outer lashes curve outward.
Use a sharp pencil for detailed work. Start with light pressure and gradually apply more toward the base of each lash.
Remember that eyelashes cast subtle shadows on the eye itself. Including these shadows adds significant realism to your drawing.
Finishing Touches and Refinement
The final stage of drawing a realistic eye requires careful attention to detail and subtle adjustments that bring your artwork to life. These finishing elements transform a basic sketch into a convincing representation with depth and character.
Highlighting and Reflected Light
Adding highlights to your eye drawing creates the illusion of a moist, reflective surface. Place a small, bright white highlight on the iris to show where light directly hits the eye. This highlight should be crisp with sharp edges.
Don’t forget secondary reflections. Real eyes often capture multiple light sources, so consider adding a smaller, less intense highlight elsewhere on the iris or cornea.
The white of the eye (sclera) isn’t actually pure white. Add very light shading to show its spherical shape, leaving the brightest areas where light would naturally hit.
Create depth by adding reflected light to the underside of the upper eyelid where light bounces off the eyeball. This subtle touch significantly enhances realism.
Perfecting the Eyebrows and Eyelashes
Eyebrows frame the eye and convey expression. Draw individual hairs rather than solid shapes for natural-looking eyebrows. Notice that eyebrow hairs grow in a specific direction—usually upward and outward.
Vary the pressure of your pencil to create thicker and thinner strokes within the eyebrows. This variation mimics the natural differences in hair thickness.
For eyelashes, remember they curve. Upper lashes curve upward and are typically longer and more numerous than lower lashes, which curve downward. Draw them in small groups rather than individually.
Avoid the temptation to make lashes too dark or uniform. Real eyelashes have varying thickness and spacing, with some appearing more prominent than others.
Final Adjustments and Review
Step back regularly to assess your drawing as a whole. Sometimes minor adjustments make a significant difference in realism.
Check the proportions once more. The iris should occupy about one-third of the eye’s height, and both the upper and lower eyelids should slightly overlap the iris.
Soften harsh lines where needed, especially around the tear duct and where the eyelids meet. In nature, few edges are completely sharp.
Add subtle shadowing beneath the eye to ground it and create dimension. This shadow indicates the eye is set into the face rather than floating on the surface.
Consider the direction of your light source and ensure all shadows and highlights remain consistent with it. Inconsistent lighting immediately breaks the illusion of realism.
- 78shares
- Facebook0
- Pinterest74
- Twitter4
- Reddit0

