Body sketching for fashion design is the foundation for creating clear and effective clothing illustrations. It helps designers show how clothes will fit and move on the human body. A good body sketch captures correct proportions and poses, making it easier to communicate design ideas clearly.
Many designers use simple shapes and lines to build accurate figures before adding clothing details. This method keeps the sketch balanced and flexible, allowing quick changes and creativity. Learning how to sketch bodies well makes the whole design process smoother and more fun.
By understanding key points like body proportions and posture, anyone can improve their fashion sketches. These basic skills give designers a strong base to bring their fashion ideas to life on paper.
Understanding Body Sketching Basics
Body sketching for fashion design starts with using the right tools, knowing basic anatomy, and mastering correct proportions. These parts work together to make sketches that show clothes clearly and attractively.
Essential Tools and Materials


A good sketch begins with simple, reliable tools. Most designers use pencils of various hardness, such as HB for light lines and 2B for darker outlines. Erasers are needed for corrections, and a sharpener keeps pencils ready.
Paper choice matters too. Smooth sketch paper helps make clean lines without smudging. Some designers prefer sketchpads with templates to speed up drawing.
Rulers and French curves help with straight lines and smooth shapes. Sometimes light markers or colored pencils are used to show fabric texture or add highlights.
Using these tools well creates clear and neat sketches. It makes the design easy to understand and bring to life.
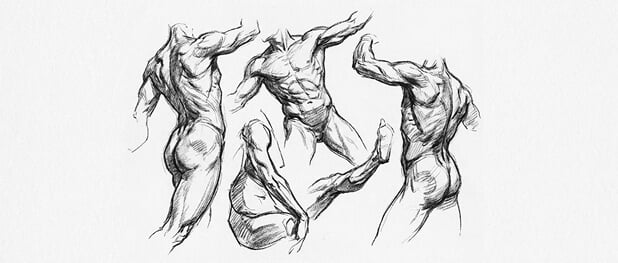
Basic Anatomy for Fashion Sketches


Understanding the human body is key to drawing clothes that fit right. Fashion sketches don’t need every muscle or detail, but designers should know basic body parts and joints.
Sketches usually focus on the torso, arms, legs, and head. Designers pay attention to how arms bend, where the waist sits, and how legs stand. This helps clothes look natural on the figure.
Some choose to elongate the body to make the design look elegant. This means stretching parts like legs and neck beyond normal size, but still keeping the general shape correct.


Knowing these anatomy basics makes sketches believable and helps convey how clothes will fit in real life.
Understanding Proportions and Balance


Proportions are about the size relationships of body parts. Fashion designers often follow the “9-head rule,” which means the figure’s height equals about nine times the length of the head. This helps create an idealized, stylized look.
Balance means drawing the body so it looks stable and natural. Weight distribution, posture, and alignment matter for this. A figure leaning too much one way can seem awkward or unrealistic.
Designers may exaggerate proportions for artistic reasons, but they keep the figure balanced so clothes appear wearable. A well-proportioned sketch helps viewers imagine the final outfit on a real person.
Step-by-Step Body Sketching Techniques
Body sketching in fashion design starts with capturing movement, correct proportions, and natural poses. Basic sketching methods help create a strong foundation for detailed work. Clear steps guide artists from quick gestures to refined croquis and dynamic model poses.
Gesture Drawing Methods


Gesture drawing focuses on capturing the flow and movement of the body quickly. Artists use loose, fluid lines to show the pose’s energy rather than details. This method helps to understand the body’s rhythm and balance.
Usually, sketches take less than a minute for each pose. The goal is to map the skeleton’s movement and major shapes like the head, torso, and limbs. It avoids rigid lines and prefers sweeping strokes to suggest motion.
Using gesture drawing regularly improves an artist’s ability to see the figure as a whole. It forms the base for more detailed and accurate drawings later on.
Drawing the Fashion Croquis


The fashion croquis is a simple, slender figure template used in design sketches. It helps designers place clothing correctly and maintain consistent proportions. Typically, croquis figures are 9 heads tall, longer than real human figures to stylize fashion looks.
Start by drawing a vertical line for the body’s center. Next, measure the head and divide the figure into equal parts for the neck, torso, hips, legs, and feet. Basic shapes like ovals and rectangles mark different body areas.
After placing these shapes, connect them smoothly to outline the body. The croquis should look balanced and ready for clothing designs without extra detail on muscles or facial features.
Posing Models for Fashion Illustration


Posing is key to making fashion sketches look natural and engaging. Artists study real models or photos to create believable stances that show fabric flow and garment fit. Poses often include slight bends in the knees, hips tilted, and arms relaxed or in use.


To build a pose, establish a strong base by positioning the feet and weight distribution. Then sketch the spine’s curve, which adds life and personality to the figure. This line influences everything from the shoulders to the hips.
Adding details like hand gestures or head tilt completes the pose. A well-pitched position highlights the clothes’ movement and fits the intended style.
Enhancing Fashion Sketches
Enhancing fashion sketches means making figures look lively, true to life, and unique. This involves showing movement, varying body shapes, and adding traits that match the design’s mood or style.
Adding Movement and Fluidity


Movement makes sketches feel more natural and dynamic. Designers often start with loose, curved lines to show the body’s flow and pose. Quick, light strokes help capture action without stiff poses.


Using gestures like a tilted head, bent elbows, or crossed legs adds realism. These small details show how fabric might react with movement, giving a better sense of the design’s fit and feel.
Varying line weight also helps. Thicker lines in key places suggest strength or shadow, while thinner lines show softer parts and details. This technique guides the viewer’s eyes through the sketch smoothly.
Sketching Different Body Types


Drawing varied body types is key to creating inclusive designs. Designers should practice proportions for different heights, widths, and shapes, not just the typical model figure.


Helpful tips include using basic shapes like ovals or rectangles to block out the body’s form. This step helps keep the sketch balanced before adding detail.
Adjusting the length of limbs, waist size, and shoulder width shows diversity. It also helps in imagining how clothes fit different people and enhances creativity when designing for real customers.
Incorporating Personality into Sketches


Adding personality lets the sketch tell a story or express a mood. Designers can use pose, facial expression, and styling to give the figure a unique vibe.
For example, a confident character might stand tall with hands on hips, while a more relaxed figure may have a casual, slouched stance. Simple changes in eye shape or mouth curve add emotion.


Color choices and textures also show mood. Bright colors can feel energetic, while soft, muted tones suggest calmness. These details help connect the viewer with the design’s spirit.
- 8.5Kshares
- Facebook0
- Pinterest8.5K
- Twitter3
- Reddit0


