The first flamingo I ever sketched fell over. Not literally, but on paper: I’d planted the leg dead-center under the tail instead of under the body’s actual mass, and the whole bird read like it was about to topple into the reeds. It took me a minute to realize the mistake, because it’s the same one I used to make blocking out car surfacing early in my career: get the mass placement wrong and no amount of clean linework saves the drawing.
A flamingo standing on one leg isn’t a trick of nature you can fake with a wobbly outline. It’s physics, and once you understand where the weight sits, the pose stops fighting you.
- Understanding the flamingo before you draw it
- Getting the proportions and balance right (a designer's approach)
- Step-by-step: how to draw a flamingo
- Drawing the flamingo from different angles
- Close-up details: beak, feathers, and eye
- Materials: traditional pencil vs. digital
- Coloring your flamingo with realistic color
- Common mistakes beginners make
- Conclusion
- FAQ
- What is the easiest way to draw a flamingo for beginners?
- How do you draw a flamingo standing on one leg without it looking off-balance?
- What pencil grade is best for realistic bird drawings?
- How do you get flamingo proportions right?
- What are the real colors of a flamingo's feathers?
- Can you draw a flamingo digitally on an iPad?
- How do you draw a flamingo in flight?
- Why do flamingos turn pink?
This guide walks through the full process: anatomy worth knowing before you pick up a pencil, proportions and balance the way a designer reads them, a numbered step-by-step build, multiple angles, materials (traditional and digital), and real feather color instead of flat pink.
Understanding the flamingo before you draw it
Why flamingos stand on one leg
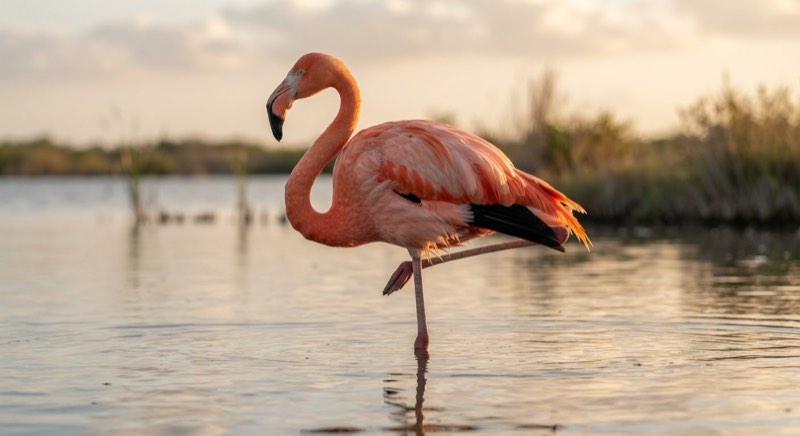
Nobody agrees completely on why flamingos do this. The leading theory is thermoregulation: tucking one leg up against the body cuts heat loss in cold water, and flamingos can lock the leg joint so it costs them almost no muscular effort to hold the pose for hours. What matters for drawing is simpler: the standing leg sits directly under the bird’s center of mass, not off to one side. Get that placement wrong and no amount of careful feather rendering will make the pose read as stable.
Species and color variation
Most references show the American (Caribbean) flamingo, the deepest pink of the six species, thanks to a diet heavy in shrimp and algae rich in carotenoids. If you’re working from a photo of a Chilean flamingo instead, expect paler, more gray-pink plumage and slightly different leg coloring (gray-pink rather than solid pink). Mixing reference photos from different species is a common reason a drawing looks “off” without anyone being able to say exactly why.
The skeletal structure a designer should actually know
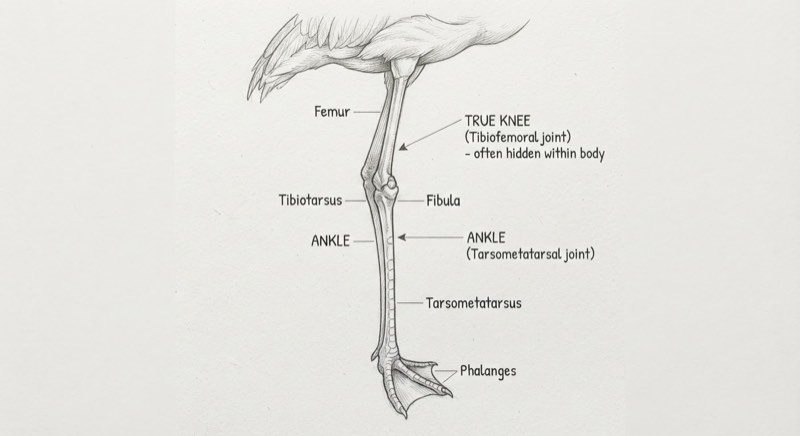
Here’s the detail that trips up almost everyone: that backward-bending “knee” partway down the leg isn’t a knee at all. It’s the ankle. The actual knee sits hidden up near the body, under feathers, and the long bone you’re drawing between the “knee” and the foot is really the equivalent of a human foot bone, elongated. Once you see the leg as ankle-down-to-toes instead of knee-down-to-foot, the proportions stop looking arbitrary and start making anatomical sense.
Getting the proportions and balance right (a designer’s approach)
Weight and center of gravity over the standing leg
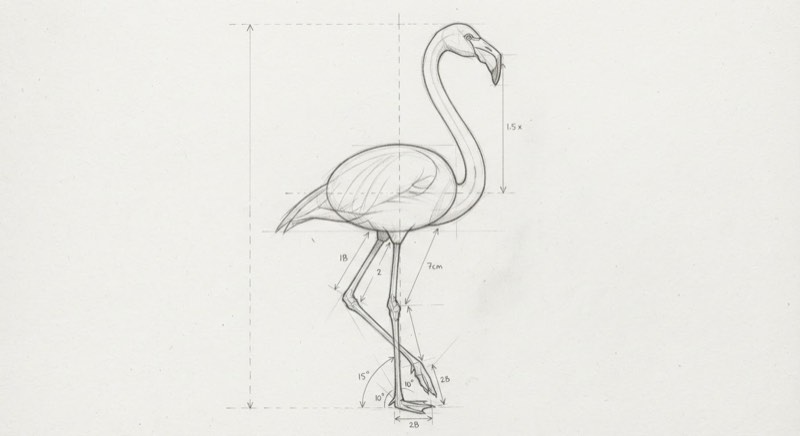
Before any linework, I mark one point on the page: where the leg meets the ground. Everything else in the drawing has to balance around that point the way a car’s silhouette has to balance around its wheelbase. Draw the egg-shaped body mass tilted slightly, with its densest area sitting roughly above that ground point, and the pose will look grounded even in a rough gesture sketch. Center the body over the tail instead, and you’ll fight the drawing for the rest of the process trying to make it look stable. It won’t.
Neck-to-body ratio
Most beginner flamingo drawings shortchange the neck. In reality, a flamingo’s neck is longer than its body, often by a noticeable margin, which is part of why the bird can reach down past its own legs to feed upside-down in shallow water. If your neck looks “long enough,” it’s probably still too short. Measure against the body oval you already drew: the neck, fully extended, should run close to one and a half times that oval’s length.
The S-curve mechanics of the neck
A single curved line reads as a broken neck, not a graceful one. The actual shape is two curves stacked: the neck bends away from the body first, then curves back toward the head, like a stretched-out letter S. I sketch this in one continuous stroke rather than in segments (hesitant, broken linework is what makes a neck look stiff even when the proportions underneath are correct).
Step-by-step: how to draw a flamingo
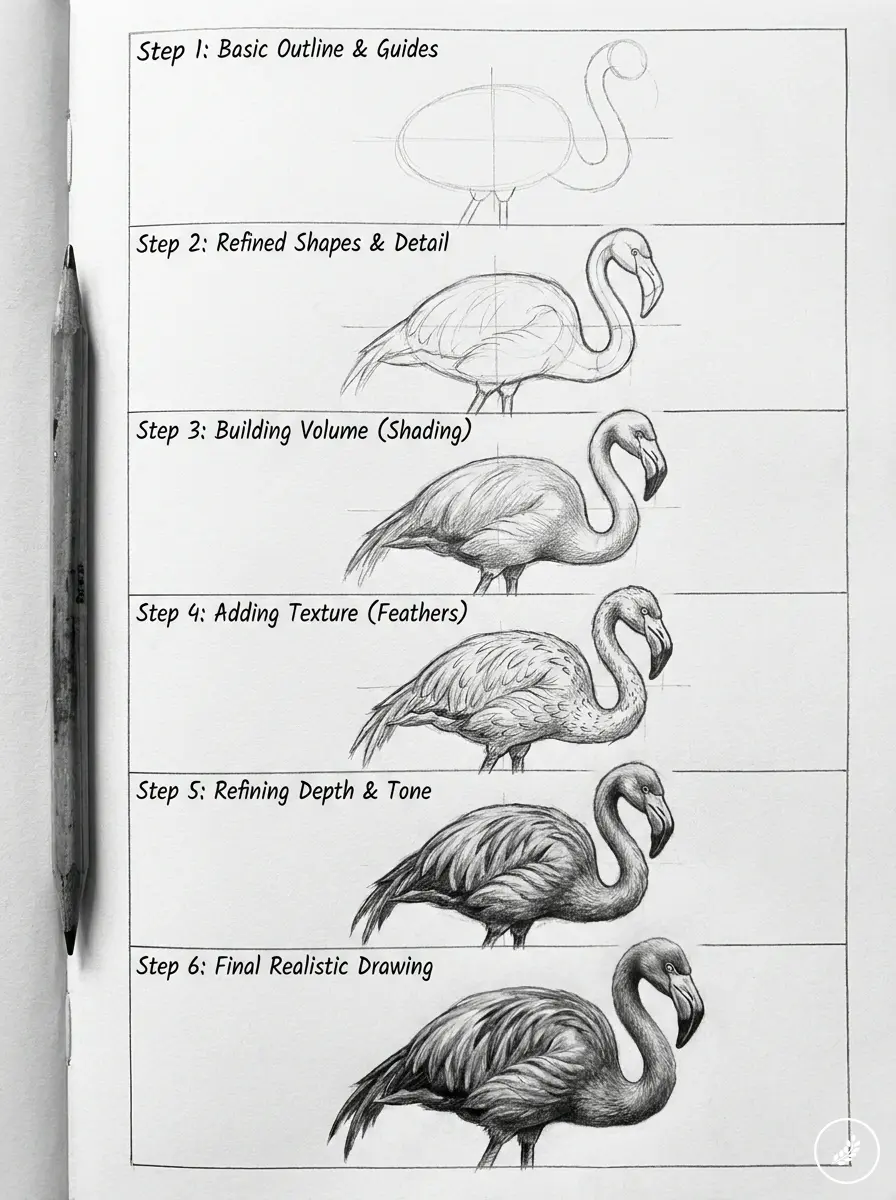
Step 1: Blocking the body mass and leg placement
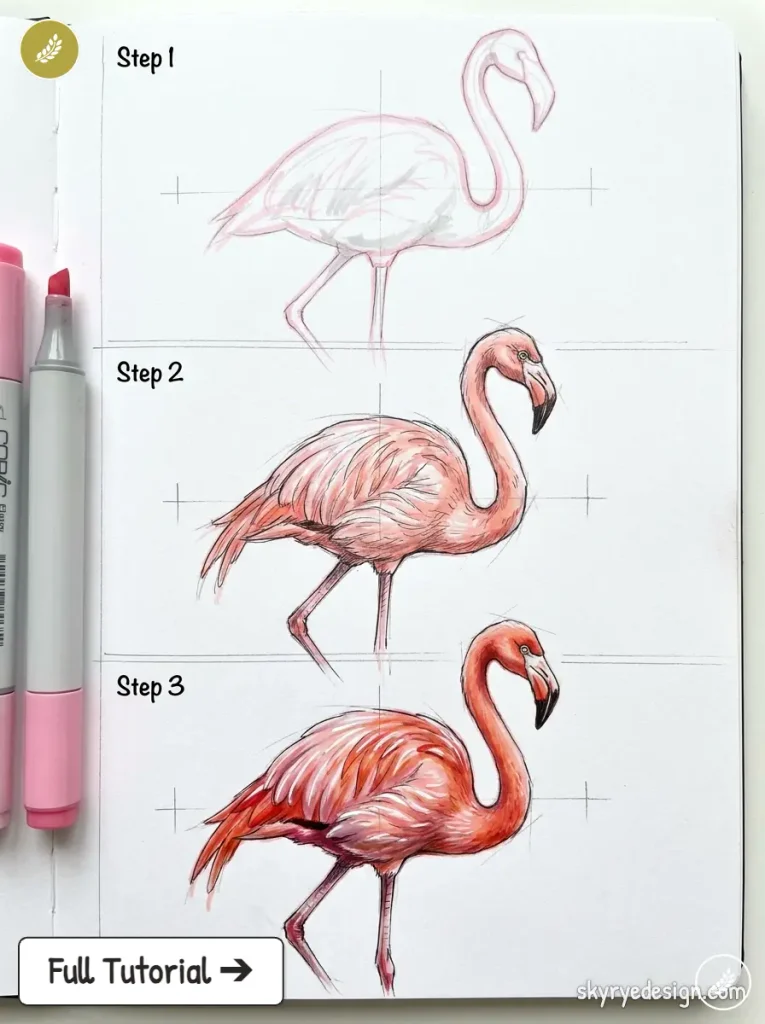
Start with an egg shape for the body, tilted slightly forward, wider at the bottom than the top. Mark your ground point directly beneath the body’s center of mass, then draw a single straight line down to it (this is your standing leg). Add a second, shorter line trailing up and back into the body for the tucked leg; it won’t touch the ground in most poses.
Step 2: Constructing the S-curve neck and head
From the top of the body oval, sketch the neck as two connected curves (away from the body, then back toward the head) using the one-and-a-half-times-body-length rule from the last section. Cap it with a small circle for the head, smaller than instinct tells you, roughly a third the size most people default to.
Step 3: Shaping the beak and eye
The beak bends downward partway along its length, almost like it’s hinged. Draw it as two flattened triangular shapes meeting at that bend, tapering to a rounded tip. Place the eye just above and behind the beak’s base, closer to the top of the head than the center.
Step 4: Wings, tail, and the second leg
Sketch the folded wing as a teardrop shape lying along the back half of the body, pointed toward the tail. Add short, layered tail feathers behind it. Refine the tucked leg from Step 1 so the foot rests naturally against the belly feathers, toes curled slightly.
Step 5: Cleaning up linework and finishing touches
Go over your construction lines with a slightly heavier, more confident stroke, committing to the final contour. Erase the guide lines you don’t need, but keep a few faint proportion marks if they help you stay consistent while adding feather texture in the next steps.
Drawing the flamingo from different angles
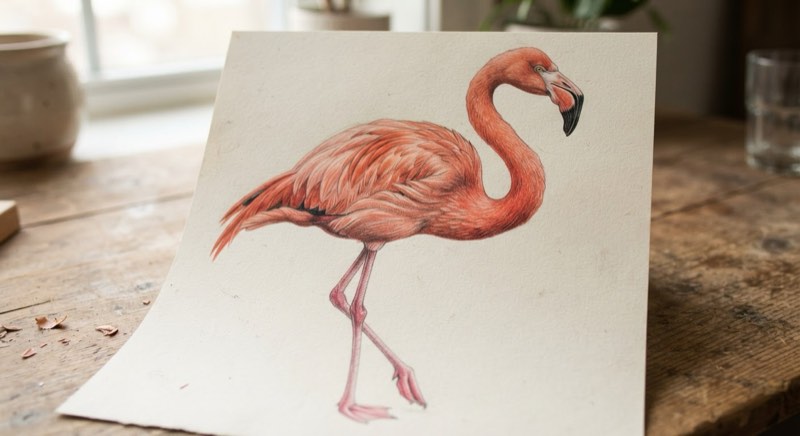
Side profile (the classic, most-searched pose)
Everything covered so far assumes this view, and it’s the right one to master first: the S-curve neck reads clearly, the one-leg balance is obvious, and the beak’s hook shape shows in full. It’s also the pose almost every tutorial online defaults to, which is exactly why it’s worth learning the other two.
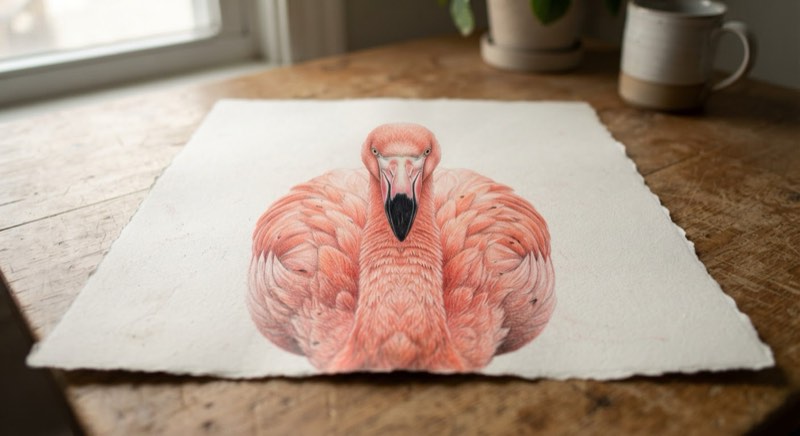
Front-facing view
This is the angle nobody covers, and it’s harder than it looks. The neck foreshortens into a shorter, thicker shape instead of the elegant S-curve, so you’re relying on shading to suggest the curve rather than drawing it as a clean line. Keep the body symmetrical around a vertical centerline, and pay close attention to the beak: from the front, it reads as a narrow wedge rather than the side profile’s hook.
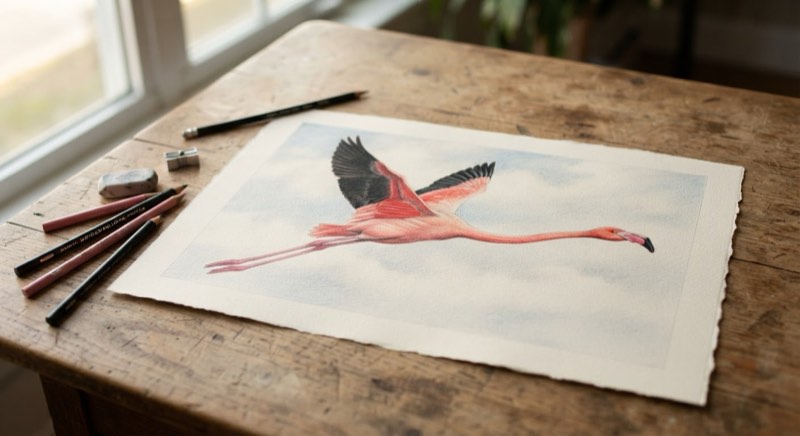
In-flight, wings spread
A flying flamingo changes almost everything about the pose. The neck extends straight out in front instead of curving, legs trail flat behind rather than supporting weight, and both wings spread wide, showing the black flight feathers that stay hidden when the bird is standing (a detail most reference photos of standing flamingos won’t show you at all). If you only draw the standing pose, you’re missing one of the most visually striking versions of this bird.
Close-up details: beak, feathers, and eye
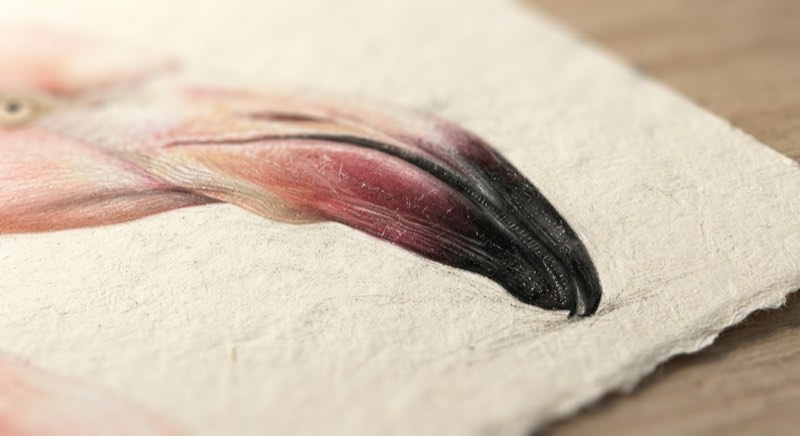
Beak anatomy and the two-tone black/pale coloring
A flamingo’s beak isn’t one solid color, and drawing it that way is one of the fastest ways to flatten an otherwise good sketch. The base, closer to the face, runs pale pink to cream. Past the bend, it shifts to black, sometimes with a hard edge, sometimes a soft gradient depending on the individual bird and the light. Filter-feeding flamingos actually hold their beaks upside-down in the water, which is worth knowing if you’re referencing feeding photos and wondering why the proportions look unfamiliar.
Feather texture and layering
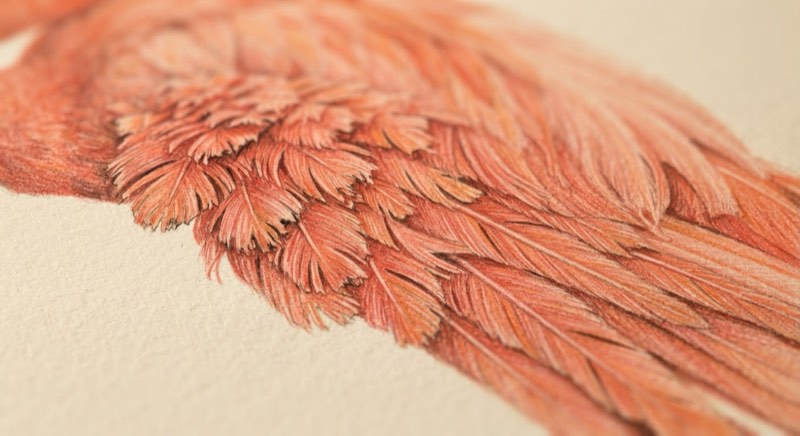
Resist the urge to outline every feather. Real flamingo plumage reads as layered clusters, not individual lines: work in short, overlapping pencil strokes that follow the direction feathers actually grow (down and back along the neck, fanning outward across the wing). Leave the densest texture where feathers overlap most, like the wing’s leading edge and the base of the tail, and let other areas stay comparatively smooth. That contrast does more for realism than uniform detail everywhere.
Materials: traditional pencil vs. digital
Pencils, paper, blending tools
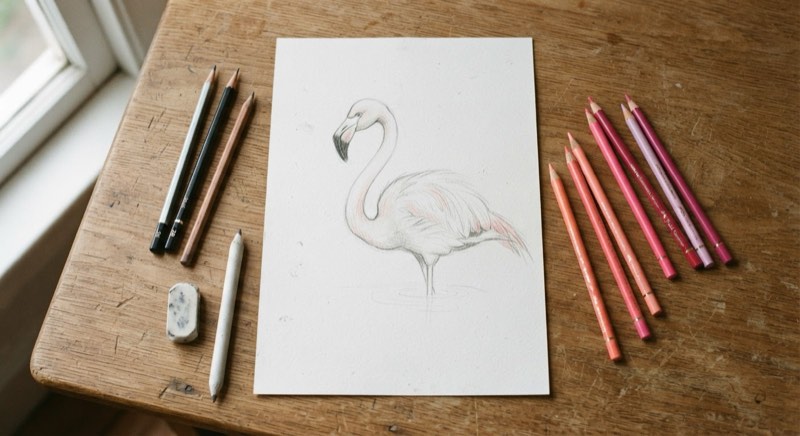
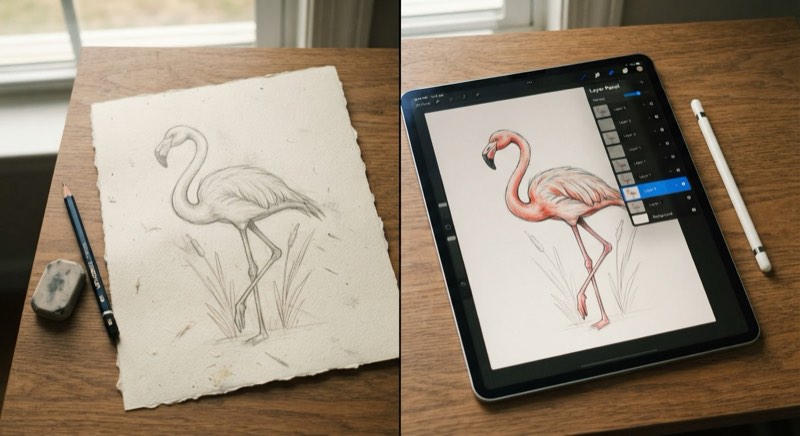
I keep the kit simple for this one: a 2H for construction lines (light enough to erase cleanly), an HB for the committed contour, and a 2B for shading and the darker beak tip. For colored work, Prismacolor Premier or Faber-Castell Polychromos both hold up well for feather layering, the pink/coral range especially. A blending stump helps soften the transition between the pale beak base and the darker tip without losing the hard edge entirely. Paper matters more than people think: a slightly toothy surface (cold-press watercolor paper works even for dry media) grips pigment better for the feather texture than smooth marker paper does.
Drawing digitally on iPad and Procreate
The same construction logic applies one-to-one on iPad, and honestly it’s forgiving in a way paper isn’t: block the gesture on a rough layer, lock its opacity down low, and build the final line on a layer above it without committing to anything permanently. For brushes, a basic HB pencil brush handles construction in Procreate; a soft airbrush or textured pencil brush works well for the feather layering pass. The real advantage isn’t the tool, it’s the undo button, especially while you’re still training your eye on where that leg needs to sit.
Coloring your flamingo with realistic color
Real flamingo pink/coral shades (and why pure pink looks fake)
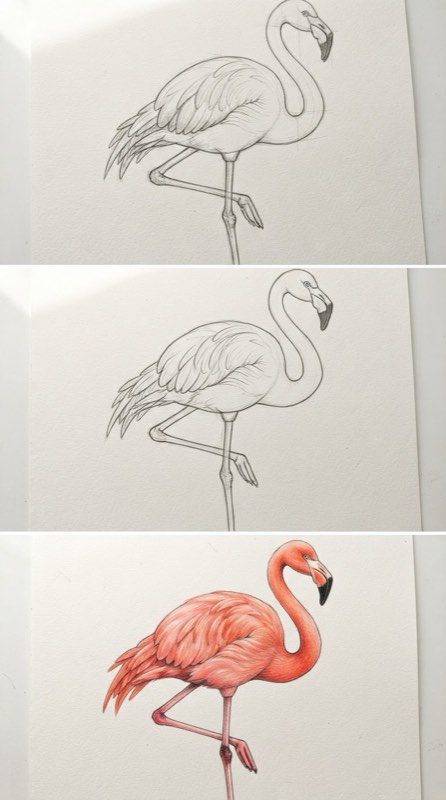
Straight-out-of-the-tube pink is the single fastest way to make a flamingo drawing look like clip art instead of an actual bird. Real plumage shifts across a range: pale salmon on the neck and body, deepening to a more saturated coral-pink across the wing coverts, with the black flight feathers only showing at the very edges when the wing is folded. Layer at least two or three pink tones rather than one flat color, building the deepest saturation where feathers overlap most (the same areas you’d have textured heaviest in the close-up section above).
Rendering the leg and beak color transitions
Legs aren’t uniformly pink either. They tend to run a grayish pink through the upper section, shifting toward a more solid, slightly duller pink at the joint and down through the foot. For the beak, work the pale-to-black transition as a gradient rather than a hard line unless your reference photo specifically shows a sharp edge (it varies by individual bird and lighting). A light gray or cool pink underlayer beneath the black tip keeps it from reading as a flat, dead black shape.
Common mistakes beginners make
The single most common one: leg placement. Center the standing leg under the tail instead of under the body’s actual mass, and the whole drawing reads as off-balance no matter how clean the linework is elsewhere. Fix it by marking the ground point first, before you commit to the body shape.
Second: a straight or single-curve neck. One smooth arc looks broken, not graceful. It needs the two-part S-curve covered earlier, sketched in one continuous stroke rather than built from hesitant segments.
Third: an oversized head. Instinct pushes people to draw the head bigger than it should be, because a small head can look “wrong” in isolation. Measure it against the body oval, not against what feels right.
Fourth: flat, single-tone coloring. A pure pink flamingo with no tonal variation reads as a cartoon or a clip-art asset, not a rendered bird. Even a quick sketch benefits from at least two pink values and a gradient beak instead of a flat black tip.
Fifth, and easy to overlook: skipping species reference entirely and mixing details from different flamingo species in the same drawing. A Caribbean flamingo’s saturated pink next to a Chilean flamingo’s paler legs, in the same piece, is a small inconsistency that quietly undermines the whole drawing.
Conclusion
Balance and the neck curve do most of the work here. Get the leg placement right under the body’s actual weight, get the S-curve neck built from two connected arcs instead of one, and the drawing holds together even before you touch color or texture. Everything past that (beak shading, feather layering, the angle you choose) is refinement on a pose that already reads correctly.
If you’re working from a photo, pick one flamingo, one species, one angle to start, and let the anatomy sections above guide where the weight and curves actually sit rather than relying on instinct alone. Once the side profile feels solid, the front-facing and in-flight versions are the same principles applied to a different silhouette, not a new skill.
FAQ
What is the easiest way to draw a flamingo for beginners?
Start with the side profile, not the front view or in-flight pose. Block the body as a tilted egg shape, mark where the standing leg meets the ground directly under that mass, then build the neck as two connected curves rather than one arc. Get those two things right and the rest (beak, wings, feather detail) is just refinement on a pose that already looks stable.
How do you draw a flamingo standing on one leg without it looking off-balance?
Mark your ground point first, before drawing the body. The standing leg needs to sit directly beneath the body’s center of mass, not under the tail, which is the most common placement mistake. Flamingos can lock that leg joint and hold the pose with almost no muscular effort, but on paper it only reads as stable if the weight is stacked correctly above the foot.
What pencil grade is best for realistic bird drawings?
A 2H for light, erasable construction lines, an HB for the committed final contour, and a 2B for shading and darker details like the beak tip. For colored work, Prismacolor Premier or Faber-Castell Polychromos hold up well across the pink-to-coral range you need for realistic feather layering.
How do you get flamingo proportions right?
Measure the neck against the body oval you draw first: fully extended, it should run close to one and a half times the body’s length, since real flamingo necks are longer than most people assume. Keep the head small, roughly a third the size instinct suggests, and build the leg from the ankle joint down (that backward-bending “knee” is actually the ankle) rather than treating it like a human leg.
What are the real colors of a flamingo’s feathers?
Not flat pink. Expect pale salmon across the neck and body, deepening to a more saturated coral-pink on the wing coverts, with black flight feathers hidden along the folded wing’s edge. Caribbean flamingos run deeper pink from a carotenoid-rich diet; Chilean flamingos are paler and more gray-pink, including in the legs, so match your palette to the species in your reference photo.
Can you draw a flamingo digitally on an iPad?
Yes, and the same construction approach applies directly: block the gesture on a low-opacity layer, then build finished linework above it on a separate layer. A basic pencil brush handles construction in Procreate; a soft airbrush or textured pencil brush works well for feather layering. The main advantage over paper is the undo button while you’re still training your eye on leg placement.
How do you draw a flamingo in flight?
The pose changes almost everywhere: the neck extends straight forward instead of curving into an S, the legs trail flat behind rather than bearing weight, and both wings spread wide, revealing black flight feathers that stay hidden when the bird is standing. Most standing-flamingo reference photos won’t show you this detail, so pull a dedicated in-flight reference before attempting it.
Why do flamingos turn pink?
Diet. Flamingos eat shrimp, algae, and other food sources rich in carotenoid pigments, which get metabolized and deposited into their feathers over time. A flamingo raised without that diet (in captivity, for example) can actually be pale gray or white, which is part of why matching your reference photo’s species and likely diet matters for getting the color believable.
- 14shares
- Facebook0
- Pinterest14
- Twitter0
- Reddit0