Drawing cats can be a fun and rewarding activity for both beginners and experienced artists. Cats are a popular subject for artists due to their unique physical features and personalities. Whether you are looking to improve your drawing skills or simply enjoy the process of creating art, learning how to draw cats can be a valuable skill to have.

One of the first things to consider when drawing cats is their anatomy. Understanding the basic structure of a cat’s body can help you create more accurate and realistic drawings. This includes the shape and placement of the head, ears, eyes, nose, mouth, and body. It is also important to pay attention to the details, such as the texture of their fur and the way their paws are positioned.
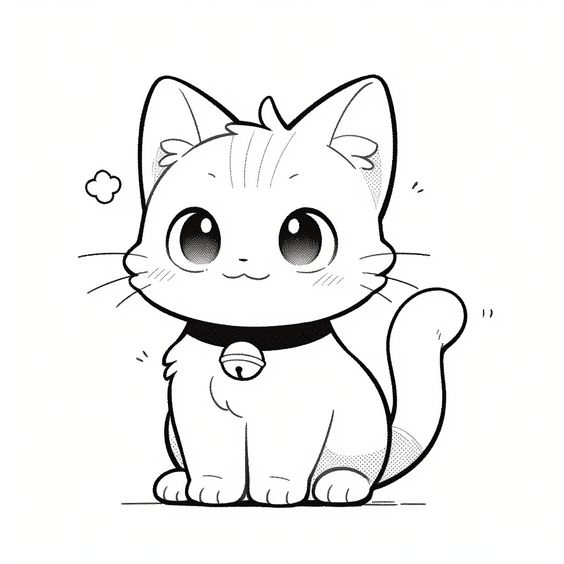

Another important aspect of drawing cats is capturing their personality and character. Cats have a wide range of expressions and behaviors, from playful and curious to sleepy and aloof. By observing cats in real life or in photographs, you can learn how to capture their unique personalities in your drawings. With practice and patience, anyone can learn how to draw cats and create beautiful works of art.
Understanding Cat Anatomy

Basic Cat Structure
To draw cats accurately, it is important to have a basic understanding of their anatomy. Cats have a compact and muscular body structure, with a head that is proportionally larger than their body. Their legs are relatively short, and they have retractable claws that they use for hunting and climbing. The tail is also an important feature of a cat’s body, used for balance and communication.
Detailed Study of Cat Features
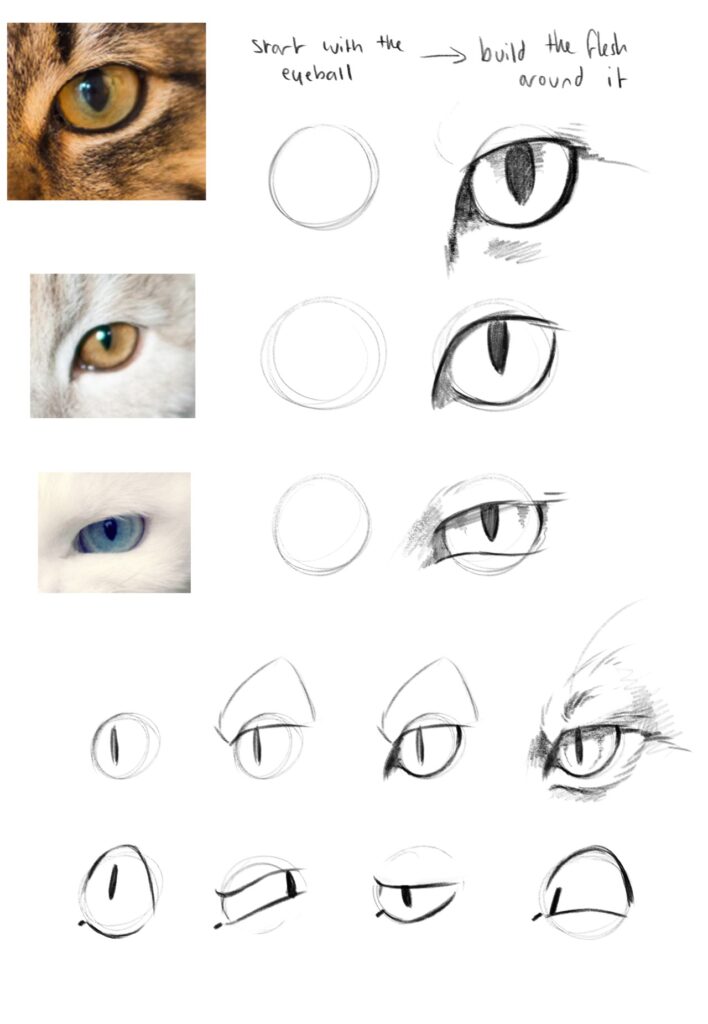

When drawing a cat, it is important to pay attention to their features. The cat face is one of the most important features to get right. It is relatively small compared to their head, and has a triangular shape.

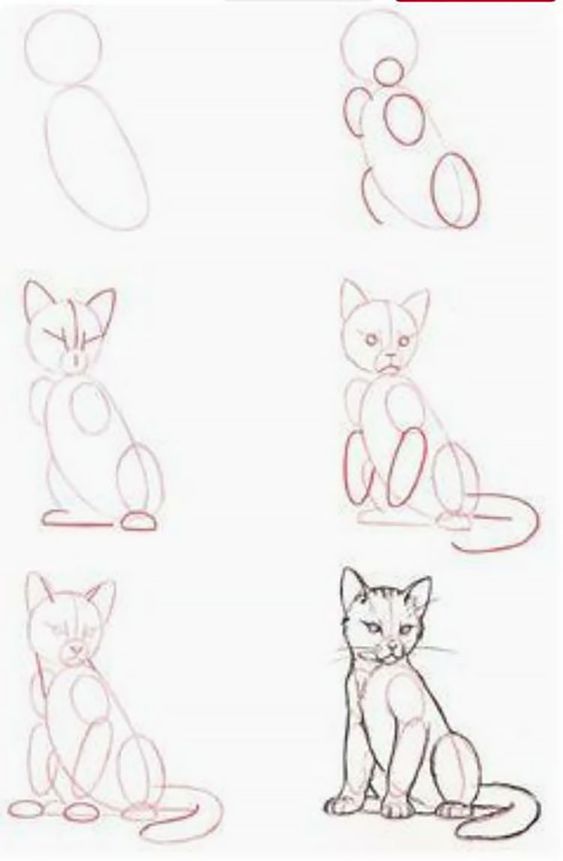
The eyes are large and round, and are usually located towards the front of the face. The ears are also important to get right, as they are large and pointed, and can be moved independently to convey different emotions.
Cat Breeds Variations
There are many different cat breeds, each with their own unique characteristics. One of the largest cat breeds is the Maine Coon, which can weigh up to 25 pounds. The lion is also a type of cat, and is the second largest cat species in the world. When drawing different cat breeds, it is important to pay attention to their specific features, such as the shape of their ears or the length of their fur.


In summary, understanding cat anatomy is crucial for drawing cats accurately. Paying attention to their basic structure, features, and breed variations can help you create a realistic and detailed drawing.
Getting Started with Drawing Cats

Essential Art Materials
Before starting to draw a cat, it is important to have the right art materials. Here are some essential materials you will need to get started:
- Pencils: A set of pencils ranging from 2H to 6B will give you a range of tones to work with.
- Eraser: A kneaded eraser is best for drawing as it can be shaped to suit the area you need to erase.
- Sketchbook: A sketchbook is a great place to start practicing your cat drawing skills. Choose one with good quality paper that can handle erasing and shading.
- Reference Images: It’s always helpful to have reference images for the cat you want to draw. You can find these online or take your own photos.
Setting Up Your Workspace
Having a comfortable and organized workspace is important for successful cat drawing. Here are some tips to set up your workspace:
- Lighting: Make sure you have good lighting to see your drawing and reference images clearly. Natural light is best, but if that’s not possible, use a bright lamp.
- Comfortable Seating: Drawing can take time, so make sure you have a comfortable chair to sit in.
- Organized Materials: Keep your art materials organized and within reach. This will save you time and frustration. Use a pencil case or storage box to keep everything together.
With the right art materials and a comfortable workspace, you are ready to start drawing cats!
Drawing Techniques and Styles

Scribble Gesture Drawing
Scribble gesture drawing is a quick and effective way to capture the essence of a cat’s movement and posture. This technique involves making rapid, loose marks on paper to create a rough outline of the cat’s form. It is important to focus on the overall shape and movement of the cat, rather than trying to capture every detail.
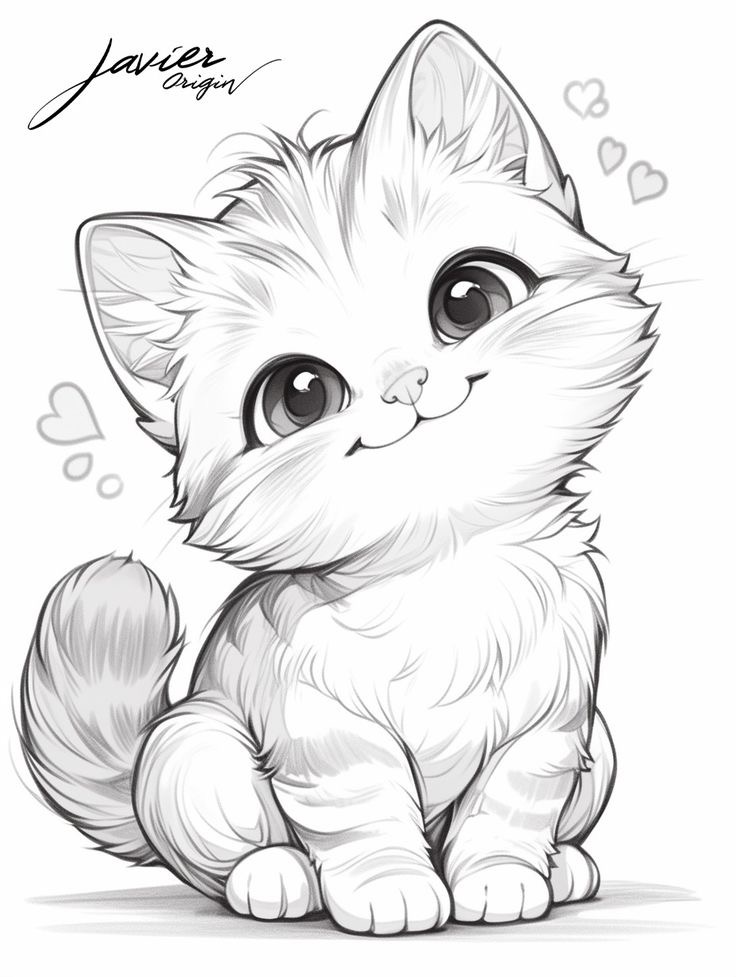
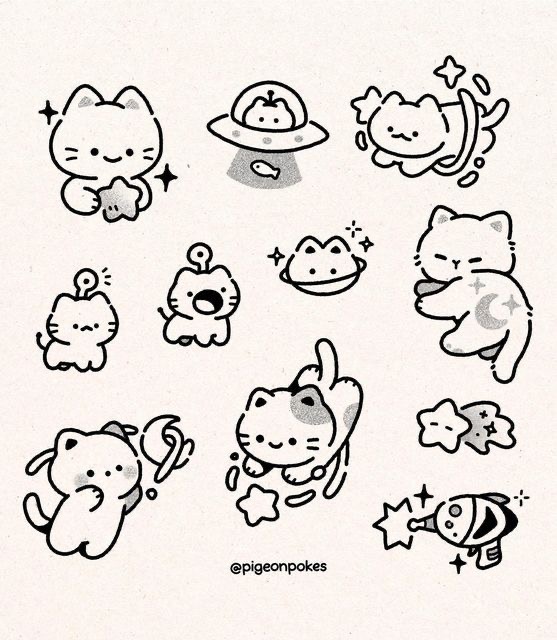
To start, lightly sketch the basic shape of the cat’s body using quick, fluid strokes. Then, add in the details of the cat’s features, such as the eyes, ears, and tail. Use bold, confident strokes to convey the cat’s energy and personality.
Stick-Figure Sketching
Stick-figure sketching is a simple and effective way to plan out the proportions and positioning of a cat before adding in the details. This technique involves sketching a basic stick-figure outline of the cat’s body, using simple lines to represent the limbs, head, and tail.

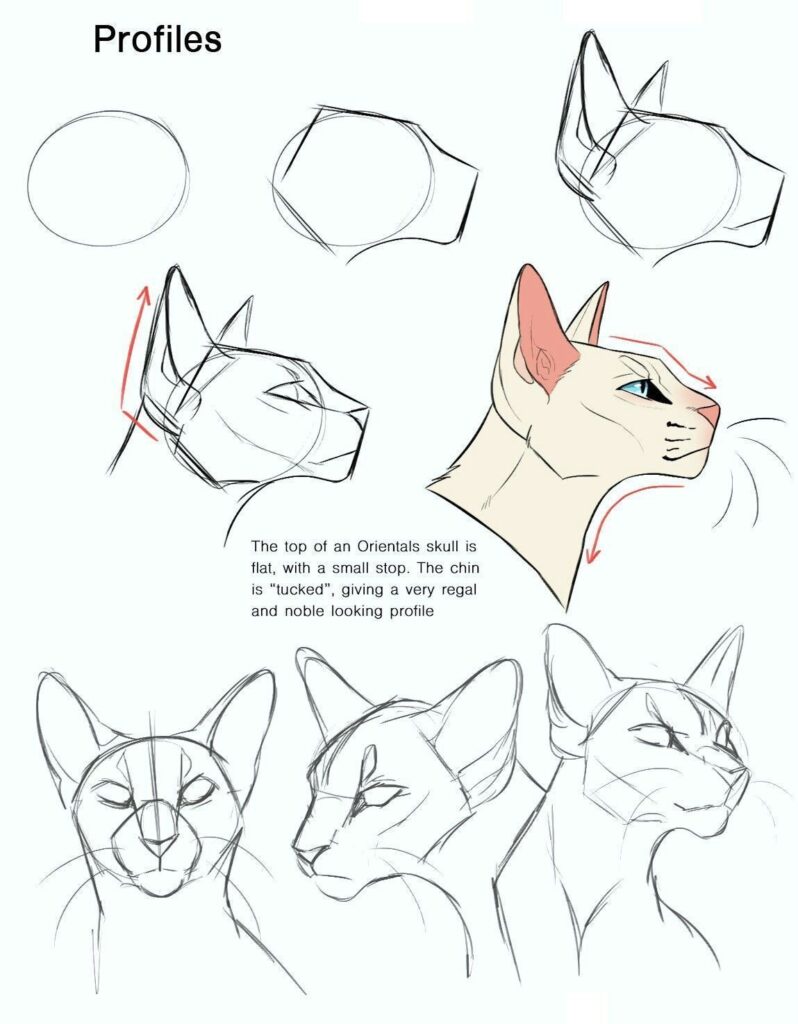
Once the stick-figure is in place, you can begin adding in the details of the cat’s features, such as the eyes, ears, and fur. This technique is especially useful for capturing the cat’s pose and movement, as it allows you to focus on the overall structure of the cat’s body.
Quick Sketching Methods
Quick sketching methods are ideal for capturing the cat’s movement and energy in a spontaneous and lively way. These techniques involve using rapid, gestural marks to create a loose, impressionistic drawing of the cat.
One quick sketching method is to use a continuous line, drawing the cat’s form in one fluid motion without lifting the pen from the paper. Another method is to use bold, confident strokes to capture the cat’s energy and personality.
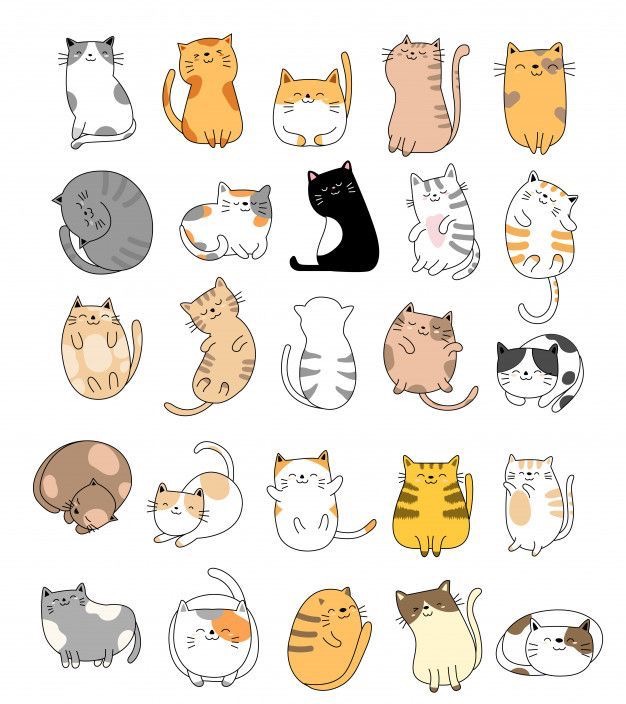

With these drawing techniques and styles, anyone can improve their drawing skills and create beautiful drawings of cats. Whether you prefer the loose, spontaneous marks of scribble gesture drawing or the structured simplicity of stick-figure sketching, there is a technique that will work for you.
Step-by-Step Guide to Drawing Cats

Drawing cats can be a fun and rewarding experience for artists of all skill levels. With a few basic techniques and some practice, anyone can learn how to draw a cat. This step-by-step guide will walk you through the process of creating a realistic cat drawing.
Creating the Basic Outline
The first step in drawing a cat is to create a basic outline. Start by drawing a circle for the head and a larger oval for the body. Next, add the legs and tail to the body. Make sure to pay attention to the proportions of the cat’s body, as this will help you create a realistic drawing.
Once the basic outline is complete, start adding details to the face and body. Draw the eyes, nose, and mouth, and add some fur texture to the ears. Use light, sketchy lines at this stage, as you will be refining the drawing in later steps.
Adding Details and Textures
With the basic outline in place, it’s time to start adding details and textures to the drawing. Use a blending stump to smooth out the sketchy lines and create a more refined look. Pay attention to the direction of the fur and use short, quick strokes to create a realistic texture.


Next, add shading to the drawing to create depth and dimension. Use a light source to determine where the shadows should fall, and use a blending stump to blend the shading into the fur. This will help create a more realistic look and give the drawing a sense of depth.
Finalizing the Cat Drawing
The final step in drawing a cat is to refine the details and make any necessary adjustments. Use a kneaded eraser to remove any unwanted lines and clean up the drawing. Add some final details, such as whiskers and paw pads, to complete the drawing.


Overall, drawing a cat is a fun and rewarding experience that anyone can enjoy. With some practice and these basic techniques, you can create a realistic cat drawing that you can be proud of.


Mastering Cat Poses and Movements

Capturing Static Poses
When drawing cats, it is important to capture their unique poses and body language. A cat’s posture can convey a range of emotions, from relaxation to alertness. To accurately depict a cat’s pose, it is important to pay attention to their body balance. A cat’s center of gravity is located in their torso, so their weight is distributed evenly between their four paws. This means that when a cat is standing, their front and hind legs should be spaced apart evenly.
When drawing a cat’s pose, it is important to consider their vision. Cats have a wide field of vision, which allows them to see prey and predators from all angles. This means that they can turn their heads up to 180 degrees, and their eyes are positioned on the front of their face, giving them binocular vision. To capture a cat’s gaze, it is important to focus on their eyes and the direction they are looking.
Depicting Movement and Action
Cats are known for their agility and speed, so capturing their movements and actions can add a dynamic element to your drawings. When a cat jumps or climbs, they use their powerful hind legs to propel themselves forward. This means that their hind legs will be extended while their front legs are bent, ready to land. To capture this movement, it is important to pay attention to the placement of their legs and the direction of their body.
When drawing a cat in motion, it is important to consider their balance. Cats are able to maintain their balance even when jumping or running at high speeds, thanks to their flexible spine and powerful leg muscles. To capture this balance, it is important to pay attention to the position of their body and the placement of their paws.
Overall, mastering cat poses and movements requires careful observation of their unique anatomy and behavior. By paying attention to their balance, vision, and movements, you can create dynamic and accurate drawings of these fascinating creatures.
Practical Drawing Exercises

Practice with Reference Photos
One of the most effective ways to improve drawing skills is to practice drawing from reference photos. Reference photos provide a clear and detailed image of the subject, allowing the artist to focus on specific details and aspects of the subject.
To practice with reference photos, start by selecting a high-quality photo of a cat. Take the time to study the photo and identify the key features of the cat, such as the shape of the head, the position of the ears, and the texture of the fur. Then, begin to sketch the cat, paying close attention to these details.
As you practice, try to vary the angles and positions of the cat in the photos you use. This will help you develop a better understanding of the cat’s anatomy and how it moves. Additionally, consider using different mediums, such as pencils, charcoal, or markers, to challenge yourself and develop a wider range of skills.
Repetitive Drawing for Skill Improvement
Another effective way to improve drawing skills is through repetitive drawing exercises. These exercises involve drawing the same subject multiple times, focusing on different aspects of the subject each time.


To begin, select a simple image of a cat, such as a cartoon or line drawing. Then, draw the image several times, focusing on different aspects each time. For example, one drawing could focus on the cat’s eyes, while another could focus on the shape of the head.
As you continue to practice, gradually increase the complexity of the subject matter. This will help you develop a wider range of skills and improve your ability to capture the unique characteristics of different cats.
By incorporating these practical drawing exercises into your routine, you can develop the skills and techniques needed to create accurate and compelling cat drawings.
Advanced Drawing Techniques

Understanding Light and Shadow
One of the most important aspects of drawing realistic cats is understanding how light and shadow work. By mastering this technique, you can create depth and dimension in your drawings. When drawing cats, it’s important to pay attention to the direction of the light source and how it affects the different parts of the cat’s body.
To create realistic shading, start by identifying the light source and then use a range of values to show the areas of light and shadow. Use darker values to show areas of the cat’s body that are in shadow, and lighter values to show areas that are in direct light. By blending these values together, you can create a smooth transition between light and shadow.
Creating Realistic Fur and Textures
Another important aspect of drawing cats is creating realistic fur and textures. To do this, pay close attention to the direction and texture of the cat’s fur. Use short, quick strokes to create a sense of texture and movement in the fur.
When drawing fur, it’s important to vary the length and thickness of your strokes to create a sense of depth and dimension. Use lighter strokes to show areas of fur that are in direct light, and darker strokes to show areas that are in shadow. By layering these strokes together, you can create a realistic sense of fur texture.
In addition to paying attention to the texture of the fur, it’s also important to pay attention to the texture of other parts of the cat’s body, such as the nose and ears. Use a range of values to create a sense of depth and dimension in these areas, and pay attention to the way that light and shadow affect them.
By mastering these advanced drawing techniques, you can create realistic and lifelike drawings of cats that capture their unique beauty and personality.
Troubleshooting Common Drawing Challenges

Fixing Proportions and Symmetry
One of the most common challenges that artists face when drawing cats is getting the proportions and symmetry right. It can be frustrating to spend hours on a drawing only to realize that the head is too big or the legs are too short. Fortunately, there are a few tips and tricks that can help.
First, it’s important to start with a rough sketch that establishes the overall shape and proportion of the cat. This can be done using basic shapes like circles and rectangles. Once the rough sketch is in place, the artist can begin to refine the details and adjust the proportions as needed.
Another helpful technique is to use a grid or reference lines to ensure that the various parts of the cat are in proportion. For example, the artist might draw a line down the center of the cat’s face to ensure that the eyes are evenly spaced and the nose is centered.


When it comes to symmetry, it’s important to remember that cats are not perfectly symmetrical creatures. However, there are certain elements of the cat’s anatomy that should be symmetrical, such as the eyes and ears. Using reference lines and careful observation can help the artist achieve a more symmetrical drawing.
Overcoming Artist’s Block
Even the most skilled artists sometimes experience artist’s block, a phenomenon where they feel stuck and unable to create. When this happens, it can be helpful to take a step back and approach the drawing from a different angle.
One technique is to simply start drawing without worrying about the end result. This can help to loosen up the artist’s hand and get the creative juices flowing. Another technique is to take a break and do something completely unrelated to drawing, such as going for a walk or listening to music.
It can also be helpful to experiment with different drawing techniques and materials. For example, the artist might try using a different type of pencil or switch to a different medium like charcoal or ink. Sometimes, simply changing up the tools and techniques can help to break through artist’s block and inspire new ideas.
By following these tips and techniques, artists can overcome common drawing challenges and create beautiful cat sketches that showcase their drawing skills.
- 2.4Kshares
- Facebook0
- Pinterest2.4K
- Twitter1
- Reddit0


