Ever gazed into the peaceful eyes of a sea turtle, or watched a tortoise slowly amble along, and thought, “I wish I could capture that serenity on paper”? Well, guess what? You absolutely can! Learning how to draw a turtle isn’t just for seasoned artists. It’s a fantastic, relaxing, and rewarding journey for anyone, regardless of their artistic background.
Whether you dream of sketching a cute cartoon turtle or a majestic, lifelike sea creature, this guide is your go-to resource. We’re going to dive deep, breaking down the process into easy, manageable steps that will have you creating your own shelled masterpieces in no time. Forget about perfection; focus on the fun, and let’s get those creative juices flowing!

Why Draw a Turtle?
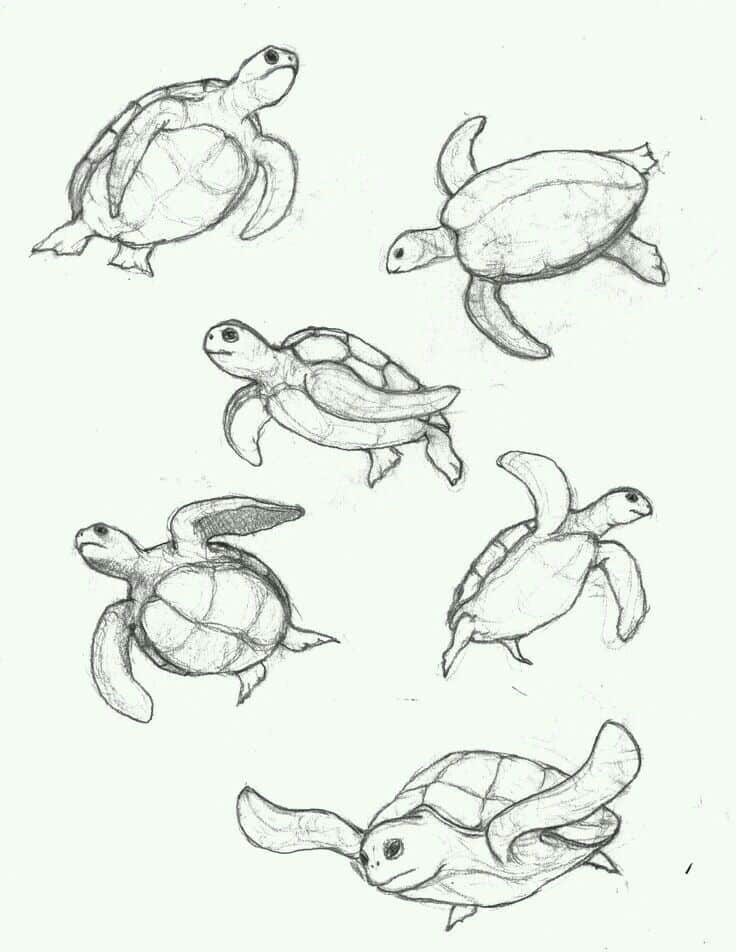
Turtles are universally loved. They symbolize wisdom, longevity, and peace across many cultures. Their unique anatomy, from the intricate patterns on their shells to their ancient, expressive faces, offers a rich subject for drawing. Plus, drawing is an incredible way to boost your focus, reduce stress, and explore your inner creativity. Think of it as a mini-vacation for your mind, where you get to bring a beautiful creature to life with just a few strokes of your pencil.
Gather Your Gear: Essential Tools for Turtle Art
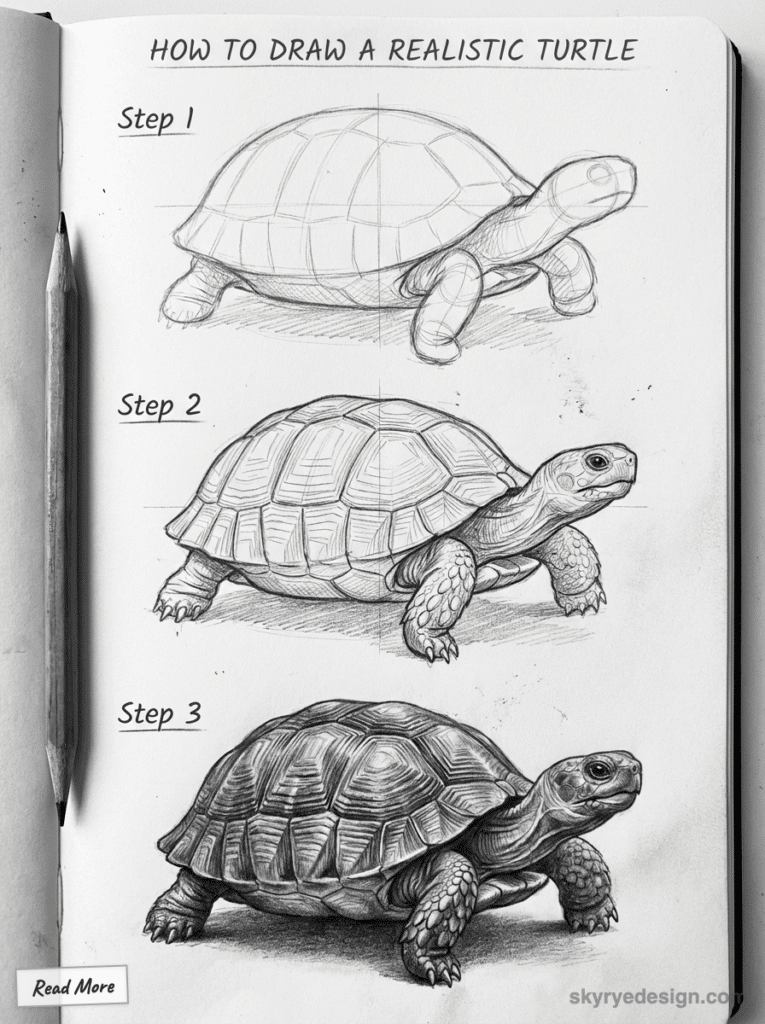
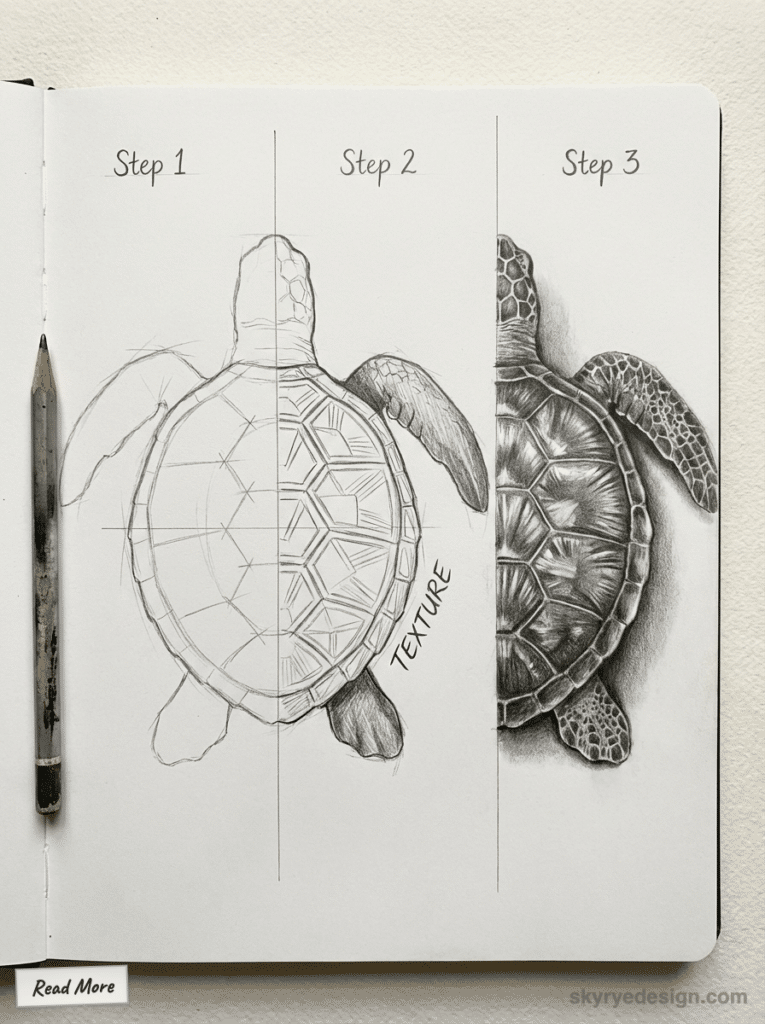
Before we embark on our artistic adventure, let’s make sure you have the right tools. Don’t worry, you don’t need a professional art studio! A few basic items will suffice to get started.
The Right Pencils Make All the Difference
You don’t need a whole set of pencils, but having a couple of different hardness levels can be a game-changer.
- HB Pencil: This is your everyday pencil, great for initial light sketches and general outlining. It’s right in the middle of the hardness scale.
- 2B or 4B Pencil: These are softer, darker pencils. They’re perfect for adding shading, depth, and bold lines. The softer lead creates a richer black and blends more easily.
Erasers: Your Best Friends in Art
Mistakes happen, and that’s perfectly okay! Erasers are not just for fixing errors; they’re also tools for lifting highlights and refining shapes.
- Kneaded Eraser: This squishy, pliable eraser is fantastic for gently lifting pencil marks without smudging or damaging your paper. You can mold it into a point for fine details.
- Plastic/Vinyl Eraser: A standard white block eraser works wonders for more thorough corrections and crisp edges.
Paper: Your Canvas for Creativity
Any paper will do to start, but certain types can enhance your drawing experience.
- Sketchbook: A spiral-bound sketchbook is excellent for practice. It keeps all your drawings in one place, and you can easily flip back to see your progress.
- Drawing Paper: If you’re ready for a more polished piece, opt for drawing paper with a slightly heavier weight (around 60-80 lb or 100-130 gsm). It holds up better to erasing and layering.
Optional Tools for Next-Level Drawing
As you get more comfortable, you might want to explore these:
- Blending Stumps or Tortillons: These tightly rolled paper tools help you smoothly blend graphite for seamless shading.
- Colored Pencils or Markers: Once your line art is done, adding color can truly bring your turtle to life.
- Reference Photos: Having a few photos of real turtles (or even cartoon turtles) is invaluable. They help you understand proportions, details, and how light interacts with their forms.
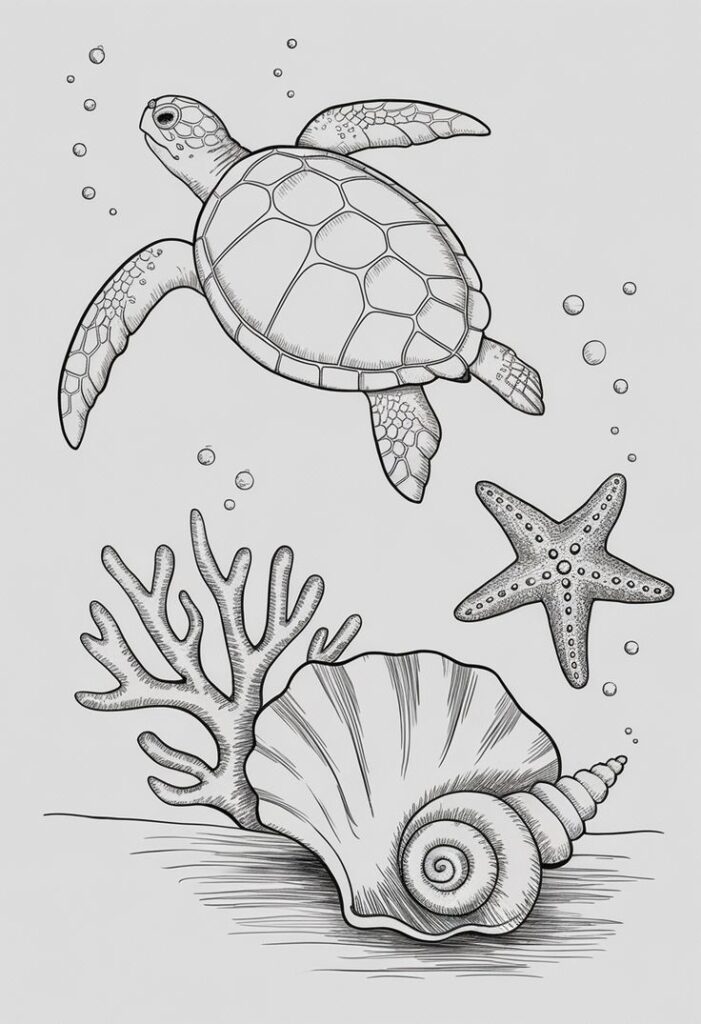
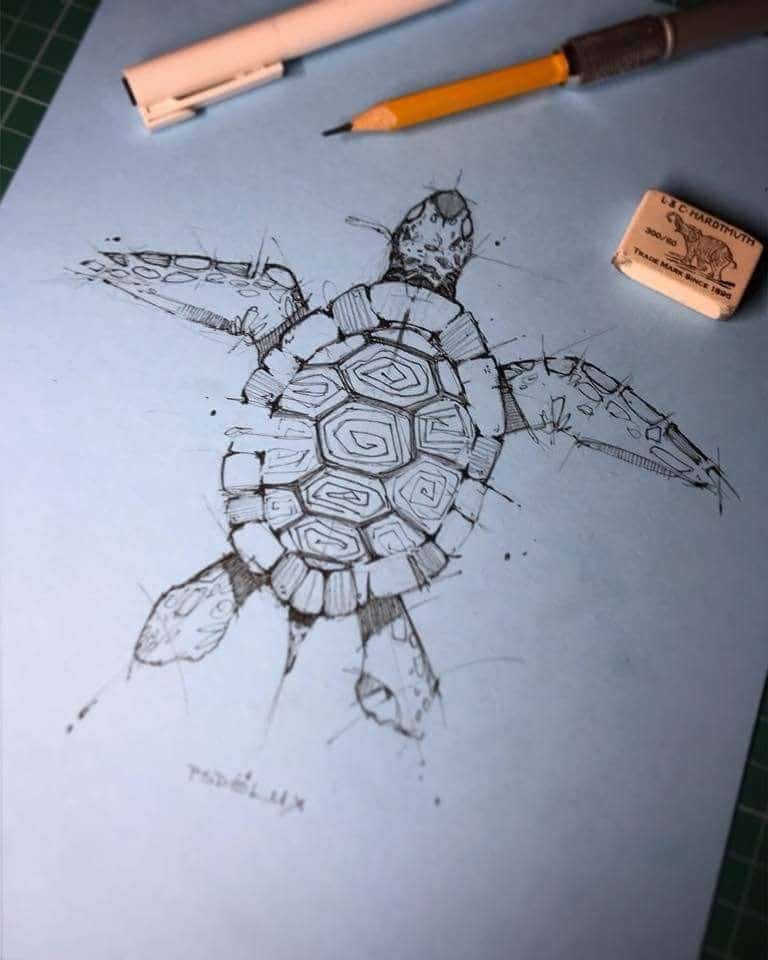
Understanding Your Subject: The Anatomy of a Turtle
Before you put pencil to paper, taking a moment to understand the basic anatomy of a turtle can make your drawing process much smoother. Don’t worry, we’re not doing a biology lesson, just focusing on the key shapes and features that define a turtle.
The Core Components
Every turtle, whether sea or land-dwelling, shares a few fundamental parts:
- The Shell (Carapace): This is the turtle’s most defining feature. It’s essentially a modified rib cage and spine, forming a protective dome. The shape can vary greatly – domed, flat, elongated, or heart-shaped.
- The Head: Connected to the shell by a flexible neck, the head typically features eyes, a mouth (beak-like in many species), and sometimes small nostrils.
- The Legs/Flippers: Land tortoises have sturdy, column-like legs for walking, often with scaly skin. Sea turtles have powerful, paddle-like flippers perfectly adapted for swimming.
- The Tail: Most turtles have a short tail, though its length can vary.
Simplifying Complex Shapes
The secret to drawing anything, especially when you’re starting, is to break down complex forms into simpler, basic shapes. Think of geometry!
- Shell: Start with a large oval or a slightly flattened dome shape.
- Head: A smaller circle or oval.
- Neck: A curved rectangle or two curved lines connecting the head to the shell.
- Legs/Flippers: Simple ovals or curved rectangles.
By seeing the turtle as a collection of these basic shapes, you can easily establish its proportions and pose before adding any details. This foundational step is crucial for building a solid drawing. For example, if you’re trying to draw people, you’d start with stick figures or basic geometric forms for the body before adding details.
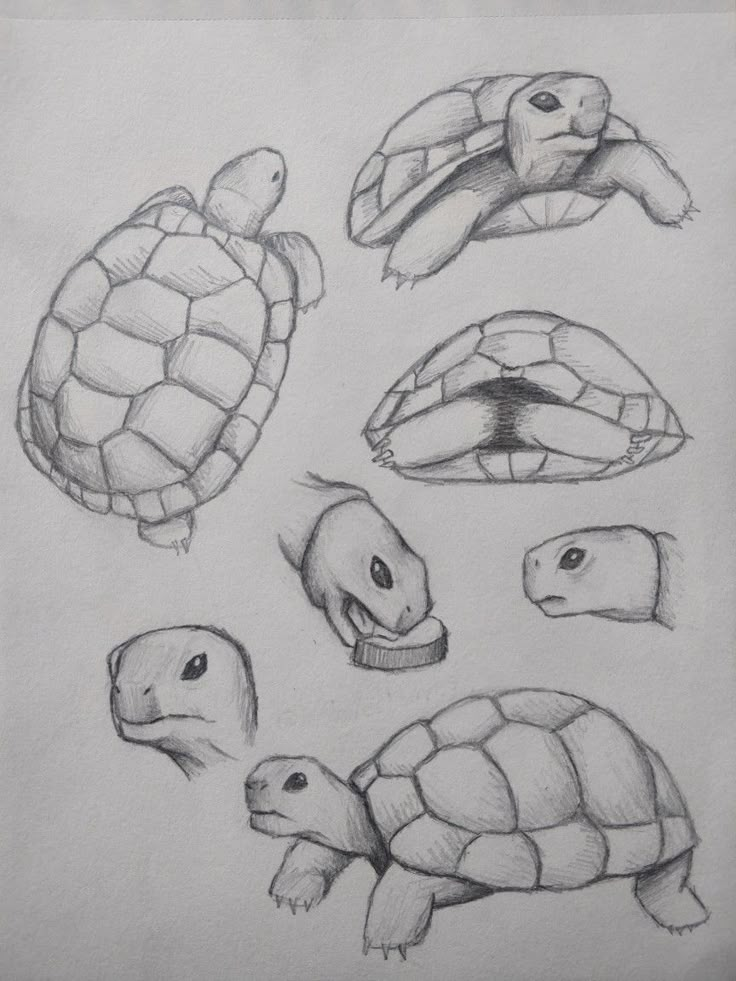
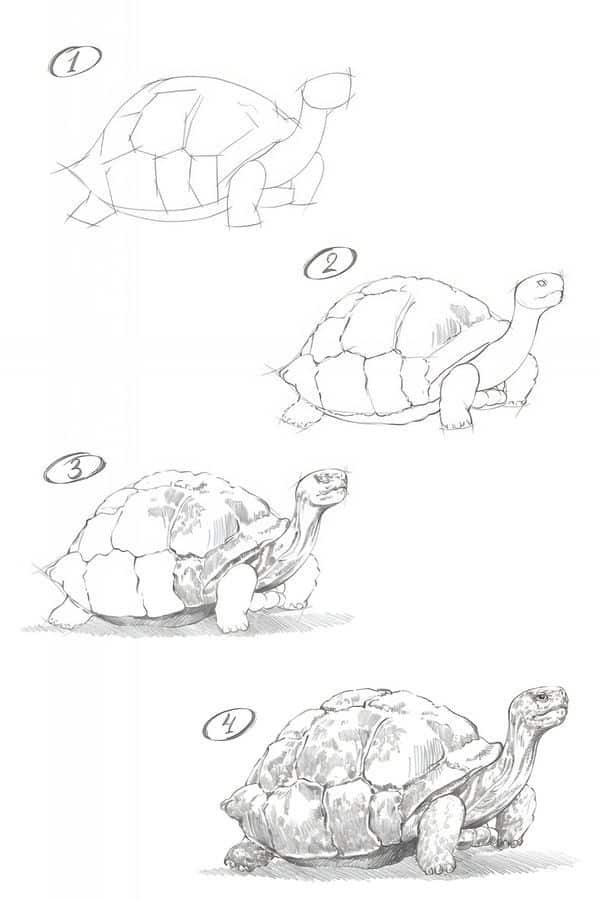
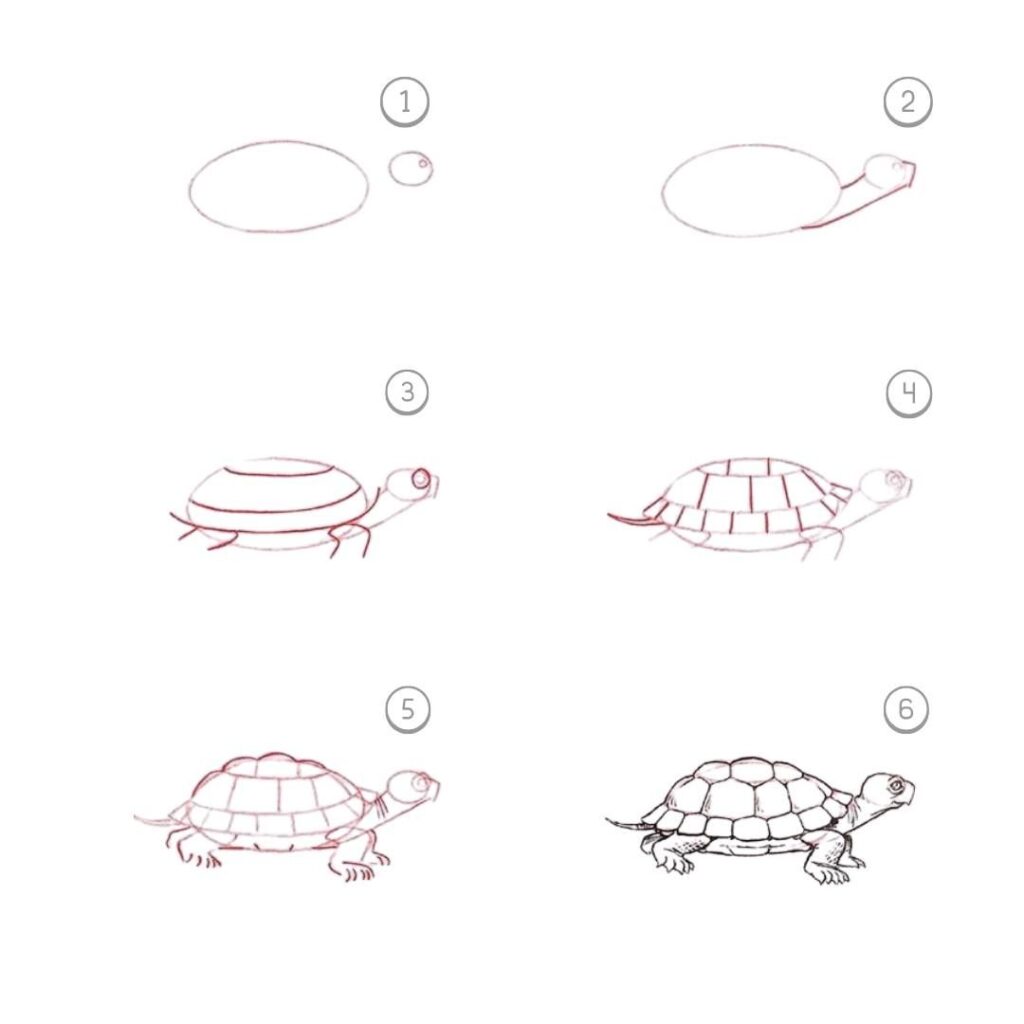
Starting Simple: The Basic Shapes Method
Alright, let’s get to the fun part! This method is perfect for beginners because it focuses on building your turtle from the ground up, using those simple shapes we just talked about.
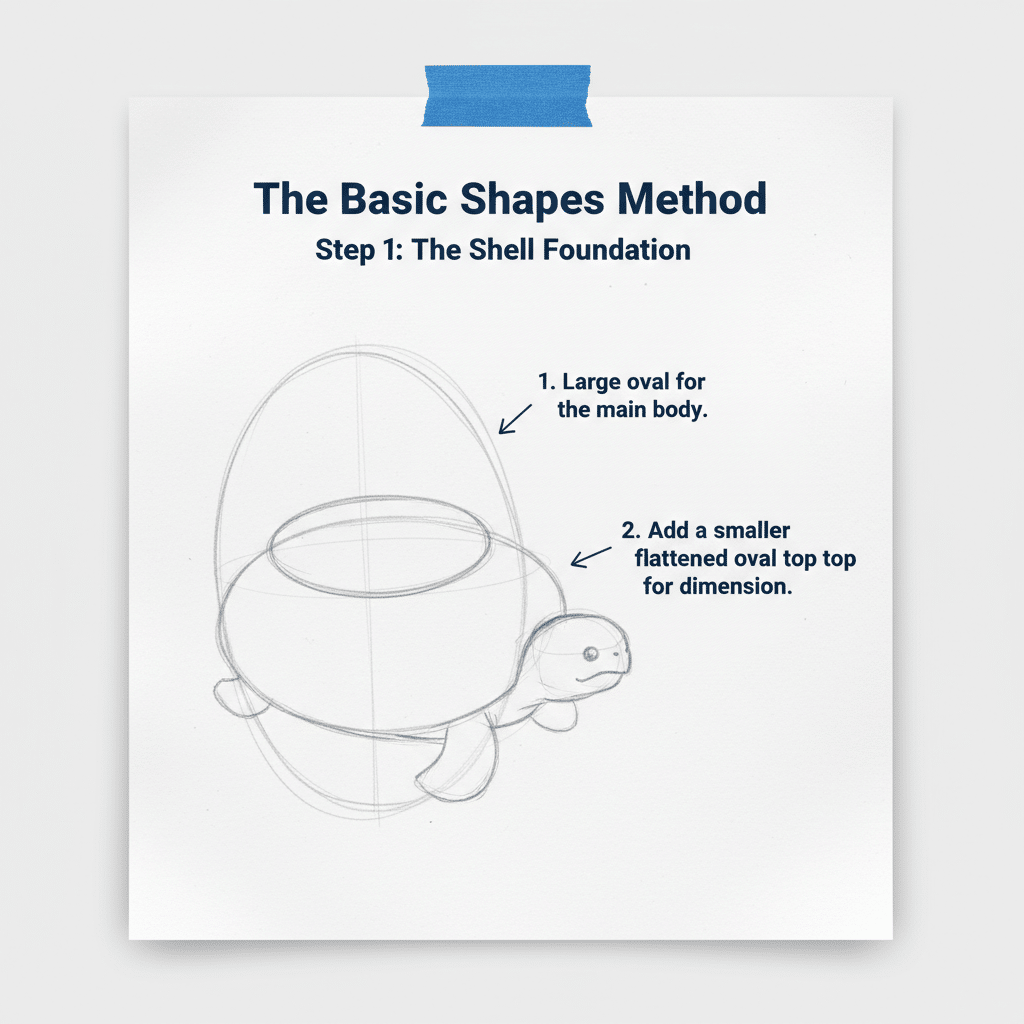
Step 1: The Shell Foundation
Begin by lightly sketching a large oval or a slightly flattened dome shape for the turtle’s shell. This will be the main body of your turtle. Don’t press too hard – these are just guide lines that you’ll erase later. Think of it as laying the groundwork for your home, like the crucial excavation that sets the foundation for success in modern construction projects.
Step 2: Head and Neck
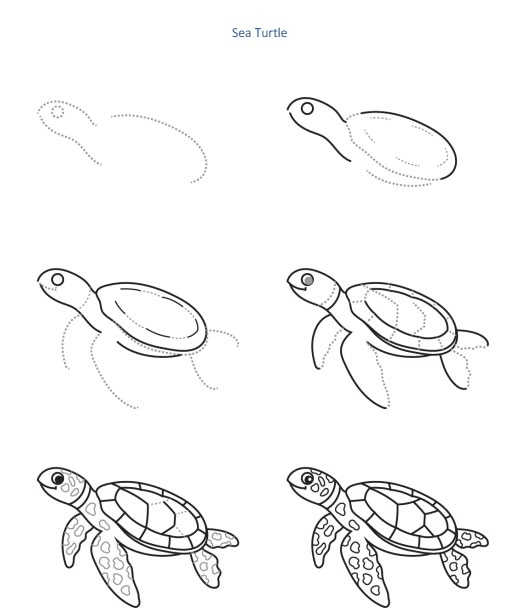
Above and slightly to one side of the shell, draw a smaller circle or oval for the head. Then, connect the head to the shell with two curved lines to form the neck. You can make the neck short and thick for a more sturdy tortoise, or longer and thinner for a sea turtle’s elegant reach.
Step 3: Legs and Tail
Now, add the limbs. For a land turtle, sketch four simple oval or rectangular shapes extending from underneath the shell for the legs. If you’re drawing a sea turtle, make them longer, wider, and more paddle-like to represent flippers. Add a small, curved line at the back of the shell for the tail.
Step 4: Refining the Outline
Once you have your basic shapes in place, start to refine the outline of your turtle. Gently round out the edges, connect the shapes more smoothly, and begin to give your turtle its distinctive form. You can start to hint at the curve of the shell, the slight bulge of the eyes, or the folds of skin around the neck. Use your eraser to clean up any overlapping guide lines that are no longer needed.
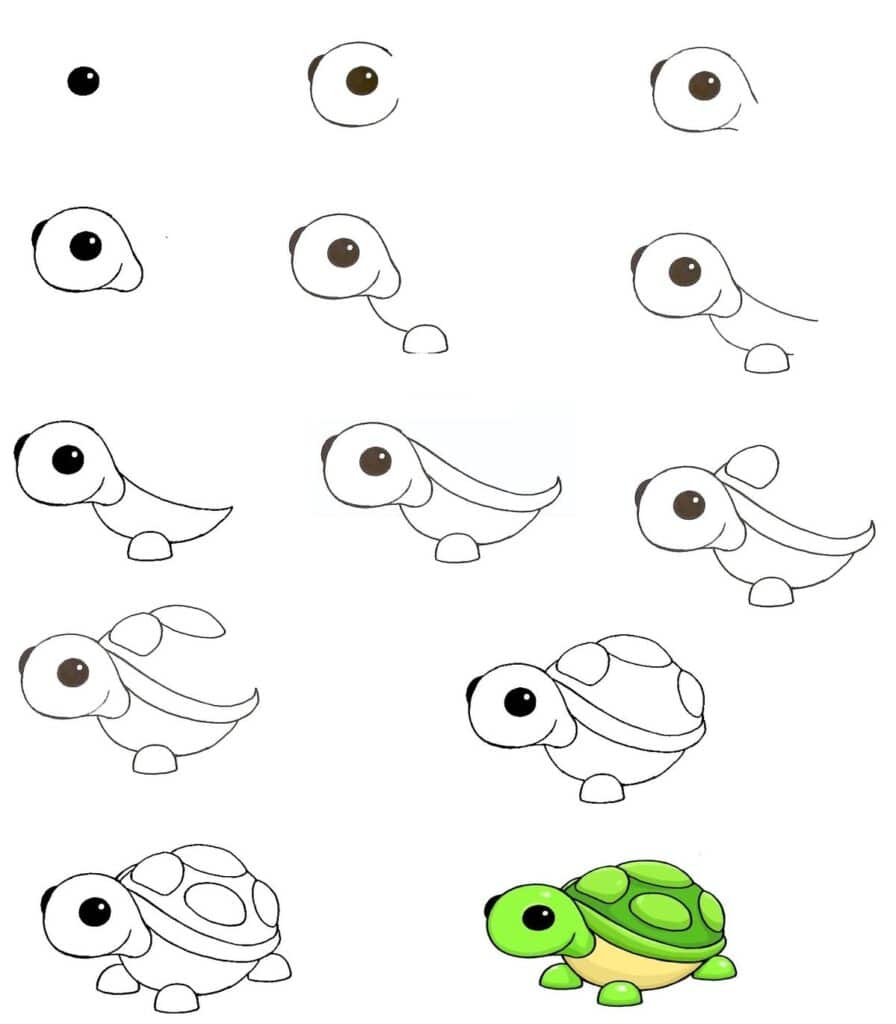
Step-by-Step Guide: Drawing a Cartoon Turtle
Cartoon turtles are incredibly fun to draw because they allow for exaggerated features and a playful vibe. Let’s create a cheerful little friend!
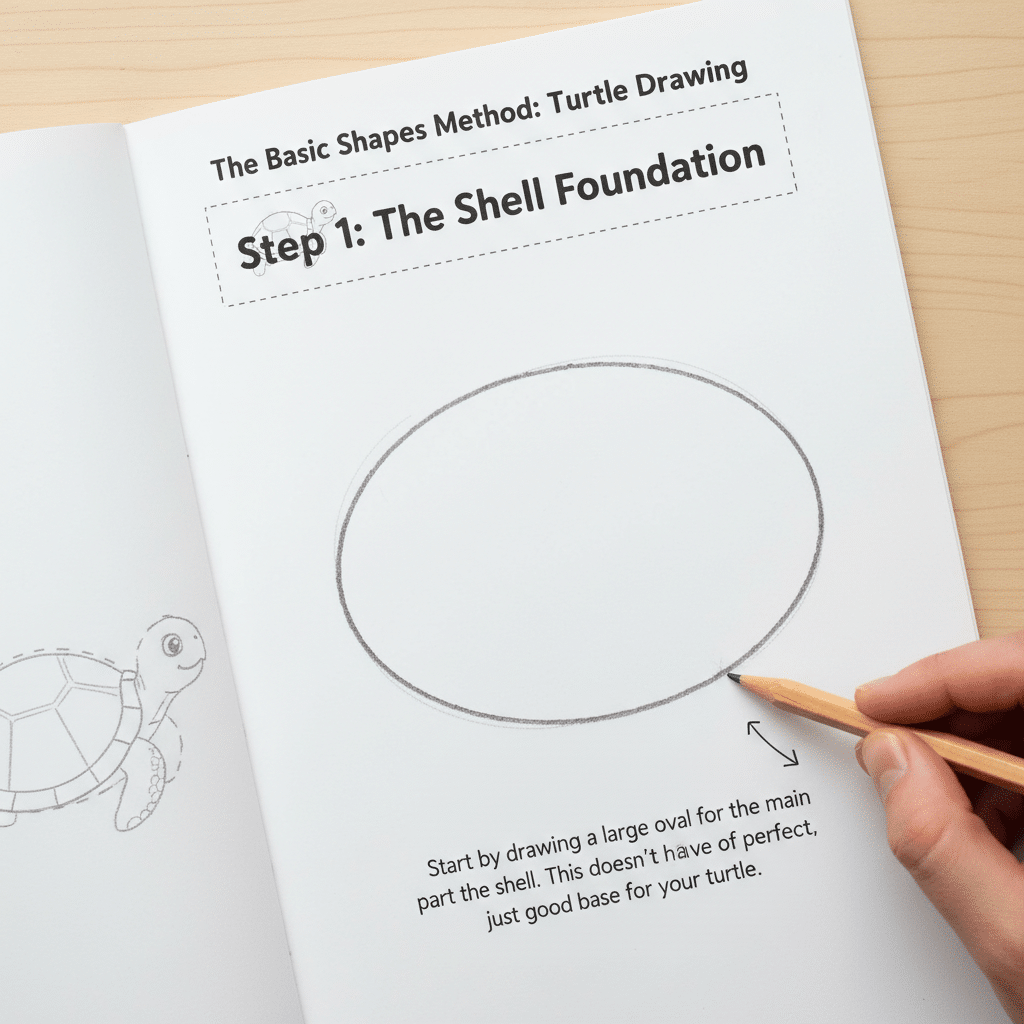
Step 1: The Shell Foundation
Start with a nice, big oval in the middle of your page. This will be the main body of your turtle’s shell. Make sure it’s light and easy to erase.
Step 2: Head and Neck
On the left or right side of your oval (wherever you want your turtle to face), draw a smaller circle for the head. Connect it to the oval shell with two curved lines for the neck. Make the neck a bit chunky – it’s a cartoon, after all!
Step 3: Legs and Tail
Now for the limbs! Draw four small, rounded shapes for the legs coming out from under the shell. For a cartoon turtle, simple rounded ‘stumps’ or cute flipper shapes work perfectly. Add a tiny, curved triangle or a small bump for the tail at the back.
Step 4: Defining the Outline
Time to give your turtle some crisp edges. Go over your light sketch with slightly darker lines, refining the overall shape. Smooth out the curves of the shell, connect the head and neck seamlessly, and make those little legs look sturdy. This is where your turtle really starts to take shape!
Step 5: Facial Features
This is where the personality comes in! Draw two small circles for the eyes on the head. Inside each, add a smaller circle for the iris and a tiny dot for the pupil. Give them a little shine by leaving a tiny white dot for a highlight. Below the eyes, draw a cute, upward-curving line for a happy smile. You can even add two tiny dots for nostrils.
Step 6: Shell Details
The shell needs its characteristic pattern. On the top of the shell, draw a series of interconnected hexagons or irregular polygonal shapes. Don’t worry about making them perfectly symmetrical; natural variations look great. You can also add a line around the very edge of the shell to give it thickness.
Step 7: Adding Character
Now, clean up any remaining guide lines with your eraser. You can add a few extra details like small wrinkles around the neck or joints, or even some subtle scales on the legs. If you want, add a few lines to suggest motion or context, like bubbles if it’s a sea turtle, or a patch of grass for a land tortoise. This is where your turtle truly comes to life!
Beyond the Basics: Drawing a Realistic Turtle
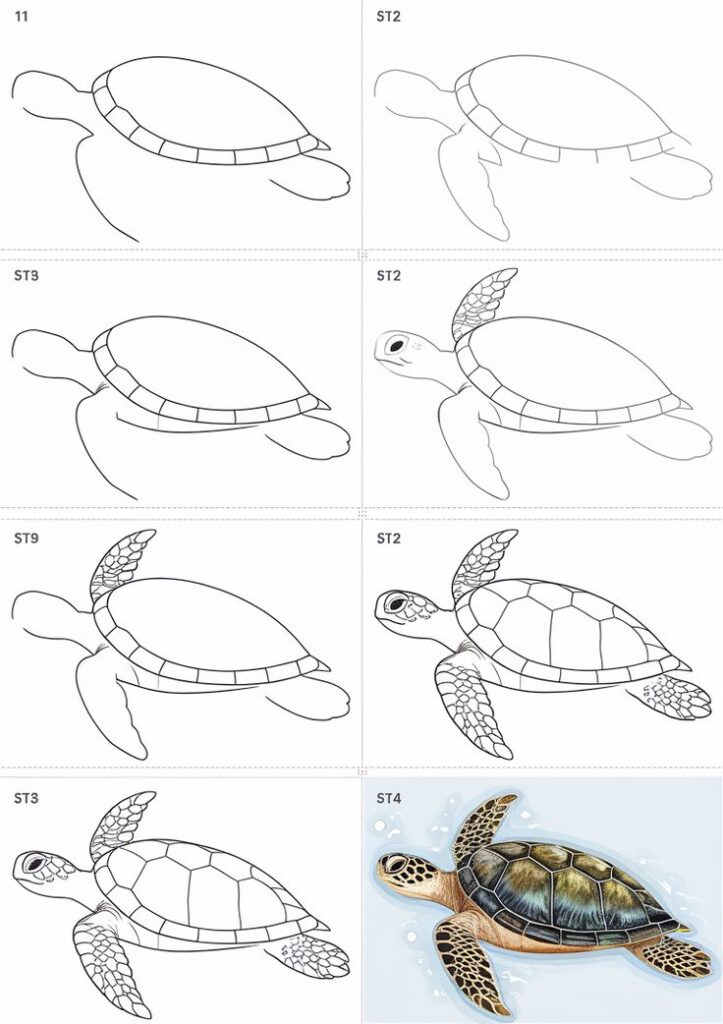
Ready to level up? Drawing a realistic turtle requires a keen eye for detail and a bit more patience, but the results are incredibly rewarding.
Observation is Key: Embrace Reference Photos
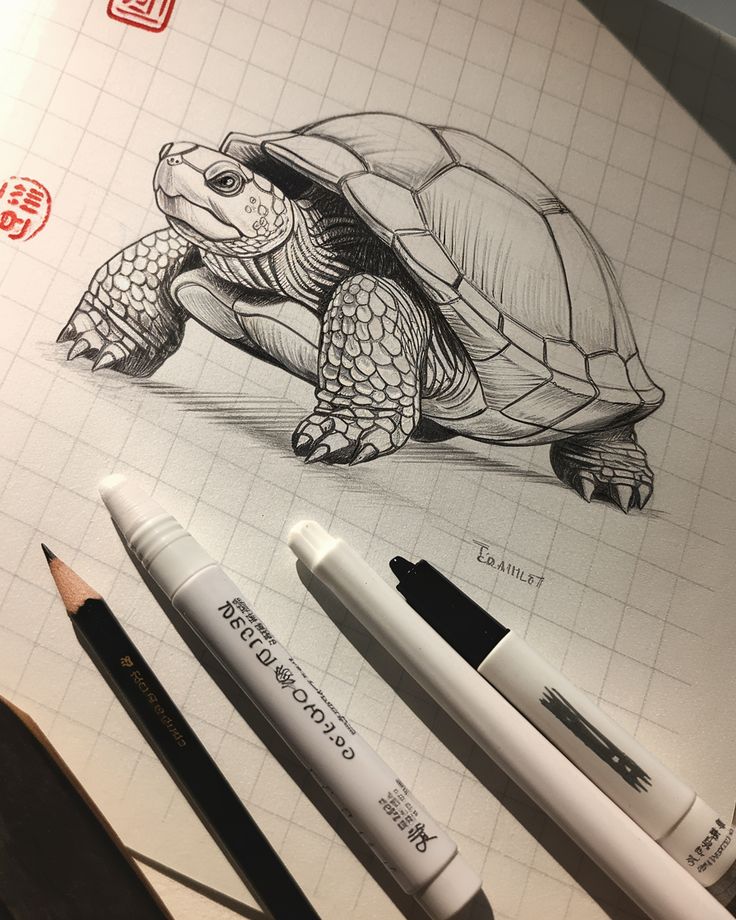
When aiming for realism, working from reference photos is absolutely essential. Don’t try to pull a realistic turtle entirely from your imagination. Find clear, high-resolution images of the specific type of turtle you want to draw – a loggerhead sea turtle, a Galapagos tortoise, a red-eared slider, etc. Observe:
- Proportions: How big is the head relative to the shell? How long are the legs?
- Shapes: What are the exact curves of the shell? Are the legs thick or slender?
- Textures: What do the scales look like? How do the scutes (the plates on the shell) overlap? What about the wrinkles on the skin?
- Lighting: Where are the shadows? Where are the highlights?
More Complex Anatomy: Details that Define
Once you have your basic shapes laid out (still start with those!), you’ll begin to add layers of detail based on your reference.
- Shell Ridge: Many turtles have a subtle or pronounced ridge running down the center of their carapace. Observe this on your reference.
- Individual Scutes: Instead of simple hexagons, focus on the unique shapes and patterns of each scute on the shell. Notice how they fit together like puzzle pieces.
- Scales and Skin Folds: The skin of a turtle is often wrinkled and covered in small, irregular scales. Pay attention to how these scales overlap and how the skin folds around joints and the neck.
- Webbed Feet/Toes: Sea turtles have broad flippers, while land turtles have distinct toes, sometimes with claws. Detail these features.
Shading and Texture: Creating Depth and Realism
This is where your turtle truly starts to look three-dimensional.
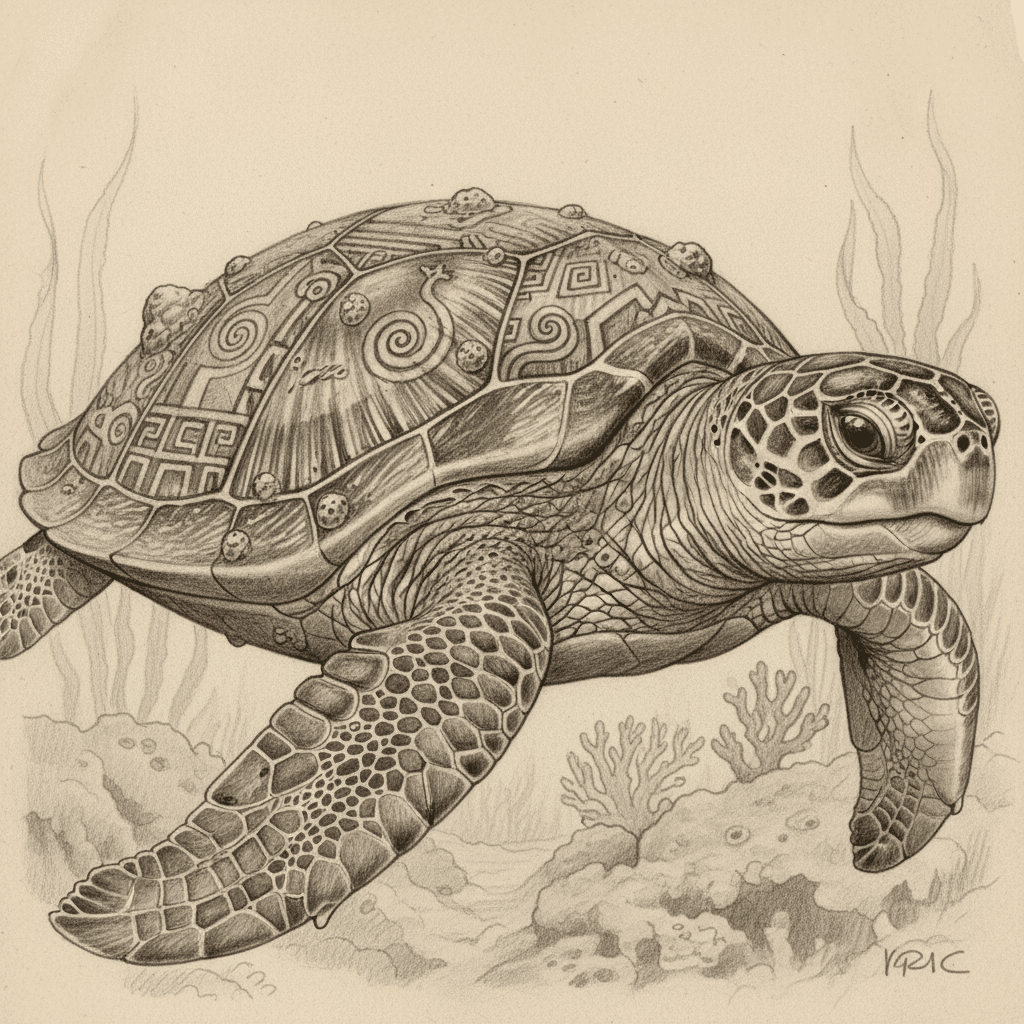
- Shell Textures: Use short, varied lines and careful shading to mimic the texture of the scutes. You can also add subtle “growth rings” on each scute to suggest age.
- Skin Textures: Use stippling (dots), small scribbles, or short, overlapping lines to create the scaly, rough texture of the skin. Pay attention to the subtle bumps and depressions.
- Eye Details: Realistic eyes will have a pupil, iris, and often a visible eyelid. Add reflections for a watery, alive look.
Adding Depth and Dimension: Shading and Highlights
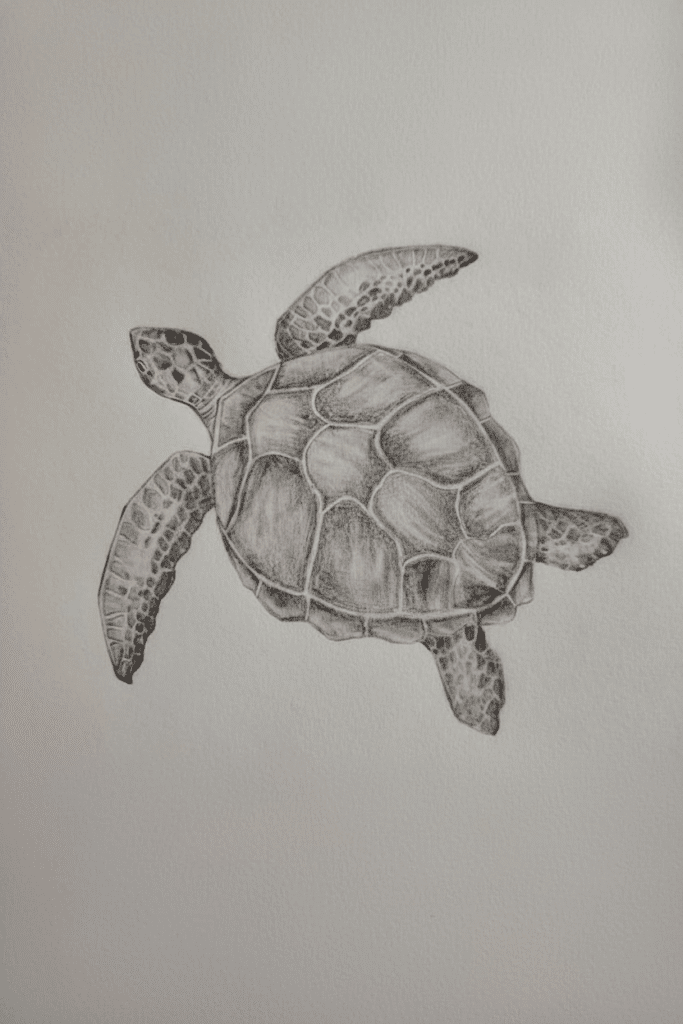
Shading is what takes a flat drawing and makes it pop off the page. It’s how you convey volume, texture, and the play of light.
Understanding Light Source
Before you shade, always ask: “Where is the light coming from?” This is crucial. Every object will have:
- Highlight: The brightest point where light hits directly.
- Mid-tone: The general color/value of the object.
- Shadow: Areas where light doesn’t reach or is blocked.
- Cast Shadow: The shadow an object casts on a surface behind or below it.
Consistent light source makes your drawing believable. If the light is coming from the top-left, all highlights should be on the top-left surfaces, and all shadows on the bottom-right.
Basic Shading Techniques
Experiment with different ways to apply graphite to create value:
- Hatching: Drawing parallel lines in one direction.
- Cross-hatching: Drawing parallel lines in one direction, then drawing another set of parallel lines crossing the first. This builds up darker values quickly.
- Scribbling: Using small, irregular circular motions to build up tone. Great for organic textures.
- Blending: Using a blending stump, tissue, or even your finger (though less recommended as oils from skin can smudge) to smooth out graphite for gradual transitions.
Using Highlights to Make Elements Pop
Highlights are just as important as shadows. They define edges and give a sense of shininess or wetness.
- Erase for Highlights: Use your kneaded or plastic eraser to carefully lift graphite from areas where light would hit the most. For shiny shells or wet skin, sharp, bright highlights work well.
- Unshaded Areas: Sometimes, the brightest highlight is simply an area you left untouched by your pencil.
Practice Exercises for Shading
- Value Scale: Draw a long rectangle and divide it into 5-7 sections. Practice shading from pure white (no graphite) to pure black (heavily applied 4B pencil), creating a smooth gradient of tones. This teaches you control over pressure.
- Geometric Shapes: Draw a sphere, a cube, and a cylinder. Practice shading each shape to make it look three-dimensional, imagining a light source from one direction. This skill directly translates to shading the curved shell and body of your turtle.
Bringing Your Turtle to Life: Color and Environment
Adding color and placing your turtle in an environment are the final steps to truly bring your drawing to life. This is where your turtle gets its personality and context.
Choosing a Color Palette
Think about the type of turtle you’re drawing and its natural habitat.
- Sea Turtles: Often have greens, blues, and browns for their shells, with lighter undersides and greenish-grey skin.
- Land Tortoises: Earthy tones like browns, greys, and even sandy yellows are common.
- Cartoon Turtles: You have complete artistic freedom here! Bright greens, vibrant blues, or even fantastical colors can make your turtle unique.
Consider color harmony. Do you want analogous colors (colors next to each other on the color wheel for a calm feel) or complementary colors (opposite on the wheel for high contrast and energy)?


Layering Colors for Richness
Don’t just apply one flat layer of color. Build it up!
- Base Coat: Start with a light, even layer of your primary color.
- Mid-tones and Shadows: Use slightly darker shades of the same color, or mix in a bit of a complementary color (e.g., a touch of purple in green shadows) to deepen the tones in shaded areas.
- Highlights: Use lighter colors, or even leave small areas uncolored for bright highlights, especially on shiny shells or wet skin.
- Texture with Color: Use short strokes or stippling with your colored pencils to mimic the texture of scales and shell patterns.
Background Elements: Context is Key
A turtle floating in a blank space is fine, but a turtle in its environment tells a story.
- Sea Turtle: Think about clear blue water, sun dappling through the surface, maybe some coral or seaweed in the distance. Bubbles around its flippers add a sense of movement.
- Land Tortoise: Rocks, sand, grass, or even a leafy forest floor. Consider elements like sunlight filtering through leaves to create interesting light and shadow patterns.
- Depth: Use lighter, less detailed colors and softer lines for background elements to create a sense of distance and focus on your turtle.
Creating a Narrative
What is your turtle doing? Is it swimming peacefully, munching on some greens, or looking curiously at something? The pose and environment can hint at a story. A small fish swimming beside a sea turtle, or a butterfly landing on a tortoise’s shell, can add charm and narrative depth.

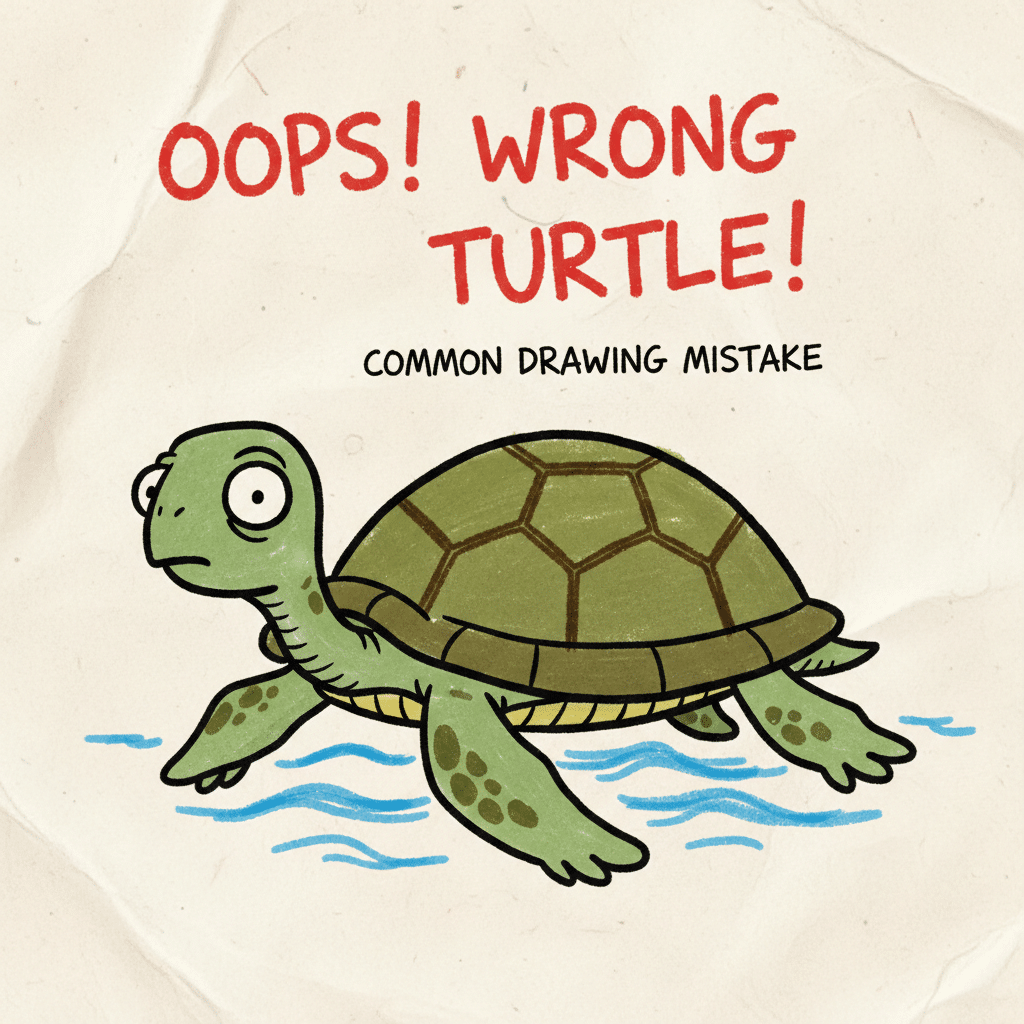
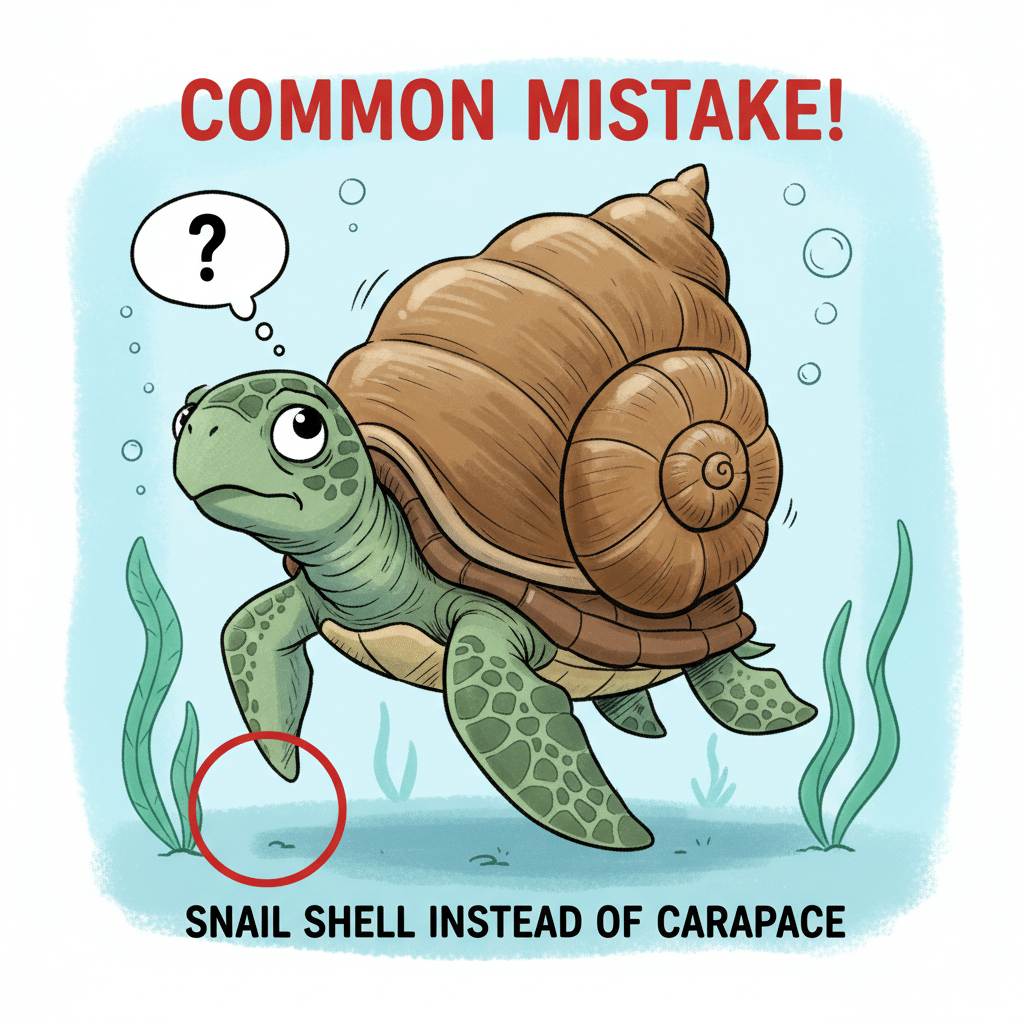
Common Mistakes and How to Avoid Them
Even the most experienced artists make mistakes, but being aware of common pitfalls can save you a lot of frustration.
Proportion Issues
One of the most frequent problems is getting the size relationships between different parts of the turtle wrong. A head that’s too big for the shell, or legs that are too short, can make your turtle look unnatural.
- Solution: Always start with basic shapes and light lines. Continuously compare the sizes of your circles and ovals to each other. “Is this head too big for this shell?” Step back from your drawing frequently to get a fresh perspective. Use your reference photos to guide you.
Lack of Detail or Over-Detailing
Some beginners skip details, making their turtles look flat, while others try to cram too much detail into every square inch, making it look cluttered.
- Solution: Find a balance. Focus on key details like the eyes, the main scute patterns on the shell, and the texture of the skin. For cartoon turtles, fewer, more expressive details are better. For realistic ones, observe your reference and choose the most impactful details to render accurately.
Too Much Pressure with the Pencil
Pressing too hard with your pencil in the initial stages can create deep grooves in the paper that are impossible to erase, making corrections difficult.
- Solution: Start very lightly. Imagine you’re barely touching the paper. As you refine shapes, gradually increase pressure for darker lines. This technique gives you maximum flexibility to adjust your drawing.
Not Using Reference Images
Trying to draw something complex like a turtle from memory, especially when you’re starting out, can lead to frustration and inaccurate results.
- Solution: Always use reference images! Collect a few good photos of the turtle you want to draw. They are invaluable for understanding anatomy, texture, and light. It’s not cheating; it’s smart practice. For more general advice on artistic development, you might find tips on drawing inspiration helpful.
Fear of Making Mistakes
The blank page can be intimidating, and the fear of “ruining” a drawing can prevent you from even starting.
- Solution: Embrace mistakes as learning opportunities. Every misplaced line or smudge teaches you something. Keep practicing, and remember that art is a process, not just a perfect end product. Use cheap paper for practice, so you don’t feel pressure to make every drawing a masterpiece.
Tips for Continuous Improvement
Drawing, like any skill, gets better with consistent effort. Here are some pointers to keep your artistic journey exciting and productive.
Practice Regularly
There’s no substitute for practice. Even 15-20 minutes a day can make a huge difference. Regularity builds muscle memory and sharpens your observational skills. Treat it like a workout for your creative brain!
Experiment with Different Styles
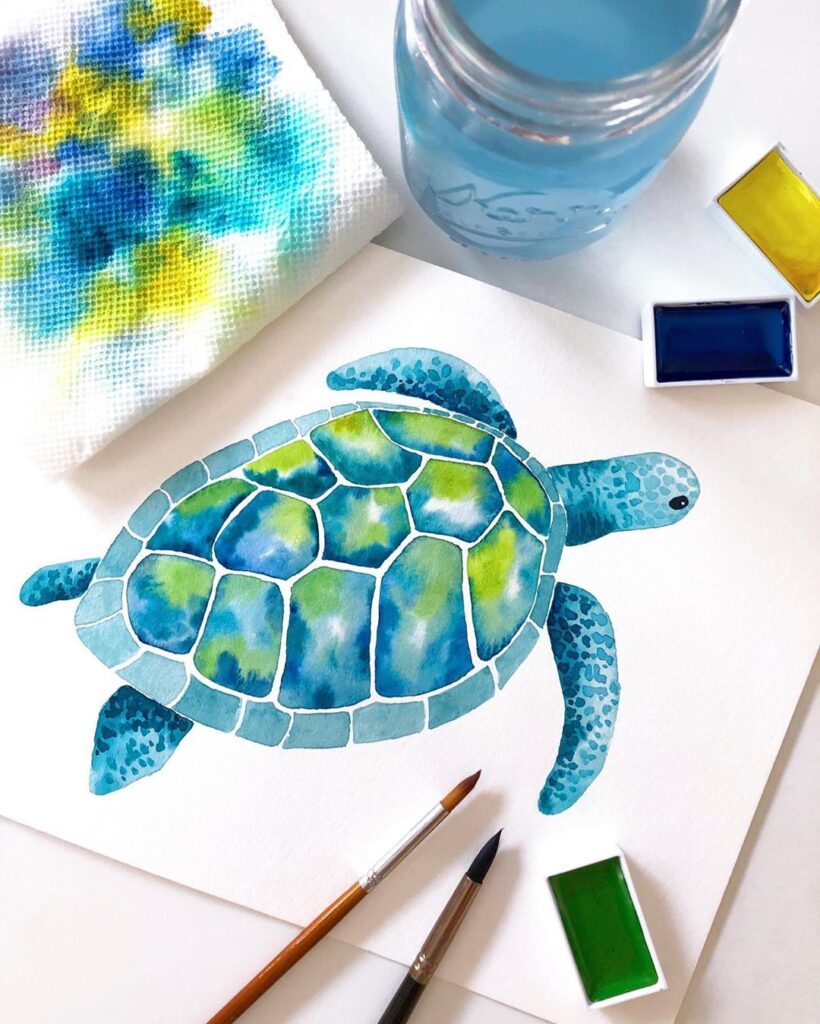
Don’t get stuck in one lane. Try drawing a super cute cartoon turtle one day, and attempt a highly detailed realistic one the next. Experiment with different mediums too – pencils, pens, charcoal, watercolors. This keeps things fresh and helps you discover what you enjoy most and what you’re good at. You might even find yourself inspired to explore completely different artistic styles, like learning how to draw Chicano art or delving into the intricate world of fashion design drawings.
Seek Feedback
Share your drawings with friends, family, or online art communities. Constructive criticism can open your eyes to areas you might not have noticed need improvement. Just remember to seek feedback from people who are genuinely supportive and offer helpful suggestions, not just harsh judgment.
Take Breaks
If you find yourself getting frustrated or your hand cramps, step away from your drawing for a bit. A fresh pair of eyes after a break often helps you spot errors or new possibilities you missed before. Sometimes, just a five-minute stretch or a walk around the room is all it takes to reset.
Keep an Inspiration Journal
Collect images, photos, or even just ideas that inspire you. This could be pictures of different turtle species, beautiful ocean scenes, or interesting patterns. When you’re feeling a creative block, you can flip through it for ideas. Staying inspired is key to long-term creative engagement, much like designers finding their top 10 sources of inspiration.
Learn from Others
Watch drawing tutorials on YouTube, read art books, or even take an online course. There are countless resources available from talented artists who can teach you new techniques and perspectives.

Conclusion
Congratulations! You’ve just embarked on a wonderful journey of learning how to draw a turtle. From understanding the basic anatomy and breaking down complex shapes to adding depth with shading and color, you now have a comprehensive guide to create your own shelled wonders. Remember, the key is to start simple, be patient with yourself, and most importantly, have fun! Every line you draw, every shade you blend, is a step forward in your artistic development. Don’t be afraid to experiment, make mistakes, and celebrate every small victory. So grab your pencils, find some inspiration, and let your creativity flow. Dive in and start drawing those magnificent turtles today!
Why is it beneficial to learn how to draw a turtle?
Drawing a turtle is beneficial because it symbolizes wisdom, longevity, and peace, and provides a rich subject that can boost focus, reduce stress, and explore creativity.
What essential tools do I need to start drawing a turtle?
To start drawing a turtle, you need basic pencils (HB and 2B or 4B), erasers (kneaded and plastic), and suitable paper such as a sketchbook or drawing paper with heavier weight for better results.
How can I simplify complex shapes when drawing a turtle?
You can simplify complex shapes by breaking them down into basic geometric forms such as ovals for the shell, circles for the head, and ovals or rectangles for the legs and tail, which helps establish proportions and pose.
- 28shares
- Facebook0
- Pinterest25
- Twitter3
- Reddit0

