Looking to refresh your living space without breaking the bank? DIY home decor projects offer a perfect solution for creating a personalized and stylish home on any budget. These creative endeavors not only save money but also provide a sense of accomplishment as you transform ordinary items into beautiful decor pieces.
Home decoration doesn’t need to be complicated or expensive to make a significant impact. Simple projects using readily available materials can dramatically change the feel of any room. Whether you’re a seasoned DIY enthusiast or just starting out, these accessible ideas can help you elevate your home with your own unique touch.
1) Crystal Sun Catchers for Window Decor
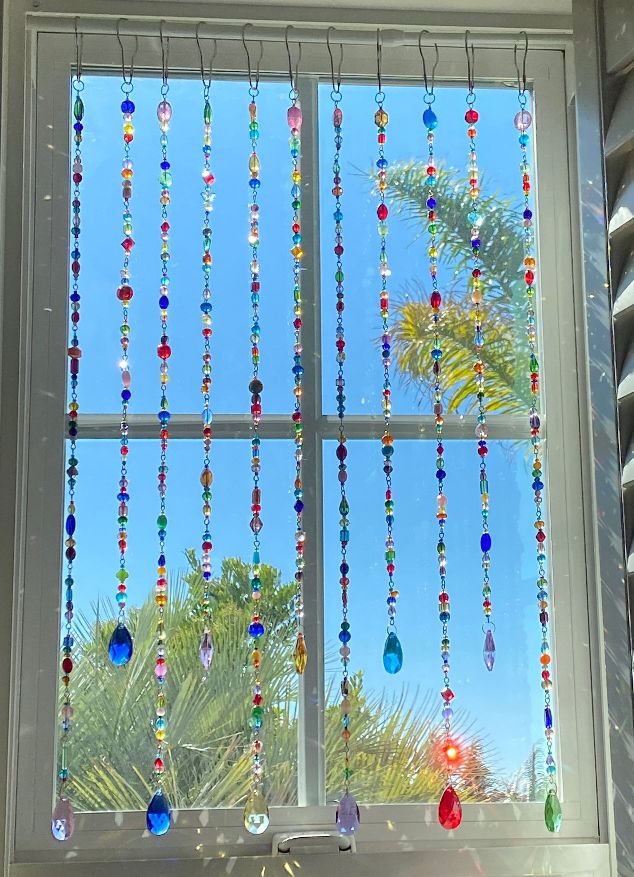
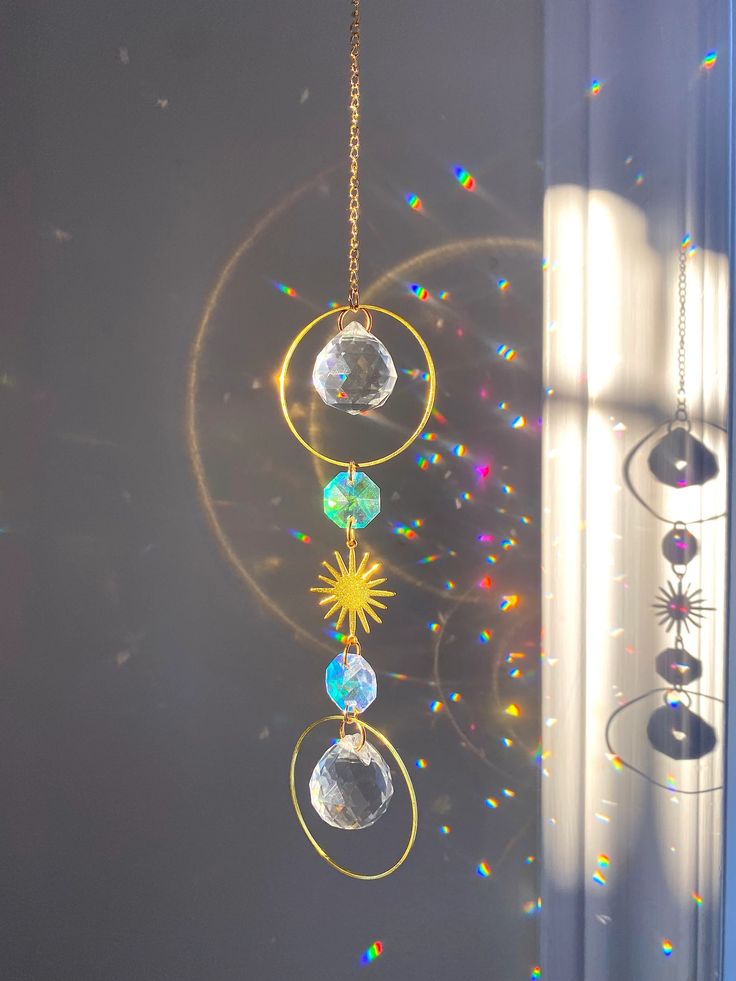
Crystal sun catchers are an elegant way to enhance your windows and bring dancing rainbows into your living space. These decorative items capture sunlight and disperse it in colorful patterns throughout your room.
Creating your own crystal sun catcher is simpler than you might think. You’ll need clear crystals or prisms, fishing line or thin chain, and basic tools like pliers and scissors.
Begin by selecting crystals in various shapes and sizes for visual interest. Arrange them in a pattern that appeals to you before attaching each piece to a length of fishing line or chain.
For a floral-inspired design, arrange crystal beads in a flower pattern. This nature-themed approach works beautifully in any window and creates stunning light effects.
You can personalize your sun catchers with colorful beads or small ornaments that complement your existing decor. Each design can be as simple or elaborate as you prefer.
When hanging your crystal sun catcher, choose a window that receives direct sunlight for maximum rainbow effect. East or west-facing windows often provide the best light for these decorative pieces.
2) Live Edge Wooden Shelf
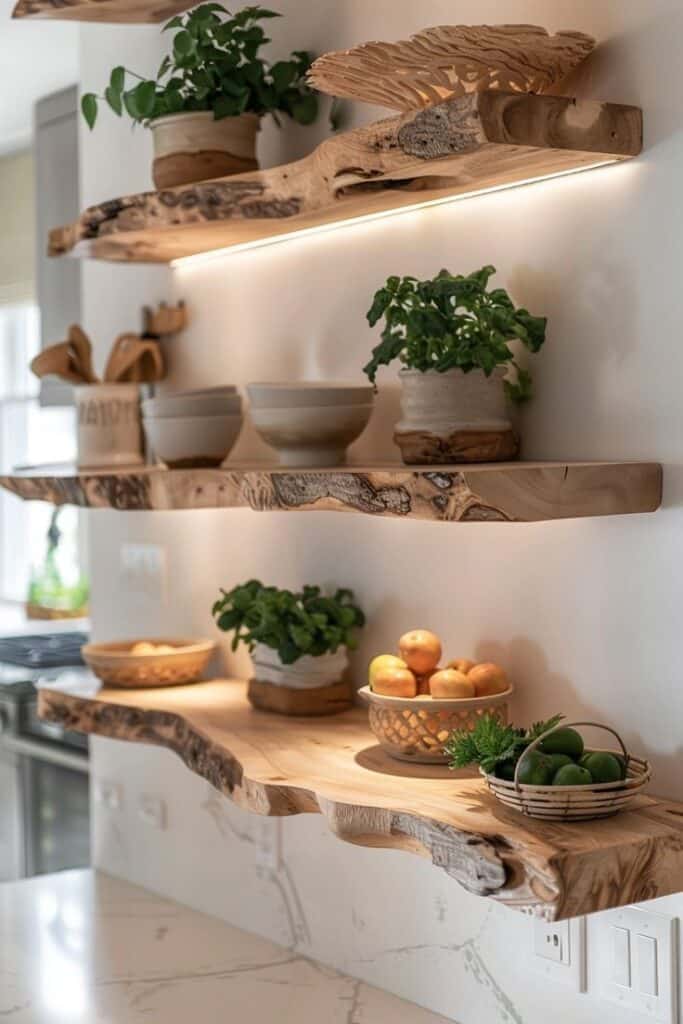
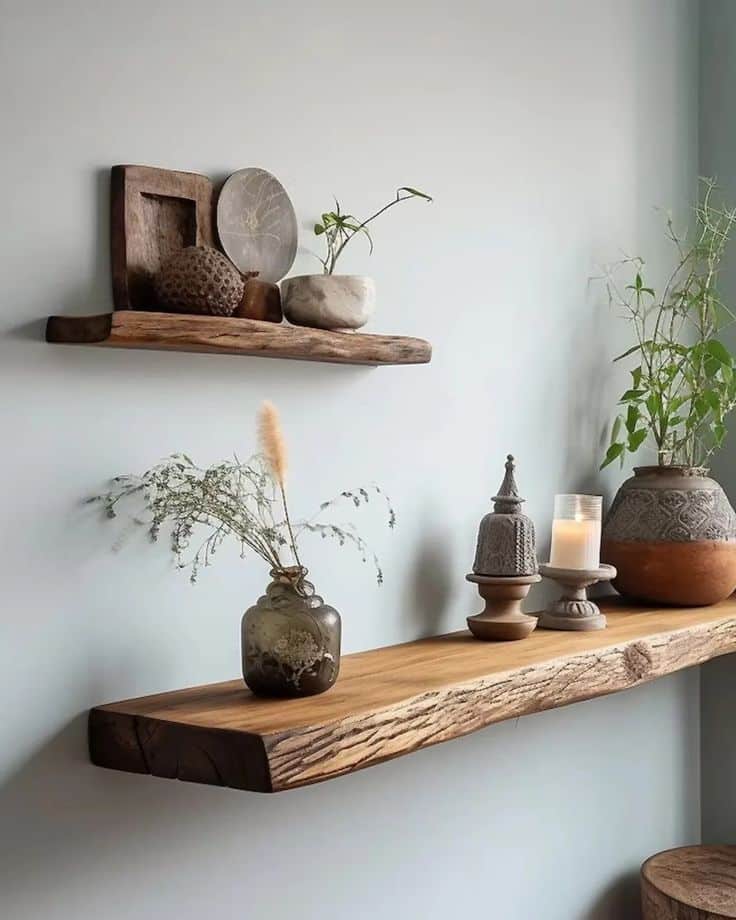
Live edge wooden shelves showcase the natural beauty of wood by preserving the original edge of the timber. These unique shelves add character and warmth to any room while providing functional storage space.
To create your own live edge shelf, start by selecting a suitable piece of wood. Look for a slab with interesting grain patterns, knots, or natural edges that appeal to you. Cedar and walnut are popular choices for their distinct characteristics.
Once you’ve found your perfect piece, clean the wood and remove any bark. Sand the surfaces thoroughly to achieve your desired smoothness while maintaining the natural edge details that give the piece its charm.
For mounting, you can use hidden bracket systems that create a floating effect. These brackets attach to your wall studs and disappear behind the shelf, giving the impression that your live edge creation is hovering effortlessly.
Position your shelves thoughtfully to create visual interest. You can arrange multiple shelves horizontally at different heights or use a single statement piece to highlight special items in your collection.
Live edge shelves work beautifully in various settings – from minimalist modern spaces where they provide organic contrast to rustic interiors where they enhance the natural aesthetic.
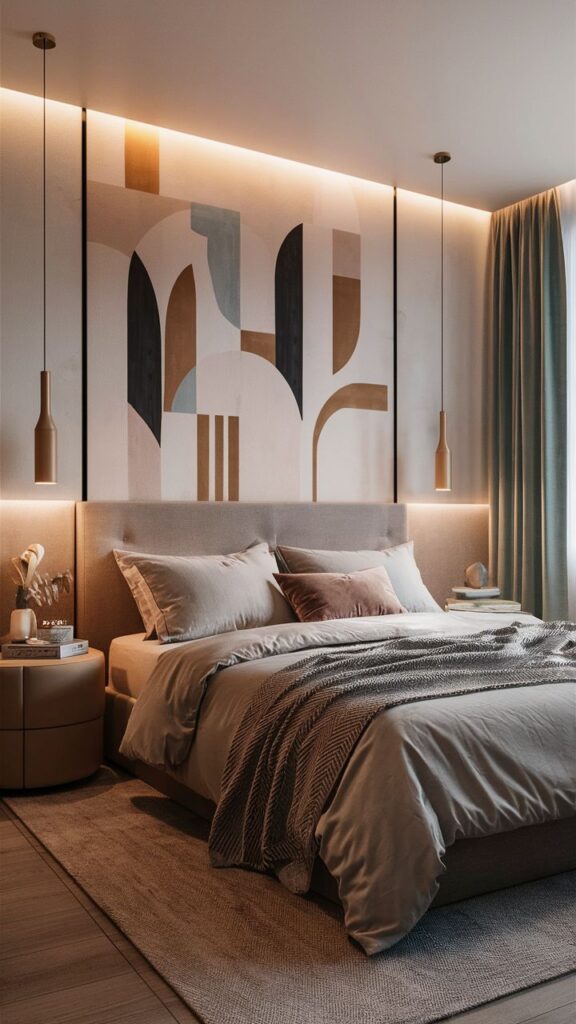
3) Painted Geometric Headboard
Transform your bedroom with a striking painted geometric headboard that requires minimal tools and materials. This project offers an affordable way to create a focal point without investing in expensive furniture.
You can start with a large piece of plywood cut to your desired headboard size. Sand the edges smooth before applying a base coat of paint in your chosen color.
Once the base is dry, use painter’s tape to create geometric patterns across the surface. Think triangles, hexagons, or abstract shapes that complement your bedroom’s aesthetic.
Select 2-4 complementary paint colors that match your bedroom décor. Apply each color to different sections created by the tape, ensuring clean lines by pressing the tape firmly before painting.
Remove the tape while the paint is still slightly wet to prevent peeling. For added dimension, consider varying the finish between matte and glossy paints.
Mount your finished headboard to the wall or attach it to your bed frame using appropriate hardware. This project typically takes a weekend to complete and makes a dramatic difference in your bedroom’s appearance.
For a softer alternative, you can create a similar effect using foam shapes covered in fabric and arranged in a geometric pattern.

4) Floral Candlestick Holders
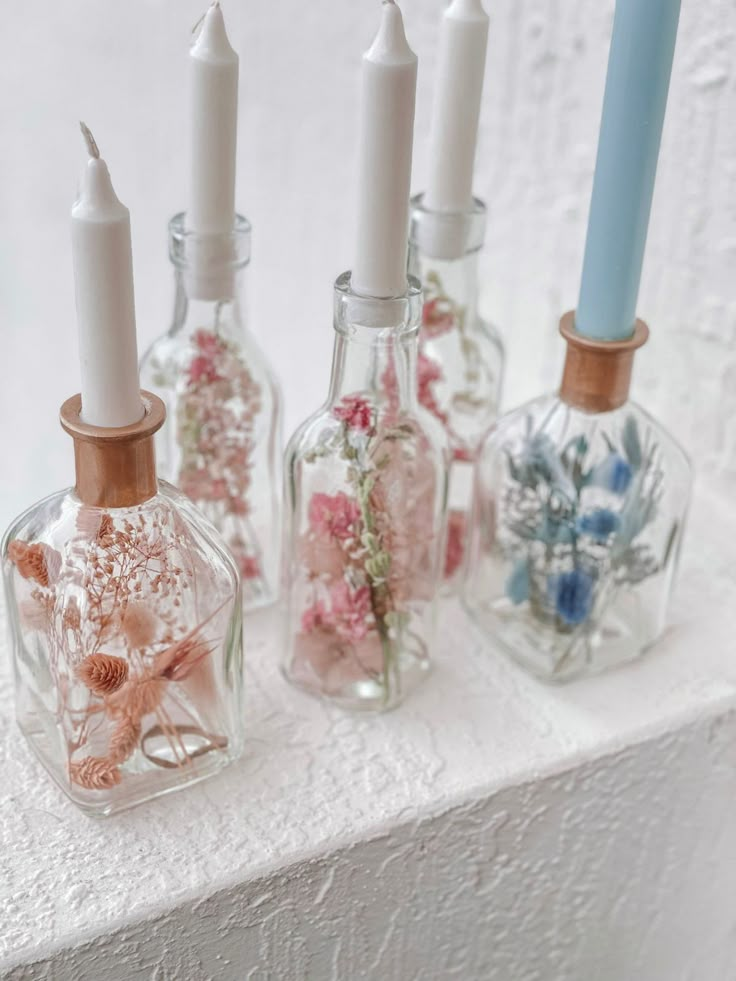
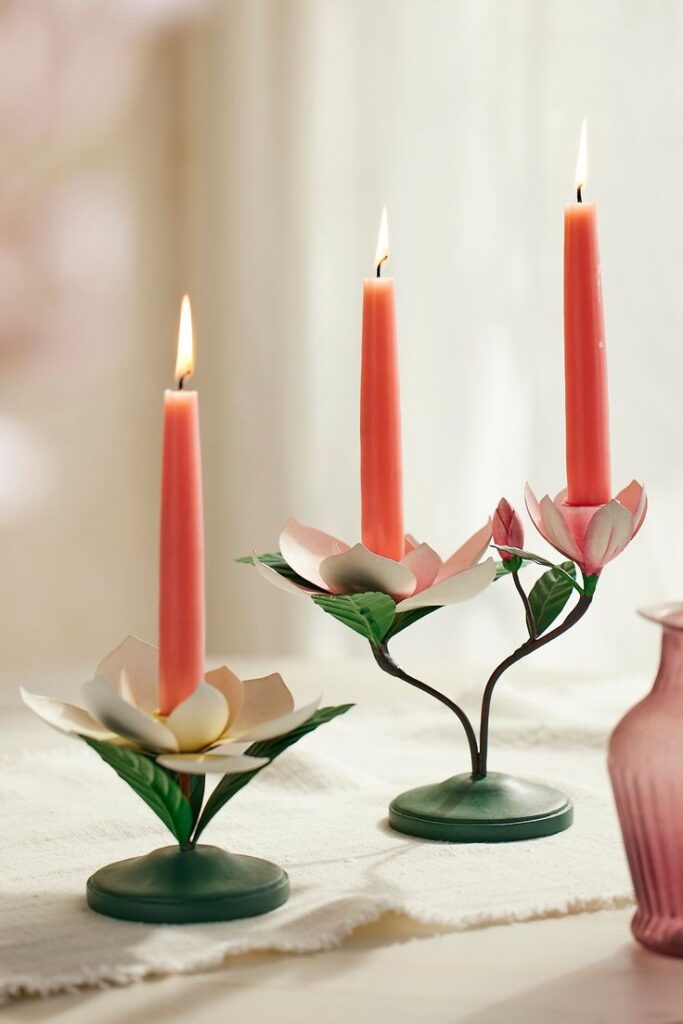
Transform ordinary candlesticks into stunning spring decorations with floral embellishments. This simple yet elegant DIY project adds a fresh, seasonal touch to your home decor without requiring extensive crafting skills.
Begin with plain candlesticks of any material – glass, metal, or wood all work beautifully. Select flowers that complement your existing decor scheme. Fresh blooms work wonderfully, but high-quality silk flowers offer longevity for your creation.
Secure your chosen flowers around the base of the candlestick using floral wire or a hot glue gun. Arrange them evenly for a balanced look. You can create a full circular wreath effect or concentrate the blooms on just one side for an asymmetrical design.
Try incorporating greenery like eucalyptus for a lush, organic feel. Small leaves provide texture and depth to your arrangement without overwhelming the candles themselves.
For different design options, consider using decorative napkins with botanical or watercolor prints as inspiration. You can even decoupage these patterns directly onto glass candleholders for a unique effect.
Place your finished floral candlesticks on dining tables, mantels, or side tables to instantly brighten your space with natural beauty.
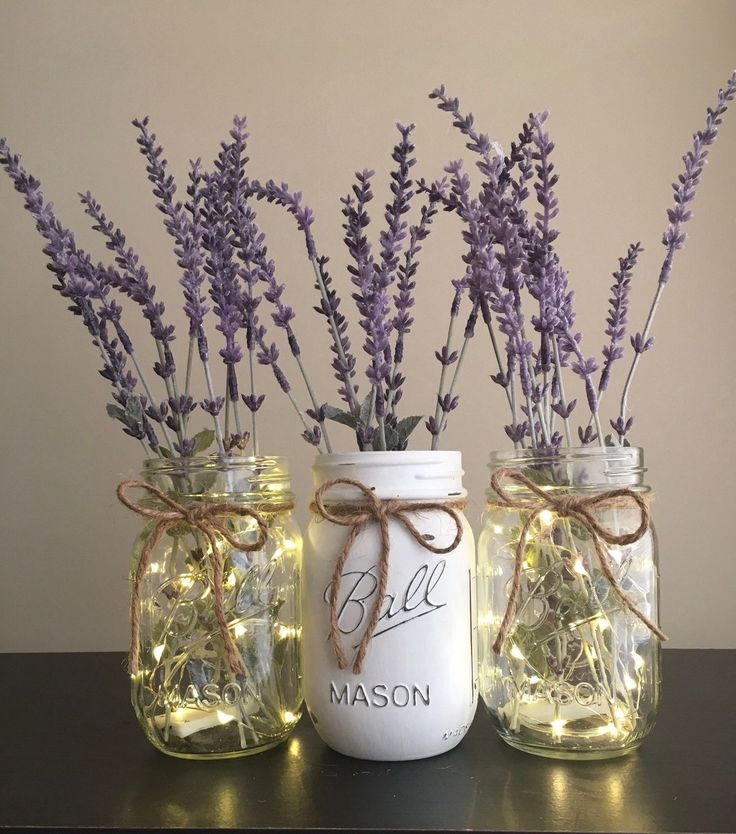
5) DIY Mason Jar Vases
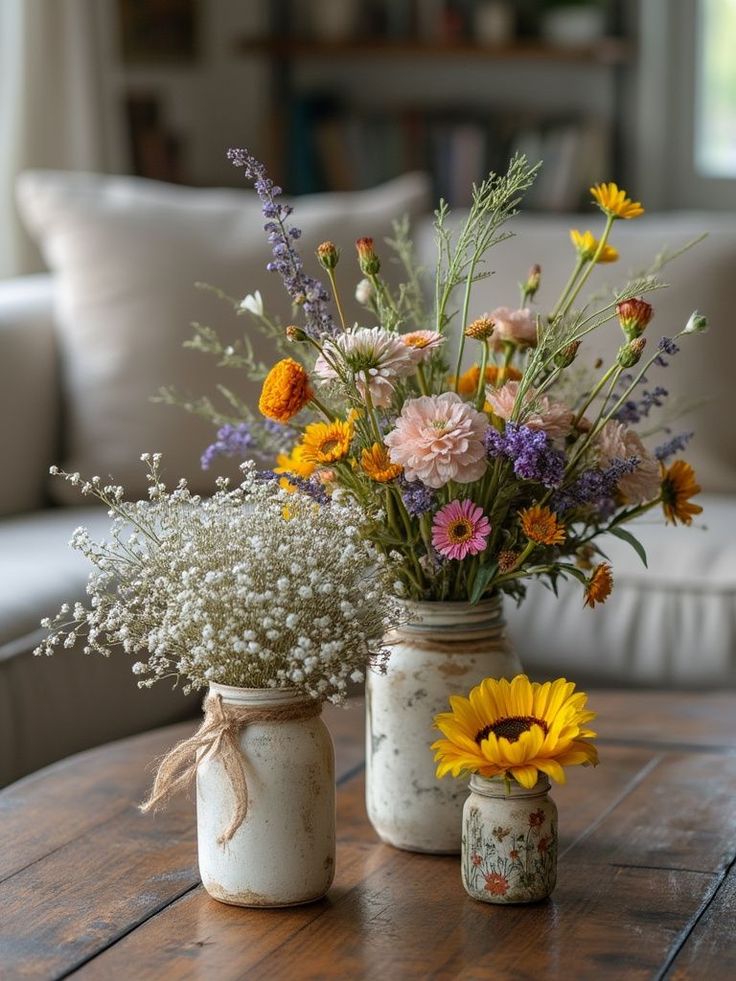
Mason jar vases are versatile and budget-friendly decor pieces that can transform your home. They’re perfect for showcasing fresh flowers, dried arrangements, or even as standalone decorative items.
You can paint mason jars in various colors to match your home decor. Consider using chalk paint for a rustic look or acrylic paint for vibrant colors. Adding ribbon, twine, or burlap around the jar creates additional texture and visual interest.
Hanging mason jar vases make for eye-catching displays. Attach wire or twine to create hangers and mount them on walls or fences for an unexpected garden element. For special occasions, these hanging arrangements can become impressive centerpieces.
Wedding decor is another popular application for mason jar vases. Simple jars with delicate flowers and ribbons make affordable yet elegant table decorations for receptions.
For a unique twist, try creating themed mason jar vases for different seasons or holidays. Add festive embellishments like snowflakes for winter or autumn leaves for fall.
The beauty of mason jar vases is their versatility. One jar can be transformed in numerous ways with paint, fabric, natural elements, or decorative accessories.
6) Anthropologie-Inspired Candle Holders
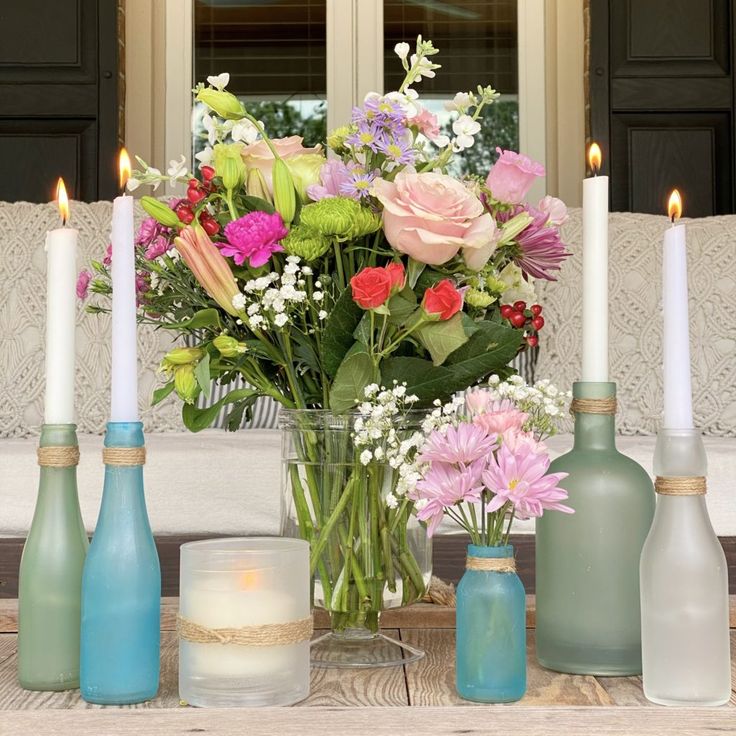
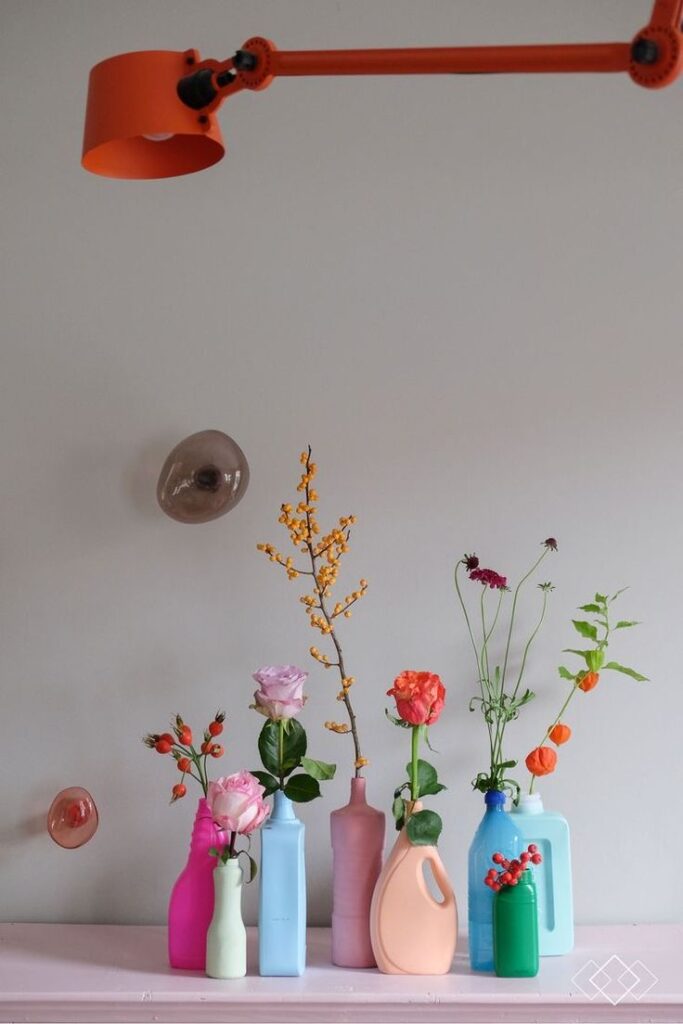
Anthropologie is known for its distinctive, artistic candle holders that add elegance to any space. You can recreate this high-end look without the hefty price tag by upcycling old candle holders or glass containers.
Start with simple glass containers from Dollar Tree or reuse old candle jars. Apply sea glass spray paint to create a frosted, ethereal look that mimics Anthropologie’s aesthetic. This transforms ordinary glass into something special with minimal effort.
For a more layered look, use E6000 adhesive to stack different holders together, creating unique, sculptural pieces. This technique allows you to customize the height and style of your candle holders.
Consider adding decorative elements like textured paint, small beads, or pressed flowers to enhance your design. These personal touches make your creation truly one-of-a-kind while maintaining that coveted Anthropologie vibe.
This project works beautifully for fall decorating or year-round home décor. Place your finished holders on mantels, coffee tables, or as dining table centerpieces to showcase your creative work.
7) Reusable Fabric Wall Art
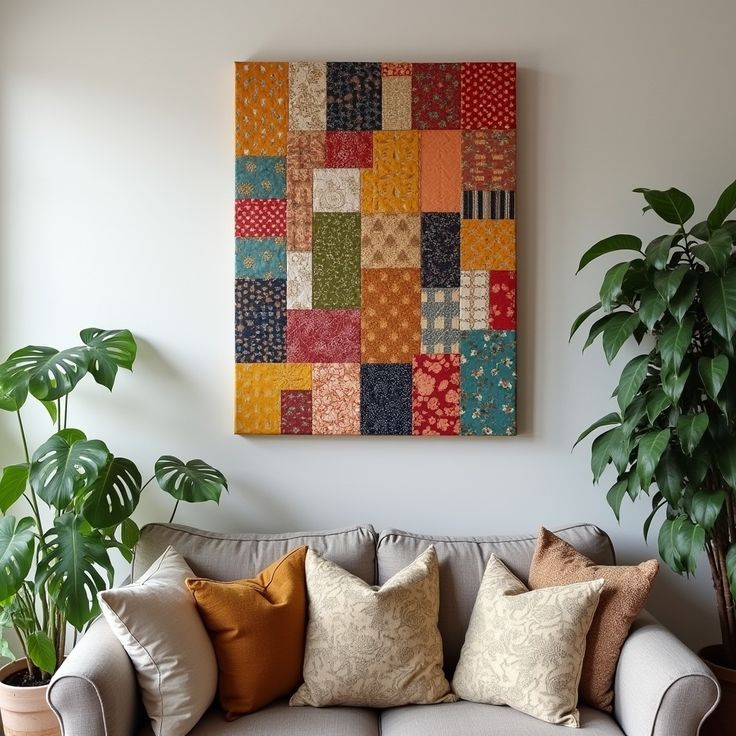
Fabric wall art offers a flexible way to decorate your space while allowing you to update your decor whenever inspiration strikes. You can create stunning textile art pieces that can be changed seasonally or whenever you want a fresh look.
Start by selecting fabric swatches with interesting patterns or colors that complement your existing decor. Consider using remnants from previous projects or upcycling old clothes for a sustainable approach.
The simplest method involves stretching fabric over a wooden frame or canvas. Secure the fabric with staples on the back of the frame for a clean, professional appearance.
For a more dynamic display, try creating a fabric wall hanging using wooden dowels at the top and bottom. This technique works particularly well with lighter fabrics that can move gently with air circulation.
Another approach is to place complementary fabric pieces inside picture frames for an elegant gallery wall effect. This method allows you to easily swap out fabrics when you’re ready for a change.
You can also add texture by incorporating embroidery or appliqué techniques to your fabric pieces before displaying them.

8) Dollar Tree Coasters with Resin
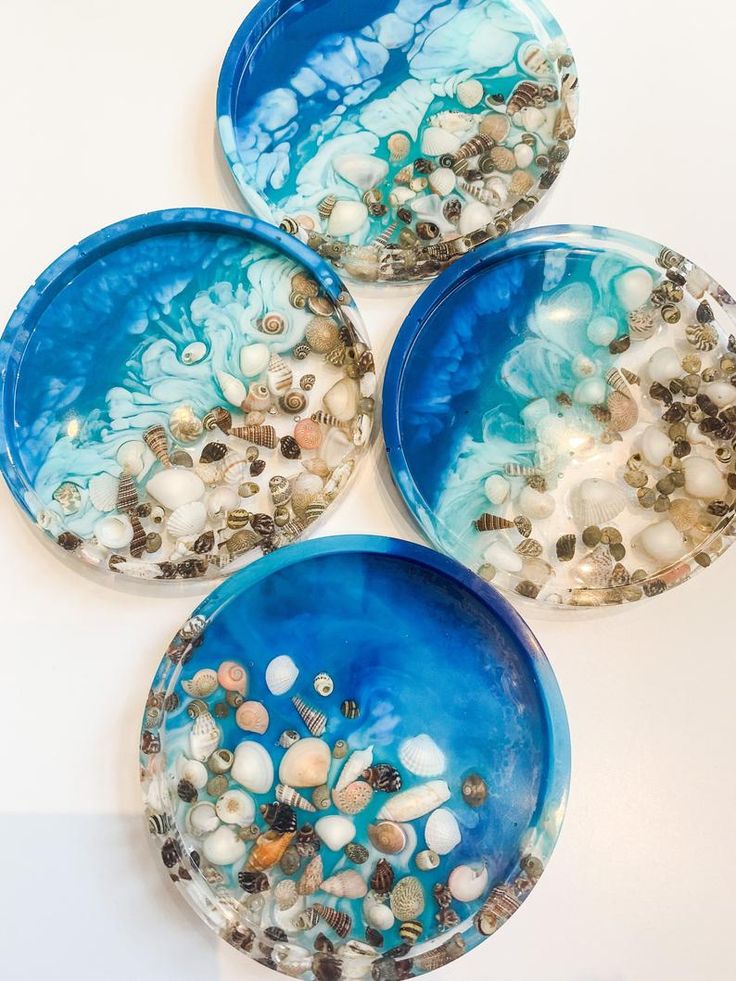
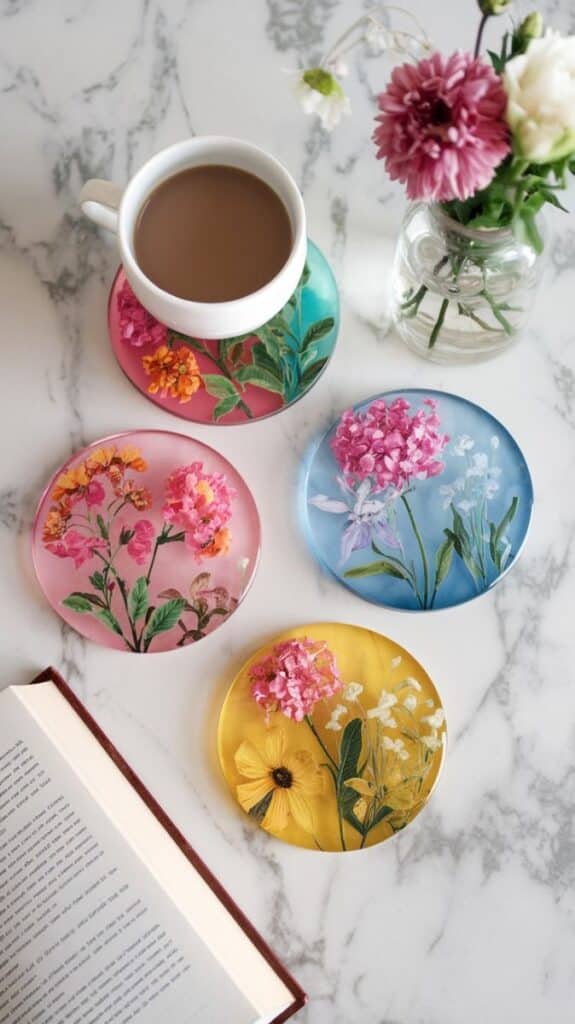
Creating custom coasters with resin is an affordable DIY project when you use Dollar Tree supplies. Their stores now carry resin molds specifically designed for coasters, along with two-part epoxy resin that makes this craft accessible to beginners.
To start this project, purchase the Dollar Tree resin mold coasters and their two-part resin (Part A and Part B). You’ll need to mix equal parts of the resin according to the package instructions for proper curing.
Add personal touches to your coasters with items like glitter, dried flowers, or ocean-themed elements. Many crafters create stunning ocean scene coasters using blue tints and white accents to mimic waves.
The beauty of this project is its versatility. You can customize each coaster with different colors and embedded elements to match your home décor or create themed sets.
Allow your resin to cure completely according to the instructions before removing from the molds. This typically takes 24 hours, but check your specific resin’s requirements.
These custom coasters make excellent gifts and can easily be sold at craft fairs if you enjoy making them. At just a few dollars for supplies, this project delivers high-end looking results on a budget.
9) Boho Macramé Wall Hangings
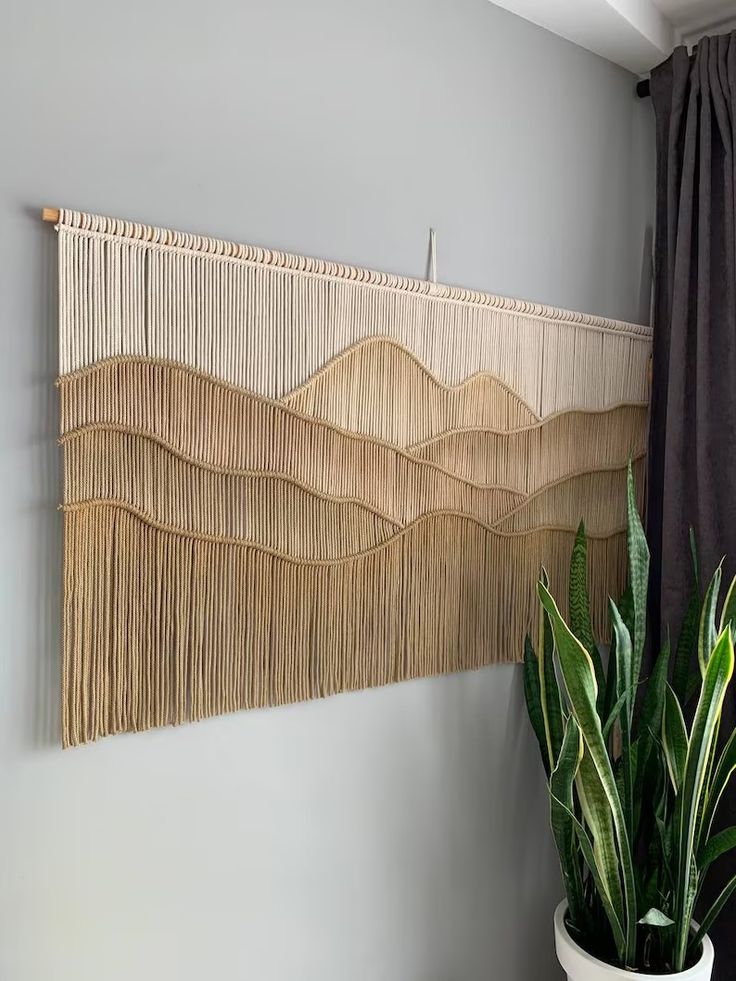
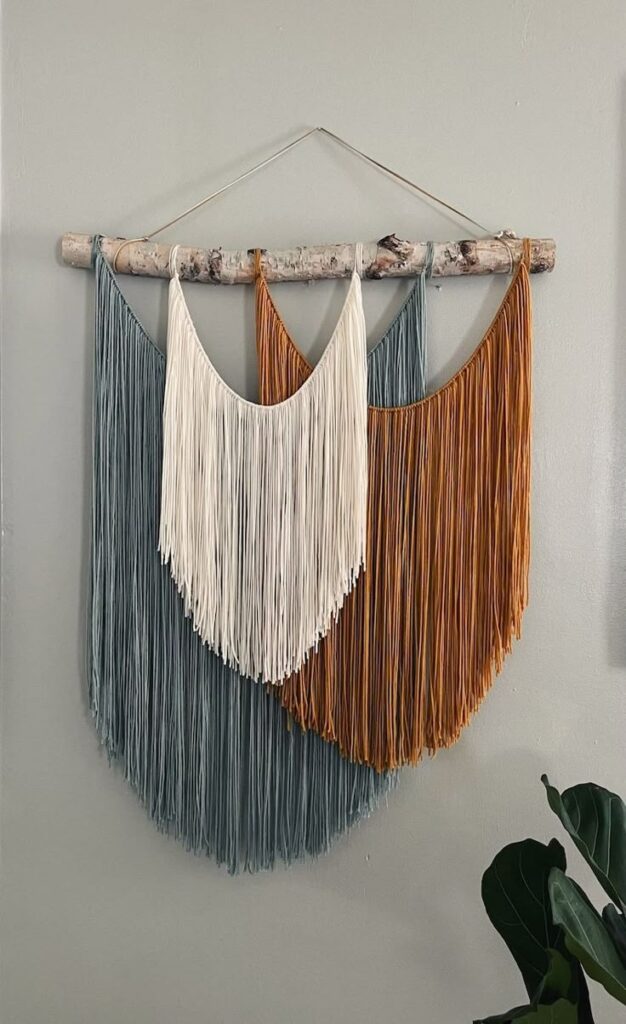
Macramé wall hangings are a perfect way to add bohemian flair to any room. These knotted creations bring texture and artistic expression to blank walls with their free-spirited design.
You can create simple or intricate pieces depending on your skill level. Basic macramé knots are surprisingly easy to learn, making this an accessible DIY project even for beginners.
To start your macramé journey, you’ll need cotton cord, a wooden dowel, and scissors. Many designs incorporate natural elements like wooden beads, feathers, or driftwood for added boho character.
Try a minimalist approach with a small hanging using simple square knots. Or challenge yourself with more detailed patterns featuring diagonal clove hitches and decorative fringe.
Wall hangings can be customized to match your existing decor through color and size variations. Natural cotton in cream or beige offers a classic boho look, while dyed cords create vibrant statement pieces.
Consider creating a macramé backdrop for a special event or as a striking headboard alternative. These versatile decorations can transform a plain wall into an artistic focal point that showcases your creativity.
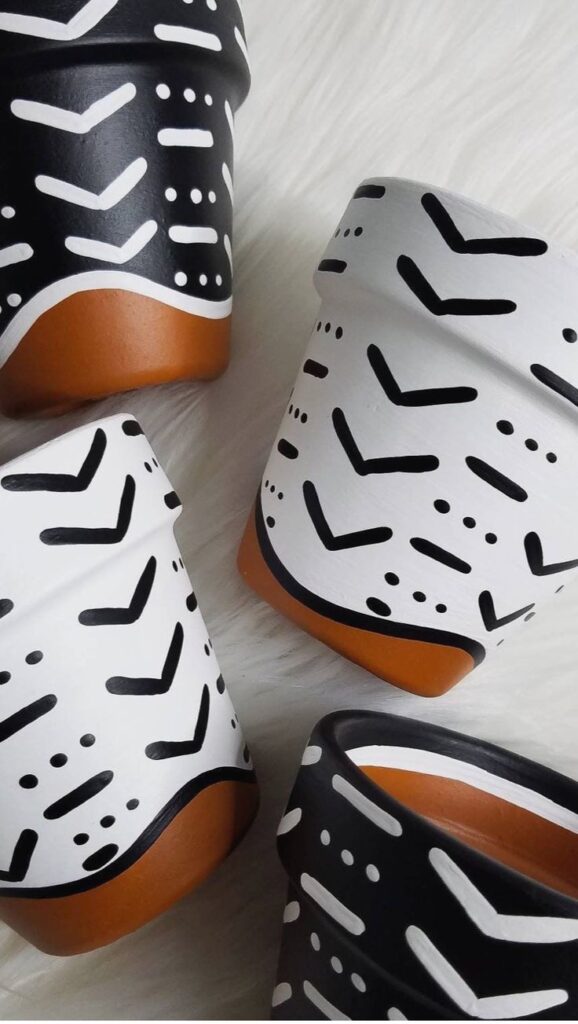
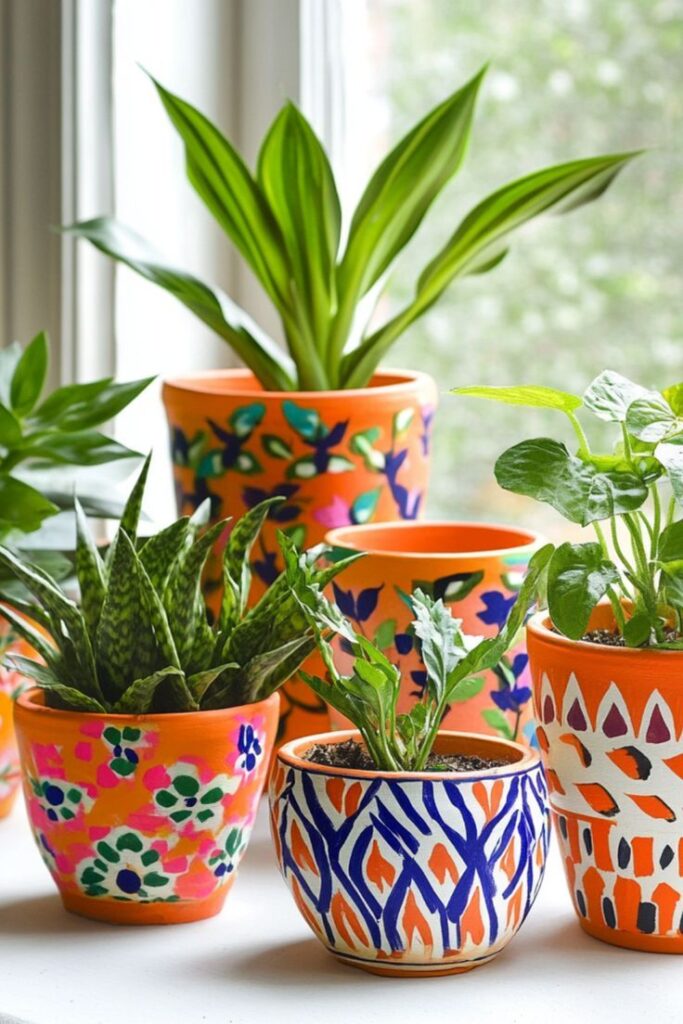
10) Hand-Painted Terra Cotta Pots
Terra cotta pots are a blank canvas for your creativity. With some acrylic paint and a few basic supplies, you can transform ordinary clay pots into personalized decor pieces for your home or garden.
Start with clean, dry pots. Apply a base coat of acrylic paint if you want a solid background, or leave the natural terra cotta exposed for a more rustic look.
You can create simple designs using painter’s tape for clean lines and geometric patterns. Alternatively, try freehand painting flowers, abstract designs, or even meaningful quotes.
For a distressed vintage appearance, apply paint and then lightly sand certain areas after drying. This technique highlights the natural texture of the clay underneath.
Don’t forget to protect your artwork with a clear sealer, especially if the pots will be used outdoors. A matte sealer preserves your design while maintaining the natural look of the pot.
These customized pots make excellent gifts for friends and family. They’re perfect for housing small plants or succulents and add a personal touch to any space in your home.
Essential Materials for DIY Decor Projects
Before diving into any DIY decor project, gathering the right materials will save you time, money, and frustration. The following supplies and sustainable materials form the backbone of most home decoration projects while keeping costs manageable.
Budget-Friendly Craft Supplies
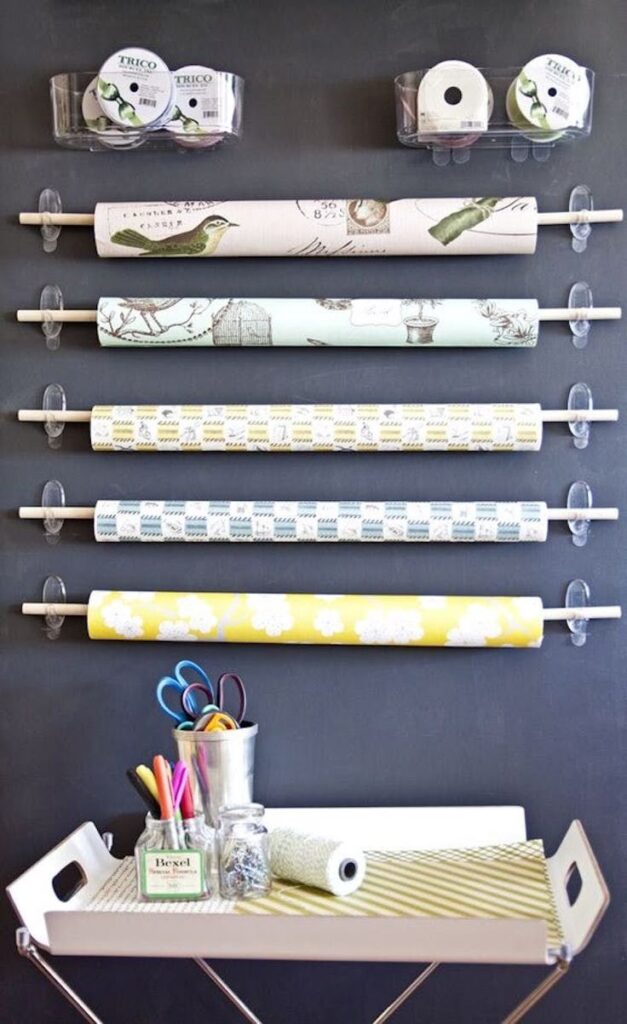
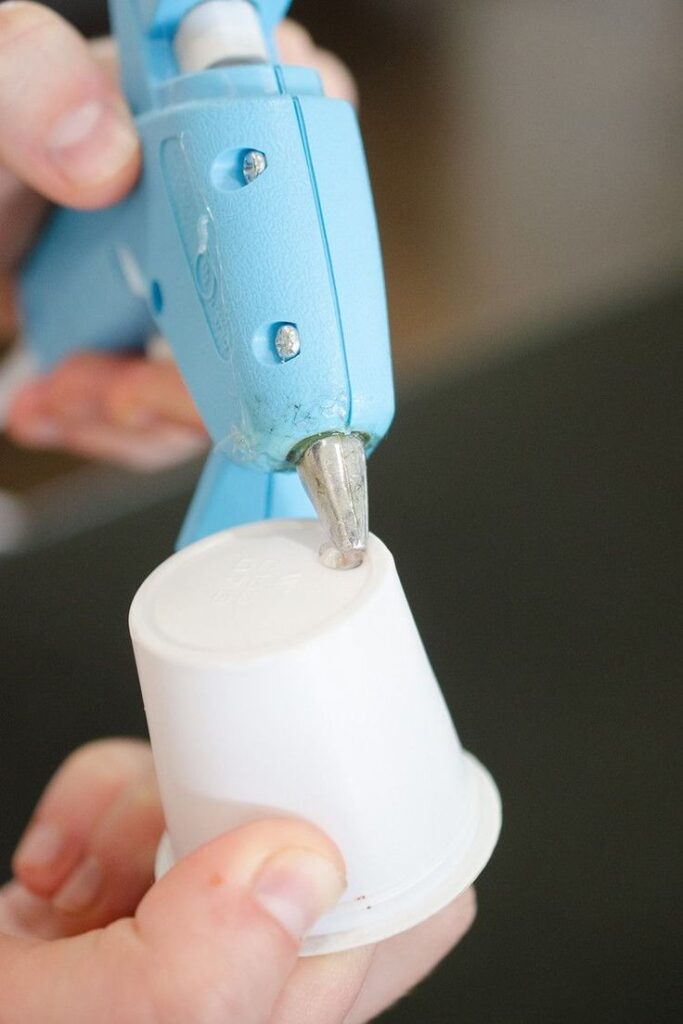
A well-stocked craft supply collection doesn’t require breaking the bank. Start with basic tools like sharp scissors, a reliable hot glue gun, and various adhesives (craft glue, double-sided tape, and mounting putty).
Paint supplies are essential – invest in a few good quality brushes in different sizes and acrylic paints in neutral colors that you can mix for custom shades. Add inexpensive craft paint in small bottles for detailed work.
Keep a collection of basic textiles like felt, burlap, and cotton fabric scraps. Paper products including cardstock, construction paper, and decorative scrapbook paper provide endless possibilities.
Look for sales at craft stores or use coupons from retailers like Michaels, Hobby Lobby, or JOANN Fabrics. Dollar stores often carry basic supplies at significant savings.
Sourcing Sustainable Materials
The most eco-friendly materials are often those you already own. Look around your home for recyclable containers like glass jars, tin cans, and cardboard boxes that can be upcycled into beautiful decor.
Natural elements provide free, sustainable decoration options. Collect pinecones, interesting branches, stones, or dried flowers during outdoor walks. These items add organic texture to your projects.
Visit thrift stores for affordable frames, vases, and fabric that can be transformed with a little creativity. Estate sales often yield vintage treasures at bargain prices.
Consider material swaps with friends or check local buy-nothing groups on social media platforms. Community recycling centers sometimes offer creative reuse sections where you can find unique materials at minimal cost.
Tips for Personalizing Your DIY Decor
Making your DIY projects uniquely yours transforms ordinary decor into meaningful pieces that reflect your personality and style. Personalization elevates even simple projects into standout home accents that visitors will notice.
Incorporating Color Palettes
Choose colors that resonate with your emotional goals for each space. Bold reds and oranges energize living areas, while blues and greens create calm in bedrooms or studies. Consider using the 60-30-10 rule: 60% dominant color, 30% secondary color, and 10% accent color.
Look to your existing favorite pieces for color inspiration. A cherished painting or textile can become the foundation for an entire room’s color scheme.
Test colors before committing by collecting paint chips or fabric swatches. Place them in your space at different times of day to see how lighting affects them.
Pro tip: Create a digital mood board with your chosen color palette to visualize how everything will work together before purchasing materials.
Blending Styles With Existing Decor
Identify connecting elements across different styles to create cohesion. A consistent color thread or material type can unite eclectic pieces successfully.
Use proportion and scale to your advantage. Balance larger statement pieces with smaller DIY accents that complement rather than compete with existing decor.
Consider the visual weight of items. Heavy furniture can be balanced with lighter DIY elements like wall hangings or botanical arrangements.
Mix textures thoughtfully to add dimension. Pair rough, handmade ceramic pieces with smooth glass or sleek metal for interesting contrast that still feels harmonious.
Try this: Take photos of your space before adding new DIY elements to better visualize the impact they’ll have on your existing decor.
Common Mistakes To Avoid in DIY Decorating
DIY home decorating can transform your space, but certain pitfalls can derail even the most enthusiastic projects. Understanding where most decorators go wrong helps you create more successful, professional-looking results.
Overlooking Prep Work
Skipping preparation is the fastest way to compromise your DIY project. Many decorators rush into painting without properly cleaning walls or removing outlet covers. This eagerness often leads to uneven finishes and paint bleed.
Always take time to sand surfaces, fill holes, and tape edges meticulously. Using the wrong primer (or none at all) can cause paint to peel or fail to adhere properly to surfaces like glossy walls or furniture.
For wallpaper projects, wall preparation is even more critical. Uneven surfaces will show through immediately, revealing every bump and imperfection. Most professional-looking results come from spending 60% of your time on prep work and 40% on the actual decorating.
Quick Prep Checklist:
- Clean surfaces thoroughly
- Repair imperfections
- Use appropriate primers
- Allow proper drying time between steps
Misjudging Project Scale
Underestimating time, materials, and skill requirements is a common DIY decorating downfall. What seems like a “weekend project” often extends into weeks because of unexpected complications or the need to learn new techniques.
Many DIYers purchase insufficient materials, leading to mid-project store runs or mismatched batches. Always buy 10-15% more material than you think you’ll need, especially for wallpaper, tile, and paint.
Tool requirements frequently surprise novice decorators. Using improper tools, like the wrong paint brush type or size, can significantly impact your results and efficiency.
Budget miscalculations happen when you focus only on primary materials while forgetting about necessary supplies like drop cloths, specialty cleaners, and proper adhesives. Create a detailed list of all required items before starting.
Scale Planning Tips:
- Double your estimated time commitment
- Research specific techniques beforehand
- Calculate materials with extra allowance
- List all tools and supplies needed
- 3.0Kshares
- Facebook0
- Pinterest3.0K
- Twitter1
- Reddit0


