Most people who search for how to draw snow already know the frustrating part. You leave the paper white, add a few dots, and the scene goes flat. The snow doesn’t look heavy, cold, or bright. It looks unfinished.
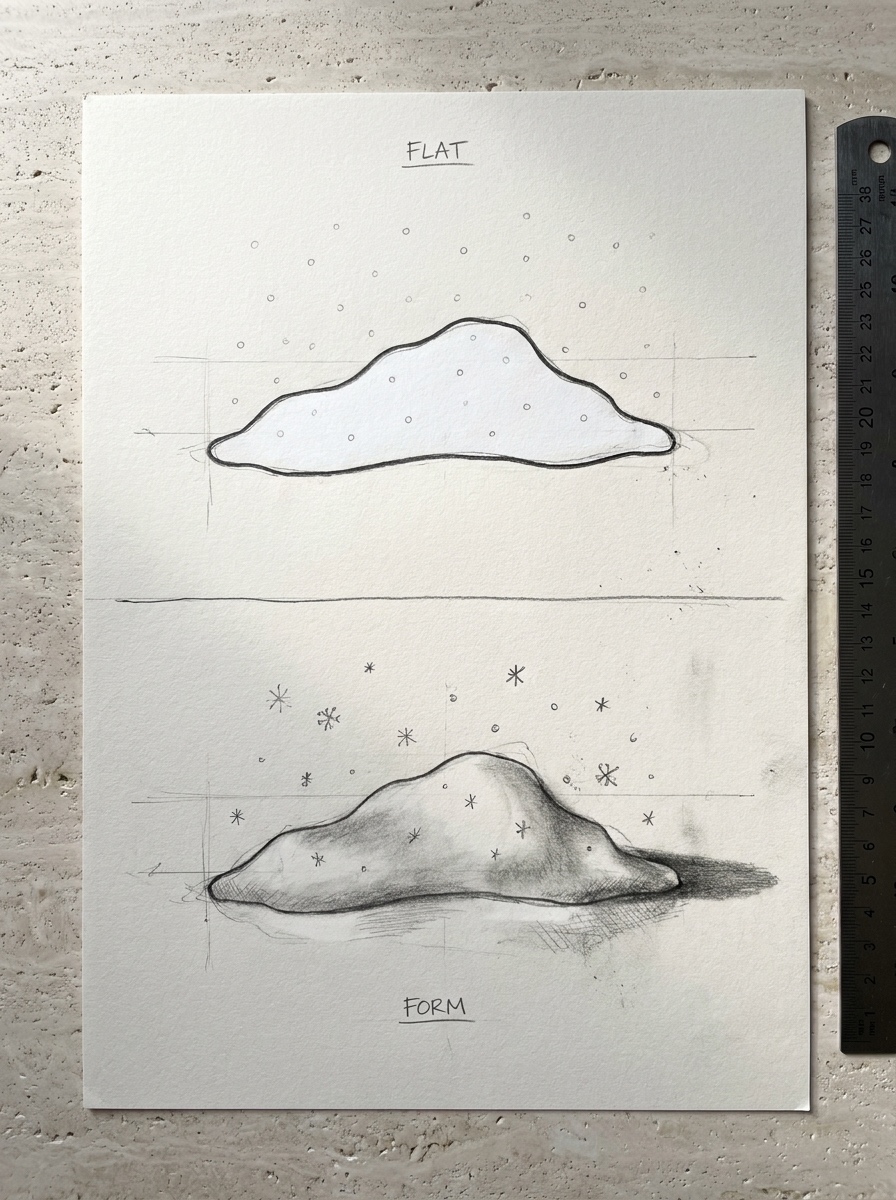
The fix is to stop treating snow as white. Snow is a bright, rough surface that picks up the color of the sky, the sun, and anything nearby. Its form only appears when you control the values around it, the temperature of its shadows, and the edges where it meets rock, branch, or air.
This tutorial covers real snow: drifts, snowbanks, snowy ground, snow-laden branches, and falling snow in a winter scene. It does not cover decorative snowflakes or Snow White. You’ll start with four quick checks and work through a six-step graphite method. Then you’ll translate that method into colored pencil, watercolor, gouache, and digital painting.
The short answer: how to draw snow convincingly
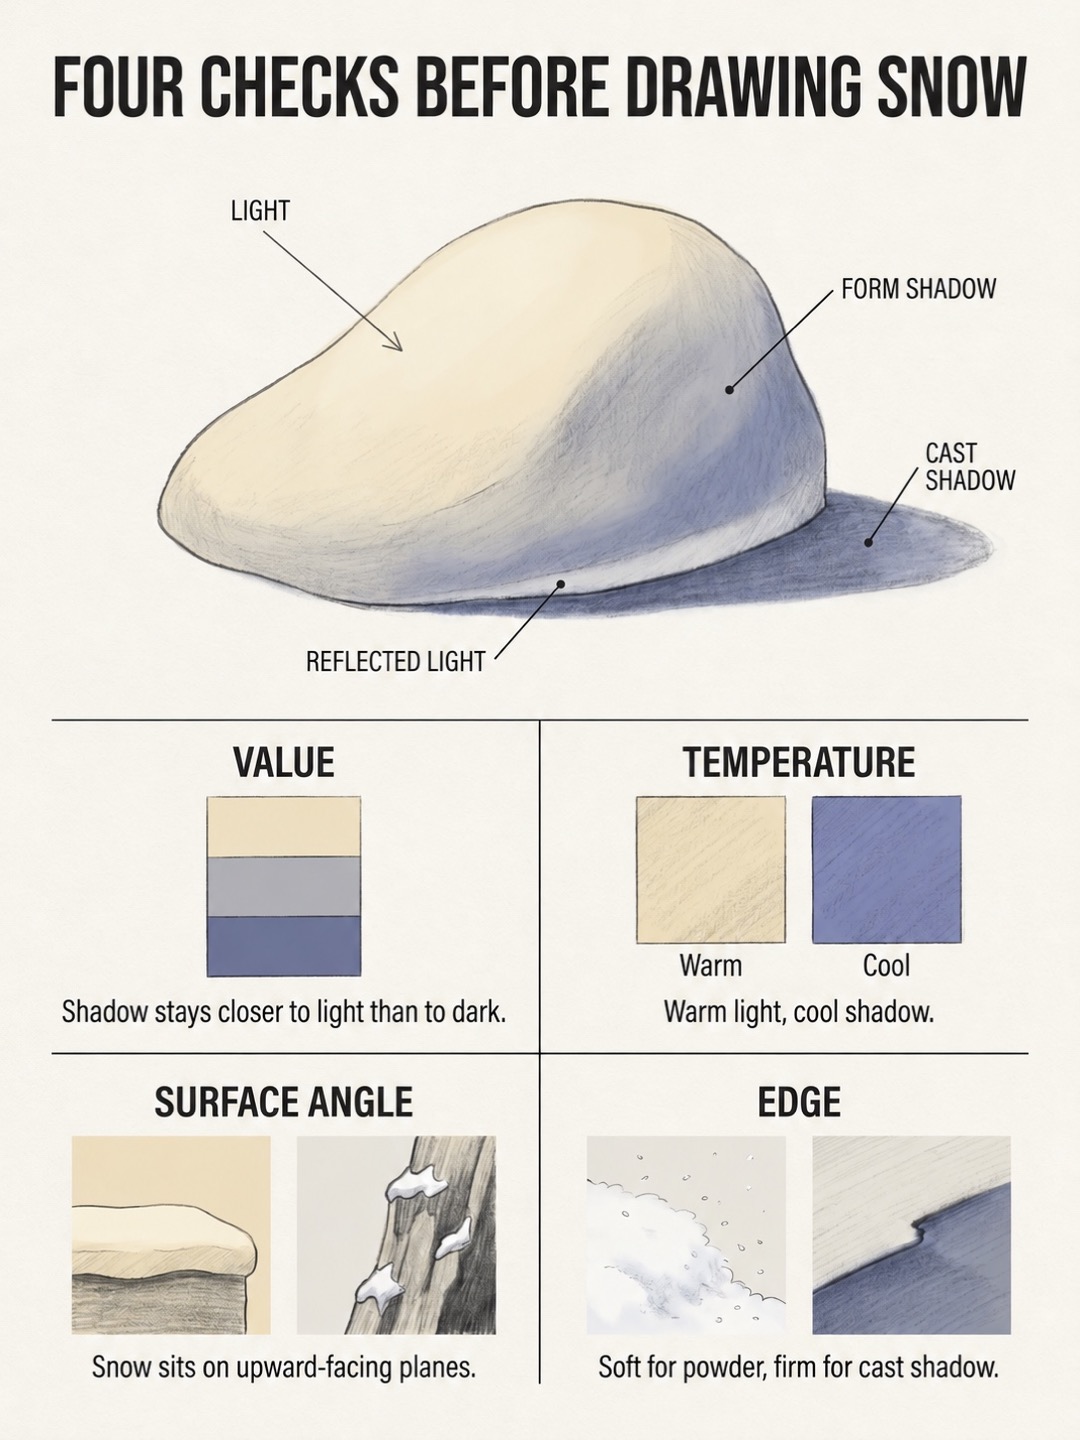
To draw snow convincingly, darken everything around it and keep its shadows light and cool. Shape it as rounded masses that rest on upward-facing surfaces. Before you make a mark, run four checks: value, temperature, surface angle, and edge.
- Value. Snow is usually the lightest mass in the picture, but not every part of it is paper white. Group the shadow side into one light-middle value. Save pure white for planes that face the light.
- Temperature. In sunlight, lit snow leans warm. Shadows lean blue or blue-violet because they take in ambient sky color. Overcast light narrows that gap.
- Surface angle. Snow settles on horizontal and gently sloped tops. Steep faces, undersides, and vertical trunks hold little or none.
- Edge. Powder snow against a soft sky gets soft edges. Compacted snow, cut paths, and sunny-day cast shadows get firmer ones.
When a snow drawing looks wrong, one of these four checks is usually the cause. Most of the work comes down to shading fundamentals. Our shading drawing guide covers form shadow, cast shadow, and value transitions in more depth.
Materials and setup
You don’t need special supplies. You need a few tools that let you control dark values and protect light ones.
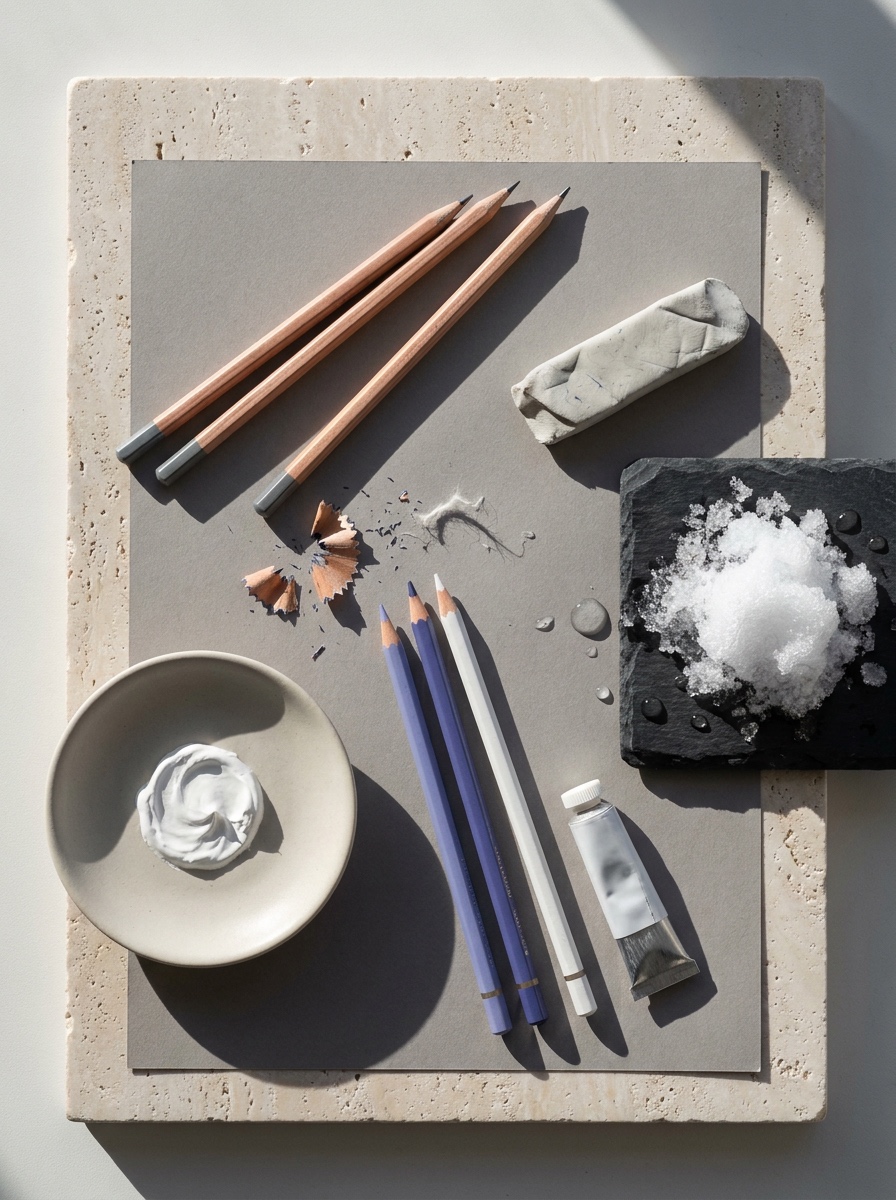
For graphite:
- HB for layout and pale snow shadows
- 2B for midtones in trees, rocks, and sky
- 4B for the darkest accents next to bright snow
- A kneaded eraser for lifting highlights and softening edges
- Smooth or lightly textured drawing paper. Heavy paper tooth breaks up shadows into speckle.
For toned paper and colored pencil:
- A mid-gray or muted blue toned paper, such as Strathmore’s toned gray sketch paper
- A white colored pencil, plus a pale cream for sunlit tops
- Two or three cools: light blue, blue-violet, and a soft gray
For watercolor and gouache:
- Ultramarine and cobalt blue for shadows and sky reflections
- A violet, such as permanent violet, to warm the blue toward evening light
- One earth color, such as burnt sienna or yellow ochre, for dirty snow and reflected warmth
- White gouache for falling flakes and recovered highlights
- Masking fluid if you prefer to protect whites mechanically
For digital: Keep the brush set small. A hard round, a soft airbrush, one texture brush, and one spatter or speckle brush are enough. Large brush libraries tend to produce busy, decorative snow.
Two habits matter more than any tool. First, work from reference photos that show clear light direction. Second, make a grayscale thumbnail before every finished piece. If the thumbnail doesn’t read, the final drawing won’t either.
How to draw snow step by step
The steps below follow one continuous example: a path curving into the picture, a low snowbank along its right edge, a pine tree on the right, and a soft hill in the distance. Do it first in graphite. The same sequence then carries into color.
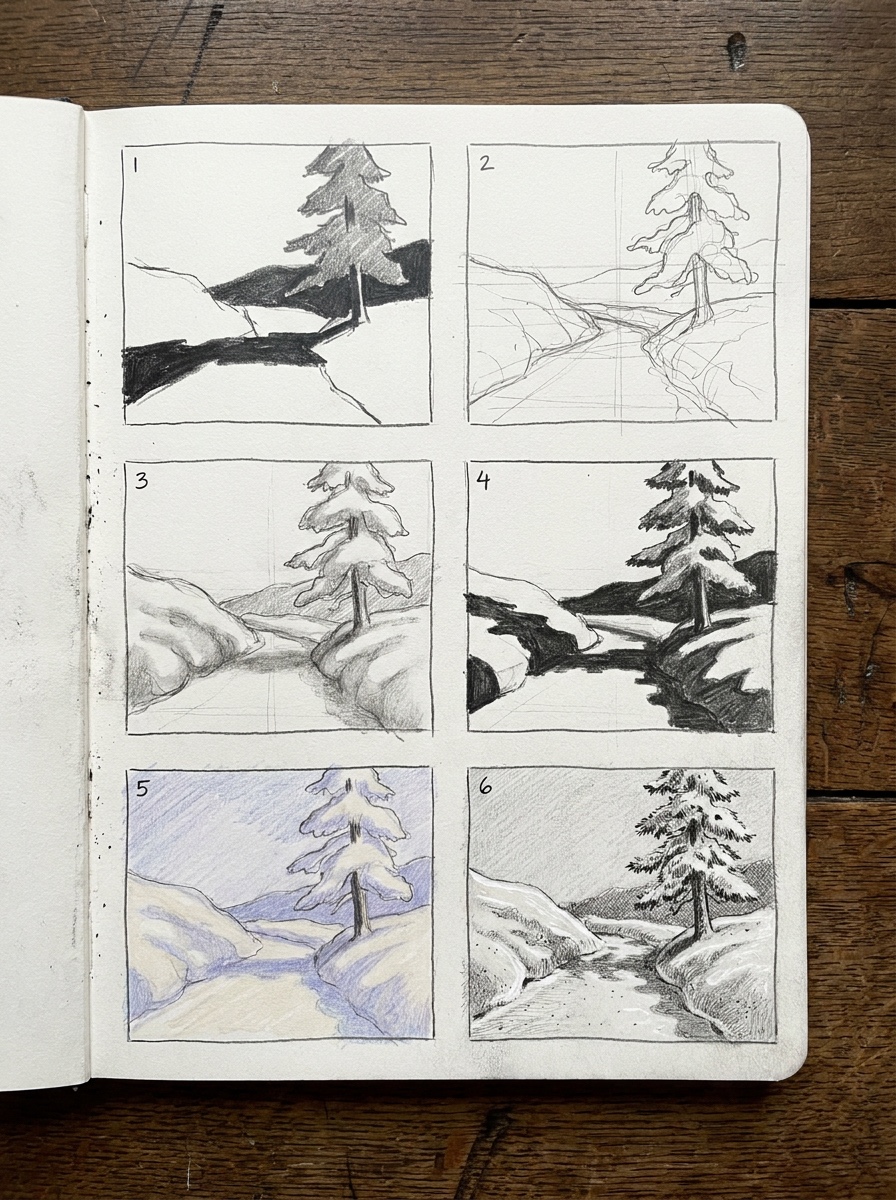
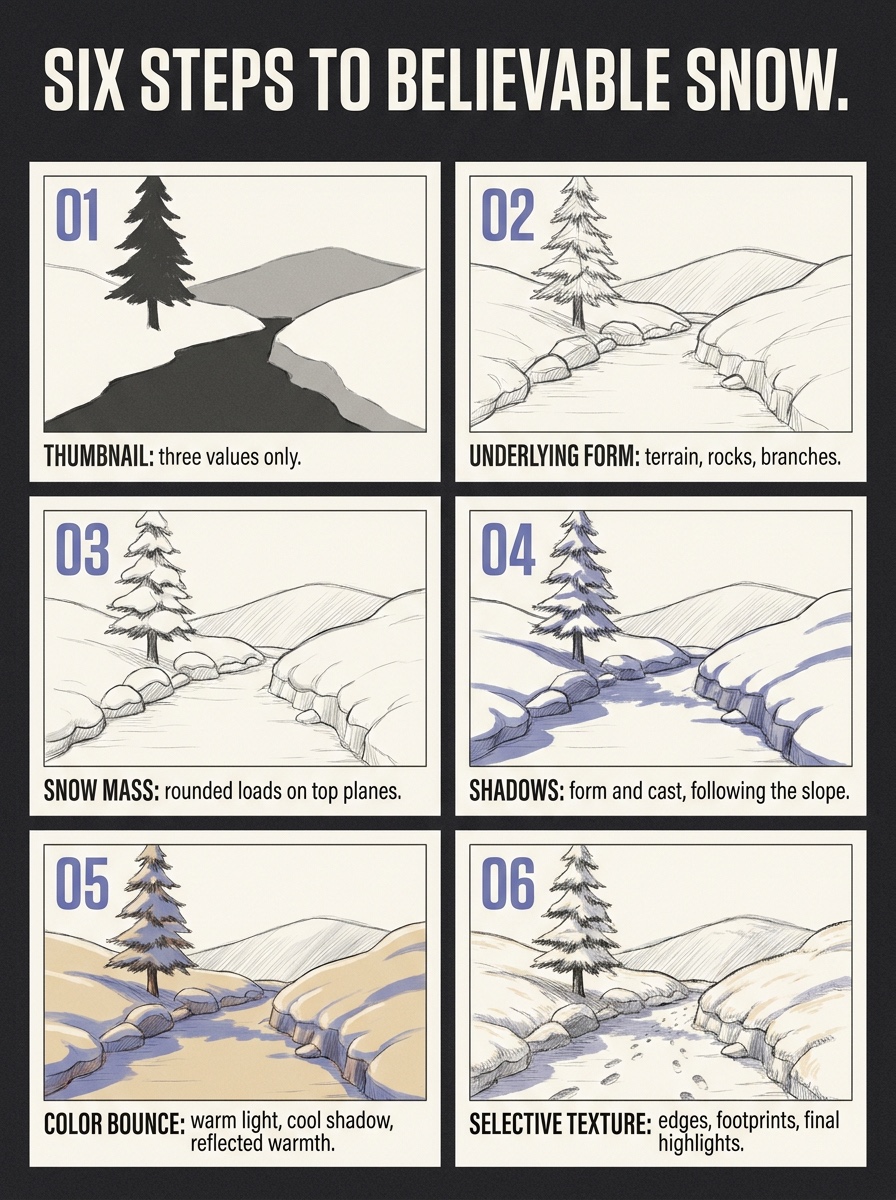
Step 1: Choose the light and make a three-value thumbnail
Decide where the sun is before you draw anything else. For this scene, place a low afternoon sun at the upper left.
Make a thumbnail about the size of a playing card using three values only:
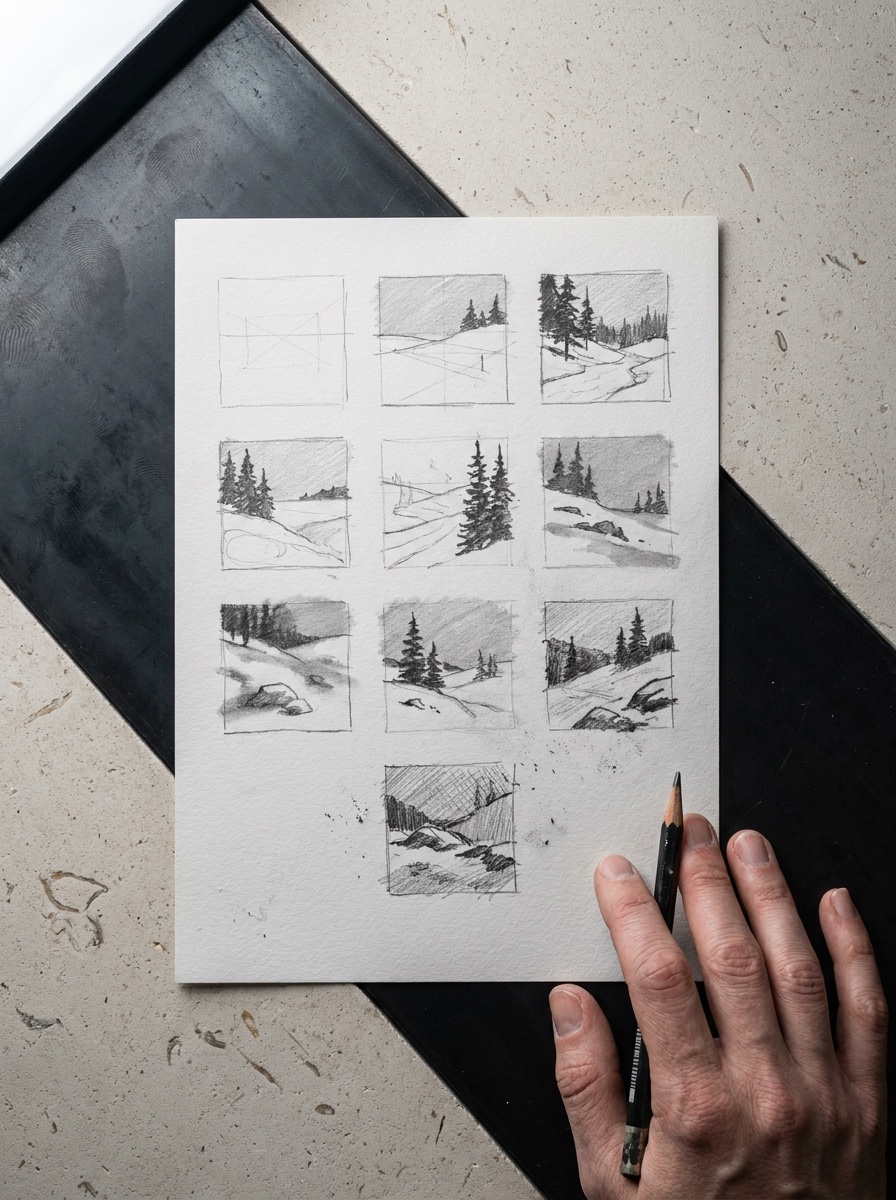
- paper white for snow in light;
- one light gray for snow in shadow and for the sky;
- one dark for the pine, rocks, and the far treeline.
Academic drawing trained me to compare big value masses before thinking about texture, and snow is where that habit pays off fastest. The test is simple. The shadow side of the snowbank should sit much closer in value to the lit snow than to the pine. When beginners push snow shadows too dark, the snow turns into gray rock.
Step 2: Draw what is under the snow
Snow is a coating, so draw the thing it coats. Lightly lay in:
- the path as two converging curves;
- the ground under the bank;
- one or two buried rocks;
- the pine trunk, with branch tiers angled slightly downward;
- the line of the hill.
My industrial design work made me care more about silhouette and surface breaks than about decorative marks. Snow follows the same logic. A bump where the bank rolls over a hidden rock tells the viewer more than any amount of stippling, and so does the notch where the path cuts through. For placing the horizon and depth planes in a larger scene, see our landscape drawing guide.
Step 3: Wrap rounded snow masses over upward-facing surfaces
Now drape the snow. It settles on surfaces that face the sky and softens every corner it sits on.
- Draw the bank’s top as a soft, swelling curve.
- Give each pine tier a pillow of snow on its upper side.
- Let the bank lip slightly over the path where it was cut.
Steep faces hold less snow. Dessindigo’s snow tutorial makes the same point: rounded shapes signal accumulation, and steep surfaces shed most of it (Dessindigo, How to Draw the Snow).
Let gravity show as well. Heavy loads pull branch tips down. A deep bank sags where nothing supports it underneath.
Step 4: Block cast shadows and form shadows
Separate the two kinds of shadow.
The form shadow is the side of the snowbank turned away from the sun. It has a soft transition where the bank rolls from light into shade. The cast shadow is the pine’s shadow thrown across the path, and it has a firmer edge.
Cast shadows on snow describe the ground under them. Where the pine’s shadow crosses the path, it lies flat. Where it climbs the bank, it bends up and over the top. Where it reaches a footprint, it dips into the hollow.
Fill all shadows with one light-middle value. Then lift a slightly lighter band low on the bank’s shadow side, where sunlight bounces up from the lit path. That reflected light is what makes the bank read as round.
Step 5: Add warm and cool shifts and reflected light
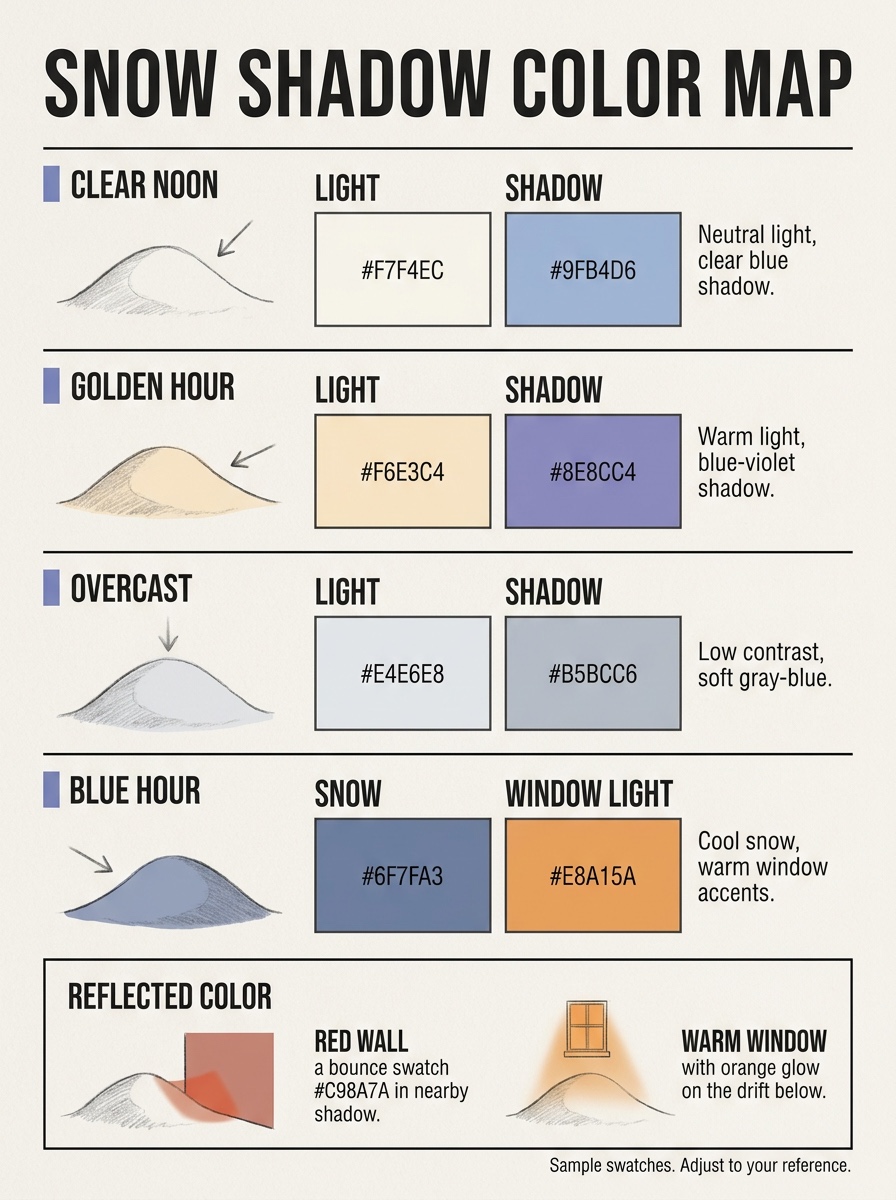
In color, sunlit snow leans warm, from cream to pale yellow. Shadows lean blue or blue-violet because they receive sky light instead of direct sun. Distant snow on the hill turns grayer and cooler through atmospheric perspective, and its contrast drops.
Renee Walden’s watercolor handbook explains why plain white paper everywhere gives no sense of form. It also shows how cool blue and violet shadows, with selective touches of reflected warmth, build volume (Walden, Painting White Subjects in Watercolour). Dessindigo’s demo works the same way, using blue, yellow-beige, gray, and purple rather than flat white.
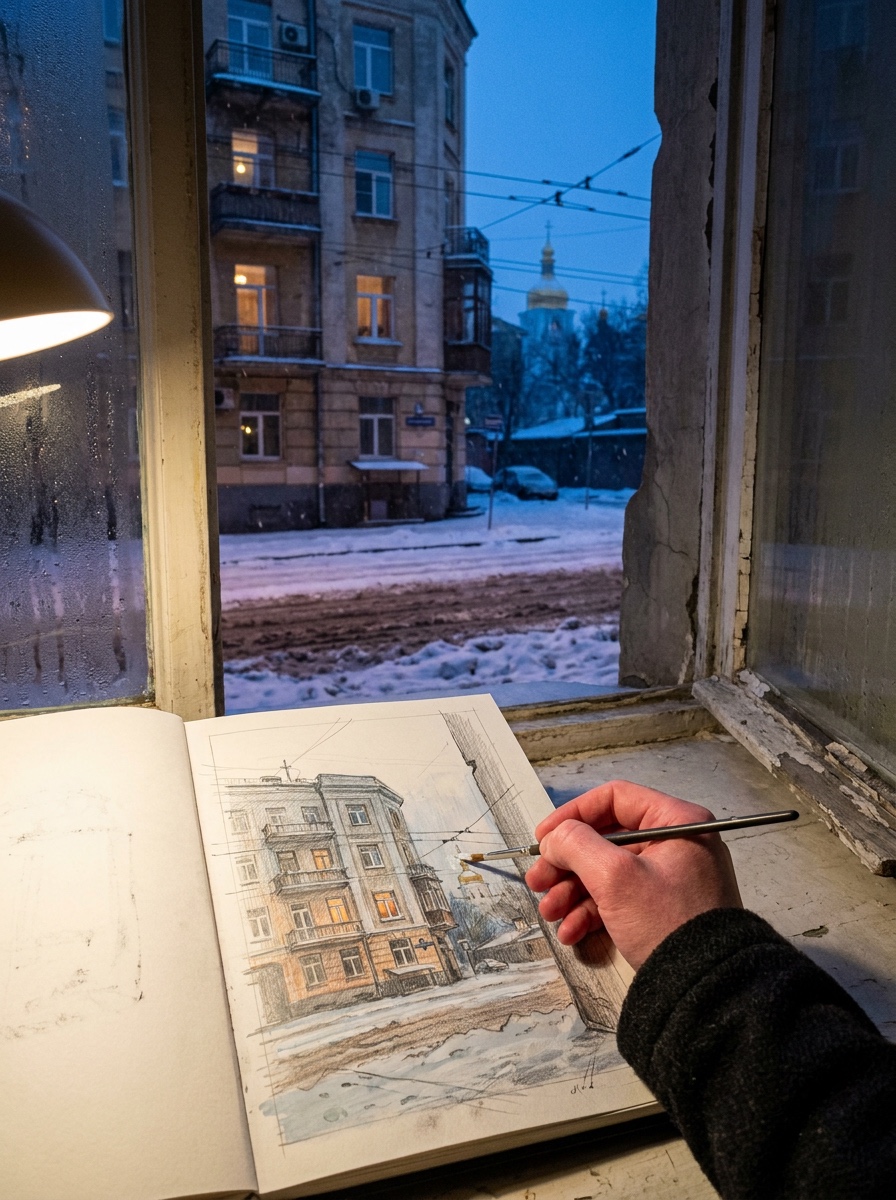
Winter light in Kyiv is a reliable teacher for this step. Overcast mornings flatten everything into blue-gray, and roadside snow goes compacted and brown-gray. At dusk, lit windows push orange into the drifts below them. Sun after a snowfall throws hard blue shadows across warm-white ground. Each of these is a different color key, and none of them is plain white.
Step 6: Add selective texture, sharp accents, and final highlights
Put texture only where the eye looks: along the light-shadow transition and in the foreground. A few broken edges, some crumbs at the bank’s lip, and footprints in snow along the path are enough.
A footprint is a small oval dip. Its shadow falls on the wall nearest the light, and the far wall catches a lit rim.
Add two or three sharp darks, such as a pine twig poking through or a rock edge at the bank’s base. These contrasts make the snow feel brighter. Finish with a handful of pure highlights along the sunlit top, lifted with a kneaded eraser or touched with white gouache. Then stop, and leave the background soft.
Three snow cases you can copy
Each case is a short, repeatable exercise. Give each one 15–25 minutes.
Side-lit snowbank
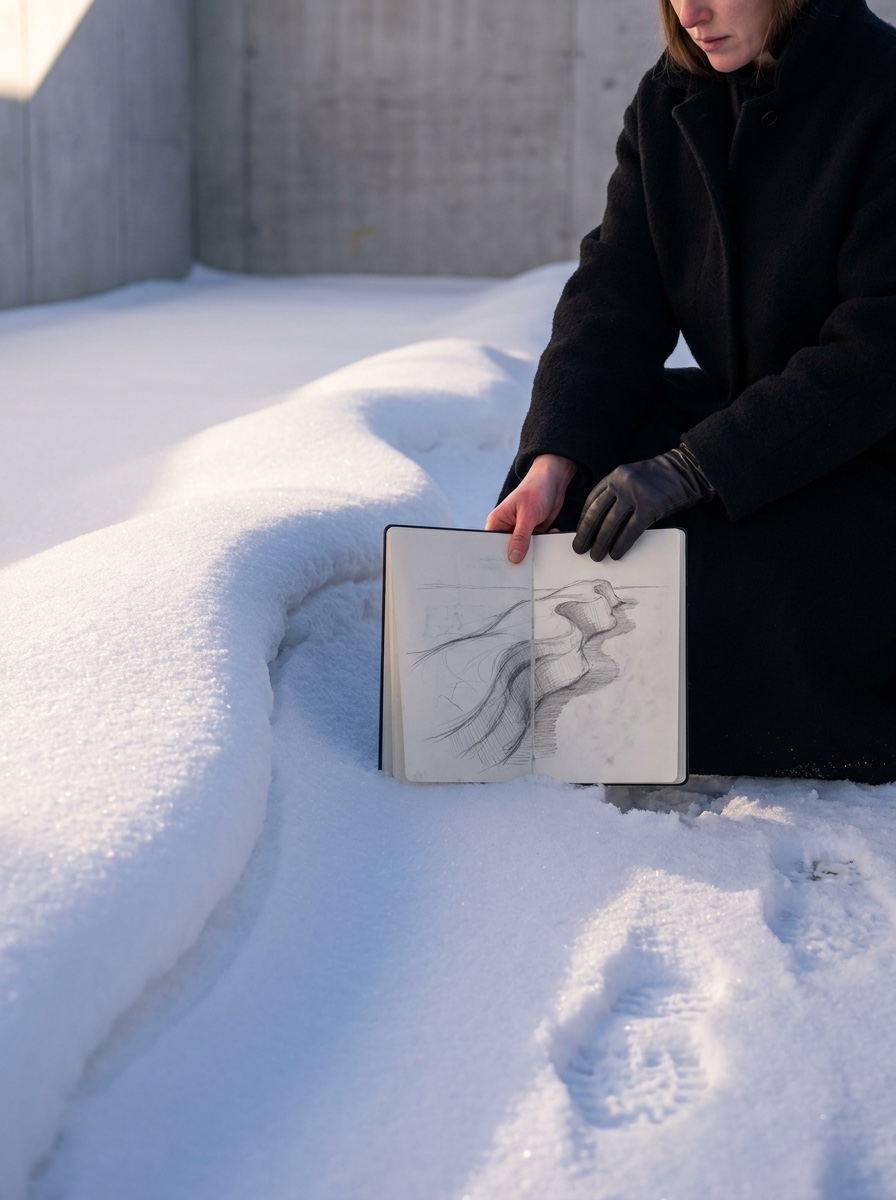
Setup: One low, lumpy snowbank on flat ground, lit by a low sun from the left.
Steps:
- Draw the silhouette as a long, uneven ellipse with one higher hump.
- Shade the right side as form shadow, with a gradual turn from light into shade.
- Throw one cast shadow onto the ground to the right, stretched long because the sun is low.
- Use two edge types. Keep the form shadow’s turn soft and the cast shadow’s outer boundary firm.
- Lift reflected light along the bottom of the shadow side.
Diagnostic: Squint. You should see two clear value groups and one firm shadow shape.
Common failure: A dark outline around the entire bank. Fix: Erase the contour on the lit side. Let the background value define that edge instead.
Snow-covered pine branch
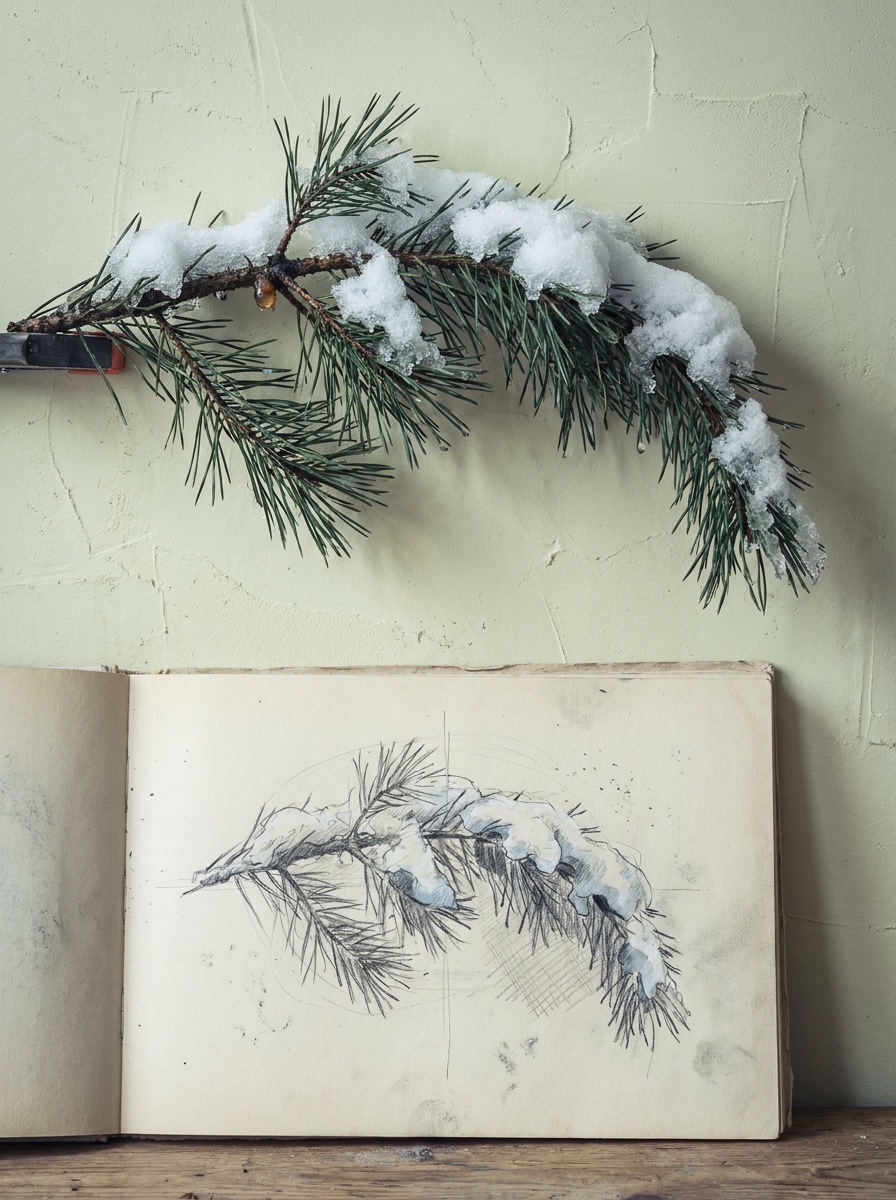
Setup: A single branch seen from the side, under overcast or overhead light.
Steps:
- Draw the branch and twigs first, then the needle clusters as dark, directional masses.
- Place rounded snow clumps only on the upper planes, and vary their size.
- Leave gaps where dark needles break through the snow.
- Let the branch sag toward the tip under the weight.
- Shade the undersides of the clumps with a cool, light value.
Dessindigo’s snowy tree tutorial follows the same order. It builds the structure first, adds rounded masses on top, keeps visible gaps, and uses a tinted ground to judge light colors (Dessindigo, Drawing a Snowy Tree). This exercise is also the foundation for drawing a whole snowy tree.
Diagnostic: Check every underside. If any of them show snow, remove it.
Common failure: Snow drawn as a continuous cartoon cloud along the whole branch. Fix: Break it into three to five unequal loads, and let needles interrupt each one.
Falling snow at night
Setup: A dark sky, a building edge, and one street lamp.
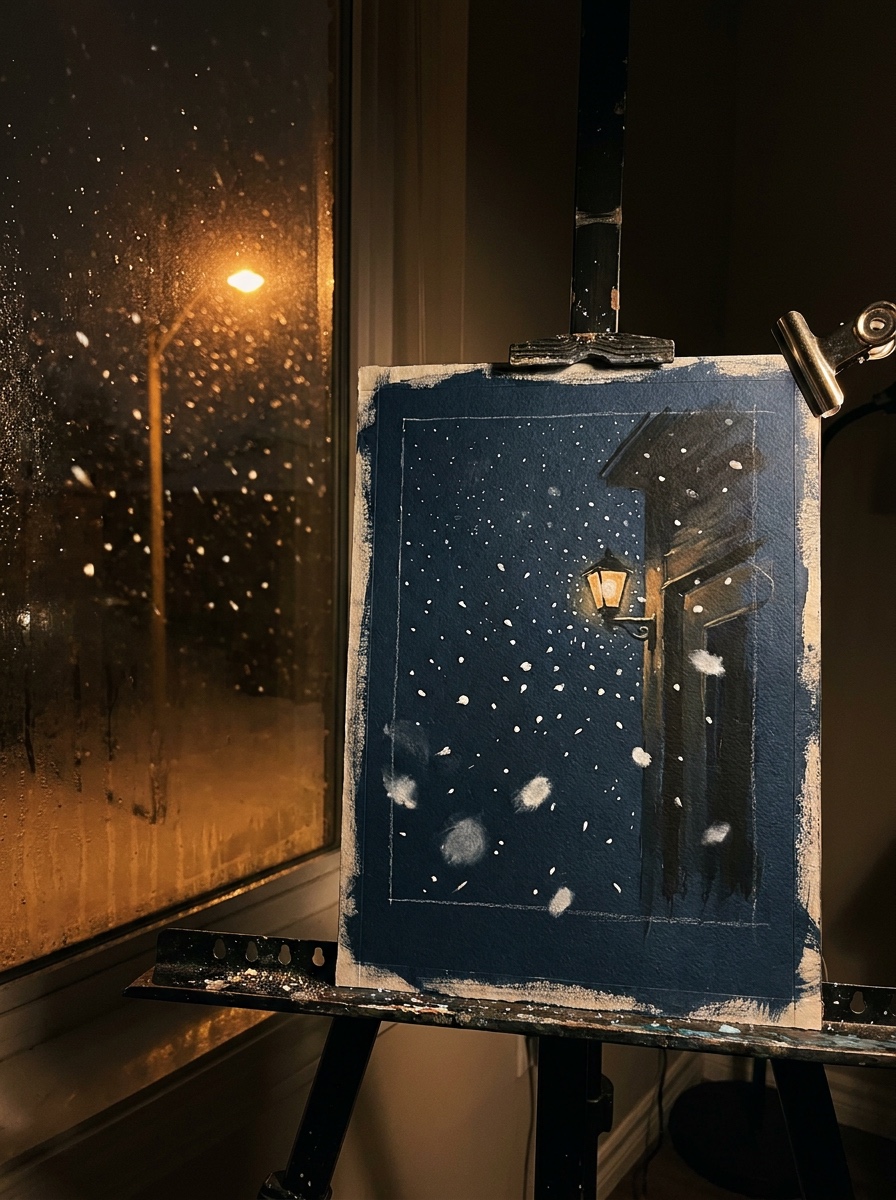
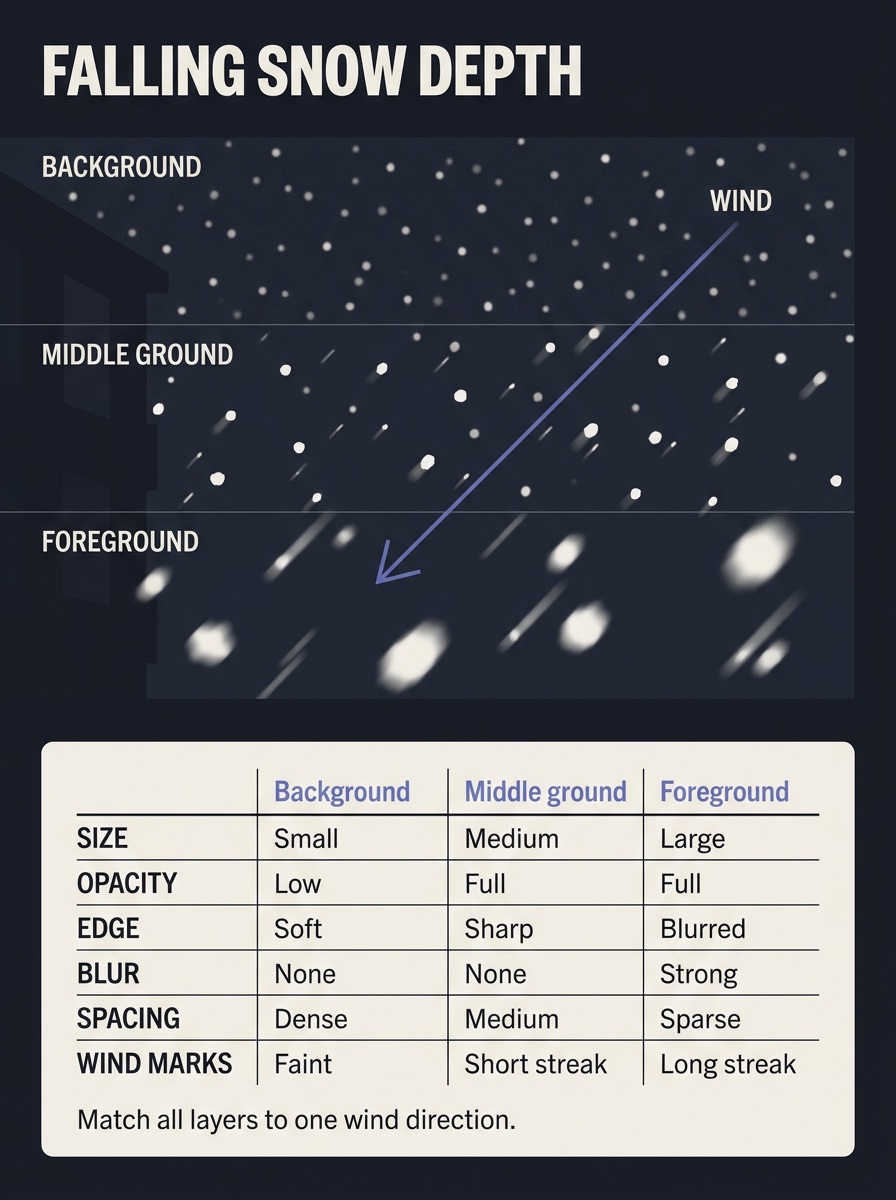
Steps:
- Finish the background first, darker than it looks.
- Add background flakes: small, numerous, low opacity, and tinted to match the background.
- Add middle flakes: medium size, sharp, and fewer.
- Add foreground flakes: large, soft or blurred, and only a handful.
- Angle every layer with the wind, and make the flakes brighter inside the lamp’s glow.
MediBang Paint recommends the same approach for digital work: two or three flake-size layers, random spacing, blur on the nearest flakes, and motion blur along the wind direction (MediBang Paint).
Diagnostic: Cover the foreground flakes with your hand. The depth should still read from the other two layers.
Common failure: Evenly spaced dots, all the same size. Fix: Delete a third of them, cluster the rest, and resize them across the three layers.
Snow in graphite, colored pencil, watercolor, and digital
Graphite
Graphite is the honest test, because you have no color to hide behind. To draw snow with a pencil, let the white paper do the work through negative space. Darken the sky, trees, and rocks with 2B and 4B, and keep snow shadows in light HB layers.
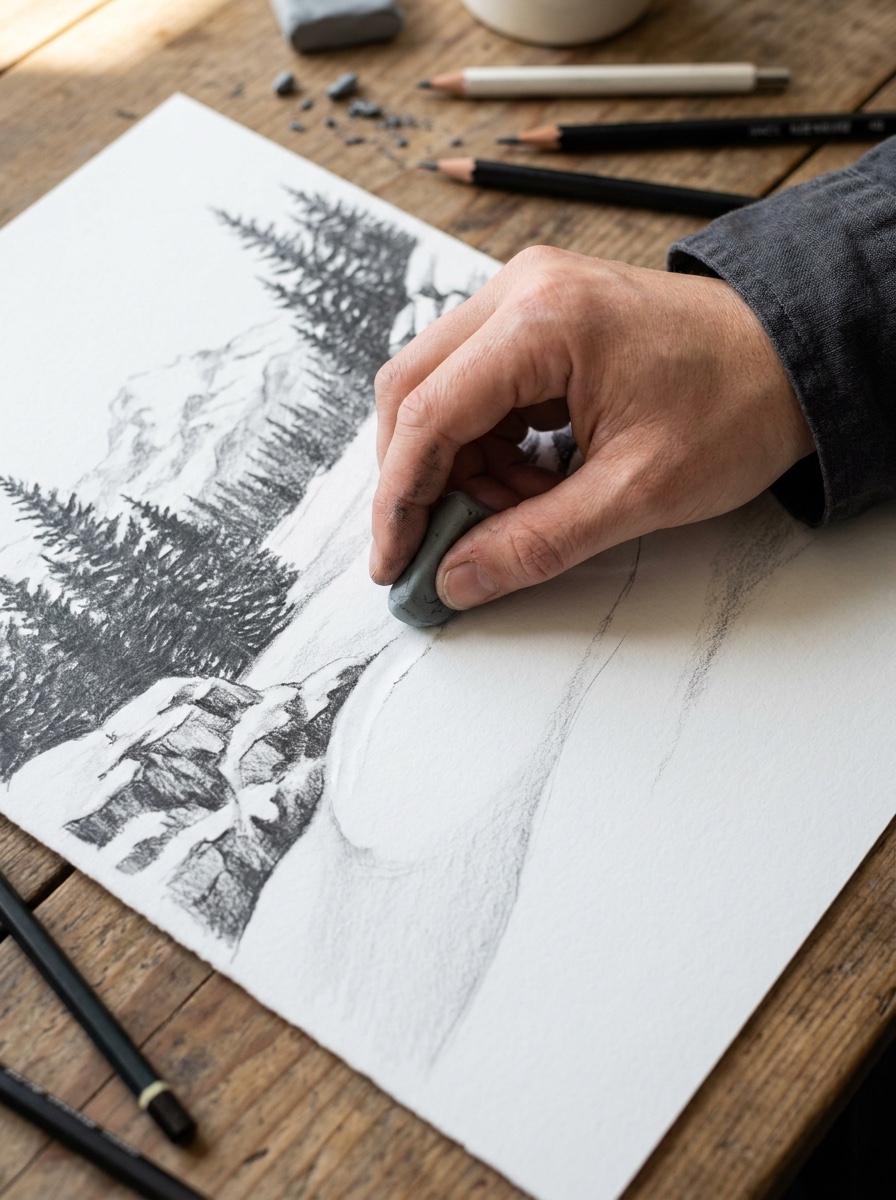
Lift highlights with a kneaded eraser instead of drawing them. Don’t blend graphite across lit snow, because a smudge reads as dirt. The trade-off is that you can’t show temperature in graphite, so edges and value spacing have to carry the image.
Colored pencil on toned paper
Toned paper gives you the midtone for free. On gray or blue stock, white goes only on lit planes. Blue-violet goes into the shadows, and a pale cream sits on the sunlit tops.
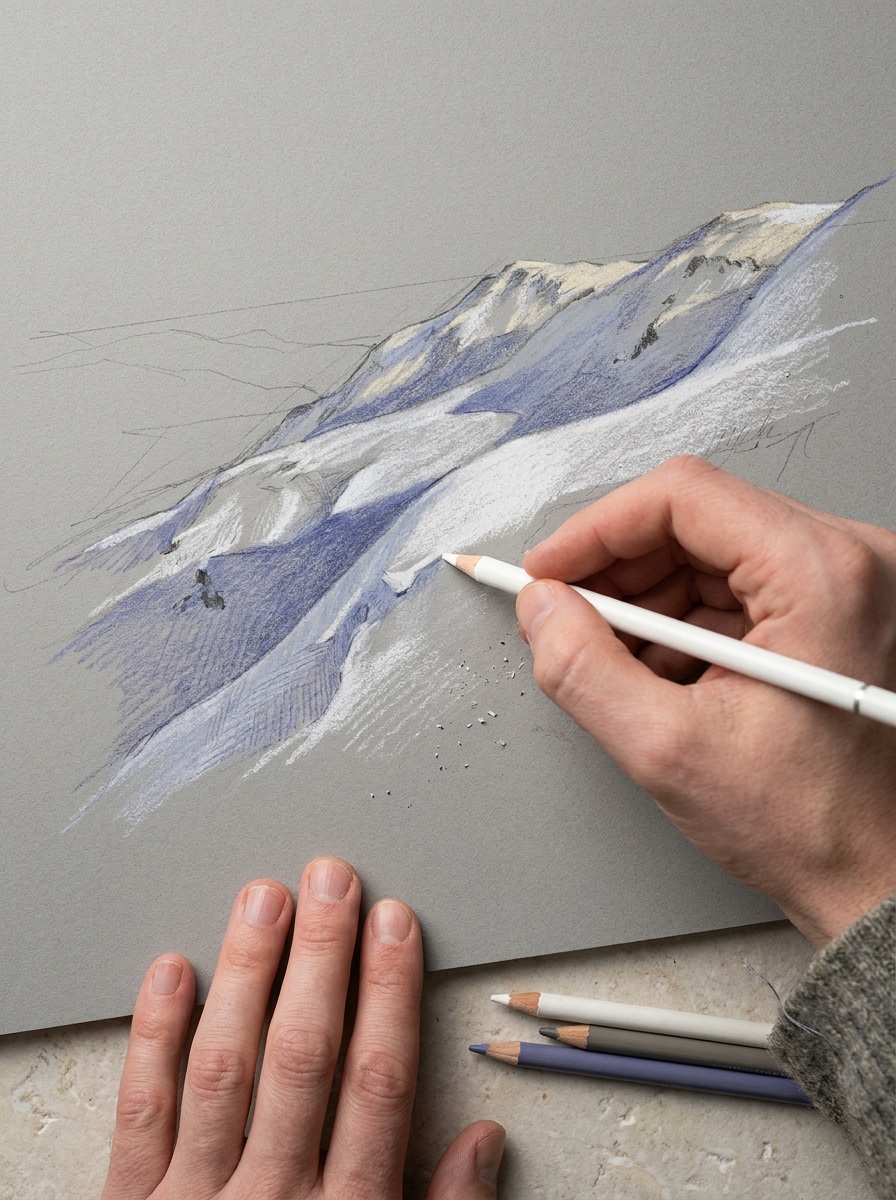
Build each color with light pressure in several layers instead of one heavy pass. Faber-Castell Polychromos are oil-based and hold a sharp point for crisp edges. Prismacolor Premier are softer and wax-based, so they blend more easily but fill the paper tooth faster.
This is the most forgiving way to learn how to color snow. Our colored pencil drawing guide covers layering and burnishing in detail.
Watercolor and gouache
In watercolor, white is a decision you make before you start. Plan your watercolor reserve: either paint around the lit snow or protect it with masking fluid.
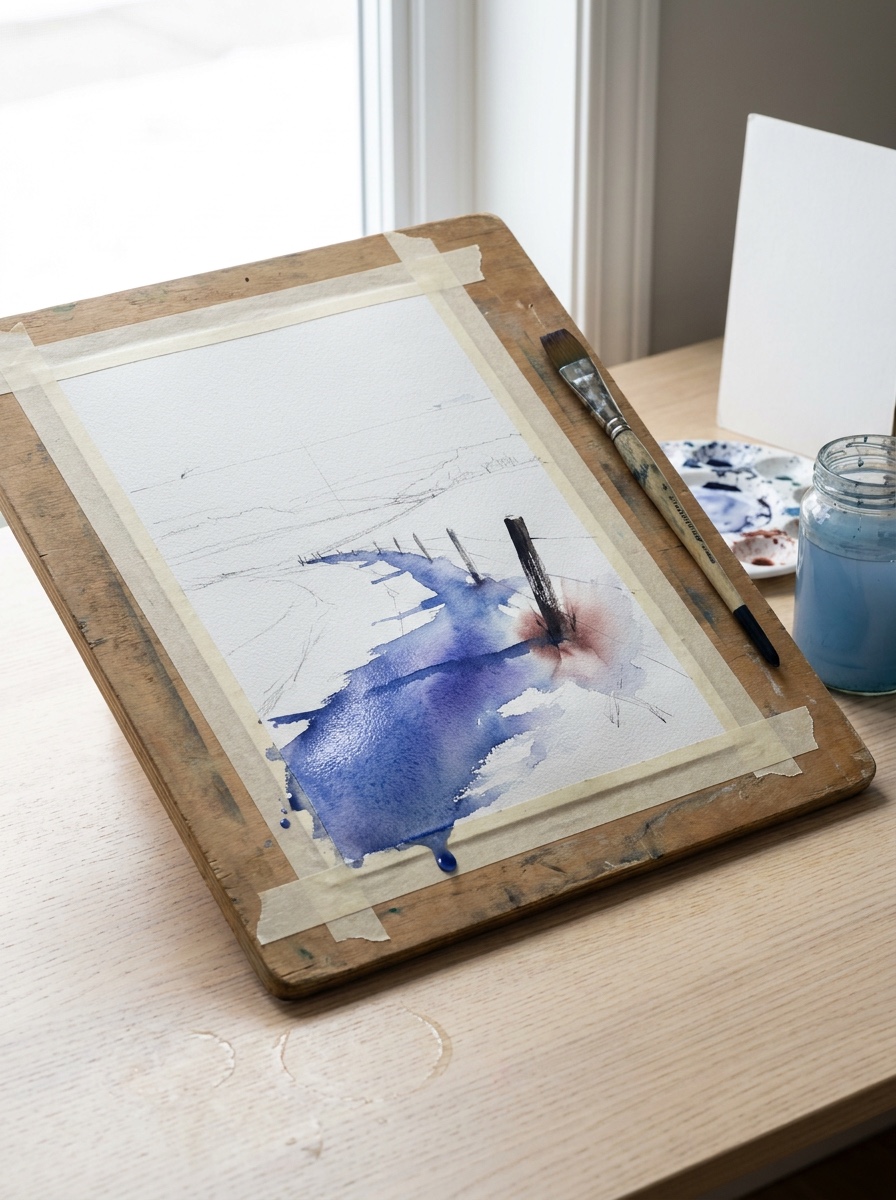
Mix shadows from ultramarine with a touch of permanent violet. Use cobalt for paler, sky-reflected areas. While a shadow wash is still damp, drop a little burnt sienna into it wherever it sits beside something warm.
For edges, work wet-in-wet on distant snow to keep it soft. Dry brushing across the paper’s grain gives sparkle where the light catches. Add white gouache last, for falling flakes and recovered highlights. Used sparingly, it reads as light. Overused, it turns chalky. Painting snow in watercolor rewards planning more than any other medium.
Digital
Digital work is the most flexible because each element can sit on its own layer. A practical stack looks like this:

- background;
- snow masses;
- a shadow layer set to Multiply in blue-violet, attached with a clipping mask;
- a light layer for warm highlights;
- three separate flake layers;
- a blur layer for the nearest flakes.
In Procreate or Photoshop, apply motion blur to the foreground flakes along the wind direction. Use a texture brush only at the light-shadow transition. Pick your snow color from a slightly tinted off-white, and save pure white for a few accents.
Digital snow brushes speed things up, but depth still comes from flake size, opacity, and sharpness. If you work on a tablet, our guide to drawing on iPad covers the basics of layers and brushes.
What Monet and Homer teach about snow
Three paintings carry most of the lessons in this tutorial. Look at them, take the decision each one makes, and don’t copy the composition.
*Claude Monet, The Magpie, 1868–69 (Musée d’Orsay). The museum describes the painting’s pale, luminous color and the way sun and shade construct the snowy setting. The fence and gate throw a shadow across the snow, and that shadow describes the ground plane while setting the light direction. Rule:* Let one well-placed cast shadow explain both the surface and the light.
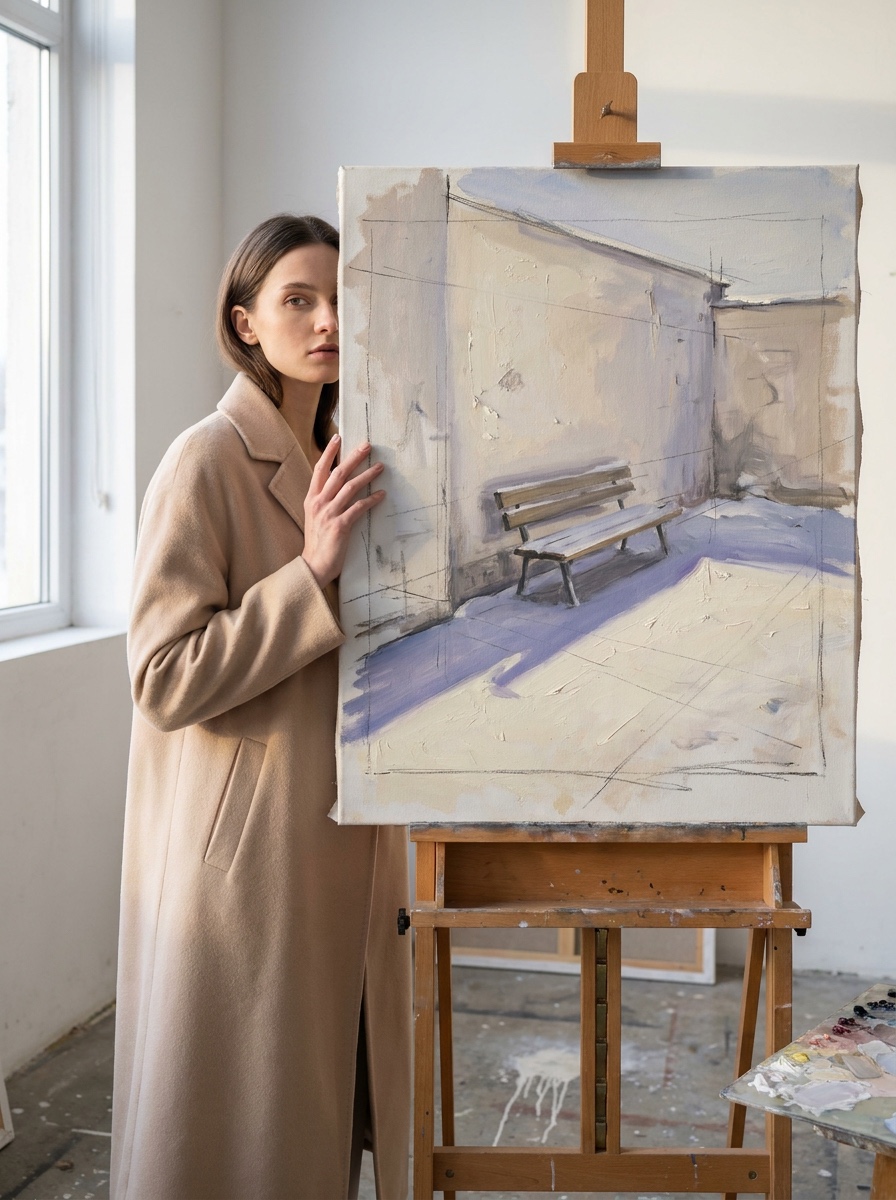
*Claude Monet, The Cart, Road under Snow at Honfleur, circa 1867 (Musée d’Orsay). Here the ground is not uniformly white. Monet uses limited browns, earth colors, and varied blues, and these create shifting reflected color across the road. Rule:* Snow on a used road is compacted and mixed with earth. Let warm browns show through ruts and tracks, and keep the cleaner whites for undisturbed areas.
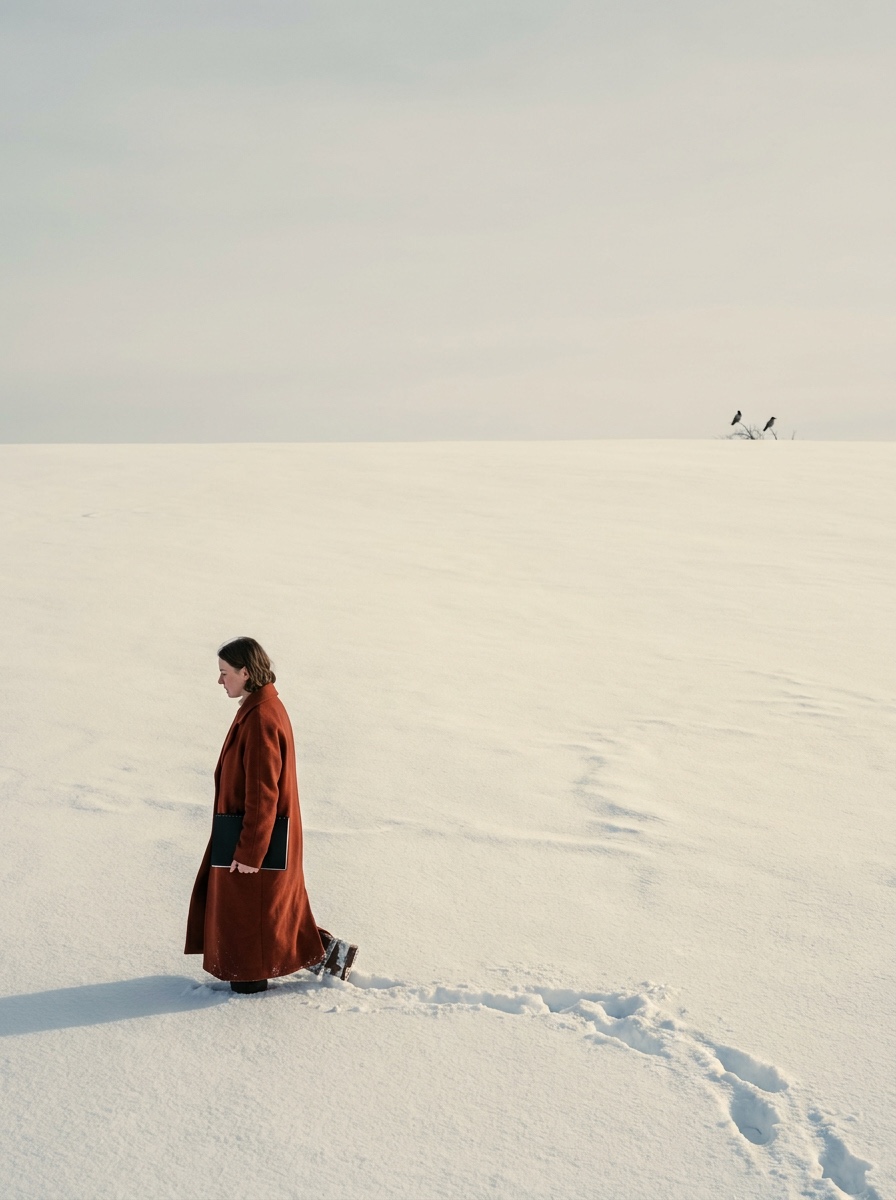
*Winslow Homer, Fox Hunt, 1893 (Pennsylvania Academy of the Fine Arts). A red fox and dark crows sit against a broad snow plane. The quiet field around them makes their silhouettes urgent. Rule:* When snow covers most of a winter landscape drawing, keep the snow restrained. Give the strongest dark-light and color contrast to one subject.
Common snow drawing mistakes and quick fixes
| Symptom | Likely cause | Fix |
|---|---|---|
| Snow looks flat and pasted on | White paper everywhere, no shadow plan | Shade the side turned from the light; darken the surroundings |
| Shadows look dirty | Black or heavy graphite in the shadow mix; value too dark | Mix shadows from blue and violet; lighten the value |
| Everything looks blue | Cool shadow color spread onto lit planes | Warm the lit snow; keep blue for shadows and distance |
| Flakes look like a pattern | One size, even spacing | Use three sizes, cluster them, blur the nearest |
| Branches look iced on every side | White traced along the whole branch | Load only the upper planes; keep undersides dark |
| Objects float above the snow | No contact shadow | Add a dark accent where object meets snow; let it sink slightly |
| Surface looks noisy | Texture across the whole drawing | Limit texture to the light-shadow edge and the foreground |
| No clear focal point | Equal contrast everywhere | Save peak contrast for one subject |
Fix the problems in this order: values first, then temperature, then edges, then texture. Correcting texture first rarely solves anything.
A five-day snow drawing practice plan
Twenty to sixty minutes a day is enough. Each day has a pass test. For more warm-ups like these, see our beginner drawing exercises.
- Day 1: value studies (20 minutes). Make six 3-minute thumbnails from snow photos, using three values only. Pass: every snow shadow is lighter than every dark object.
- Day 2: snowbanks (30 minutes). Draw three side-lit snowbanks, one each with the light from the left, the right, and behind. Pass: each bank has one cast shadow and two clearly different edge types.
- Day 3: branches and a roof (30 minutes). Do one pine branch and one simple roof under snow. Pass: no snow on any underside, and at least three unequal loads per branch.
- Day 4: falling snow (30 minutes). Do one night study with three flake layers. Pass: the background layer has the most flakes and the foreground has the fewest, and all three layers share one wind angle.
- Day 5: finished winter scene (60 minutes). Combine a path, a bank, a tree, and a distant plane. Pass: the grayscale thumbnail and the finished piece have matching value groups.
Snow drawing FAQ
How do you draw white snow on white paper?
Darken around it. Keep the paper white only on lit planes, and shade the shadow side light gray or blue. Darken the sky, trees, and rocks so the snow reads as bright by comparison. Define the snow’s edge with the background value instead of an outline. Toned paper is easier for beginners because white only goes where light hits.
What color should snow shadows be?
In sunlight, snow shadows run from light blue to blue-violet, because shadowed snow mostly reflects the sky. Warmer sunlight pushes the shadows toward violet. Under overcast skies they turn soft gray-blue, with less contrast against the lit snow. Near a warm object, add a little of its color. Keep shadow values light, closer to the lit snow than to the dark objects.
How do you draw falling snow so it has depth?
Use three layers. Distant flakes are small, faint, and close in color to the background. Middle flakes are medium-sized and sharp. Foreground flakes are large, few, and blurred. Space them unevenly, and angle all three layers with the same wind.
How do you draw snow with a pencil?
Use HB for snow shadows, and 2B to 4B for the surroundings. Leave the lit snow as bare paper. Build shadows in light, even layers, then lift highlights with a kneaded eraser. Avoid smudging graphite into lit areas.
How do you draw snow on trees?
Draw the branches first. Place rounded, uneven clumps on the upper surfaces only, leave gaps where needles or twigs show through, and let the branch tips sag. Keep undersides dark. Vertical trunks stay mostly clear unless wind has plastered snow onto one side.
How do you make a winter scene look realistic?
Keep one consistent light direction. Plan the values in a thumbnail first. Give the light a warm temperature and the shadows a cool one. Reduce contrast in the distance, give every object a contact shadow, and save your strongest contrast for one focal point.
Your next assignment
Snow becomes believable when you stop drawing whiteness and start drawing light on a surface. Use the same four checks every time: value, temperature, surface angle, and edge.
For the next step, set a timer and make three 10-minute snowbank studies of the same bank:
- under warm, low sun, with cream light and violet shadows;
- under cool midday light, with neutral white light and blue shadows;
- under overcast light, with gray-blue shadows and soft edges.
Put the three studies side by side. If they look interchangeable, return to Step 5 and push the temperature difference further. Next, take the same method to a snow-covered tree or a full winter landscape.
- 0shares
- Facebook0
- Pinterest0
- Twitter0
- Reddit0