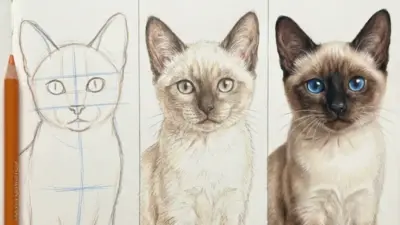
Wolf drawing captivates artists and nature enthusiasts alike, offering a unique opportunity to explore the grace and beauty of this majestic creature. Understanding wolf anatomy is essential for capturing their spirit and expression on paper. Whether one is a beginner or an experienced artist, learning to draw wolves can enhance skills and broaden creative horizons.
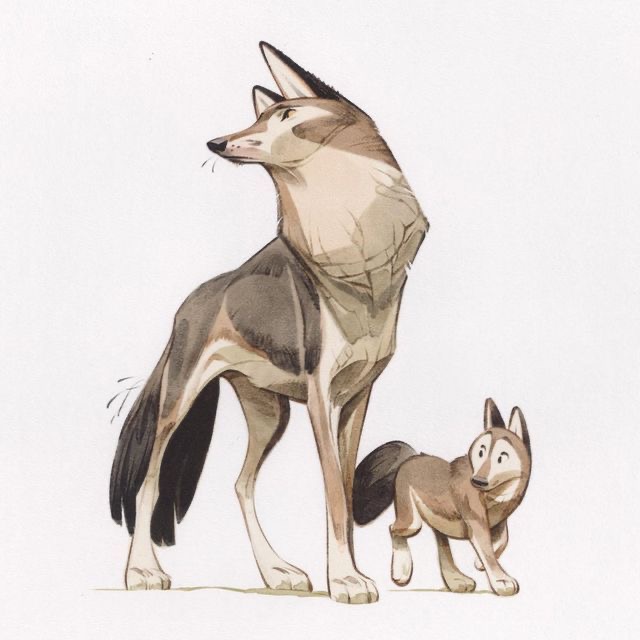
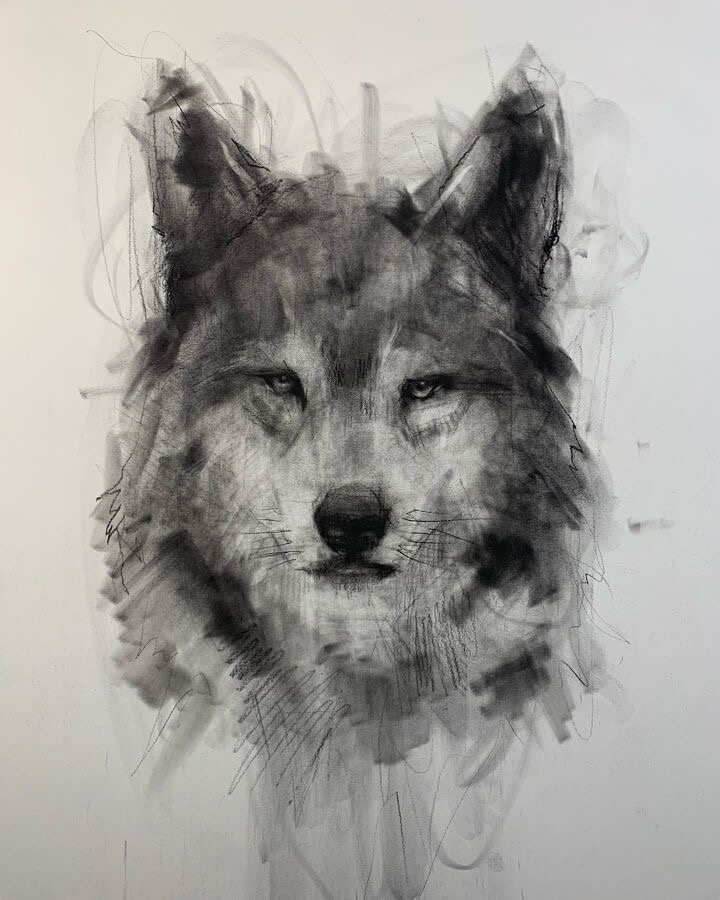
The process of sketching a wolf involves more than just putting pencil to paper; it requires knowledge of different materials, techniques, and styles. Each element plays a crucial role in how one represents these animals, from understanding their body structure to the choice of medium that brings the artwork to life. Exploring various compositions and poses can also elevate the final result, making each drawing a personal interpretation.
With the right guidance and practice, anyone can improve their wolf drawing skills. By addressing common mistakes and offering tips for refinement, aspiring artists are better equipped to create powerful and lifelike representations of wolves.
Key Takeaways
- Knowledge of wolf anatomy enhances drawing accuracy.
- Choosing the right materials improves artistic expression.
- Tips and techniques are vital for mastering wolf illustrations.
Understanding Wolf Anatomy
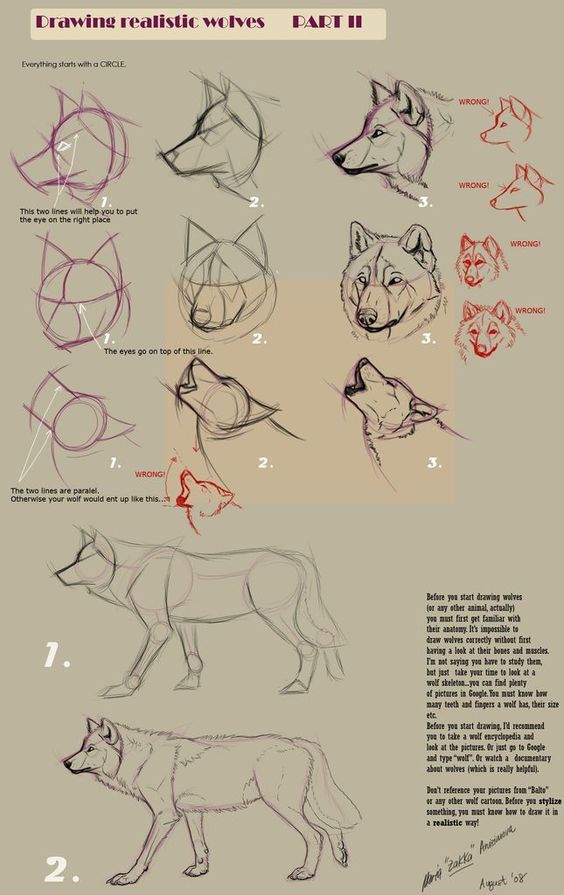
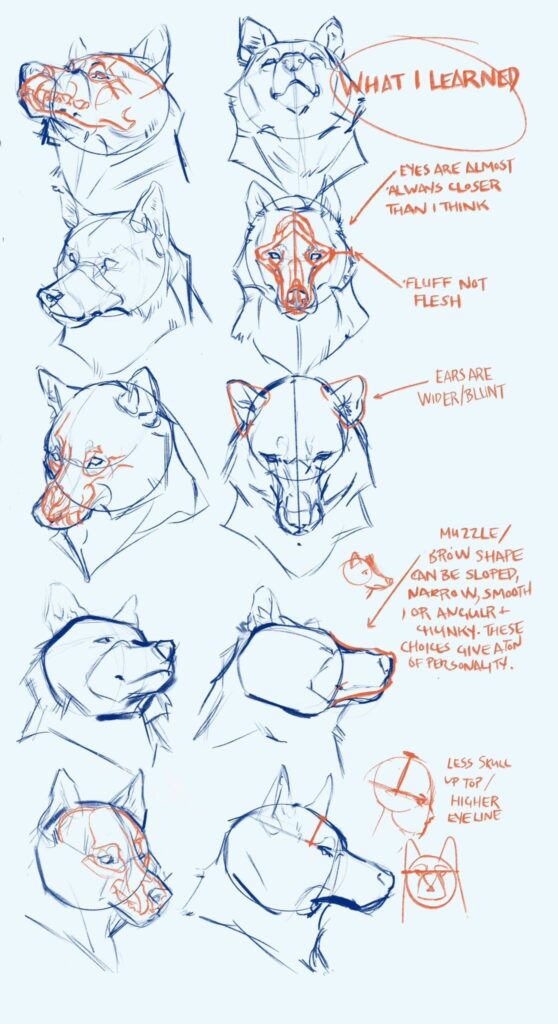
An accurate representation of a wolf begins with knowledge of its anatomy, which is essential for drawing. Understanding the skeleton structure, muscle groups, and facial features is crucial for depicting this majestic animal correctly.
Skeleton Structure
Wolves possess a robust skeleton designed for strength and agility. Their skeletal structure comprises approximately 319 bones, forming a strong framework.
- Cranium: The skull is long and narrow, housing strong jaws with sharp teeth.
- Vertebral Column: It includes seven cervical, thirteen thoracic, and seven lumbar vertebrae, contributing to their flexibility.
- Limbs: Wolves have long, powerful legs that enable running at high speeds.
This combination of bones supports their hunting lifestyle and endurance in various terrains.
Muscle Groups
Wolves exhibit well-defined muscle groups aiding in their powerful movement. The muscular structure is essential for activities such as running, jumping, and biting.
- Forelimb Muscles: These include the biceps brachii and triceps, allowing for strong forepaw movements.
- Hindlimb Muscles: The quadriceps and hamstrings facilitate propulsion and agility.
- Back Muscles: The latissimus dorsi and erector spinae ensure stability and strength during motion.
Their muscular arrangement ensures that wolves are both agile and powerful, essential traits for survival.
Facial Features
The face of a wolf is characterized by distinctive features that facilitate hunting and communication.
- Eyes: Wolves have forward-facing eyes, granting them binocular vision for depth perception.
- Ears: Their erect ears can swivel to detect sounds, enhancing their ability to locate prey.
- Snout: The elongated snout houses large canine teeth and enhances their sense of smell.
These facial characteristics support their roles as apex predators and enable effective interaction within their pack.
Materials and Tools
Selecting the appropriate materials and tools is essential for creating detailed and striking wolf drawings. The right choices can significantly impact the final result, helping an artist translate their vision onto paper.
Choosing the Right Pencil
When drawing wolves, pencil selection plays a crucial role. Graphite pencils range from H (hard) to B (soft), affecting the darkness and texture of lines.
- H Pencils: Ideal for fine lines and initial sketches. They are less smudgy but require more pressure.
- B Pencils: Great for shading and depth, producing darker lines. They lend themselves well to more expressive strokes.
Artists benefit from using a variety of pencils, typically ranging from 2H for detailed outlines to 8B for rich, dark shadows. Premium brands offer quality options that are smooth and durable, providing better control during the drawing process.
Types of Paper
Paper choice influences the texture and finish of wolf drawings. Different types of paper cater to various styles and techniques, making it essential to choose wisely.
- Drawing Paper: Specifically designed for pencil, it has a textured surface that grabs graphite effectively. A weight of 90-120 lb is often preferred.
- Bristol Board: Offers a smooth surface, perfect for detailed work. It’s available in both vellum (some texture) and plate (very smooth) finishes.
- Watercolor Paper: Best for mixed-media techniques. It can handle wet mediums if an artist chooses to blend or add color.
Each paper type impacts how graphite appears, with smoother finishes yielding sharper, cleaner lines.
Erasers and Blending Tools
Erasers and blending tools are critical for refining wolf drawings. Proper usage can enhance detail and create realistic fur textures.
- Erasers: Kneaded erasers are versatile for lifting graphite cleanly without damaging the paper. Vinyl erasers work well for removing bold lines effectively.
- Blending Stumps: These help in creating smooth gradients and soft transitions, particularly useful for fur. Artists often use tortillons for smaller areas.
- Paper Towels and Brush: Useful for wiping off excess graphite. A soft brush can also help in feathering edges to create more depth.
Having these tools on hand facilitates a more precise and polished approach to drawing wolves.
Basic Techniques
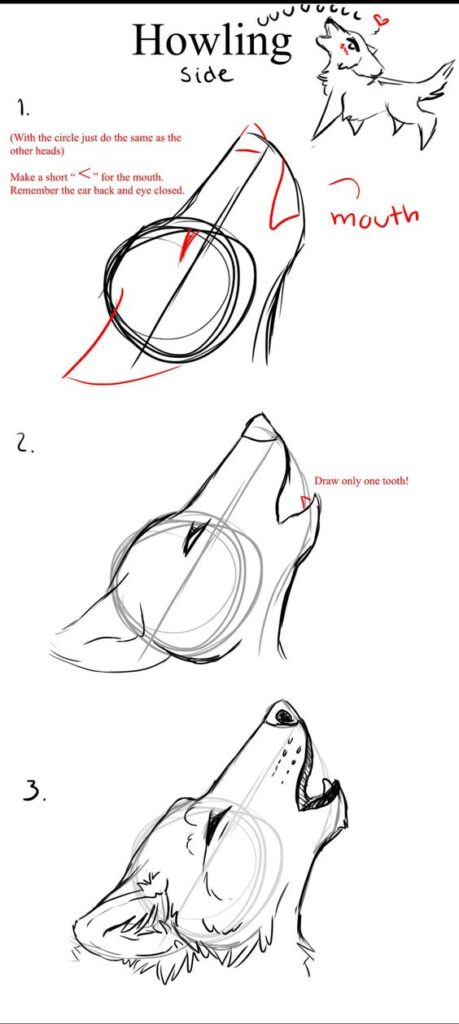
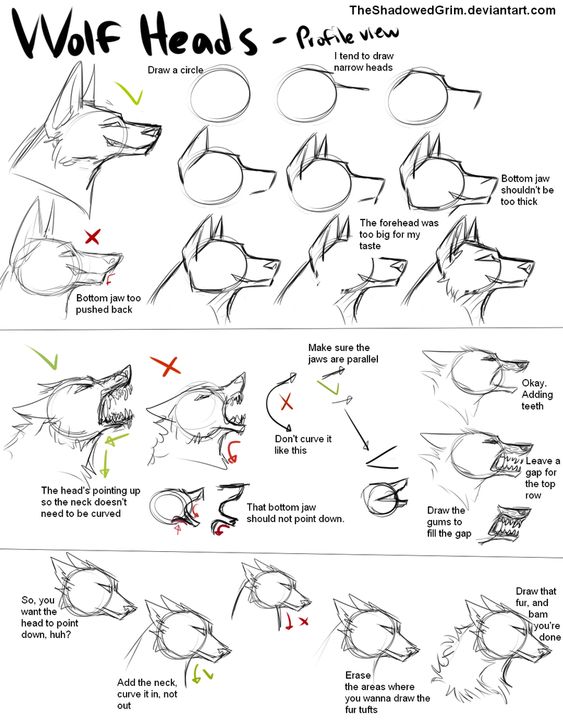
Mastering wolf drawing involves several foundational techniques that help capture the essence and realism of this majestic animal. Key techniques include establishing base shapes, incorporating shading and texture, and ensuring depth and volume.
Sketching the Basic Shape
To start the drawing process, it is essential to sketch the basic shape of the wolf. This involves using simple geometric forms like circles and ovals to outline the head, body, and limbs.
- The head can be represented with a circle, while an elongated oval forms the body.
- Subsequently, sketch lines for the legs and tail, focusing on proportion and posture.
Maintaining a light hand during this phase is crucial. It allows for easy adjustments. Once the proportions feel right, the artist can begin refining these shapes into more detailed outlines, considering the wolf’s unique features such as the muzzle, ears, and eyes.
Shading and Texture
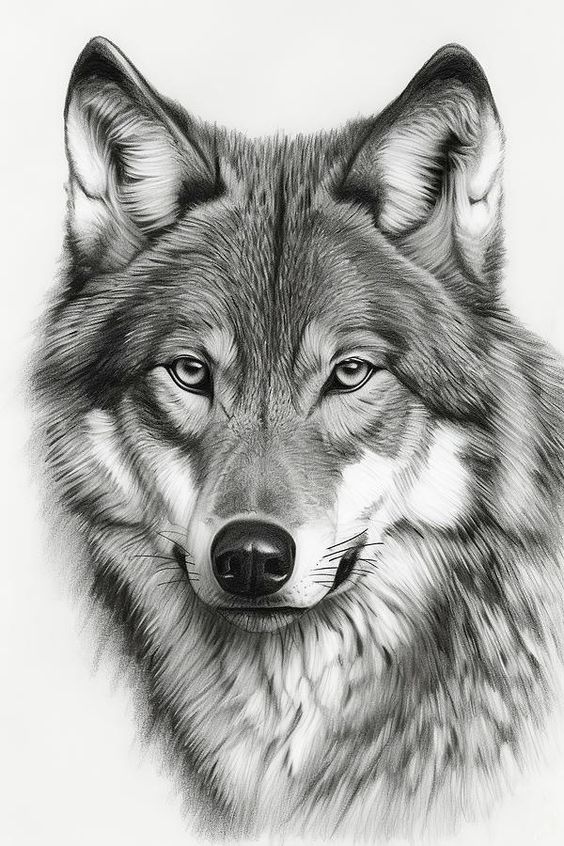
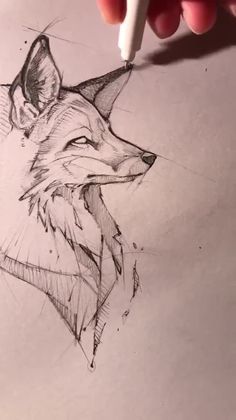
Shading plays a critical role in adding life to the drawing. It creates the illusion of fur and depth.
- Select a light source to determine where highlights and shadows should fall.
- Use a range of pencils to achieve different shades; softer pencils produce darker lines suitable for shadows, while harder pencils yield lighter shades for highlights.
Textures can be added by employing varied strokes. Short, quick strokes mimic fur, while longer, softer strokes can create a smooth appearance on the wolf’s underbelly. Blending techniques, using either a blending stump or fingers, can help achieve a more seamless transition between light and dark areas.
Creating Depth and Volume
To create depth and volume, it is vital to understand the anatomy of the wolf. This knowledge aids in portraying the three-dimensional aspect of the figure.
- Incorporating overlapping elements, such as limbs in front of the body, enhances realism.
- Utilize darker shading along the contours and lighter shading on raised areas to suggest volume.
Focusing on the eyes can also add depth, drawing the viewer’s attention. Adding background elements, while keeping them less detailed than the wolf, helps ground the creature in its environment, enhancing the overall composition.
Step-by-Step Guide
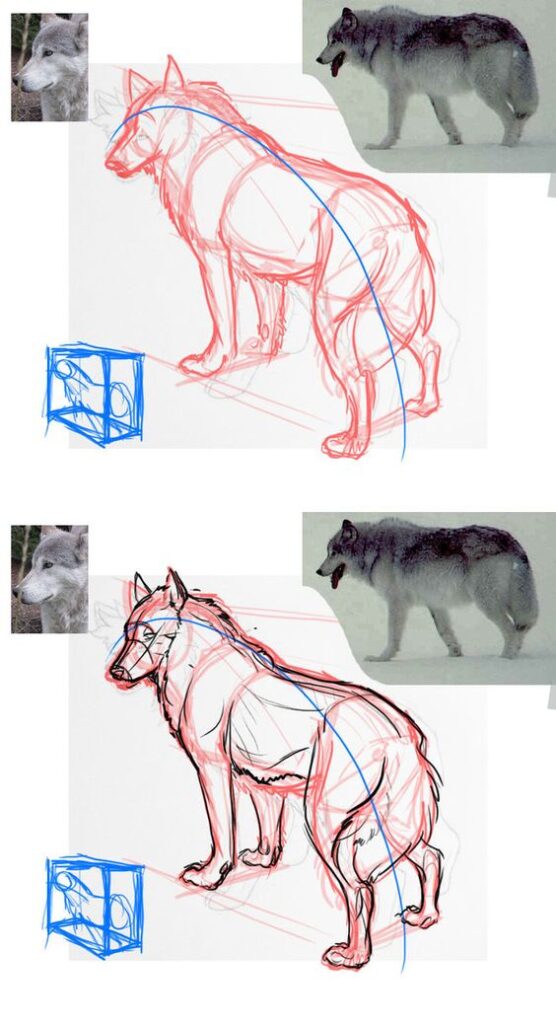
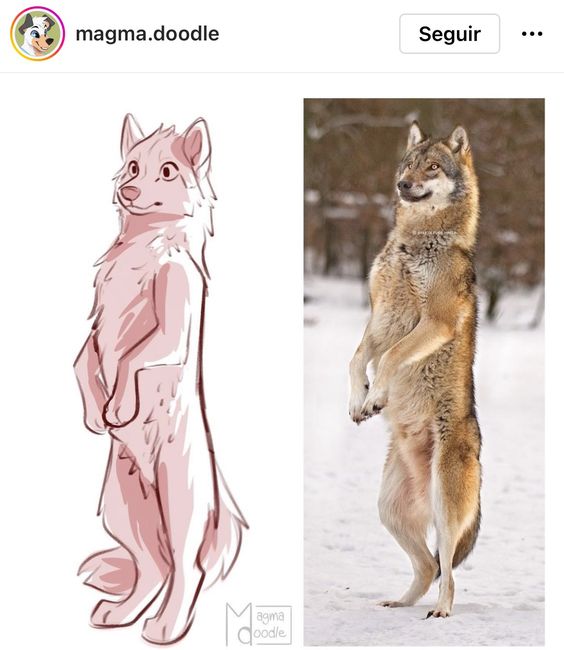
This guide provides essential steps for creating a wolf drawing. Each phase emphasizes specific techniques to achieve a realistic depiction of a wolf.
Laying the Foundation
Begin with light pencil strokes to sketch the basic shapes. Use simple geometric forms like ovals and circles to outline the wolf’s head and body. Keep proportions in mind; the head should be roughly one-third the size of the body.
Positions matter; place guidelines to indicate the wolf’s stance. Include a line where the spine will curve, ensuring the posture appears natural. This foundational step allows for modifications without losing detail in the later stages.
Once the basic shapes are positioned, connect them to form the wolf’s silhouette. Use soft lines to maintain flexibility for adjustments. This phase is crucial for defining the overall composition.
Defining the Body
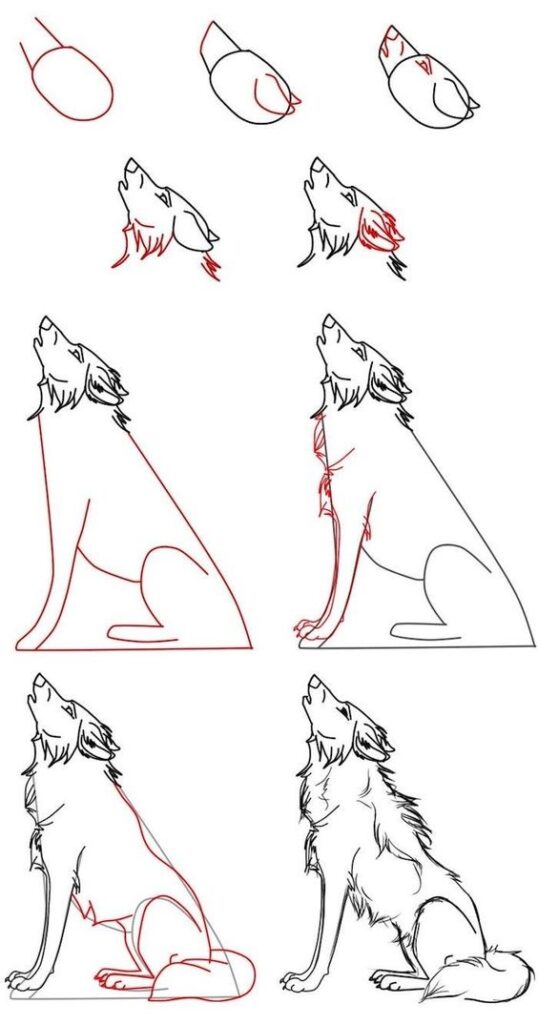
With the foundation laid, the next step involves detailing the wolf’s body. Transition from basic shapes into a more recognizable form. Focus on the wolf’s muscular structure by adding curves and contours.
Start with the front legs, using parallel lines to indicate the limbs’ strength. The back legs should be slightly thicker to reflect muscle. Pay attention to the tail; it should taper subtly, emphasizing mobility.
Include the torso’s outline and the position of the neck. Ensure the head connects naturally to the body through smooth lines. This stage significantly enhances the drawing’s realism by defining structural characteristics.
Adding Details to the Face
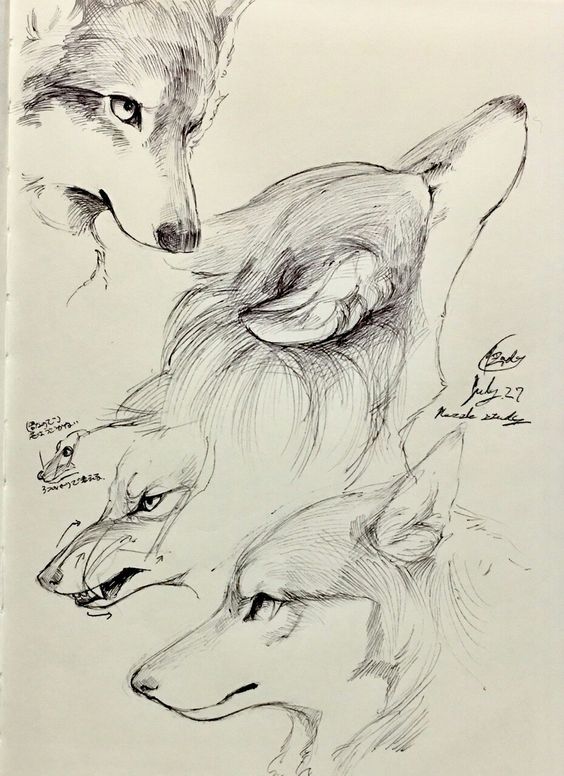
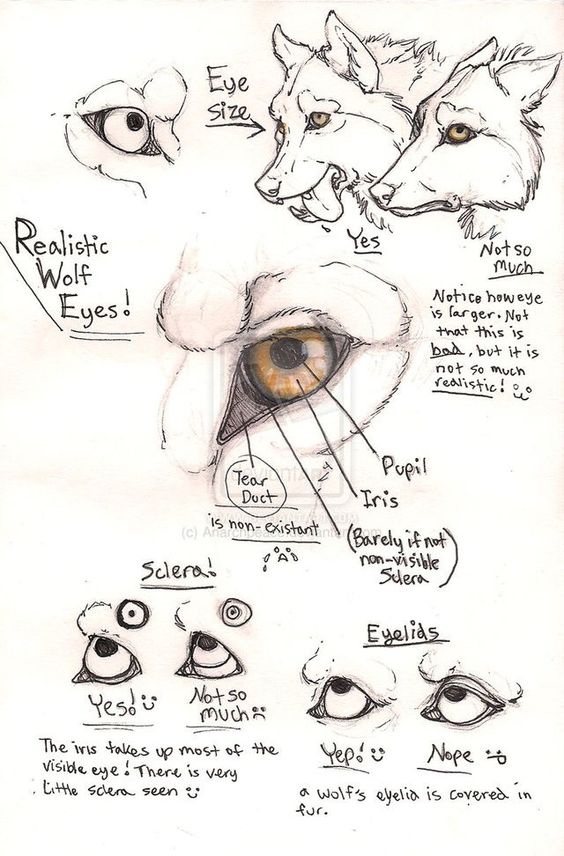
Detailing the face brings the wolf to life. Start by sketching the eyes; they are crucial for expression. Position them slightly above the midpoint of the head and ensure they are almond-shaped.
Next, define the snout. The snout should be elongated with a prominent nose. Add nostrils and lines to indicate the mouth, creating a more realistic appearance.
Ears are essential; they should be triangular and slightly curved. Placement is key—position them atop the head at angles that suggest alertness. Facial features add personality to the drawing and create a connection with the viewer.
Refining the Fur
Fur detailing elevates the drawing’s texture. Use short, quick strokes to mimic the appearance of fur. Focus on the direction of fur growth; it varies across different body parts.
Start with the head, where fur tends to be shorter, and then transition to the body, where it may be thicker. Remember to layer strokes for depth. Employ shading techniques to create contrast, emphasizing the light and shadow across the wolf’s form.
Detail the tail with longer strokes, indicating movement. This attention to fur texture adds a realistic quality.
Final Touches
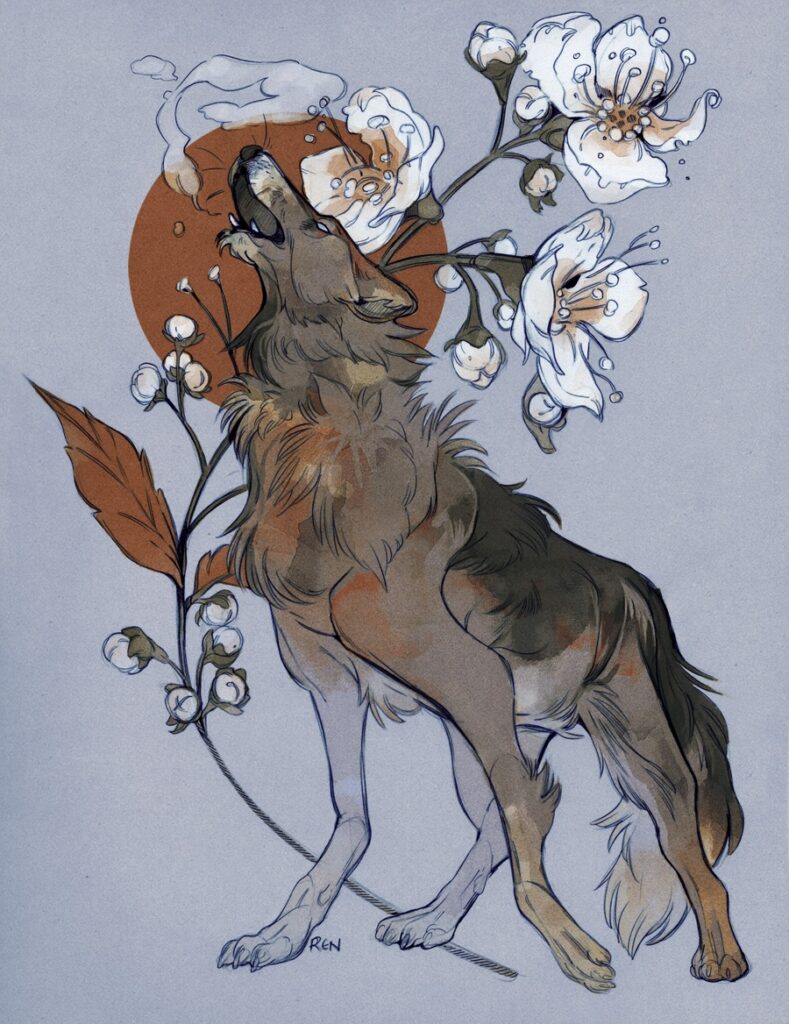
The final phase involves refining the drawing with finishing details. Review proportions and ensure balanced features. Darken the outlines of the wolf for emphasis, but keep some lighter areas for contrast.
Spend time on the eyes; adding highlights brings them to life. Incorporate subtle shadows around the neck and underbelly to enhance depth.
Erase any unnecessary guidelines for a clean finish. Consider adding a background or elements that enhance the overall composition without distracting from the wolf itself. These finishing touches will complete the drawing and showcase the artist’s skills.
Styles and Mediums
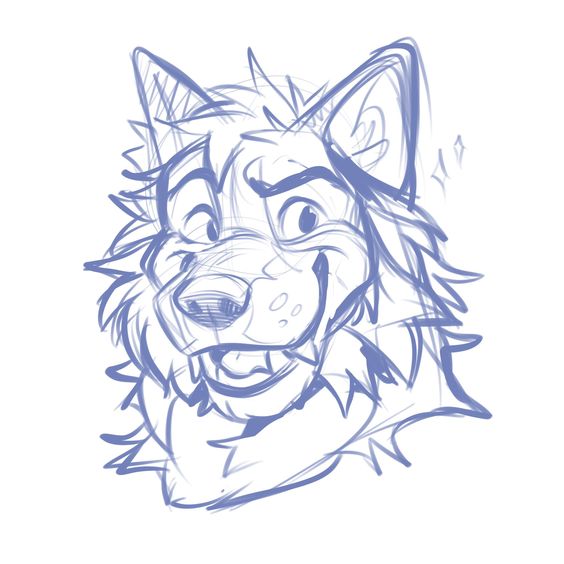
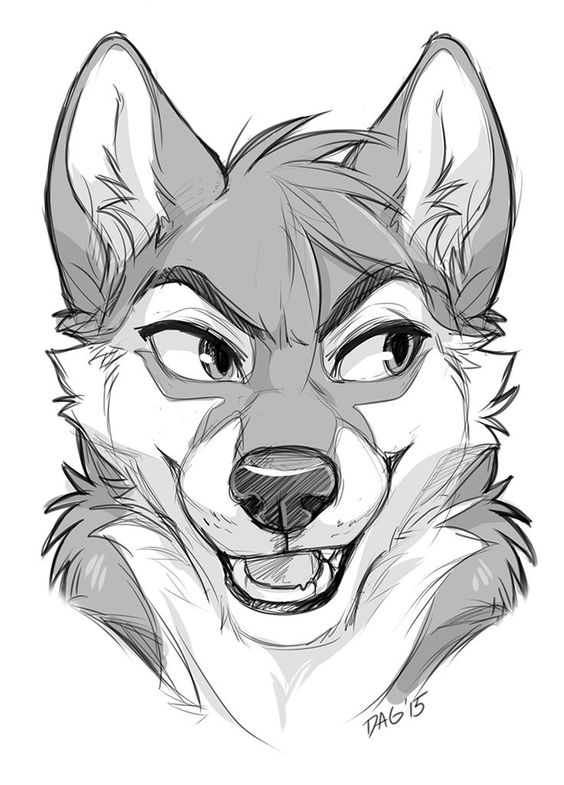
Various styles and mediums define wolf drawing, each offering unique characteristics. The choice of style and medium influences the representation of the wolf and can enhance the artist’s intent and expression.
Realistic Style
Realistic wolf drawings aim to capture the true essence of the animal. Artists focus on intricate details, depicting features like fur texture, eye expression, and anatomical precision.
Key techniques include:
- Observation: Artists observe real wolves or high-quality photographs.
- Shading: Gradients and shadowing techniques create depth.
- Proportions: Accurate proportions are critical for realism.
This style may use mediums such as graphite, charcoal, or colored pencils, allowing for detailed textures. Realistic drawings often evoke emotion and connection, showcasing the wolf’s raw beauty.
Stylized Approach
A stylized approach permits greater creative freedom and interpretation. In this style, artists may exaggerate certain traits or combine elements to convey a specific mood.
Common characteristics include:
- Simplification: Reduced detail can enhance emotional impact.
- Color Variation: Unnatural colors can evoke different feelings.
- Symbolism: Stylized elements can represent ideas or cultures.
Mediums like ink, watercolor, or mixed media are often favored. This approach can appeal to a wider audience by emphasizing artistic vision rather than strict adherence to reality.
Digital Drawing Tools
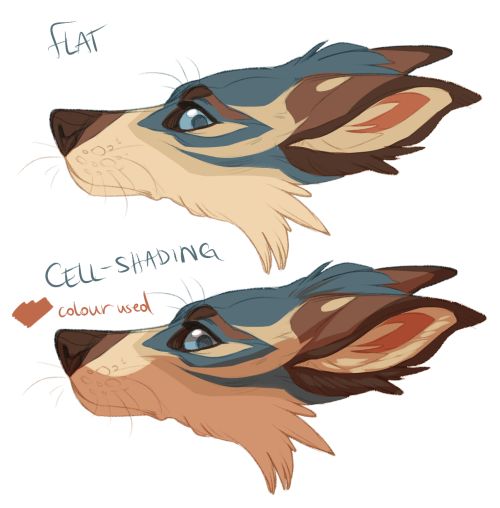
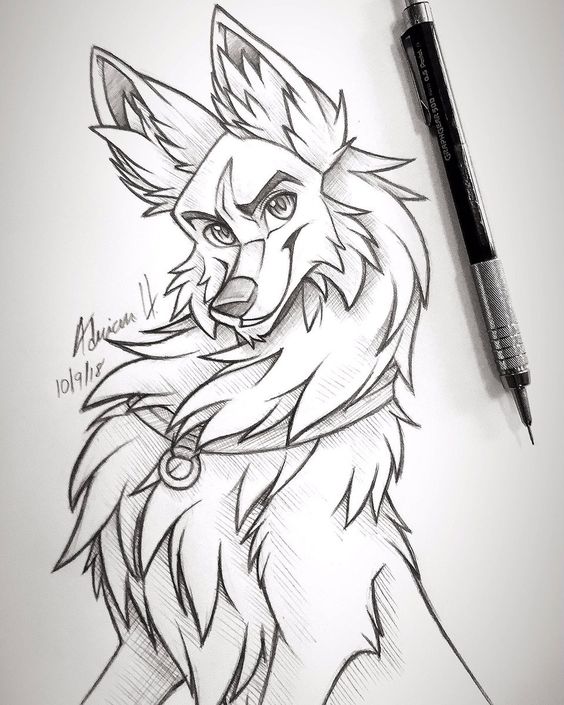
Digital drawing has transformed how wolves are depicted, offering versatility and accessibility. Artists can utilize software such as Adobe Photoshop or Procreate, allowing for experiments with layers and effects.
Advantages of digital mediums:
- Undo Options: Mistakes can be easily corrected.
- Variety of Brushes: Simulates traditional tools like pencils or paints.
- Easy Modifications: Adjust colors and features without starting over.
Digital art provides opportunities to blend realistic and stylized techniques, making it popular among contemporary artists.
Composition and Pose
Effective composition and pose are crucial in wolf drawing. They determine how the viewer perceives the subject and can convey emotion, action, and realism. Attention to detail in these areas can elevate a drawing, making it more engaging.
Dynamic Posing
Dynamic posing captures a sense of movement and life in the wolf. To achieve this, artists should consider the wolf’s anatomy and natural behaviors. A wolf in mid-run or engaged in an action like stalking presents energy and excitement.
Utilizing reference images can aid in capturing realistic poses. Elements like leg positioning, tail placement, and head orientation create a sense of dynamism. Artists may also experiment with exaggerated angles to enhance the impact.
Incorporating Background Elements
Background elements add depth and context to a wolf drawing. Integrating natural surroundings, like forests or mountains, can situate the wolf within its habitat. Artists should aim for a balance between the wolf and the background, ensuring the animal remains the focal point.
Using perspective can enhance depth. For example, placing the wolf in the foreground while incorporating blurred trees or rocks in the background can create a sense of distance. Layering elements within the background can also contribute to a more immersive composition.
Lighting and Perspective
Lighting plays a pivotal role in shaping the overall mood of a wolf drawing. It can highlight the wolf’s features and create shadows that enhance depth. Artists should consider the light source’s direction and intensity to accurately portray textures in the fur.
Perspective is also essential. A lower viewpoint can make the wolf appear more dominant and powerful. Conversely, viewing from above can evoke vulnerability. Combining lighting techniques with strong perspective can significantly enhance the visual impact of the drawing.
Common Mistakes and Tips
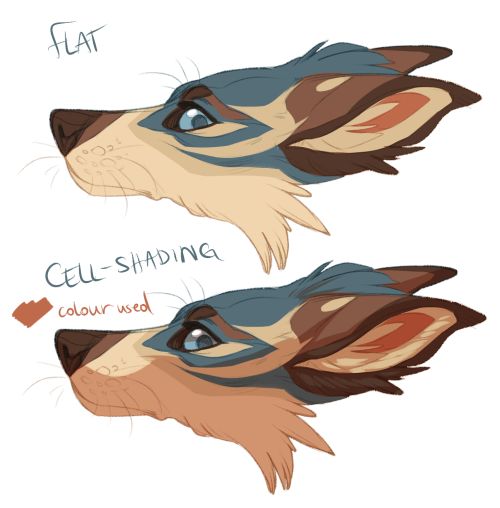
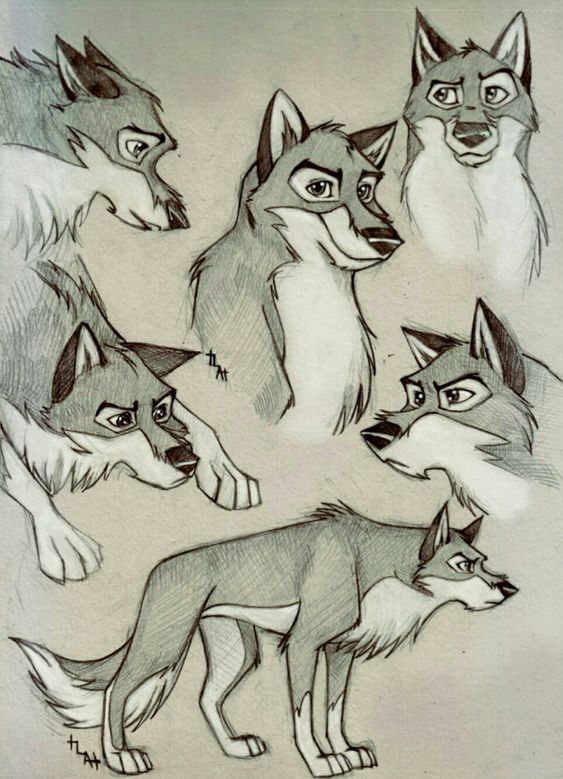
When drawing wolves, it’s easy to make some common mistakes. Understanding proportions, knowing how to avoid overworking the drawing, and recognizing when to stop can greatly improve the final result.
Proportions and Symmetry
Getting the proportions right is crucial in wolf drawing. A wolf’s head should be roughly equal in width to its length. The eyes should sit approximately halfway down the head.
Key points to remember:
- The snout should be longer than the width of the skull.
- Ears should be proportionate; they are often triangular and set high on the head.
- The body length is about 1.5 times the height at the shoulder.
Sketching guidelines can help maintain symmetry. Consider using a grid method to ensure features align properly.
Avoiding Overworking the Drawing
It’s common for artists to keep refining their drawings. Overworking can lead to muddled lines and diminished detail.
Tips to prevent this:
- Set a time limit for refining specific features or aspects of the drawing.
- Take breaks to assess the work with fresh eyes. This helps identify areas that may need tweaking.
- Use layers if working digitally. This allows for easy adjustments without compromising the entire drawing.
Keeping a light hand during the initial stages also allows for corrections without making the paper too heavy or smudged.
Knowing When to Stop
Recognizing when a drawing is complete can be challenging. Continuing to work on it can lead to frustration.
Indications that it’s time to stop:
- When the key features stand out without excessive detail.
- If more changes start to detract from the overall image instead of improving it.
- Positive feedback from peers can also signal readiness to finalize.
A good practice is to step away for a while and return. This will provide clarity and help determine if further work is necessary.
- 135shares
- Facebook0
- Pinterest132
- Twitter3
- Reddit0
