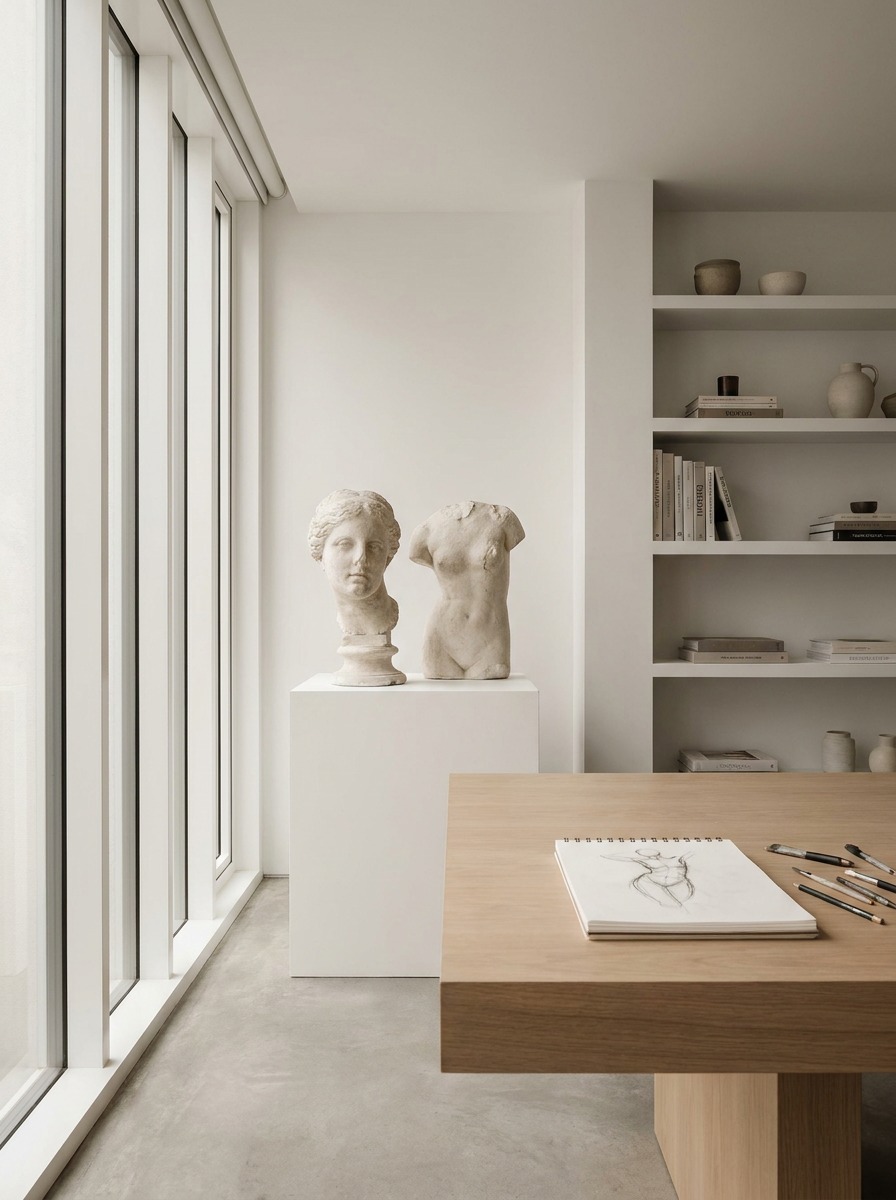
I remember an academic drawing session focused on classical sculpture casts, where the instructor stopped the room in front of a plaster study of the Venus de Milo and asked a simple question: why does this figure feel alive when it’s not moving at all?
The answer was contrapposto — the subtle weight-shift through the hips and shoulders that every serious classical figure of Aphrodite uses, and that essentially no beginner tutorial ever explains.
- Why Most Aphrodite Drawings Look Like Generic Cartoon Girls
- The Classical Proportion Canon
- How to Draw Aphrodite Step by Step
- Contrapposto in Depth
- Drawing Wet Drapery
- Classical/Academic Style vs. Stylized/Modern Interpretation
- Common Aphrodite-Drawing Mistakes (and the Fix)
- Materials That Actually Matter
- Final Thoughts
- Frequently Asked Questions
- What is the easiest way to draw Aphrodite?
- What is contrapposto and why does it matter for drawing Aphrodite?
- How many heads tall is the classical proportion canon?
- What is wet-drapery technique?
- Where does Aphrodite come from in Greek mythology?
- Is it necessary to study classical sculpture to draw Aphrodite well?
Search “how to draw Aphrodite” right now and you’ll find a wall of cute cartoon tutorials — curved lines for a face, generic wavy hair, a shell, done. That’s fine for a quick sketch, but it skips everything that actually makes an Aphrodite figure read as classical rather than generic: contrapposto, the classical proportion canon, and the wet-drapery technique that lets fabric suggest form instead of hiding it.
This guide covers all three, the way an academic figure-drawing class would actually teach them.
Why Most Aphrodite Drawings Look Like Generic Cartoon Girls
Every currently popular tutorial on this subject follows the same shortcut: draw a pretty face, add flowing hair, put a shell underneath, call it Aphrodite. The result is technically recognizable but visually interchangeable with any other stylized female character — nothing about the drawing is actually doing the specific work that makes classical Aphrodite imagery, from the Venus de Milo to Botticelli’s Birth of Venus, instantly identifiable across two and a half thousand years of Western art.
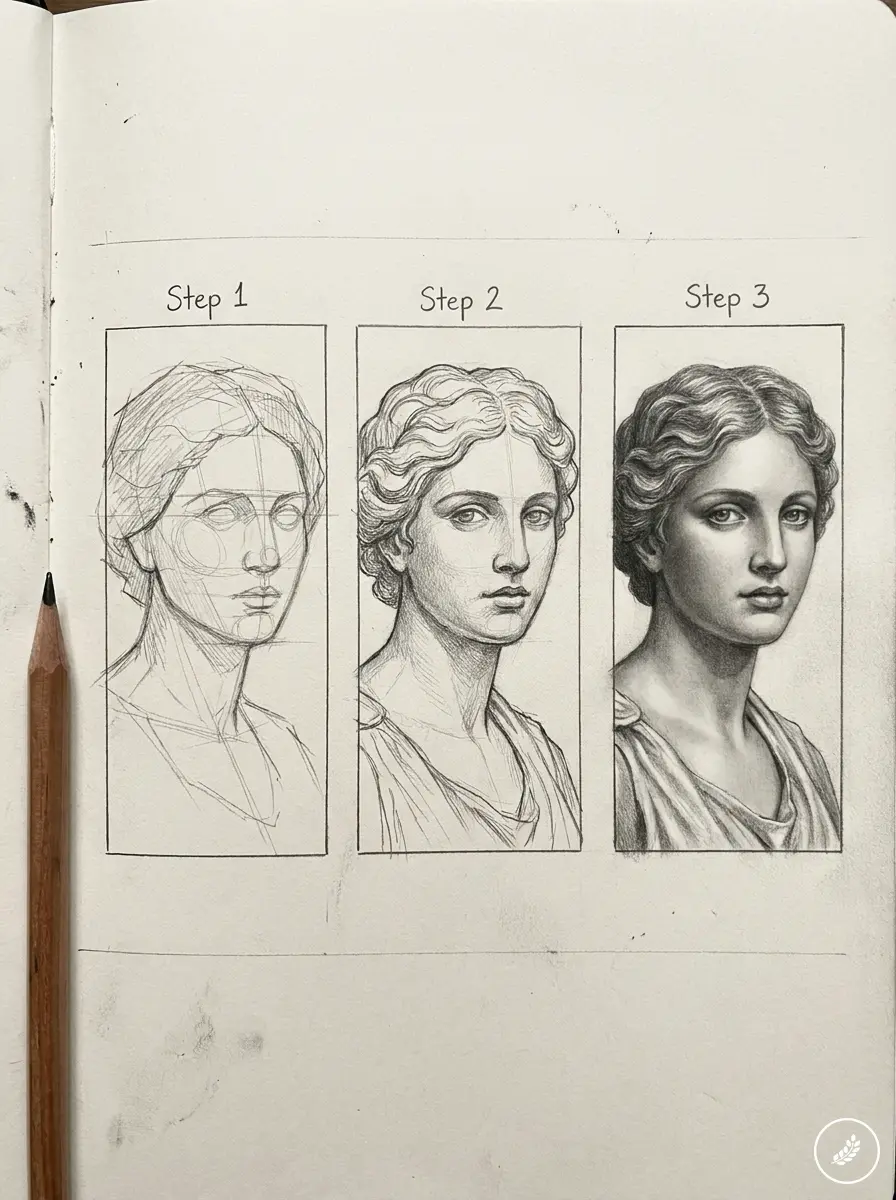
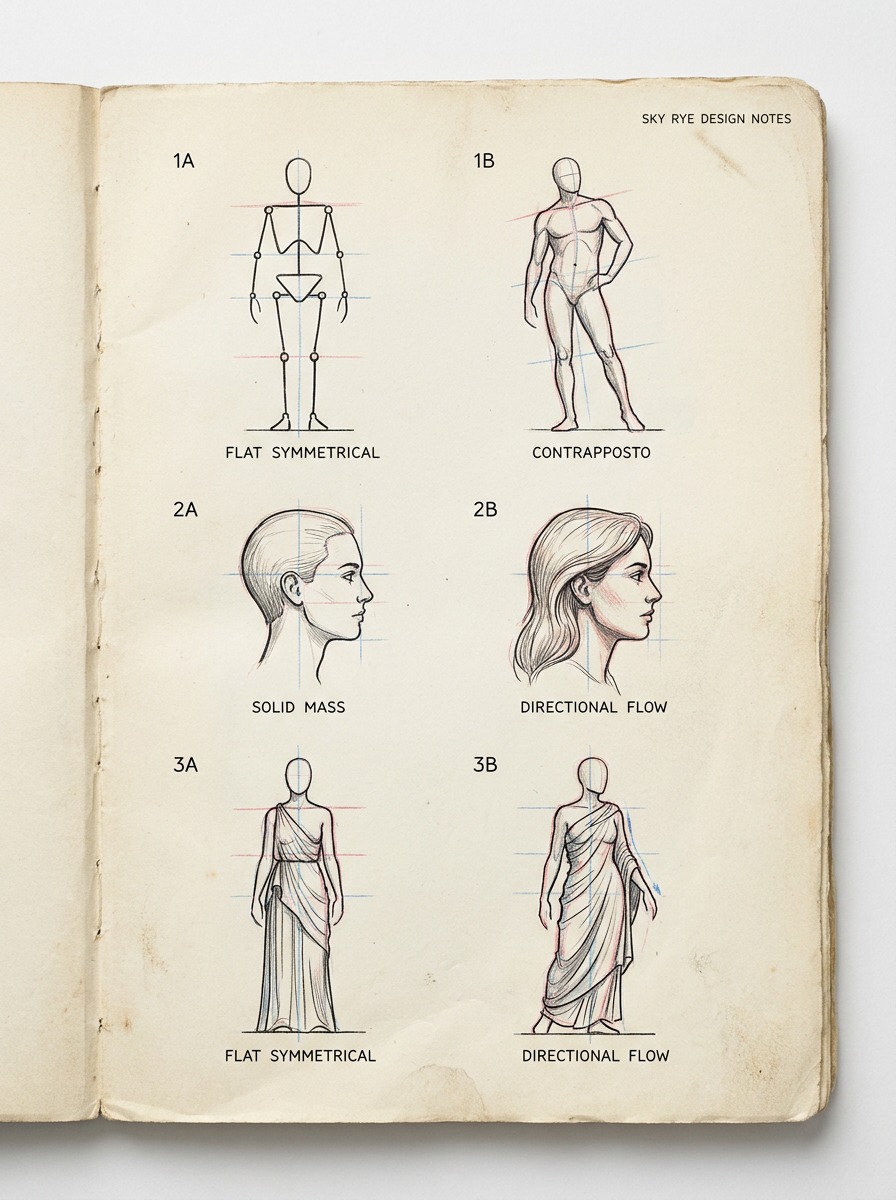
What’s missing is structural, not decorative. A generic cartoon figure stands frontally, weight distributed evenly on both legs, hair rendered as a solid mass rather than a considered design element, drapery treated as a flat costume rather than fabric responding to the body beneath it. Classical Aphrodite figures do none of that.
The pose carries real weight and asymmetry. The proportions follow an idealized but specific canon. The drapery clings, folds, and reveals according to actual cloth logic. None of this is difficult once you understand it — it’s just never taught in the tutorials currently available.
The Classical Proportion Canon
Before any pose or detail work, classical figure drawing establishes proportion using a head-height unit system — the figure’s total height measured in multiples of its own head length, rather than in inches or arbitrary guesses. The standard idealized canon runs roughly eight head-heights tall: the head itself as one unit, with the rest of the body’s major landmarks (chest, waist, hip, knee, ankle) falling at specific, learnable fractions of that total height.
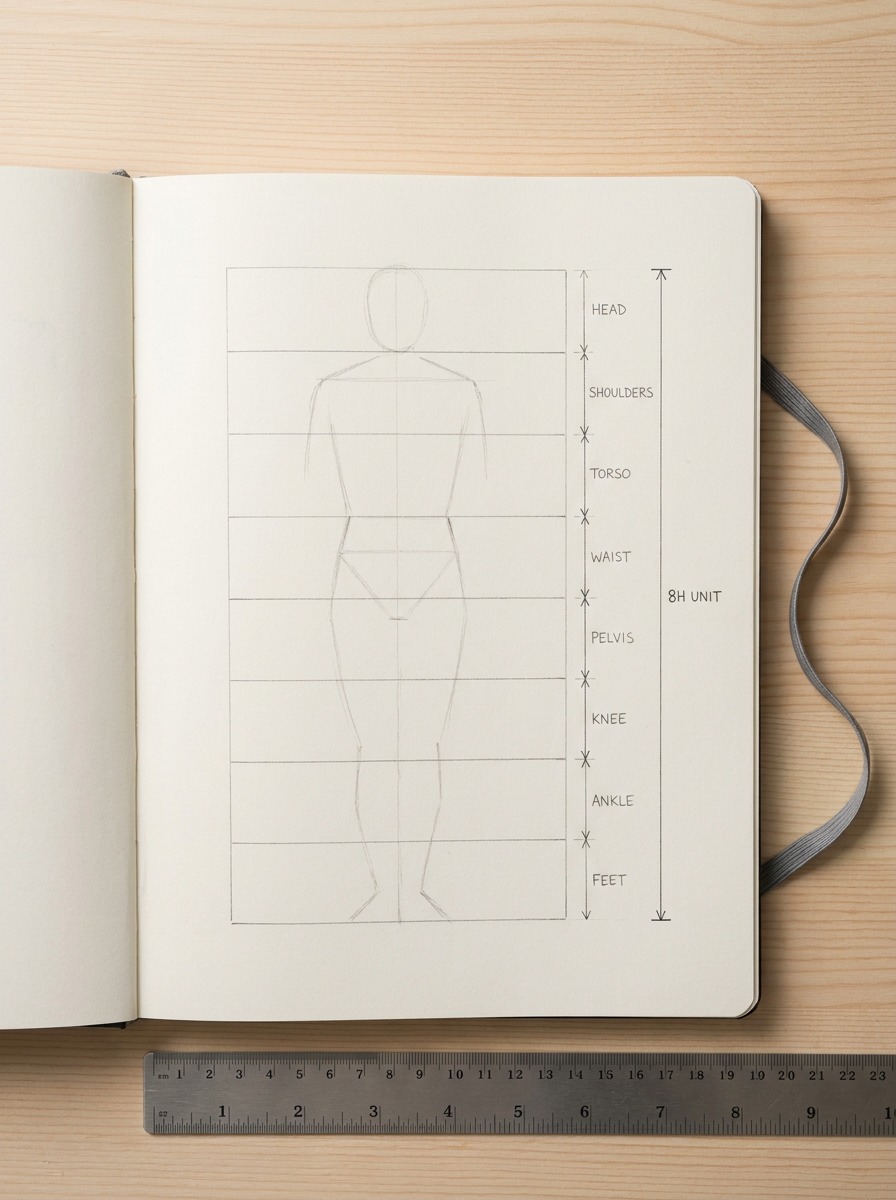
This matters more than it sounds like it should. A figure built freehand without this reference almost always ends up with an oversized head relative to the body — a extremely common beginner error, since faces get so much attention that the rest of the figure shrinks in comparison during construction.
Marking out eight head-height units as light horizontal guidelines before any other construction work solves this before it becomes a problem, rather than trying to fix proportions after the figure is already drawn.
How to Draw Aphrodite Step by Step
Four stages, each building on the last — this is the sequence that actually produces a classically grounded figure rather than a generic character sketch.
Step 1 — Gesture Line and Contrapposto
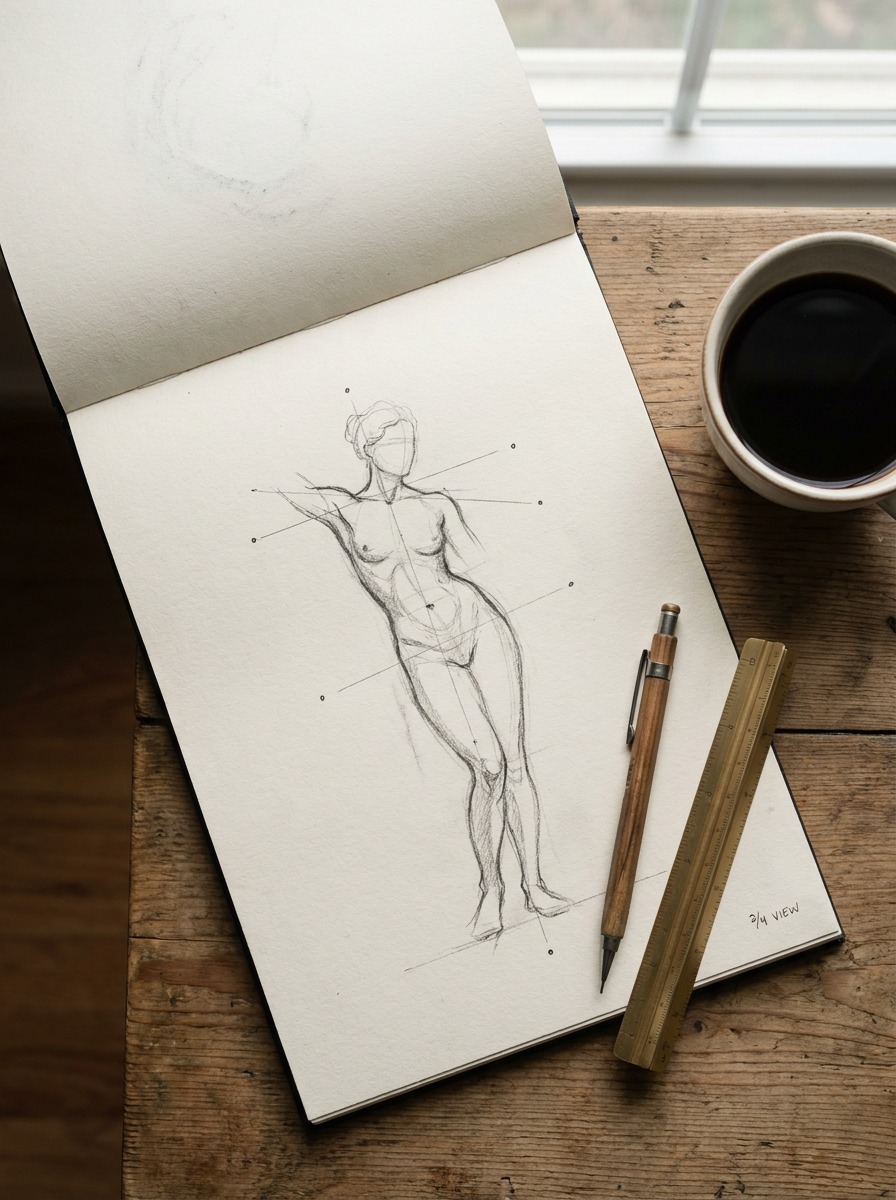
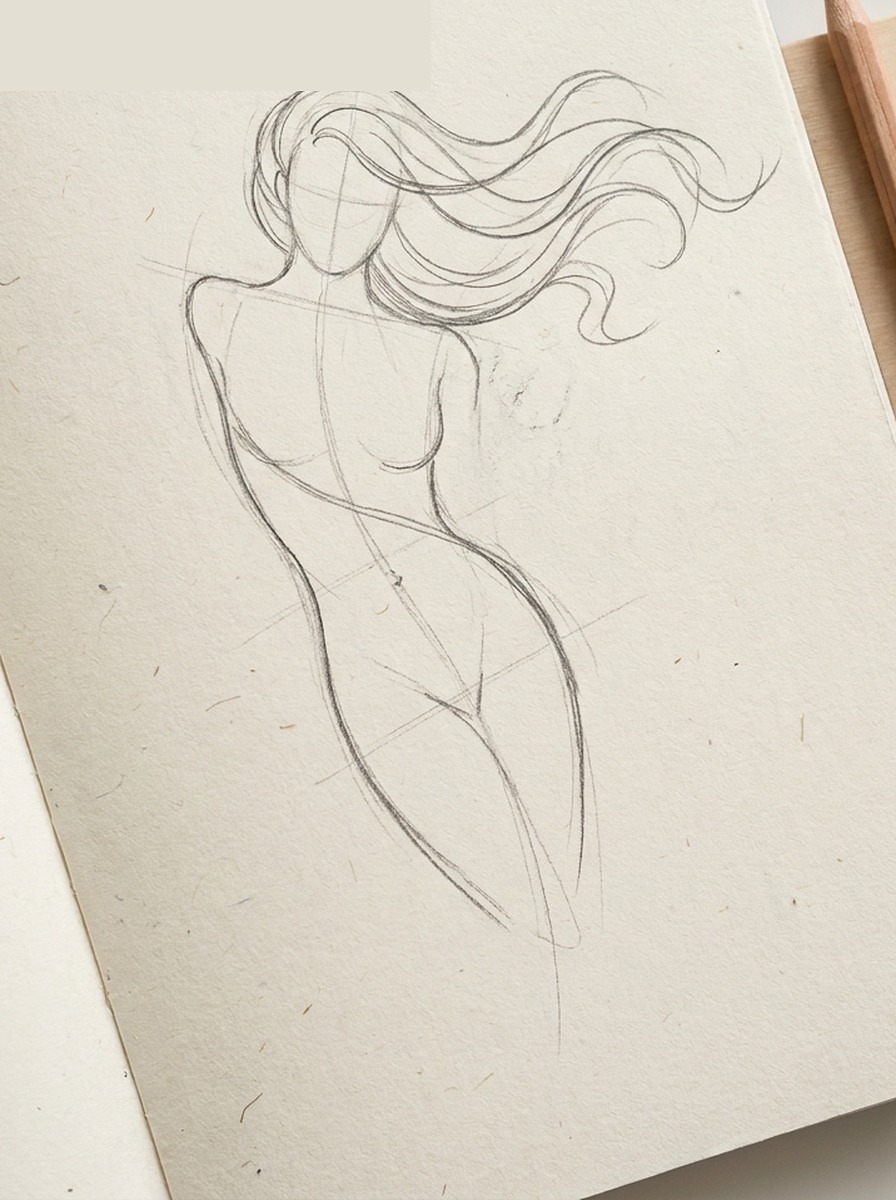
Before any proportion grid or detail, sketch one flowing gesture line establishing the figure’s overall weight and balance — specifically, decide which leg is bearing weight. That single decision determines everything: the weight-bearing hip lifts slightly, the opposite shoulder drops to compensate, and the spine curves gently to keep the whole figure balanced. This S-curve through the torso is contrapposto, and it’s the single most important structural decision in the entire drawing — get it right here, thirty seconds in, and the whole figure reads as alive rather than propped up.
Step 2 — Proportion Blocking
Lay the eight head-height guidelines over the gesture line, then block in the major masses — ribcage, pelvis, limbs — as simple volumes rather than final contours. Because of the contrapposto weight shift from Step 1, the ribcage and pelvis masses should tilt in opposite directions relative to each other, not sit as two parallel blocks stacked evenly. This asymmetry between the two masses is what actually produces the visual “S-curve” people associate with classical female figures, more than any single curved line could on its own.
Step 3 — Face, Hair, and Attributes
Build the face using standard facial proportion guidelines (eyes at roughly the head’s vertical midpoint, for example), then treat the hair as a deliberate design element rather than a solid mass — classical Aphrodite imagery consistently uses hair as both a compositional flow line echoing the body’s contrapposto curve and, frequently, a modesty device draped intentionally rather than simply covering the head. Attributes like a shell, doves, or roses get placed to support the composition’s balance, filling visual weight on the side opposite the weight-bearing leg rather than being scattered arbitrarily.
Step 4 — Drapery and Final Contour
Add drapery last, using the wet-drapery technique covered in detail below, then clean up construction lines into confident final contours. Shade with the light source established early, keeping the deepest values in the folds created by the drapery clinging against the underlying form rather than treating shadow as decorative.
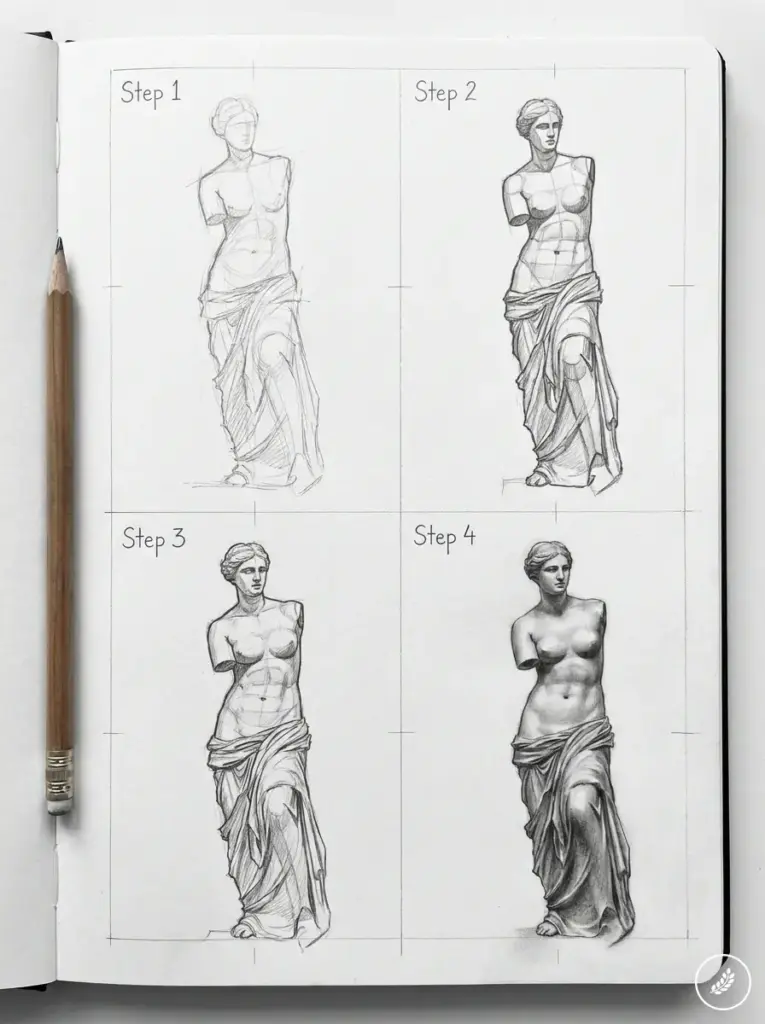
Tip: Work the four steps in order every time. Jumping to face and drapery detail before the contrapposto gesture and proportion blocking are settled is the single most common way a promising start turns into a flat, generic figure by the finished stage.
Contrapposto in Depth
Contrapposto is worth a dedicated section because it’s genuinely the difference between a classical-reading figure and a stiff one, and almost nobody currently teaches it as its own technique rather than a vague “give it a nice pose” instruction.
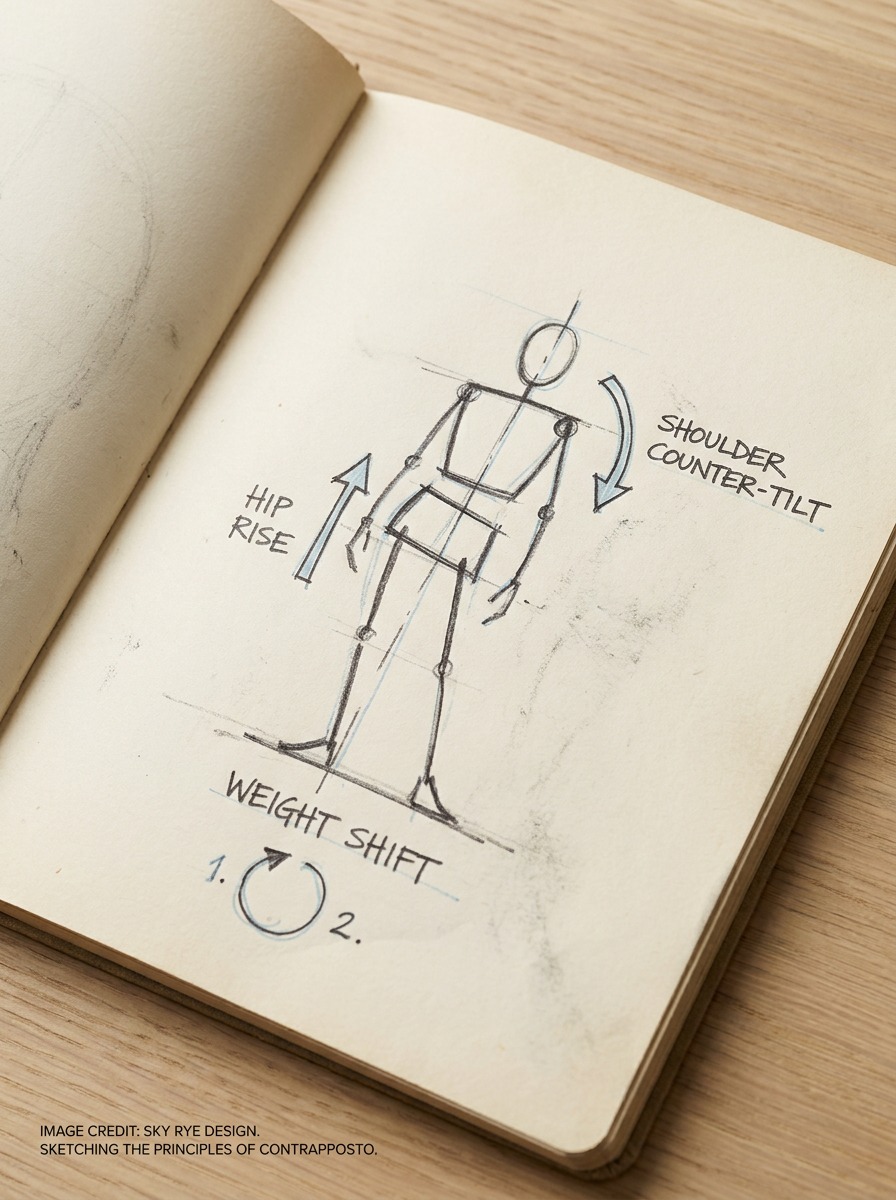
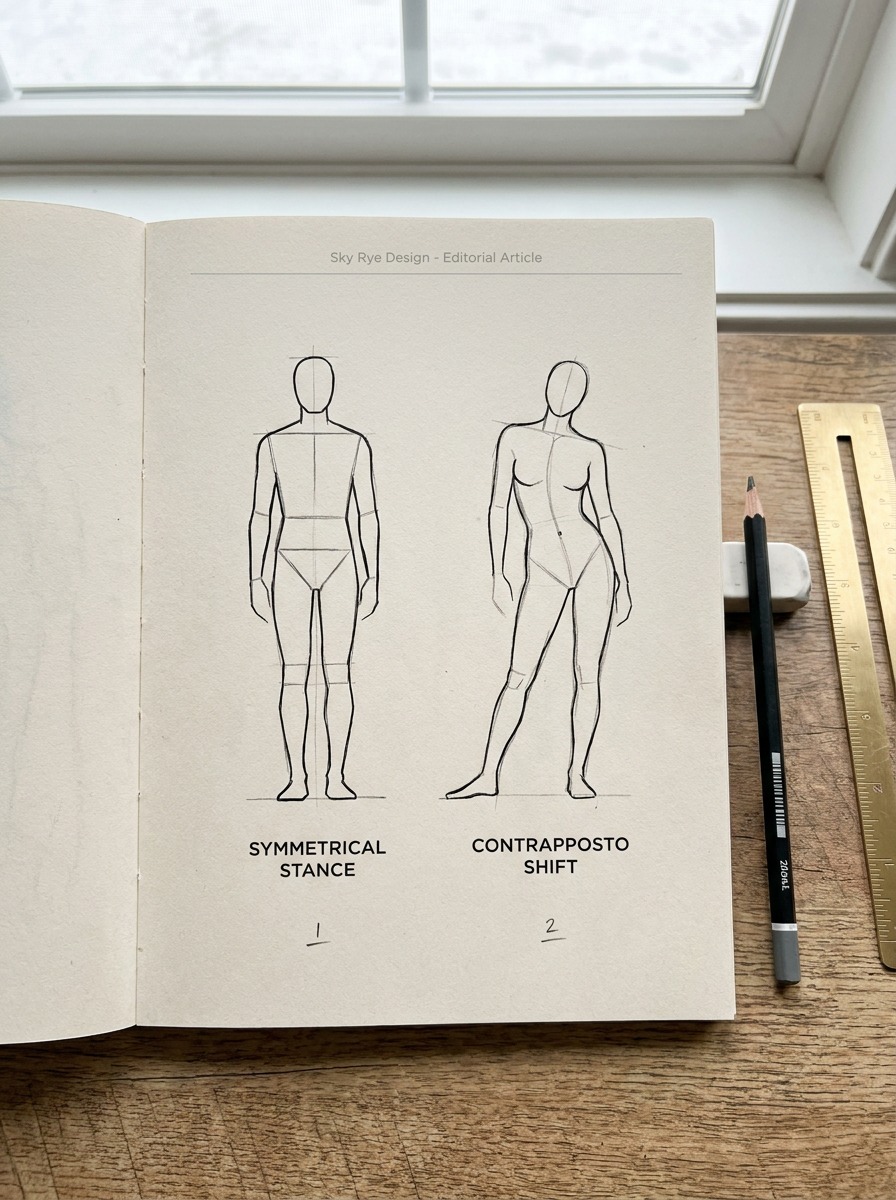
The mechanism is straightforward once isolated: when weight shifts onto one leg, that hip rises, the corresponding shoulder drops to keep the body balanced, and the spine curves gently between the two counter-tilted points.
The relaxed leg, carrying little to no weight, can bend freely at the knee, while the weight-bearing leg stays straighter to actually support the figure. This isn’t stylization — it’s how a standing human body actually redistributes weight, which is exactly why it reads as more alive than a figure standing with even weight on both feet and a rigid, symmetrical torso.
The mistake I see most often once someone knows the term but hasn’t practiced the mechanism: they tilt the hips but forget the counter-tilt in the shoulders, producing a figure that looks like it’s falling sideways rather than balanced. Both counter-tilts need to happen together, or the whole effect reads as broken rather than dynamic.
Drawing Wet Drapery
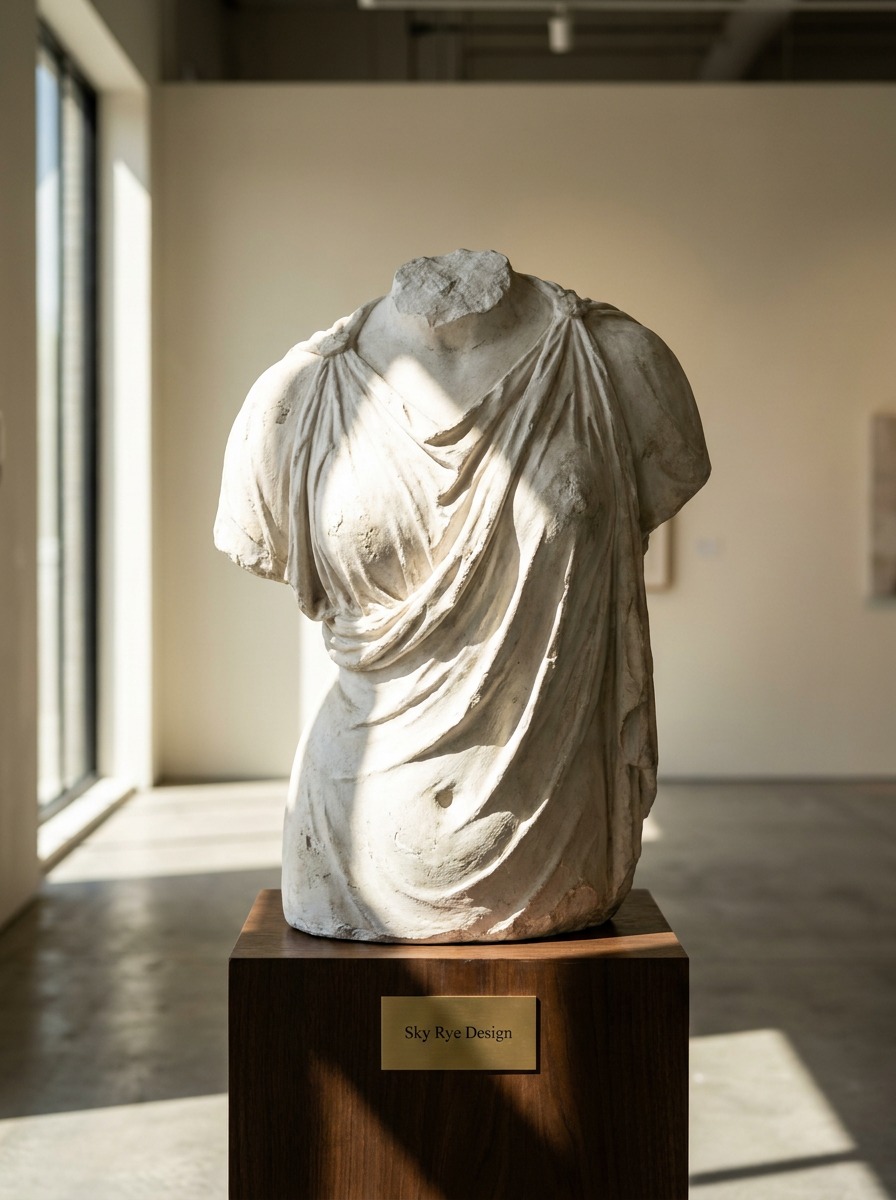
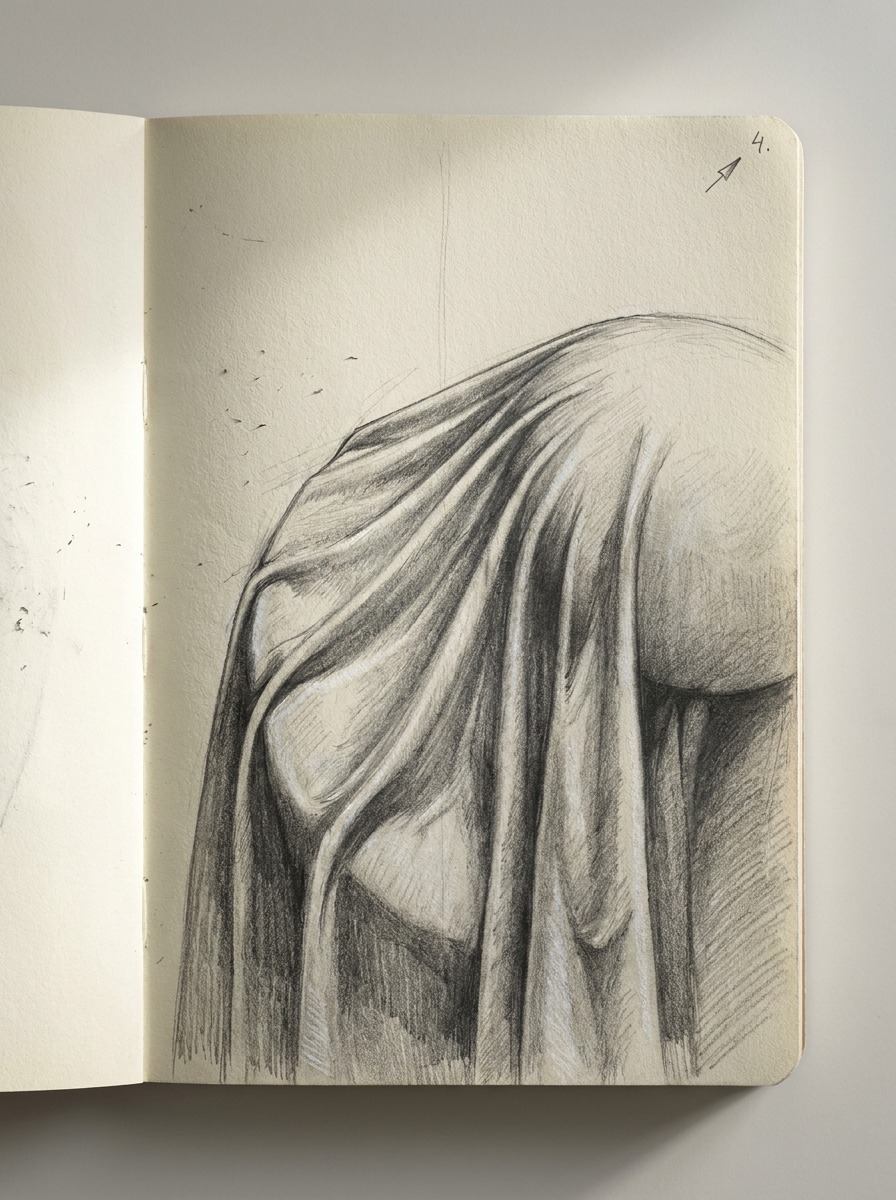
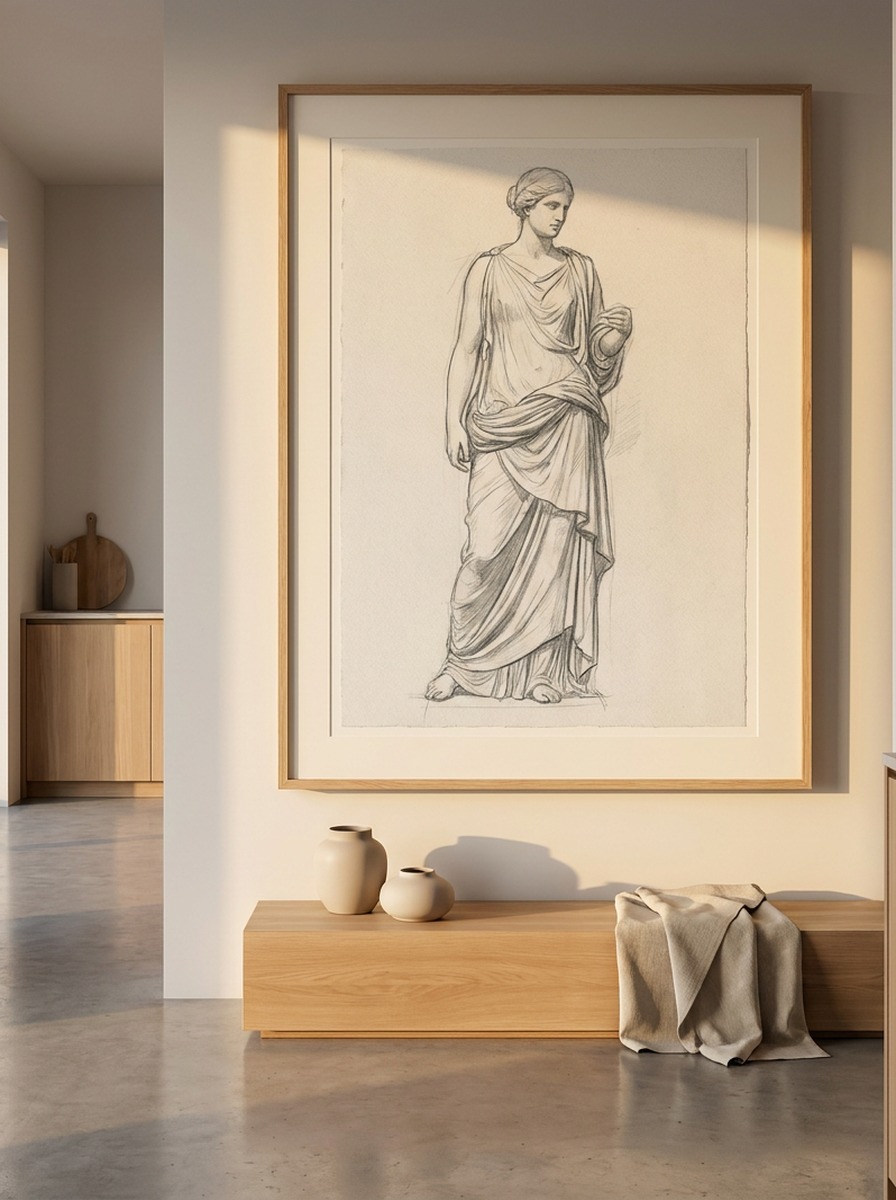
Wet-drapery technique gets its name from classical Greek sculpture, where fabric was rendered as if soaked through and clinging to the body, revealing the form’s volume rather than hiding it under a shapeless costume.
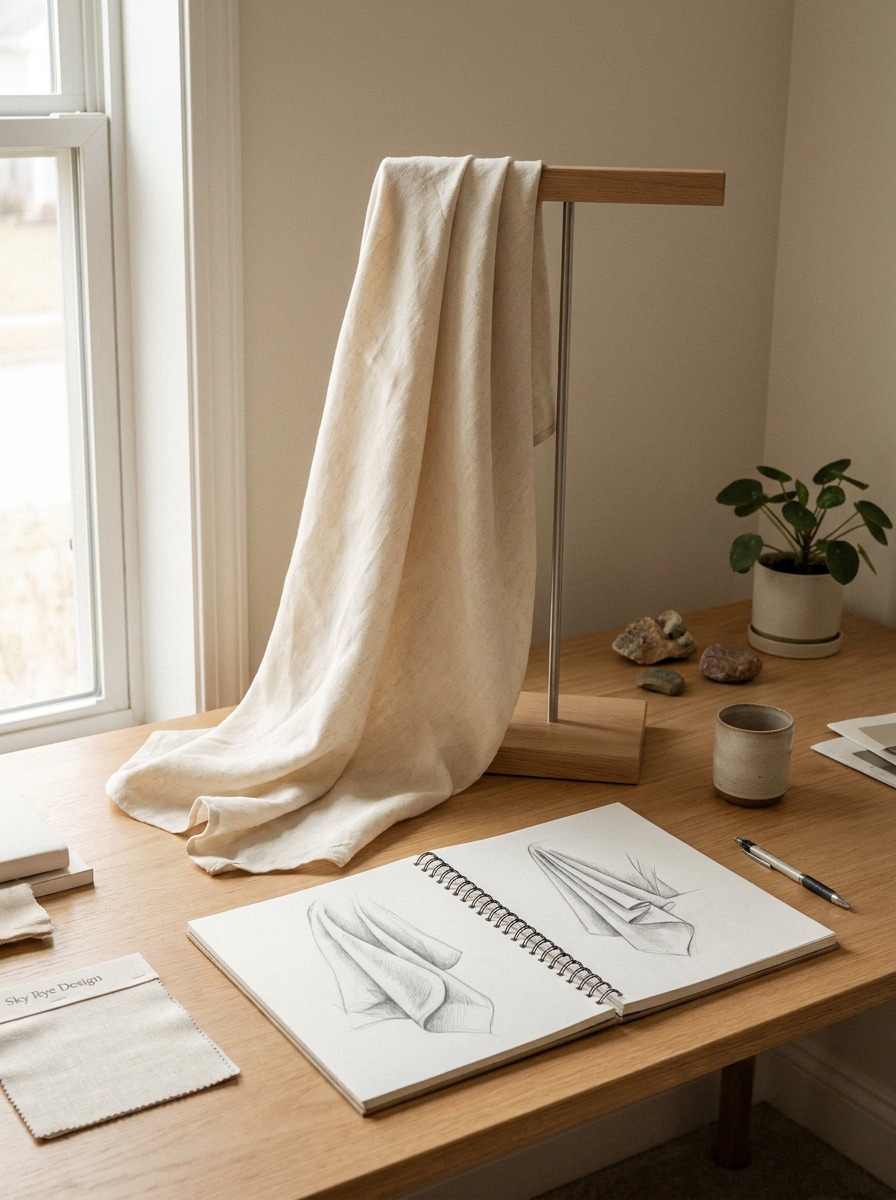
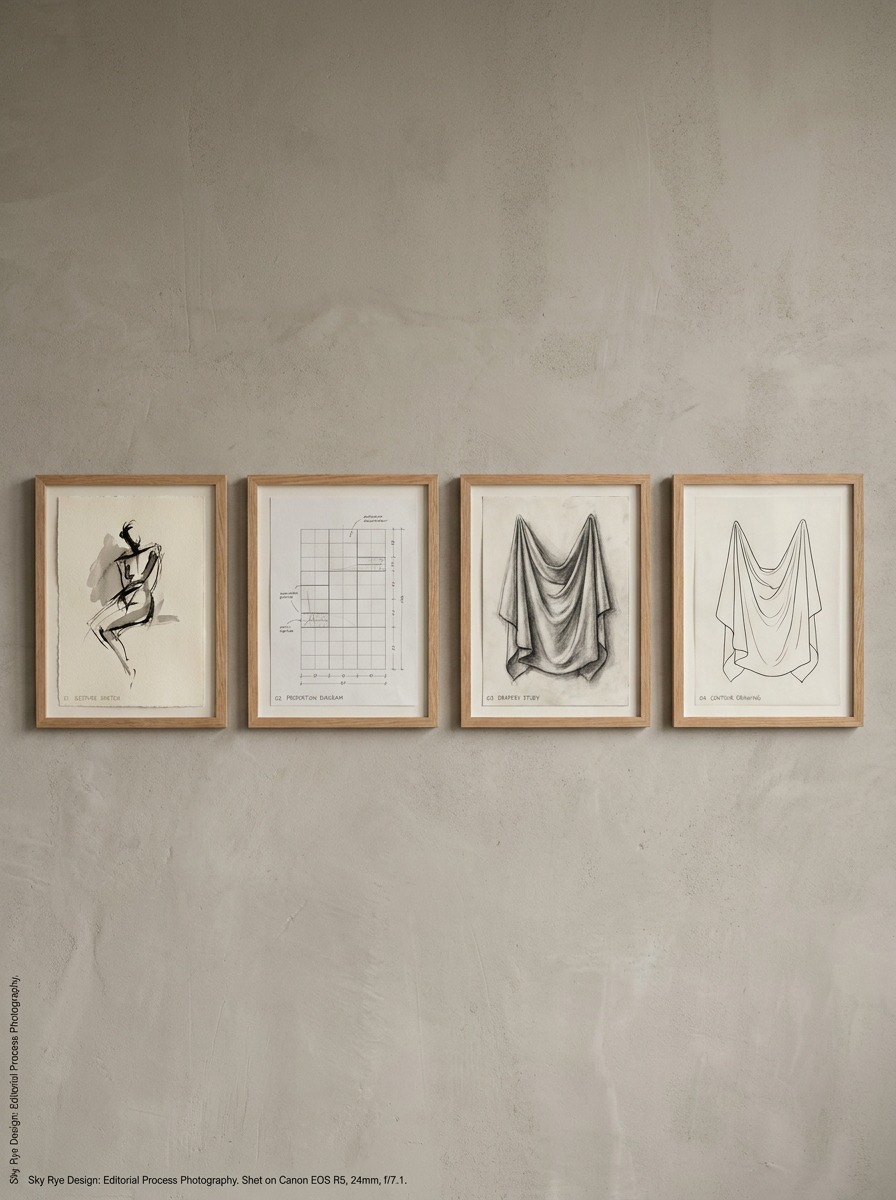
The underlying logic is simple: draw the body’s form first, then let the drapery’s folds follow that form’s actual contours — pulling taut across raised areas like the hip or thigh, pooling and folding more loosely in recessed areas, and generally behaving like real cloth responding to gravity and the body beneath it rather than an arbitrary decorative pattern. Fold lines should radiate outward from points of tension (where the fabric catches on a raised form) rather than running in a uniform, repeated pattern across the whole drapery, which is the single fastest way to make drapery read as flat and costume-like instead of dimensional.
This is a genuinely different skill from drawing an unclothed figure or drawing simple fabric folds in isolation — it requires understanding both at once, which is exactly why it’s worth practicing as its own dedicated study rather than assuming it’ll come together automatically once you can draw a figure and can draw fabric separately.
Classical/Academic Style vs. Stylized/Modern Interpretation
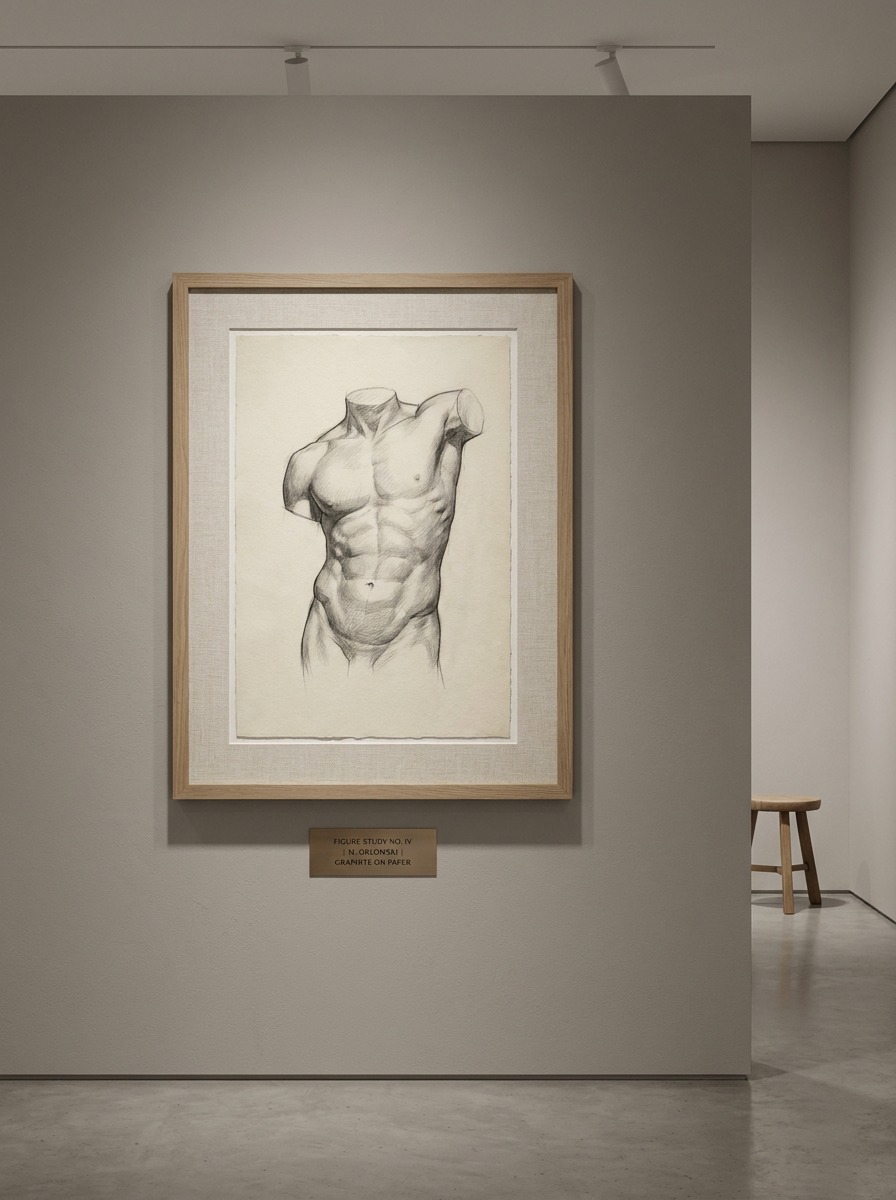
Once contrapposto, proportion, and drapery logic are solid, that same underlying structure pushes cleanly into more stylized interpretations without losing what makes it read as intentional.
What stays the same: the contrapposto weight shift and the basic proportion relationships between major body masses carry over directly into a more stylized or modern illustration approach. A stylized Aphrodite with simplified, cleaner linework still needs that same weight-bearing asymmetry, or it falls into the same generic-cartoon trap the current SERP is full of, just with better line quality.
What simplifies: detailed drapery fold logic often compresses into fewer, bolder folds in a more graphic or modern illustration style, and facial proportion can shift toward more stylized, less anatomically precise conventions depending on the target aesthetic. None of this simplification is wrong — it’s a legitimate stylistic choice, provided the structural fundamentals underneath are still correct.
Common Aphrodite-Drawing Mistakes (and the Fix)
Flat, Frontal, Symmetrical Pose
The mistake: both feet bearing even weight, hips and shoulders perfectly level, no S-curve through the spine. The fix: commit to contrapposto explicitly in Step 1, before any other construction work — decide which leg bears weight and let that decision drive the hip and shoulder counter-tilt from the very first gesture line.
Hair Rendered as a Solid Helmet-Shape
The mistake: hair drawn as one undifferentiated mass with a hard outer edge, rather than individual flowing locks that echo the body’s curve. The fix: break hair into a few major flowing shapes that follow the same directional logic as the contrapposto curve, rather than outlining one blob and filling it in.
Drapery Treated as a Flat Costume
The mistake: fabric drawn as a shape covering the body with no relationship to the form underneath — essentially clothing rather than wet drapery. The fix: draw the body’s contours first, even lightly, before adding drapery, so the fold logic has an actual form to respond to rather than existing independently.
Materials That Actually Matter
Pencil Grades for Figure and Drapery Work
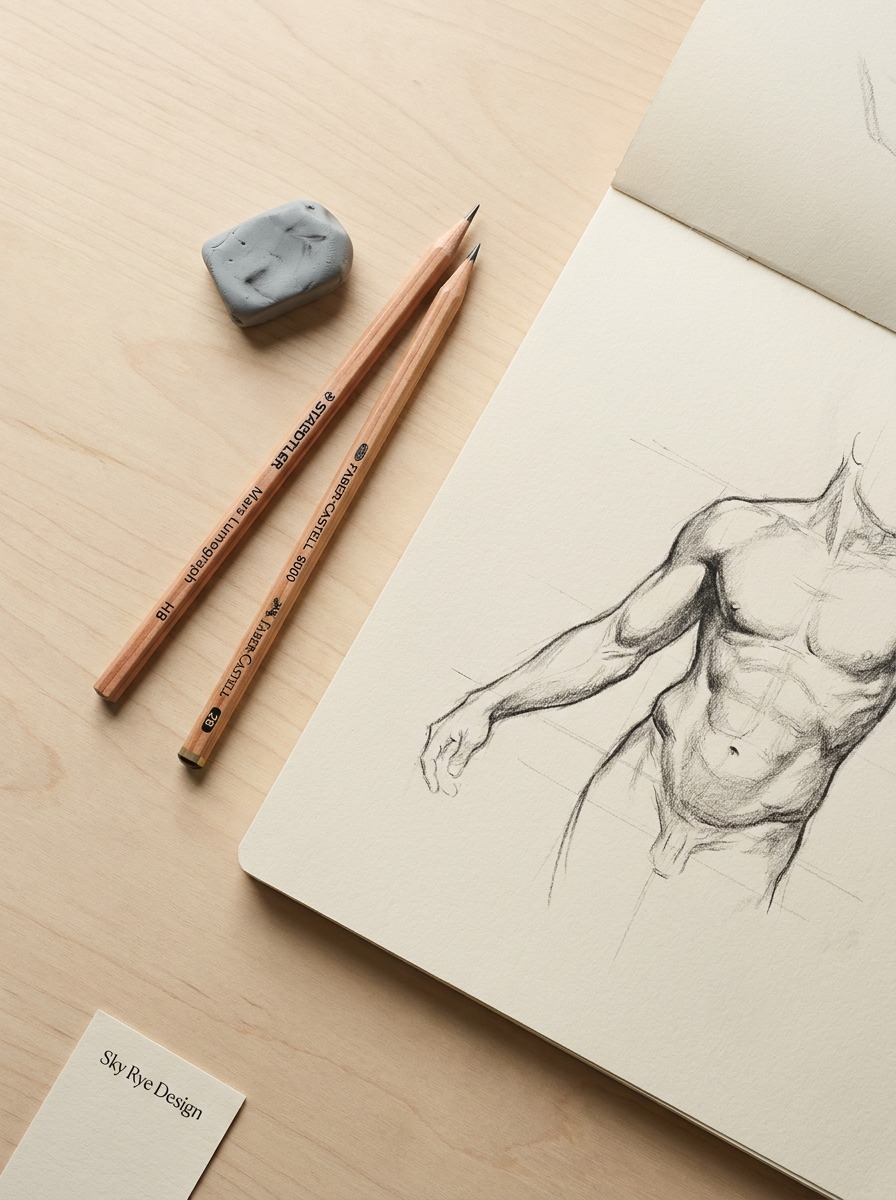
An HB handles the initial gesture line and proportion blocking, where control matters more than tonal depth. Switch to a 2B for the drapery fold shading in the final pass, since the deeper values in drapery recesses need real tonal range that an HB can’t comfortably reach without heavy build-up. A kneaded eraser is worth keeping specifically for lifting soft highlights along the drapery’s raised, taut areas, where the fabric catches the most light relative to the folds around it.
Final Thoughts
Aphrodite isn’t difficult to draw because the face or the shell are hard — she’s difficult to draw well because contrapposto, proportion, and drapery logic are all doing invisible structural work in every convincing classical depiction, and none of that work shows up if you skip straight to surface detail.
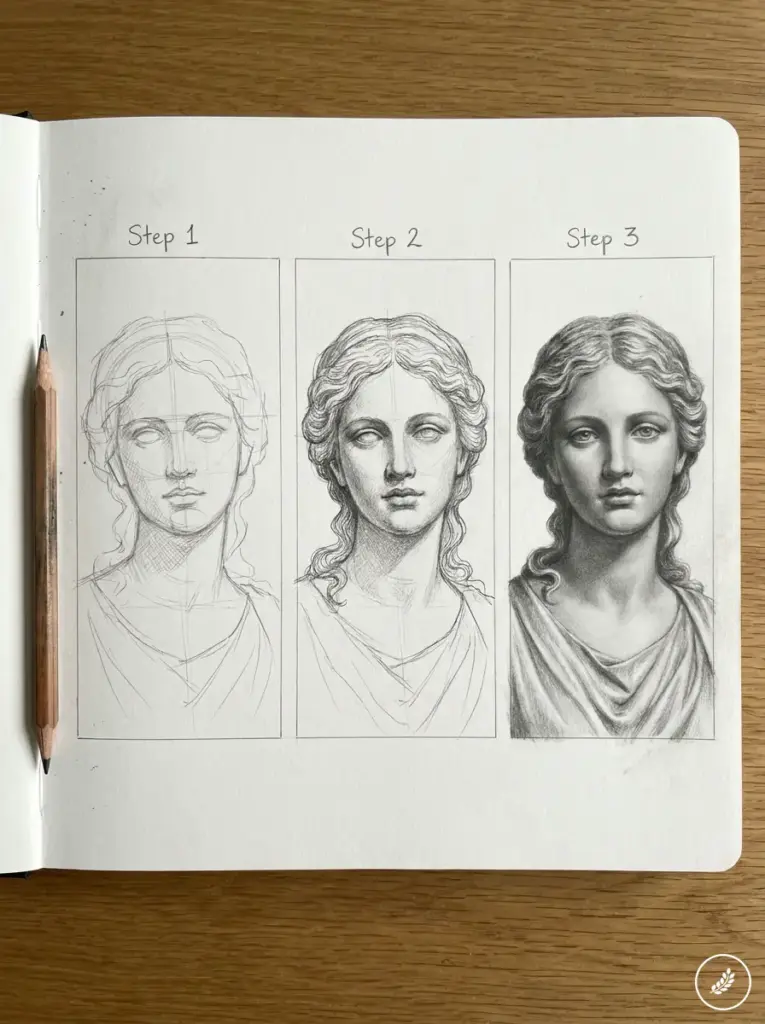
Build the weight shift first, block proportion against a real reference system, and let drapery respond to the form beneath it, and the same subject that produces a hundred interchangeable cartoon sketches online starts to actually carry the weight of the tradition it’s drawing from.
Frequently Asked Questions
What is the easiest way to draw Aphrodite?
Start with a single gesture line establishing contrapposto — which leg bears the weight — before anything else. That one decision does more to make the figure read as intentional than any amount of facial or drapery detail added afterward without it.
What is contrapposto and why does it matter for drawing Aphrodite?
Contrapposto is the weight-shifted standing pose where one hip rises as its leg bears weight, the opposite shoulder drops to compensate, and the spine curves gently between them. It’s the structural foundation of nearly every classical Aphrodite figure, from the Venus de Milo to Renaissance paintings, and skipping it is the main reason most beginner drawings look static rather than classical.
How many heads tall is the classical proportion canon?
The standard idealized classical figure canon runs approximately eight head-heights tall, with major body landmarks like the chest, waist, and hips falling at specific, learnable points along that measurement. Using this as a guideline before drawing final contours prevents the common beginner mistake of an oversized head relative to the body.
What is wet-drapery technique?
Wet-drapery is a classical sculptural and drawing convention where fabric is rendered as if clinging to the body beneath it, with folds responding to the body’s actual form rather than hanging as a shapeless, independent costume. Fold lines radiate from points where the fabric catches on a raised part of the form, like a hip or thigh.
Where does Aphrodite come from in Greek mythology?
In the most well-known version of the myth, Aphrodite was born from sea foam after Uranus’s severed remains fell into the ocean, emerging fully formed near the island of Cyprus. This origin is why shell and ocean imagery appears so consistently in her visual depictions, including Botticelli’s famous Birth of Venus.
Is it necessary to study classical sculpture to draw Aphrodite well?
It genuinely helps, since contrapposto and drapery logic were developed and refined specifically through classical Greek and Roman sculpture over centuries. Studying photographs or plaster casts of works like the Venus de Milo directly shows how weight distribution and fabric behavior actually work on a three-dimensional form, which translates directly into stronger two-dimensional drawing.
- 1.2Kshares
- Facebook0
- Pinterest1.2K
- Twitter0
- Reddit0