Learning how to draw an anime body can feel intimidating at first, especially if you’re new to figure drawing. Anime characters often look simple, but their bodies are carefully structured with clear proportions, balance, and stylized anatomy. The good news? Once you understand the basics, drawing anime bodies becomes much easier—and a lot more fun.
This guide breaks the process down into simple, practical steps so you can build strong anime characters from the ground up.
Key Takeaways
- Understanding anatomy is vital for accurate character design.
- Practice basic frameworks to enhance drawing skills.
- Attention to detail helps characters appear more dynamic.
Understanding Anime Anatomy


Anime anatomy blends realism with stylistic elements. The key to proficient drawing lies in grasping the proportions and distinct characteristics of male and female bodies. This section will explore essential aspects of anime anatomy, focusing on the differences between genders and the nuances of facial features.
Anatomy Basics for Male and Female Characters
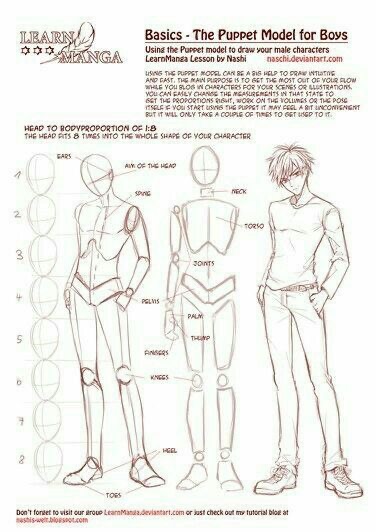
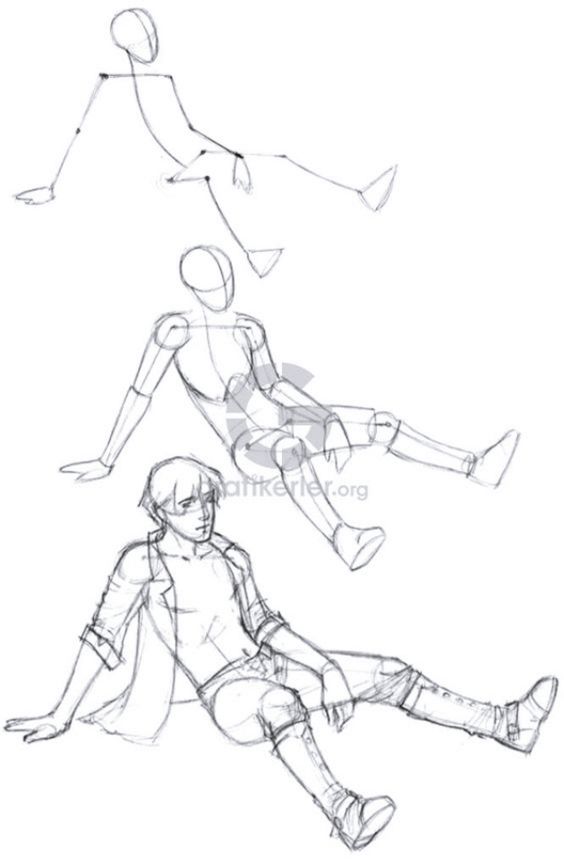
When drawing male characters, the body tends to bulk out at the shoulders, sporting a decidedly more muscular physique. The torso often ends up looking like a rectangle, with pectorals and abs that are super defined. Arms and legs are usually drawn on a bit longer & more angular than you might see in real life, making the character look as strong as possible.
For female characters, the body usually has a distinctly curvier silhouette. The hips are a lot wider, creating a nice hourglass figure that’s hard not to notice. Breasts tend to be drawn bigger, and the waist is noticeably narrower. Arms & legs on these characters are usually a bit softer looking, with curves that say “feminine” and give a sense of gentleness that needs some really careful attention to get right.
Facial Features & Expressions
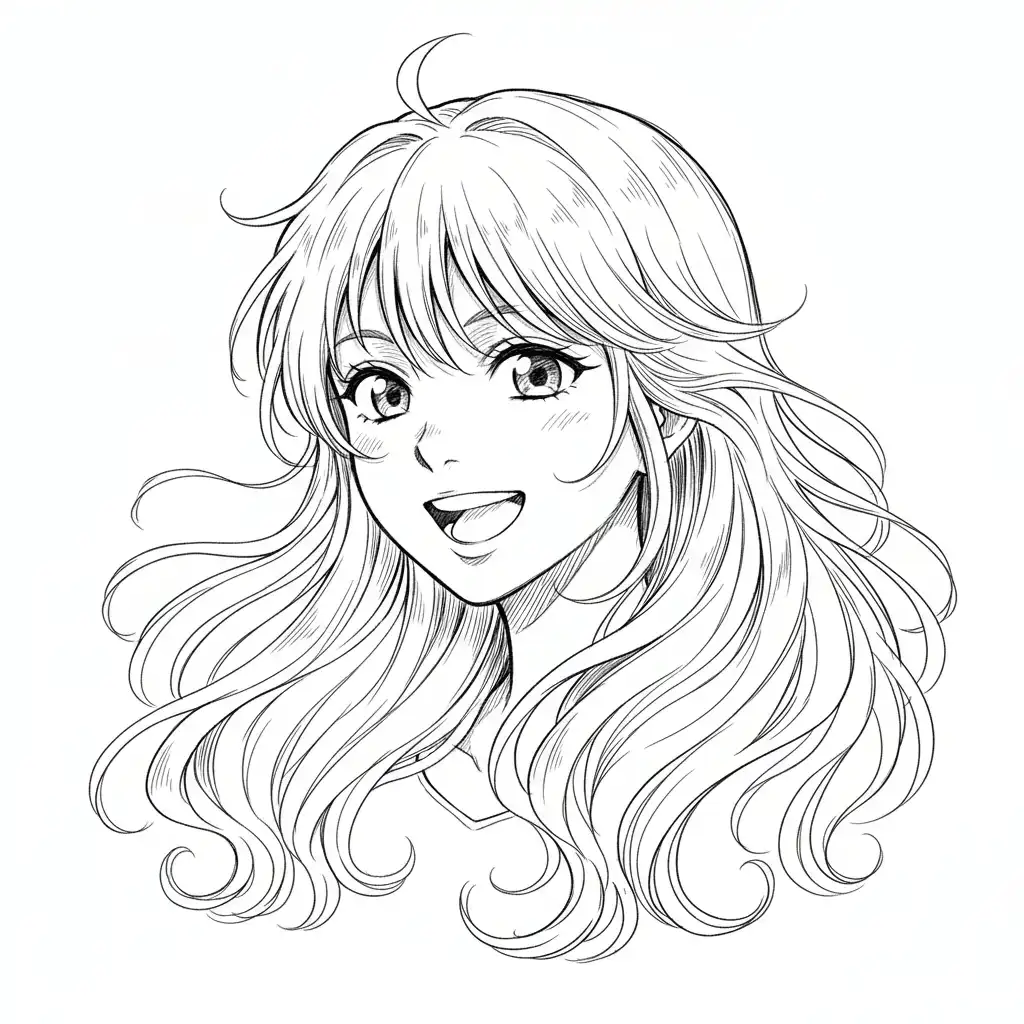
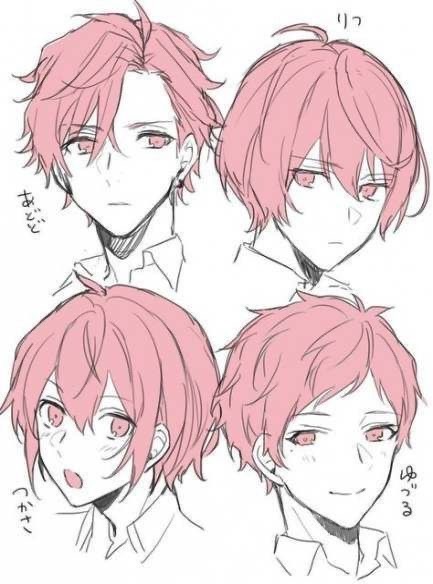
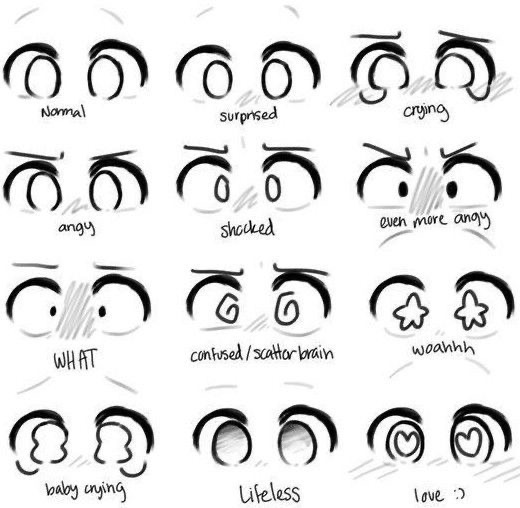
In anime – facial features are really important because they tell a lot about how the character is feeling. The eyes usually have to be big enough to grab the viewer’s attention & express what’s going on inside. They also have a bunch of different layers like the iris, pupil & reflections which all add some depth to the character.
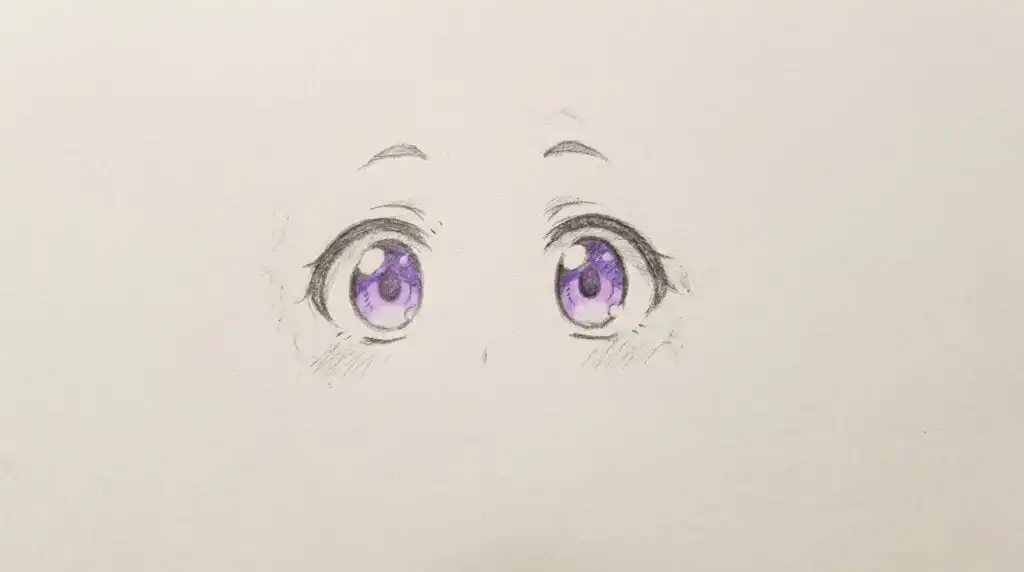
Facial expressions can also change really quickly just from making a few tiny adjustments. It can go from a tiny little smile all the way up to a big goofy grin, while the eyebrows can be all arched up or scrunched down to show all sorts of different moods. The nose & ears tend to be pretty minimal in design so as to keep things simple & stay true to the more stylized look that’s so typical of anime art.
Getting Started with Drawing Basics


To begin drawing anime bodies, it’s essential to master simple shapes and guidelines. This foundation supports more complex forms and allows for accurate proportions. Additionally, selecting the right tools enhances the overall drawing experience.
Drawing Simple Shapes and Guidelines
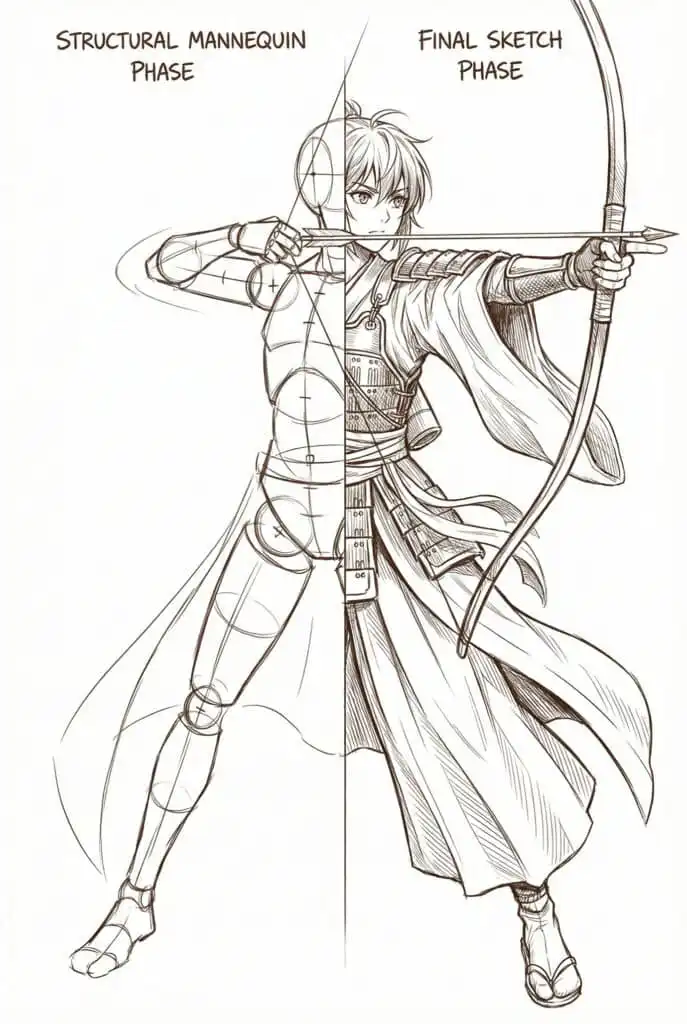
Drawing simple shapes is the first step in creating anime bodies. These foundational elements—such as circles, ovals, and rectangular shapes—serve as guides for building structure.
- Circles: Useful for heads and joints.
- Ovals: Ideal for the torso and limbs.
- Rectangles: Help to define the waist and shoulders.
Establishing guidelines is crucial. Start with a vertical line from head to toe, followed by horizontal lines for the shoulders and hips. These guidelines should be light enough for easy erasing but clear enough to be seen.
Practicing these shapes will improve a beginner’s ability to create dynamic poses and maintain proportions in their characters.
Finding the Right Tools
Choosing the right tools can greatly affect the drawing process. For beginners, a simple pencil and eraser are sufficient for practice, allowing for mistakes and adjustments.
Once comfortable, artists may opt for:
- Fine-tip pens for inking outlines.
- Colored pencils to add depth and character.
The use of quality paper can also enhance the experience. Smooth paper is recommended for detailed work, while textured paper adds flair to sketches. Investing in these tools ensures a more enjoyable and productive creative journey.
With the right shapes and tools, the path to mastering anime drawing becomes smoother and more rewarding.
Constructing the Body’s Framework


Creating a well-structured anime body begins with a solid foundation. This section explores the critical aspects of building the skeletal structure and adding muscle details, emphasizing symmetry and proportion.
Creating the Skeletal Structure
The skeletal structure serves as the core framework for the body. Start by establishing a vertical line to maintain overall symmetry. This line guides proportions, ensuring balance from head to toe.
Next, identify the joints: shoulder, elbow, wrist, knee, and ankle. Use mitten shapes to represent the hands and feet in a simplified manner. Each joint should correspond to natural movement; for instance, the elbow should bend at a 90-degree angle.
Circles help outline key joint locations. An average anime character’s size may vary, but maintaining proportionality is vital. Incorporating these elements creates a realistic appearance, letting the character translate fluidly in motion.
Adding Muscles and Other Details
Once the skeletal structure is in place, focus shifts to the muscles. Use light lines to indicate muscle groups, specifically around the shoulders, arms, and legs. Remember that natural movement influences how muscles appear at rest and in action.
For instance, shoulder joints exhibit a curve, while elbows create distinct angles. Pay attention to how muscles attach and move around joints. This will ensure that characters maintain a believable range of motion.
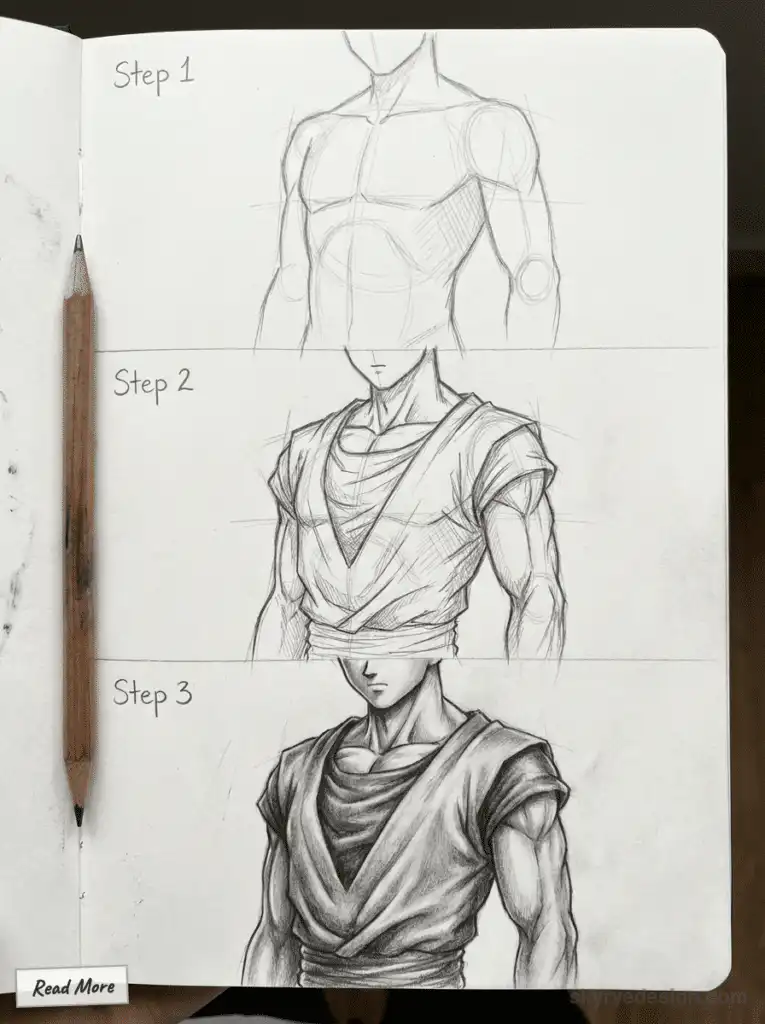
Employ horizontal lines to create divisions between muscle groups, enhancing the body’s depth. Keeping proportions consistent is key; observe real-life anatomy to inform design choices. The goal is to achieve a realistic, yet stylized, depiction of anime bodies that aligns with artistic intention.
Defining Body Shapes and Sizes


The distinct body shapes and sizes in anime significantly influence character design. Understanding body proportions allows artists to create characters that resonate with their intended personalities and narratives.
Body Proportions for Different Characters
Body proportions vary widely among different anime characters. For instance, typical anime characters often adhere to the ‘7-head’ rule, where the height of the character is about seven times the height of their head.
Common Body Shapes:
- Hourglass Shape: Typically associated with female characters. This shape features a narrower waist, accentuated hips, and breasts.
- Trapezoid Shape: Often used for male characters. They exhibit wider shoulders and a more athletic build, tapering down to the hips.
Height also plays a crucial role. Shorter characters may have exaggerated features, whereas taller ones might display more realistic proportions. This diversity helps convey varying personalities—from cute and innocent to strong and confident.
Differences in Male and Female Body Shapes
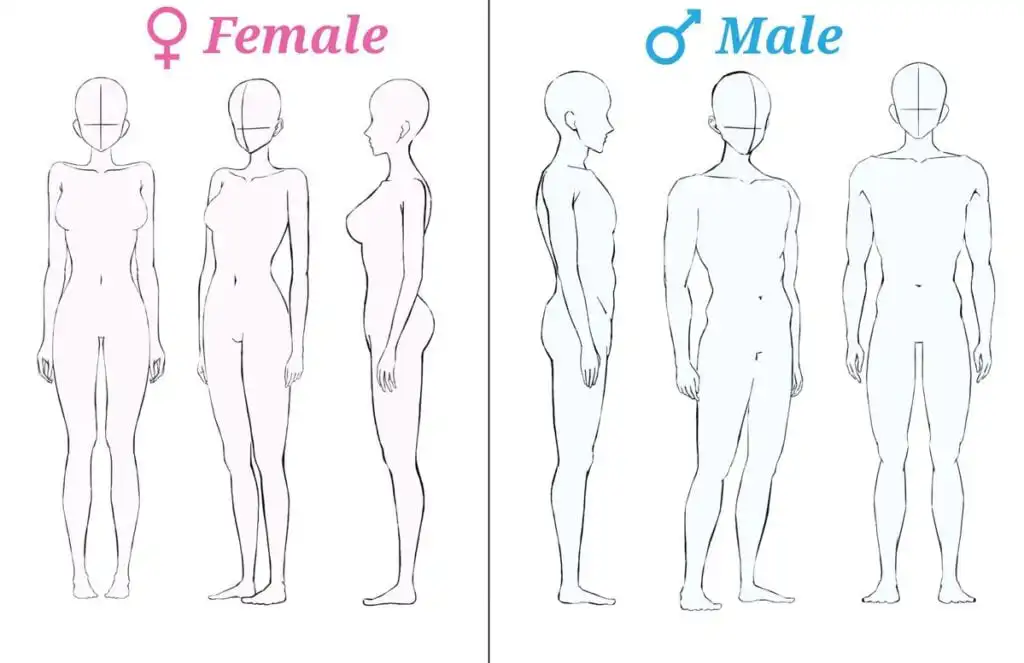
In anime, male and female body shapes are portrayed distinctly to emphasize gender differences.
Male Characters:
- Shoulders: Broad and strong, often depicted in a trapezoidal shape.
- Waist: Slimmer but maintains a more rectangular appearance.
- Pectorals: Well-defined, giving a muscular look associated with strength.
Female Characters:
- Shoulders: Generally narrower compared to hips, creating that hourglass silhouette.
- Waist: Typically more defined, creating a visually appealing curve.
- Breasts: Varying sizes are common, reflecting personality or character traits.
These differences are crucial for effectively conveying character traits and emotions. The choice of body shape not only impacts aesthetics but also influences the viewer’s perception of the character.
Outlining the Limbs and Extremities


Outlining the limbs and extremities is crucial for creating dynamic and proportional anime characters. Focus on the structure of arms and hands, alongside the legs and feet, to establish a solid foundation for your drawings.
Drawing Arms and Hands
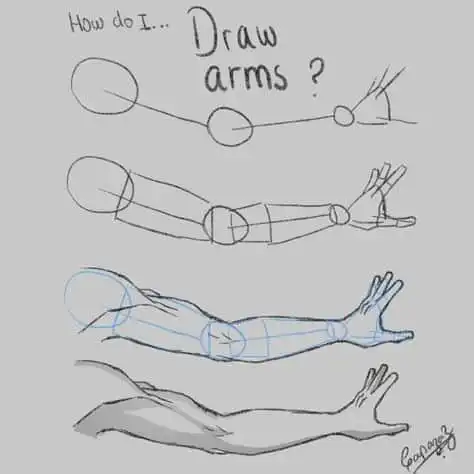
When drawing arms, start with basic shapes. The upper arm can be represented by a cylinder, tapering down to the elbow. From the elbow, the forearm should similarly taper towards the wrist. This basic form helps in visualizing the arm’s perspective and pose.
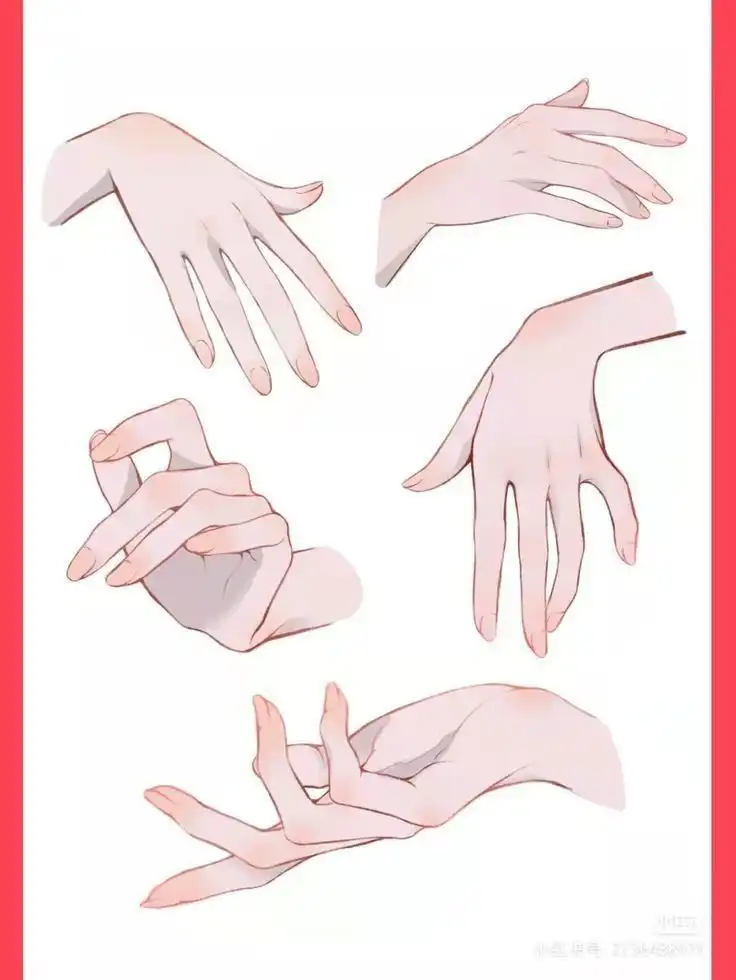
For hands, it’s helpful to break them down into simple shapes. Start with the palm as a rectangle, and use lines to mark finger positions. Each finger can be divided into three segments, with the thumb slightly shorter. Pay close attention to the proportions and vary the hand’s position, as different angles will convey unique emotions or actions.
Drawing Legs and Feet
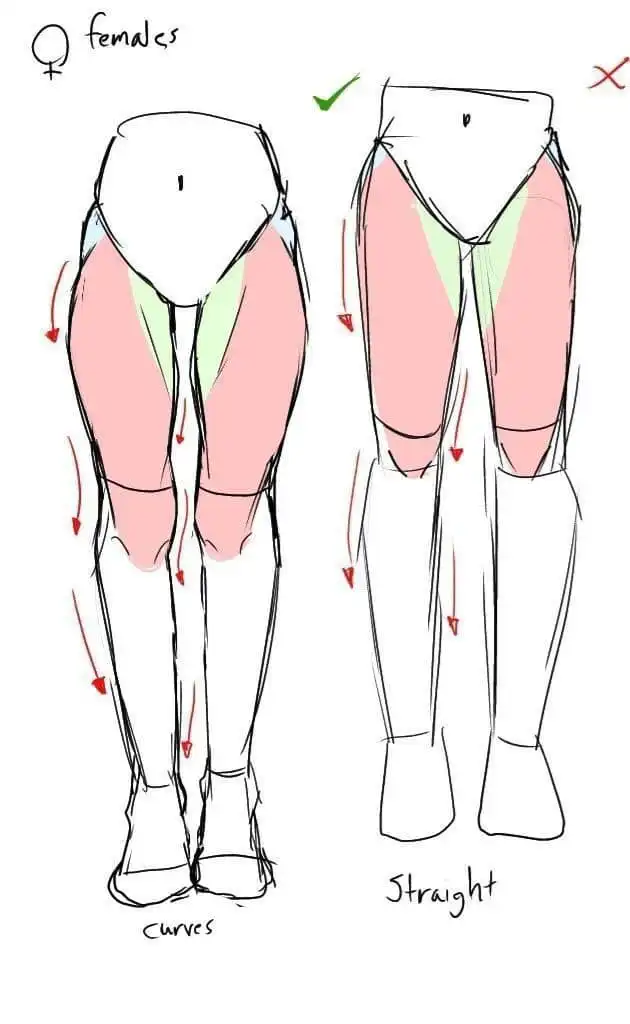
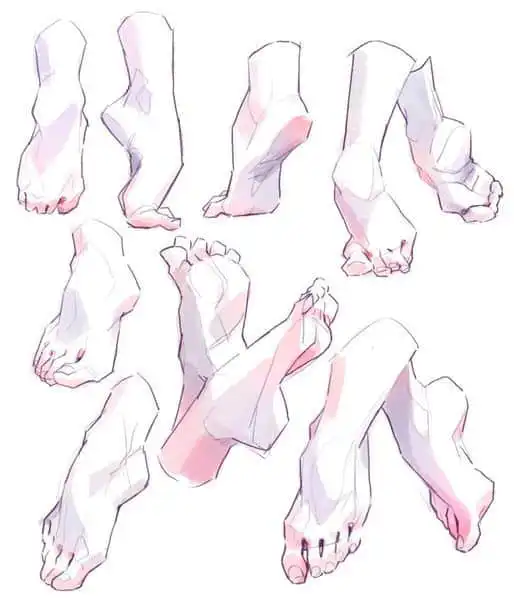
Legs also follow a pretty standard approach , draw the thigh as a gentle tapering cylinder getting wider as it goes up to the hip, & then narrow down to a clear definition at the knee. Lower legs will follow a similar shape, just maintaining some balance to give it a true to life look.
When it comes to drawing feet, start with a basic shape to capture the arch of the foot – don’t worry too much about the details just yet. Then extend out the toes as smaller, separate shapes coming out from the front of the foot.
Adding shoes to the mix is as simple as adding a rounded top & detailing the sole underneath. Just remember to pay particular attention to the ankle joints as you draw them – they need to connect pretty smoothly to the leg & the foot. Try to think about how the character is weighed & how this affects how their legs & feet are positioned.
Styling Hair and Clothing
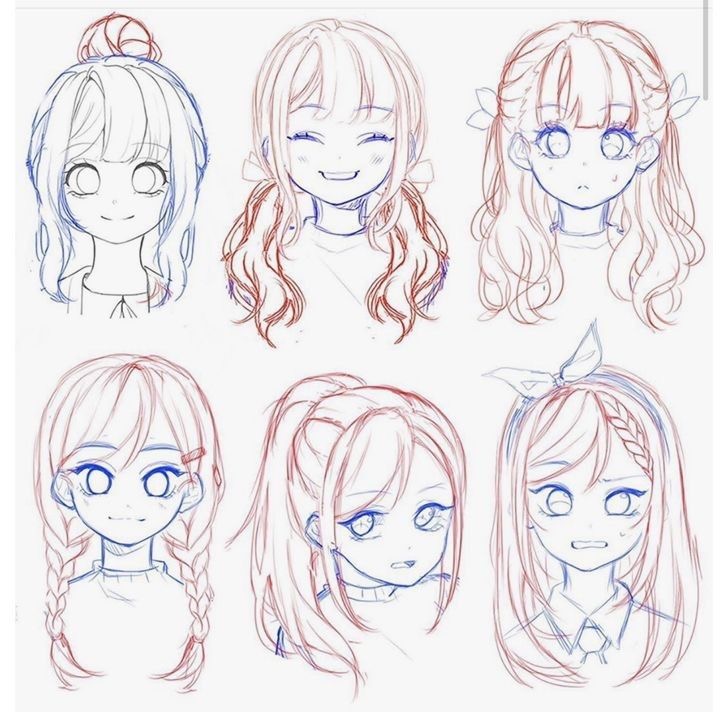
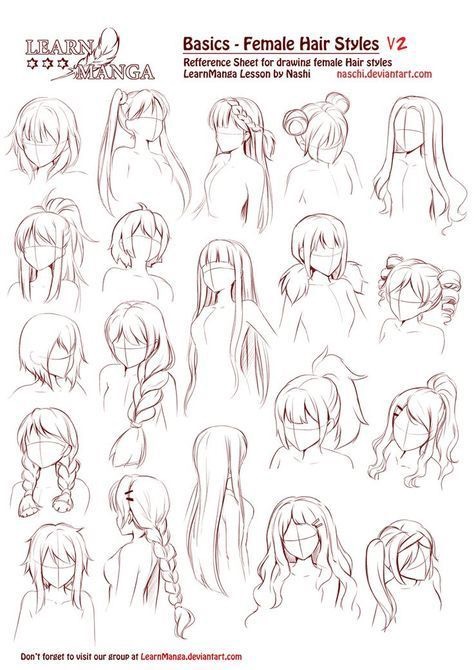
Hair and clothing play a crucial role in defining a character’s personality and style in anime. Unique hairstyles and thoughtfully designed outfits help bring characters to life and make them memorable.
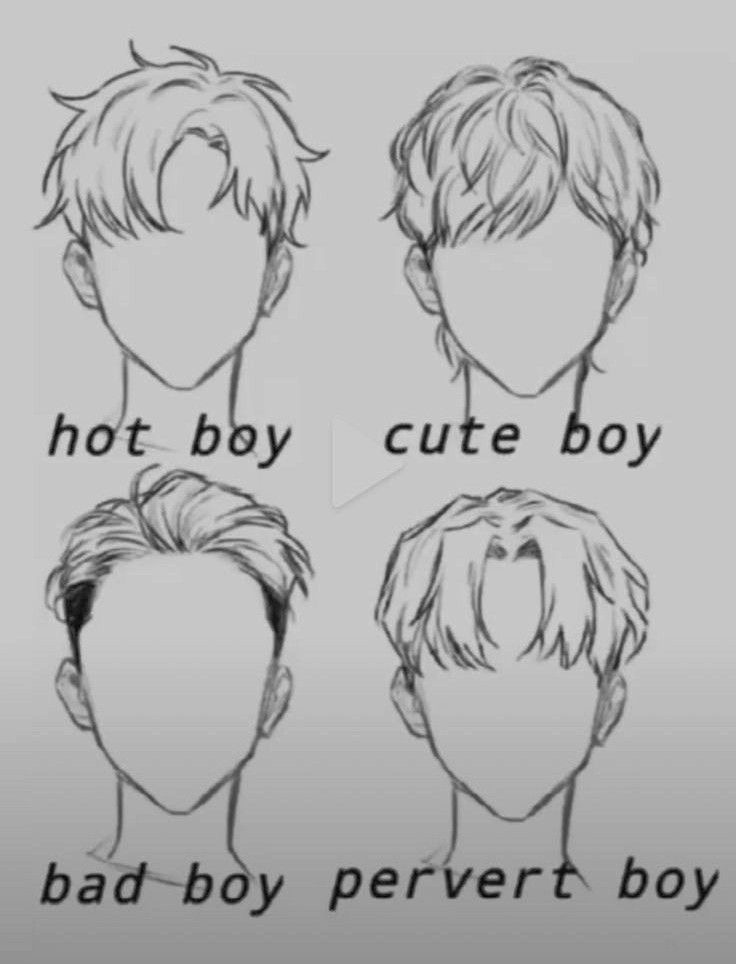
Creating Unique Hairstyles
When designing anime hairstyles, it’s important to consider the character’s personality and role. For example, a character with a bold and adventurous spirit might have spiky hair, while a more reserved character may opt for a sleek, long hairstyle.
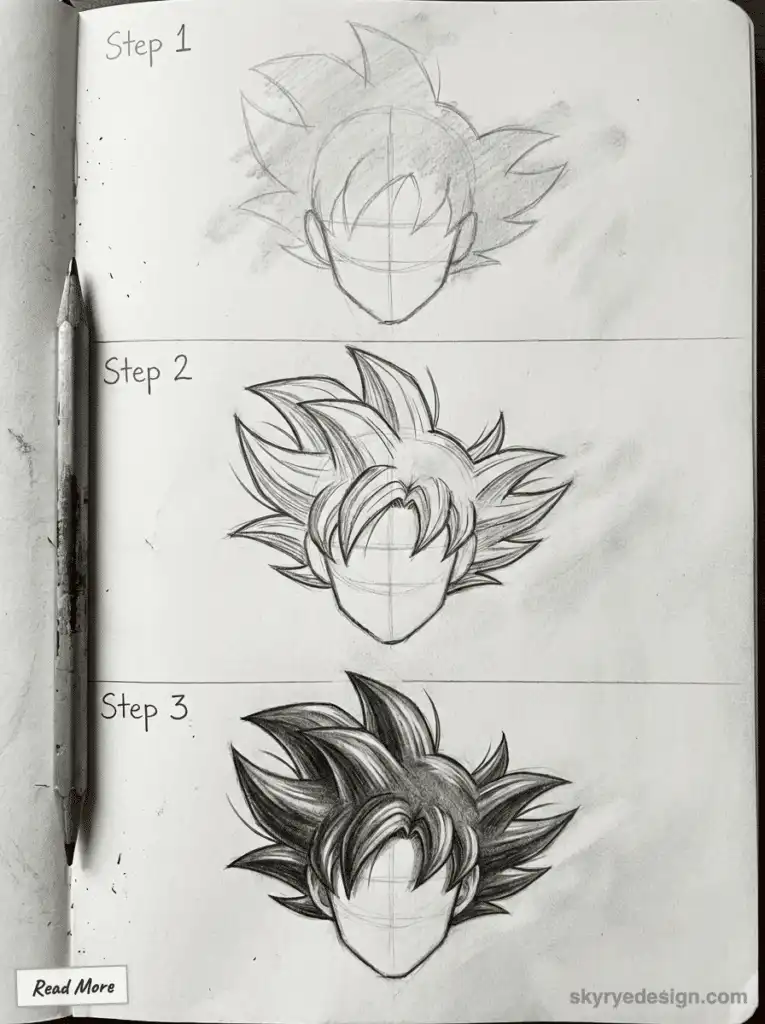
Key elements to focus on include:
- Volume and Shape: Experiment with varying levels of volume. Curly, wavy, or straight hair can dramatically change a character’s appearance.
- Color Palette: Choose colors that reflect the mood of the character. Bright colors may represent energy, while darker tones can suggest seriousness.
- Accessorizing: Incorporate headbands, clips, or other accessories to enhance the hairstyle and add personality.
Designing Clothing and Accessories


The clothing of an anime character should align with the narrative and individual traits. Clothing styles can convey culture, time period, and character role effectively.
Important considerations include:
- Silhouette: The cut and shape of the outfit can influence how a character is perceived, whether it’s flowy and loose or tight and structured.
- Color Schemes: The colors chosen should not only reflect the character’s personality but also interact harmoniously with their hair and skin tones.
- Accessories: Items like belts, jewelry, and even weapons serve to complement the outfit and add depth to the character design.
By focusing on these elements, anyone can create compelling and visually pleasing characters that resonate with viewers.
Posing and Movement
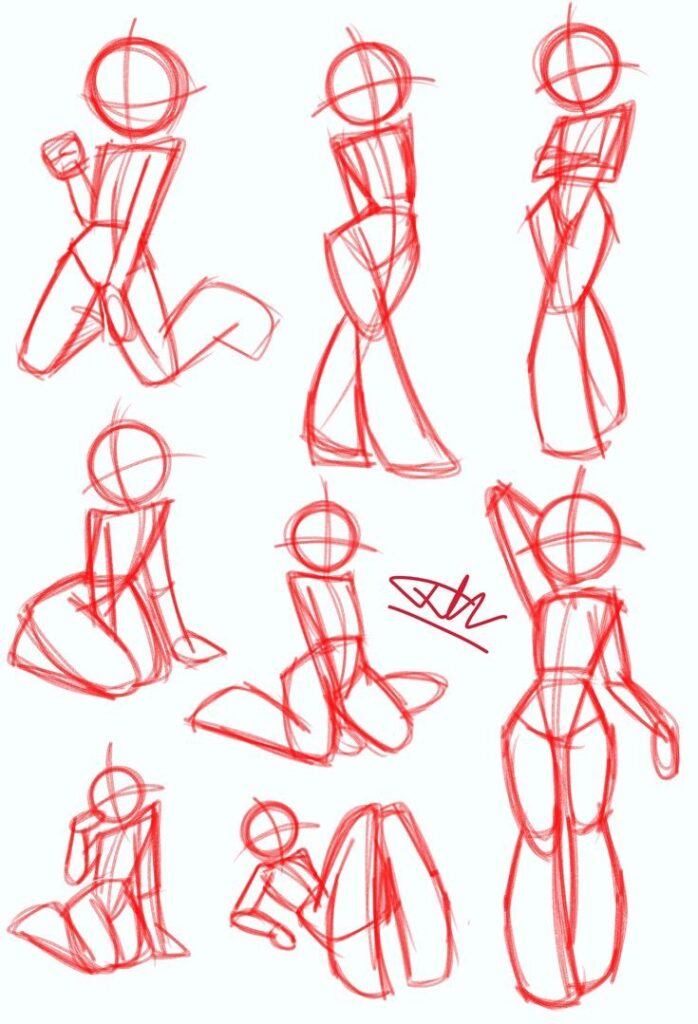
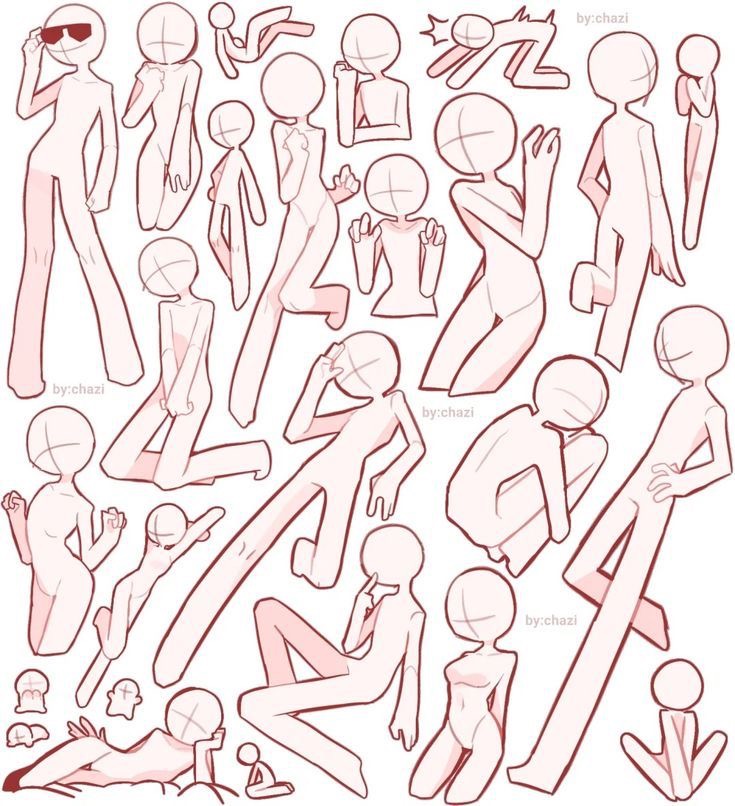
Posing and movement significantly impact the effectiveness of an anime character’s depiction. Proper poses can convey action, emotion, and personality, making art more engaging and lifelike.
Dynamic Posing for Action
Dynamic poses are essential for portraying characters in motion. They create a sense of energy and urgency. To achieve this, focus on exaggerated angles and the line of action. This means the body should have a clear path that guides the viewer’s eye.
Consider using squash and stretch techniques to emphasize movement. For example, a character leaping might have their knees pulled up, showcasing their momentum. For action scenes, drawing ideas such as combat stances or athletic movements can enhance the excitement.
Incorporate balance into your dynamic poses. A character mid-jump should maintain stability through their limbs, not just rely on arms or legs. This attention to balance creates a more realistic portrayal of movement.
Natural Stances for Standing Characters
Natural stances are crucial for establishing a character’s mood and personality. These poses should feel relaxed and grounded. Start by considering the character’s weight distribution; a slight shift to one leg often helps achieve this.
Utilize subtle body language to express emotions. For instance, a character with arms crossed might appear defensive, while an open stance conveys confidence. Paying attention to hand positioning also adds to the realism. Gentle curves in the limbs can signify relaxation, while rigid postures suggest tension.
When drawing standing characters, ensure their heads align with their poses. The gaze can direct attention to specific elements in the drawing. Crafting these natural stances helps create relatable characters that draw viewers in.
Adding Depth with Shading and Texture
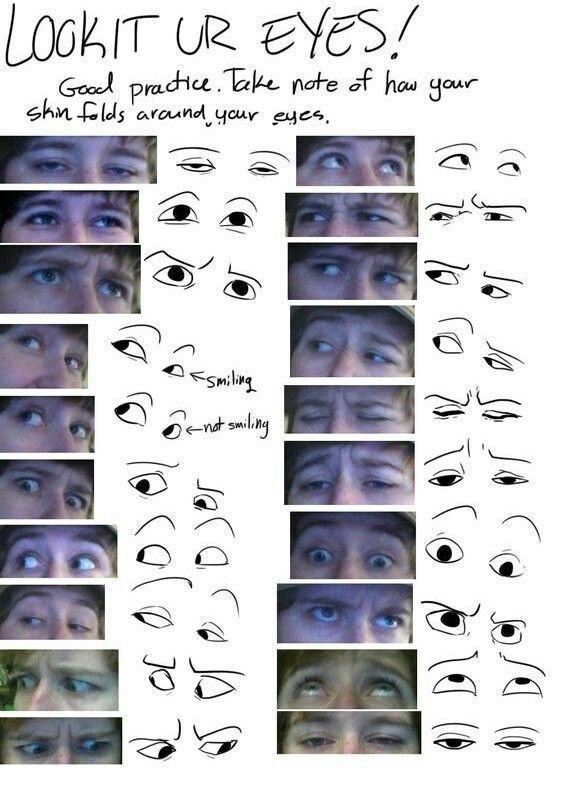
Shading and texture are essential for creating depth in anime character drawings. These elements can enhance realism and add a professional touch to the artwork. Understanding basic techniques and applying them effectively will result in a more compelling representation of the character’s body.
Techniques for Effective Shading
To achieve effective shading, artists should focus on light sources and how they affect the form. The use of gradients can create smooth transitions from light to dark, reflecting how light interacts with surfaces.
- Identify the Light Source: Determine the primary direction of light.
- Use Cell Shading: This technique involves creating distinct blocks of shade, ideal for anime styles.
- Soft vs. Hard Shadows: Soft shadows can make the body appear rounded, while hard shadows add definition.
Experimenting with varying opacity levels can also enhance depth. Utilizing layering helps achieve subtle nuances that contribute to a lifelike appearance.
Creating Texture for Realism
Texture in anime drawings adds complexity and realism to the character’s body. By incorporating different textural elements, one can suggest materials and surfaces effectively.
- Linework: Varying line thickness can suggest texture, with thicker lines creating a bolder effect.
- Hatching and Cross-hatching: This technique can indicate shadows and forms, enriching the visual experience.
- Digital Brushes: Using custom brushes in digital art can replicate various textures, such as skin, fabric, or hair.
Attention to detail in texture can significantly improve the quality of the artwork. Utilizing references from real-life objects will help achieve a more accurate representation, ensuring that the artwork stands out with a more realistic appeal.
Final Touches and Refinements
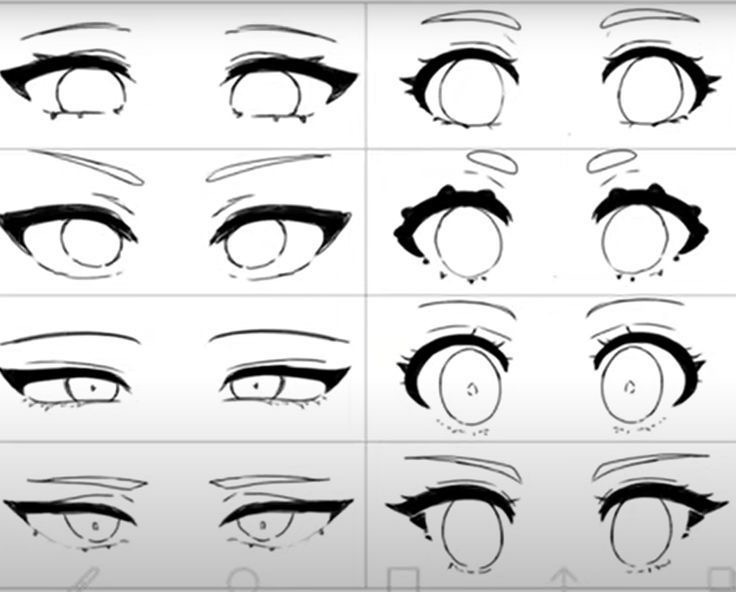
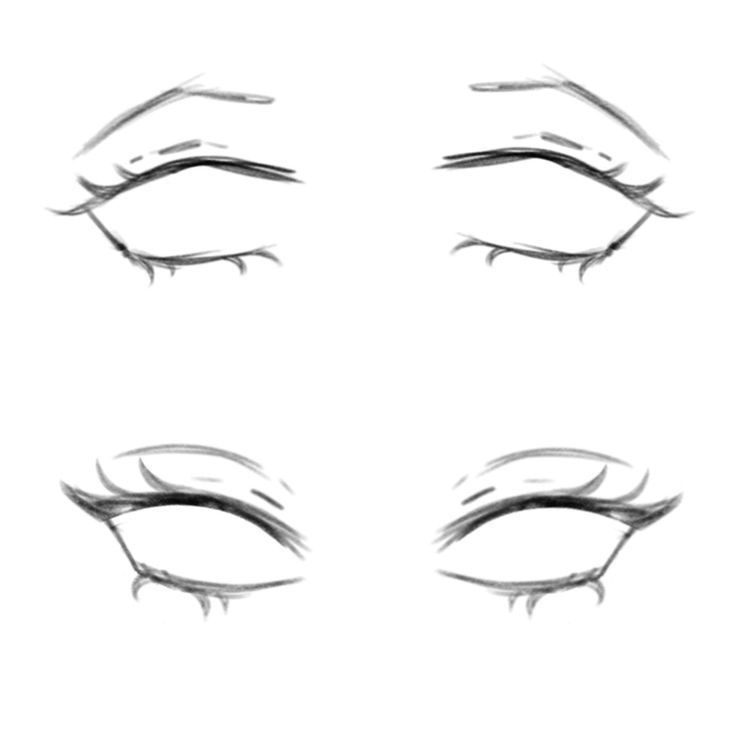
The finishing touches can significantly enhance the quality of an anime drawing. Focusing on detailed elements and refining techniques can lead to a more polished and realistic outcome. The following subsections cover essential practices for improving the overall aesthetic and cleanliness of anime illustrations.
Giving Your Art a Second Look
Artists need to take a step back at some point and give their work a good, honest critique. It’s this review process that lets you see where your art needs a bit of work, like if the proportions or the line work need an upgrade.
When you’re in this phase, it’s the tiny details that can really make your drawing pop like facial expressions, the way people hold their hands, and the way their clothes are creased. Getting these right can mean tweaking the lines, and whether you use software or an old-fashioned eraser, it’s all about getting rid of any inconsistencies.
Its a good idea when you’re going over your drawing to compare it to some reference images. that way you can get an idea of what a more realistic anatomy and clothing looks like, and if you copy that then it adds up to a more polished finish to your art.
Simple Tips For Cleaner Drawings
Getting nice clean lines in your anime drawings is pretty much essential for making them look top-notch. One trick that’s been found to work well for those working digitally is layering – it lets you nudge things about without having to go back to the drawing board and re-do the whole thing.
When it comes to traditional drawing, using decent paper and the right tools (like a good quality fineliner for instance) is a big help in producing crisp, sharp lines. And the smoother your hand movement is, the neater your finished work is going to be.
It’s worth mentioning that using an eraser can come in handy when you’re trying to remove some of the mistakes and smudges you’ve made along the way. The more you practice, the more control you’ll get over your hand movements, which in turn makes it a lot easier to draw nice, clean lines.
Lastly, taking regular breaks to step back and take a look at your drawing from a distance is a good idea – it helps spot any clutter or imperfections that might have snuck in while you were working on it.
Practical Exercises and Projects
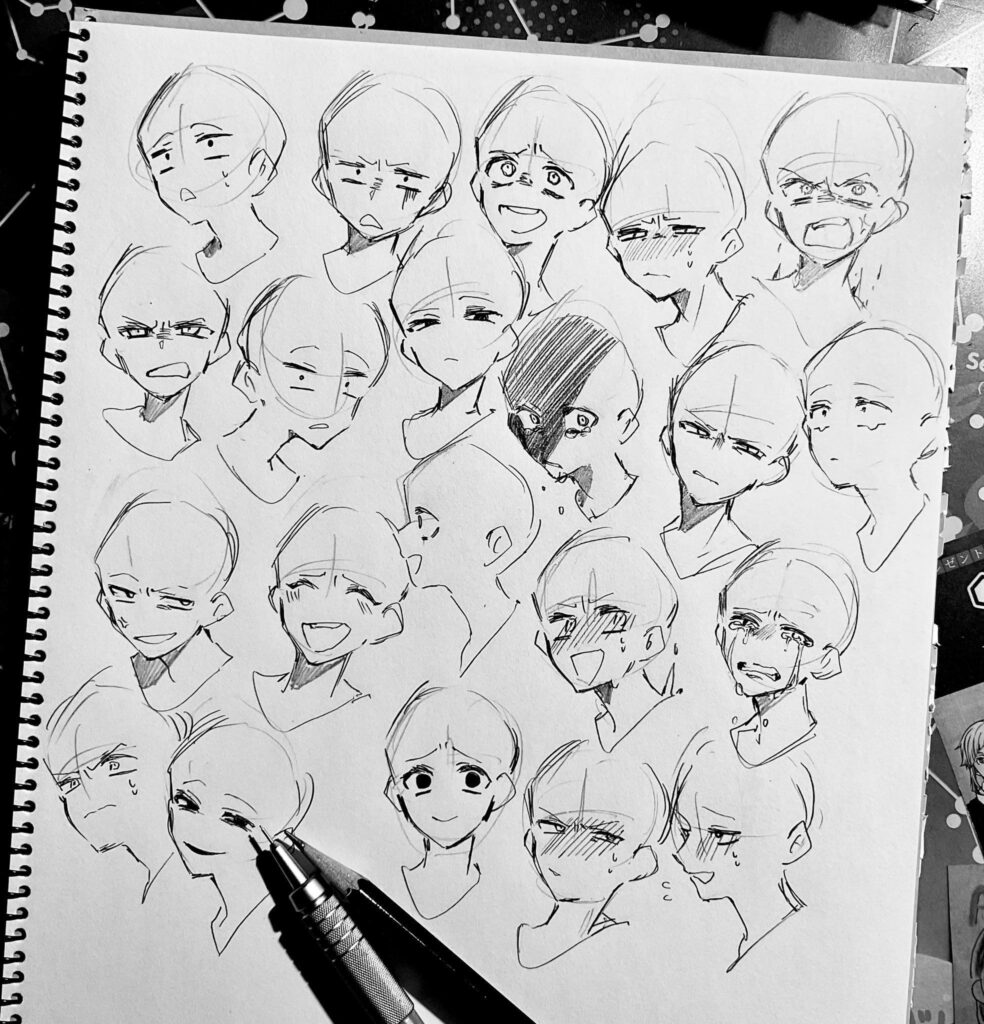
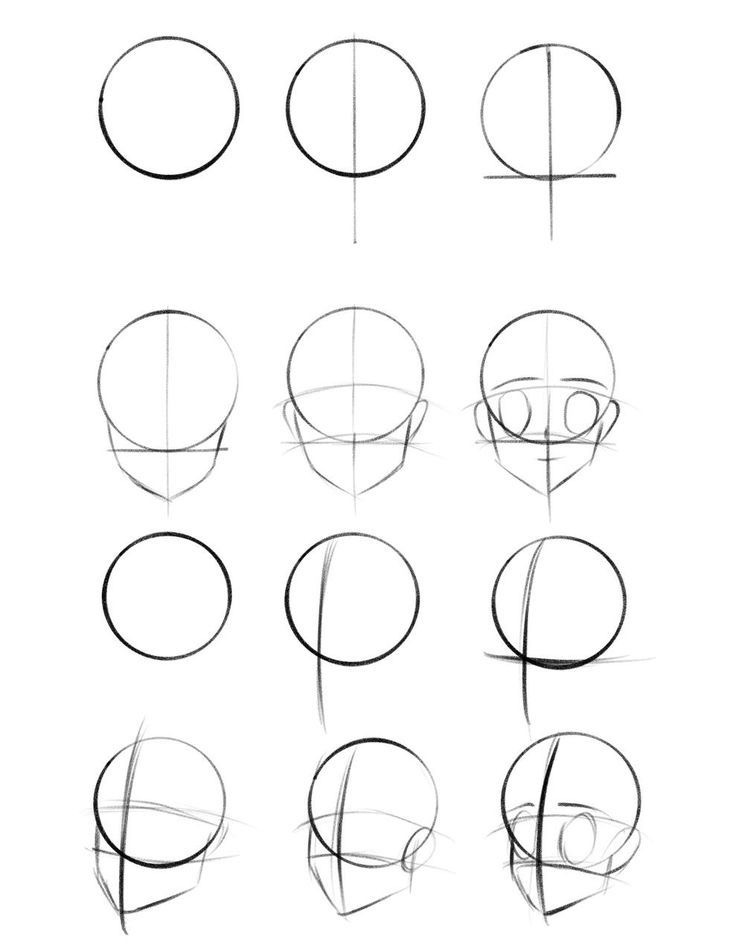
Developing skills in drawing anime bodies requires dedicated exercises and projects. Focusing on structured practice and step-by-step tutorials can significantly enhance techniques and understanding of proportions and styles.
Step-by-Step Drawing Projects
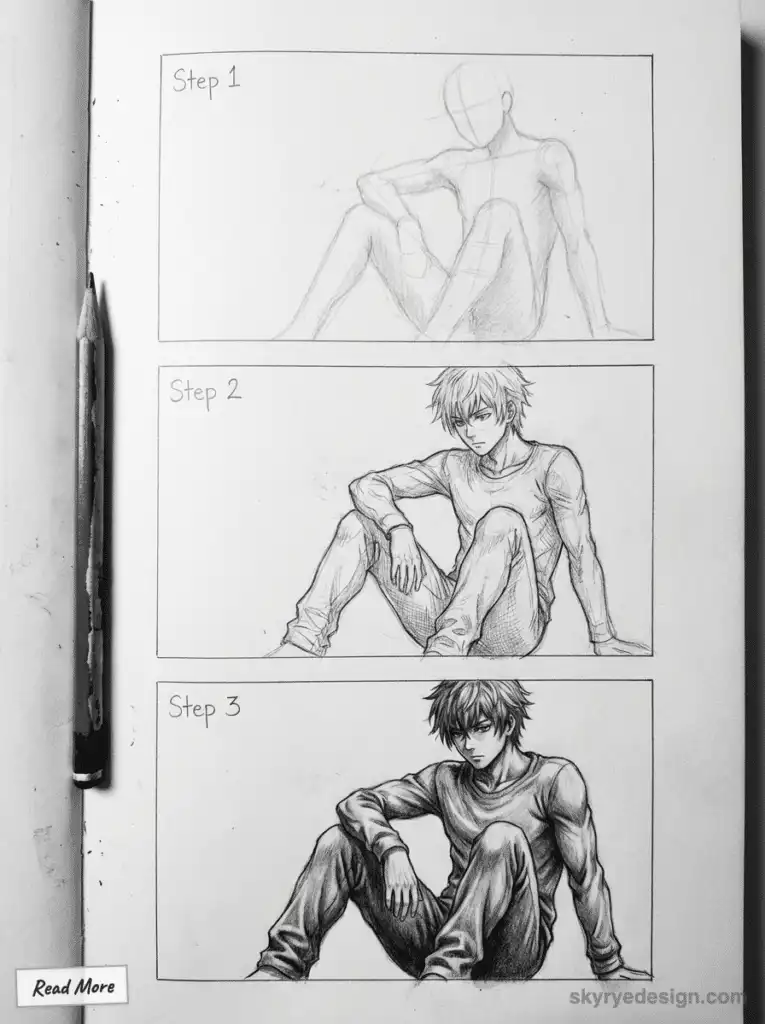
Engaging in step-by-step drawing projects is essential for mastering anime body construction. Tutorials can guide individuals through the process, starting with basic shapes.
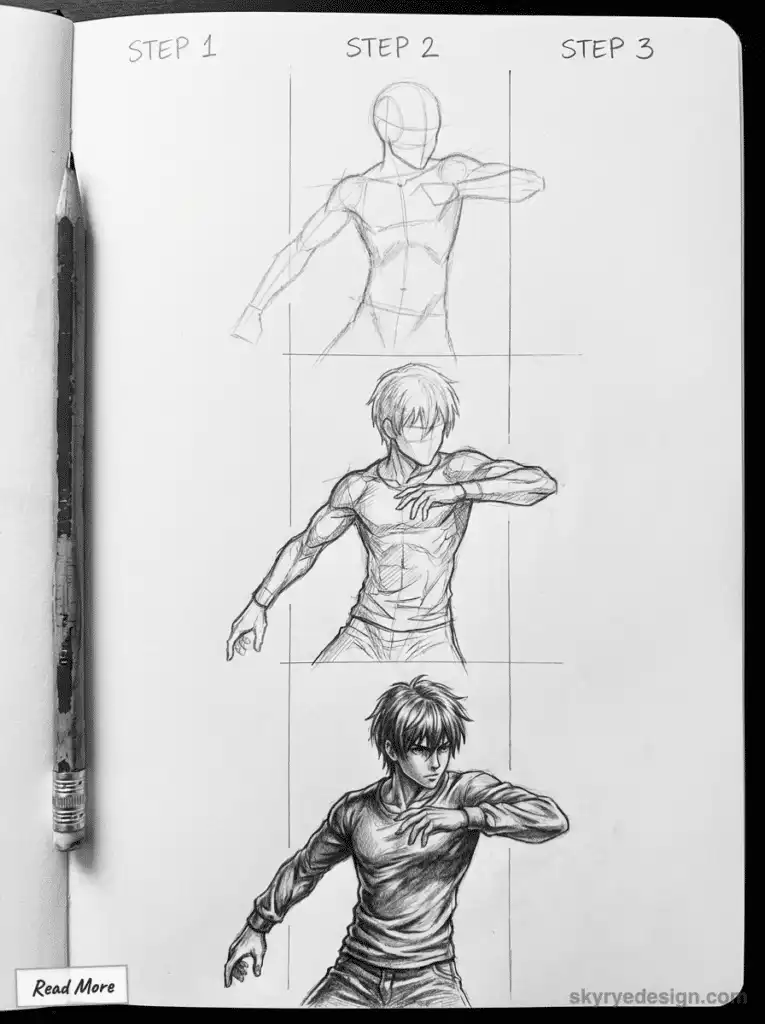
Basic Body Structure: Begin by sketching a simple stick figure. This forms the foundation for anatomy.
Adding Volume: Gradually flesh out the figure by adding shapes for different body parts like the torso, arms, and legs.
Refining Details: Focus on features such as facial expressions, hair, and clothing.
Online resources provide video tutorials that offer visual guidance throughout each stage. Following these systematically allows artists to understand the flow and proportion of the body effectively.
Continuous Practice Routines
To improve skill consistently, establishing a daily practice routine is crucial. This helps reinforce learned techniques and develop muscle memory.
Daily Sketches: Spend at least 15-30 minutes daily on drawing different poses. Using reference images can aid in understanding muscle tone and body positioning.
Challenge Sessions: Dedicate specific days to tackle challenging anime styles or poses.
Critique and Feedback: Join online communities to share work and receive constructive feedback.
This routine encourages experimentation and regular improvement. By integrating various drawing tutorials and resources into practice sessions, one can enhance both creativity and technical ability in anime art.
Frequently Asked Questions
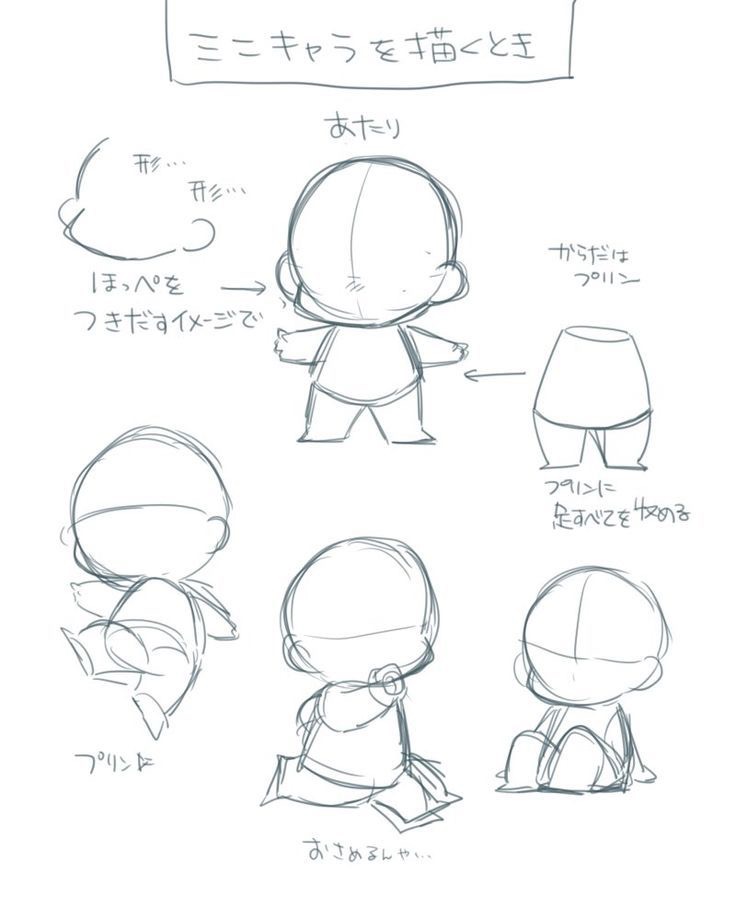
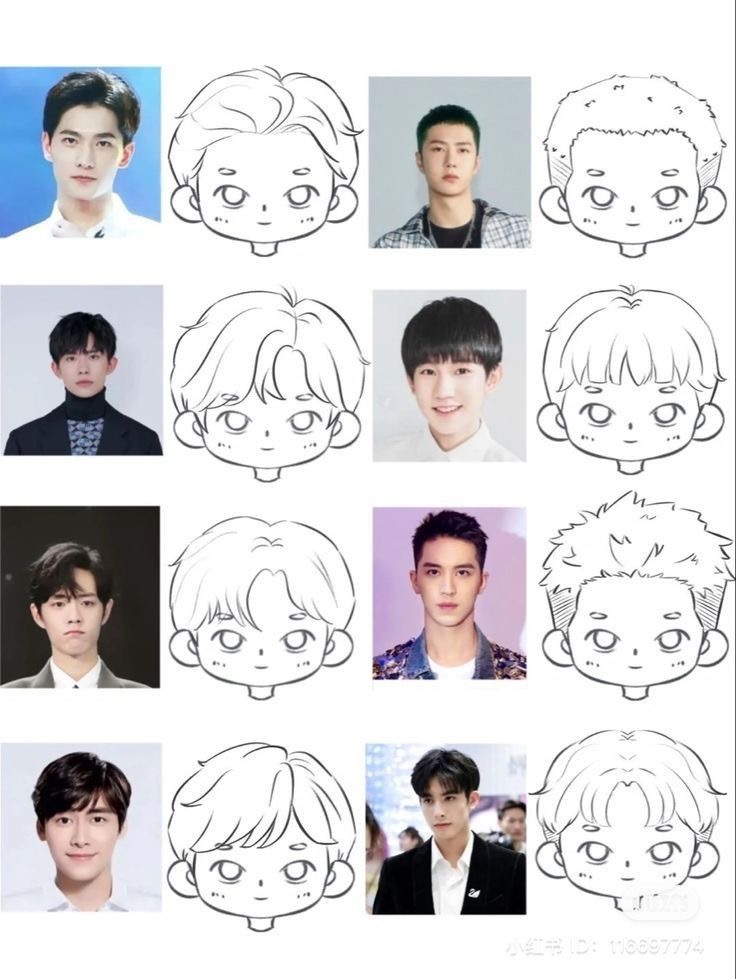
This section addresses common inquiries related to drawing anime bodies. It covers essential techniques, different body types, and practical tips to facilitate the drawing process for artists at various skill levels.
How do I start drawing an anime body for beginners?
Beginners should start by understanding basic anatomy and shapes. Using simple geometric forms, such as circles and cylinders, helps in establishing the proportions and posture of the body. Practice sketching these shapes lightly before adding details.
What are the steps to draw an anime male body?
To draw an anime male body, follow these steps: first, create a basic skeleton to define posture. Next, outline the shapes representing the chest, waist, and limbs. Afterward, refine the outline by adding muscle definition and facial features. Lastly, incorporate additional details such as hair and clothing.
What is the process for drawing an anime girl’s body?
The process for drawing an anime girl’s body involves similar steps to drawing a male body. Start with a rough skeletal framework, then sketch the torso and hips, noting differences in proportions. Add defining features such as curves and softer lines to the outline, and finish with hair and outfit details.
How can I draw anime body poses accurately?
To draw accurate body poses, observe reference images or use mannequins for guidance. Understanding the natural movement of the body is crucial. Break the pose down into simple shapes and lines, adjusting proportions to match the desired action or stance.
Can you draw anime bodies with clothes on, and how?
Drawing anime bodies with clothes involves layering the clothing over the sketched body structure. Start with the body outline, then sketch the clothing’s basic shapes and folds while considering movement. Pay attention to how the fabric drapes to maintain a realistic appearance.
Are there tips for drawing anime bodies easily for novice artists?
Novice artists should focus on practicing regularly and studying anatomy. Simplifying complex forms into basic shapes helps in understanding proportions. Additionally, using online tutorials and reference images can provide guidance and inspiration for improving drawing skills.
- 62.2Kshares
- Facebook0
- Pinterest62.2K
- Twitter0
- Reddit0
