Have you ever watched a horse thunder across a field, manes and tails flying, muscles rippling with raw power? It’s a breathtaking sight, a true marvel of motion. And as an artist, you might feel that surge of inspiration, that itch to capture such magnificent energy on paper. But then reality hits: how on earth do you translate that incredible, complex movement into a static drawing? Drawing a horse, especially one in full gallop, can seem like a monumental challenge. It’s not just about getting the shape right; it’s about conveying speed, power, and the very essence of dynamic motion.
But don’t you worry, my fellow art enthusiast! We’re about to embark on an exciting journey together. This guide is all about breaking down the seemingly daunting task of how to draw a horse galloping into manageable, fun steps. We’ll explore the secrets behind capturing that elusive momentum, from understanding equine anatomy in action to finessing the details that bring your drawing to life. So grab your pencils, clear your workspace, and let’s get ready to make some art that truly gallops off the page!
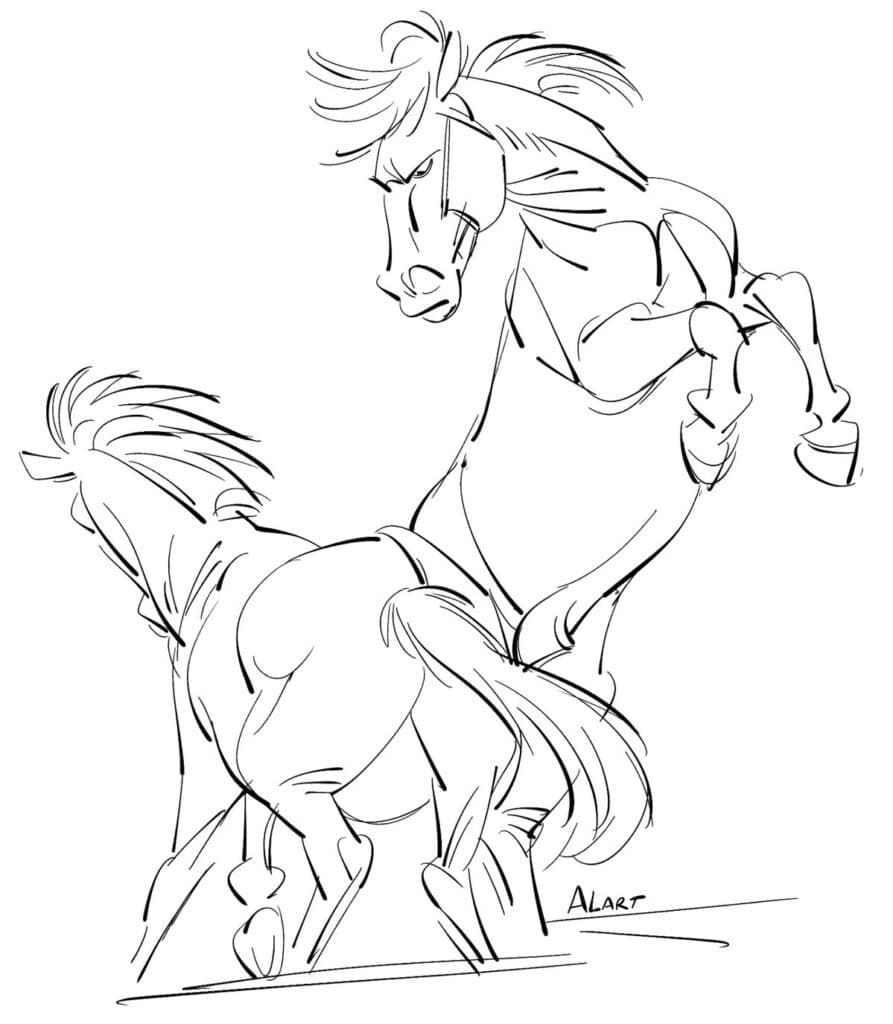
Understanding Horse Anatomy and Movement: The Dance of Power
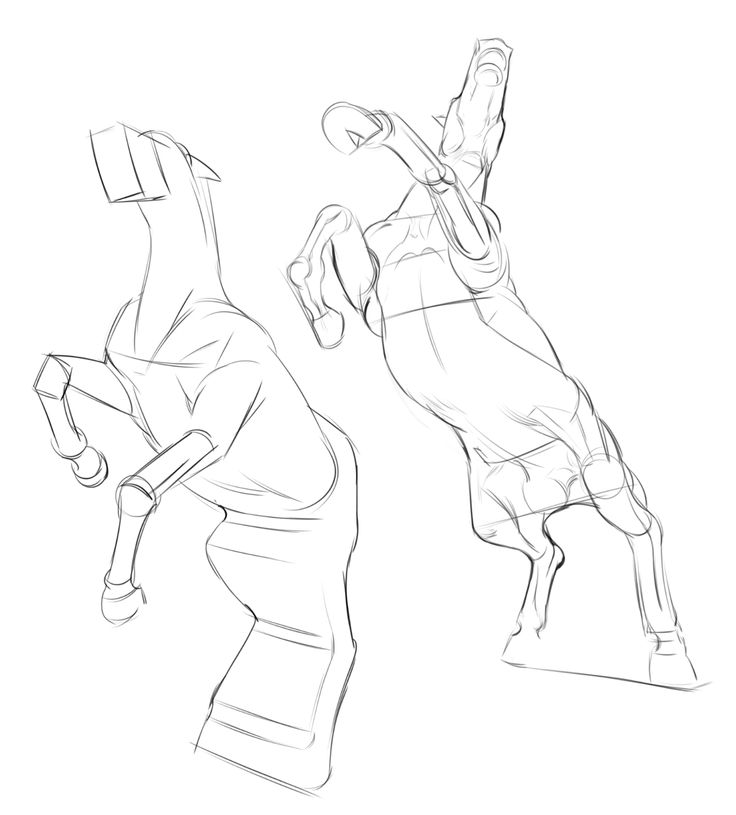
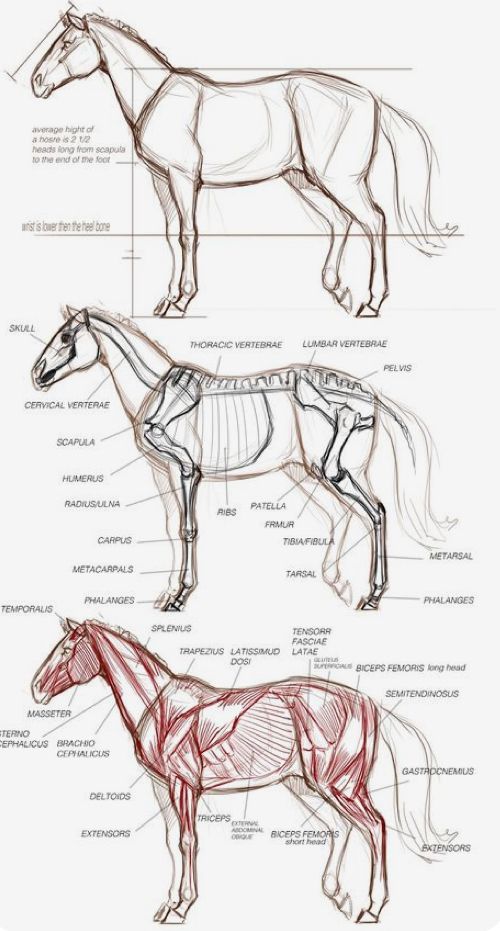
Before we even think about putting pencil to paper, let’s get a little friendly with our subject. A horse isn’t just a collection of pretty shapes; it’s an incredible biological machine, perfectly engineered for movement. Understanding its basic anatomy, especially how its bones and muscles work together during a gallop, is your superpower. You don’t need to be a vet, but a foundational knowledge will make your drawings believable, not just generic horse-like figures.
Think about a horse’s skeleton: the long spine, the powerful shoulder and hip joints, the relatively delicate lower legs designed for speed and shock absorption. Then overlay the muscles: the massive glutes and thigh muscles in the hindquarters for propulsion, the strong chest and shoulder muscles in the forequarters for impact absorption and lift. When a horse gallops, these parts don’t move independently; they work in a symphony, stretching, contracting, and flexing.
The gallop isn’t just a fast run; it’s a four-beat gait with a crucial suspension phase where all four hooves are off the ground. This “flying gallop” is what often captures our imagination. Imagine the spine flexing and extending, acting like a spring. The hind legs reach far forward under the body, pushing off with immense force. The forelegs then extend, absorbing the landing, and propel the horse forward again. It’s a complex, rhythmic dance.
To truly grasp this, I highly recommend watching videos of horses galloping in slow motion. You’ll notice details you’d miss at full speed – the angle of the neck, the flick of the tail, the specific sequence of hoof placement. Pay attention to how the body compresses and elongates. This observation is priceless. You’ll start to see not just a horse, but a dynamic system of forces and energy. This visual research is just as important as the act of drawing itself, providing crucial drawing inspirations that will inform your creative process.
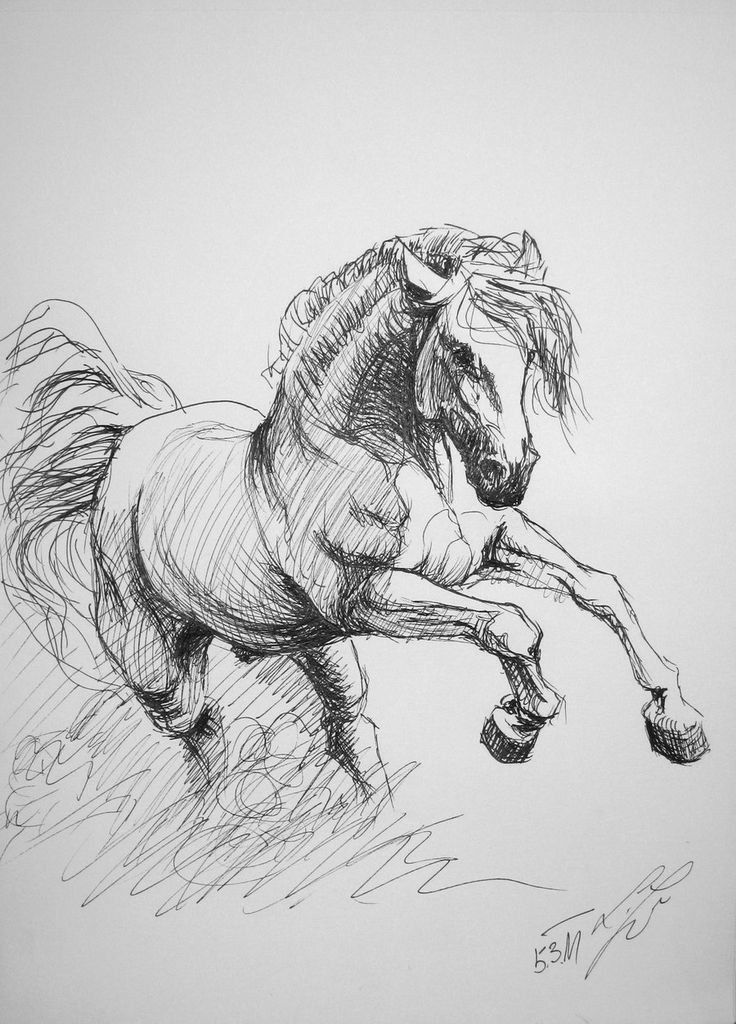
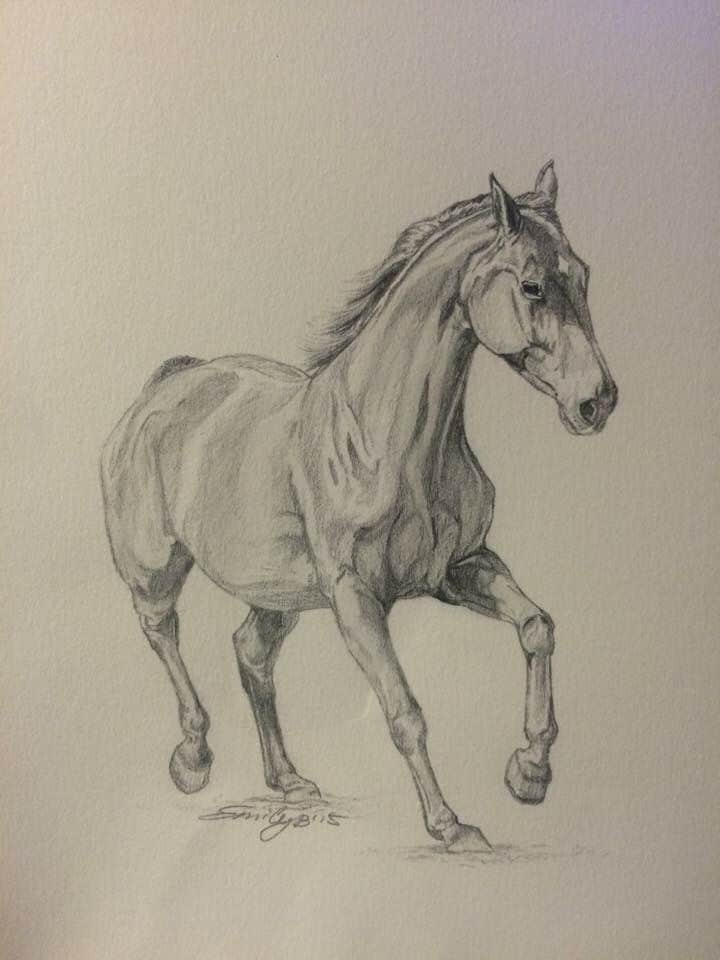
Gathering Your Tools and Setting Up for Success
Alright, before we dive into the nitty-gritty of strokes and lines, let’s make sure you’re well-equipped. You don’t need a fancy art studio, but having the right basic tools can make a huge difference in your drawing experience and the quality of your work.
First up, pencils! I suggest a small range. An HB pencil is great for initial light sketches and general lines. A 2B or 4B pencil will give you darker lines and allow for more expressive shading. If you want really deep blacks, a 6B or 8B can be a lot of fun.
Next, erasers. A kneaded eraser is fantastic for lifting graphite without damaging the paper, allowing you to lighten lines or clean up areas. A standard rubber eraser is good for more precise removal of mistakes (because yes, we all make them!).
Paper is important too. A good sketchbook with decent quality paper (around 80-100gsm) is perfect for practice. If you’re working on a more finished piece, opt for drawing paper with a slightly heavier weight and a bit of tooth (texture) to hold the graphite better.
And, of course, your references! As we discussed, photos and slow-motion videos of galloping horses are your best friends. Don’t try to pull it entirely from memory, especially when starting out. Even seasoned artists rely on references. Maybe even create an inspiration wall with a collection of powerful galloping horse images.
Finally, set up a comfortable workspace. Good lighting is key. Whether it’s natural light from a window or a dedicated desk lamp, make sure you can see your drawing clearly without casting shadows. A flat surface, a comfy chair, and maybe some inspiring music will complete your setup. Remember, drawing should be an enjoyable process, so make your environment work for you.
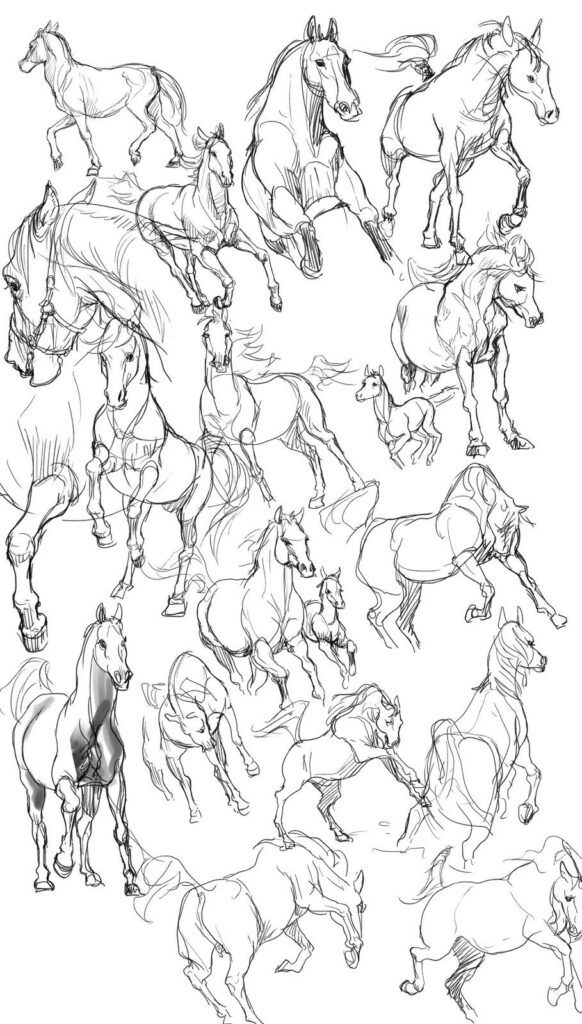
Deconstructing the Gallop: Key Phases of Motion
The beauty and complexity of a galloping horse lies in its distinct phases. It’s not just a blur of motion; it’s a carefully orchestrated sequence. For our purposes, we’ll focus on the “flying gallop,” which is the most dramatic and often depicted. Forget the old “rocking horse” static image where all legs are splayed equally; real gallop is far more dynamic.
Let’s break it down into roughly four main phases, though some experts might define more:
1. Hind Legs Pushing Off (Propulsion): The horse’s hind legs are tucked relatively far under its body, deeply bent, and then powerfully extend, pushing off the ground. This is where a huge amount of the forward momentum comes from. The back is arched upwards. 2. Suspension (The “Flying” Moment): This is the iconic moment where all four hooves are off the ground. The hind legs are still extending backward, and the forelegs are reaching forward. The horse’s body is elongated, almost stretched through the air. This is the peak of the dynamic arc. 3. Forelegs Landing (Absorption): The forelegs reach out and land, absorbing the impact and acting like brakes to prevent falling, then immediately transitioning into a new push-off. They are usually relatively straight at impact. 4. Forelegs Pushing Off / Hind Legs Preparing to Land: The forelegs push off the ground, lifting the front of the horse, while the hind legs are beginning to tuck under the body, preparing for their powerful push-off again. This creates a cycle.
Observing these phases is critical. When you look at a reference photo, try to identify which phase the horse is in. This will help you understand the angles of the legs, the curve of the back, and the overall body posture. Don’t be afraid to sketch quick stick figures for each phase to internalize the movement. Understanding this sequence is far more effective than trying to guess where each leg should be; it gives your drawing a sense of realism and motion.
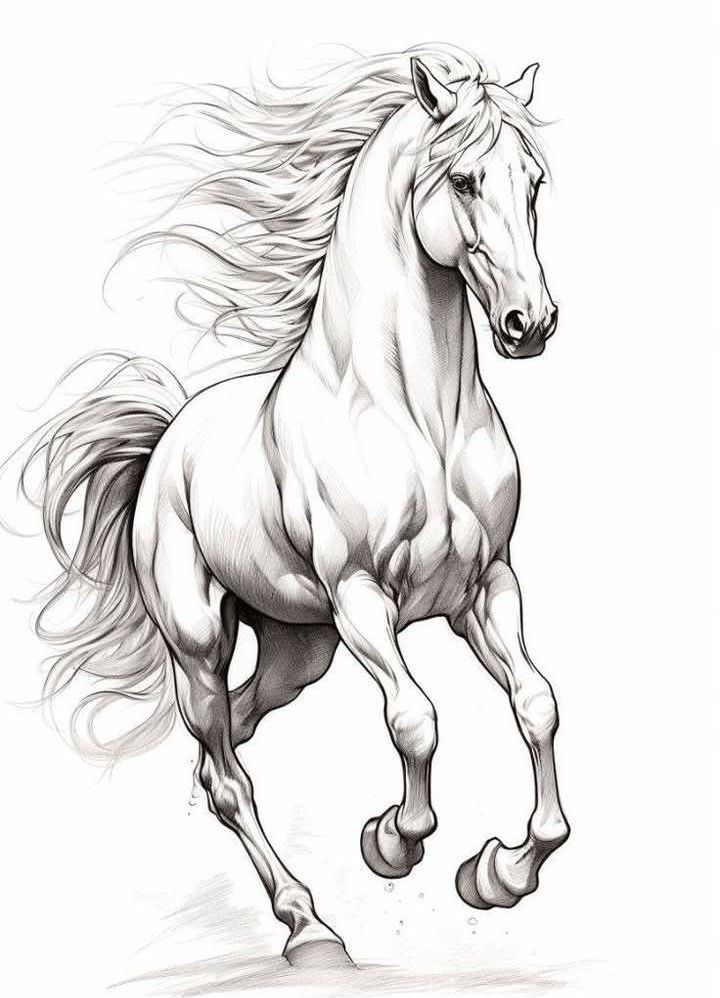
Starting with Basic Shapes: The Foundation of Your Gallop
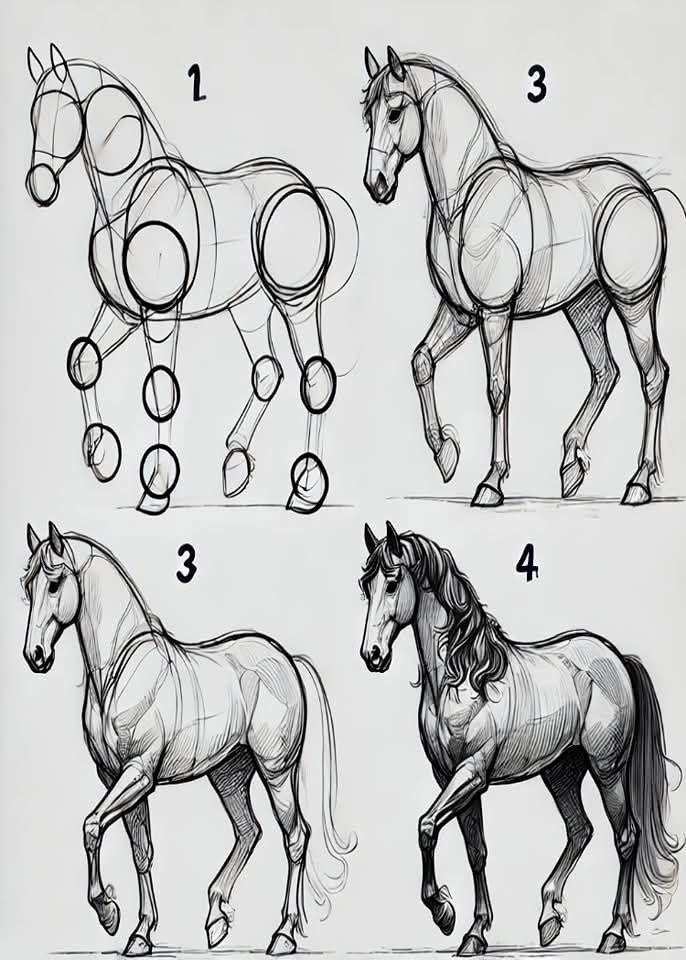
Every complex drawing starts with simple shapes. Think of them as the skeletal framework upon which you’ll build your magnificent horse. This step is about establishing the overall gesture and proportion, not about details. Keep your lines light and loose – we’ll be refining them later.
1. The Line of Action: This is perhaps the most crucial starting point for a dynamic drawing. It’s an imaginary line that conveys the main direction and energy of your subject. For a galloping horse, this line will often be a powerful, sweeping curve, reflecting the arch and stretch of the spine. Draw this line first, indicating the overall flow from head to tail. It dictates the rhythm of your drawing. 2. Ovals for Major Body Masses: Chest/Ribcage: Draw a large oval for the main body mass, centered along your line of action. This will be the deepest part of the chest. Hindquarters: Add another, slightly smaller oval for the hindquarters, overlapping the chest oval and also following the line of action. This is where the powerful propulsion comes from. Head: A smaller oval or even a squarish shape for the head. Neck: Connect the head and chest with a curved line for the neck. 3. Lines for Legs: Now, using simple lines, indicate the direction and length of each leg. Pay close attention to foreshortening – some legs will appear shorter or more compressed because they’re coming towards or going away from the viewer. This is where your reference photos are invaluable. Remember the phases we discussed: some legs will be extended, others bent.
At this stage, your drawing will look very basic, almost like a stick figure made of ovals and lines. That’s perfectly fine! The goal here is to get the proportions, balance, and overall gesture right. Don’t worry about perfection; focus on the flow. If the initial shapes feel off, erase and redraw. It’s much easier to correct a simple oval than a fully detailed leg. This approach is similar to how artists often begin drawing portraits by blocking in the head shape and major features before adding fine details.
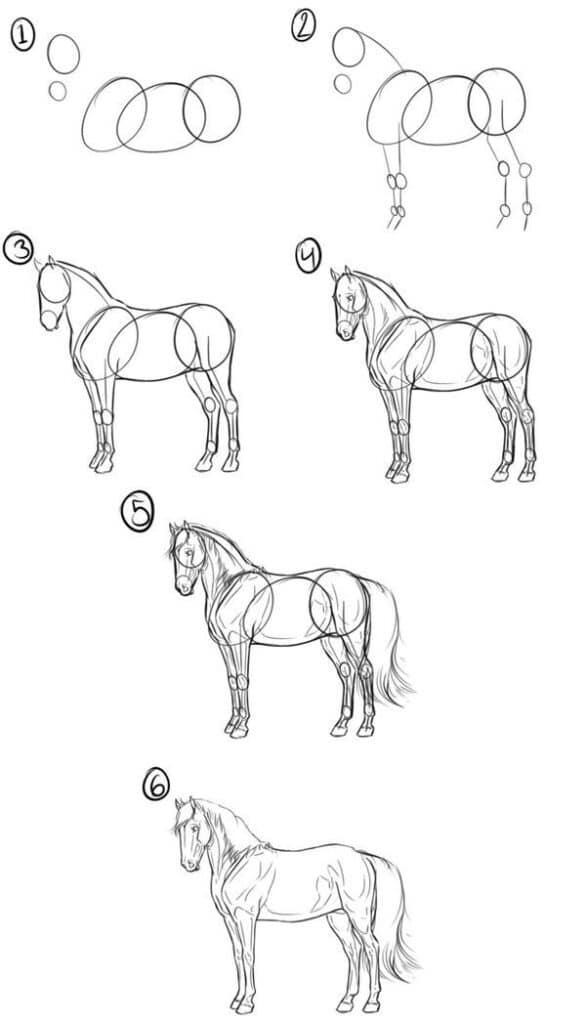
Building the Form: Anatomy in Motion
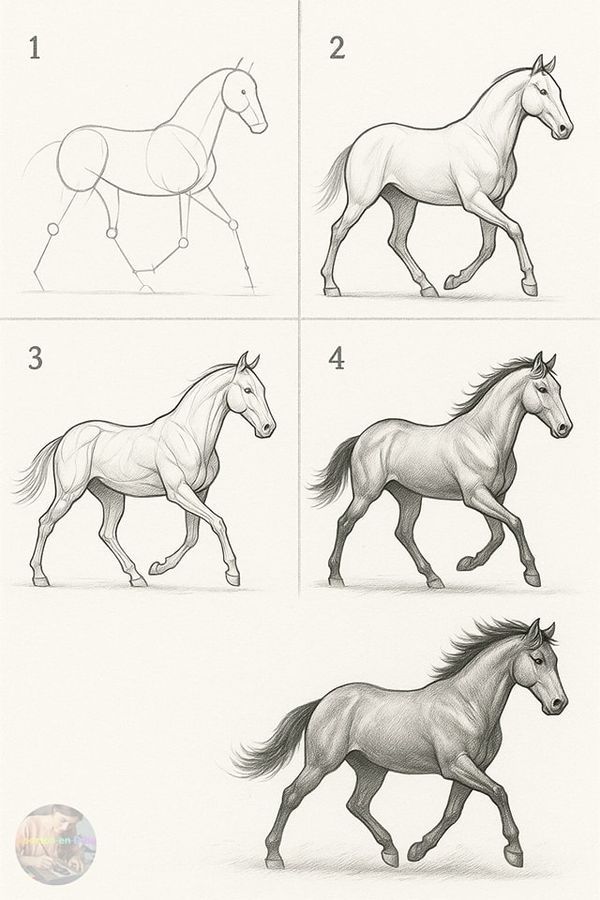
Once your basic shapes are in place, it’s time to start adding volume and turning those simple lines into a believable horse. This is where we begin to sculpt the musculature and define the body.
1. Connecting the Ovals: Use smooth, flowing lines to connect your chest and hindquarter ovals, creating the belly and back. Remember how the spine arches during a gallop; don’t make the back flat. The belly will typically be tucked up due to the intense exertion. 2. Developing the Legs: Upper Legs: Build out the powerful upper leg muscles around your initial stick lines. The shoulder and thigh areas will be substantial. Think of them as cylinders or slightly tapered forms. Lower Legs: The lower legs (cannon bones, fetlocks, hooves) are thinner but still have structure. Pay attention to the joints – knees, hocks, and fetlocks. They aren’t straight pipes but have distinct angles. Hooves: Represent the hooves as solid, wedge-like shapes at the end of each leg. 3. Neck and Head: Refine the neck, giving it a strong, muscular curve. The head’s position is key to conveying direction and effort. Often, it will be stretched forward or slightly angled down. Add simple outlines for the muzzle and ears. 4. Mane and Tail (Dynamic Flow):* Don’t forget these essential elements that amplify the sense of motion. The mane and tail will be flying backward, caught in the wind. Think of them as flowing ribbons, following the overall direction of the horse’s movement. They aren’t static; they are extensions of the horse’s energy.
As you build out these forms, constantly compare your drawing to your references. Are the muscles bulging in the right places? Are the leg angles accurate for that phase of the gallop? Are the proportions still looking good? It’s like you’re putting flesh onto the skeletal structure you laid down. Understanding basic animal (or even male body anatomy drawing) principles can truly help here, as it gives you a mental map of what lies beneath the skin. Keep your lines relatively light at this stage so you can easily adjust them.
Refining Details and Adding Life: Bringing Your Horse to Life
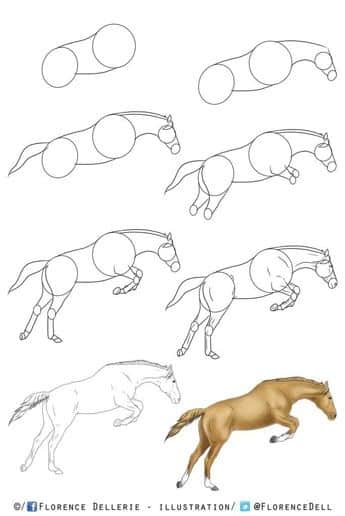
Now that you have a solid foundation and form, it’s time to add the smaller details that truly differentiate your drawing and breathe life into it. This is where your horse stops being just “a horse” and becomes your horse.
1. Facial Features: The eyes, nostrils, and ears are crucial for conveying emotion and alertness. Eyes: Position the eye correctly on the side of the head. Give it a reflective quality; a bright highlight can make it sparkle. Nostrils: Flared nostrils are a hallmark of a galloping horse, indicating exertion and deep breathing. Make them pronounced. Ears: The ears are typically pinned back or slightly flattened against the head during a gallop, reacting to the speed and wind. 2. Hooves: Go back to those wedge shapes and add more definition. Horses have distinct hooves with a visible coronary band. While a galloping horse’s hooves might be obscured by motion blur or dust, in a clear depiction, they need to look solid and functional. 3. Mane and Tail: Instead of just masses, start to define individual strands or clumps of hair within the overall flow. Show how the wind is catching and shaping them. The mane might fan out, and the tail will trail majestically. 4. Muscle Definition and Wrinkles: This is where you indicate the powerful musculature. Don’t draw every single muscle fiber, but use subtle lines and shading to suggest the major muscle groups – the powerful shoulders, the defined hindquarters, the taut belly. Look for slight wrinkles around the joints, chest, or flanks, which appear as the skin stretches and folds with movement. These small details add a tremendous amount of realism. 5. Shading and Value: This is where you create depth and form. Think about where your light source is coming from. Highlights: Areas directly hit by light will be brightest. Mid-tones: The general color of the horse. Shadows: Areas where light doesn’t reach. Use your darker pencils (2B, 4B) to build up these shadows. Don’t be afraid to go dark! Strong contrasts create drama and make your horse pop off the page. Shadows under the belly, in the folds of the legs, and beneath the head will give it a three-dimensional quality.
Remember, the key is not to over-detail every square inch. Focus on the most important areas and let other parts be suggested. This helps maintain the sense of motion rather than making the horse look frozen.
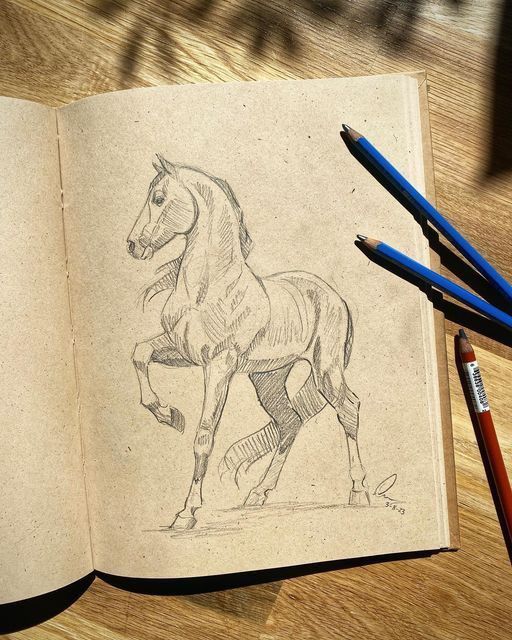
Capturing Speed and Energy: The Dynamic Elements
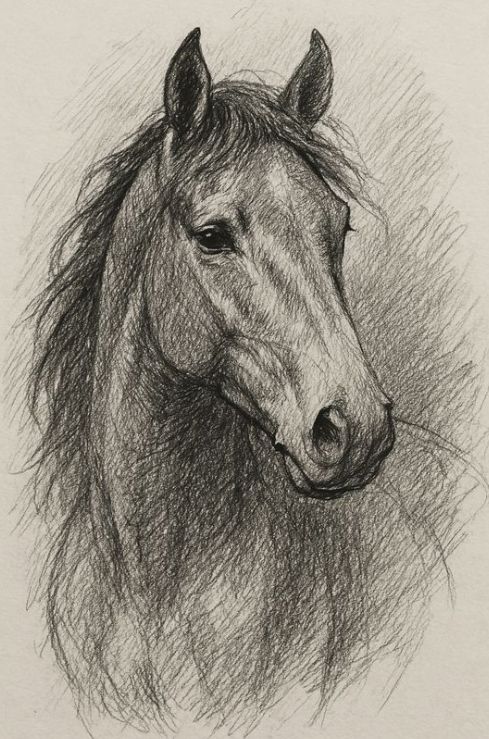
A galloping horse isn’t just a static pose; it’s pure kinetic energy. Your drawing needs to convey that sense of explosive speed and power. This is where we go beyond just accurate representation and tap into the emotional impact of motion.
1. Implied Motion Lines (Speed Lines): These are classic for a reason! Use short, quick lines behind the horse, especially around the hooves and tail, to suggest rapid movement. They don’t have to be perfectly straight; a slight curve can emphasize the direction of motion. Think of them as trails left by the horse’s passage. 2. Dust and Flying Debris: If your horse is galloping across a dusty plain or soft ground, show it! Little plumes of dust kicked up by the hooves add a fantastic layer of realism and dynamism. These can be drawn as irregular, soft shapes, with some lighter and some darker areas. Small pebbles or clumps of dirt flung backwards also heighten the effect. 3. Blurred Background (if applicable): While not always necessary, a subtly blurred background can dramatically enhance the perception of speed. If your horse is sharp and in focus, a background with softer, less defined elements suggests that it’s rushing past. You can achieve this by using lighter pressure, softer lines, and less detail in the background elements. 4. Expressive Lines and Marks: Don’t be afraid to use varied line weights. A bolder, heavier line on the underside of the horse or the leading edge of a leg can suggest tension and weight, while lighter, quicker lines can indicate speed and agility. Experiment with quick, energetic strokes for the mane and tail to make them feel like they’re whipping in the wind. 5. The Feeling of Tension and Release: A galloping horse is a bundle of coiled energy. Show this! The powerful push-off from the hind legs will have immense tension, while the suspension phase might show a moment of release before the next impact. Even the slight tension in the horse’s neck and jaw can communicate effort.
Think about the “gesture” of the drawing. Does it feel fast? Does it feel powerful? Sometimes, a slightly exaggerated curve in the back or an extra-long stretch of the forelegs can enhance the dynamic impact without sacrificing realism. It’s about conveying the impression of speed, not just illustrating it. For more artistic expression, you might find other drawing aesthetic styles or techniques to integrate.
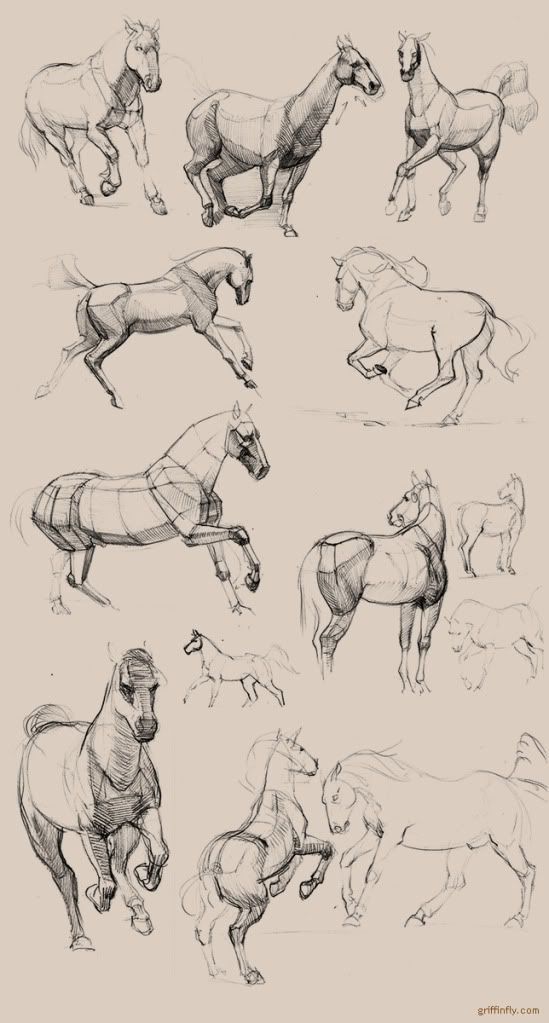
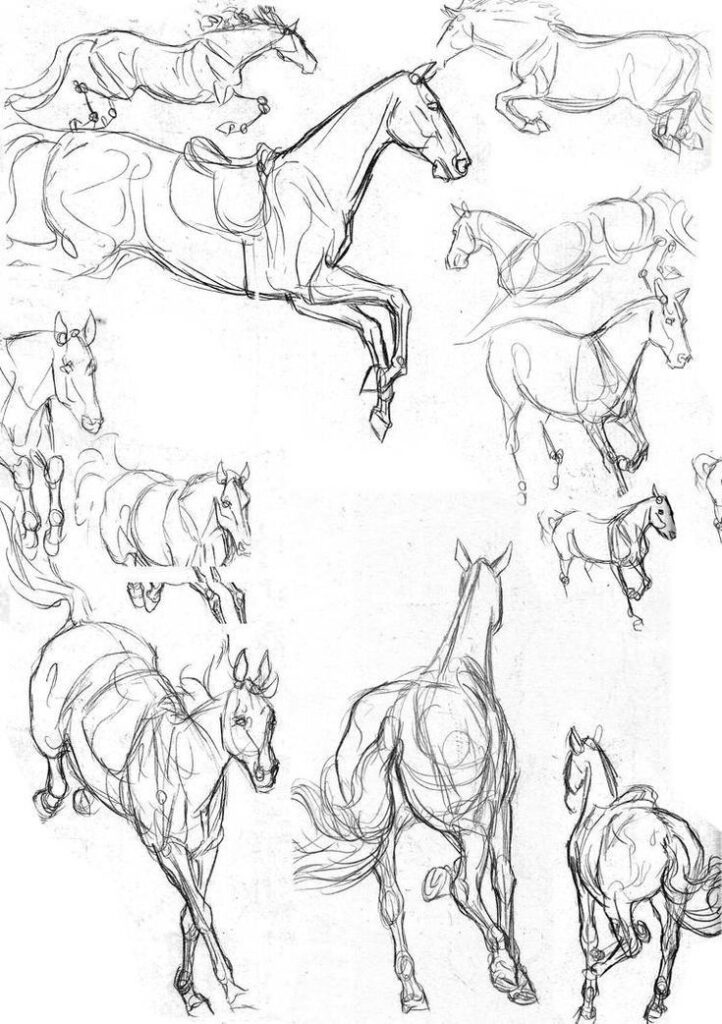
Common Pitfalls and How to Avoid Them
Even with the best intentions, it’s easy to fall into certain traps when drawing something as complex as a galloping horse. Recognizing these common pitfalls can help you sidestep them and improve your artwork faster.
1. Stiff Poses: This is perhaps the most common issue. When you draw from memory or a single, unclear reference, horses often end up looking like they’re on stilts or frozen in an unnatural mid-stride. Solution: Go back to your line of action. Ensure it’s curved and dynamic. Watch more slow-motion videos. Pay attention to how the spine, neck, and legs all contribute to the overall flowing gesture. Remember the suspension phase – it’s crucial for dynamism. 2. Incorrect Anatomy and Proportions: Legs too short, heads too big, chests too narrow – these can make your horse look less like a majestic steed and more like a caricature. Solution: Use multiple references. Don’t be afraid to simplify the horse into basic shapes (ovals, cylinders) at the beginning to get the proportions right before adding detail. Think of how a horse’s body compares to a human’s; the legs are much longer relative to the torso. 3. Lack of Foreshortening: This happens when parts of the horse (like a leg or the head) are coming towards or going away from the viewer, but you draw them as if they’re flat or seen from the side. This makes the drawing look flat and unrealistic. Solution: This is a tough one and takes practice. Again, references are key. Mentally (or lightly sketch) draw a box around the offending limb. How would that box appear from your chosen angle? Practice drawing cylinders and boxes in various perspectives. 4. Over-Detailing Too Early: Getting bogged down in hair textures or eye details before the fundamental structure is sound is a recipe for frustration. You’ll end up with a highly detailed, but poorly proportioned, horse. Solution: Work in layers. Start with light, loose gestural lines. Refine major shapes and proportions. Then build muscle mass. Only then move onto intricate details like mane strands, facial features, or hooves. Think of it as building a sculpture: you get the overall form right before chiseling the fine lines. 5. Not Using Enough Reference Material: Relying solely on your imagination for a complex subject like this often leads to generic or inaccurate results. Solution:* Gather a diverse collection of reference photos and videos. Look at horses from different angles, in different phases of the gallop, and with varied body types. Don’t just copy; study them to understand the underlying structure and movement. Sometimes, you might need to combine elements from several references to get the perfect pose or dynamic energy you’re aiming for. It’s also wise to check out 7 inspiring sketching ideas for your sketchbook to keep your practice fresh and your observation skills sharp.
Patience and persistence are your best allies. Every “mistake” is a learning opportunity. Don’t get discouraged; just keep observing, sketching, and refining!
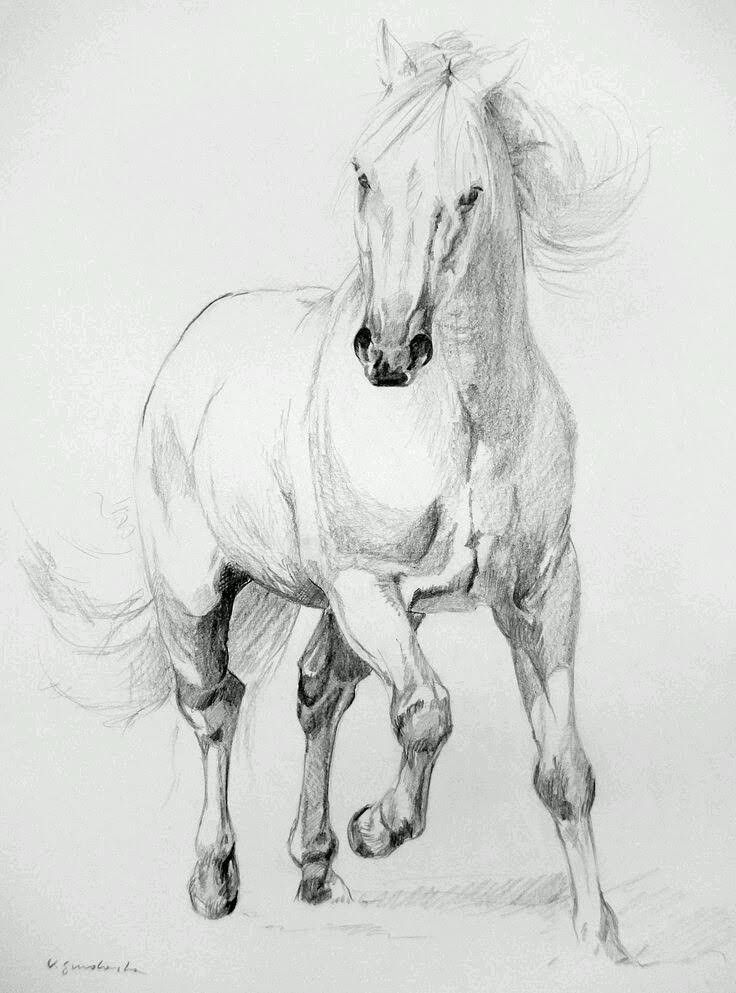
Unleash Your Inner Equestrian Artist!
Phew! We’ve covered a lot of ground, haven’t we? From understanding the intricate dance of equine anatomy to the thrilling challenge of capturing speed and energy, you now have a comprehensive toolkit to tackle the magnificent task of how to draw a horse galloping.
Remember, drawing isn’t just about perfect lines and realistic shading; it’s about conveying emotion, movement, and the very spirit of your subject. A galloping horse is a symbol of freedom, power, and untamed beauty, and your drawing can capture that essence.
The journey to becoming a skilled artist is a continuous one. Don’t expect your first attempt to be a masterpiece. Each sketch, each observation, each time you pick up your pencil, you’re building skill and understanding. The more you practice, the more intuitive the process will become. You’ll start to see horses not just as animals, but as dynamic forms, ready to spring to life under your hand.
So, what are you waiting for? Grab those pencils, pull up your favorite references, and let your creativity gallop wild! The joy of creating something so powerful and majestic is truly unparalleled. Go on, give it a try – you’ve got this!
How can I accurately depict a galloping horse in my drawings?
To accurately depict a galloping horse, understand its anatomy and the key phases of motion, such as the push-off of the hind legs, the suspension phase, the landing of the forelegs, and the preparation for the next push-off. Observe references and break down the movement into these stages for dynamic and realistic drawings.
What basic shapes should I start with when drawing a galloping horse?
Begin with simple shapes like a line of action to establish the overall movement, then add ovals for the chest, hindquarters, and head. Use lines for legs to indicate direction and foreshortening, focusing on the gesture and proportion before adding details.
How do I add realism and life to my horse drawing after establishing the basic form?
After the basic shapes, refine the anatomy by connecting the ovals, developing the muscles, defining the joints, and adding details like facial features, mane, tail, and shading. Focus on capturing muscle definition, subtle wrinkles, and the flow of the mane and tail to breathe life into your drawing.
What techniques can I use to convey speed and energy in my horse drawing?
Use implied motion lines, dust and debris, blurred backgrounds, expressive line weights, and dynamic gestures to suggest movement. Adding the tension and release in the horse’s posture also enhances the impression of speed and energy.
What are common mistakes to avoid when drawing a galloping horse?
Avoid stiff poses, incorrect anatomy or proportions, lack of foreshortening, over-detailing early, and relying on memory alone. Use references, work in layers starting with loose sketches, and ensure your poses capture the fluid, dynamic motion of a galloping horse.
- 2.0Kshares
- Facebook0
- Pinterest2.0K
- Twitter3
- Reddit0

