Nearly 70 percent of homeowners say that adding personal art makes their space feel more inviting. Choosing and creating your own wall art not only brightens a room, it lets your personality shine through every brushstroke. Whether you want a calming retreat or a bold statement, each step in this creative process guides you from idea to finished masterpiece, helping you craft meaningful decor that fits your story.
Table of Contents
- Step 1: Select The Perfect Wall Art Concept
- Step 2: Gather Essential Materials And Tools
- Step 3: Prepare Your Workspace For Creativity
- Step 4: Design And Lay Out Your Artwork
- Step 5: Assemble And Finish Your Wall Art
- Step 6: Display And Review Your Creation
Quick Summary
| Key Point | Explanation |
|---|---|
| 1. Select a Reflective Art Concept | Choose wall art that reflects your personal style and the room’s aesthetic for a cohesive look. |
| 2. Gather Quality Materials | Invest in good quality supplies, as they greatly affect the outcome of your artwork. |
| 3. Optimize Your Workspace | Create an organized and distraction-free environment to enhance your creative process. |
| 4. Plan Your Design Layout | Use sketches and layout techniques to ensure a balanced and visually pleasing composition. |
| 5. Critically Evaluate Placement | After displaying your artwork, assess its impact and make adjustments based on lighting and angles. |
Step 1: Select the perfect wall art concept
Choosing the right wall art concept transforms your space from ordinary to extraordinary. This step helps you discover a personalized artistic vision that reflects your unique style and personality.
Start by understanding your room’s existing aesthetic. According to the guide on the role of art in living spaces, art should harmonize with your current decor while adding visual intrigue. Walk through your space and observe color schemes, furniture styles, and overall mood.
Consider the emotions and atmosphere you want to create. Do you seek calm and serenity or vibrant energy? The Smithsonian Institution suggests exploring different artistic mediums that can evoke specific feelings. Watercolor landscapes might offer tranquility, while abstract pieces could introduce dynamic movement.
Think about personal connections. Wall art is deeply personal. Select concepts that tell your story or spark joy. This could mean choosing photographs from memorable travels, artwork from local artists, or pieces that remind you of significant life moments.
Practical tip: Measure your wall space before selecting artwork. A massive canvas in a tiny room will feel overwhelming, while a small piece on a large wall might look lost. Aim for art that fills approximately two thirds to three quarters of your available wall space.
Ready to bring your wall art concept to life? The next step involves gathering inspiration and creating your unique design.
Step 2: Gather essential materials and tools
Preparing the right materials and tools is the foundation of your DIY wall art project. This step will help you assemble everything you need to transform your creative vision into reality.
According to the Contemporary Austin guide on DIY drawing tools, you can often create artistic materials using household items. For your wall art project, start with these core supplies:
- Canvas or sturdy backing board
- Acrylic paints or watercolors
- Paintbrushes in multiple sizes
- Palette for mixing colors
- Pencils for initial sketching
- Ruler or measuring tape
- Drop cloth or protective covering
- Painter’s tape
Research from the MAEIA Arts Education Network highlights the importance of selecting quality materials that match your artistic technique. If you are painting, invest in artist grade acrylic paints which provide richer pigmentation and better durability. For mixed media projects, consider additional materials like:
- Texture mediums
- Stencils
- Metallic paint markers
- Craft paper
- Scissors
- Adhesive
Pro tip: Always have extra materials on hand. Creative projects often require experimentation, and having backup supplies prevents interrupting your artistic flow.
With your materials ready, you are set to begin the exciting process of creating your unique wall art piece.
The next step involves preparing your workspace and planning your design.
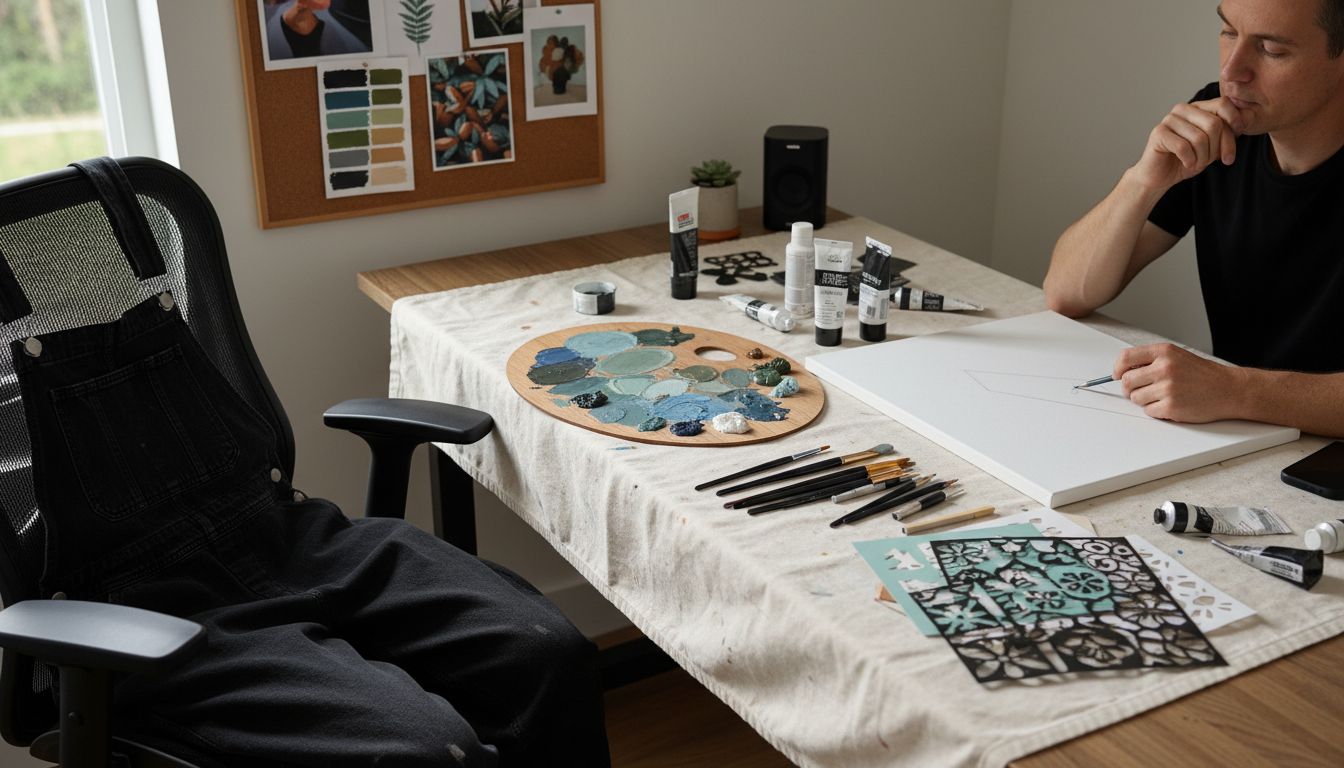
Step 3: Prepare your workspace for creativity
Creating the perfect workspace sets the stage for artistic inspiration and productivity. This step transforms an ordinary area into a creative sanctuary where your wall art project can come to life.
According to the Art of Education research, organizing your workspace is crucial for maximizing creativity. Start by selecting a well lit area with good ventilation. Natural light works wonders for capturing true colors and maintaining an energetic atmosphere.
Clear your workspace completely before beginning. Get organized with portable storage solutions to keep your materials accessible yet neatly contained. Arrange your supplies within easy reach but avoid cluttering your primary work surface.
Protect your work area by laying down a drop cloth or old newspapers. This prevents accidental paint spills from damaging your floor or furniture. Position your canvas or art board at a comfortable height to minimize strain during your creative process.
Research from the SEDL Arts Toolkit emphasizes creating an environment that minimizes distractions. Consider these workspace optimization strategies:
- Keep your phone on silent
- Select a quiet area of your home
- Have a small music player or speaker for optional background inspiration
- Ensure comfortable temperature and lighting
Pro tip: Keep a small trash bin and cleaning supplies nearby. Quick cleanup prevents interruptions and maintains a smooth creative workflow.
With your workspace primed and ready, you are set to unleash your artistic vision and begin crafting your unique wall art masterpiece.
Step 4: Design and lay out your artwork
Designing and laying out your wall art is where your creative vision truly comes to life. This pivotal step transforms your initial concept into a tangible artistic expression.
According to the Garden Care tutorial on textured wall art, start by creating a rough sketch of your design. Use a light pencil to outline your main composition on the canvas. This preliminary sketch serves as your roadmap and helps prevent mistakes during the painting process.
Explore different layout techniques when planning your wall art design. Consider the rule of thirds a fundamental principle in visual composition. Imagine your canvas divided into nine equal sections and position your key elements along these imaginary lines or at their intersections.
The Art of Education research highlights the importance of selecting the right tools for your design process. Experiment with different materials like texture mediums, stencils, or layering techniques to add depth and visual interest to your artwork. Consider using painter’s tape to create clean geometric shapes or crisp edges in your design.
Plan your color palette carefully. Select colors that complement your existing room decor while expressing your personal artistic style. Consider the emotional impact of different color combinations.
Pro tip: Before committing to your final design, take a step back and photograph your initial layout. This allows you to view your composition from a different perspective and make necessary adjustments.
With your design mapped out, you are ready to bring your artistic vision to life through careful execution and creative expression.
Step 5: Assemble and finish your wall art
This final stage transforms your creative concept into a polished masterpiece ready to elevate your living space. Assembling and finishing your wall art requires precision and patience.
According to the North Carolina Art Museum lesson plan on wall hangings, begin by carefully reviewing your initial design. Ensure all paint layers are completely dry before proceeding with assembly or additional treatments.
Apply a protective clear coat to preserve your artwork and enhance its longevity. Explore creative DIY home decor techniques that can add unique finishing touches to your piece. Select a clear acrylic medium that complements your artwork style whether you prefer a glossy or matte finish.
The Harvard Office of the Arts resource on collagraph prints suggests paying special attention to your artwork edges. Use painters tape or carefully trim excess material to create clean professional looking borders. If your piece includes multiple elements consider how they will interconnect and support each other visually.
Prepare your mounting hardware thoughtfully. Select wall anchors appropriate to your artwork weight and wall surface. Measure precisely and mark mounting points before making any holes.
Pro tip: Allow your finished artwork to cure completely before hanging. Some protective coatings require 24 to 48 hours of drying time to achieve maximum durability.
With your wall art assembled and finished you are now ready to showcase your creative vision and transform your living space with a truly personal artistic statement.
Step 6: Display and review your creation
Congratulations on completing your DIY wall art project. This final stage celebrates your creativity and transforms your artwork from a personal project into a stunning room focal point.
According to the Minnesota Online Museum of Art Association guide, professional art installation requires careful planning. Start by selecting the perfect location that complements your room’s existing color scheme and architectural elements.
Discover easy DIY ideas to brighten your home that can help you integrate your new artwork seamlessly. Consider the lighting in your chosen space. Natural and artificial light can dramatically affect how your artwork appears throughout the day.
The Lifehack article on wall art projects recommends stepping back and viewing your piece from multiple angles. Take photographs of your artwork in different lighting conditions and positions. This helps you evaluate its visual impact and make any final adjustments.
Evaluate your creation critically but kindly. Look for balance in composition, color harmony, and emotional resonance. Ask yourself if the artwork tells the story you intended and reflects your personal style.
Pro tip: Live with your artwork for a few days before making permanent mounting decisions. Sometimes viewing a piece in different lights and moods can reveal subtle nuances you might initially overlook.
Your wall art is more than decoration. It is a personal expression of creativity that transforms your living space and tells your unique story.
Here’s a comparison of the main steps for creating DIY wall art:
| Step | Purpose | Key Actions |
|---|---|---|
| Step 1: Select Concept | Define artistic vision | Reflect on style Consider emotions Measure wall space |
| Step 2: Gather Materials | Prepare supplies | Collect paints Choose tools Have extras |
| Step 3: Prepare Workspace | Maximize creativity | Organize area Reduce distractions Set lighting |
| Step 4: Design Layout | Plan composition | Sketch ideas Choose colors Review design |
| Step 5: Assemble & Finish | Finalize artwork | Apply coatings Prepare hardware Allow to cure |
| Step 6: Display & Review | Showcase and assess | Hang artwork Check lighting Evaluate impact |
Turn Your Walls Into Personal Masterpieces With Expert DIY Guidance
Feeling overwhelmed about choosing the right concept or gathering all the materials to create stunning custom wall art? This detailed DIY wall art tutorial addresses common challenges like selecting meaningful designs and preparing a creative workspace that truly inspires. Whether it’s balancing your color palette or mastering layout techniques, you can express your story perfectly with confidence.
Explore Creative DIY Decor Ideas & Crafts | Sky Rye Design for step-by-step projects and inspiration to help you assemble, design, and finish your art seamlessly.
Take control of your space today by discovering practical tips and artistic techniques on Watercolor Art & Step-by-Step Techniques | Sky Rye Design. Let Skyrye Design guide you in transforming your creative visions into reality. Ready to get started? Visit us now at Skyrye Design and explore how easy and rewarding custom DIY art can be.
Frequently Asked Questions
How do I select the right wall art concept for my space?
Choosing the right wall art concept involves reflecting on your room’s existing style and the emotions you want to evoke. Walk through your space, observe color schemes and furniture, and consider themes or personal connections that resonate with you. Aim for artwork that fills about two-thirds of your available wall space for balance and impact.
What materials do I need to start my DIY wall art project?
To begin your DIY wall art project, gather essential materials like a canvas, acrylic paints or watercolors, various paintbrushes, and sketching pencils. Additionally, have painter’s tape, a ruler, and a drop cloth for protection. Collect everything needed upfront to ensure a smooth and uninterrupted creative process.
How can I prepare my workspace for creating wall art?
Prepare your workspace by choosing a well-lit area and organizing your art supplies to minimize clutter. Lay down a protective covering to prevent messes and ensure that your canvas is at a comfortable height. Aim to reduce distractions by keeping your phone silent and setting up an inspiring atmosphere.
What steps should I follow to design and lay out my artwork?
Start by sketching a rough outline of your design directly on the canvas. Use the rule of thirds as a guide for your layout, placing key elements along these lines. Experiment with colors that complement your decor and feel free to step back and assess your layout before finalizing it.
How do I finish and hang my DIY wall art?
Finish your wall art by ensuring all paint is dry, then apply a clear protective coat for durability. Prepare your mounting hardware by measuring and marking where to hang the piece, ensuring it balances well within your space. Allow any coatings to cure completely, typically 24 to 48 hours, before hanging to preserve the quality.
How can I evaluate the impact of my completed wall art?
After hanging your artwork, assess its visual impact by viewing it from different angles and lighting conditions. Evaluate balance, color harmony, and how well it tells your intended story. Live with the artwork for a few days before making any permanent mounting decisions to fully appreciate its presence.
Recommended
- 7 Inspiring DIY Home Decor Ideas for Creative Spaces |
- 8 Easy DIY Ideas to Brighten Up Your Home Quickly | Sky
- DIY Mirror Ball Lighting: Transform Your Space Today – Mirror Balls
- 1share
- Facebook0
- Pinterest1
- Twitter0
- Reddit0


