Fire drawing gets easier once you stop treating a flame like a solid object. Build it from an uneven base, tapered tongues, a pale hot center, and darker surroundings. The shape should rise, split, overlap, and change direction rather than repeat the same neat curve.
Below you will find a direct step-by-step method, 15 fire drawing ideas, pencil and digital techniques, color notes, mistakes to fix, and short observations under every image. Use the references as studies: copy one decision at a time instead of trying to reproduce every spark.
- How to draw fire step by step
- What makes a fire drawing look believable
- 15 fire drawing ideas from simple to advanced
- Fire color, glow, and reflected light
- How fire changes the light around it
- Fire drawing composition ideas
- Common fire drawing mistakes and quick fixes
- Tools for pencil, marker, paint, and digital fire
- Fire drawing FAQ
- More fire drawing lessons and references
- Final fire drawing check
- What to draw next
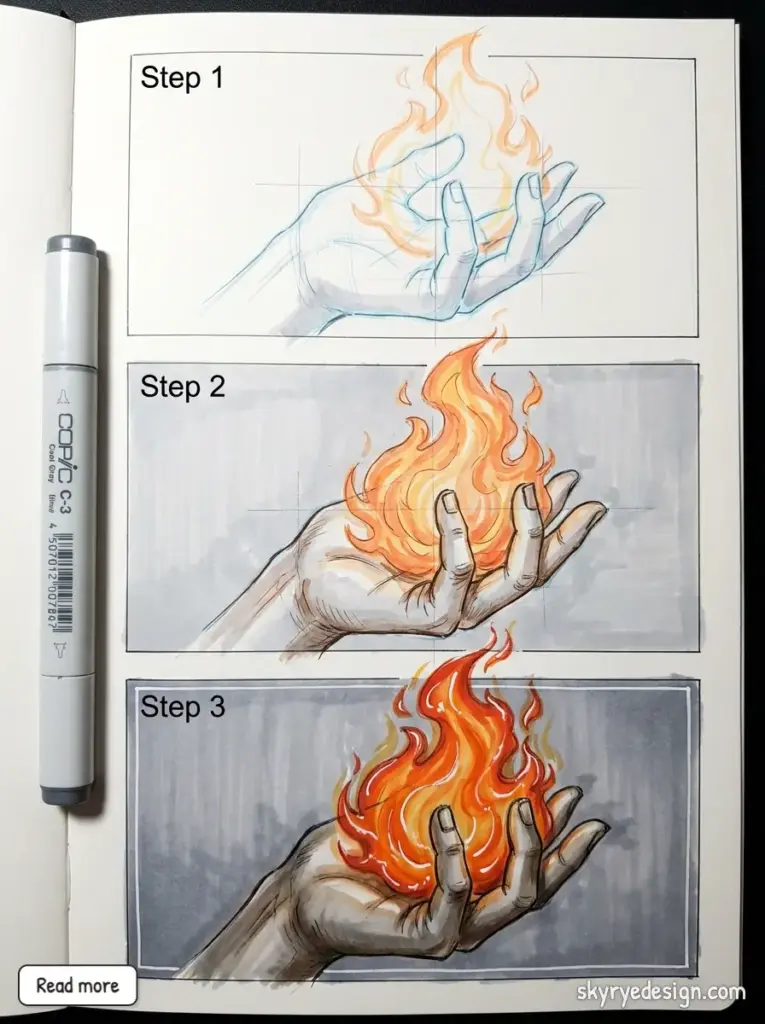
The final panel works because the hand stays darker than the flame. Preserve that value contrast before adding orange and red around the fingers.
How to draw fire step by step
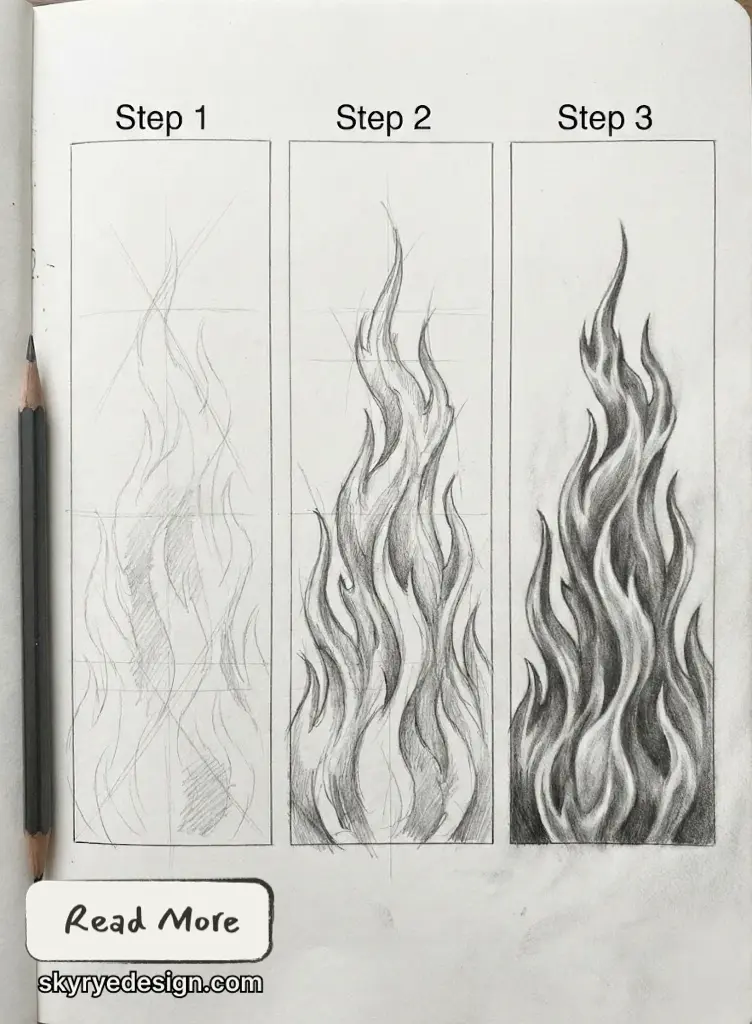
To draw fire, begin with a broad, irregular base and pull several narrow shapes upward. Keep the center open and light, then add smaller flame tongues inside the outer silhouette. Vary the height, width, and lean of each peak. If you are working in pencil, shade around the flame and leave the core as paper. If you are using color, place pale yellow or cream at the center, orange around it, and deeper red near embers or cooler edges. Finish with a few sparks and cast light on the nearest surface. The flame should feel connected to a wick, log, torch, hand, or other source.
- Mark the fuel or source so the flame has a believable starting point.
- Sketch one uneven outer silhouette with a wide base and tapered top.
- Cut two or three smaller flame shapes into the silhouette.
- Keep the hot center light and build darker values around it.
- Add smoke, sparks, and cast light only after the main flame reads clearly.
- Step back from the drawing and remove any repeated, symmetrical peaks.
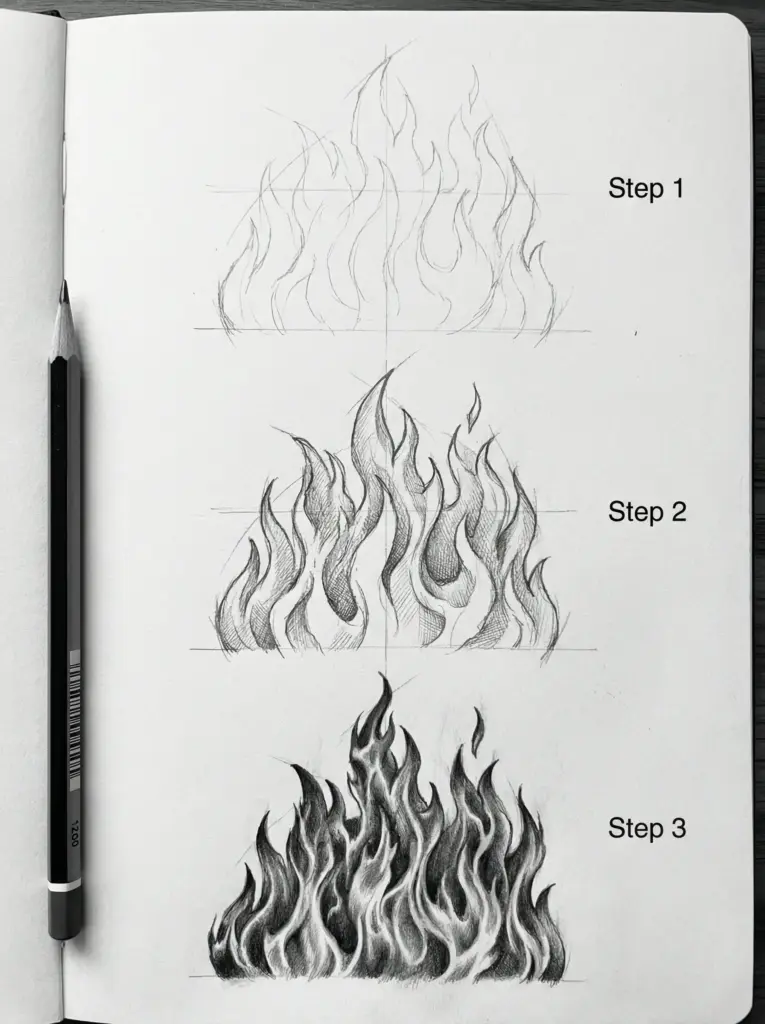
Start with the outer silhouette, then cut smaller flame shapes into it. The shaded version feels active because the peaks are uneven and lean in different directions.
What makes a fire drawing look believable
A convincing flame depends on four things: direction, asymmetry, value, and reflected light. Flames rise, even when wind bends them sideways. Their shapes repeat a family of curves, but no two tongues should be identical. Most importantly, fire emits light. If the flame is bright but the nearby hand, wall, or ground receives no warm light, the effect feels pasted onto the scene.
My quickest diagnostic is to view the drawing as a thumbnail. The flame should remain the lightest, most active shape, while the fuel and surrounding scene stay quieter. If it disappears at small size, strengthen the value contrast before adding more detail.
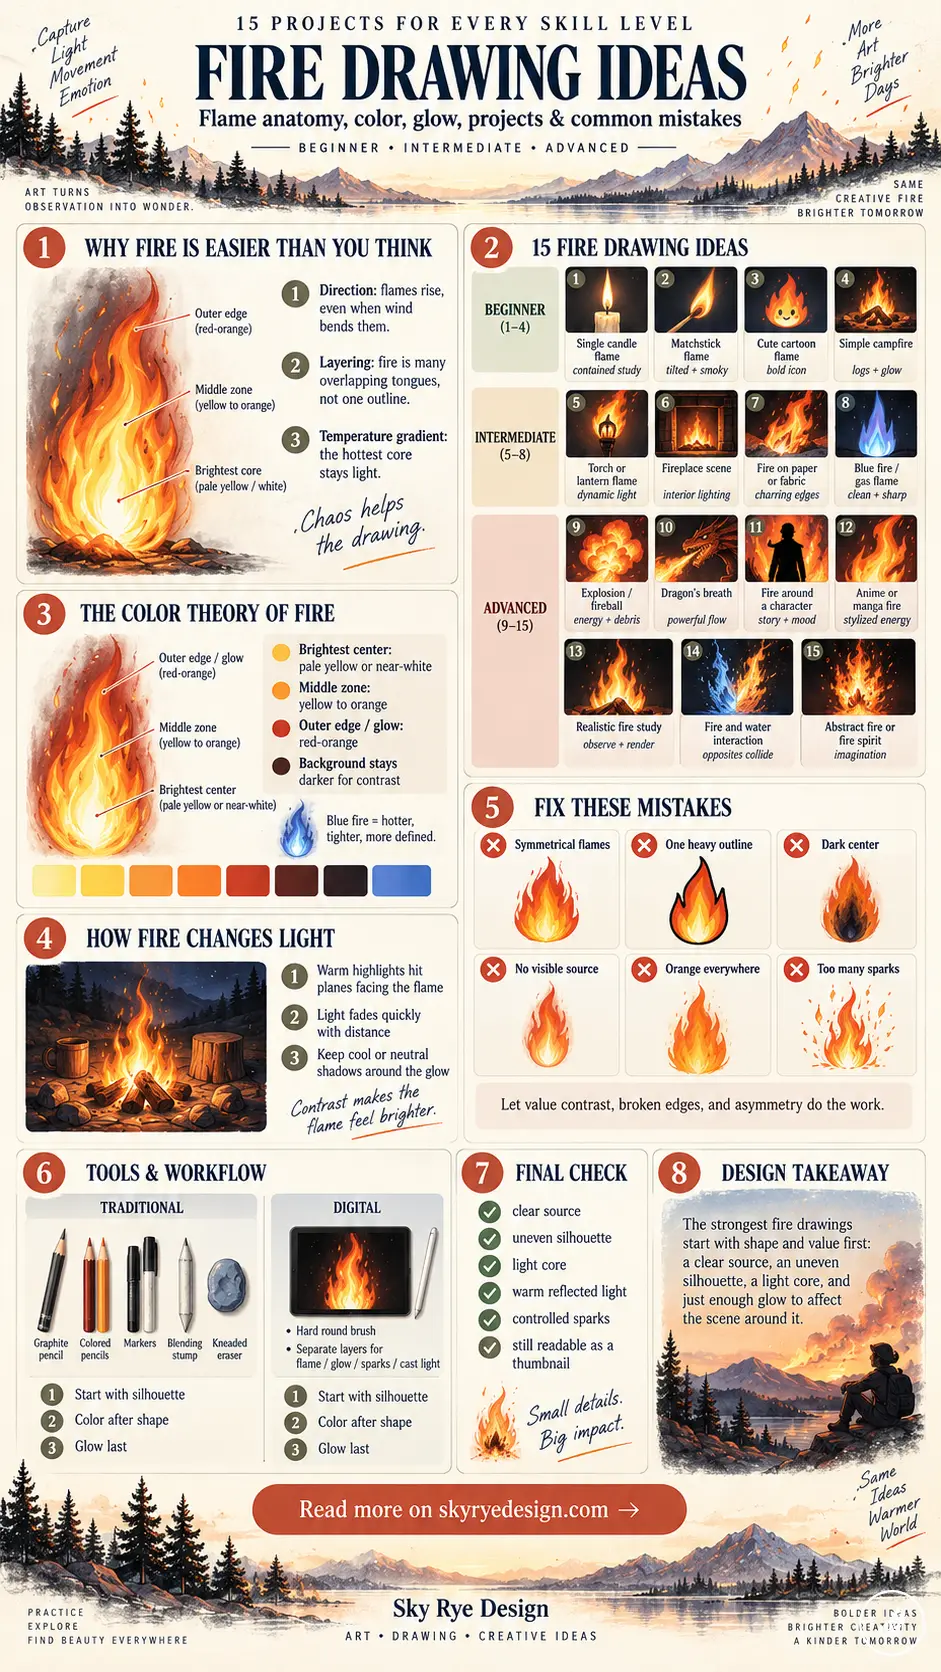
| Fire drawing element | What to look for | Beginner fix |
|---|---|---|
| Outer silhouette | Uneven peaks and a stable base | Delete matching left and right curves. |
| Inner core | Small, pale, hottest shape | Keep it lighter than the orange edge. |
| Movement | Upward flow with a clear lean | Angle all major tongues with the same wind. |
| Fuel | Wick, logs, paper, gas, or magic source | Show where the flame begins. |
| Cast light | Warm color on nearby planes | Fade the glow quickly with distance. |
| Smoke and sparks | Secondary accents | Use fewer marks than you first want. |
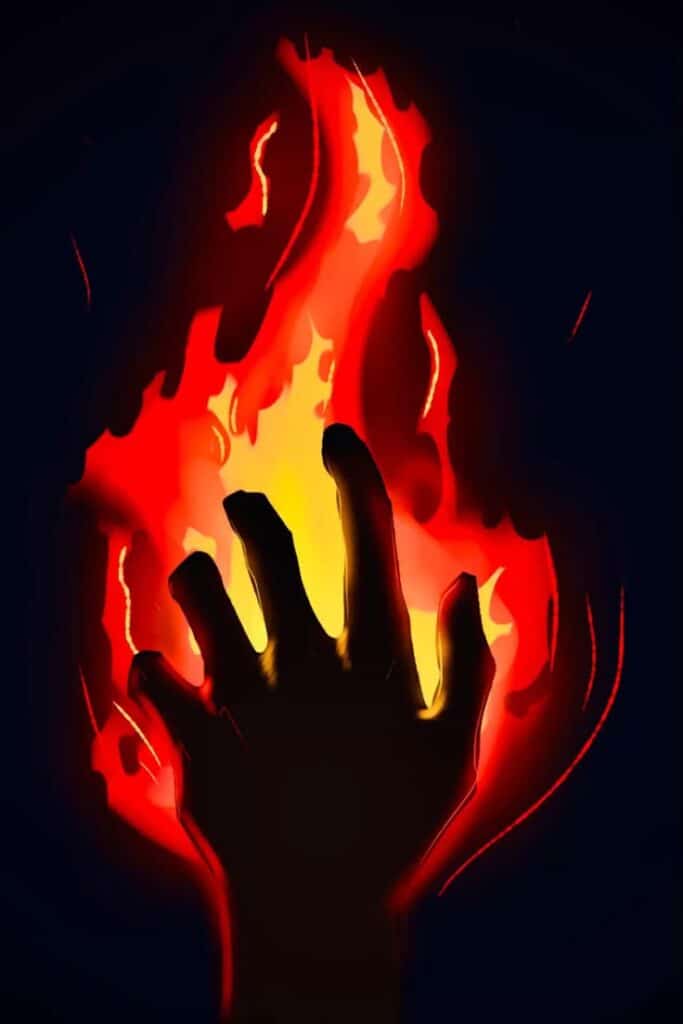
Use this as a dramatic reference, not a literal tracing. Keep the fingertips readable and let several flame edges overlap the hand to create depth.
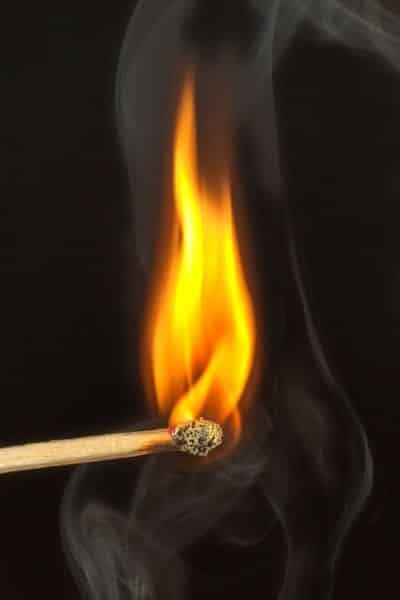
A match flame is compact and slightly tilted. Notice the dark match head, bright base, and thin smoke trail; those three details explain the whole scene.
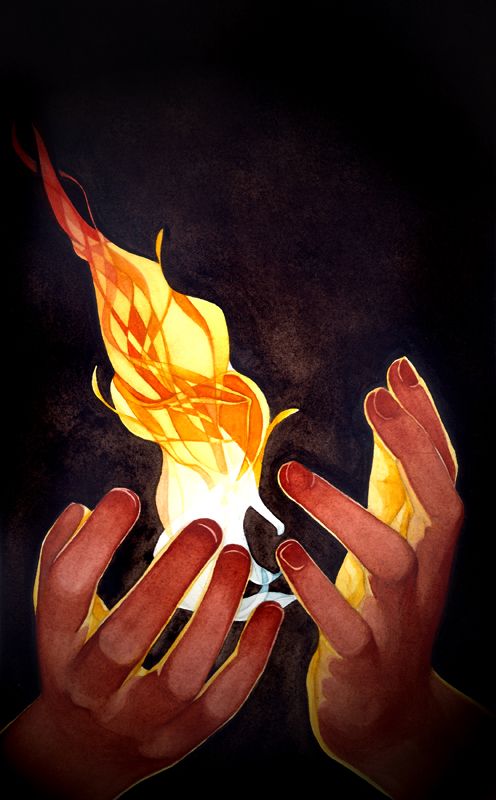
The glow spreads across both palms but fades quickly toward the wrists. That fast falloff makes the fire feel bright without painting every surrounding area orange.
15 fire drawing ideas from simple to advanced
Start with a contained flame, then move toward scenes where fire changes the lighting, overlaps a character, or interacts with another element. Each idea below trains a different problem rather than giving you fifteen versions of the same icon.
Beginner fire drawing ideas
1. Single candle flame
Draw a long teardrop that bends slightly at the tip, then place a smaller pale shape inside it. Add the wick and a tiny halo around the base. This is the cleanest way to practice flame anatomy because the source stays still and the silhouette remains small.
2. Matchstick flame
Keep the flame tighter than a candle flame and tilt it with the match. Darken the burned head, leave a bright connection at its top, and add a thin smoke curl. That dark-to-light transition gives a tiny drawing surprising clarity.
3. Cute cartoon flame
Round the peaks, simplify the inner color shape, and add a small face only after the outline works. A cute flame is still a flame. The character details should sit inside a readable silhouette, not compensate for a weak one.
4. Simple campfire
Cross two or three logs, place the widest flame where they meet, and use dark gaps between the wood pieces. Add a few stones and an oval pool of light on the ground. Even a simple campfire feels complete when the surroundings react to it.
Intermediate fire drawing ideas
5. Torch or lantern flame
A torch flame stretches with movement and wind, while a lantern flame stays protected and more vertical. In both cases, show the object that contains the fire and place a warm highlight on its nearest edge. The container tells the viewer how the flame should behave.
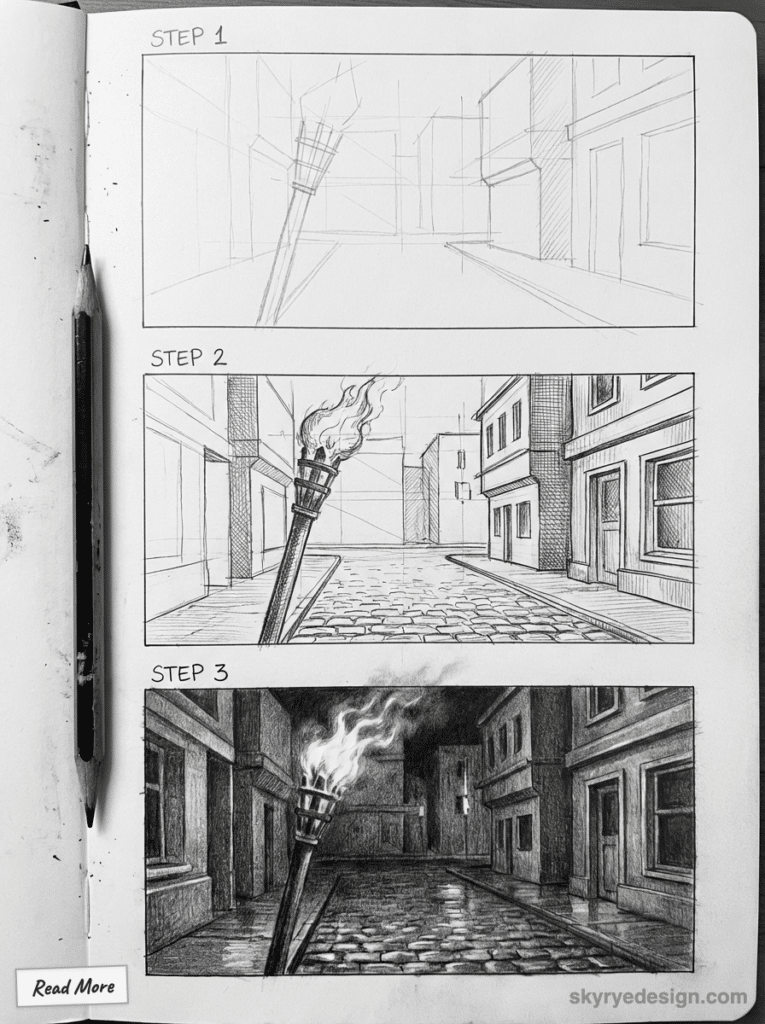
Block the street perspective before drawing the torch. A small pool of light on the stones connects the flame to the environment and keeps it from floating.
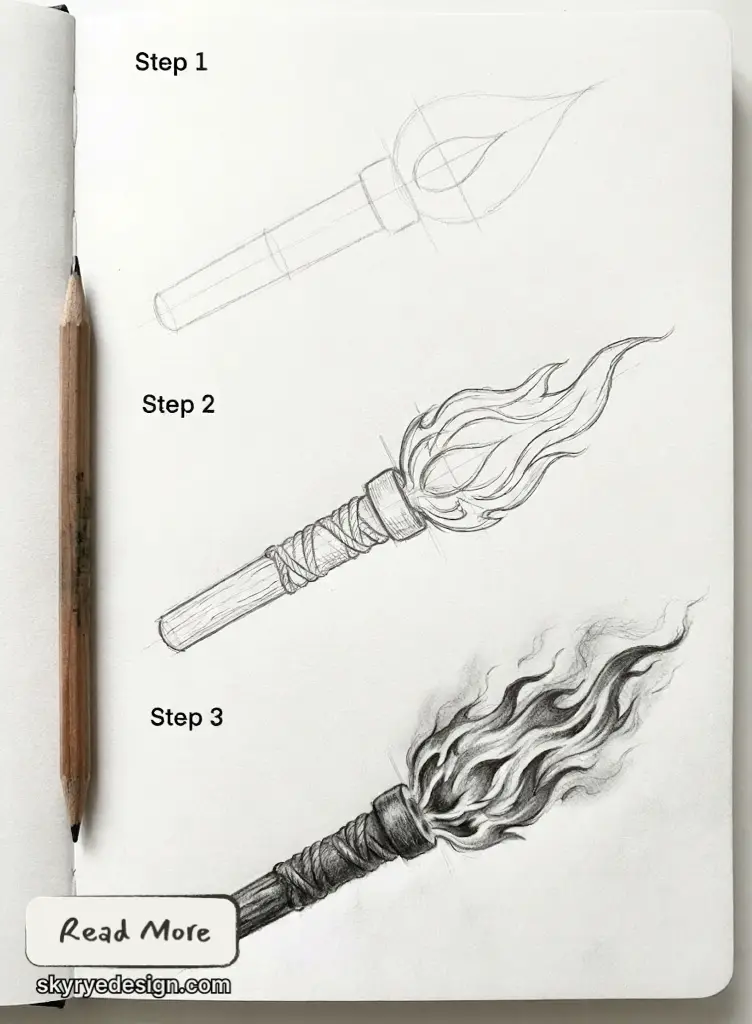
The torch gives the flame a clear source and direction. Bend the outer tongues with the wind, then add only a few sparks on the trailing side.
6. Fireplace scene
Draw the opening, hearth, and log arrangement before the flame. A fireplace combines rigid perspective with loose organic shapes, which makes it a useful composition exercise. Let the fire break the symmetry, but keep the stone or brick structure measured.
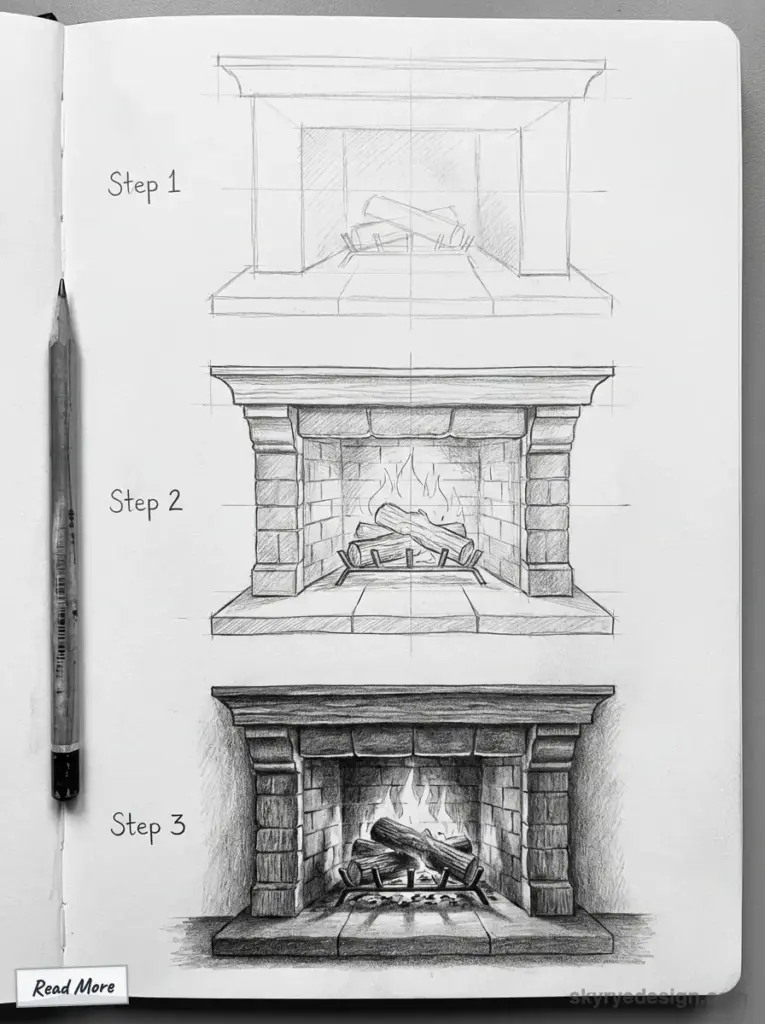
Build the rectangular fireplace and masonry first. Once the structure is stable, the loose fire shapes can break the rigid geometry without making the scene feel crooked.
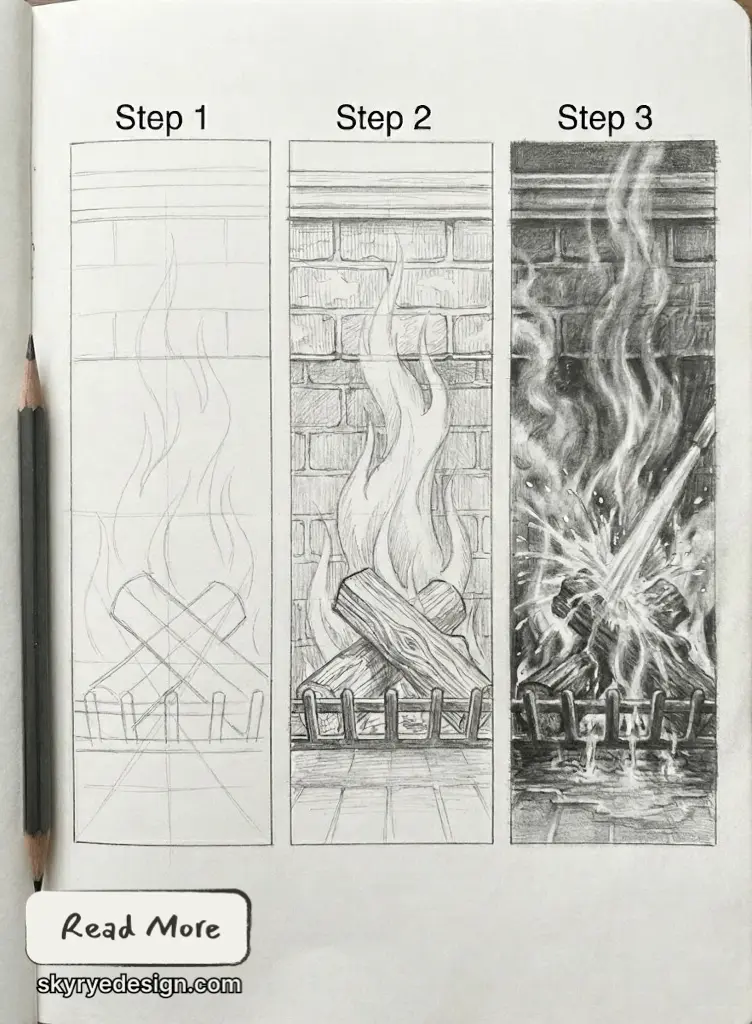
The darkest values belong between the logs and behind the flame. Leave pale paper inside the hottest shapes so the fire appears luminous in graphite.
7. Fire spreading across paper or fabric
This idea is about edge behavior. Draw curled, broken material around the hot area and let the flame follow those openings. An easy hand drawing guide is useful if the scene includes fingers holding a burning page; the hand must remain structurally clear under the glow.
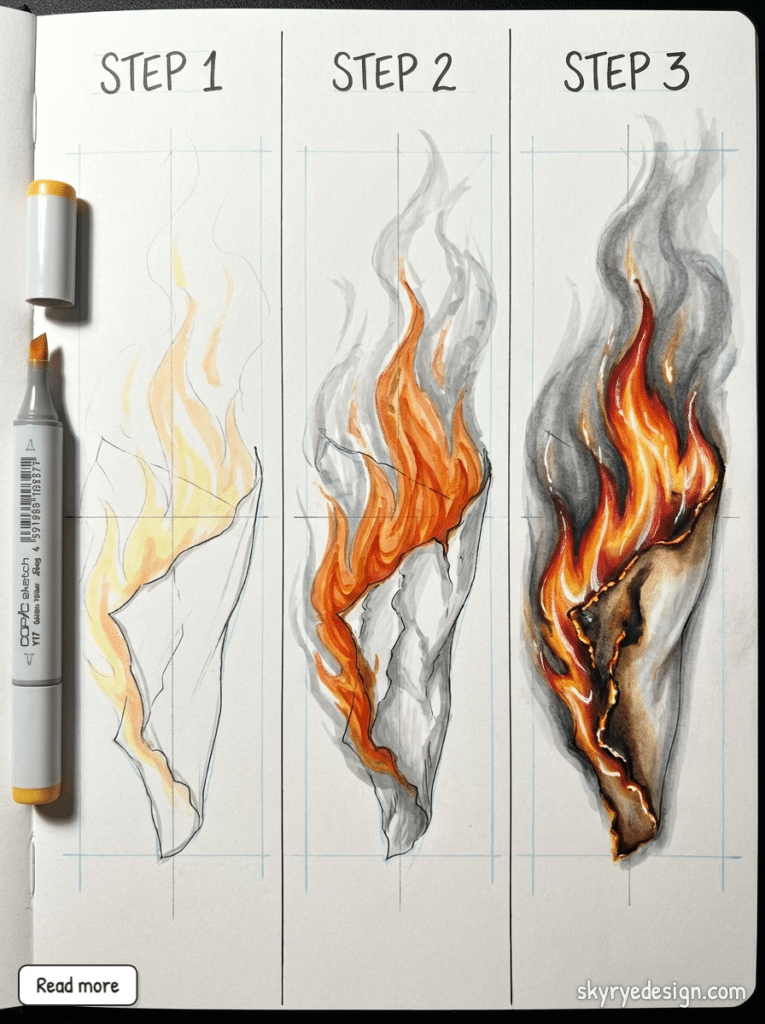
Burning paper needs an irregular edge. Alternate curled dark sections with bright orange bites, then add smoke softly so it does not compete with the flame.
8. Blue fire or gas flame
Use a pale center, saturated blue middle, and deep cool surroundings. Blue fire should not become one flat cyan blob. Keep a small hot core and soften the glow beyond the sharp flame edge, especially in digital work.
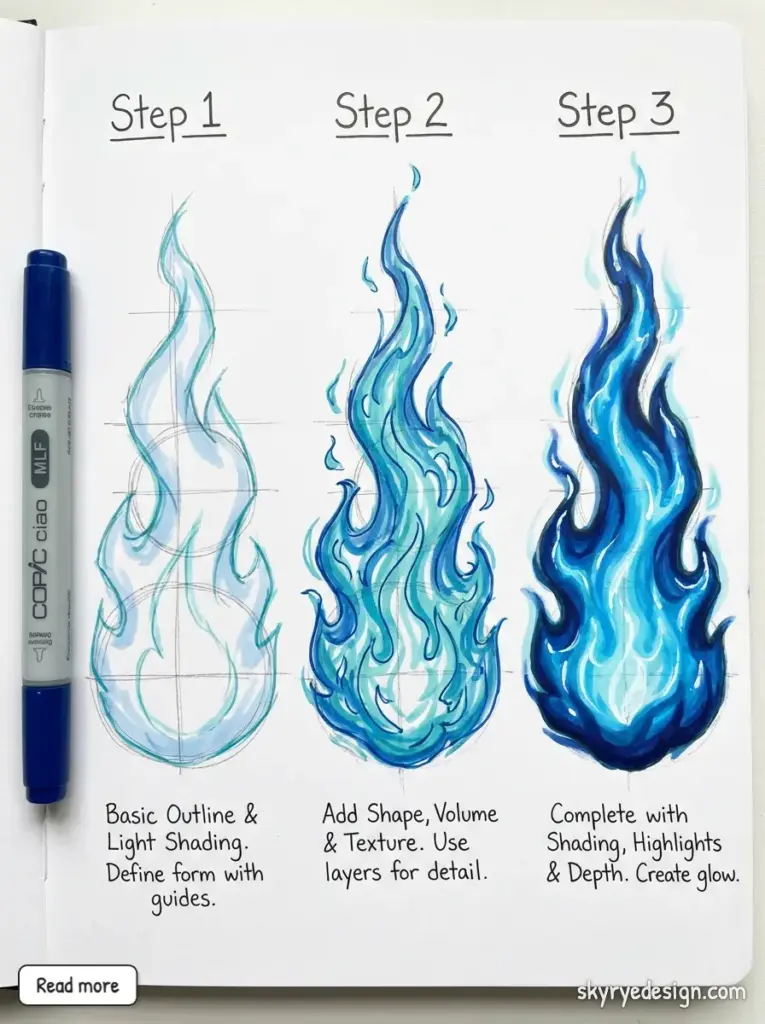
Blue fire still needs a value hierarchy. Keep a pale center, saturated blue middle, and darker outer atmosphere rather than filling the whole flame with one cyan tone.
Advanced fire drawing ideas
9. Explosion or fireball
Build the effect around a bright mass, then stretch flame and smoke backward to show direction. Keep one clean focal area. If every spark and cloud has equal contrast, the explosion loses its center and starts looking decorative.
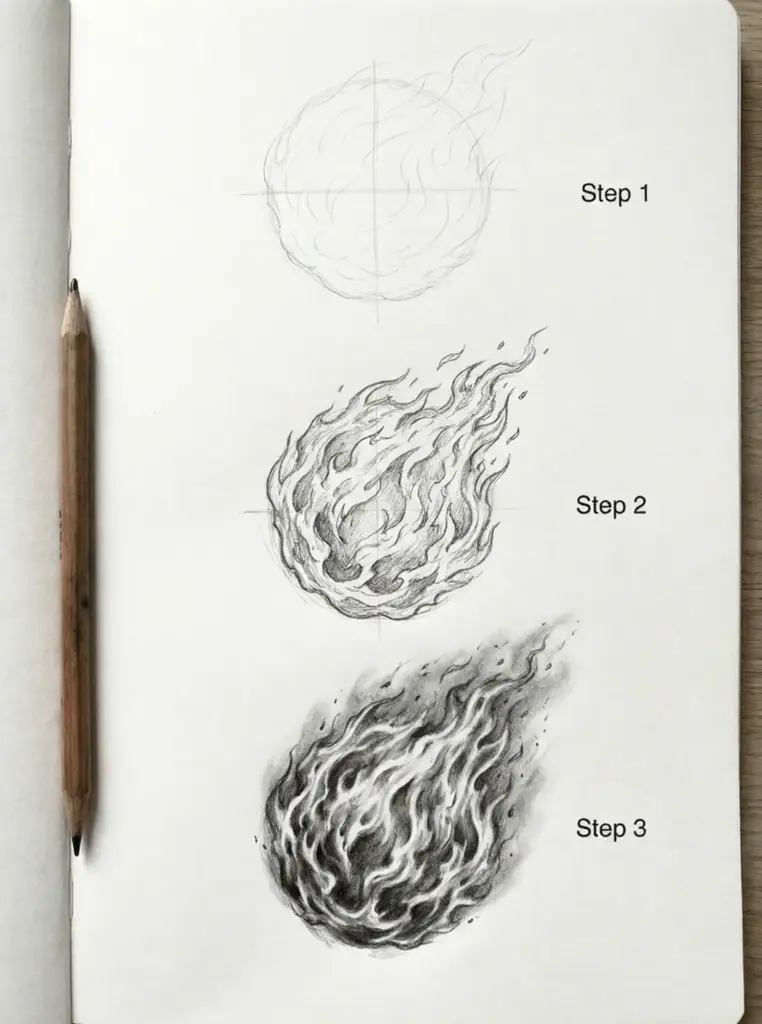
Treat the fireball as a bright mass with a trailing direction. The core can stay round, while the outer flames stretch backward to show speed.
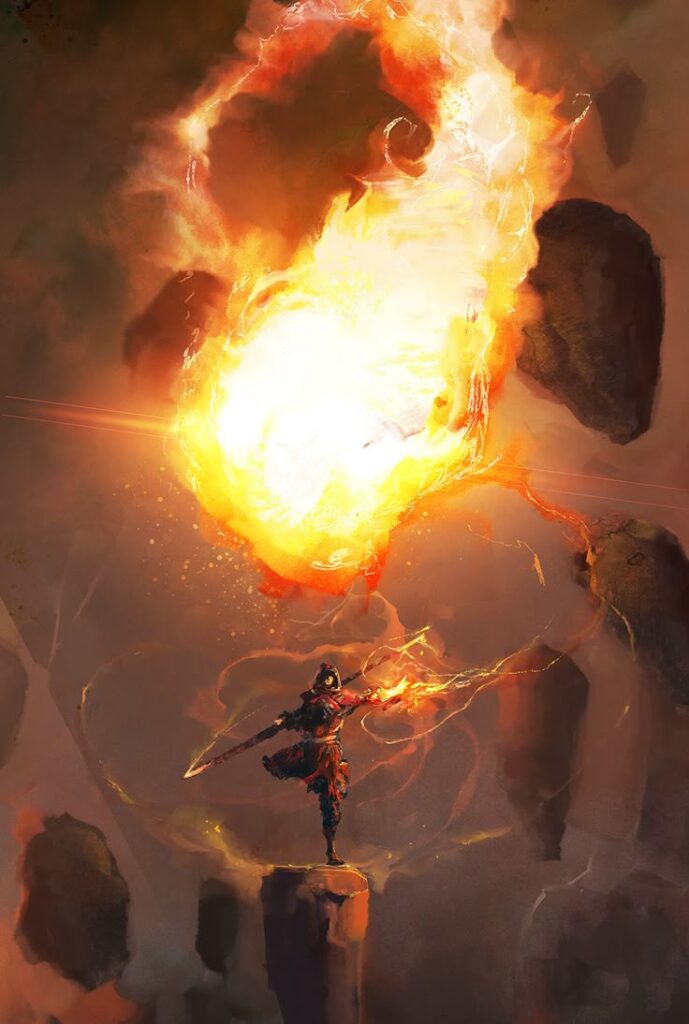
Overlap sells scale here: the hands sit in front of the glowing mass while sparks cross the silhouette. Those layers make the explosion feel larger.
10. Dragon’s breath
Design the dragon first, then aim the fire from the open mouth along the head and neck gesture. The dragon drawing guide can help with jaw structure and pose; after that, widen the flame stream and place warm reflections under the muzzle, horns, and nearest scales.
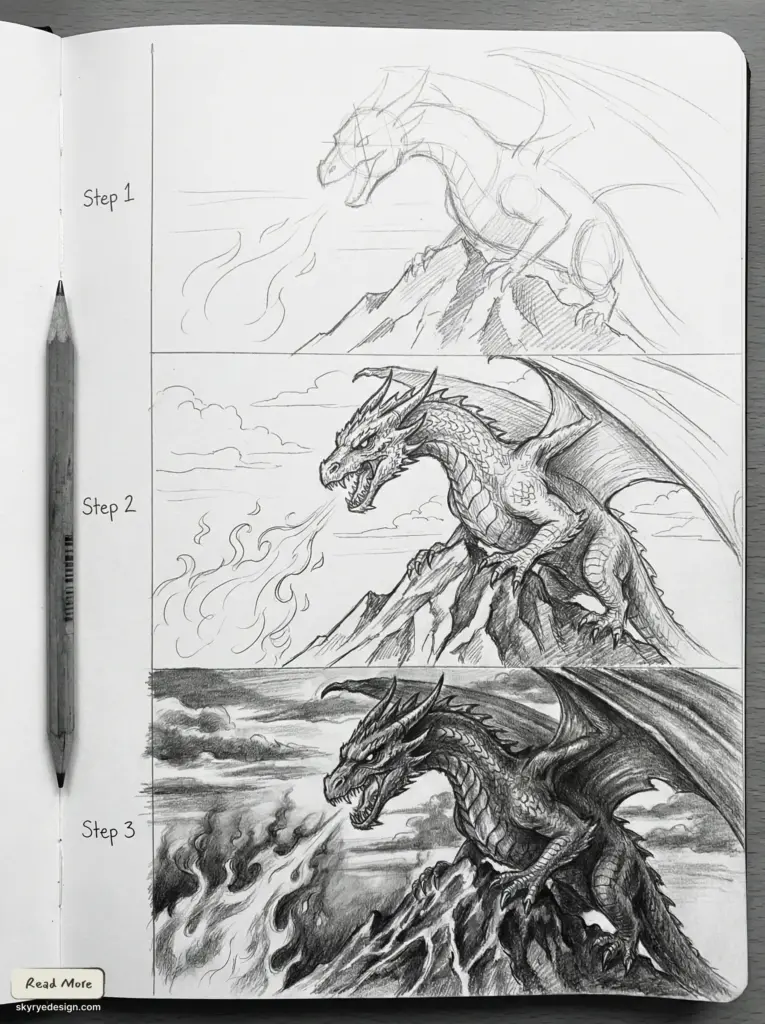
Finish the dragon’s jaw, neck, and pose before adding breath. The flame should follow the mouth direction and widen as it moves away from the source.
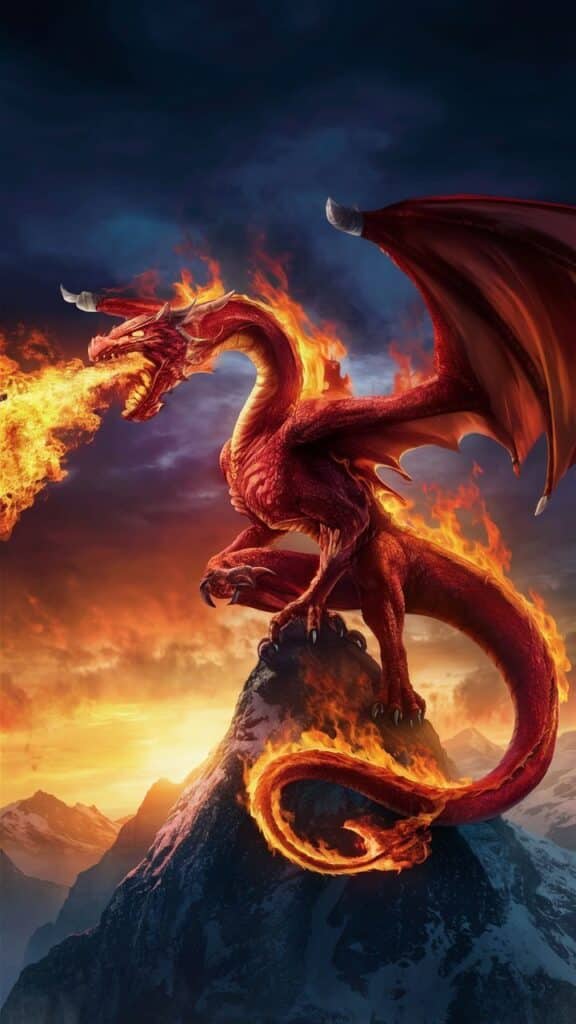
This scene uses the fire as a focal point. Keep the dragon and mountain darker, then repeat small warm highlights along nearby scales and rock edges.
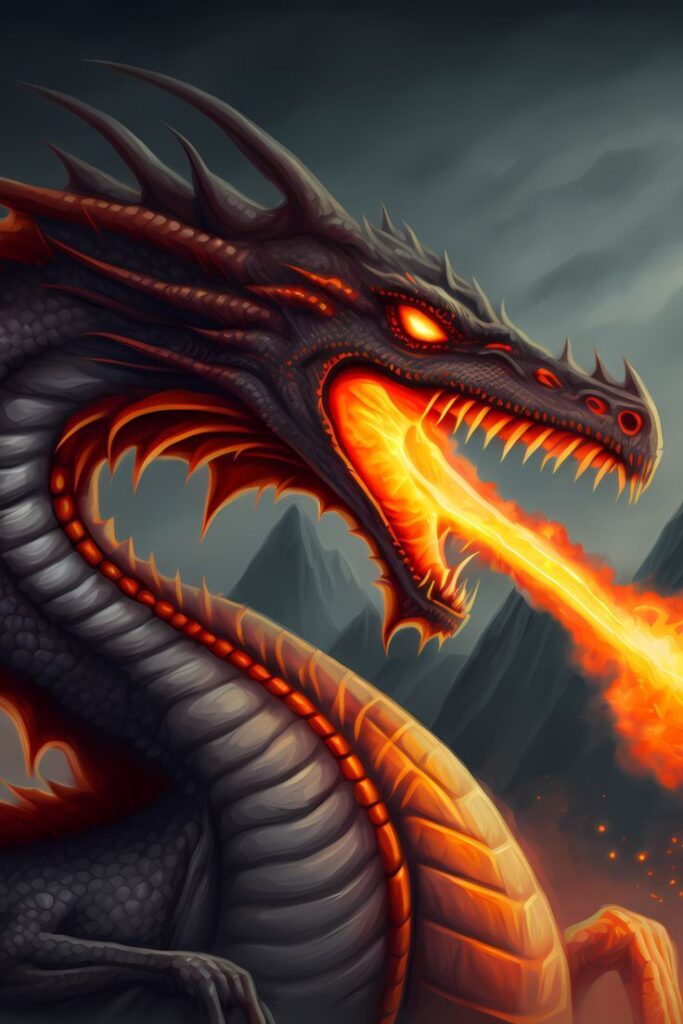
The distant mountains are cooler and softer than the fire. That atmospheric separation keeps the orange flame sharp even in a detailed fantasy scene.
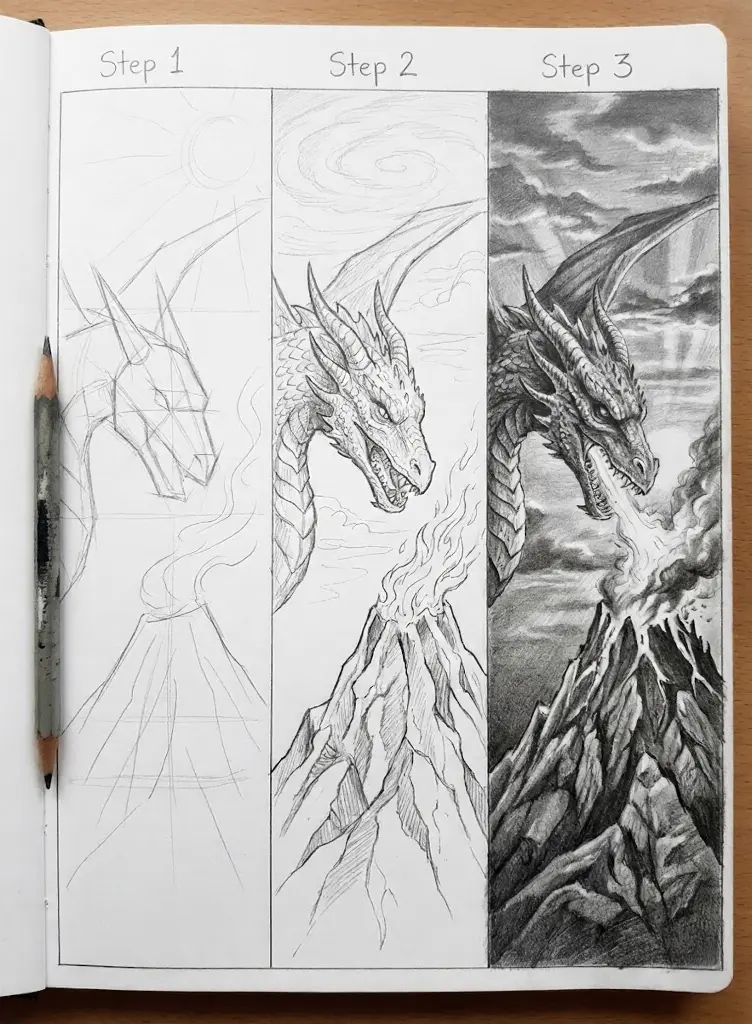
Separate dragon, volcano, smoke, and flame into clear value groups. If every section uses the same dark graphite, the action collapses into one gray patch.
11. Fire surrounding a character
Fire effects should support the pose. Use the sweep of the torso, arms, or costume to guide the flame arcs, and protect the face silhouette from busy sparks. Study dramatic lighting for figure drawings when the glow needs to wrap around a body without flattening it.
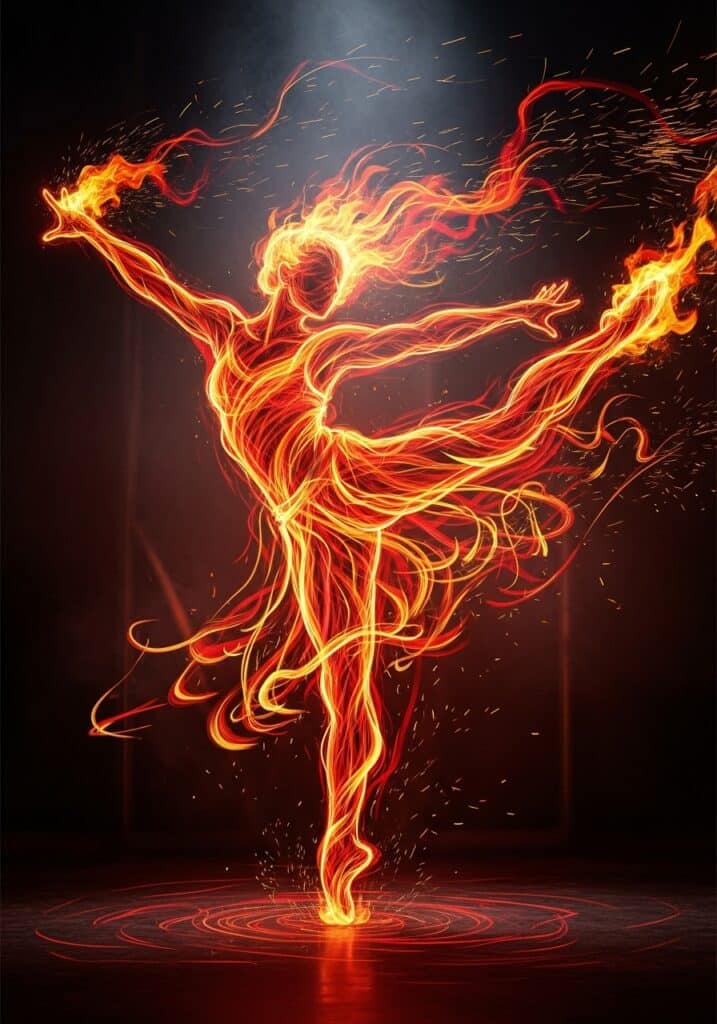
The gesture line matters more than the flame texture. Capture the dancer’s weight and sweep first, then wrap fire shapes around that movement.

Pull each brushstroke from the broad base toward a narrow tip. Reversing that motion often leaves blunt flame ends that look like leaves.
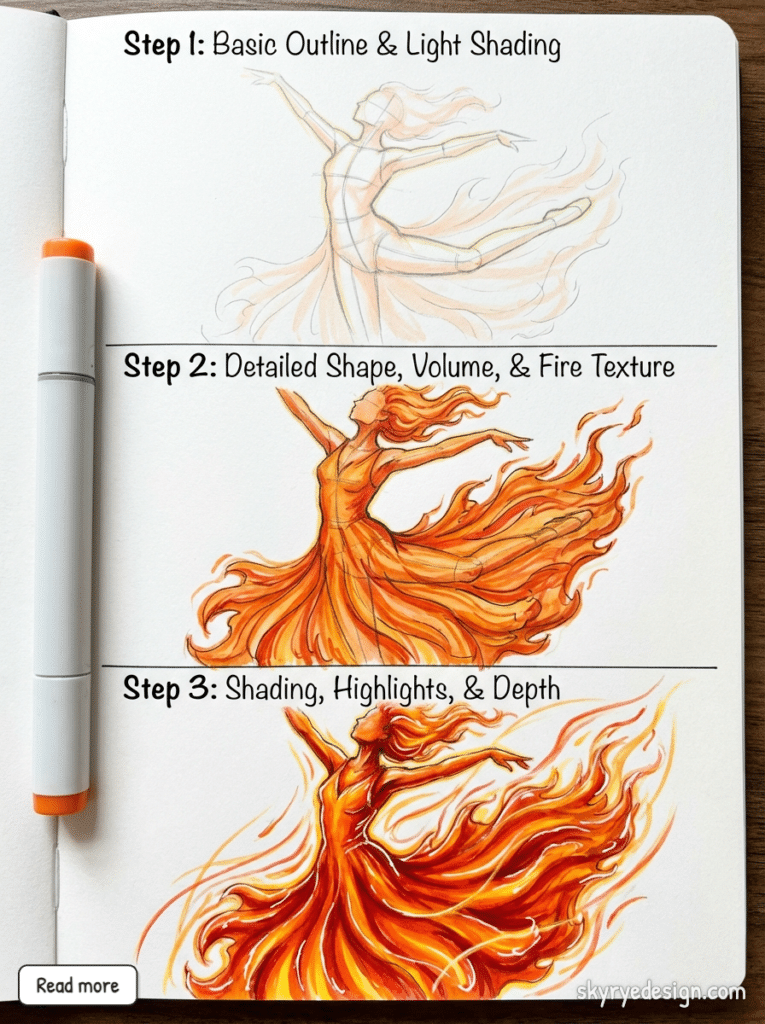
The three stages show a sensible order: pose, flame design, then value. Keeping that order prevents the effects from hiding weak anatomy.
12. Anime or manga fire
Anime fire favors clean curves, strong silhouettes, and controlled color blocks. Use long S-curves around action poses, then choose a few sharp accents for speed. The broader digital art ideas guide is useful for brush control, layers, and effects once the flame design already reads.
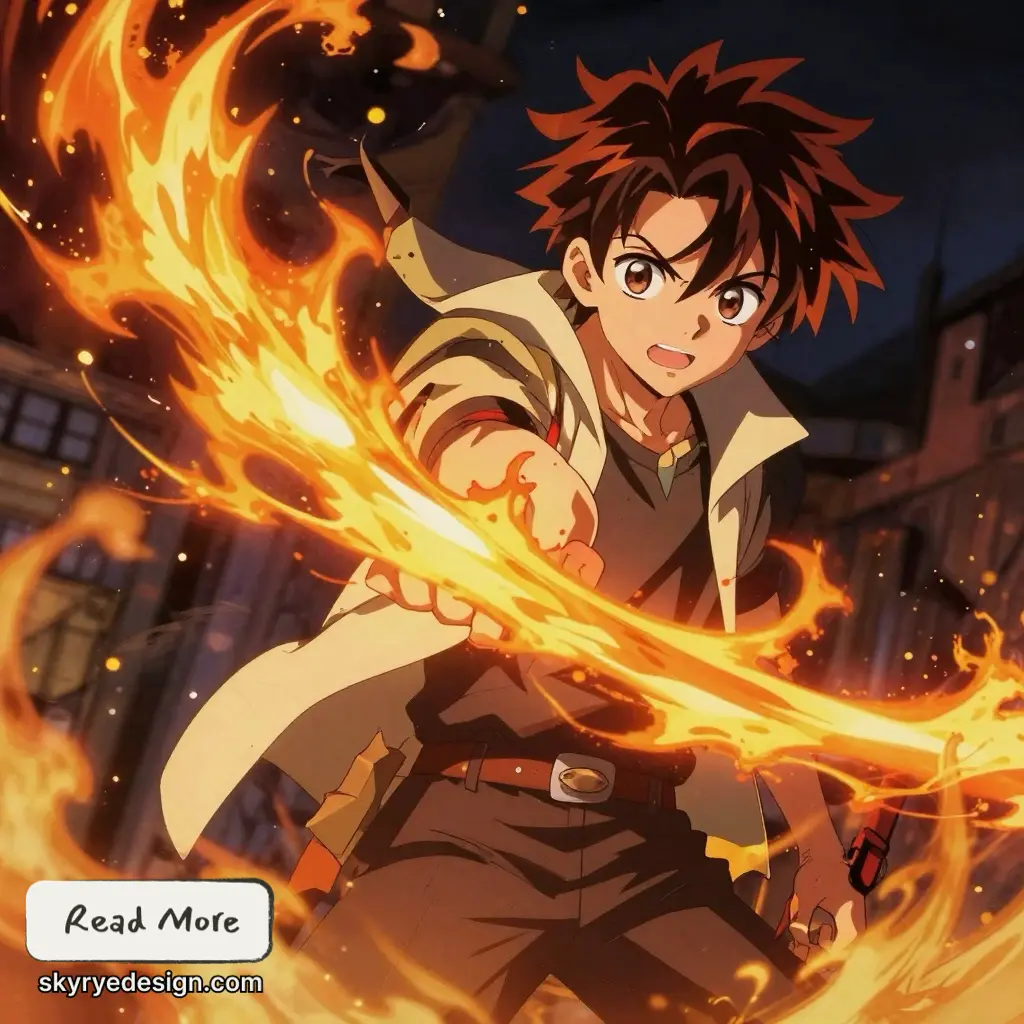
Anime fire often uses longer curves and cleaner color blocks than realistic fire. Let the flame arcs reinforce the character’s action rather than filling empty space randomly.
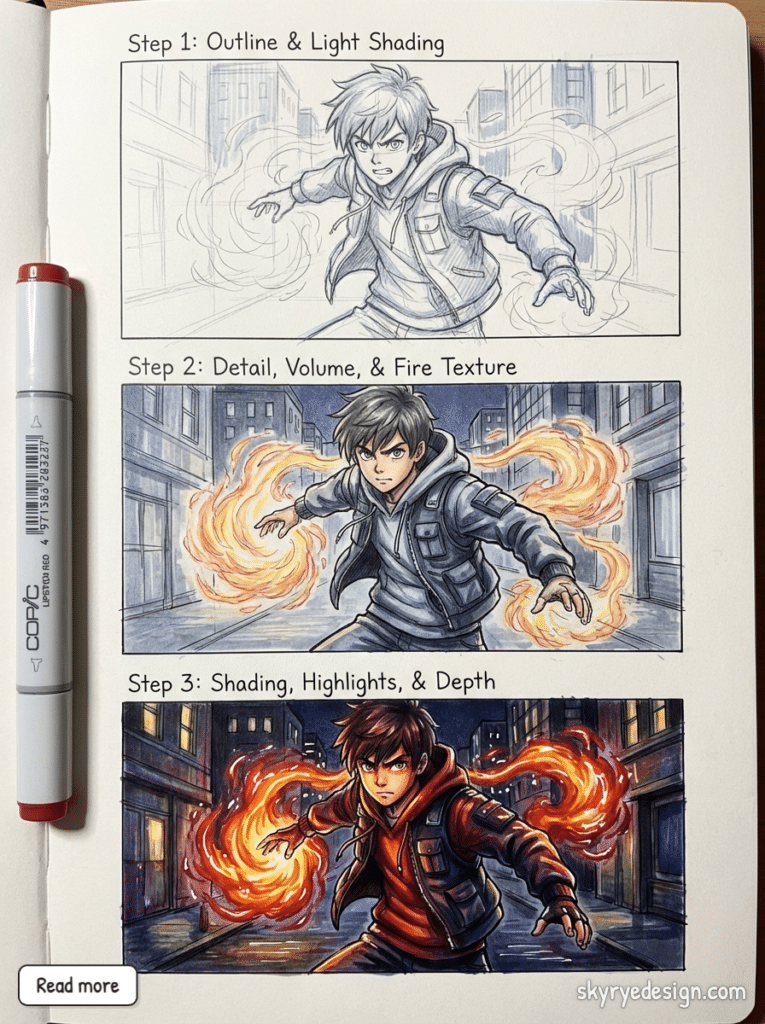
The effect works because the figure silhouette remains readable. Place bright fire beside the body edges, not across every important face and costume detail.
This is a good design drill. Reduce the subject to three or four large tongues, then vary their width and spacing before adding internal lines.
13. Realistic fire study
Work from a photo or paused video and squint at the reference. Paint or draw the largest light and dark masses first. Real flames contain lost edges, transparent areas, smoke, and abrupt bright fragments, so a single crisp outline will always feel too graphic.
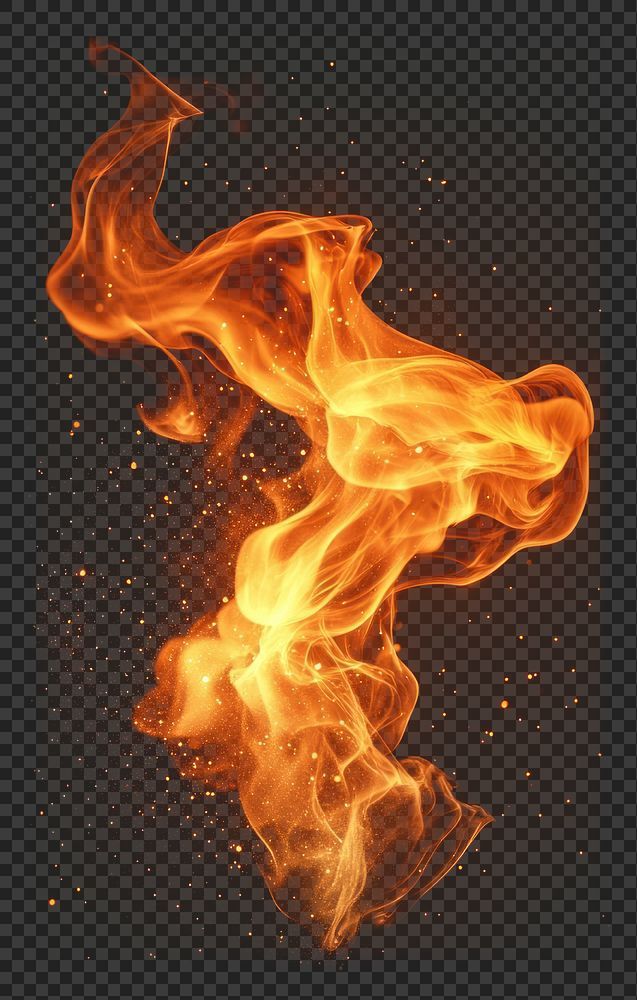
This isolated silhouette is useful for outline practice. Copy the large outer rhythm first and ignore the tiny sparks until the main flame reads clearly.
14. Fire and water interaction
Show the reaction zone with steam, ripples, droplets, or a softened flame edge. The two elements should affect one another. A hard flame sitting beside a perfect blue drop reads as two symbols rather than one event.
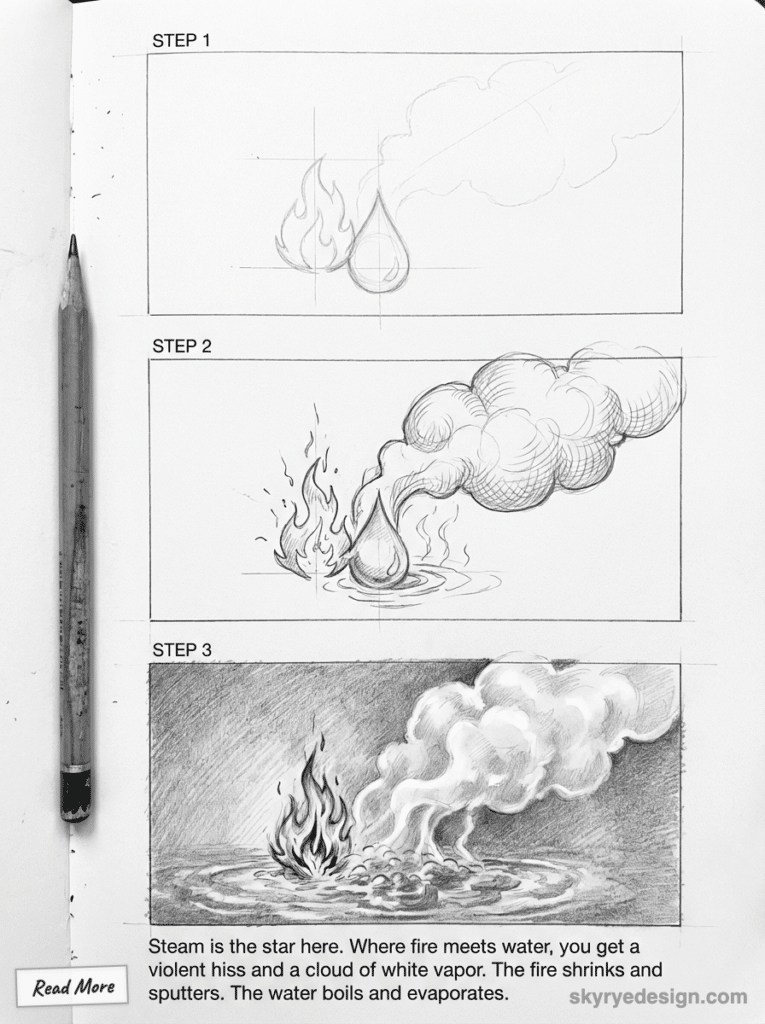
Where fire meets water, show the reaction. A soft steam cloud and disturbed ripples explain the contact better than simply placing a flame beside a droplet.
15. Abstract fire or fire spirit
Turn the flame into a character, geometric mark, or color study. You can bend natural color and shape, but keep an internal logic: one directional flow, one focal point, and a consistent family of curves or angles. More fantasy drawing ideas can help you turn the effect into a full scene.
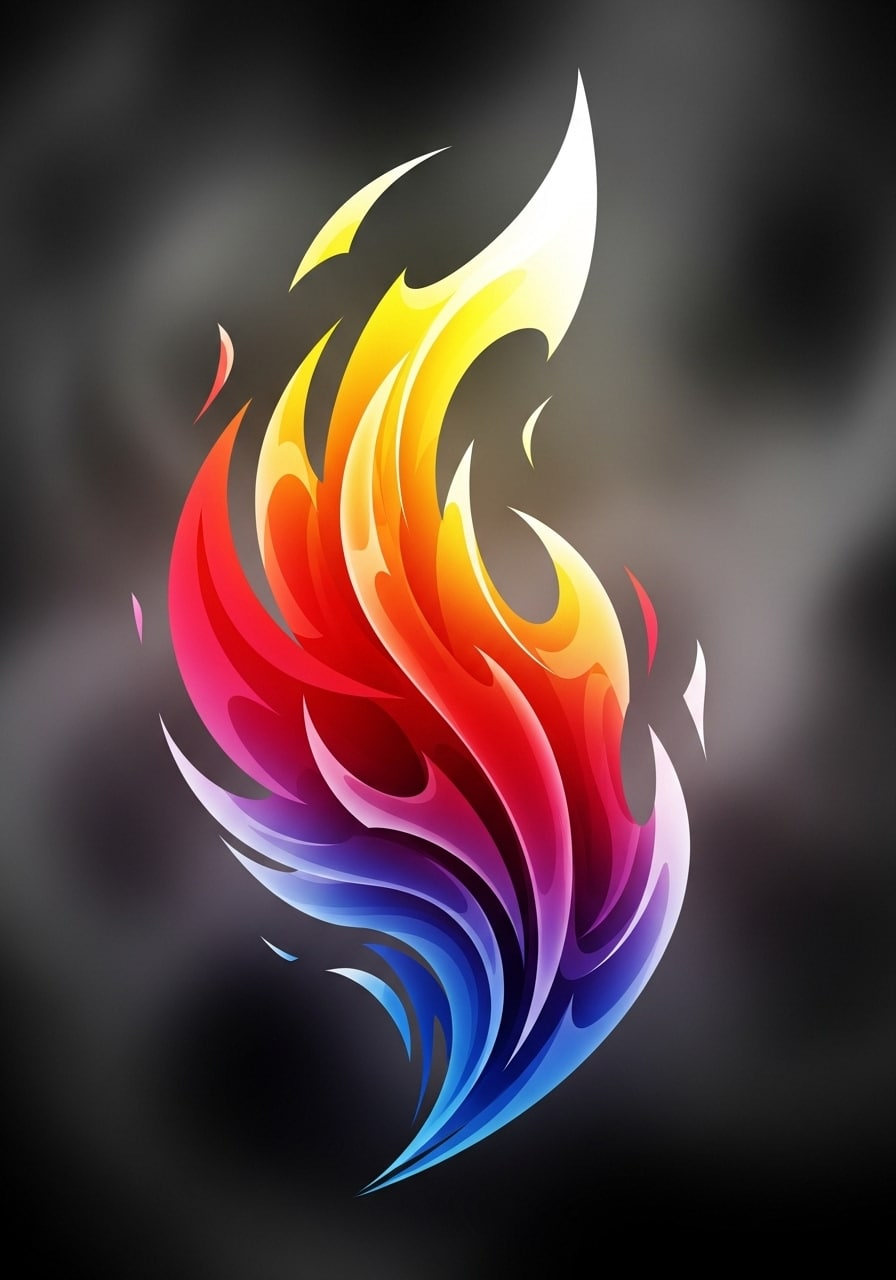
The abstract version can break natural color rules, but it still needs a clear light-to-dark path. Choose one bright focal area and let the palette move away from it.
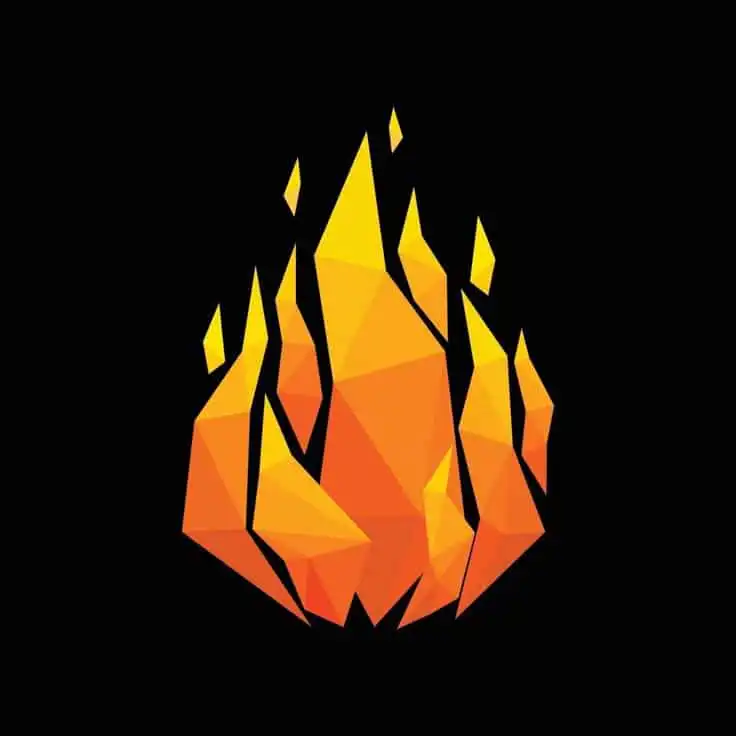
For a geometric flame, simplify curves into angled planes. Keep the widest shapes at the base and use smaller triangles to suggest rising heat.
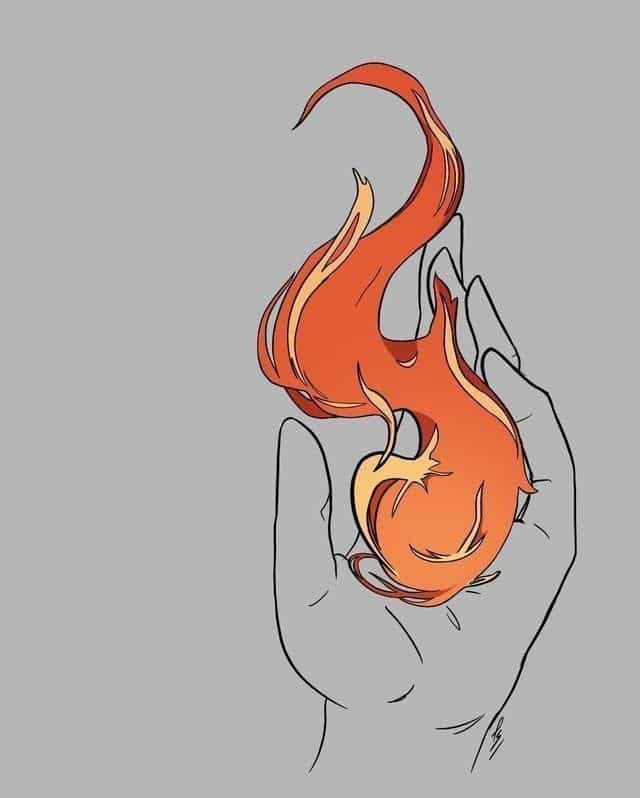
Check the hand silhouette before polishing the flame. The open palm creates a visual platform, while the narrow wrist balances the tall fire shape.
Fire color, glow, and reflected light
Fire color is easier to control when you separate hue from value. The center is usually the lightest area, while yellow, orange, and red describe progressively cooler zones or surrounding glow. Practice color blending techniques on a small swatch before coloring the final drawing, especially if the transitions keep turning muddy.
For traditional media, a colored pencil drawing approach works well: layer pale yellow first, build orange with light pressure, reserve white paper for the hottest accents, and deepen the background last. Do not press hard too early or the waxy surface will stop accepting new layers.
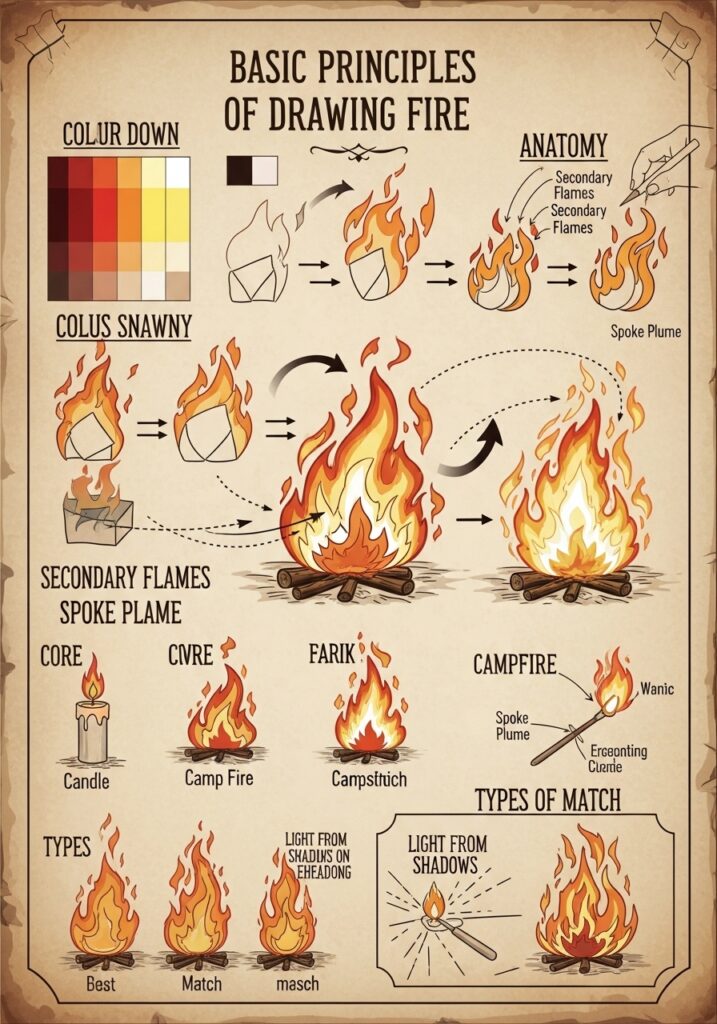
Use this sheet as a quick checklist: source, silhouette, inner core, outer color, and sparks. You rarely need every detail in a small drawing.
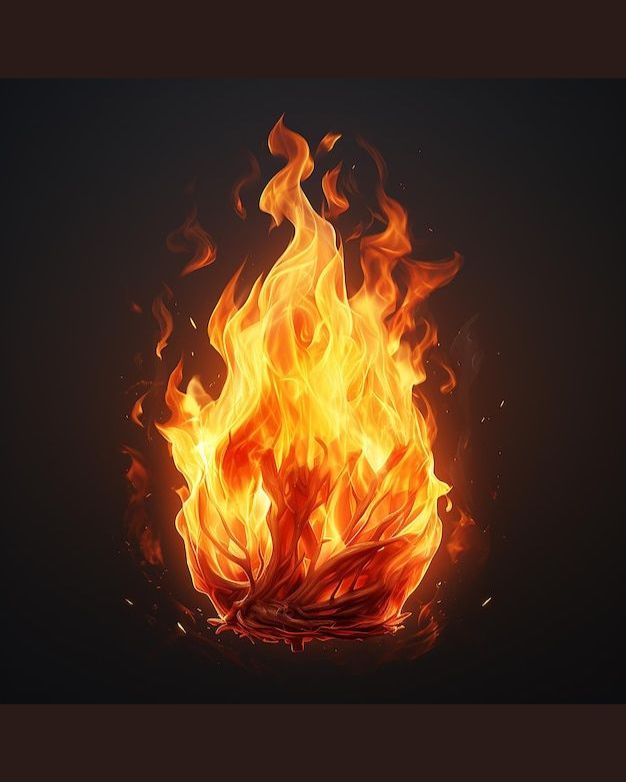
Notice how the brightest yellow sits inside the orange rather than around it. Preserve that order when coloring so the flame reads as light-emitting.
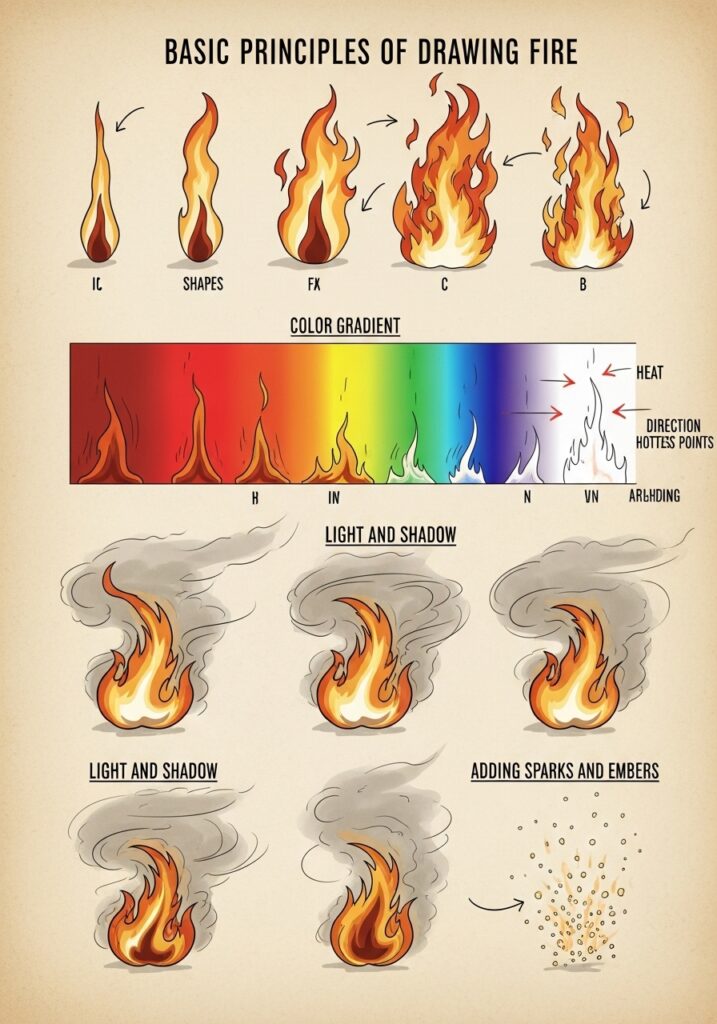
This reference separates the problem into manageable pieces. Practice shape first, color second, and cast light last instead of trying to solve everything in one pass.
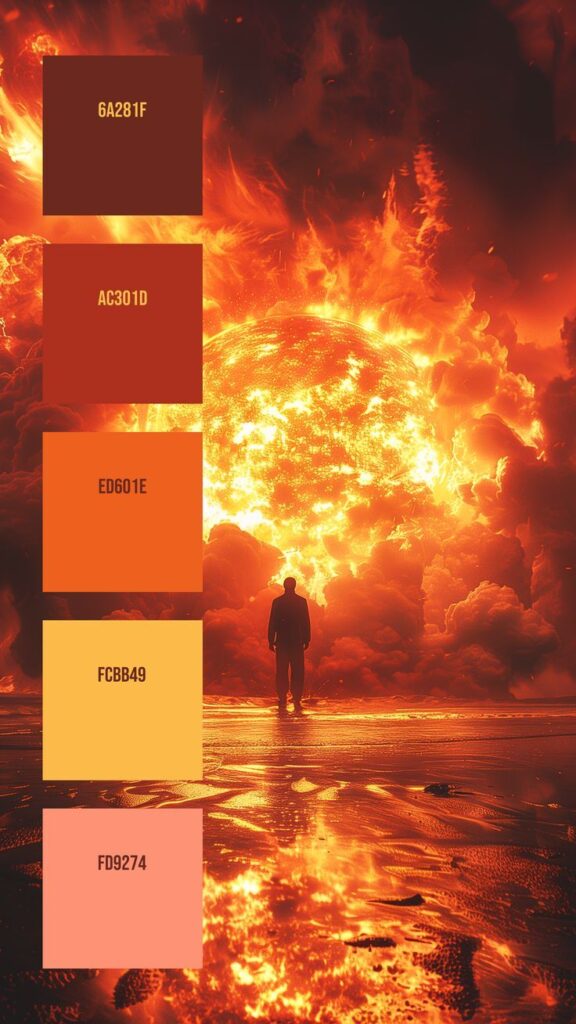
A sampled palette keeps the warm colors distinct. Choose one pale highlight, one yellow-orange, one red-orange, and one deep surrounding value.
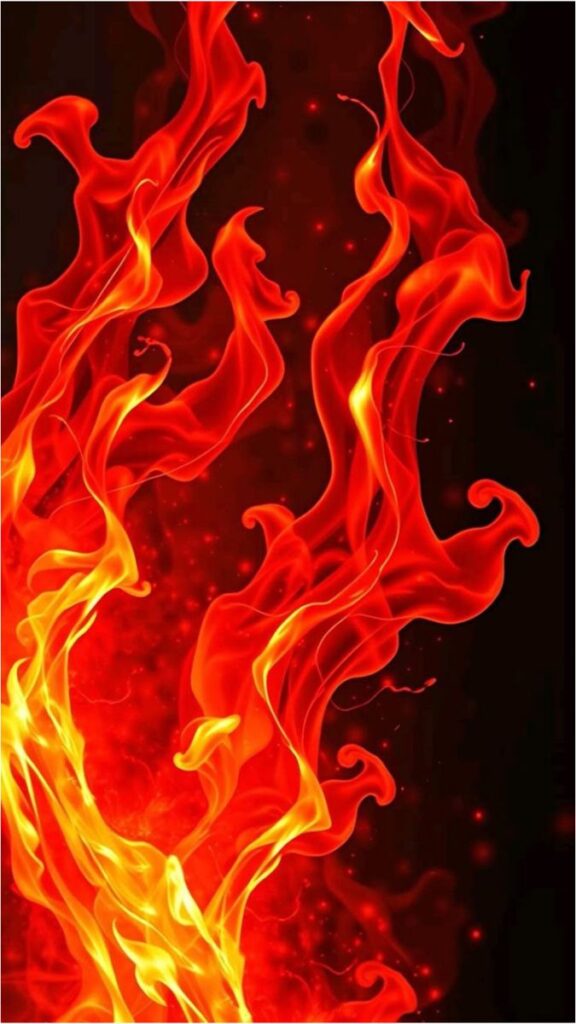
The dark background makes thin yellow edges look brighter. Avoid outlining every flame in black; let value contrast create most of the boundary.
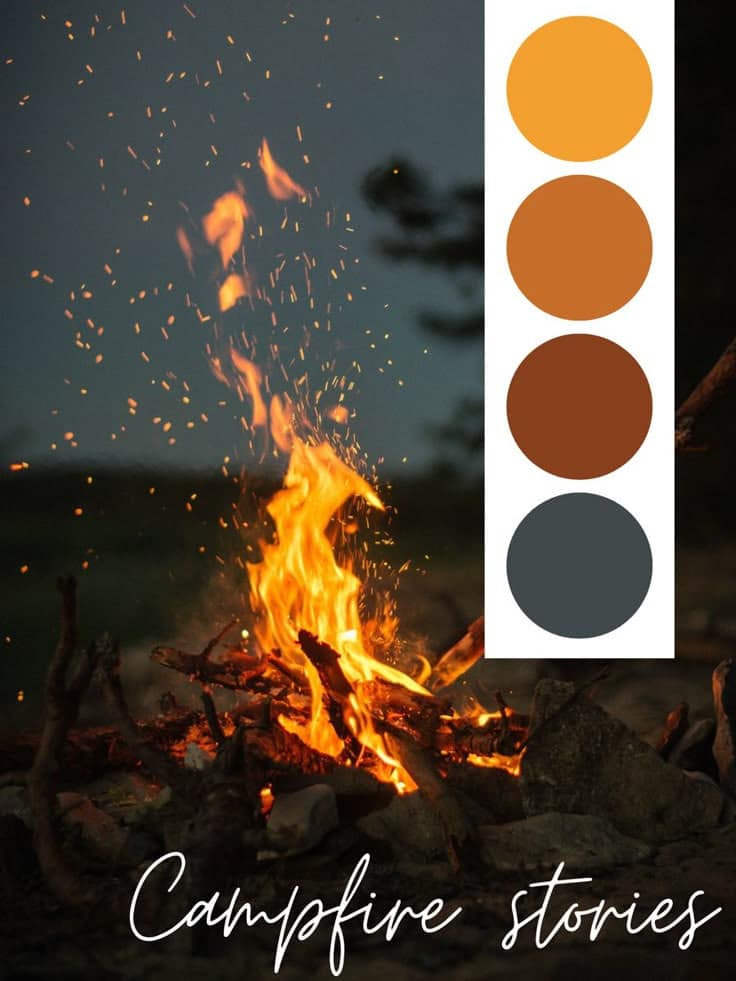
The useful lesson is the relationship between colors, not the exact hex codes. Keep the ember red deeper than the central yellow and the night much cooler.

A night campfire needs restraint. Leave most of the sky dark and concentrate detail around the logs, stones, sparks, and nearest patch of ground.
How fire changes the light around it
A flame lights nearby planes more than distant ones. Put the strongest warm highlight on surfaces facing the source, then reduce saturation and value as the distance grows. Shadows can become sharper near a small bright flame, while smoke and glow soften selected edges.
Keep some cool or neutral color in the scene. If the whole page becomes orange, the fire has nothing to contrast against. Deep blue-gray, violet, or neutral graphite around the warm center can make a modest flame feel much brighter.

Use this diagram to place cast light. Surfaces facing the flame warm up; planes turned away should stay darker and cooler to preserve form.

The crumpled paper adds several small planes for reflected light. Use it to practice warm highlights against cool, nearly black shadow pockets.
Fire drawing composition ideas
Before a detailed study, make three thumbnail sketches. Change the flame height, the dark surrounding shape, and the location of the fuel. Choose the version with the clearest value pattern, not the one with the most sparks.
Fire can also become a design element: a cute mascot, campfire icon, flaming heart, poster accent, or surreal object. Keep the silhouette recognizable and match the edge style to the rest of the artwork. Soft realistic fire beside hard vector shapes rarely feels intentional.

Thumbnail several flame silhouettes before committing to one. Tiny sketches reveal repeated shapes and stiff symmetry faster than a polished page.

A cute flame needs a simple face and a clean outer shape. Keep the eyes and mouth small so the character still reads as fire rather than a sticker with spikes.
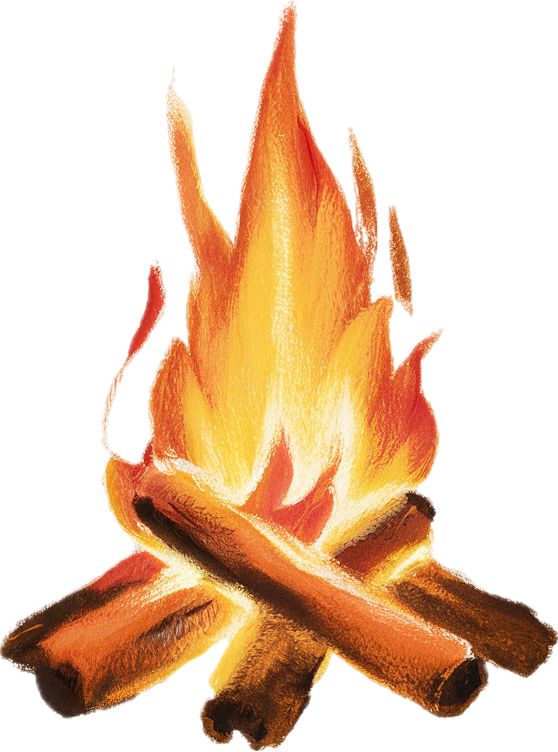
This flat style is ideal for beginners. Use two crossed logs, one bold outer flame, and a smaller yellow center with no complicated shading.
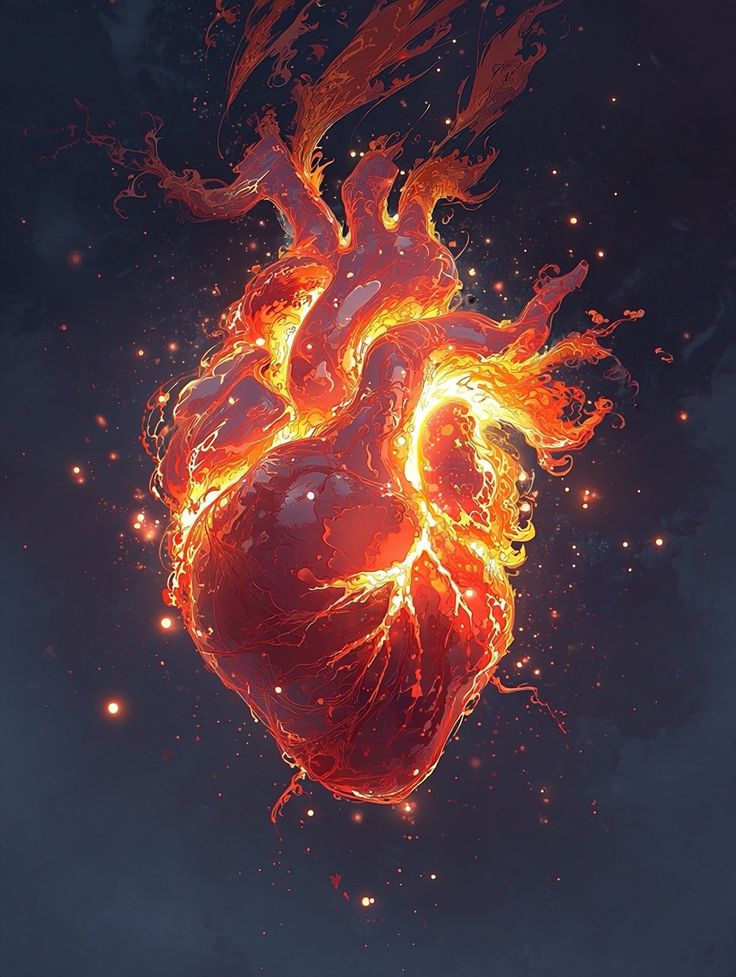
Wrap the flames around the heart’s contour instead of placing them only on top. Repeated curves make the object and fire feel like one design.
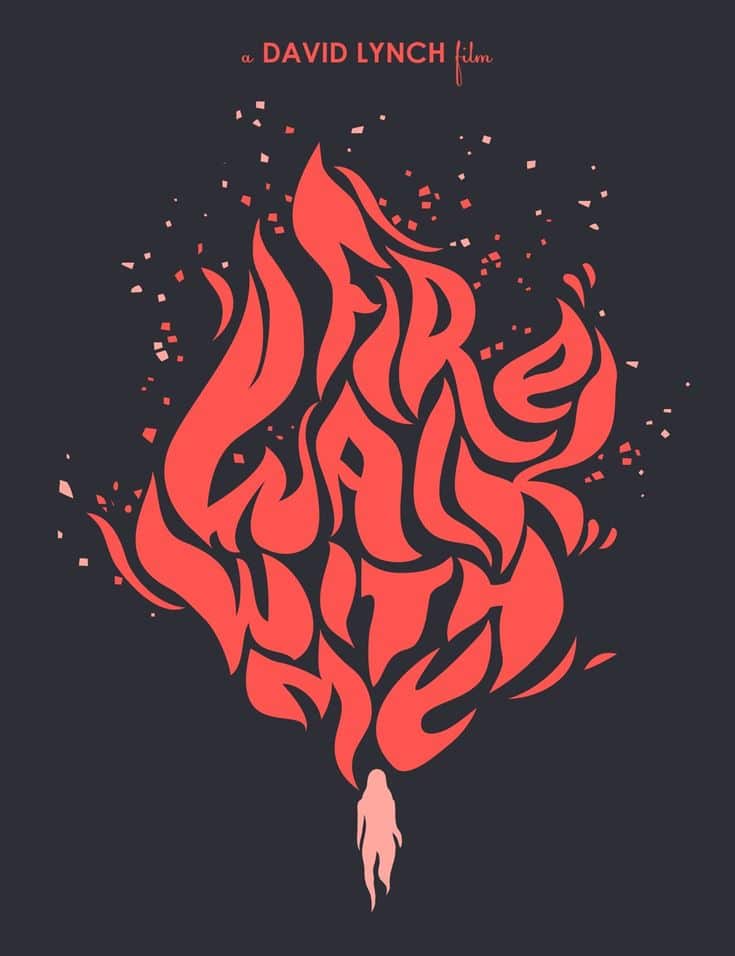
A limited pink palette can still feel hot if the center is pale and the background is deep. Value does more work than literal orange color here.
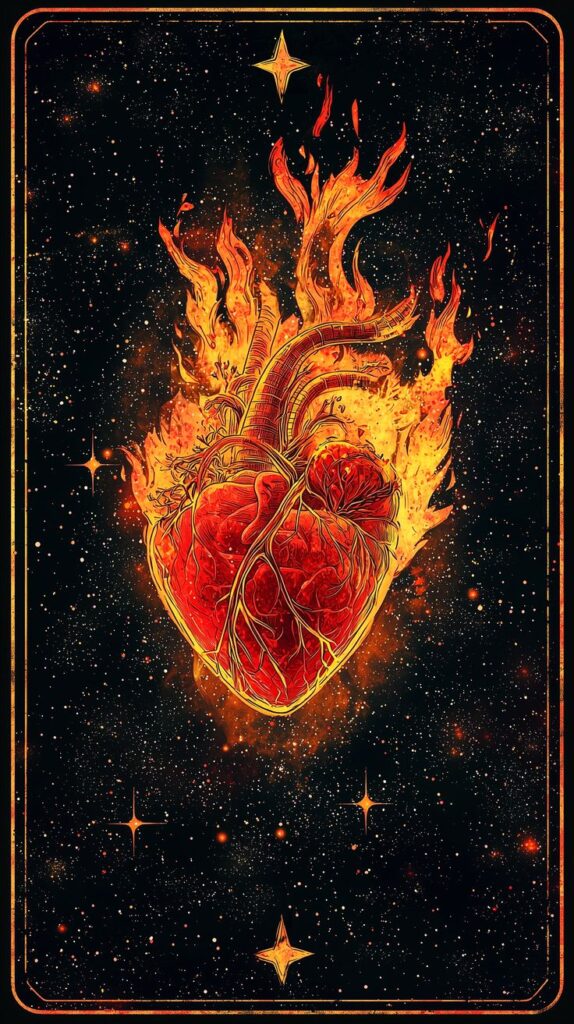
The heart has dense detail, so the surrounding fire stays broader. That contrast between intricate anatomy and simple flame shapes keeps the image readable.
Common fire drawing mistakes and quick fixes
- Symmetrical flames. Delete one matching curve and vary the height, lean, and spacing of the peaks.
- One heavy outline. Break edges where the flame dissolves into glow, smoke, or the bright background.
- A dark center. Reverse the value plan so the hottest core stays light and the surroundings carry the darkest tones.
- No visible source. Add the wick, logs, gas opening, magical hand, or object that feeds the flame.
- Orange everywhere. Keep cool or neutral areas around the fire so the warm light has contrast.
- Too many sparks. Use a few accents to show movement; a dense field of dots makes the drawing noisy.
Tools for pencil, marker, paint, and digital fire
For graphite, use a 2B pencil, kneaded eraser, and blending stump. For colored pencil, add a white or cream pencil, warm yellow, orange, red-orange, and a dark neutral. Markers give crisp color blocks, while watercolor is good for broad glow and smoke. Pick the medium that matches the edge quality you want.
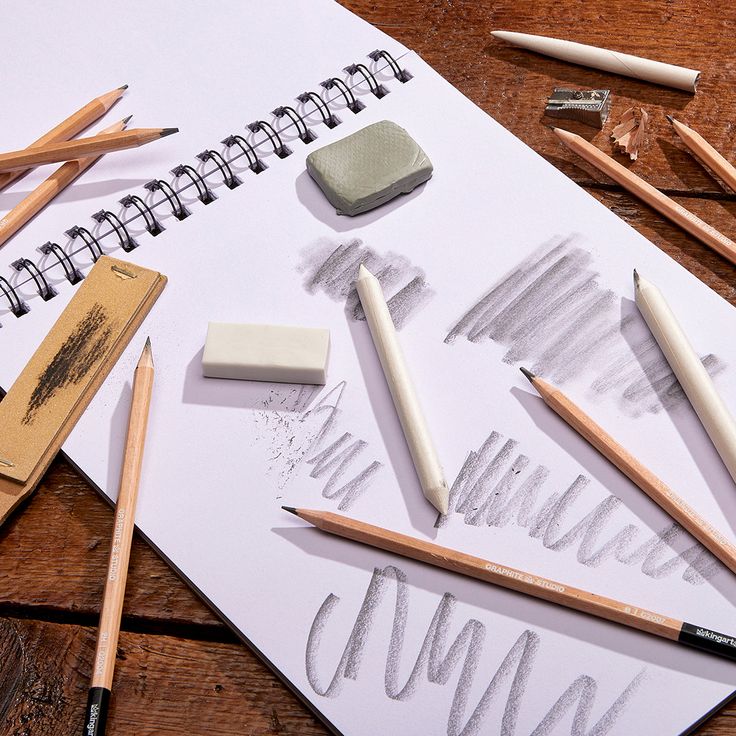
A 2B pencil, kneaded eraser, and blending stump are enough. Save the softest graphite for the background and charred areas, not the bright flame core.
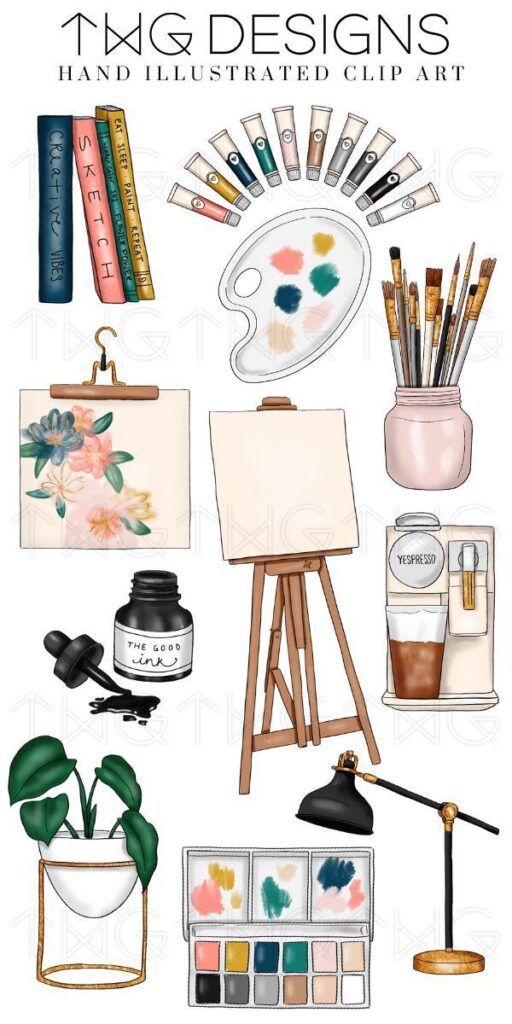
Choose tools by finish: pencil for value, colored pencil for layered glow, markers for clean blocks, and paint for soft edges and reflected light.
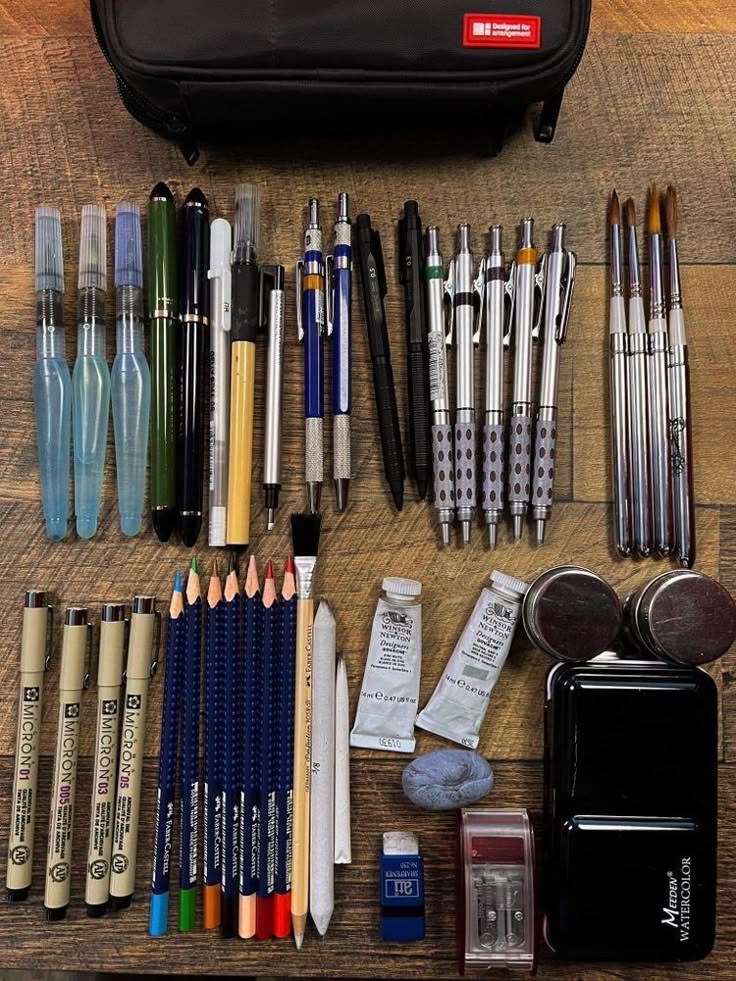
A smaller tool set usually gives a cleaner study. Pick one drawing tool, one color medium, and one eraser before you start experimenting.
For digital fire, start with a hard round brush and separate the flame, glow, sparks, and cast light onto different layers. A soft airbrush is useful only after the main silhouette works. Screen or Add blending modes can brighten the effect, but lower the opacity before the glow washes out the drawing.
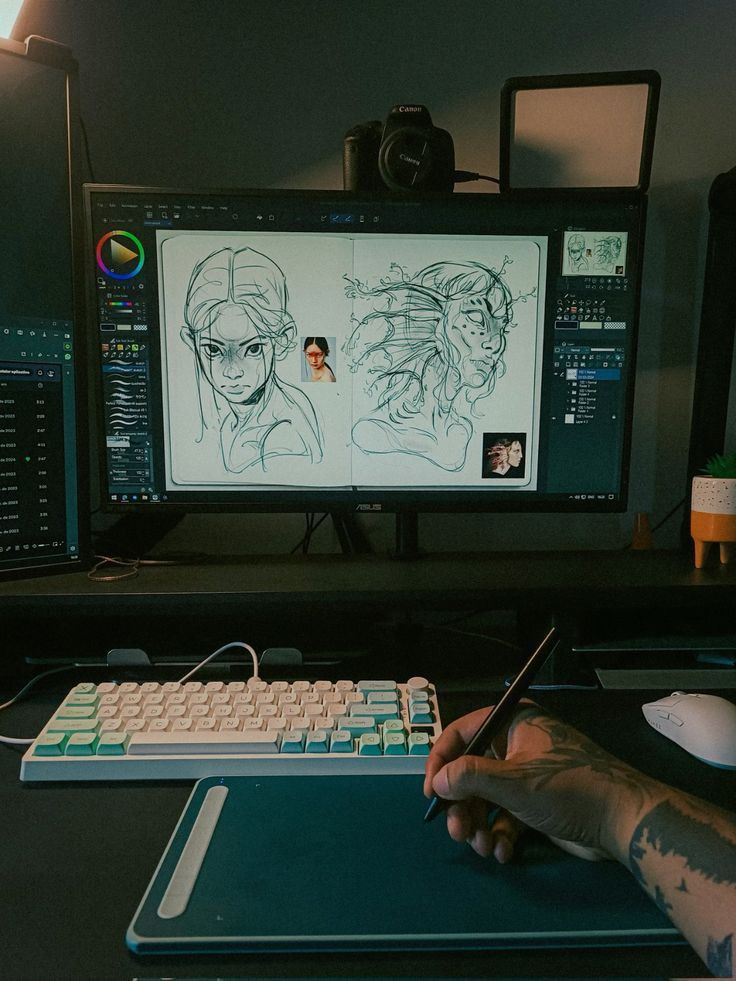
Work with separate layers for the flame, glow, sparks, and cast light. This keeps the effect editable and prevents one oversized airbrush pass.
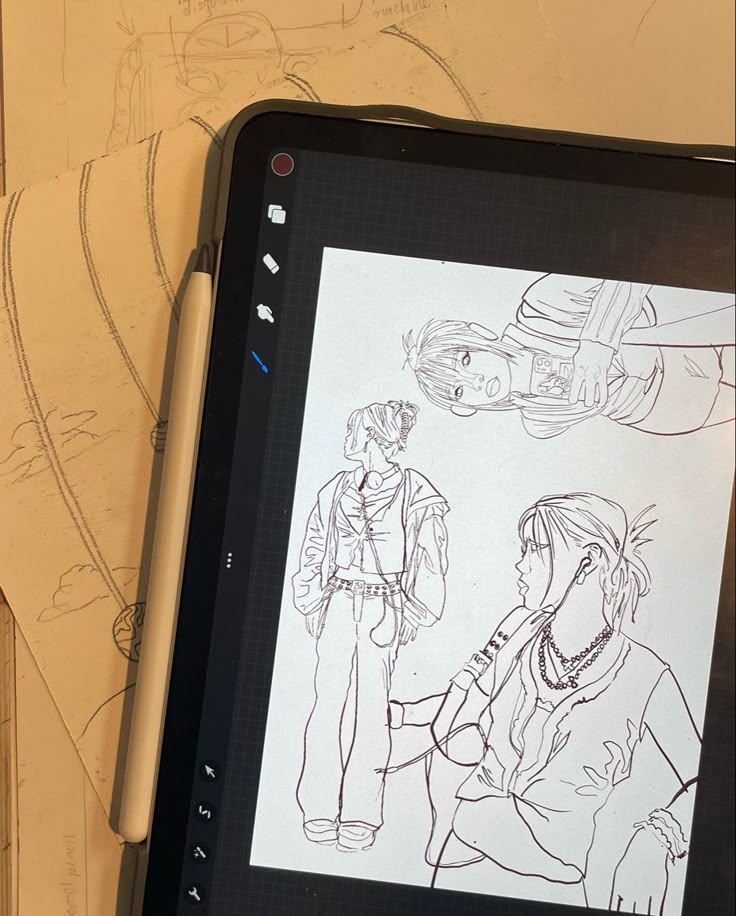
Test a hard round brush before downloading specialty fire brushes. A simple brush makes you solve shape and value instead of relying on texture.
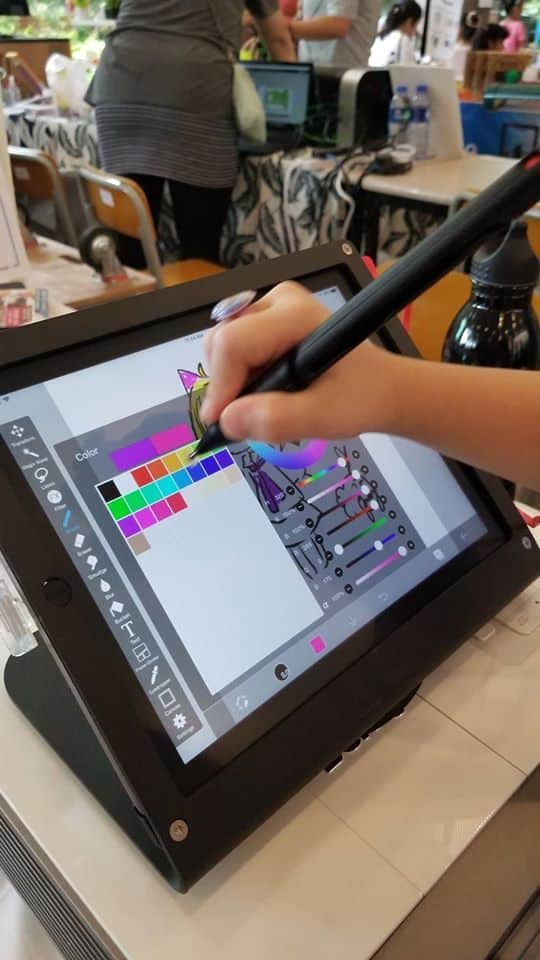
Pen pressure is useful for tapering flame tips. Pull quick strokes upward, then clean the silhouette at normal zoom rather than polishing while magnified.
Fire drawing FAQ
Q: How do you draw a simple fire?
A: Draw a wide, uneven base and pull two or three tapered flame tongues upward. Add a smaller inner shape for the hottest area, then erase any repeated peaks that make the flame look symmetrical. For color, keep the center pale yellow, move through orange, and use red only near cooler outer edges or embers.
Q: How do you make fire look realistic in a drawing?
A: Start with value, not texture. The flame core should be the lightest area, the surrounding scene much darker, and nearby surfaces should catch warm reflected light. Vary the flame edges: some should be sharp, others lost in smoke or glow. A few sparks help, but too many turn the drawing into visual noise.
Q: What colors should I use for a fire drawing?
A: A practical palette is pale cream, yellow, yellow-orange, orange-red, and a deep red-brown for embers. Blue can appear near hot gas flames or in stylized work. Keep the brightest color inside the flame and reserve the darkest value for the background, fuel, smoke pockets, or charred material.
Q: How do you draw a cute little flame?
A: Use one rounded outer flame with two or three soft peaks, then place a smaller yellow flame inside. Add a tiny face only after the silhouette reads clearly. Large eyes and a small mouth work well, but keep the features away from the pointed edges so the character does not feel cramped.
Q: How do you sketch a bonfire?
A: Begin with two or three crossed logs, then place the widest part of the flame where the logs meet. Draw several overlapping flame tongues, add dark gaps between the logs, and scatter a few embers above. A ring of stones and a soft pool of light on the ground give the bonfire scale and context.
Q: Can you draw fire with just a pencil?
A: Yes. Leave the flame core as clean paper and shade the surrounding shapes instead. Use a 2B pencil for smoke, charred logs, and the dark background, then lift soft glow with a kneaded eraser. Avoid outlining the entire flame in black; broken edges and value contrast look more convincing.
Q: How do you make digital fire glow?
A: Paint the flame on a hard-edged layer first, then add a separate soft glow layer underneath or around it. Keep the center almost white, use saturated orange at the edge, and paint warm cast light onto nearby forms. Screen or Add modes can help, but the glow should support a strong value structure rather than replace it.
More fire drawing lessons and references
For a second way to break down the basic silhouette, compare the Skip to My Lou fire tutorial with the Easy Drawing Guides fire tutorial. Both are useful for checking whether a beginner flame can be reduced to a few readable steps.
The Art Projects for Kids flame lesson keeps the shapes especially simple, while the Art by Ro flame drawing guide shows another step-by-step approach to stylized flames. These references are best used for comparison, not for copying one outline repeatedly.
Final fire drawing check
- The flame has a clear source and rises from it.
- The outer silhouette is uneven without becoming random noise.
- The center is lighter than the surrounding orange, red, smoke, or fuel.
- Nearby forms receive warm reflected light.
- Sparks and smoke support the movement instead of hiding the flame.
- The drawing still reads clearly as a thumbnail.
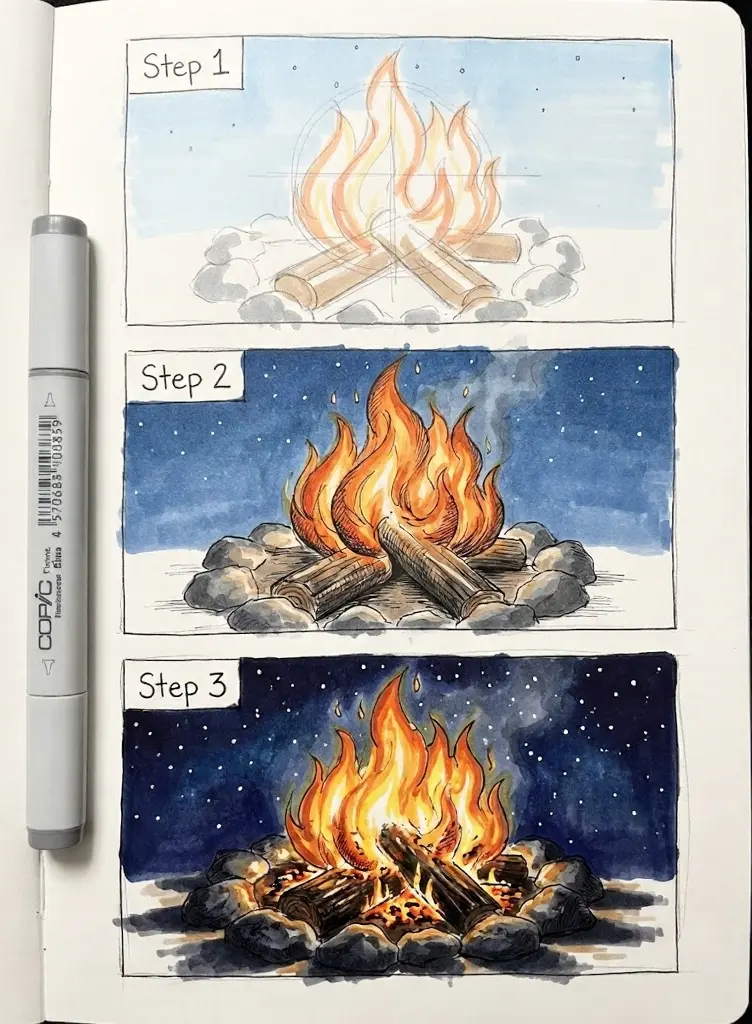
The mixed-media finish works because watercolor handles the broad night wash while markers sharpen the flame, logs, and brightest reflected edges.
What to draw next
Choose one contained subject, such as a candle or campfire, and draw it three times: outline only, graphite value study, and full color. That short sequence teaches more than polishing one complicated explosion before the light structure is understood.
- 12.3Kshares
- Facebook0
- Pinterest12.3K
- Twitter0
- Reddit0