Drawing legs can be challenging due to their complex anatomy and varied muscle structures, but understanding the basics will make the process much easier. Focusing on the skeletal framework and key muscle groups helps you capture accurate proportions and natural movement in your leg drawings. This knowledge creates a solid foundation whether you want to sketch simple shapes or detailed, realistic legs.
By breaking the anatomy into manageable sections like the upper leg and lower leg, you can practice each part separately and build confidence. Exploring different leg shapes, angles, and poses will also develop your skill in rendering both male and female legs with correct musculature and tension. The right reference and step-by-step strategies can guide you through these stages efficiently.
Key Takeways
- Understanding basic leg anatomy improves drawing accuracy.
- Breaking legs into sections simplifies complex shapes.
- Practicing varied poses sharpens your overall skill.
Leg Anatomy Fundamentals
Understanding the leg’s underlying structure helps you create accurate and dynamic drawings. Focus on the interplay between muscles, bones, and joints to capture realistic movement and form.
Major Muscle Groups of the Leg
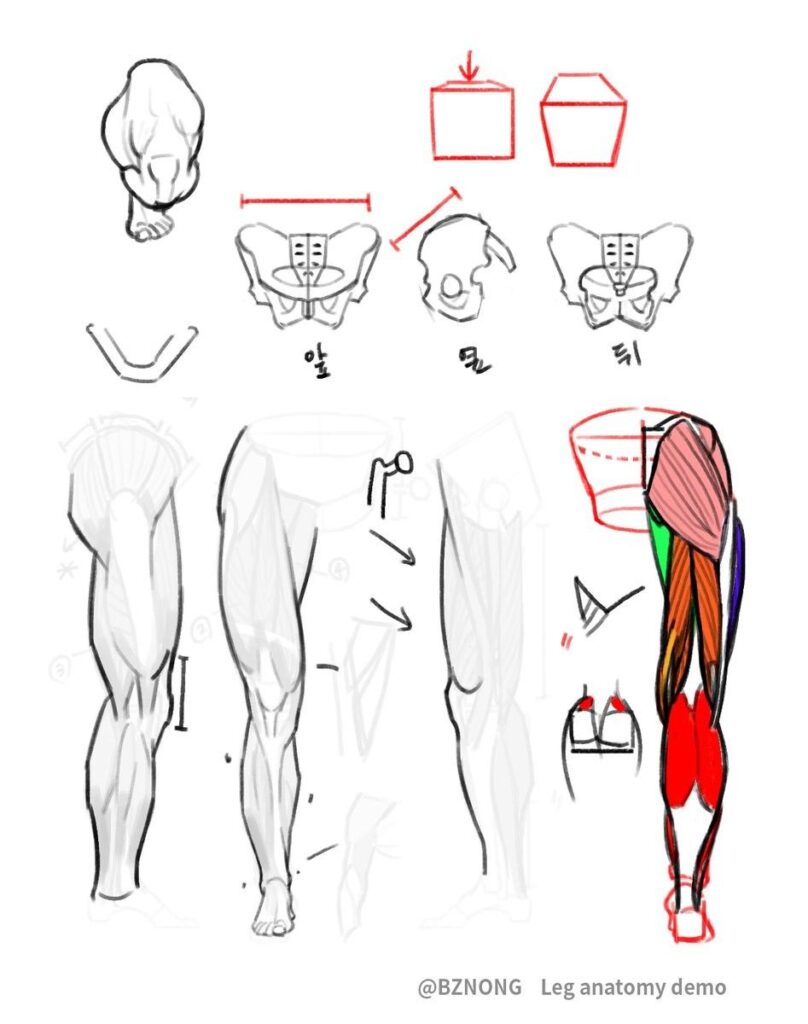
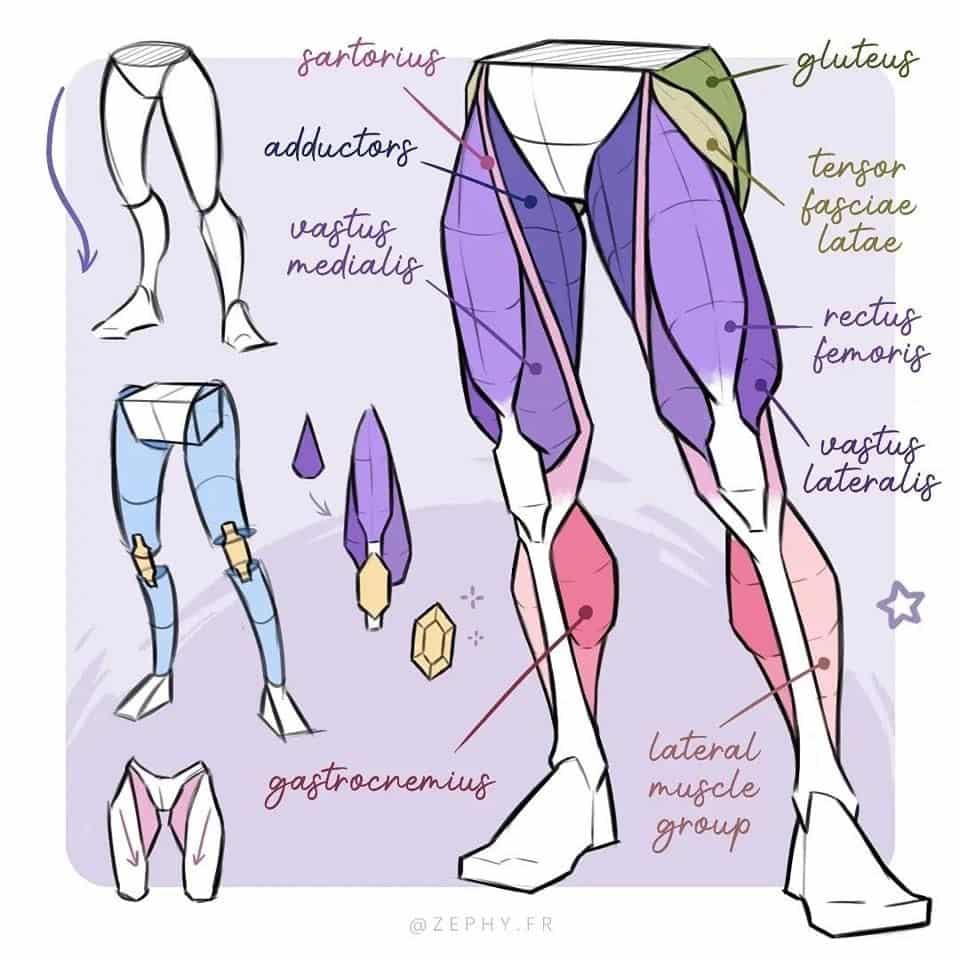
The leg contains several major muscle groups that define its shape and function. In the front, the quadriceps group works to straighten the knee and includes four muscles, the largest being the rectus femoris. On the back, the hamstrings control knee bending and hip extension.
The lower leg muscles include the gastrocnemius and soleus, which form the calf and enable foot movement. These muscle groups create visible contours you should emphasize depending on the leg’s position or tension.
Bone Structure and Landmarks
The femur is the longest bone in your leg, supporting most of the weight. It extends from the hip to the knee, with a slightly curved shaft important to note for realistic leg shaping.
Key landmarks include the medial and lateral condyles at the femur’s lower end, connecting to the knee joint, and the tibial tuberosity below the knee. The fibula runs parallel to the tibia on the lower leg’s lateral side, offering important form details.
The Knee Joint and Patella
The knee joint is where the femur connects with the tibia and fibula, functioning as a hinge for bending and straightening. It is stabilized by ligaments but visually defined by the patella, or kneecap.
The patella sits within the tendon of the quadriceps and moves slightly during leg motion. Its shape and position affect shadows and highlights near the front of the knee and are essential for conveying both tension and relaxation in your drawing.
Drawing the Upper Leg
When drawing the upper leg, focus on the underlying bone structure and how the major muscle groups shape the form. Pay attention to proportions, muscle placement, and how these elements change with different poses. Understanding these will improve the accuracy and realism of your sketches.
Thigh Structure and Proportion
The femur is the central bone of the thigh and sets the foundation for your drawing. It is the longest and strongest bone in the body, running from the hip to the knee. When sketching, begin by framing the thigh’s overall length and angle with simple lines following the femur’s direction.
Proportionally, the upper leg is roughly twice the length of the lower leg. The thigh also has a wider, rounded upper section near the hip, tapering slightly toward the knee. This taper helps establish the flow of your drawing and keeps the leg looking natural.
Use basic shapes to block out the thigh before adding muscle details. Visualize the thigh as a cylinder with a slightly wider top and a narrowing bottom to capture its volume.
Quadriceps: Form and Function
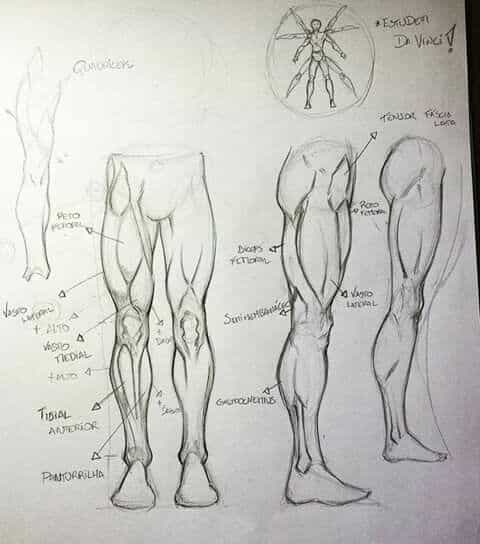
The quadriceps muscle group dominates the front of the thigh and controls knee extension. It consists of four separate muscles, with the vastus lateralis positioned prominently on the outer side.
When drawing the quadriceps, observe their insertion points around the knee and how they bulge over the femur. This muscle group has a firm, rounded shape but changes with flexion and extension.
Highlight the vastus lateralis as it wraps from the side to the front. This muscle often gives the thigh its widest appearance. Be mindful of how light and shadow emphasize its volume, especially in dynamic poses.
Understanding the Hamstrings
The hamstrings run along the back of the thigh and function primarily to bend the knee and extend the hip. This group includes multiple muscles with long, tendinous fibers that affect the leg’s silhouette.
In drawing, the hamstrings create a visible groove on the inner back thigh and flare slightly toward the knee. They contrast with the quadriceps by appearing softer and less bulky but remain essential for defining leg movement.
Accurately placing the hamstrings requires understanding their relationship to the femur and adjacent muscles. Their shape shifts with knee position, so study bent and extended poses to capture their fluid form.

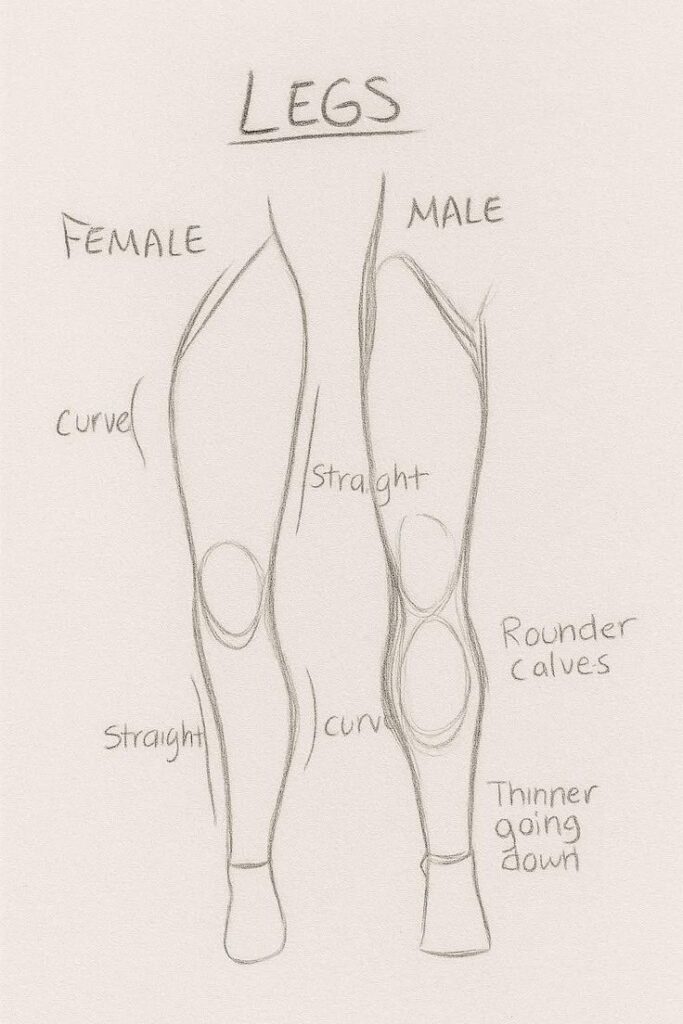
Drawing the Lower Leg
Understanding the structural elements of the lower leg is essential for accurate and dynamic leg drawings. Focus on how muscle groups shape the form and how contouring helps define volume without overwhelming details.
Calf Muscles and Anatomy
The calf is dominated by two main muscles: the gastrocnemius and the soleus. The gastrocnemius forms the visible bulk of your calf and has two heads giving it a distinctive, rounded shape. It attaches above the knee and tapers down to the Achilles tendon. The soleus lies beneath and adds thickness to the lower part of the calf, visible mainly from the side.
When drawing, emphasize muscle definition by showing the curve and tension between these muscles, especially as they flex or extend. The shape changes with leg position, so observe muscle overlap and where shadows naturally fall. The Achilles tendon is a key landmark, connecting the calf muscles to the heel, creating a strong line of tension.
Lower Leg Contour Techniques
To capture the lower leg’s form, begin by sketching basic geometric shapes to represent the shin bone (tibia) and surrounding muscles. Use simple cylinders and ovals to map volumes before adding details.
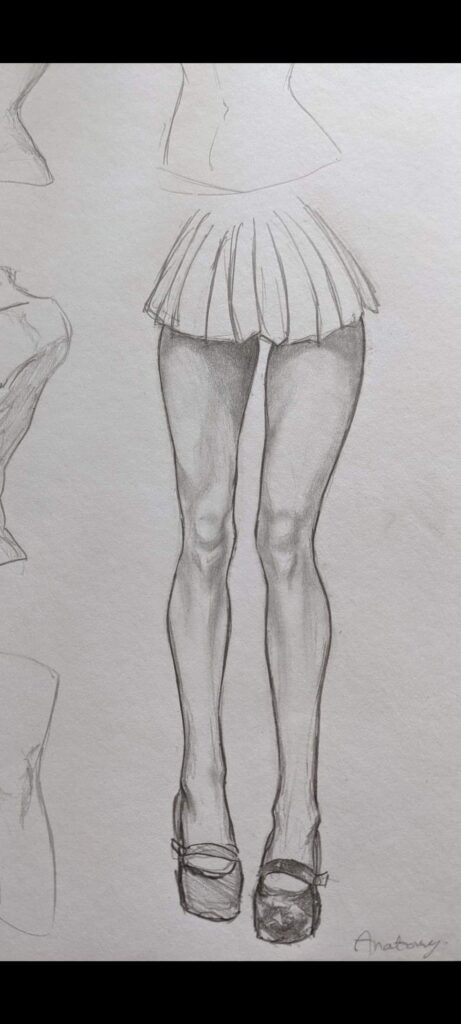
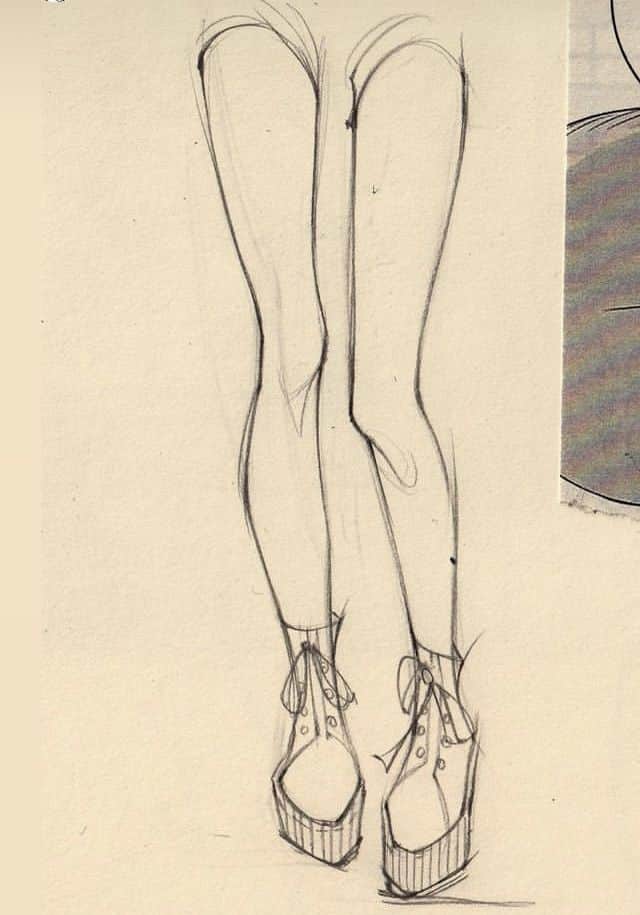
Pay attention to the contours (the outline and surface curves). The front of the lower leg should reflect the tibia’s straight edge, often visible under the skin. The calf’s rounded bulk contrasts this with softer curves at the back and sides. Utilize varied line thickness to show muscle boundaries versus bone edges.
You can create a rhythm by connecting simple shapes with smooth flowing lines to suggest natural muscle flow and skin folds. Avoid overly rigid or harsh outlines since the leg is a combination of firm bones and pliable muscles.
Step-by-Step Methods for Leg Drawing
To draw legs accurately, you need a clear process that builds from simple shapes to detailed anatomy. Understanding how to construct the leg, apply correct proportions, and define muscles will improve your leg drawing skills.
Basic Construction Techniques
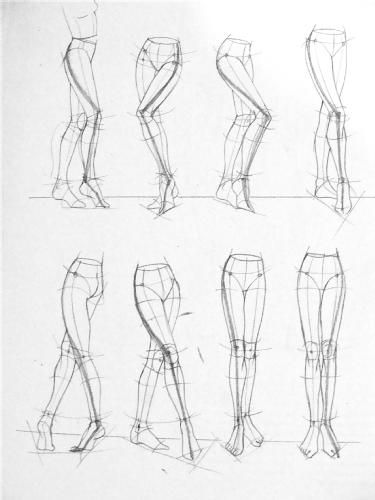
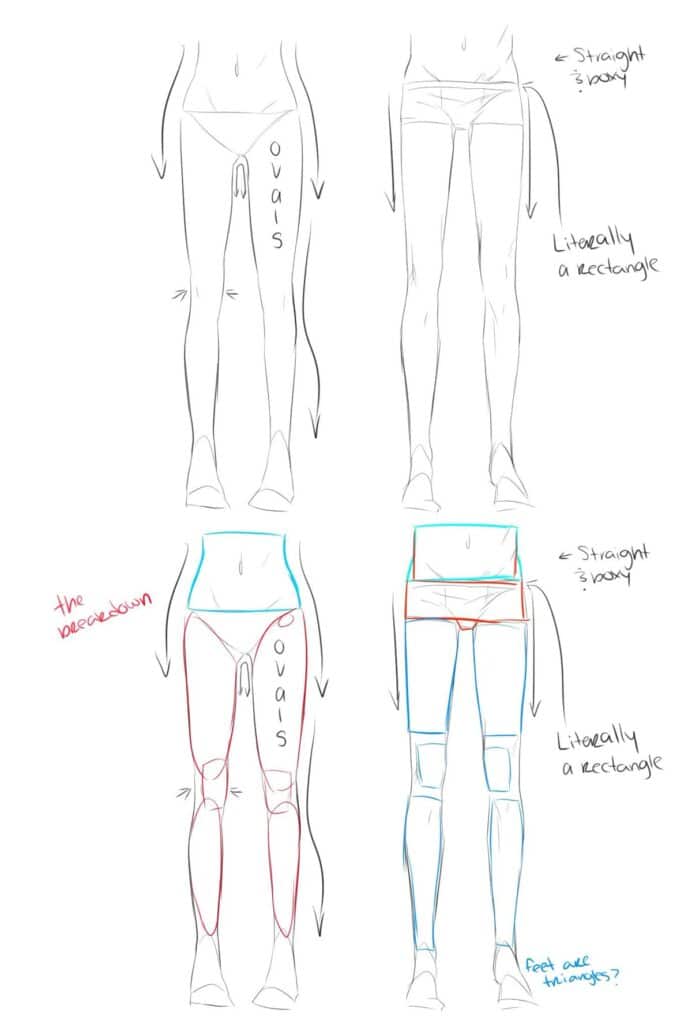
Start by breaking the leg into simple shapes to outline its structure. Use cylinders for the thighs and calves to establish volume and orientation. The knee can be represented by a small oval or circle to mark its position clearly.
Begin with a light sketch using curved lines to map the overall pose and movement. Keep your lines flexible to adjust posture and balance easily. This approach reduces complexity by focusing on basic shapes before adding details.
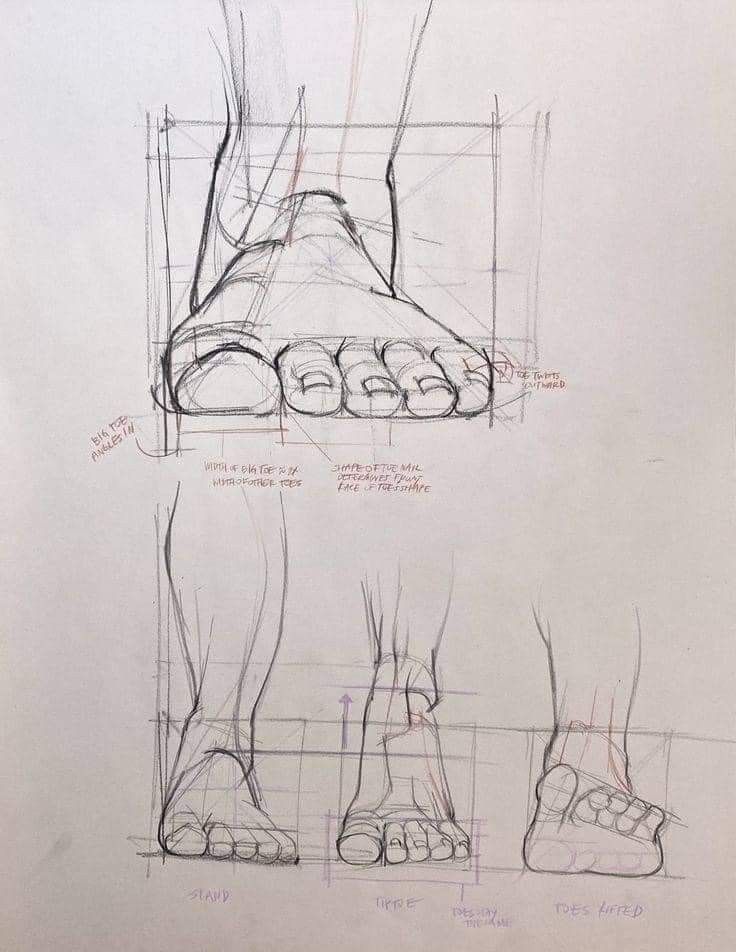
Visualize the leg in segments: upper leg (thigh), knee joint, and lower leg (calf). Position the foot relative to the lower leg using simple forms like wedges or triangles. This helps in maintaining correct angles and flow.
Applying Proportions and Rhythm
Correct proportions are essential for realism in your leg drawing. The thigh is generally about the same length as the lower leg, from knee to ankle. Measure and mark these lengths proportionally to your figure’s scale.
Pay attention to the natural rhythm of the leg’s curves. The combination of convex and concave curves creates a smooth, dynamic shape. Avoid straight, rigid lines, which can make the legs look stiff.
Use landmarks like the kneecap, ankle bones, and muscle bulges to maintain consistent proportions. Keep in mind these points when shifting the leg’s position to preserve anatomical accuracy.
Adding Muscle Definition
After the basic structure and proportions, focus on muscle anatomy to create a realistic leg drawing. Understand key muscles that influence the leg’s surface shape, such as the quadriceps, hamstrings, and calves.
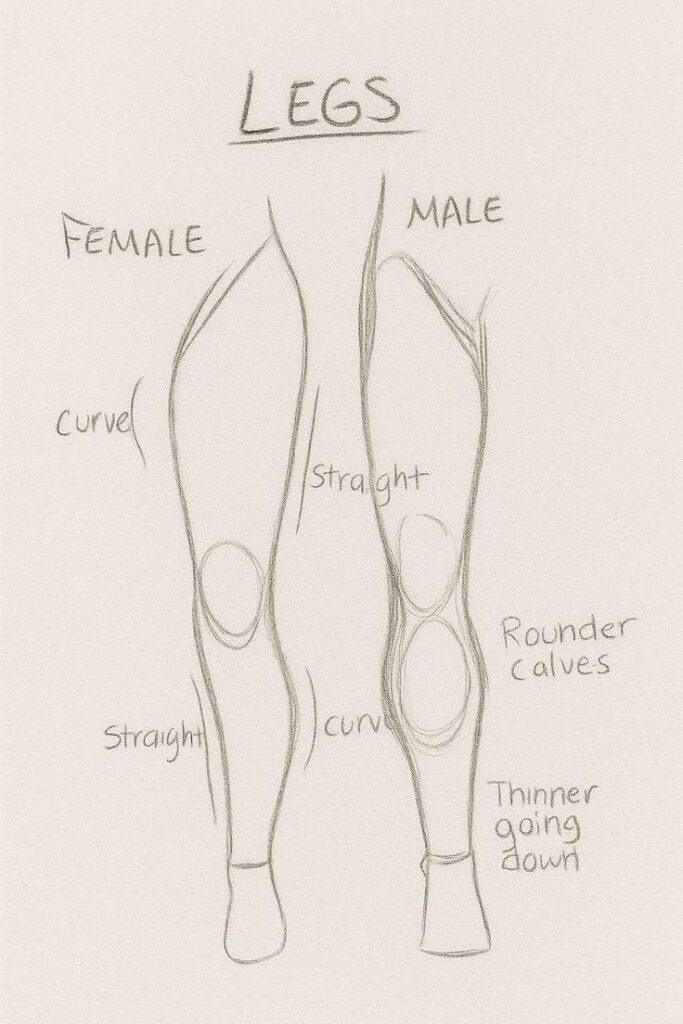
Use lighter shading or fine lines to mark muscle groups and their direction. Show how muscles connect near joints like the knee and ankle by drawing subtle curves instead of hard edges.
Avoid over-defining muscles in beginner drawings; instead, aim for smooth transitions between form and anatomy. Highlight major muscle shapes without cluttering your drawing with excessive detail.
Leg Anatomy Drawing Ideas for Figure Drawing
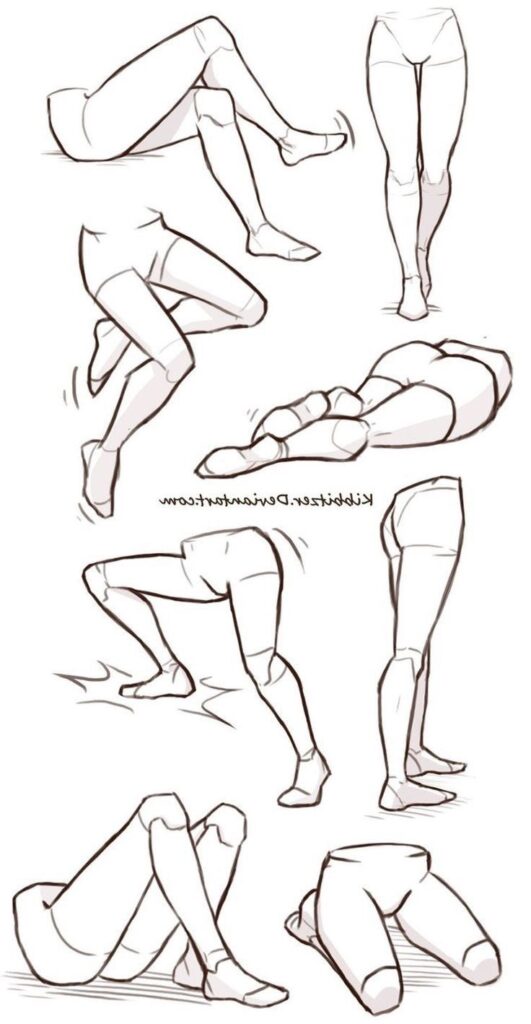
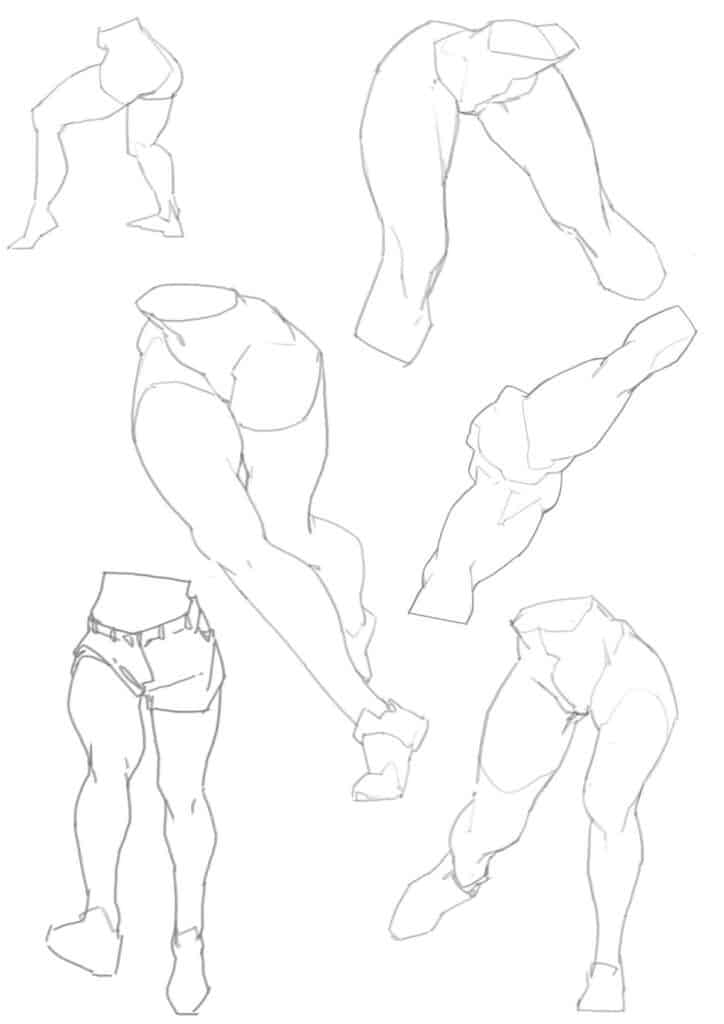
When drawing legs, understanding muscle groups, bone structure, and natural movement is essential. Your goal is to capture both the form and function that define realistic figure drawing. Applying anatomy knowledge will improve your ability to depict varied poses and character styles.
Dynamic Poses and Movement
To create dynamic leg poses, focus on key joints: hip, knee, and ankle. These control leg bending and rotation, affecting silhouette and balance.
Observe how muscles stretch or contract in different actions like walking, running, or crouching. For example, the quadriceps tighten when the knee extends, while the hamstrings contract during flexion.
Use simplified lines to map the leg’s basic shapes—cylinders for thigh and calf—with clear angles at joints. This helps break down complex anatomy into manageable segments.
Pay attention to weight distribution and how foot placement affects leg posture. Dynamic movement often exaggerates muscle tension or shifts limb alignment, which you can emphasize for realism.
Leg Anatomy for Character Design
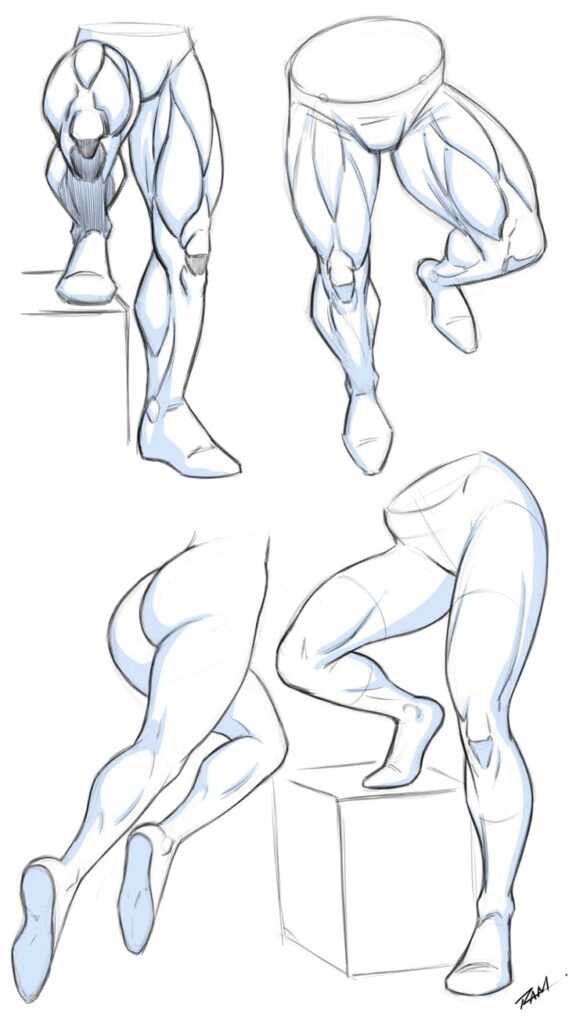
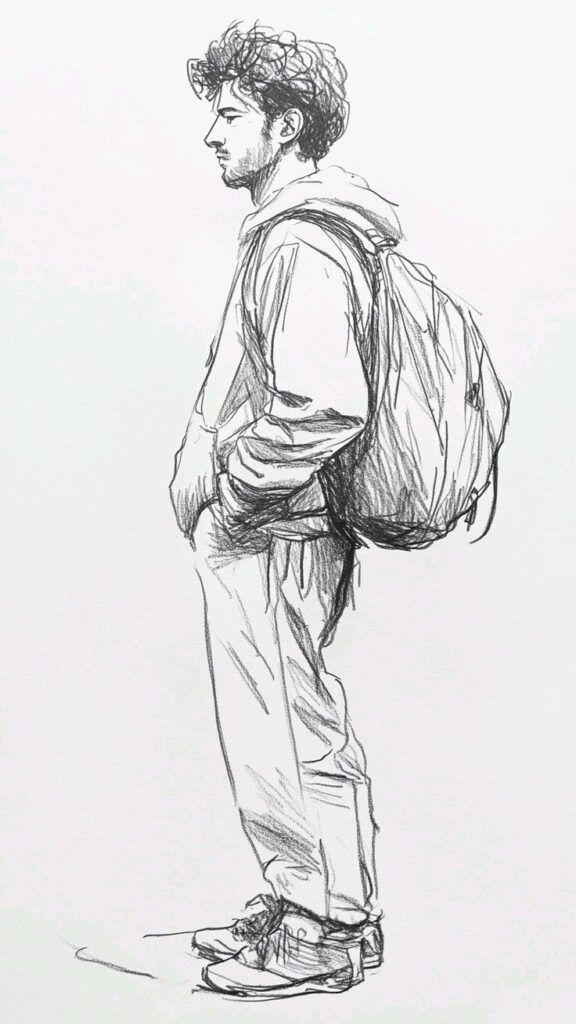
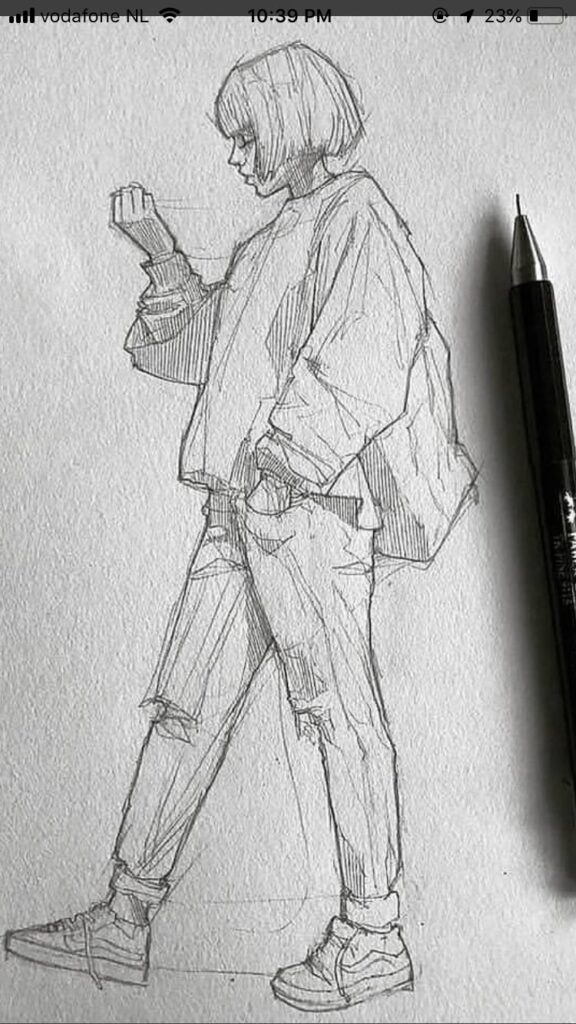
When designing characters, leg anatomy must serve both function and style. Start with the underlying skeletal landmarks such as the femur and tibia for proportion accuracy.
Adapt muscle definitions based on character traits. For example, robust calves and thighs suit athletic characters, whereas slender limbs work for more delicate or stylized figures.
Remember to consider flexibility and range of motion depending on character type—this affects how legs bend and pose naturally.
Use layering: begin with bones, then add simplified muscle masses, and finally refine skin and surface details like tendons or visible veins. This stepwise approach ensures your drawings remain anatomically sound yet adaptable to stylistic choices.
Practice Tips and Unique Inspiration
Developing skill in leg anatomy drawing involves trying varied positions, balancing accuracy with artistic style, and making the best use of references. You’ll find it useful to challenge yourself with dynamic poses and refine your approach using tools that enhance both realism and creativity.
Exploring Creative Leg Poses
Experiment with a range of leg poses to improve your understanding of muscle tension and weight distribution. Start with basic stances like standing or walking, then move to more complex poses such as crouching or running. This variety helps you observe how muscles stretch and compress.
Use poses that emphasize balance and movement, which often reveal the subtle shifts in anatomy during activity. Incorporate elements from leg day workouts or athletic movements you’ve seen to capture realistic muscle engagement.
Sketching quick gesture drawings of legs in motion also sharpens your ability to capture natural forms. Rotate angles frequently, including 3/4 views and foreshortened perspectives, to deepen your spatial awareness.
Incorporating Realism and Stylization
Striking a balance between anatomical accuracy and stylistic choices will make your drawings stronger. Focus on core muscle groups and bones while allowing some simplification to keep your work accessible and visually appealing.
You might choose to emphasize muscle definition for a more realistic look or smooth out details for a minimalist style based on your project needs. This flexibility is crucial when adapting to different types of art, from detailed studies to comic or character design.
Use simplified shapes—cylinders and spheres—to block out leg forms before adding layers of muscle and skin detail. This technique helps you retain proper proportions whether you lean toward realism or stylization.
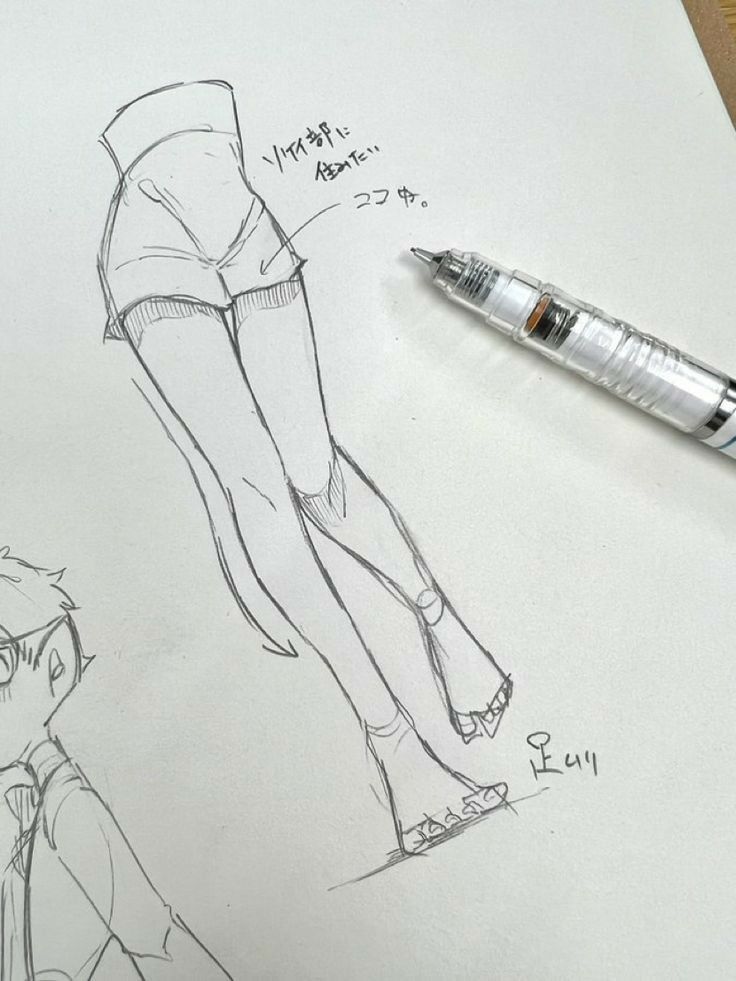
Using References Effectively
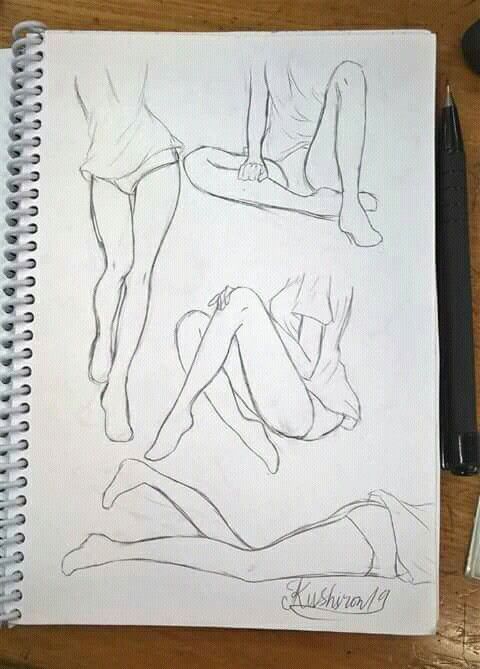
References are essential for consistent and accurate leg drawings. Use photos, anatomy books, or online sources focused on muscular and skeletal structures during leg day or physical activity.
Analyze how light and shadow define muscle groups and tendons in your references. You can create a reference checklist to ensure you cover key aspects like knee shape, calf curvature, and ankle positioning.
Avoid relying on one source; combining different references helps you understand varied body types and motions. Regular review of your references during your drawing sessions sharpens your detail recognition and supports muscle memory.
- 3shares
- Facebook0
- Pinterest0
- Twitter3
- Reddit0


