Drawing arms and shoulders can be tricky because of how many muscles and bones overlap and move in different ways. Artists often need good references to capture the right shapes and poses, especially when showing different angles or action movements. Using clear arm and shoulder drawing references helps artists understand anatomy and improve their ability to create lifelike, dynamic characters.
Good references show not just the outer shape but also the muscle structure and the way shoulders connect with arms. This makes it easier to draw arms in various poses, from relaxed to raised or bent. Having access to strong visual examples saves time and builds confidence for artists of all levels.
Many tools and websites offer free or detailed pose models to help practice. These resources often include photos, 3D models, and tips for understanding the parts of the arm and shoulder, making it simpler to get better results.
Essential Anatomy For Arm And Shoulder Drawing
Understanding the bones, muscles, and joints in the arm and shoulder helps artists create realistic drawings. Knowing how these parts connect and move is key to capturing the arm’s natural shape and range.
Bone Structure Overview
The arm’s main bones are the humerus, radius, and ulna. The humerus runs from the shoulder to the elbow. The radius and ulna stretch from the elbow to the wrist, side by side.
The shoulder blade, or scapula, and the clavicle (collarbone) make up the shoulder girdle. These bones connect the arm to the torso. The scapula sits on the back and moves with the arm.
It’s helpful to remember the arm’s bones act like simple shapes: the humerus is a cylinder, connecting to spheres at the shoulder and elbow. This helps artists plan arm poses and angles clearly.
Major Muscle Groups
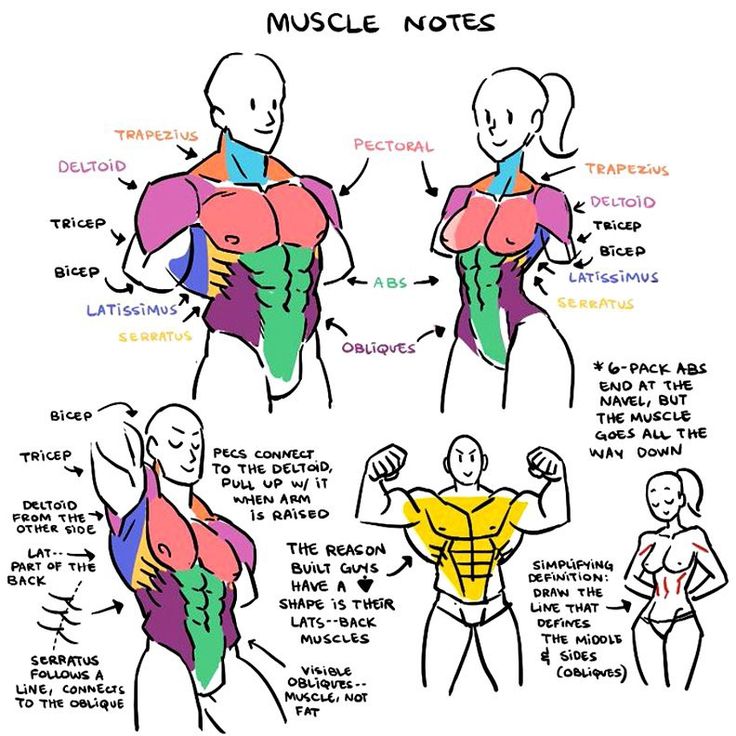
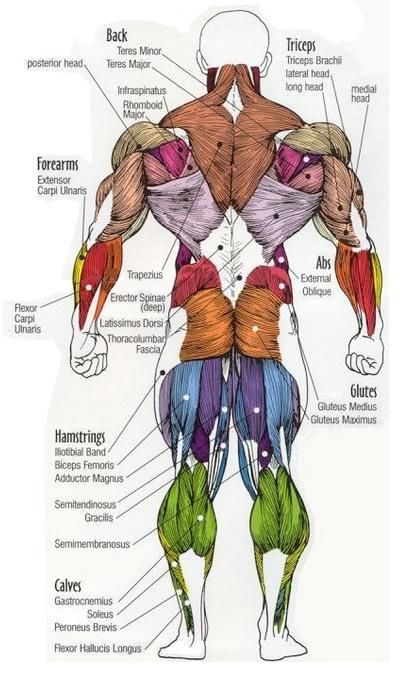
The arm and shoulder have key muscles artists must recognize. The deltoid forms the rounded shoulder and has three heads: front, middle, and rear. These heads wrap around the shoulder, producing most arm movements.
The biceps brachii sits on the front of the upper arm and flexes the elbow. Next to it is the brachialis, which also helps bend the arm but sits deeper.
On the back is the triceps brachii. It has three heads and straightens the elbow. Around the shoulder, smaller muscles like those in the rotator cuff stabilize and rotate the arm.
Joints And Range Of Motion
The shoulder joint is a ball-and-socket joint allowing a wide range of motion. The humerus fits into the scapula’s socket, letting the arm rotate, lift, and swing in many directions.
The elbow joint is a hinge joint, mainly bending and straightening the arm. It connects the humerus with the radius and ulna.
The wrist joint controls hand movement with smaller, flexible bones. These joints work together, so understanding their limits helps artists draw arms in natural, believable poses.
Proportions And Landmarks
Understanding the size and placement of the shoulder and arm parts helps to create realistic drawings. Knowing where to find key points on the body guides the artist in shaping the arm correctly. Different body types have unique proportions that affect how the arm looks and moves.
Shoulder To Arm Ratios
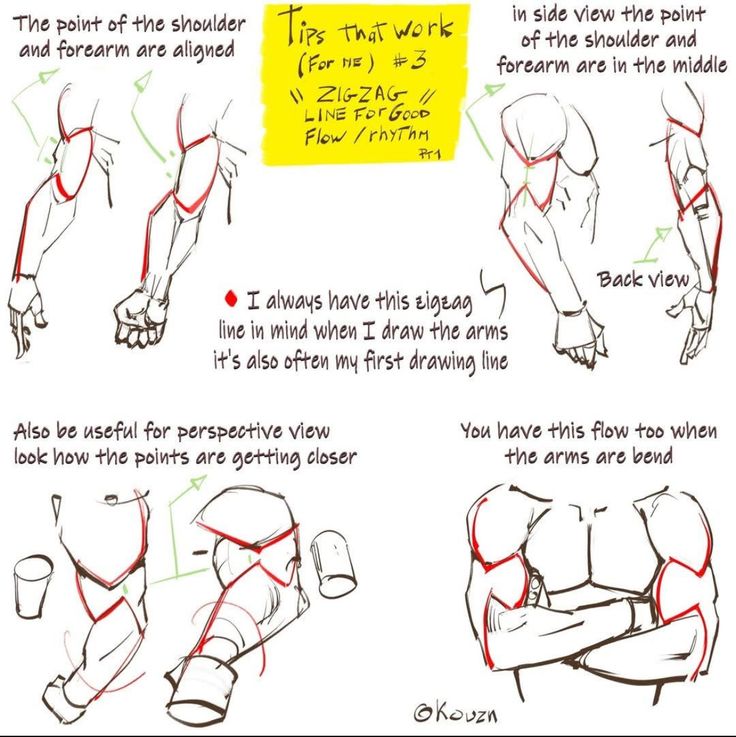
The shoulder width usually matches the length of one arm from shoulder to wrist. The upper arm (shoulder to elbow) and lower arm (elbow to wrist) are almost the same length.
The shoulder sits roughly as wide as two head widths. The arm bone lengths create a natural flow and help the figure look balanced. When the arm hangs down, the fingertips generally reach mid-thigh level.
Ratios like these help artists keep arms proportional and believable in drawings. Stretching or bending the arm may change appearance but not the overall length proportions.
Key Visual Landmarks
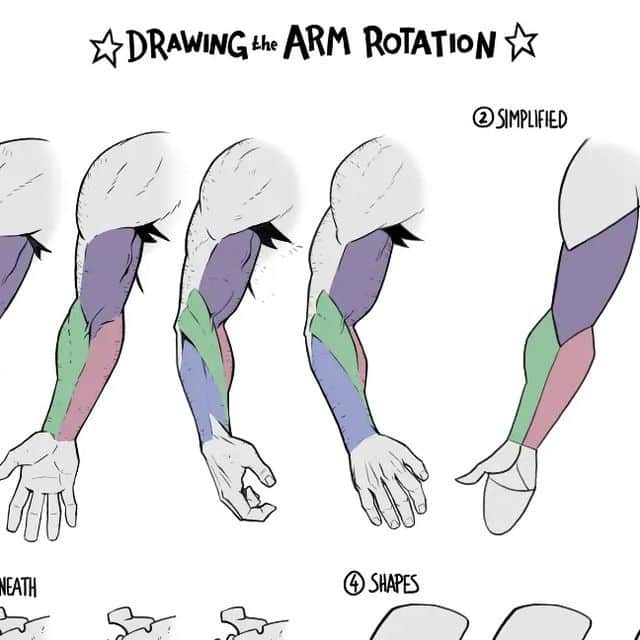
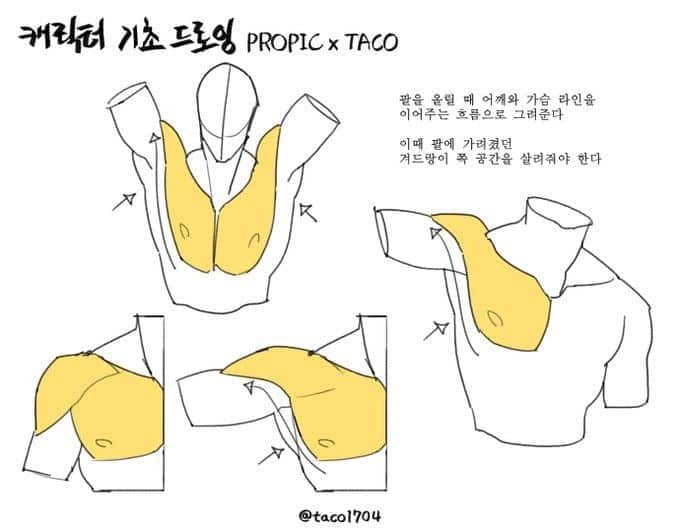
Certain points on the arm and shoulder guide drawing and movement. These landmarks include:
- Clavicle: The collarbone shapes the shoulder’s top edge.
- Acromion: The outer tip of the shoulder where the arm meets the body.
- Deltoid muscle: Covers the shoulder, giving its rounded shape.
- Elbow joint: The bend point that connects upper and lower arm.
- Wrist: Where arm meets the hand, allowing rotation.
Finding these helps position muscles and joints correctly. Shadows and muscle shapes follow these landmarks, making the form clear.
Variation Across Body Types
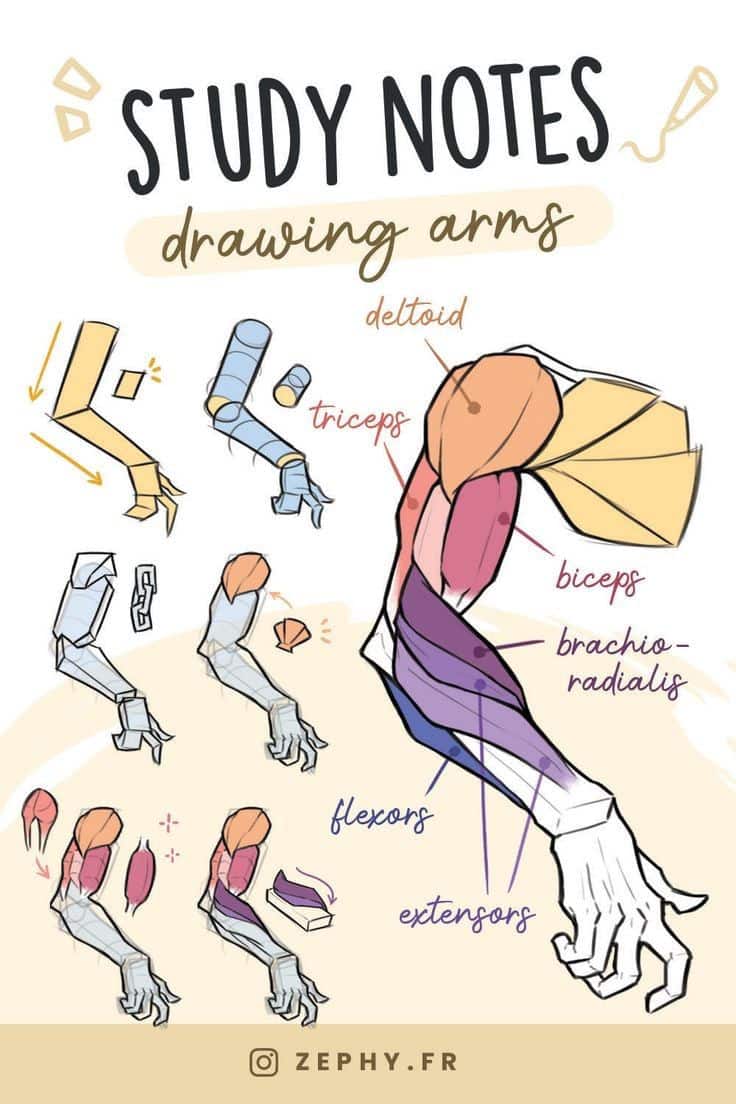
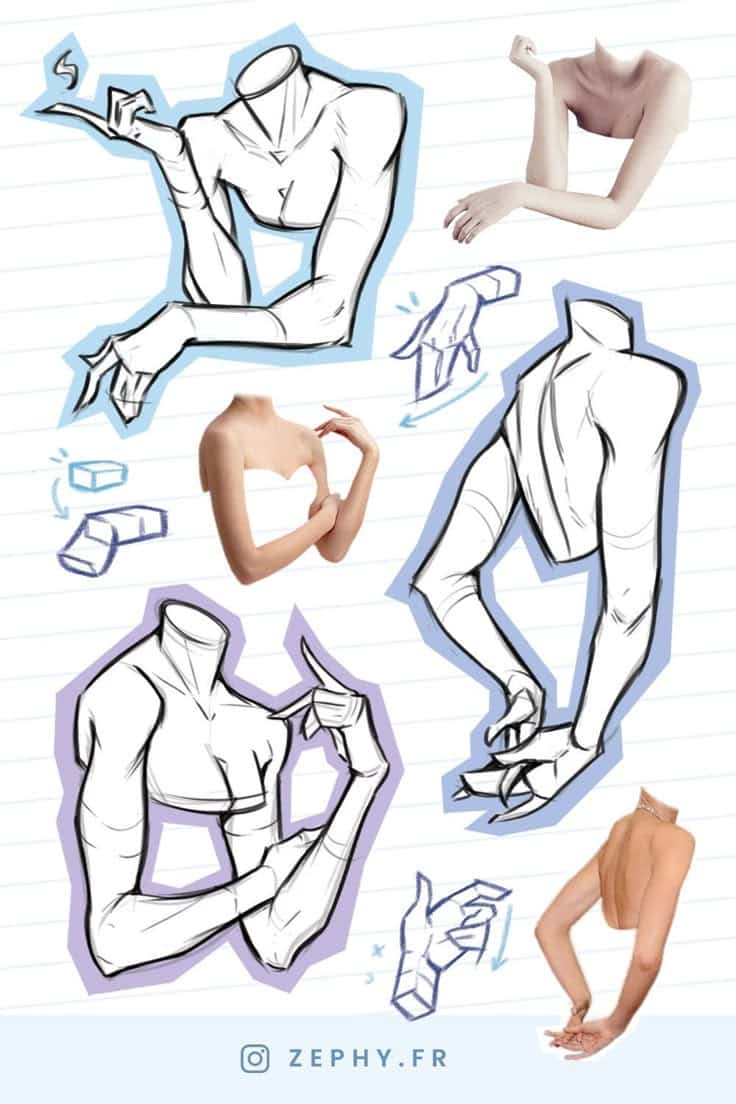
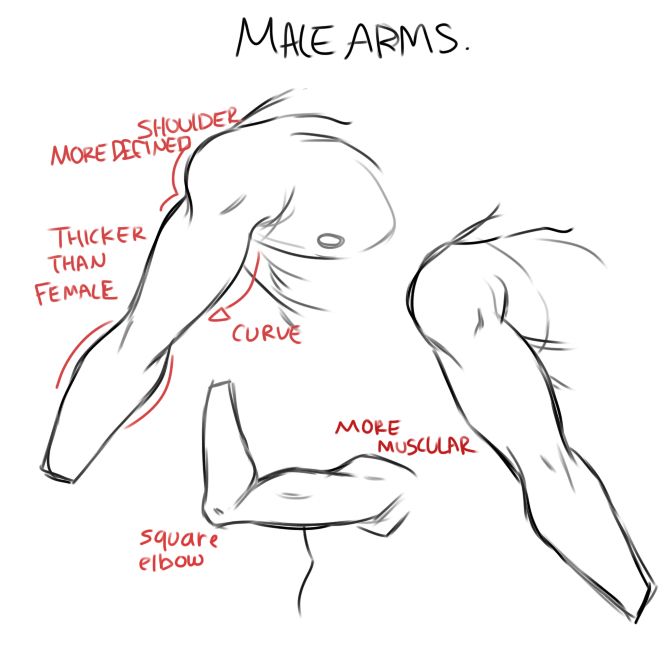
Arm and shoulder proportions change with age, gender, and body type. Men often have broader shoulders and thicker arms with more muscle mass. Women tend to have narrower shoulders and smoother arm shapes.
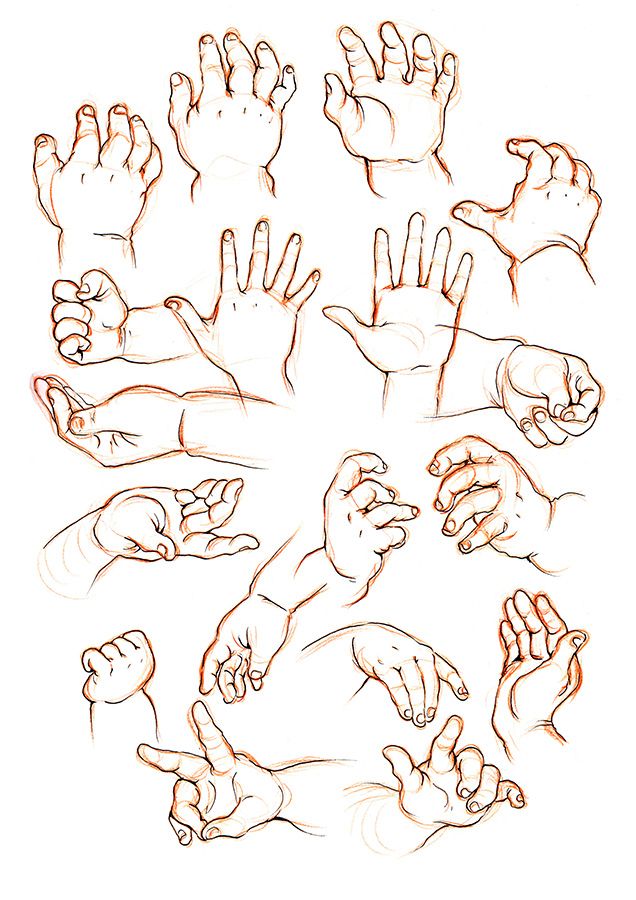
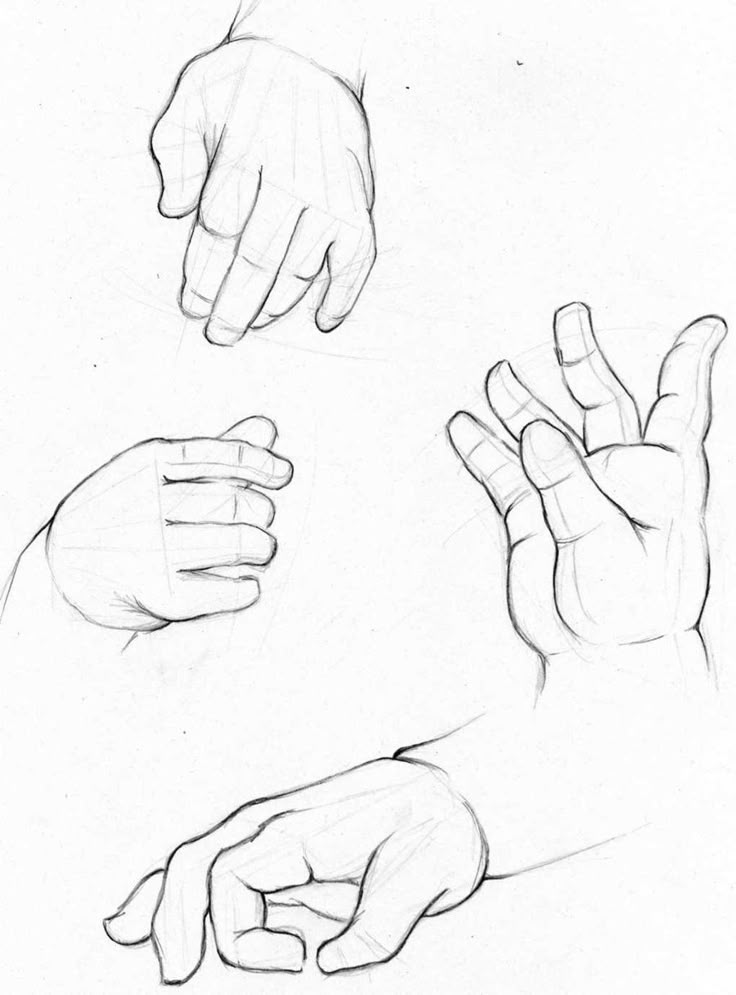
Children’s arms look shorter compared to their heads, as their bodies are still growing. Older adults may show looser muscles with softer outlines.
Artists should adjust proportions based on the character’s age, fitness, and gender to portray realistic diversity in arm shapes and sizes.
Dynamic Poses And Gestures
Capturing natural arm and shoulder movement requires understanding how muscles stretch, twist, and interact in different positions. Knowing how to show foreshortening and overlapping forms adds depth and realism. These details help bring energy and life to figure drawing.
Movement And Flexion References
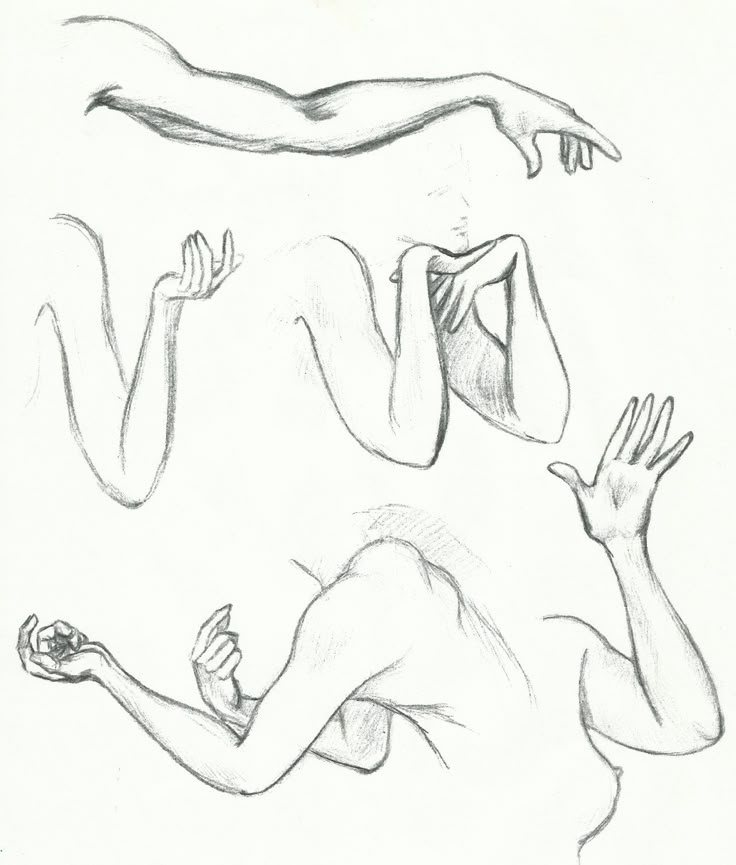
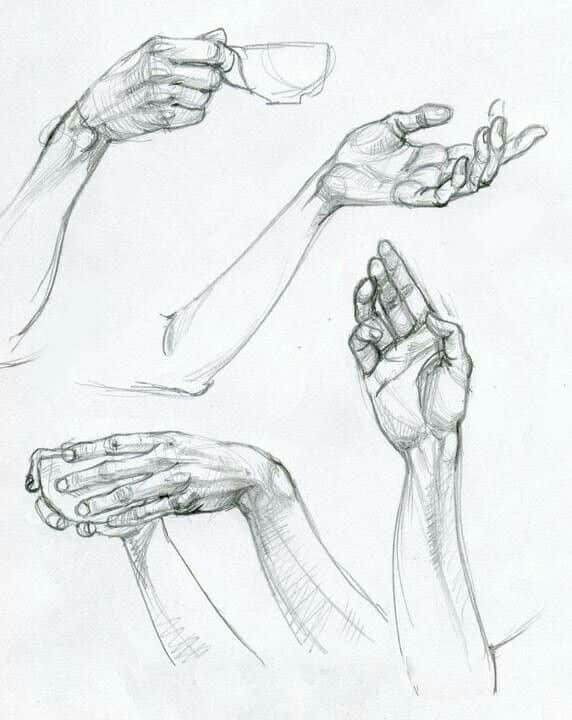
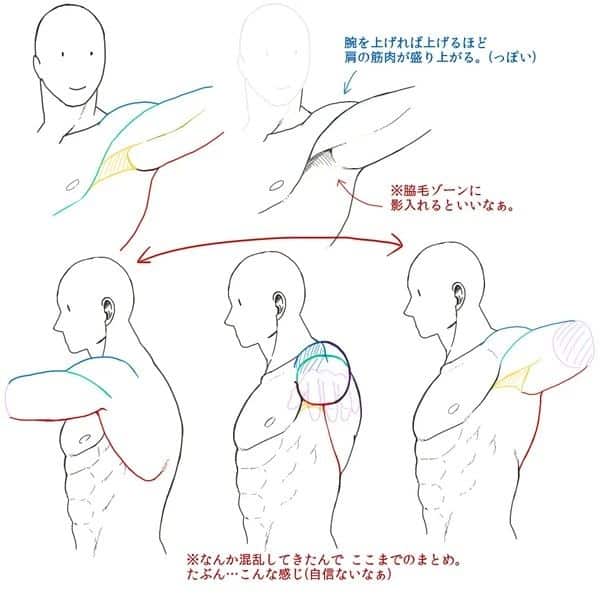
Arms and shoulders bend and flex in many ways, so references should show clear muscle shifts. When an arm bends at the elbow, the biceps tighten and shorten while the triceps stretch. The shoulder muscles also move depending on how the arm lifts or reaches.
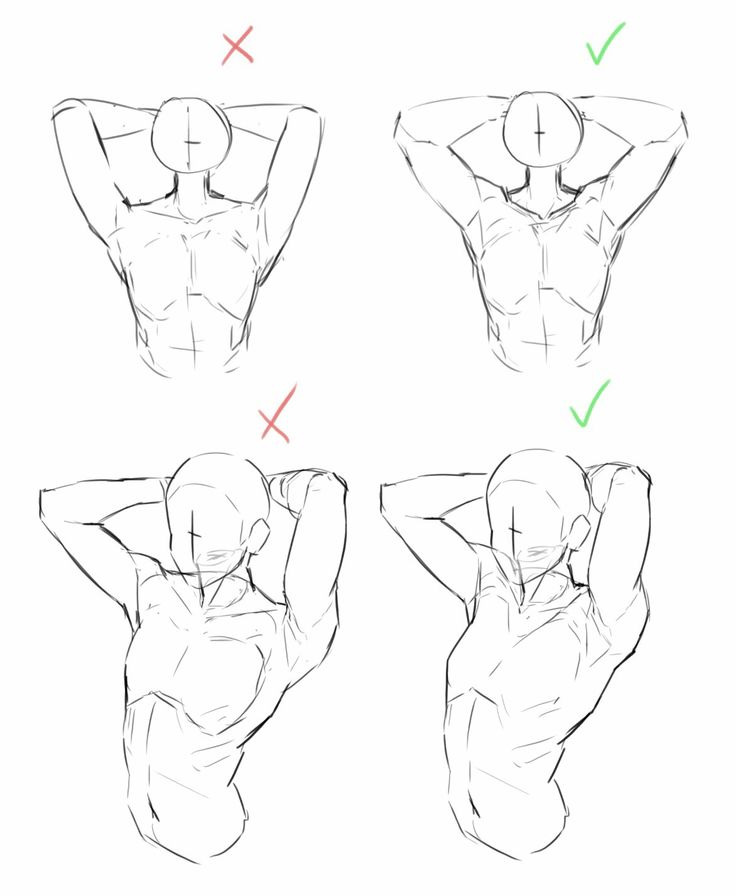
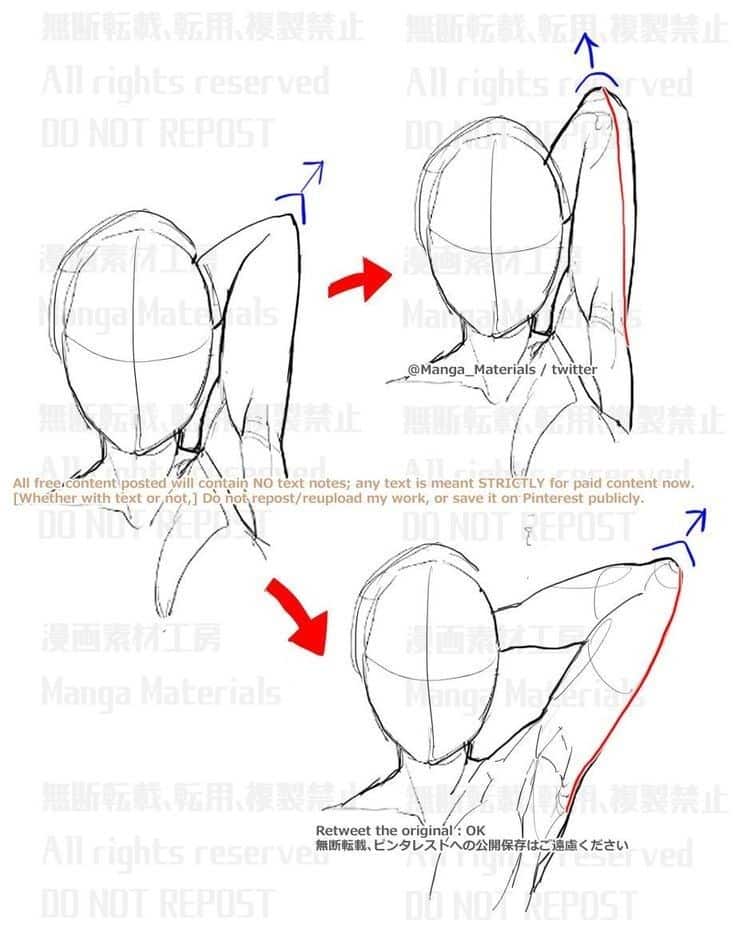
It helps to study photos or models that show arms in action—lifting, pushing, or pulling. Quick gesture drawings capture fluid movement and muscle changes better than static poses. Drawing these poses helps an artist understand the natural flow of arm movement and avoid stiff or unnatural shapes.
Twisting And Overlapping Forms
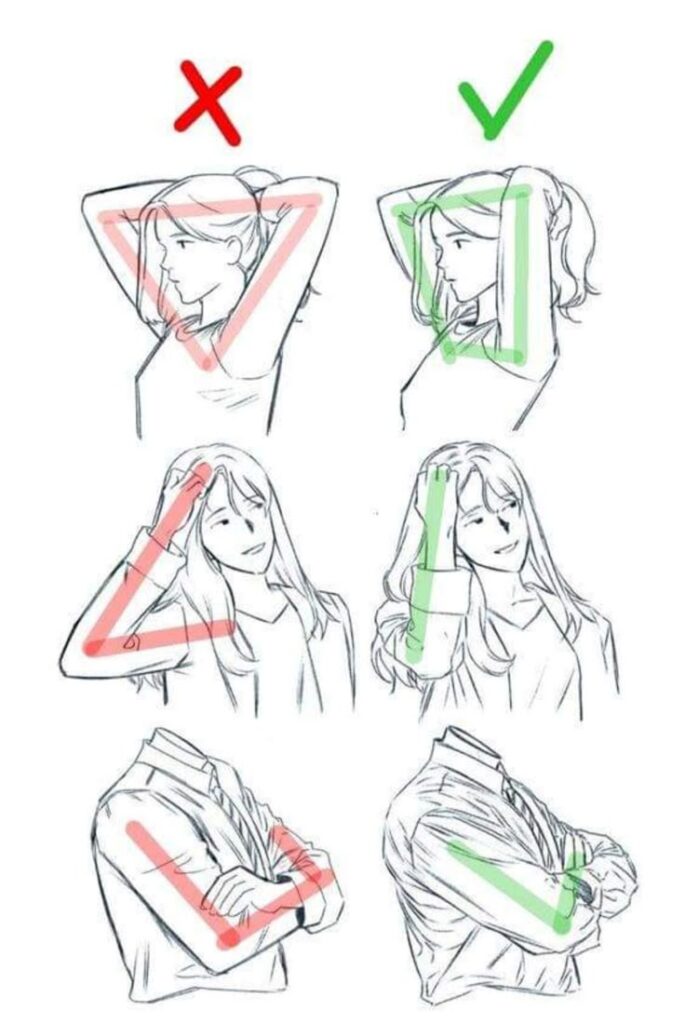
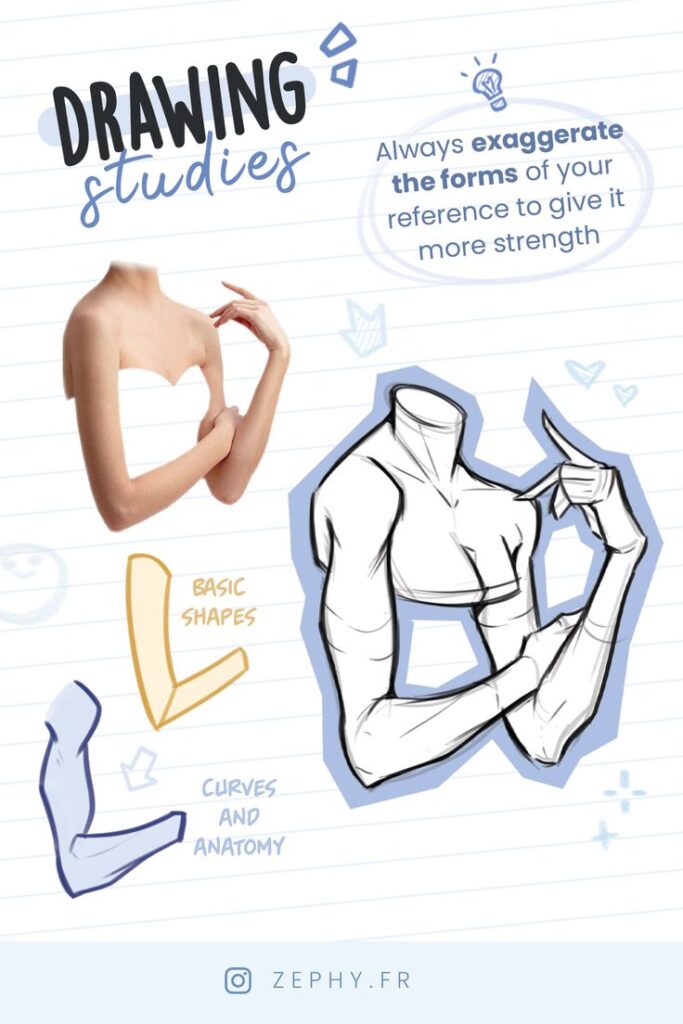
Twisting the torso or arm causes muscles to overlap and change shape. The deltoid muscles on the shoulder wrap differently when the arm twists, and the chest and back muscles push against each other.
References that show twisting arms reveal how bones and muscles shift layers in three dimensions. Overlapping forms create shadows and highlights, giving the drawing a solid and believable look. Artists should practice drawing these complex interactions to improve body dynamics and depth.
Foreshortening Techniques
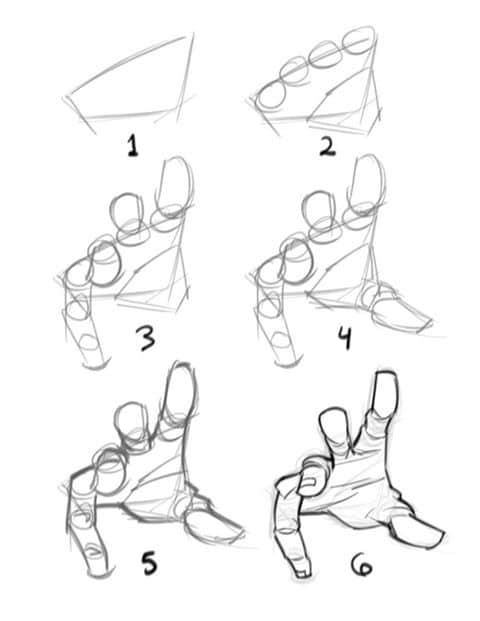
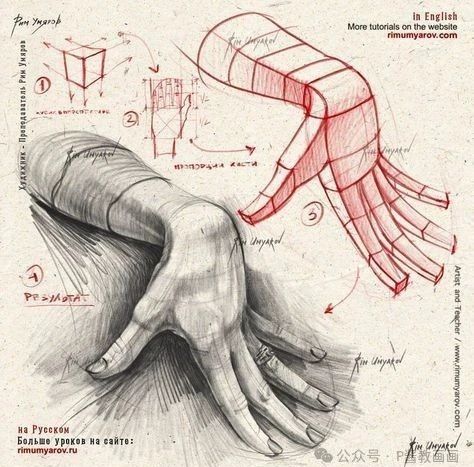
Foreshortening happens when parts of the arm or shoulder point toward or away from the viewer, making them look shorter. This effect can be tricky because it changes the usual shapes and proportions.
To draw foreshortened limbs well, use reference images taken from varied angles. Breaking down the arm into simple shapes and adjusting their size helps capture the shrinking effect. Practicing with gesture drawing tools or 3D models improves confidence with foreshortening and boosts realism.
Lighting And Shading Of Arms And Shoulders
Lighting and shading help show the shape and muscle structure of arms and shoulders. Proper shading makes muscles look three-dimensional and can highlight how the skin stretches over bone and muscle. The direction of light changes shadows and helps define curves and angles clearly.
Understanding Form With Light
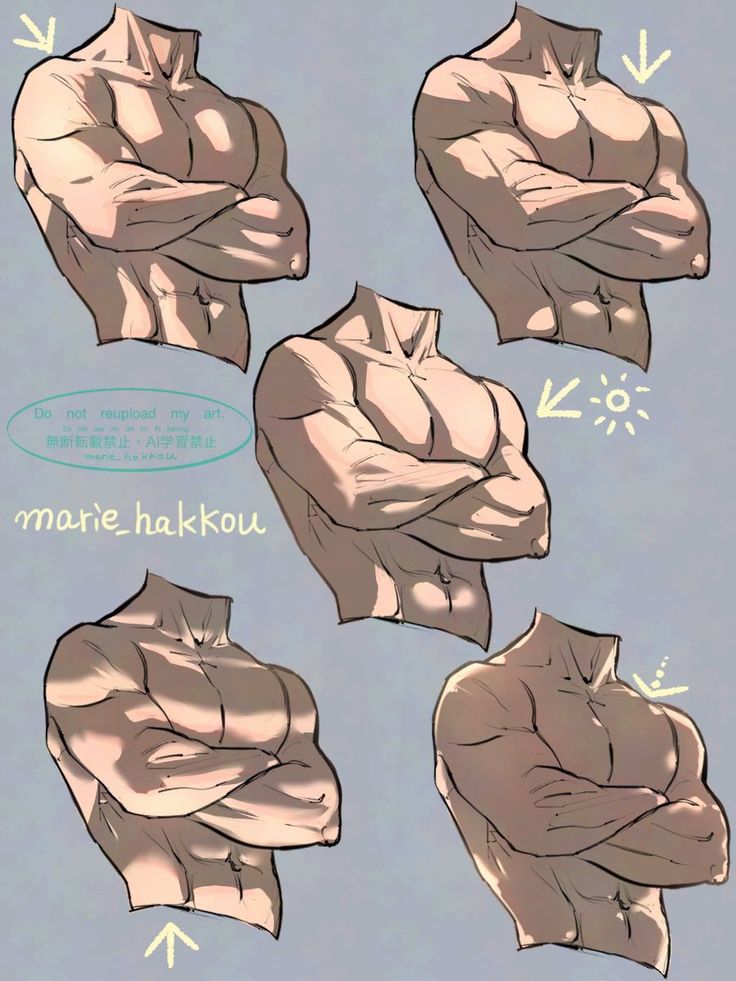
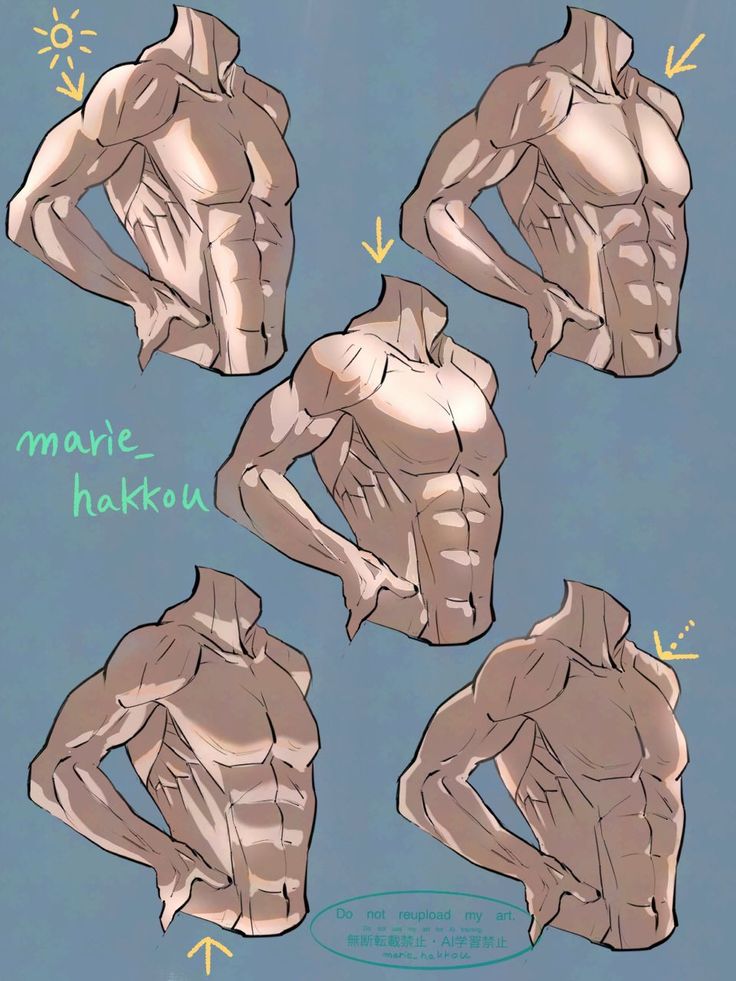
Light reveals the roundness and volume of arms and shoulders. When light hits these areas, it creates highlights on raised parts like the deltoid or biceps. The round muscles catch light differently depending on their shape and position, so artists should observe how light moves across these forms.
Using a single light source helps to keep shading consistent. This light creates gradual changes from bright highlights to softer midtones and then to shadows. Showing this transition helps the arm and shoulder look solid, not flat.
Shadow Placement On Muscles
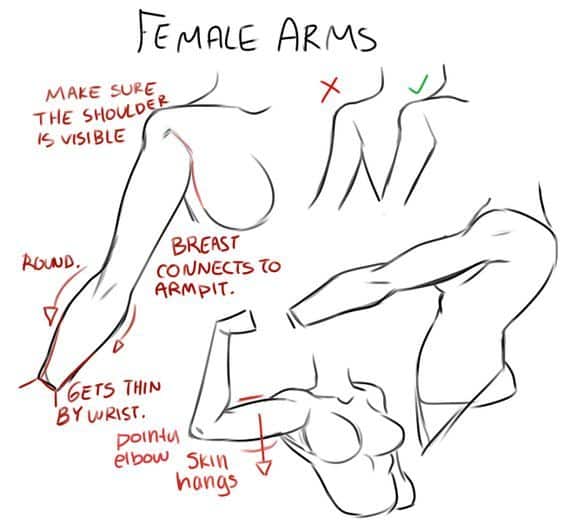
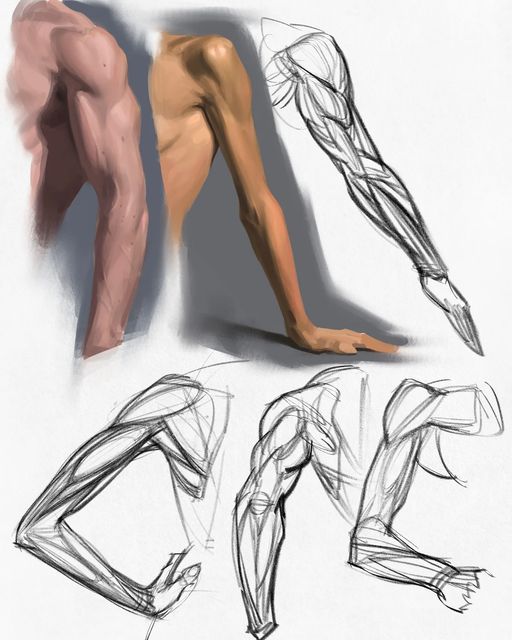
Shadows appear where muscles turn away from the light or overlap each other. For example, the space between the biceps and triceps usually has a soft shadow because one muscle curves behind the other.
Key muscles to watch are the deltoid, biceps, triceps, and trapezius. Their edges and folds cast shadows that show their separation. Shadows under these muscles also emphasize the arm’s round shape.
Artists can use hard shadows for sharp edges where bones or tendons show, and soft shadows for curved muscle surfaces. This variation adds depth and realism.
Reference Sources And Practice Tips
Using a mix of reliable references and hands-on practice helps artists improve their arm and shoulder drawings. Several tools and techniques exist that make accurate study easier and more effective.
Photo Reference Recommendations
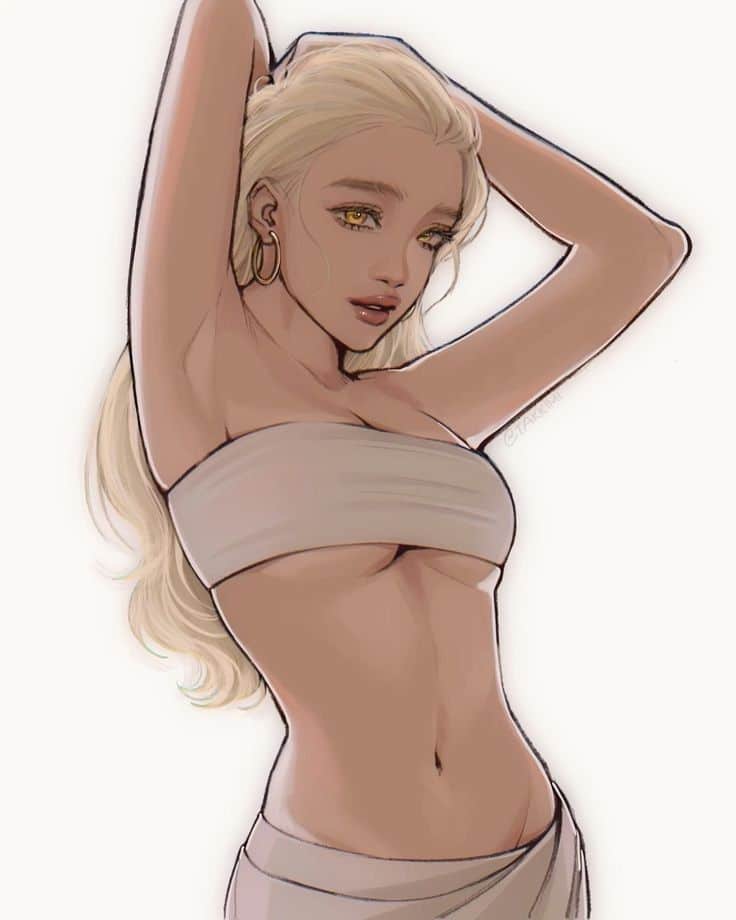
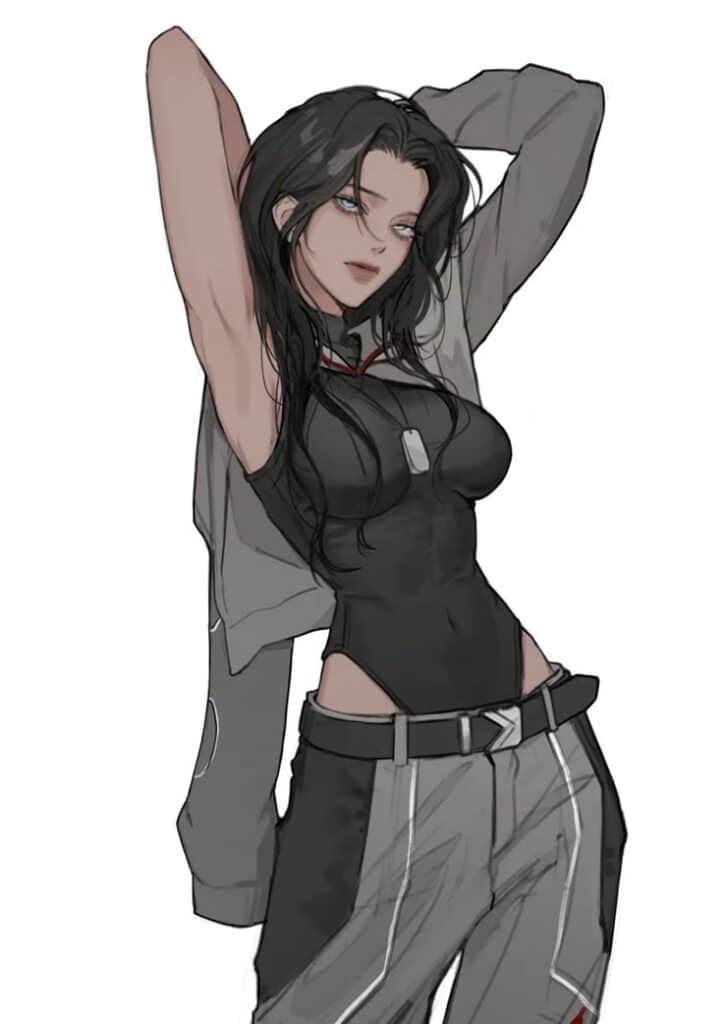
Photos are essential for observing real arm and shoulder positions. Artists should look for images that show a variety of angles, lighting, and muscle tension. This variety helps capture different muscle shapes and skin folds.
High-quality photos with clear muscle definition work best. Muscle details, like those in flexed and relaxed arms, can highlight important anatomy. Artists may keep a folder of poses that show different arm and shoulder actions, such as lifting, bending, or twisting.
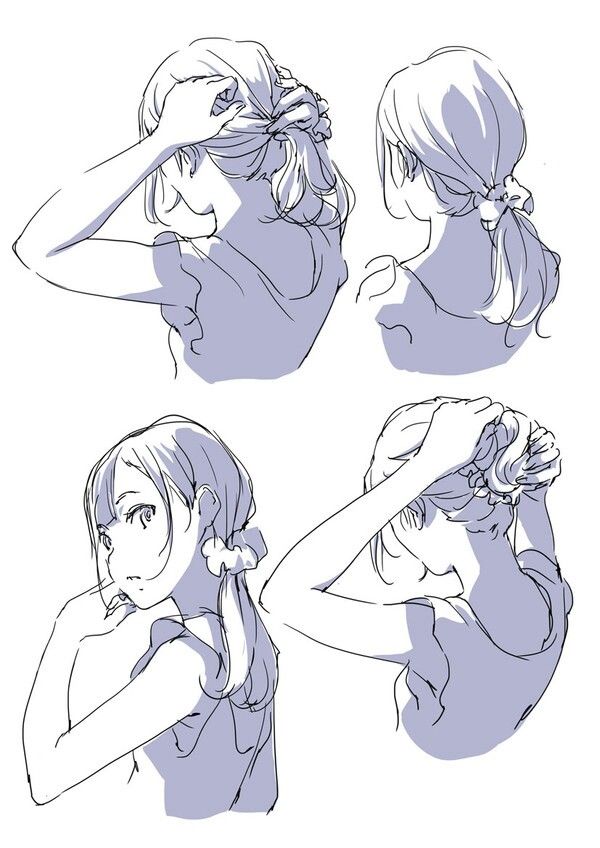
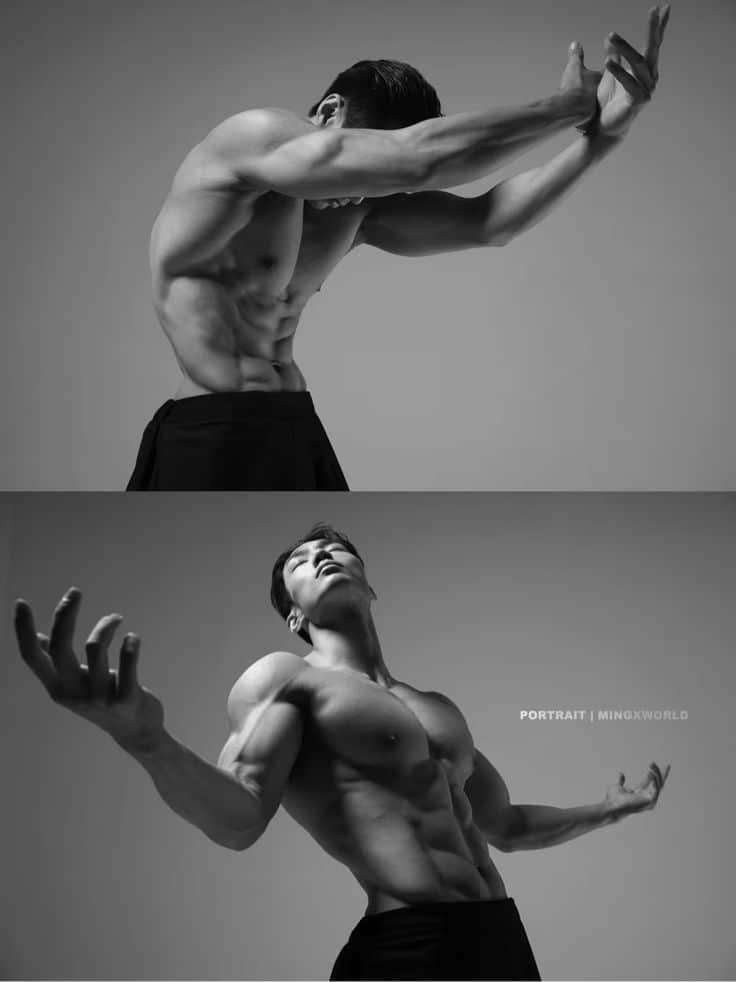
It’s helpful to study photos showing both male and female arms. This adds understanding of how muscle mass and bone structure influence shapes. Artists should also use images with clear shadows to practice shading techniques.
3D Model And Online Tools
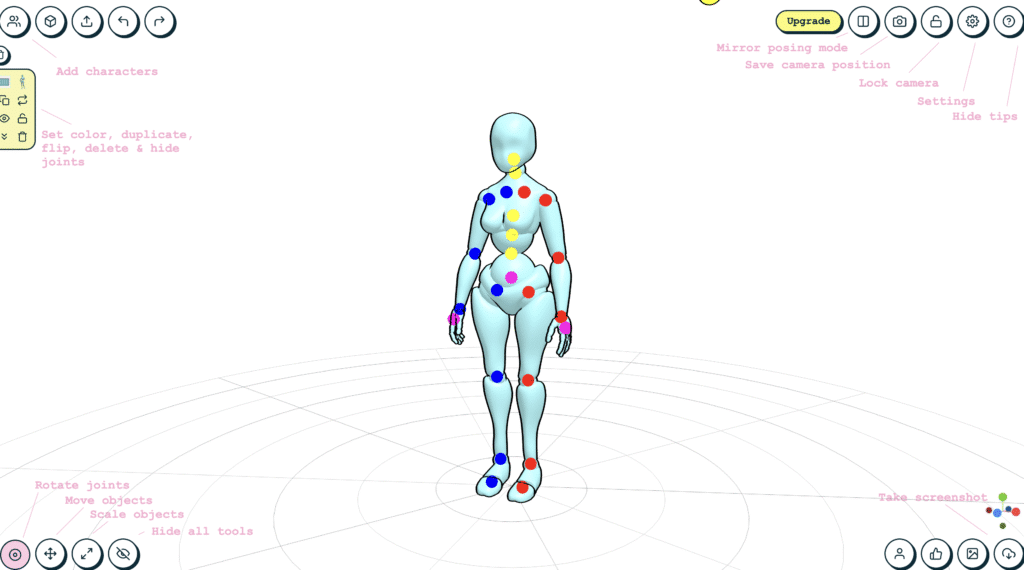
3D models are useful because they allow artists to rotate and zoom in on arms and shoulders from any angle. Many online apps offer customizable figures with adjustable muscles and poses. These tools help visualize how muscles connect and move.
Websites like PoseMy.Art and JustSketchMe provide easy access to 3D references. Models can be posed in realistic ways without needing a live model. Some tools also have timers, helping artists practice sketching quickly.
Using 3D models can prepare artists to draw challenging poses or foreshortening. They are especially helpful for studying anatomy in motion or unusual viewpoints that are hard to find in photos.
Creating Custom Reference Photos
Taking your own reference photos is one of the best ways to get exactly what an artist needs. They can control pose, lighting, and muscle tension. Using a camera or smartphone, artists can ask someone to pose or use a mirror for self-reference.
Custom photos allow study of unique poses or specific arm angles. They also help artists practice observing and capturing details like bone placement and muscle curves firsthand.
Using consistent lighting helps create clean shadows for shading practice. Artists should try taking multiple shots from different distances and angles to fully explore the arm and shoulder form. This also builds a personal reference library for future work.
- 51shares
- Facebook0
- Pinterest51
- Twitter0
- Reddit0
