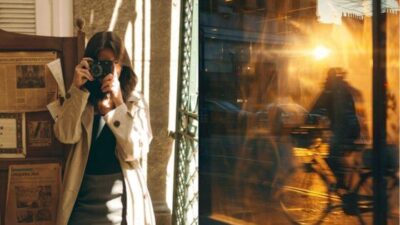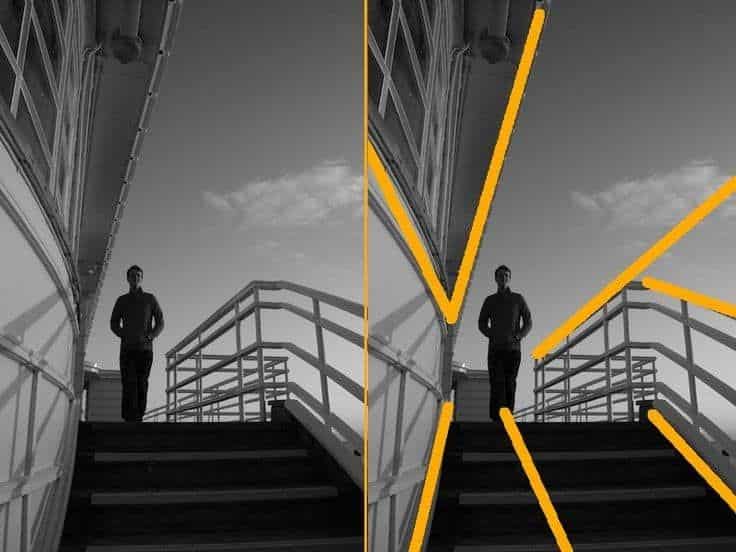
Framing in photography is a simple but powerful way to improve photos by drawing attention to the main subject. It involves using elements within the scene to create a natural border around the subject, guiding the viewer’s eye and adding depth. Framing helps make photos clearer and more interesting by focusing attention on what matters most.
Photographers can use many different objects as frames, such as windows, doors, trees, or shadows. The right frame helps add context and mood without distracting from the subject. Understanding how to choose and position these frames can turn an ordinary shot into an eye-catching image.
Using framing creatively can also tell a story or highlight details that might go unnoticed. It works in many types of photography, from portraits to landscapes, and learning to avoid common framing mistakes makes photos stronger and more effective.
Key Takeaways
- Framing guides the viewer’s focus to the subject.
- Choosing natural frames enhances image depth and interest.
- Good framing avoids distractions and improves photo storytelling.
Understanding Framing in Photography
Framing shapes how a photo looks and feels. It guides the viewer’s eye, highlights the main subject, and adds depth to the image. Using framing well helps make pictures stronger and more interesting.
Definition of Framing
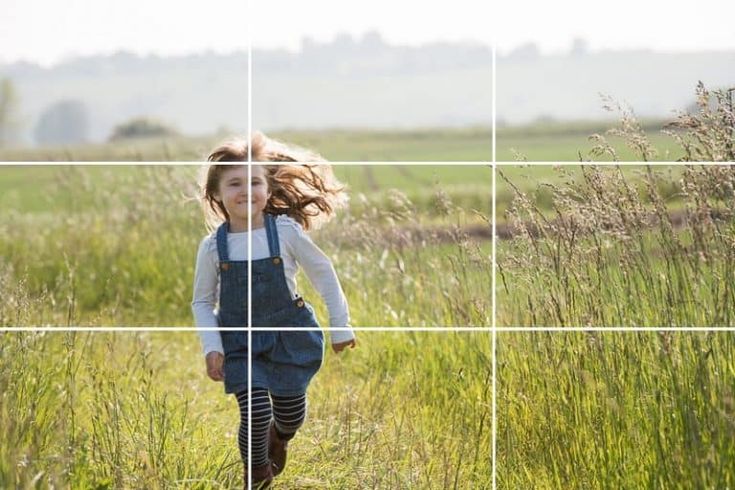
Framing means using elements inside or outside the shot to create a border around the subject. This could be natural things like trees or man-made objects like windows.
It helps isolate the subject from the background, making it stand out more clearly. Framing can be tight around the subject or wide to include more context.
The frame directs attention and can also add meaning. For example, framing a face with light adds focus, while framing with shadows can create mystery.
Role of Framing in Composition
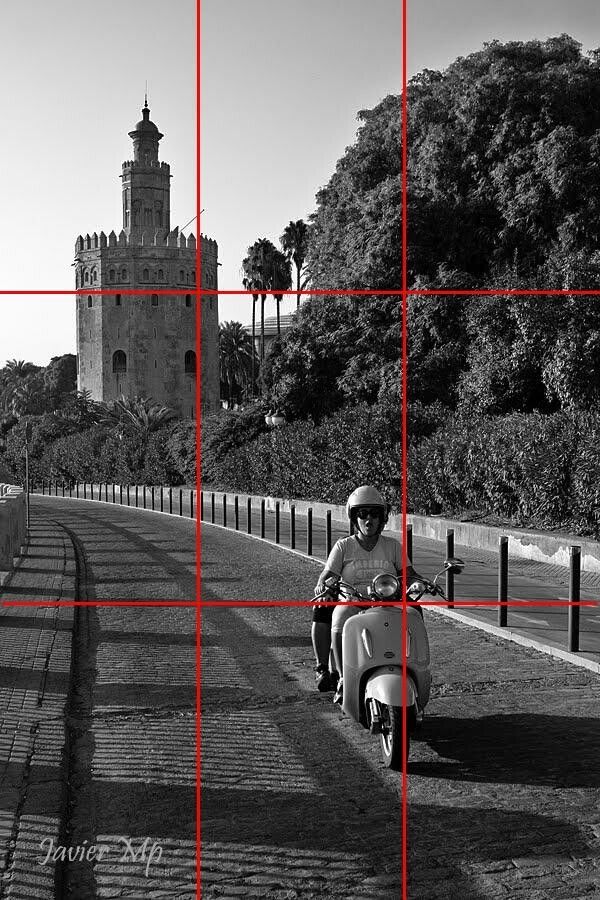

Framing is a key part of photo composition. It controls where the viewer looks first and keeps their eyes within the picture.
Good framing balances the photo’s parts and can lead to a more pleasing layout. It often works with other rules like the rule of thirds or leading lines.
A strong frame can add depth by creating layers between foreground and background. This makes flat images feel more three-dimensional.
Impact on Viewer Perception


Framing changes how viewers feel about the photo’s story. It can suggest emotions like safety, isolation, or tension by how the subject is enclosed.
A frame that feels tight can create a sense of closeness or confinement. Open frames can show freedom or loneliness depending on the scene.
By choosing what to include or exclude, framing also controls what viewers notice. It influences how people understand and connect with the photo’s message.
Types of Framing Techniques
Framing in photography can come from different sources. This includes using objects found in nature, built structures, or broader surroundings to create a focused view. Each method guides the viewer’s eye toward the main subject while adding depth and interest.
Natural Framing Elements


Natural framing uses parts of the environment like trees, leaves, branches, or flowers to surround the subject. This type of frame is often organic and soft, helping pictures feel more connected to the outdoors. For example, shooting through a cluster of leaves can highlight a person or animal in the center.
The use of natural frames adds layers to the image. Shadows and light passing through these elements can also create patterns that enhance the subject’s presence. Photographers often wait for the right natural frame that fits the mood and story they want to tell.
Architectural Framing

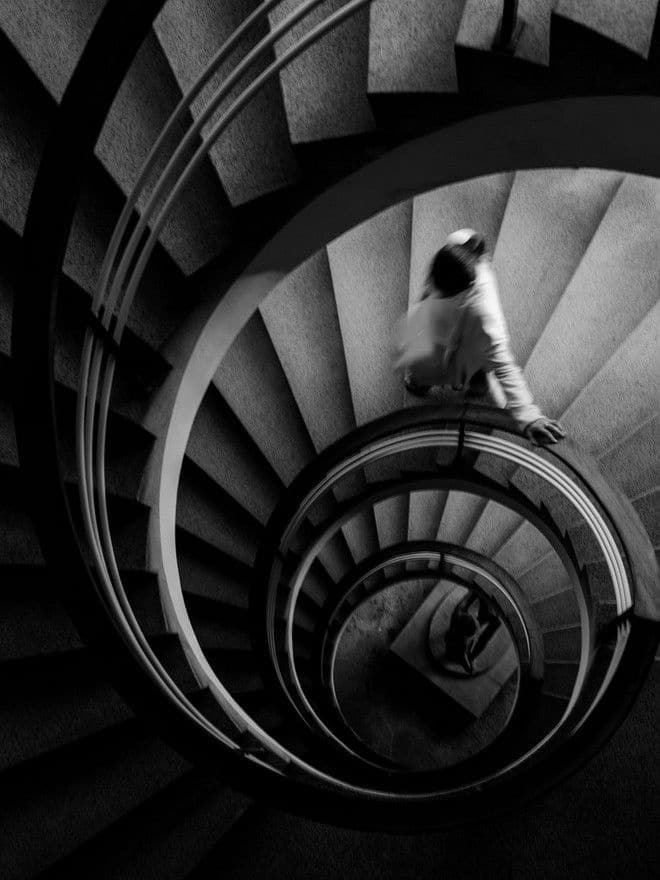
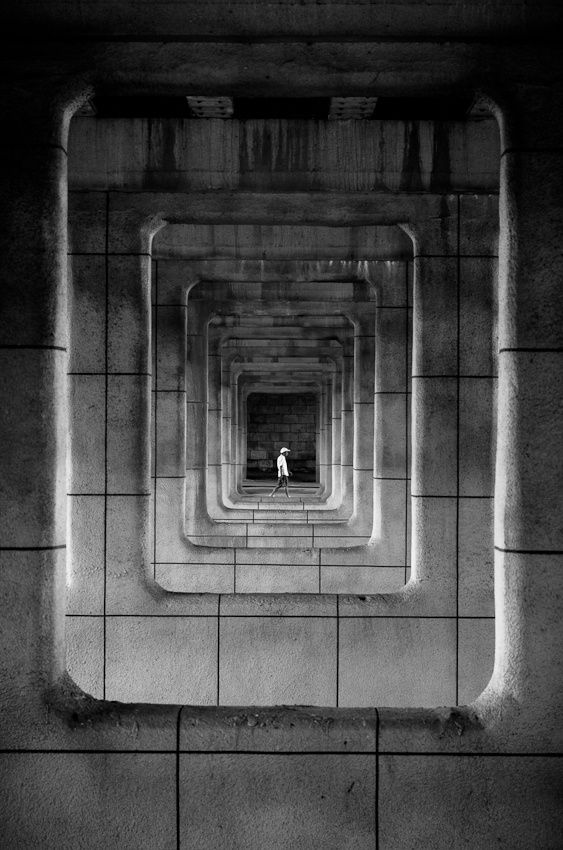
Architectural framing uses man-made structures like doorways, windows, or arches to frame subjects. These frames are usually strong and geometric, giving photos a clear, defined look. For instance, a person standing in a doorway can become the main focus against the straight lines of the building.
This style adds contrast between the human or natural subject and the built environment. It also helps emphasize shapes and patterns. Photographers can experiment with symmetry or asymmetry by carefully choosing the frame’s position and angle.
Environmental Framing

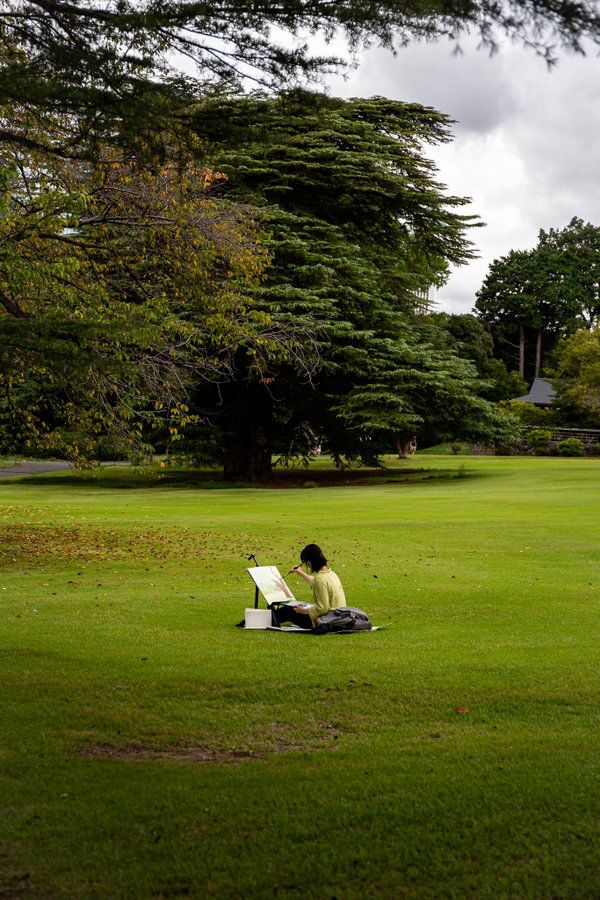
Environmental framing incorporates larger elements of a scene to frame the subject, such as hills, water bodies, or open sky. It creates a sense of place and context for the subject, showing them as part of a wider setting.
This technique can evoke emotions like isolation, peace, or adventure depending on what surrounds the main focus. For example, a person framed by a wide mountain range may appear small but powerful in the vast landscape. Lighting and distance play important roles in making this frame work effectively.
Choosing Effective Frames
Frames guide the viewer’s eye and add depth to photos. Deciding where to place the frame, whether in the foreground or background, shapes how the subject is seen. Separating the subject from distractions also helps make the image stronger.
Foreground Vs. Background


Frames in the foreground often include branches, doorways, or windows close to the camera lens. These elements create a visual border that draws attention inward to the subject. Foreground frames give a sense of depth by showing layers between the camera and the subject.
Background frames are usually farther away and can include patterns or shapes behind the subject. They help surround the subject and can add context to the scene. However, background frames should not be too busy or cluttered, or they might distract from the main subject.
Choosing between foreground and background frames depends on the scene and desired impact. Foreground frames work well to create intimacy. Background frames better highlight the environment around the subject.
Subject Isolation


Isolating the subject means making it stand out clearly from the frame. This can be done by using contrast in colors, focus, or lighting. Bright or sharp subjects against darker or blurred frames pull the viewer’s attention directly.
Photographers should avoid frames that compete with the subject. If the frame has too many details or strong colors, it can confuse the viewer. Simple frames with clear edges help isolate the subject and keep the image balanced.
Focusing on the subject while keeping the frame subtle improves visual clarity. This balance helps the subject remain the strong focal point in the photo.
Creative Uses of Framing in Photography
Framing can change how a photo feels and where attention goes. It can create a sense of space or direct viewers through the image. Using different framing techniques helps photographers make their photos more interesting and clear.
Adding Depth


Framing adds depth by placing something in the foreground that surrounds the subject. This creates layers, making the image look three-dimensional. For example, shooting through tree branches or a window frame puts the subject behind a natural frame and shows distance.
Using shadows or light patterns as frames can also add depth. These frames give a sense of space between the camera and subject. Depth makes the photo more engaging because the viewer feels like they are looking into the scene, not just at it.
Guiding the Viewer’s Eye


Frames help direct the viewer’s attention to the most important part of the photo. By surrounding the main subject with a frame, the eye moves straight to it without distraction.
Lines or shapes can be used as natural frames. A doorway can lead the eye inward, or a circle of leaves can focus attention. This technique is helpful when the background is busy or when the subject is small in the scene.
Key points:
- Use frames to highlight the subject.
- Choose shapes or lines that lead inward.
- Avoid frames that confuse or distract.
Technical Considerations for Framing
Proper camera settings and lens choices help shape how well a frame defines the subject. These factors control focus, depth of field, and the angle of view, which are key to creating effective frames.
Camera Settings

Adjusting aperture is critical. A wide aperture (small f-number) creates a shallow depth of field, blurring the background and emphasizing the frame around the subject. A narrow aperture (large f-number) keeps the whole frame and background sharp.
Shutter speed must be fast enough to avoid blur, especially if handheld or if the subject moves. ISO should be set as low as possible to reduce noise, but raised if light is low.
Manual focus or focus lock can help ensure the framed area remains sharp. Autofocus can sometimes focus on the wrong part when using complex frames.
Lens Choices

Wide-angle lenses (14mm to 35mm) help include more of the frame element, making it easier to frame large scenes or objects. They tend to exaggerate perspective, which can add drama but also distort proportions.
Standard lenses (around 50mm) offer a natural view, working well for simpler frames and everyday scenes. They keep proportions close to what the human eye sees.
Telephoto lenses (85mm and above) can isolate the subject more by compressing the scene. They allow the photographer to stand farther back, which helps capture tight frames without physically moving close.
Framing in Different Photography Genres
Framing changes how a photo feels depending on what is being captured. It guides the viewer’s eye and highlights important parts of the image. Different genres use framing to support their unique goals and subjects.
Portrait Photography


In portrait photography, framing usually centers around the subject’s face or body to show emotion or personality clearly. Photographers often use tight frames to eliminate distractions. This helps focus on facial expressions, eyes, or hands.
Natural elements like doorways, windows, or branches are common frames. They add depth and a sense of context while drawing attention inward. Simple backgrounds, like blurred areas (bokeh), work as soft frames that make the subject stand out.
Proper framing in portraits also respects space. It gives subjects room to “look into,” creating a balanced composition. Photographers pay close attention to headroom and the subject’s position, typically following the rule of thirds to make the image appealing.
Landscape Photography


In landscape photography, framing helps lead the eye through the vast scene. Photographers use natural objects such as trees, rocks, or arches to form frames. This frames part of the view, creating a window into the environment.
This technique adds depth, making the flat photo seem three-dimensional. It also gives the viewer a sense of place, as if looking through something to the faraway horizon.
Unlike portraits, the frame here often includes empty or wide spaces to show scale. Balance is key so the frame does not overpower the main scene. Photographers avoid tight crops, allowing the frame to guide viewers softly to the center of interest.
Common Mistakes to Avoid With Framing


One common mistake is overcrowding the frame. When too many elements compete for attention, the main subject can get lost. Photographers should keep the frame simple and clear.
Another error is placing the subject too close to the edge. This can make the photo feel unbalanced. It is better to leave some space around the subject to give it room to “breathe.”
Using frames that are too busy can also distract viewers. Frames should help guide the eyes toward the subject, not pull focus away.
Sometimes, photographers ignore lighting around the frame. Shadows or bright spots can interfere with the main subject’s visibility. Proper lighting should be checked before taking the shot.
Here’s a quick list of mistakes to watch for:
| Mistake | Why It’s a Problem | How to Fix It |
|---|---|---|
| Overcrowded frame | Main subject gets lost | Simplify the scene |
| Subject at frame edge | Unbalanced composition | Leave space around subject |
| Too busy framing | Distracts from the subject | Choose simple, clear frames |
| Poor lighting on frame | Reduces subject visibility | Adjust light before snapping |
Avoiding these errors helps make framing a tool that adds strength and focus to photos.
Post-Processing and Enhancing Frames


After taking a photo with a frame, photographers often use post-processing to improve the final image. Editing software helps adjust brightness, contrast, and colors to make the frame stand out more clearly.
They might crop the image to tighten the frame. This removes distracting elements and focuses attention on the subject inside the frame.
Sharpening tools can make edges of the frame clearer. This helps the frame separate from the background, adding depth to the photo.
Some photographers add vignettes or blur the background slightly. These effects guide the viewer’s eye toward the framed area.
Here is a simple list of common editing steps for framing photography:
- Adjust exposure and contrast
- Crop carefully to improve composition
- Enhance colors for better separation
- Use sharpening to define edges
- Add vignettes or background blur
Using these techniques thoughtfully enhances the framing effect. It makes the photo look purposeful and polished.
Inspiration and Case Studies in Framing Photography

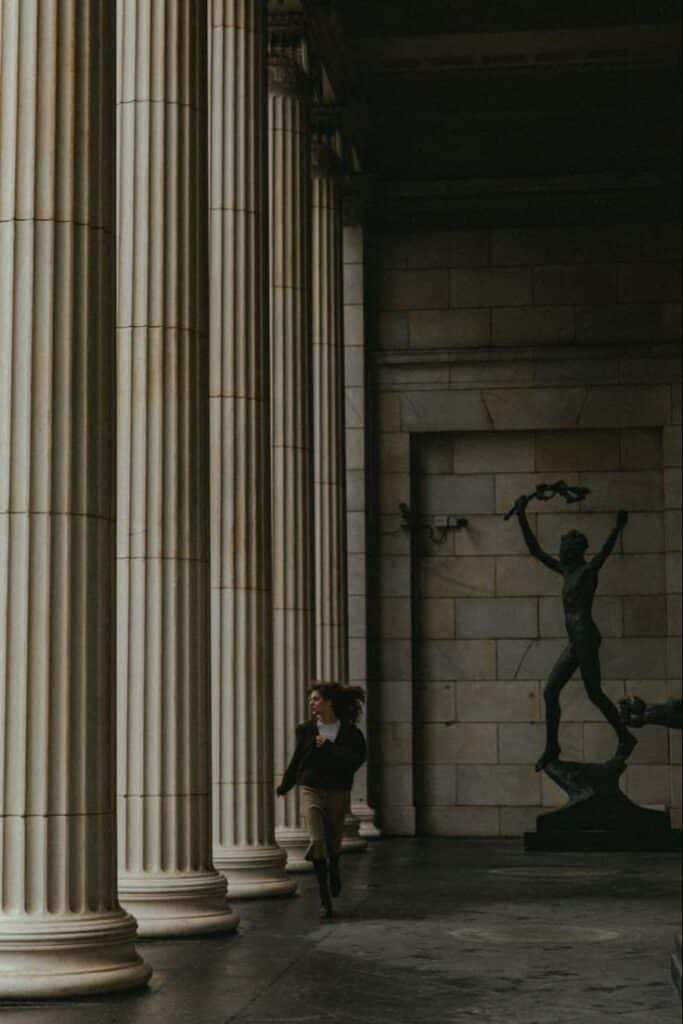
Many photographers use framing to guide the viewer’s eye and add depth to their photos. One famous example is Steve McCurry’s portrait of the “Afghan Girl,” where the window acts as a natural frame for her face.
Framing can be found in nature too. Ansel Adams often used tree branches or shadows to frame landscapes, making them more striking. This technique helps focus attention on the main subject.
Here is a simple list of common framing methods:
- Using windows or doorways
- Shooting through arches or tunnels
- Including overhanging branches or leaves
- Using light and shadow as natural borders
In a case study, photographer Sarah took photos of urban scenes through rain-splattered glass. The raindrops created a unique frame and added texture, making ordinary scenes feel different and alive.
Another example is wildlife photographer Chris, who framed animals using tall grass. This not only highlighted the subject but also showed the environment where the animals lived, adding context to the image.
- 3shares
- Facebook0
- Pinterest0
- Twitter3
- Reddit0

