A fire resistant house does not need blank concrete walls, slit windows, or the mood of a survival compound. The better approach is quieter. It keeps embers out, removes places where burning debris can settle, and makes the first five feet around the building part of the architecture.
That shift changes the design brief. Roof edges, vents, glazing, decks, fences, planting, and maintenance access all have to work together. A strong wall cannot compensate for an open vent. A Class A roof cannot help much if dry needles collect beneath an exposed deck.
Industrial design taught me to look at joints before surfaces. On a vehicle, the large body panels get the attention, but seals, drains, fasteners, and openings often decide how the product ages. Wildfire design has the same logic. The vulnerable parts are usually small enough to fit in your hand.
- A fire resistant house starts with ember control
- Turn the first five feet into architecture
- Make the roof and vents one protective system
- Protect windows, walls, doors, and deck junctions
- Keep warmth through courtyards and layered materials
- Retrofit in the order fire finds weaknesses
- Maintenance belongs in the architecture
- Design the weak points first
- Fire-resistant house FAQ
- Sources
This article explains architectural planning principles, not a site-specific fire-safety specification. Local codes, exposure conditions, evacuation requirements, and stamped advice from licensed professionals still control the project.
A fire resistant house starts with ember control
The cinematic version of wildfire is a wall of flame hitting a house. Real buildings can ignite much earlier. Wind-blown embers arrive ahead of the main fire, enter openings, land in gutters, collect beside walls, or start a small fire beneath a deck.
This is why “fireproof house” is the wrong promise. No normal home is invulnerable to every combination of wind, direct flame, radiant heat, neighboring structures, and delayed firefighting. The practical goal is to reduce ignition opportunities and buy time.
Think in three exposures
Embers test openings and debris traps. Radiant heat tests windows, doors, siding, and anything close to the facade. Direct flame tests the assemblies where vegetation, furniture, fencing, sheds, or decks give fire a continuous path to the building.
A good design responds to all three. It blocks small particles, increases the distance between fuel and glass, and interrupts combustible connections. The house becomes a chain of protective decisions rather than one heroic material choice.
Find the smallest weak point
NIST’s construction guidance identifies dozens of ember-related vulnerabilities across roofs, windows, vents, doors, cladding, decks, stairs, and attached structures. That long list carries a useful design lesson: simplify the number of places where materials meet.
Complex roof valleys, open eaves, decorative gaps, and layered ledges look harmless on a rendering. Under ember exposure, each one can become a pocket for burning debris. Calm geometry is easier to protect and easier to inspect.
Turn the first five feet into architecture
California calls the area from the building to five feet away Zone 0. The intent is to keep this band resistant to ember ignition by removing vegetation and other combustible material next to walls, windows, decks, and stairs.
There is an important date attached to that statement. As of September 2026, the California Board of Forestry says the statewide Zone 0 rule package remains under final review. The final regulation has not yet been published by the Secretary of State. Treat it as a strong planning direction and verify the rule that applies to your address before construction.
Make the clear band feel deliberate
Five feet of bare gravel wrapped around a house can look like a service strip. It does not have to. Large-format pavers can extend an entry terrace. A stone plinth can meet a mineral ground band. Steel edging can draw a precise line where planting begins.
I would draw this zone on the first site plan, not add it after the doors and terraces are fixed. That early move lets the clear perimeter align with circulation, drainage, window views, and the proportions of the facade. The same thinking belongs in the wider site and planting design process.
Avoid wood mulch, stored firewood, doormats, plastic planters, combustible furniture, and shrubs in this band. Pay special attention below windows and around corners, where wind can pile debris against the wall.
Continue the strategy beyond Zone 0
The next zones still matter. California’s current guidance describes Zone 1 from five to 30 feet and Zone 2 from 30 to 100 feet, or to the property line. Planting can return, but spacing, pruning, dead material removal, and separation from accessory structures become part of the maintenance plan.
This does not mean clearing a site into a moonscape. It means avoiding uninterrupted fuel paths. A tree canopy can remain valuable for shade, but branches should not bridge directly to the roof. A planted bed can frame a view, but it should begin beyond the noncombustible perimeter rather than press against glazing.
Make the roof and vents one protective system
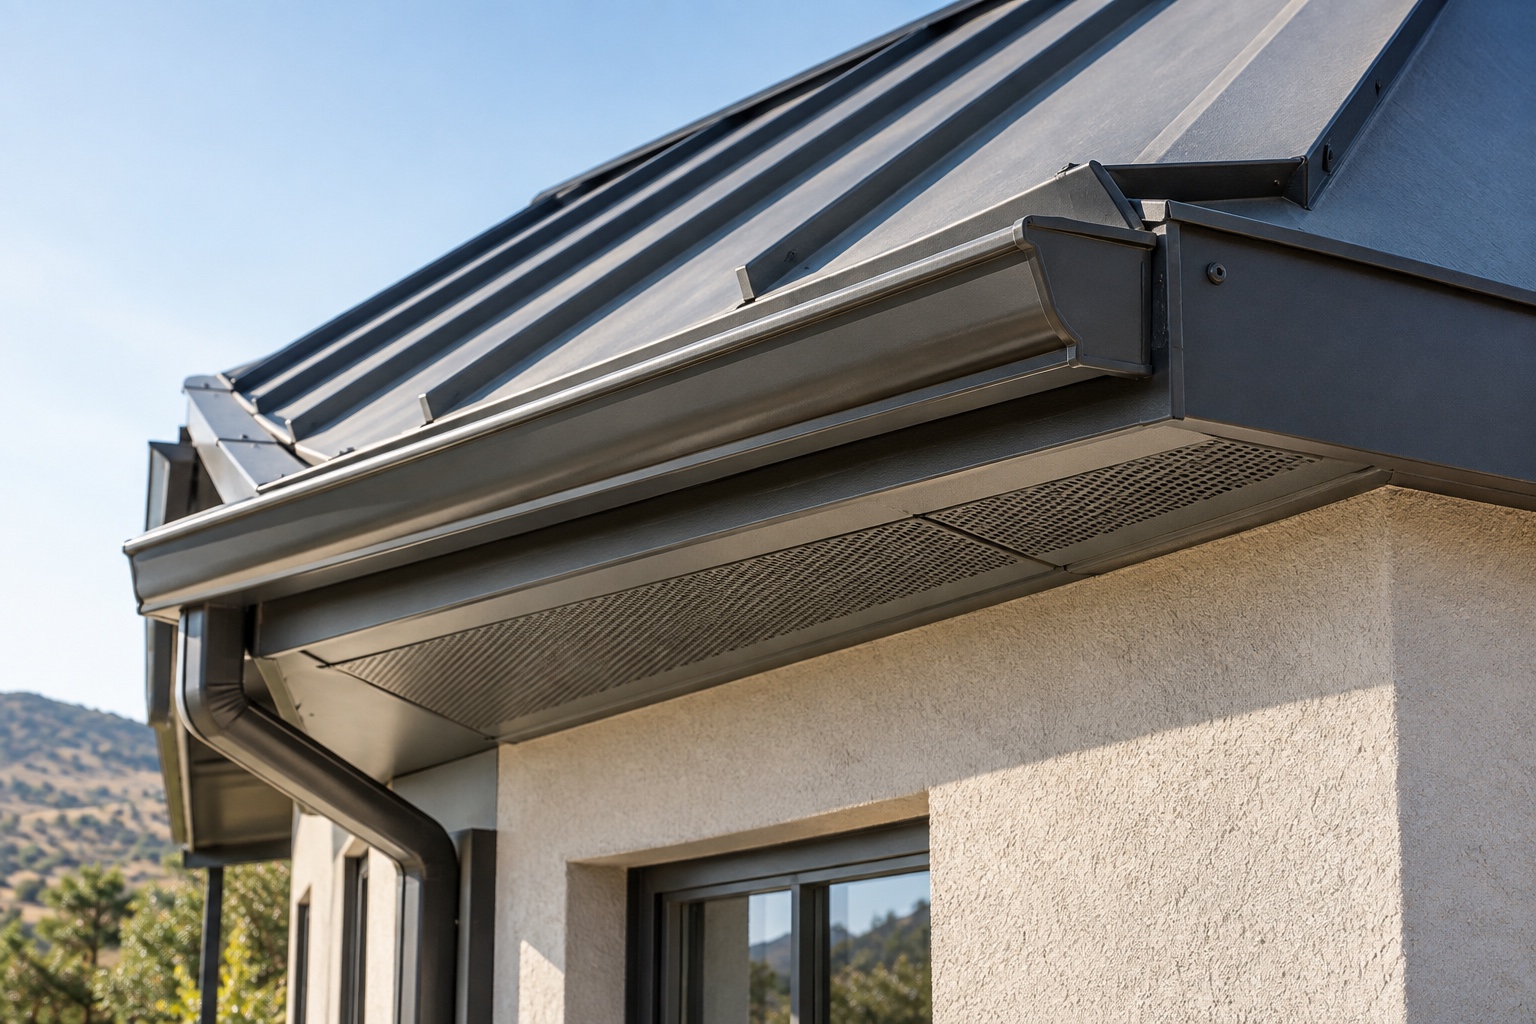
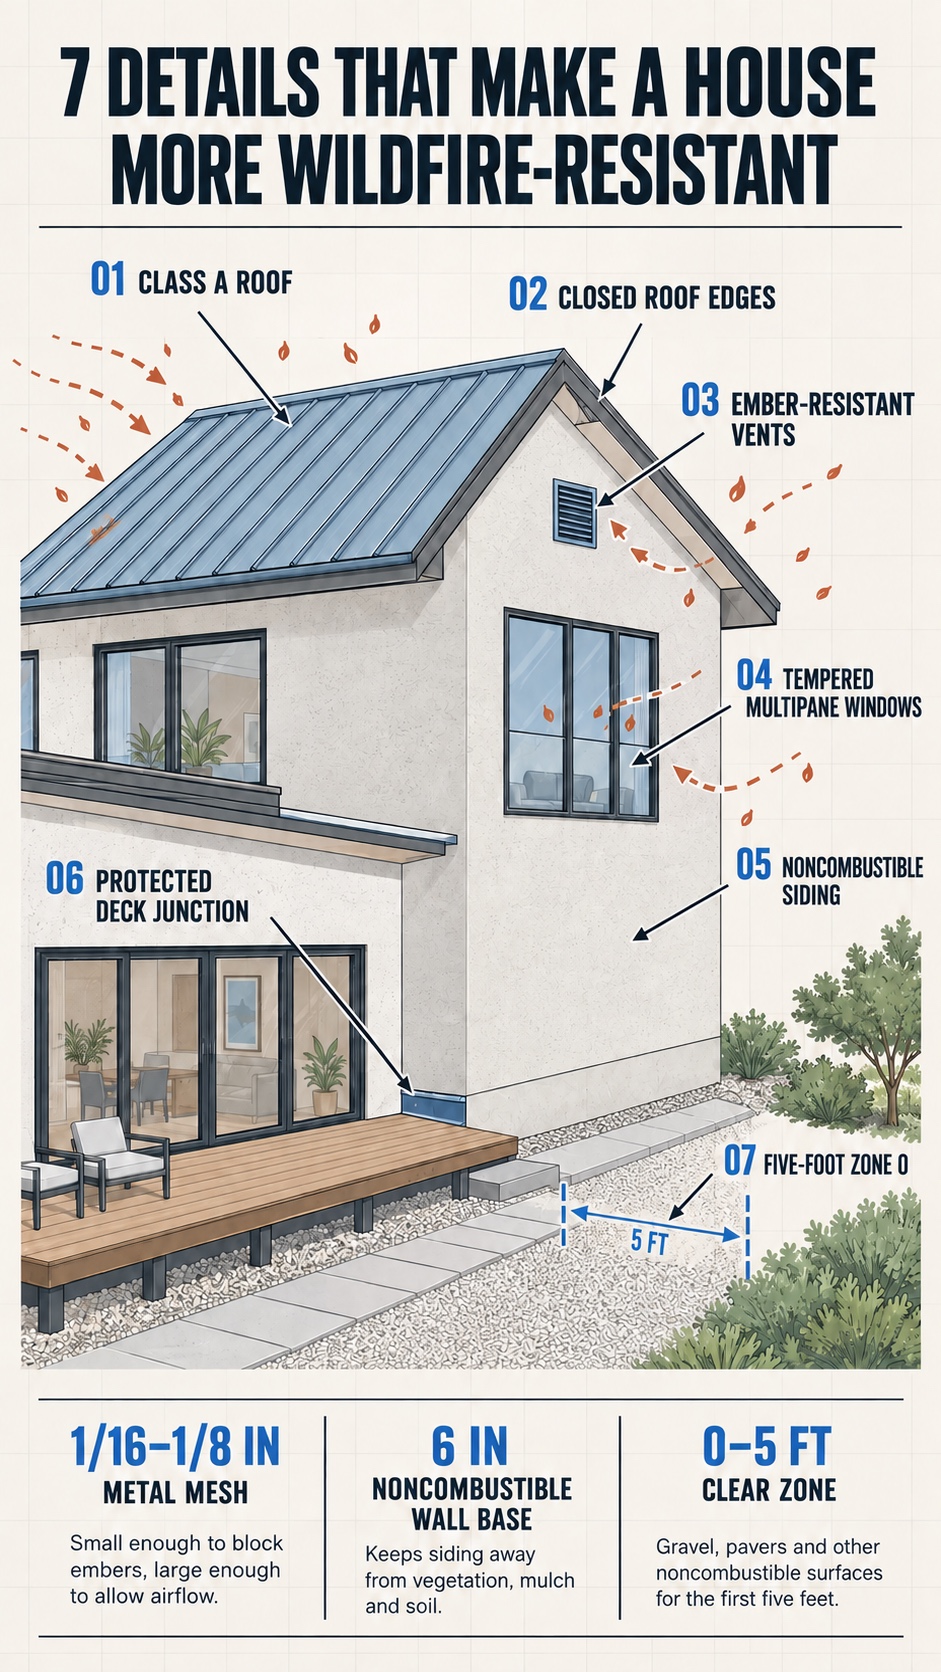
The roof receives embers for longer than the flame front may remain nearby. Start with a Class A-rated covering, then examine every edge, opening, valley, skylight, gutter, and penetration. The rating on the outer material is only one part of the assembly.
Choose a roof shape that can be cleaned
Standing-seam metal, concrete tile, clay tile, slate, and qualifying asphalt shingles can form Class A roof systems when specified and installed correctly. Curved tiles need closed ends so embers cannot enter the space beneath them. Flashings should close gaps at ridges, eaves, dormers, and wall junctions.
A complicated roof is not automatically unsafe, but it asks more of detailing and maintenance. Valleys catch leaves. Intersections trap needles. Gutters hold fine debris. If the architecture needs several roof volumes, give each collection point safe access and a clear cleaning route.
Simple does not mean dull. A crisp metal roof can give a house a light profile, while deep color and carefully proportioned edges keep it from looking industrial. I use the same rule when sketching an automotive body: settle the main silhouette first, then earn every extra crease.
Specify vents, not just mesh
Attic, soffit, ridge, gable, crawl-space, and dryer vents all need attention. UC ANR’s California guidance points to approved flame- and ember-resistant vents and allows corrosion-resistant noncombustible screening with openings between 1/16 and 1/8 inch in applicable locations. Chapter 7A restricts vents in eaves unless the assembly has demonstrated resistance to ember and flame intrusion.
Smaller mesh is not a free upgrade. It can reduce airflow or clog faster, so ventilation calculations still matter. Use listed assemblies where the code requires them, keep plants away from openings, and provide enough access to inspect the screens without dismantling the facade.
Protect windows, walls, doors, and deck junctions
The vertical facade is where safety and domestic character meet. People want daylight, views, timber textures, terraces, and doors that stay open in good weather. The answer is not to remove those qualities. It is to control where combustible material appears and how openings respond to heat and embers.
Use glazing as an assembly
CAL FIRE recommends double-pane tempered glass. Its guidance notes that tempered glass is about four times more resistant to breaking during a wildfire than ordinary glass. Metal screens can also improve window performance under radiant heat.
The surrounding conditions matter just as much. Remove vegetation and stored items in front of windows. Avoid placing a combustible fence, hedge, or shed where flames can expose a large glazed opening. If a project uses sliding shutters or screens, make sure they can close without power and remain operable after years of weather.
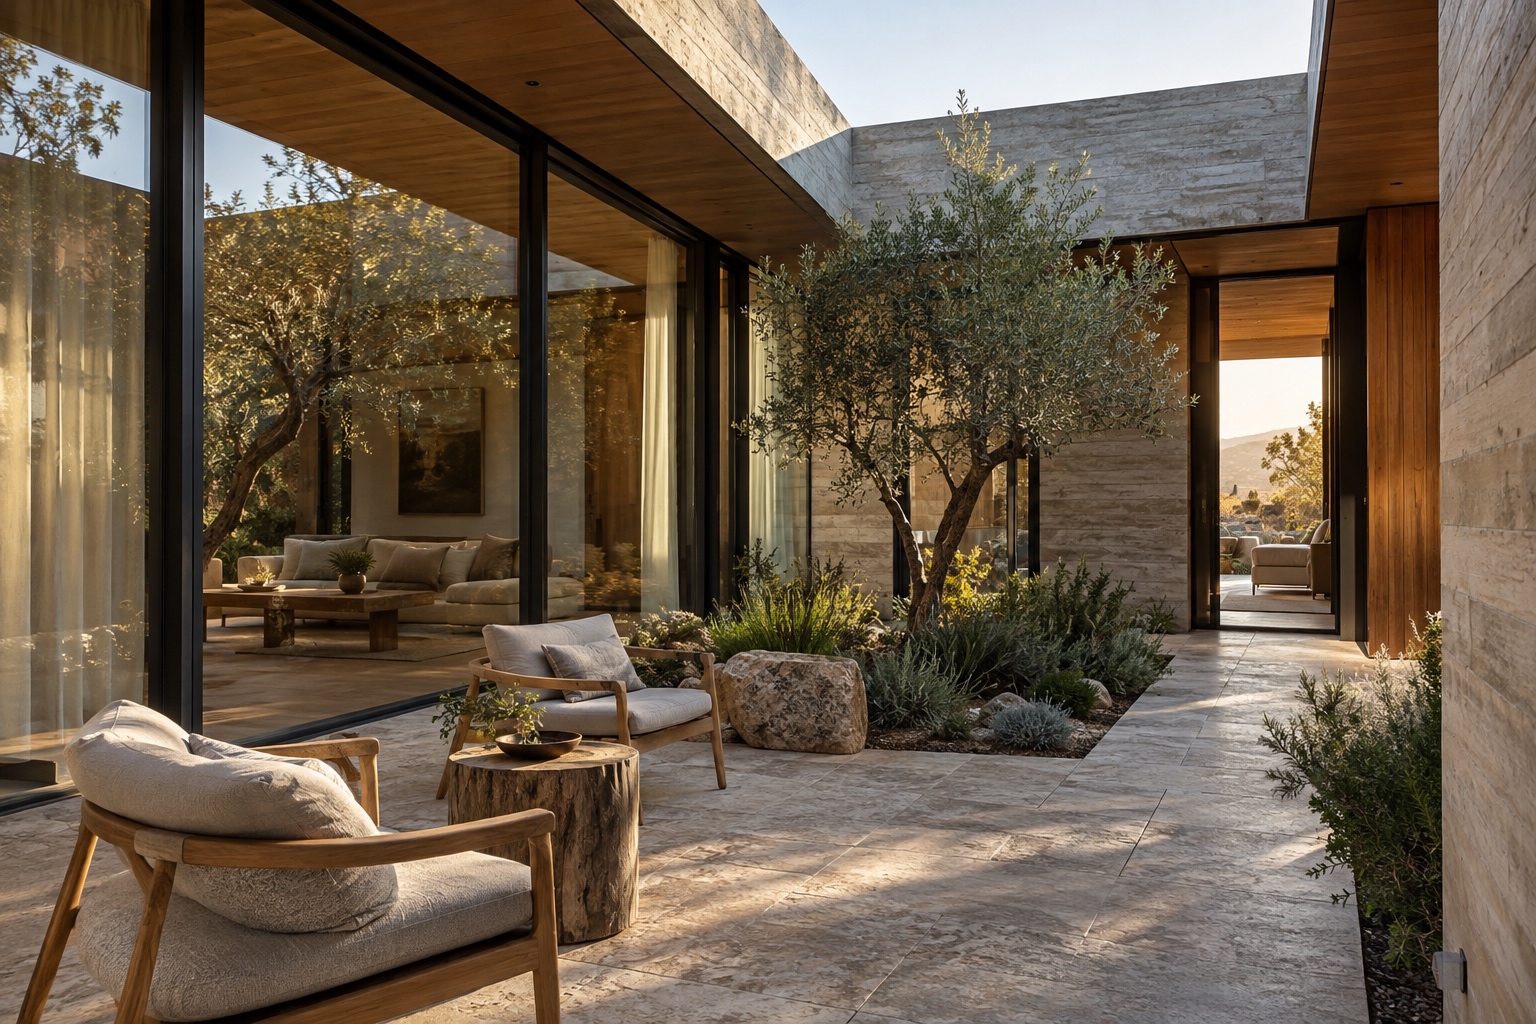
A courtyard can help concentrate large windows toward a more controlled outdoor space. It also preserves the pleasure of indoor-outdoor living. The courtyard still needs a fire-safe material plan, but it gives the architect more control over immediate fuel and exposure than an opening aimed directly at dense vegetation.
Give the wall a noncombustible base
Stucco, fiber cement, brick, stone veneer, and metal are familiar options for noncombustible or ignition-resistant exterior surfaces. Material names alone are not enough. Check the tested assembly, joints, backing, penetrations, and clearances required by local code.
The IBHS Wildfire Prepared Home standard includes a minimum six-inch vertical noncombustible clearance at the base of exterior walls. That small plinth is easy to integrate into the elevation. It can align with a sill, terrace edge, or change in texture instead of looking like a patch added after inspection.
If the project also needs a visual update, coordinate these safety assemblies with the material hierarchy in Sky Rye Design’s guide to modernizing a home’s exterior. A new cladding pattern is much easier to resolve when flashing, vents, wall bases, and inspection access are designed at the same time.
For more detail on metal specification under heat, connect this residential strategy with Sky Rye Design’s guide to stainless steel and fire resistance. Wildfire exposure and structural fire ratings are different problems, but both demand assembly-level thinking.
Break the path at decks and fences
Decks create several problems at once: debris between boards, combustible storage below, flame exposure from a slope, and a direct connection to siding. CAL FIRE recommends clearing beneath decks, extending an ember-resistant ground zone outward, and using at least six inches of vertical metal flashing at vulnerable deck-to-wall intersections.
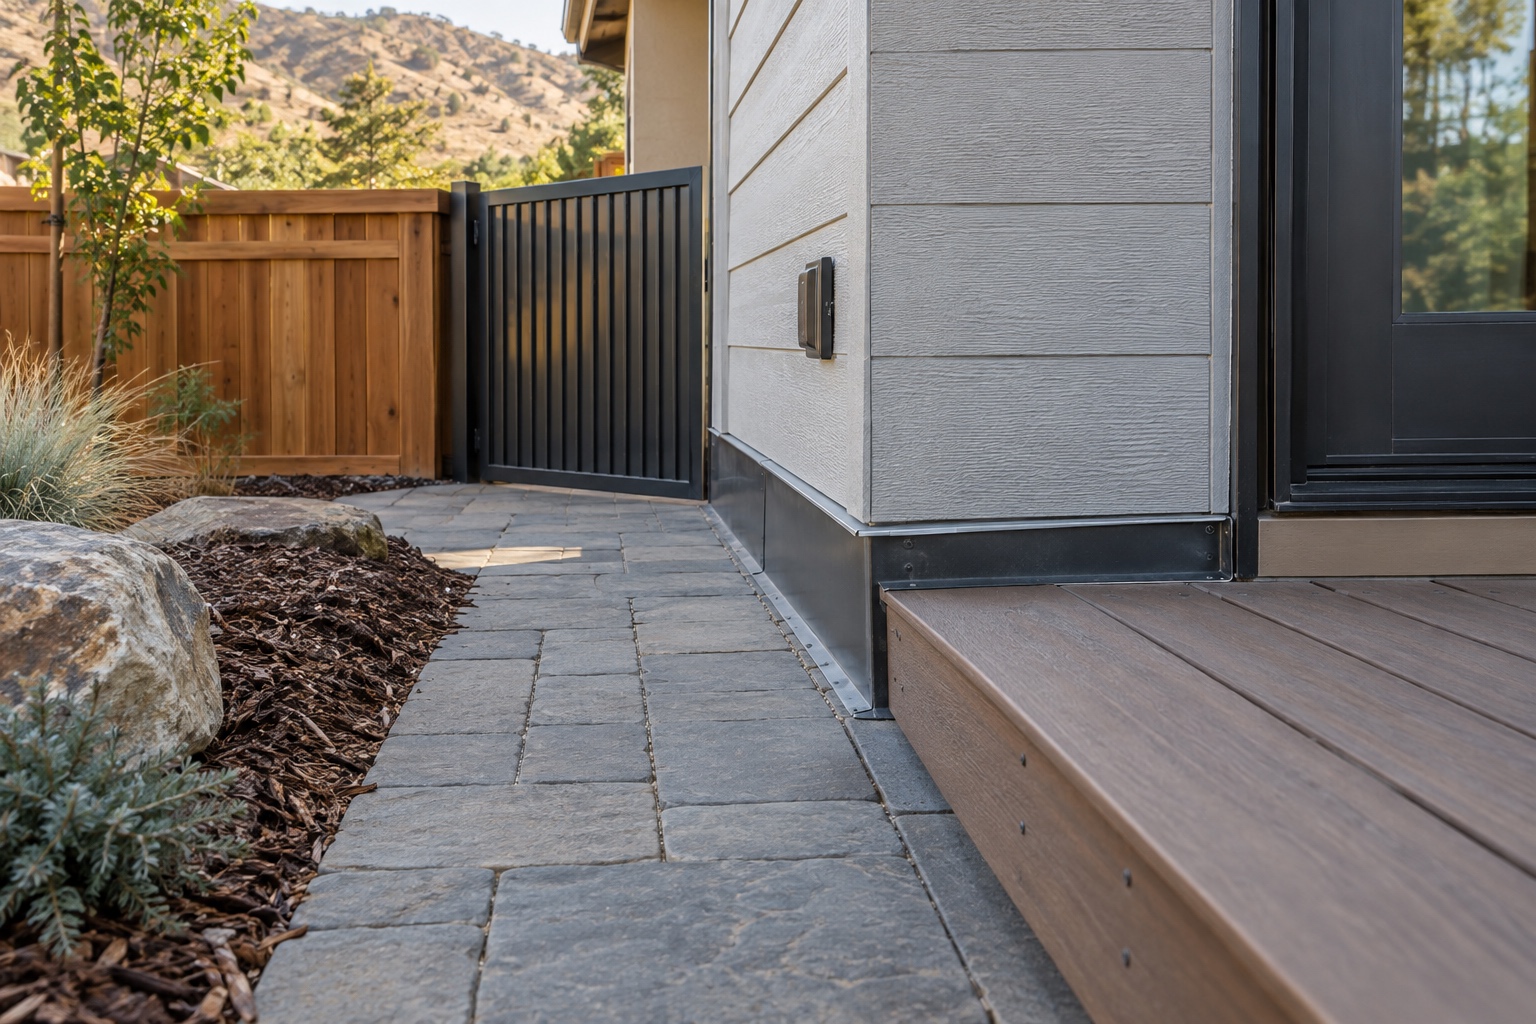
If a full deck replacement is not possible, its guidance suggests considering a noncombustible walking surface for the first foot beside the house. That is a useful retrofit detail because it interrupts the place where heat, debris, and the wall meet.
A wood fence can carry fire straight to the facade. CAL FIRE recommends replacing the first eight feet of an attached combustible fence or gate with a noncombustible option. Keep the base clear of leaves and climbing plants. The transition can become a designed gate or metal screen rather than an awkward safety insert.
Keep warmth through courtyards and layered materials
Concrete is useful, but a house made safe by material monotony is a poor architectural bargain. Warmth can come from protected timber inside, deep window reveals, textured mineral finishes, shaded courtyards, fabric, furniture, and controlled views.
The most convincing wildfire-adapted houses separate permanent protection from replaceable finish. A noncombustible shell takes the main exposure. Selected outer elements may age, weather, or even be treated as sacrificial, provided they do not create a hidden path into the structure.
California projects show several approaches
Mork-Ulnes Architects’ Frame House in Sonoma places cedar panels over an exposed concrete structure. The cedar brings the visual warmth expected of a Northern California home, while the concrete remains the deeper defensive layer.
At 4/Way House in Topanga, Deegan-Day Design & Architecture folds a standing-seam zinc surface across the roof and portions of the building. Terraces make outdoor rooms while creating separation from surrounding vegetation.
Faulkner Architects’ CAMPout near Lake Tahoe limits glazing on the forest-facing perimeter and directs larger openings toward an internal courtyard. Concrete and steel meet the exterior exposure; cedar moves inside.
Pine Flat Residence uses a Corten steel shell, sliding screens, deck sprinklers, and dedicated water storage. None of these projects supplies a universal recipe. Together, they show that wildfire design can shape massing, views, material depth, and outdoor space without erasing the idea of home.
View the credited project photography and complete California survey on Designboom. The images remain on the source site and are not reproduced here.
Retrofit in the order fire finds weaknesses
An existing home rarely needs every intervention at once. Start where embers can enter or accumulate, then address components exposed to heat and direct flame. This sequence also prevents an expensive facade upgrade from being undermined by an inexpensive vent or a pile of debris.
| Priority | Action | Reason |
|---|---|---|
| 1 | Clear roof, gutters, decks, and the first five feet | Removes immediate ignition points without changing the building |
| 2 | Replace or retrofit vulnerable vents | Reduces ember entry into attics and crawl spaces |
| 3 | Seal gaps at eaves, roof edges, doors, and garage openings | Closes small paths into concealed spaces |
| 4 | Interrupt combustible fences and deck junctions | Breaks direct fire paths to walls |
| 5 | Upgrade roof, windows, siding, and decks during planned replacement | Coordinates major costs with normal renovation cycles |
Photograph every elevation and mark the places where leaves collect after a windy day. That simple survey is more useful than guessing from a product catalogue. Then compare the findings with CAL FIRE’s home-hardening assessment and local requirements.
New construction offers more freedom because windows, roof form, wall bases, and the Zone 0 perimeter can be coordinated before permits and pricing lock the geometry. Retrofitting asks for sharper priorities. Both still depend on the same question: where can an ember stop, enter, or start something else burning?
Maintenance belongs in the architecture
A protected house can become vulnerable again if gutters fill, mesh corrodes, sealant fails, mulch migrates toward walls, or furniture collects beneath a deck. Maintenance is not a footnote. It is part of the fire strategy.
Design access into the building. Give gutters safe cleaning points. Make vent screens visible from a ladder or service path. Keep planting borders obvious so future owners do not gradually fill Zone 0 with shrubs. Avoid cavities that can only be checked after removing cladding.
This is also where good architecture saves effort. A simple roof sheds debris better. A clear wall base reveals damage sooner. A gravel band makes windblown leaves visible. Details that communicate their condition are more likely to be maintained.
Design the weak points first
The fire-resistant home does not begin with a bunker-shaped sketch. It begins with a clean roof edge, a protected vent, a safer window, a noncombustible wall base, and five carefully designed feet of ground.
Draw those constraints early and the architecture can absorb them. Courtyards preserve large openings. Mineral terraces become outdoor rooms. Metal roofs sharpen the silhouette. Timber can move to protected interior surfaces or carefully considered outer layers.
Start small: walk around the house after a windy day and find every place debris has gathered. Those pockets show where embers may gather too. Fix the weak points before spending money on a dramatic material statement.
Fire-resistant house FAQ
Can a house be completely fireproof?
No conventional house is completely fireproof. Wind, radiant heat, direct flame, neighboring buildings, and delayed firefighting create different exposure levels. Designers instead reduce ignition risks with ember-resistant openings, safer assemblies, defensible space, and regular maintenance. These measures improve the odds of survival; they do not replace evacuation orders.
What is the most important feature of a fire resistant house?
There is no single feature, but ember control is the best starting point. A Class A roof, protected vents, clean gutters, closed gaps, and a noncombustible five-foot perimeter work together. If one opening remains exposed, expensive walls or roofing may not solve the weak point.
What is California Zone 0?
Zone 0 is the first five feet around a structure, deck, or attached element. California is developing statewide rules for an ember-resistant zone in designated fire-hazard areas. As of September 2026, the Board of Forestry reports that the package remains under final review, so confirm the current state and local requirements before acting.
What size mesh blocks wildfire embers?
UC ANR cites corrosion-resistant noncombustible vent screening with openings between 1/16 and 1/8 inch under California Chapter 7A guidance. Some vent locations require a tested flame- and ember-resistant assembly rather than ordinary mesh. Smaller openings can restrict airflow or clog, so the vent design still needs professional sizing and code review.
Are metal roofs wildfire-resistant?
Metal can be part of a Class A roof system, but the covering alone does not protect every opening. Edges, ridges, underlayment, flashings, gutters, skylights, penetrations, and spaces beneath roof panels or tiles must also resist ember entry and debris accumulation.
Can a wildfire-resistant house use wood?
Yes, but placement matters. Wood inside a protected shell can provide warmth without becoming the first exposed surface. Exterior timber needs careful assembly design, clearances, backing, maintenance, and code approval. Some architects use replaceable or sacrificial wood over concrete, but that project-specific strategy is not permission to add combustible cladding casually.
Should I replace windows or vents first?
Fix obvious ember-entry points first, especially damaged or unprotected vents and gaps. Window replacement becomes a higher priority when glazing is single-pane, vegetation or nearby structures increase radiant exposure, or a planned facade renovation makes the work practical. A local assessment should decide the sequence.
Sources
- Designboom: How do you design a house to live with wildfire?
- California Board of Forestry: Defensible Space Zones 0, 1, and 2
- CAL FIRE: Home Hardening
- CAL FIRE: Defensible Space
- IBHS: Wildfire Prepared Home Technical Standard
- UC ANR Fire Network: Vents
- NIST: Hardening Actions and Construction Guidance
- Building America Solution Center: Design for Wildfire Resistance
- 0shares
- Facebook0
- Pinterest0
- Twitter0
- Reddit0