The first thing I check in any room is the window treatments. Before the furniture, before the palette, before anything else. My academic drawing training wired me to read light first — where it enters, what it does to surfaces, how it changes throughout the day. And custom drapes are the primary tool for controlling that light, which is why I think most designers still underestimate them.
In spec work, I’ve watched clients spend €15,000 on a sofa and €200 on off-the-shelf curtains. The room never quite works. Not because of the sofa. The drapes are too short, the fabric wrong for the light exposure, the lining nonexistent. Every morning that east-facing bedroom floods with glare. Every winter the floor-to-ceiling glass bleeds heat.
- Why fabric choice defines everything
- Fabric comparison guide
- Construction details that separate custom from off-the-shelf
- Thermal performance and why it matters more than people think
- Hardware: the part most designers underspecify
- Specifying custom drapes: a practical brief
- Light direction and room orientation — matching drapes to exposure
- Maintenance and longevity — what nobody tells you upfront
- FAQ: Custom drapes
- How much do custom drapes cost per panel?
- Are custom drapes worth it over ready-made curtains?
- What’s the best fabric for thermal curtains?
- How do I choose between pinch pleat and eyelet headings?
- Do custom drapes need professional installation?
- Can I add blackout lining to existing drapes?
- How far below the ceiling should I hang the rod?
- Final thoughts
Off-the-shelf curtain panels exist for rooms that don’t have specific requirements. The moment you have a ceiling height that doesn’t match standard drop lengths, a window width that leaves side gaps, or fabric weight that’s wrong for the afternoon sun the room actually gets — you’re outside what panels can solve.
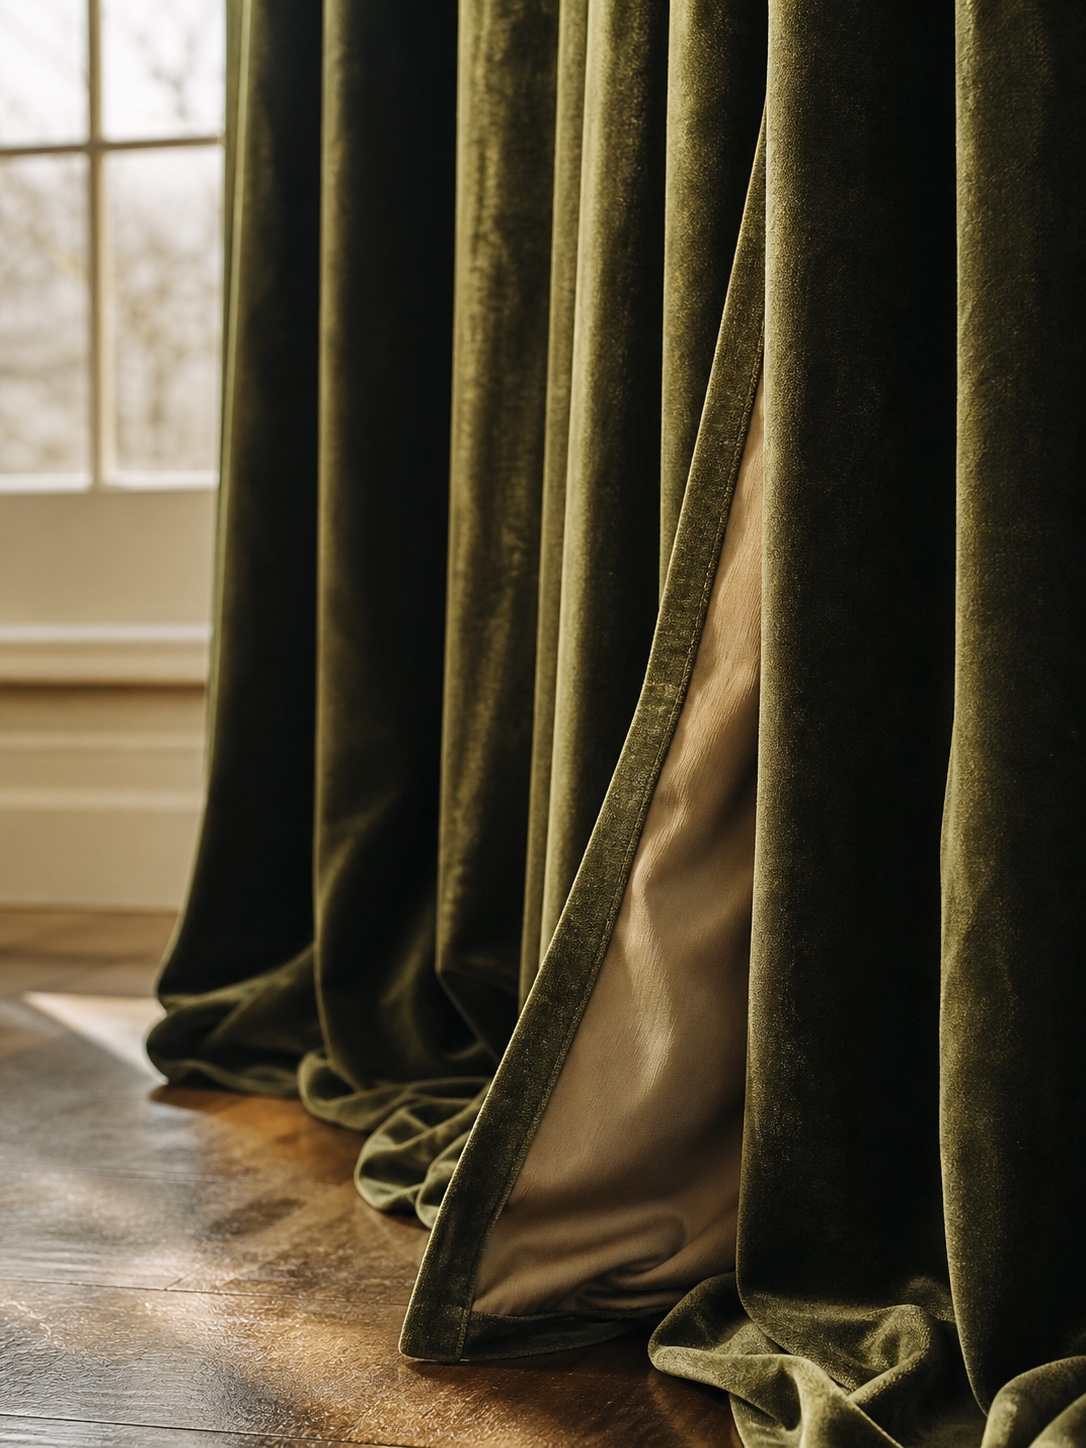
Custom drapes fix the fit, the weight, the lining, and the proportion. That last one matters more than most people expect. A room with correctly proportioned drapes reads as finished in a way that’s hard to attribute to any single thing.
This piece covers how to specify them correctly — where fabric choice drives everything else, what construction details are worth paying for, how hardware affects the hang, and when thermal lining moves from optional to necessary.
Why fabric choice defines everything
Every professional drapery project I’ve done starts with the same question: what does this fabric need to do? Not ‘what looks good’ — that comes second. Thermal performance, light filtration, acoustic mass, durability under UV exposure. Those are the engineering parameters. The aesthetic follows from what those parameters allow.
Velvet and heavy weaves for full light control
Velvet is still the best material I know for blackout applications without a separate blackout lining. The pile traps light. Add a standard white sateen lining and you’re blocking 85–90% of daylight without the stiff, plasticky feel of bonded blackout fabric. Designers like Kelly Wearstler have used velvet drapes extensively in residential hotel projects — not just for the visual weight, but for sound attenuation in rooms that face busy streets.
The downside is cost and maintenance. A single velvet panel at 300cm drop runs roughly €150–€400 in fabric alone, depending on silk content. It also needs professional cleaning. For a bedroom or a home cinema, the investment makes sense. For a kitchen? Different answer.
Linen and open weaves for diffuse light
Unlined linen is my default for studios and any north-facing room that needs all the daylight it can get. Belgian linen from Libeco in natural ecru (around €28–40 per meter) filters light beautifully without killing it. The weave scatters direct sun into that soft, even wash that’s ideal for drawing or photography work. I spec it with a simple pinch pleat heading rather than eyelet rings, which tend to bunch the fabric in a way that interrupts the light diffusion.
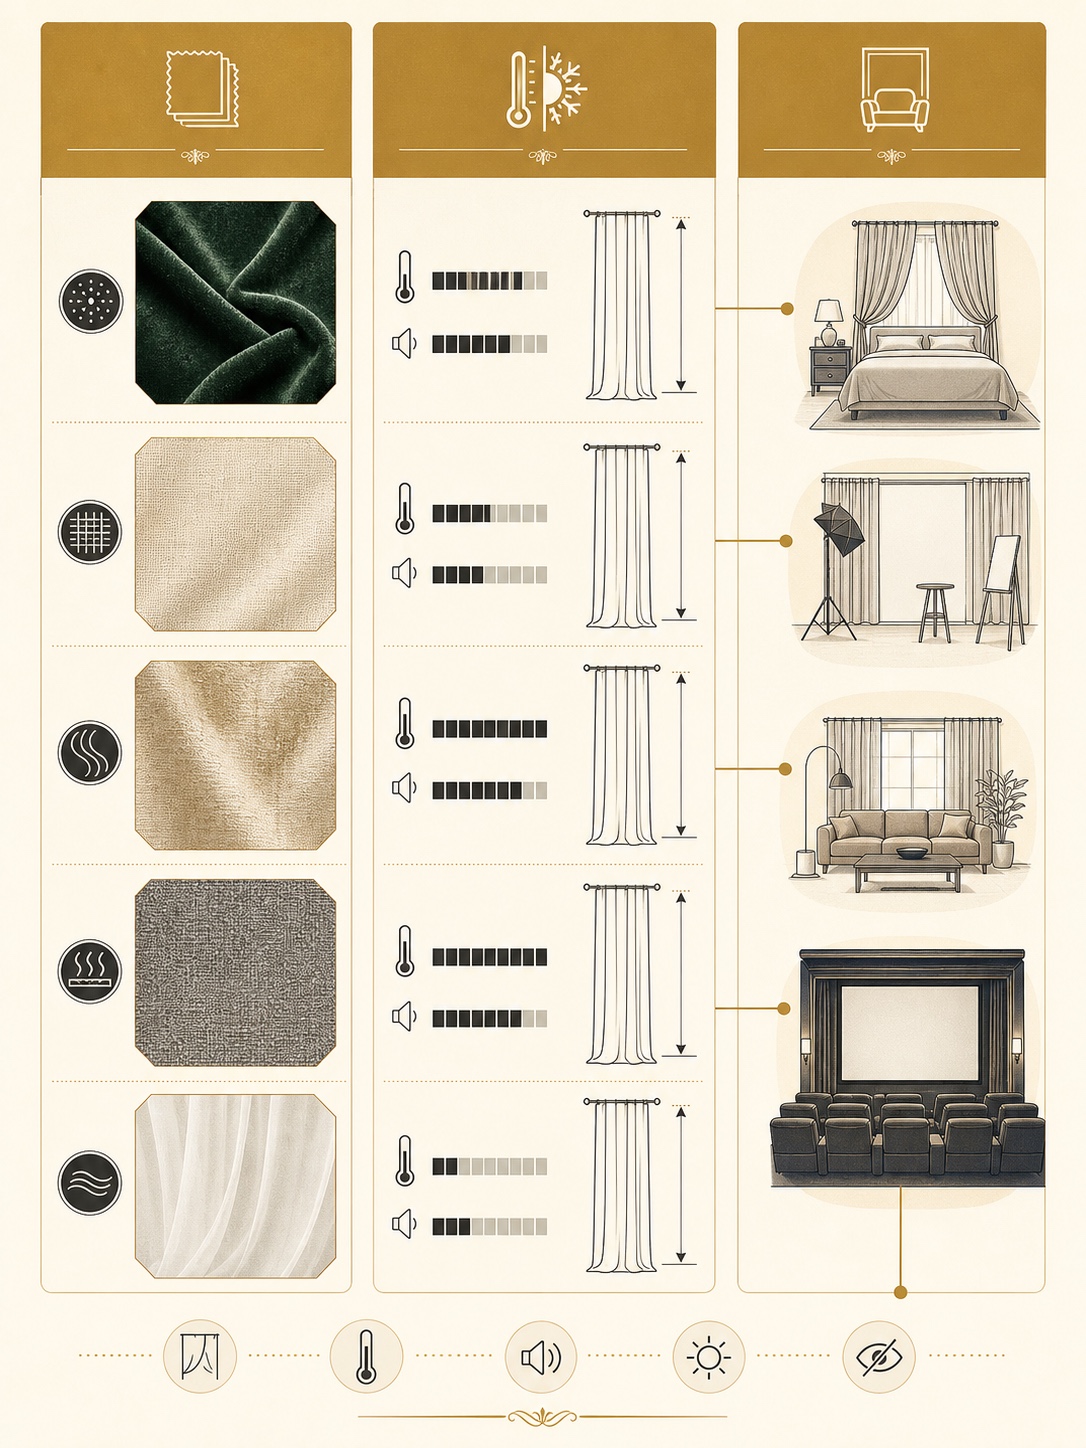
Fabric comparison guide
| Fabric Type | Thermal Rating | Light Control | Best Room | Price Range |
|---|---|---|---|---|
| Velvet (blackout lining) | Excellent | Full block | Bedroom, cinema room | $80–$250/panel |
| Linen (unlined) | Low | Soft diffuse | Studio, kitchen | $40–$100/panel |
| Silk dupioni (interlining) | Good | Partial filter | Dining, living room | $120–$400/panel |
| Thermal pinch pleat | Excellent | Heavy filter | Any room | $60–$180/panel |
| Sheer voile (layered) | Minimal | Glow filter | Living room | $20–$60/panel |
Construction details that separate custom from off-the-shelf
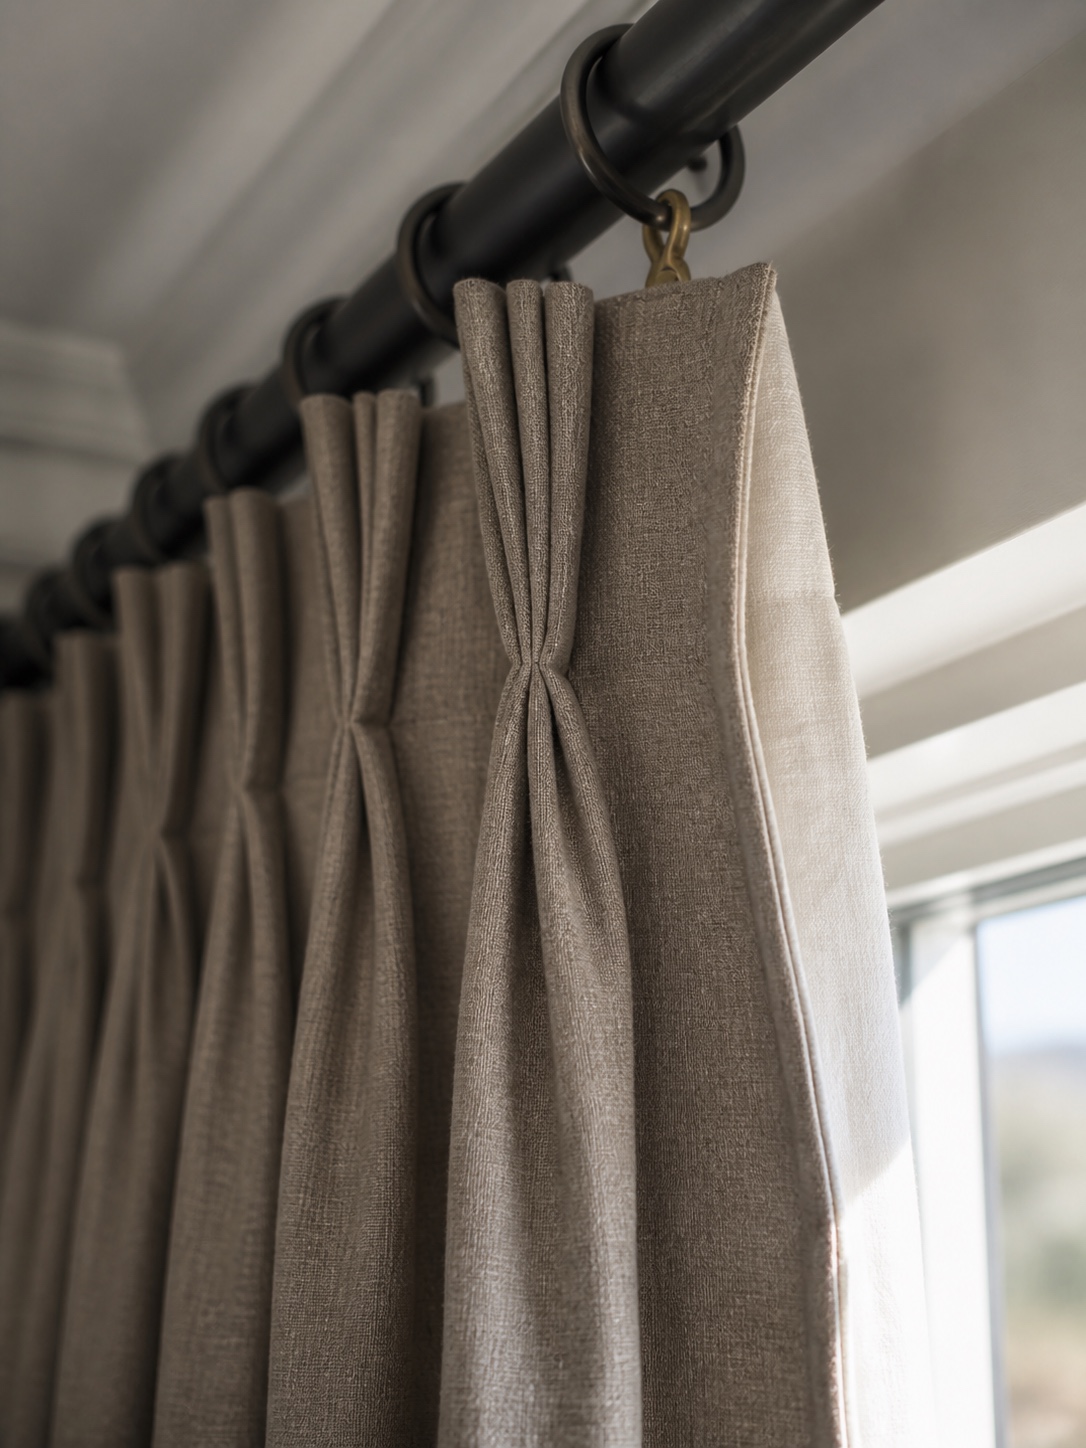
Off-the-shelf panels from H&M Home or IKEA aren’t built to last, and the construction shows. The heading tape is thin, the lining (if present) is heat-bonded rather than sewn, and the hems are machine-finished with no weight tape. They drape adequately for a first apartment. They look wrong in any room with real architectural intention.
Heading styles and how they affect proportion
The heading is the top construction where fabric meets hardware. It determines the pleat structure, fullness, and visual weight of the entire panel. For most residential work I default to pinch pleat (triple pleat for heavier fabrics, double for lighter ones) at 2.5x fullness. This means if you have a 3m wide window, your fabric cut width is 7.5m per panel. The pleats create that structured, tailored column look rather than casual gathers.
Eyelet (grommet) headings are popular because they’re easy to install and slide smoothly, but they bunch the fabric into fixed accordion folds. That works for casual interiors. For a dining room or a room with formal architectural detail, it reads as underdressed.
Pencil pleat is the most economical construction — good for rentals and lighter fabrics where you want flexibility. Goblet pleat is the most formal and labour-intensive. I’ve specified goblet pleat velvet panels for a client’s Kyiv apartment with 3.8m ceilings, and they added about €200 per panel over standard triple pleat. Worth it for that room.
Lining types and what they actually do
An unlined drape is a design choice, not a cost-saving measure. It reads as intentionally casual and lightweight. If you’re spec’ing linen sheers in a Mediterranean-style space with exposed beams, unlined is correct. But in a north European apartment where heat retention matters, you need at minimum a standard lining — and probably interlining too.
Interlining is a thick, soft batting material sewn between the face fabric and the lining. It adds thermal mass, acoustic dampening, and changes the drape entirely. A panel with interlining falls in clean, sculptural folds rather than collapsing flat. It’s also the reason why couture drapery feels so different to the touch. The downside: dry clean only, heavier hardware required, and roughly 30–40% higher fabrication cost.
Thermal performance and why it matters more than people think
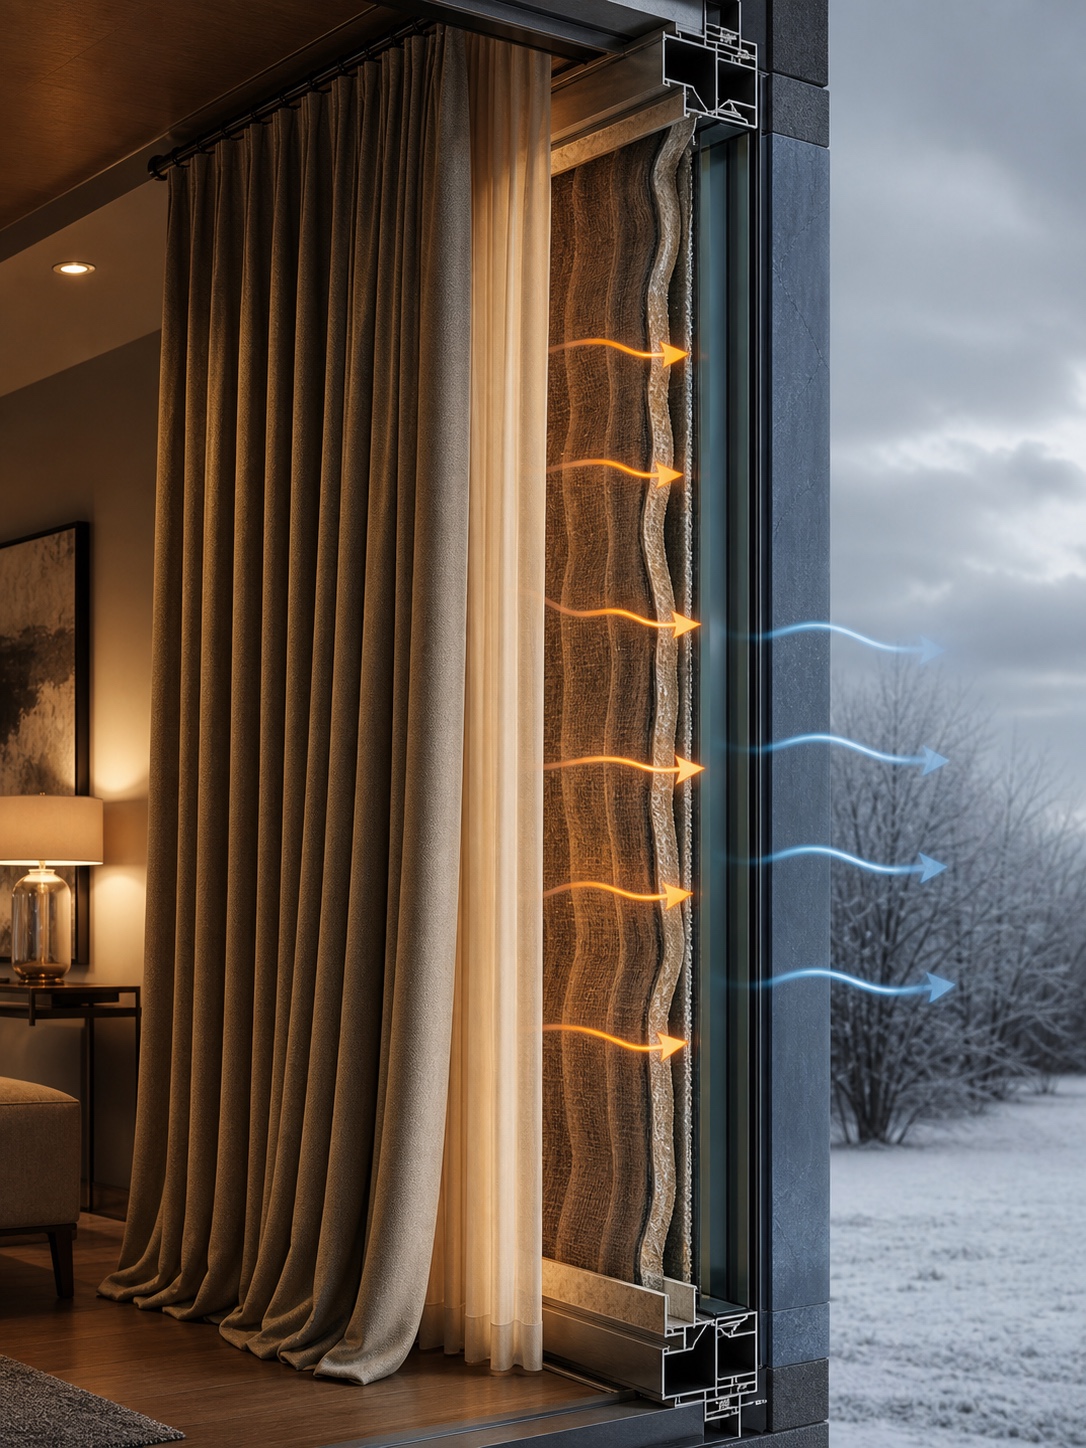
I live in Kyiv. The temperature range from January to August is roughly -15°C to +35°C. Window treatment performance isn’t an abstract consideration — it’s the difference between a comfortable room and a heating bill that doubles in winter. And in summer, a south-facing room with no thermal curtains in that range of temperatures becomes genuinely unusable by noon.
Windows with standard double glazing have a U-value around 1.1–1.4 W/m²K. A bare window allows both radiant heat gain in summer and conductive heat loss in winter. Properly specified
The cold wall problem and how drapes fix it
Cold glass creates a convective loop in winter: air near the glass cools, drops, flows across the floor, and creates a draught at ankle level even with no door or window open. Full-length drapes that reach the floor and are positioned close to the glass break that convection loop. The drape traps a still air pocket. Still air is a better insulator than moving air.
The critical spec detail here is the hem. Puddle hems look beautiful but leave a gap at the floor. A ‘break’ hem that just touches the floor is better thermally. For maximum performance, I spec a weighted hem tape sewn inside the bottom fold — this keeps the panel against the floor rather than lifting with air movement.
Summer solar gain — working with fabric opacity
South-facing rooms in summer need to block direct solar radiation before it enters as heat. A pale, tightly woven fabric reflects more radiation than it absorbs. White cotton poplin with a white sateen lining reflects roughly 75% of incident solar radiation. Dark velvet absorbs heat instead — fine in winter on interior walls, wrong on a sun-exposed window in summer.
The best thermal solution for mixed climates is a double layer: a sheer with good reflectance for daytime diffusion, and a heavier panel for night insulation and blackout. This is the same logic as a layered clothing system. I specify the layers on separate tracks rather than combined rods — you lose 4–6cm of rod depth, but you gain full independent control of both layers.
Hardware: the part most designers underspecify
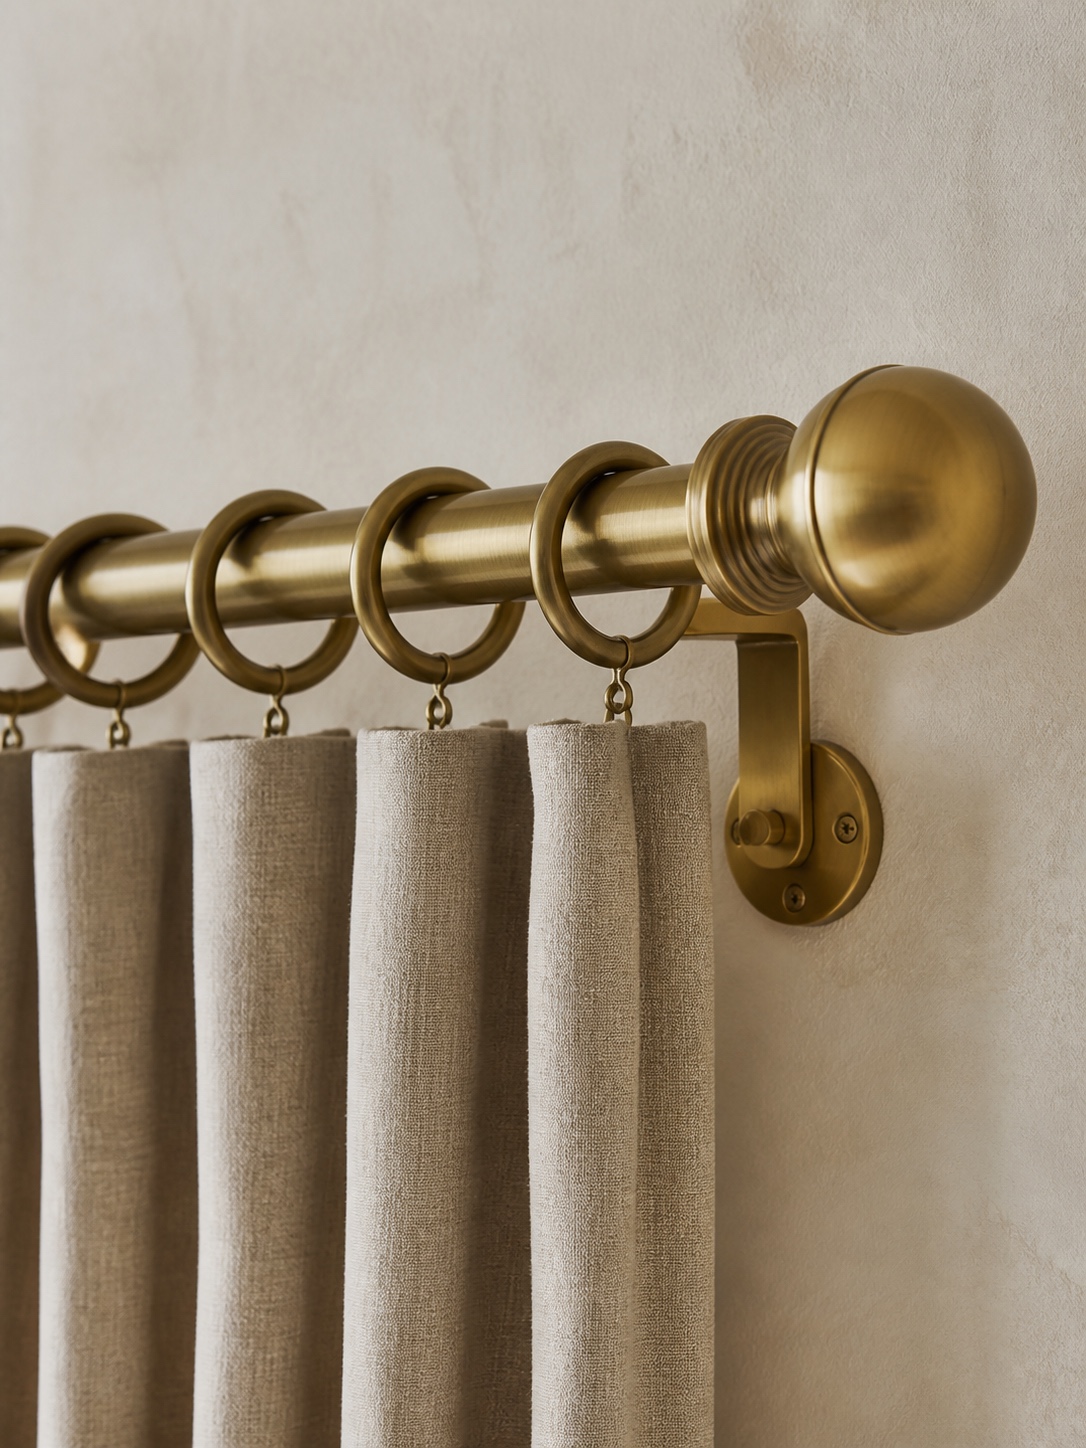
The hardware is the structural element. A rod that flexes under panel weight drops the heading out of plumb — the pleats open, the panels shift, the whole thing looks wrong within a year. I’ve seen €2,000 worth of custom velvet panels destroyed by a €40 hollow steel rod from a mass-market DIY supplier.
Rod sizing and weight bearing
For panels over 4kg per panel (which is typical for interlined velvet above 260cm drop), you need a 28mm or 35mm solid steel rod, not hollow. The brackets must be wall-mounted into masonry or solid timber — plasterboard anchors are not adequate. Bracket spacing over 180cm apart will cause visible sag in anything but the lightest fabrics.
I default to brass-finished or matte black steel hardware from suppliers like Integra or Jones Interiors (UK), or equivalent European trade suppliers. Consumer products from household stores are built for 1.5kg panels at most. Specify trade hardware from the start — it’s 30–50% more expensive and lasts decades.
Motorization for large panels
Anything wider than 3m or heavier than 8kg total panel weight is a candidate for motorization. Not for convenience — for longevity. Manually dragging a 6kg interlined panel twice a day across a 4m track stresses the heading tape, wears the rings, and eventually deforms the pleat structure. A Somfy or Rollease Acmeda motor system on a traverse rod solves this completely. The Somfy Irismo kit runs around €350–€500 for a single motor, plus installation — but it’s a one-time cost for panels that will outlast the house.
Specifying custom drapes: a practical brief
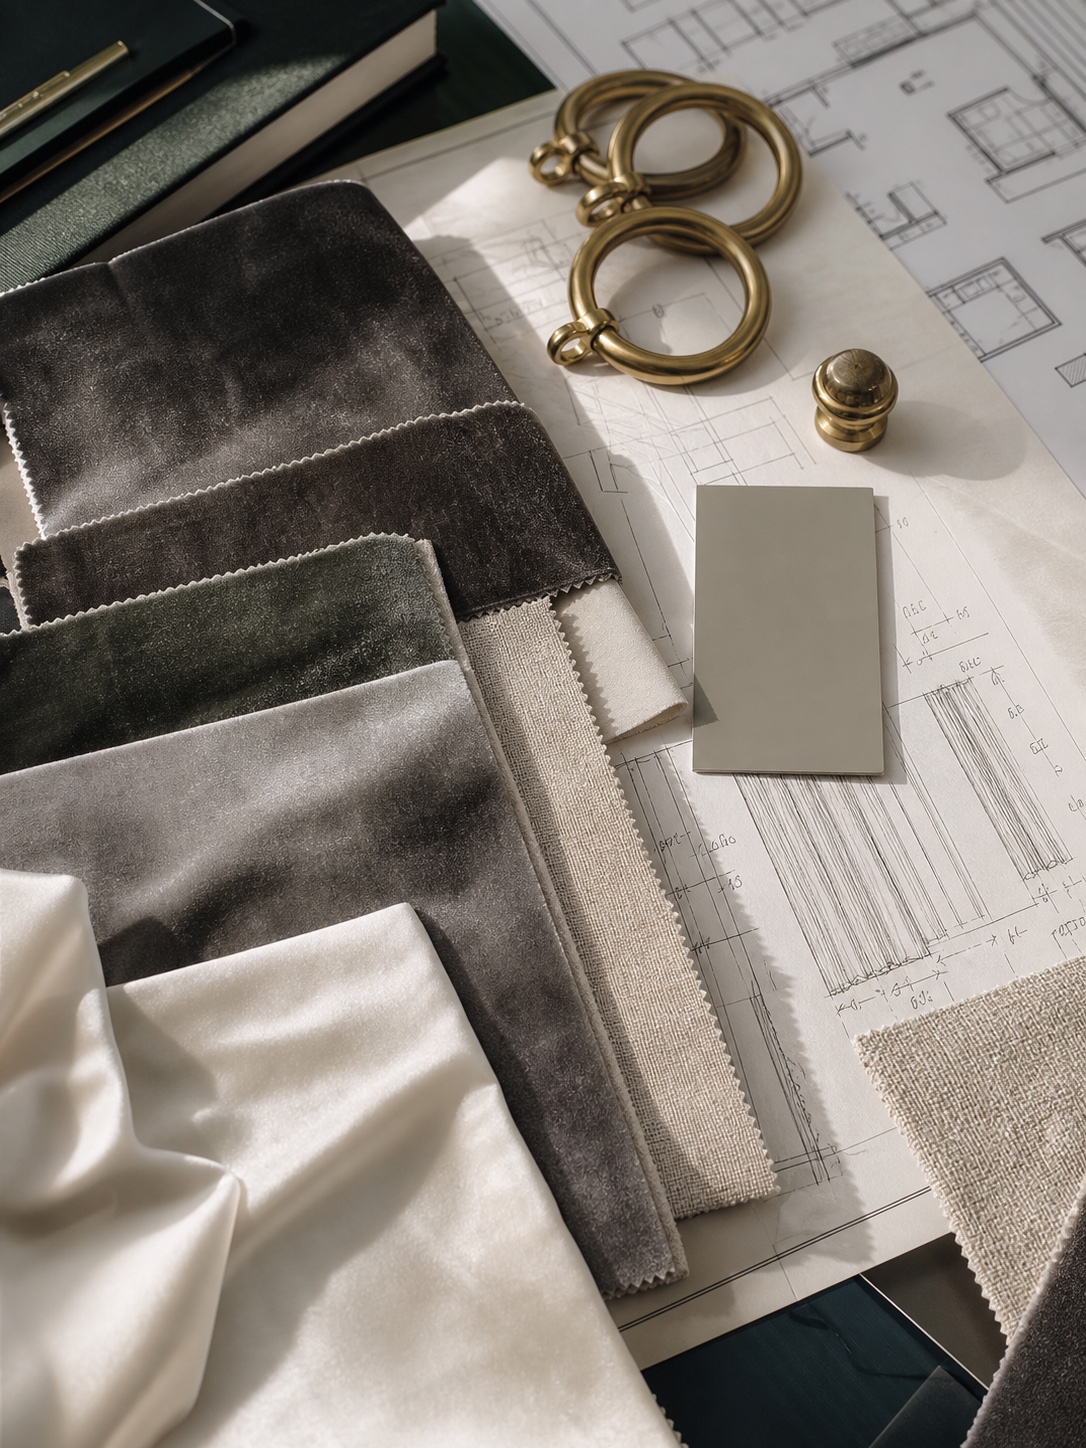
When I brief a drapery workroom — I’ve worked with a couple of excellent ones in Kyiv and one in Munich over the years — I use a standard spec sheet that covers every variable. This avoids the most expensive mistakes: wrong length, wrong fullness, wrong lining, wrong pleat type. A proper
✔ Always measure wall-to-wall width rather than window-to-window. This gives you the total rod run, which is the number that drives fabric requirements.
The measurement protocol
Width: measure the total rod run, not the window opening. Standard stack-back (fabric needed beyond the window edge to fully open the panels) is 30–35% of the window width per side. So a 3m window needs a 4.2m rod at minimum to stack clear of the glass when open.
Height: measure from the top of the rod (or ring eye, if using rings) to the floor. Subtract 1cm for a break hem, 1.5cm for a standard hem, or add 5–18cm for a puddle. Never measure from the window frame — the rod position is what determines drop.
Fullness: calculate fabric cut width as finished width × fullness factor. Double pleat needs 2.0×2, triple pleat needs 2.5×3x. Add 20cm per panel for side hems (2 × 5cm turned twice) and 15cm for the heading seam allowance.
The spec brief format
Room and window reference, finished width per panel, finished drop, heading style and pleat count, fabric name and colorway, lining type (none/standard/blackout/interlined), interlining yes/no, hem style, hardware reference, and any special instructions (weighted hem tape, magnetic hem closure for floor contact, motorization prep). That’s the document. Any workroom worth working with knows exactly what to do with it.
Light direction and room orientation — matching drapes to exposure
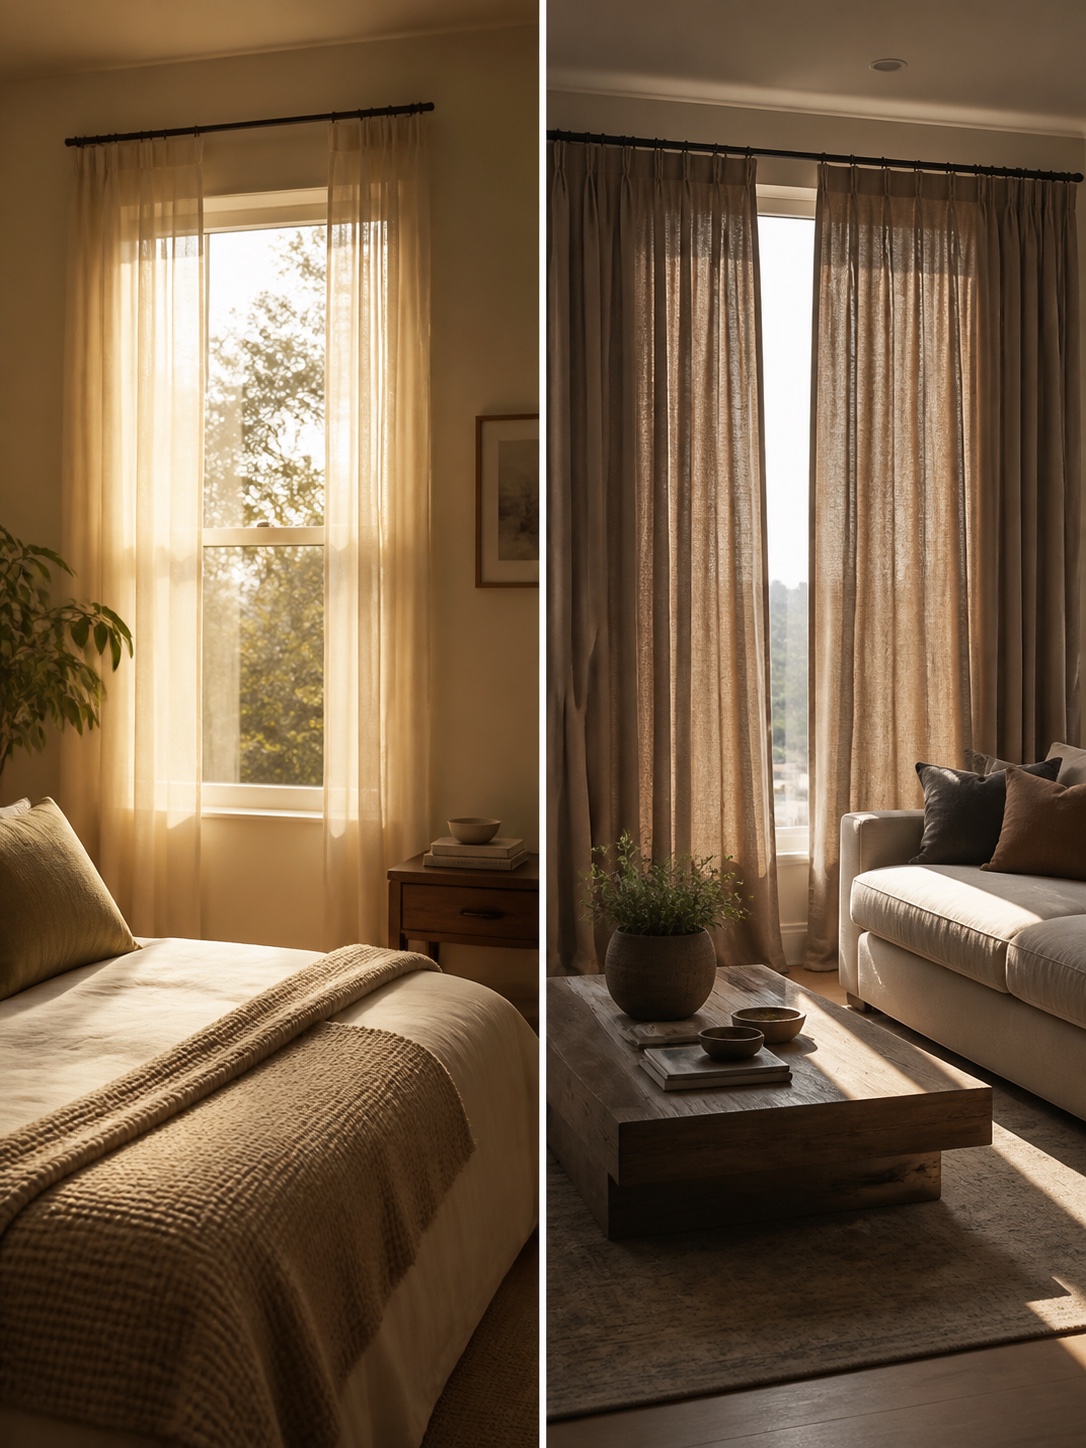
East-facing rooms get the hardest morning light — low angle, high intensity, penetrating deep into the space. This is great for a kitchen or a studio where you want to wake the room up, but it’s difficult for a bedroom or a workspace with a monitor. The material spec for east-facing windows needs to prioritize morning solar control more than thermal mass.
South-facing rooms in the northern hemisphere get the most total solar radiation across the year. In summer the angle is high, so overhangs or external shading help. But in winter the angle drops and you actually want that solar gain. This is the room where a double-layer system makes the most thermodynamic sense: sheer for winter light capture, heavy panel for summer blocking.
North-facing rooms need maximum light, minimum blocking. I almost never specify anything heavier than unlined linen for a north-facing room in our climate. The light is soft and consistent, perfect for drawing or painting. Heavy drapes would just darken what’s already a low-light situation. Sometimes the correct answer is a simple linen sheer and nothing else.
Maintenance and longevity — what nobody tells you upfront
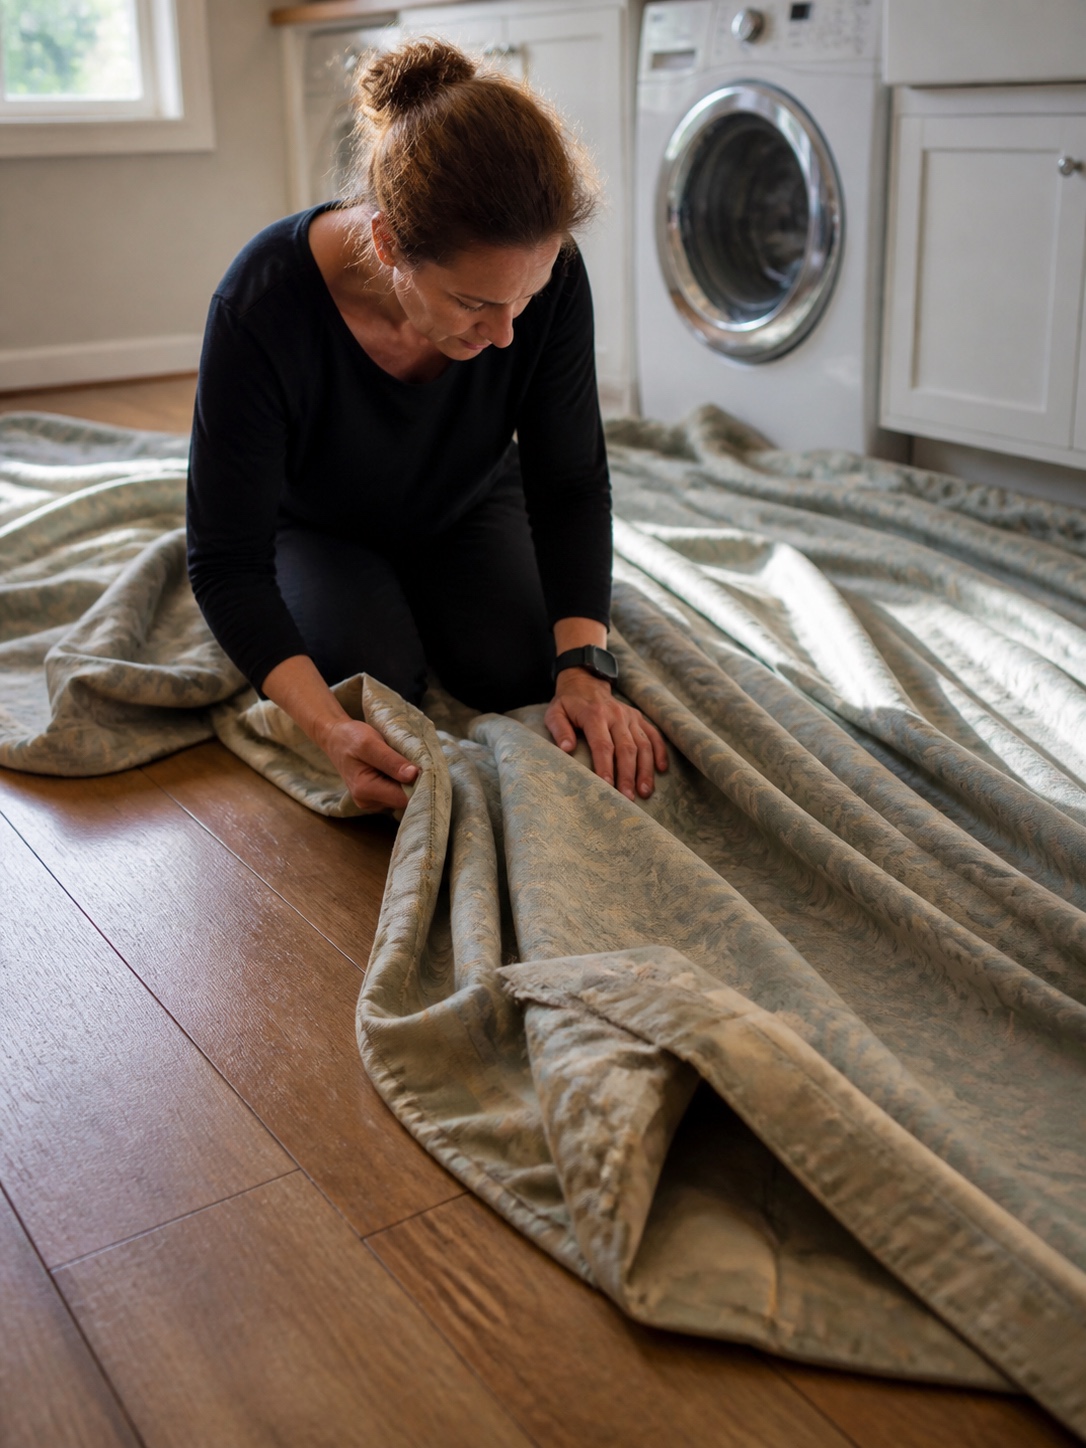
A good set of custom drapes should last 15–20 years. The fabric degrades before the construction does, usually — UV exposure fades and weakens fibers from the sun side, while the room side stays intact. This is why I often specify panels that can be reversed at the 7-10 year mark, adding effective life without replacement cost.
Cleaning schedule: I recommend a light vacuum (upholstery brush attachment, low suction) every three months to remove dust before it becomes embedded. Full cleaning — professional dry clean for interlined and silk panels, cool machine wash for unlined linen — every 2–3 years. Never wash interlined panels at home. The interlining shrinks at a different rate than the face fabric and the lining, which creates permanent puckering.
✔ Protect the heading tape from cleaning by pinning it flat before washing lighter panels. The tape loses its stiffness after immersion if it’s machine-washed pulled straight.
Hardware maintenance is simpler: clean the rod and rings annually with a dry cloth, check bracket screws for any movement, and re-wax traverse track cords if the glide stiffens. A system that’s maintained this way runs smoothly for decades. The most common failure point I’ve seen is neglected rings that corrode and score the rod surface — and then score the ring interior, and eventually won’t slide without catching.
FAQ: Custom drapes
How much do custom drapes cost per panel?
Expect €80–€200 per panel for unlined or standard-lined panels in mid-range fabric. Add €80–€150 for interlining. Silk or wool fabric can push a single panel to €400–€800 before fabrication. Hardware is separate: budget €50–€200 per window for quality rod and bracket systems. The fabrication (labour) from a skilled workroom typically runs 40–60% of the total fabric cost. So a 3m window with interlined velvet panels might cost €700–€1,200 complete, excluding hardware.
Are custom drapes worth it over ready-made curtains?
For any room with non-standard proportions, yes — immediately. Off-the-shelf panels come in fixed drop lengths (usually 228cm, 259cm, or 274cm) and fixed widths. A ceiling of 3.2m and a window 3.4m wide means nothing ready-made will fit correctly. Custom drapes also use better heading tape, heavier interlining options, and wider fabric choices than retail. The cost difference is real but so is the result difference.
What’s the best fabric for thermal curtains?
Interlined velvet or wool blend gives the best thermal performance for cold climates. The interlining adds mass and traps a still air layer. For warm climates focused on solar control, a tightly woven pale linen or cotton with a white sateen lining reflects heat effectively without the weight. The lining choice matters as much as the face fabric — a standard white sateen lining improves thermal performance even on lighter face fabrics.
How do I choose between pinch pleat and eyelet headings?
Pinch pleat for formal rooms, traditional architecture, and any room where you want structured drape and clean lines when the panels are drawn. Eyelet for casual or Scandinavian interiors where accordion folds are appropriate and installation flexibility matters. Eyelet panels can’t be used on motorized traverse rods. Pinch pleat panels work on both poles and traverse tracks. If there’s any chance of motorization in future, specify pinch pleat from the start.
Do custom drapes need professional installation?
For anything heavier than 3kg per panel or wider than 2.5m, yes — professional installation is worth it. Getting the rod perfectly level, the brackets spaced correctly for the panel weight, and the panels dressed properly (trained into their pleat form after hanging) takes skill and the right tools. A badly hung set of €1,500 custom panels looks worse than a correctly hung set of €300 ones. The installation is not where to save money.
Can I add blackout lining to existing drapes?
Yes, with caveats. A detachable blackout lining that attaches to the existing heading tape is widely available and works reasonably well for lightweight panels. But for heavier panels or any panel with interlining, retro-fitting a sewn-in blackout lining requires taking the panel apart. A workroom can do this, but the cost approaches 60–70% of making new panels. If blackout is the goal, specify it from the start.
How far below the ceiling should I hang the rod?
Standard guidance is 10–20cm below the ceiling, or as close to the ceiling as the panel can stack without the heading touching the ceiling. The visual logic is simple: the higher the rod, the taller the room reads. For rooms with standard 2.6m ceilings, I mount at 2.4m (20cm below ceiling) and run panels to the floor. That 20cm of bare wall above the rod disappears visually once the panels are hung. In rooms above 3m, mount as close to the ceiling as the stack allows.
Final thoughts
Custom drapes aren’t a luxury category. They’re an engineering decision that happens to have an aesthetic dimension — like specifying the right joinery detail for a cabinet or the right tyre compound for a car. Get the spec wrong and the room doesn’t work, regardless of what else you’ve done right.
Start with the function: what does this window need to do in summer, in winter, at 7am, at midnight? Then choose fabric and construction to meet those requirements. The aesthetics follow from the engineering almost automatically — a well-specified interlined velvet panel looks exactly as good as it performs.
Measure twice, brief the workroom clearly, specify trade hardware, and don’t compromise on interlining for rooms that need it. The rest is personal preference: color, pattern, heading style. Get the architecture right first.
These high-performance fabric solutions work beautifully when designing floating setups or custom sheer canopy bed drapes that control light and drafts gracefully.
Drapes can soften glare from pale timber floors; pair this with the light oak flooring interior guide for wall color, curtain, and rug decisions.
- 34shares
- Facebook0
- Pinterest34
- Twitter0
- Reddit0